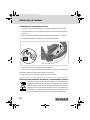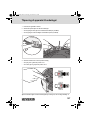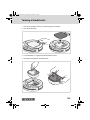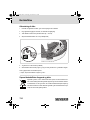
1
Chill.book Seite 1 Freitag, 18. Juli 2014 6:54 06 www.severin.com Typ 7025 DE Saugroboter • Gebrauchsanleitung ........................................................ 3 GB Robotic vacuum • Instruction manual................................................... 19 FR Aspirateur robot • Mode d'emploi ......................................................... 35 NL Zuigrobot • Bedieningshandleiding....................................................... 51 ES Robot aspirador • Manual de instrucciones.......................................... 67 IT Robot aspirapolvere • Istruzioni per l'uso............................................. 83 DK Gulvstøvsuger med pose • Betjeningsvejledning ................................. 99 PL Robot odkurzający • Instrukcja obsługi ............................................. 115 Chill.book Seite 2 Freitag, 18. Juli 2014 6:54 06 2 Chill.book Seite 3 Freitag, 18. Juli 2014 6:54 06 Vielen Dank DE Liebe Kundin, lieber Kunde, 1 Vielen Dank wir wünschen Ihnen mit dem Qualitätsprodukt aus dem Hause SEVERIN viel Freude und bedanken uns für Ihr Vertrauen. Die Marke SEVERIN steht seit über 120 Jahren für Beständigkeit, deutsche Qualität und Entwicklungskraft. Jedes Gerät wurde mit Sorgfalt hergestellt und geprüft. Mit der sprichwörtlichen Sauerländer Gründlichkeit, Genauigkeit und Ehrlichkeit überzeugt das Familienunternehmen aus Sundern seit der Gründung 1892 mit innovativen Produkten Kunden in aller Welt. In den acht Produktgruppen Kaffee, Frühstück, Küche, Grillen, Haushalt, Floorcare, Personal Care und Kühlen & Gefrieren bietet SEVERIN mit über 250 Produkten ein umfassendes Elektrokleingeräte-Sortiment. Für jeden Anlass das richtige Produkt! Lernen Sie die SEVERIN-Produktvielfalt kennen und besuchen Sie uns unter www.severin.com. Ihre Geschäftsleitung und Mitarbeiter der SEVERIN Elektrogeräte GmbH Zu dieser Gebrauchsanleitung Diese Gebrauchsanleitung enthält wichtige Tipps für Ihre Sicherheit sowie zum Gebrauch des Geräts. Bei Nichtbeachtung der Gebrauchsanleitung kann es zu Verletzungen von Personen oder Schäden am Gerät kommen. Die Gebrauchsanleitung gut aufbewahren. Bei Weitergabe des Geräts an Dritte die Gebrauchsanleitung mitgeben. Gebrauchsanleitung vor dem ersten Gebrauch vollständig durchlesen. Inhaltsverzeichnis Vielen Dank ...................................... 3 Raum reinigen ................................ 12 Sicherheitshinweise ........................ 4 Staubbehälter leeren ...................... 13 Akku aktivieren ................................ 9 Probleme beheben ......................... 15 Akku aufladen ................................ 10 Entsorgung ..................................... 18 Gerät an Untergrund anpassen .... 11 3 Chill.book Seite 4 Freitag, 18. Juli 2014 6:54 06 Sicherheitshinweise Sicherheit bestimmter Personengruppen 2 Sicherheitshinweise – Das Gerät kann von Kindern ab 8 Jahren und älter sowie von Personen mit reduzierten physischen, sensorischen oder mentalen Fähigkeiten oder Mangel an Erfahrung und/oder Wissen benutzt werden, wenn sie beaufsichtigt werden oder bezüglich des sicheren Gebrauchs des Gerätes unterwiesen wurden und die daraus resultierenden Gefahren verstanden haben. – Kinder dürfen nicht mit dem Gerät spielen oder sich auf das Gerät stellen oder setzen. Reinigung und Benutzer-Wartung dürfen nicht durch Kinder ohne Beaufsichtigung durchgeführt werden. – Kinder jünger als 8 Jahre von Gerät und Stromkabel fernhalten. – Verpackungsmaterialien außerhalb der Reichweite von Kindern aufbewahren und entsorgen. Anderenfalls besteht Erstickungsgefahr. Gerät sicher anschließen Das Gerät wird mit elektrischem Strom aufgeladen, dabei besteht grundsätzlich die Gefahr eines elektrischen Schlags. Achten Sie daher besonders auf Folgendes: – Netzteil nur an Steckdosen anschließen, die den Angaben auf dem Typenschild des Netzteils entsprechen. – Gerät und Netzteil vor dem Benutzen auf eventuelle Beschädigungen kontrollieren. Niemals ein defektes Gerät oder ein Gerät mit defektem Netzteil betreiben. – Niemals versuchen, das Gerät oder sein Netzteil eigenständig zu reparieren. Um Gefährdungen zu vermeiden, dürfen Reparaturen an Gerät und Netzteil nur durch unseren Kundendienst durchgeführt werden. Ein defektes Gerät oder Netzteil zur Reparatur an einen Fachhändler oder den SEVERIN-Kundendienst geben. 4 Chill.book Seite 5 Freitag, 18. Juli 2014 6:54 06 Sicherheitshinweise – Gerät oder Netzteil nicht in Wasser oder andere Flüssigkeiten tauchen. Gerät und Netzteil von Regen und Nässe fernhalten. Gerät nicht im Freien oder in Räumen mit hoher Luftfeuchtigkeit betreiben. – Netzteil nicht mit nassen Händen anfassen. Beim Herausziehen des Netzteils aus der Steckdose immer direkt am Netzteil ziehen. – Darauf achten, dass das Netzteilkabel nicht geknickt, eingeklemmt oder überfahren wird oder mit Hitzequellen, Feuchtigkeit oder scharfen Kanten in Berührung kommt. Darauf achten, dass das Netzteilkabel nicht zur Stolperfalle wird. – Vor dem Reinigen oder Warten des Geräts sowie vor dem Zubehörwechsel Gerät ausschalten und sicherstellen, dass das Netzteil nicht angeschlossen ist. Sicherheit beim Umgang mit Akkus Bei falschem Umgang mit Akkus besteht Verletzungs- und Explosionsgefahr. – Sollte es erforderlich sein, den Akku auszutauschen, einen Fachhändler oder den SEVERIN Kundendienst kontaktieren. Akku niemals selbst ersetzen. Akku niemals durch andere Akkus oder Batterien ersetzen. – Vor dem Aktivieren, Einsetzen oder Ausbauen des Akkus, sicherstellen, dass das Netzteil aus der Steckdose gezogen ist. – Akkus niemals auseinandernehmen, hohen Temperaturen aussetzen oder ins Feuer werfen. – Akkus nicht direktem Sonnenlicht aussetzen. - Bei einer Lagerdauer von bis zu 3 Monate folgende Temperaturen einhalten: -20 ― +45 °C. - Bei einer Lagerdauer von über 1 Jahr folgende Temperaturen einhalten: -20 ― +20 °C. 5 Chill.book Seite 6 Freitag, 18. Juli 2014 6:54 06 Sicherheitshinweise – Akkus niemals kurzschließen, d. h. nicht beide Pole zur gleichen Zeit berühren, insbesondere nicht mit elektrisch leitenden Gegenständen. Akkus so lagern, dass sie auch bei der Lagerung nicht durch andere Akkus oder Metallgegenstände kurzgeschlossen werden. – Zum Aufladen des Akkus ausschließlich das mitgelieferte Netzteil verwenden. Den Akku keinesfalls mit einem anderen Netzteil laden. Das mitgelieferte Netzteil wiederum ausschließlich zum Aufladen des Akkus dieses Geräts verwenden. – Akku nach Gebrauchsende wie beschrieben ausbauen. Akku danach umgehend an eine entsprechende Sammelstelle in Ihrer Nähe übergeben und so einer sicheren und umweltgerechten Entsorgung zuführen. Akkus niemals über den Hausmüll entsorgen! – Bei unsachgemäßem Umgang kann Flüssigkeit aus dem Akku austreten. Akku nicht länger verwenden, wenn er beschädigt ist oder gar Flüssigkeit austritt. - Falls Flüssigkeit ausgetreten ist, Kontakt mit der Flüssigkeit vermeiden. - Falls es zu Kontakt mir der Flüssigkeit gekommen ist, diese umgehend mit reichlich Wasser abspülen. Bei Folgeerscheinungen (egal welcher Art) einen Arzt aufsuchen. Bestimmungsgemäße Verwendung Das Gerät darf nur im Haushalt eingesetzt werden. Das Gerät darf ausschließlich für das Reinigen auf ebenen, normal verschmutzten Hartböden eingesetzt werden. Dabei werden die besten Reinigungsergebnisse in kleinen oder in sich geschlossenen Räumen erzielt. Falls die Rundbürsten nicht montiert sind, kann es auch auf kurzflorigem Teppich einsetzt werden. Jede weitere Verwendung gilt als nicht bestimmungsgemäß und ist untersagt. 6 Chill.book Seite 7 Freitag, 18. Juli 2014 6:54 06 Sicherheitshinweise Um Verletzungen, Bränden und Schäden vorzubeugen, darf das Gerät nicht eingesetzt werden für das Saugen von: – Menschen, Tieren oder Pflanzen. Saugöffnung stets von Körperteilen, Haaren und Kleidungsstücken fernhalten. – glühenden, brennenden oder glimmenden Partikeln (wie z. B. Asche, Kohle, Holzkohle, Zigaretten, Streichhölzer). – explosiven oder leicht entzündlichen Stoffen oder Toner. – Wasser und anderen Flüssigkeiten, z. B. feuchten Teppichreinigern. – spitzen Gegenständen wie Glassplittern, Nägeln oder Bauschutt. Verboten ist außerdem: – Selbstständiges Umbauen oder Reparieren des Geräts oder seines Netzteils. – Gebrauch, ohne dass Staubbehälter, Filter und Deckel korrekt eingesetzt sind. – Einsatz in Räumen, in denen zerbrechliche Gegenstände oder solche, die leicht umkippen können, stehen. Räume so vorbereiten, dass der Einsatz des Geräts keine Schäden hervorrufen kann. – Gebrauch, Aufbewahrung oder Aufladen im Freien. – Das Abstellen von Gegenständen auf dem Gerät. 7 Chill.book Seite 8 Freitag, 18. Juli 2014 6:54 06 Auspacken 1. Geräte und Zubehör auspacken. 3 Auspacken 2. Lieferung auf Vollständigkeit prüfen (siehe Abbildung). 1 2 7 3 6 4 5 1 Saugroboter CHILL 5 Reinigungspinsel 2 Rundbürsten 6 Netzteil 3 Ersatz-Rundbürsten 7 Ersatz-Filter 4 Akku – nicht abgebildet: Gebrauchsanleitung 8 Chill.book Seite 9 Freitag, 18. Juli 2014 6:54 06 Akku aktivieren 1. Sicherstellen, dass das Gerät ausgeschaltet und das Netzteil nicht angeschlossen ist. 4 Akku aktivieren 2. Geräte vorsichtig auf die Oberseite legen, so dass die Unterseite zugänglich ist. 3. Akkufachabdeckung kräftig mit beiden Händen abziehen (siehe Abbildung). 4. Akkusteckverbindung wie abgebildet anschließen (siehe Detail). 5. Akku in Akkufach gleiten lassen (siehe Abbildung). 6. Akkufachdeckel wieder kräftig aufschieben, bis er hör- und spürbar einrastet. Der Akku ist nun aktiviert und muss geladen werden, Seite 10, „Akku aufladen“. 9 Chill.book Seite 10 Freitag, 18. Juli 2014 6:54 06 Akku aufladen Akku am besten vor jedem Gebrauch laden, insbesondere nach längerem Nichtgebrauch. 5 Akku aufladen Dies erhöht die Lebensdauer des Akkus und sorgt für möglichst lange Reinigungszyklen. 1. Sicherstellen, dass das Gerät ausgeschaltet ist. 2. Netzteil ans Gerät anschließen (siehe Abbildung). 3. Netzteil an Steckdose anschließen (siehe Detail). – Die LED blinkt. Ca. 6,5 Stunden warten, bis die LED dauerhaft leuchtet. 6,5 h 4. Netzteil aus Steckdose und Gerät ziehen. Gerät für den Einsatz vorbereiten, Seite 11, „Gerät an Untergrund anpassen“. 10 Chill.book Seite 11 Freitag, 18. Juli 2014 6:54 06 Gerät an Untergrund anpassen 1. Sicherstellen, dass das Gerät ausgeschaltet ist. 6 Gerät an Untergrund anpassen 2. Bürsten je nach Untergrund anbringen oder abziehen: – Wenn Hartböden gereinigt werden sollen, Rundbürsten anbringen (siehe Abbildung). – Wenn kurzflorige Teppiche gereinigt werden sollen, Bürsten abziehen (siehe Abbildung). 3. Alle 3 Fallsensoren gleichzeitig in die gleiche Stellung bringen: – Bei hellen Böden und flachen Stufen Stellung 0 bis 1. – Bei dunklen Böden und höheren Stufen Stellung 2 bis 3. TIPP: Wenn der Roboter auf dunklen Böden andauernd rückwärts fährt, Einstellung „3“ wählen. 11 Chill.book Seite 12 Freitag, 18. Juli 2014 6:54 06 Raum reinigen Raum wie folgt vorbereiten: 7 – Raum reinigen Lose Gegenstände, die der Roboter vor sich her schieben könnte, wegräumen. – Kabel, Vorhänge und alles, was sich in den Bürsten verheddern könnte, wegräumen. – Zerbrechliche Gegenstände oder solche, die leicht umkippen können, wegräumen. Gerät wie folgt einschalten: 1. Gerät in die Mitte des zu reinigenden Raums stellen. 2. Gerät am Ein-/Ausschalter einschalten (Stellung „I“ siehe Detail). Das Gerät reinigt den Raum nun nach folgendem Muster: Das Gerät reinigt nun solange, – bis der Staubbehälter voll ist und die LED – oder bis der Akku geladen werden muss und die LED leuchtet, Seite 13, „Staubbehälter leeren“. leuchtet, Seite 10, „Akku aufladen“. In beiden Fällen stoppt das Gerät nach einer Weile. Es stößt dann jede Minute einen Piepton aus, – bis Sie es am Ein-/Ausschalter ausschalten (Stellung „0“) – oder der Akku völlig leer gelaufen ist. Wenn Sie beabsichtigen, das Gerät länger nicht zu benutzen, nehmen Sie den Akku heraus, Seite 18, „Akku ausbauen“. 12 Chill.book Seite 13 Freitag, 18. Juli 2014 6:54 06 Staubbehälter leeren 1. Sicherstellen, dass das Gerät ausgeschaltet und das Netzteil nicht angeschlossen ist. 8 Staubbehälter leeren 2. Deckel abnehmen (siehe Abbildung). 3. Staubbehälter am Griff aus dem Gerät heben (siehe Abbildung links). 4. Staubbehälterdeckel abnehmen (siehe Abbildung rechts). 13 Chill.book Seite 14 Freitag, 18. Juli 2014 6:54 06 Staubbehälter leeren 5. Filter nach oben aus dem Staubbehälter nehmen (siehe Abbildung links). TIPP: Es empfiehlt sich, dabei einen Staubsauger zu benutzen. Dieser nimmt evtl. austretenden Schmutz direkt auf und reinigt den Filter ebenfalls effizient. 6. Staubbehälter leeren und zusammen mit dem Filter grob trocken reinigen (siehe Details). Bei Bedarf Staubbehälter und Filter nass reinigen: 24 h 14 Chill.book Seite 15 Freitag, 18. Juli 2014 6:54 06 Probleme beheben 9 Probleme beheben Anhand nachstehender Tabelle prüfen, ob sich das Problem beheben lässt: Problem Gerät lässt sich nicht einschalten. mögliche Ursache / Lösung Akku ist nicht aktiviert. Akku aktivieren, Kapitel 4, „Akku aktivieren“. Akku ist völlig leer. Gerät ausschalten (Stellung „0“) und Akku laden, Kapitel 5, „Akku aufladen“. Gerät war beim Ladevorgang eingeschaltet (Stellung „I“). Gerät am Ein-/Ausschalter aus- (Stellung „0“) und wieder einschalten (Stellung „I“). Das Gerät läuft daraufhin an. Deckel wurde abgenommen, während das Gerät noch eingeschaltet war. Gerät am Ein-/Ausschalter aus- (Stellung „0“) und wieder einschalten (Stellung „I“). Das Gerät läuft daraufhin an. Deckel sitzt nicht korrekt. Gerät ausschalten (Stellung „0“) und Deckel erneut aufsetzen. LED „ “ leuchtet rot. Akku muss geladen werden. Gerät ausschalten (Stellung „0“) und Akku aufladen, Kapitel 5, „Akku aufladen“. Gerät hat keinen Bodenkontakt. Gerät auf den Boden stellen. Es beginnt nun direkt zu reinigen. LED „ “ leuchtet rot. Staubbehälter ist überfüllt oder Filter ist verschmutzt. Gerät läuft zwar an, fährt aber andauernd rückwärts. Schieberegler zur Einstellung der Empfindlichkeit der Fallsensoren steht auf einer Stellung für helle Böden, während das Gerät auf einem dunklen Boden eingesetzt wird. Gerät hält von allein an. Akku muss geladen werden. Gerät hat sich festgefahren. Gerät ausschalten (Stellung „0“) und Kapitel 8, „Staubbehälter leeren“. Stellung des Schiebereglers zur Einstellung der Empfindlichkeit der Fallsensoren anpassen, Kapitel 6, „Gerät an Untergrund anpassen“. Gerät ausschalten (Stellung „0“) und Akku aufladen, Kapitel 5, „Akku aufladen“. Von Hand etwas nachhelfen, indem Sie dem Gerät einen Schubs geben. 15 Chill.book Seite 16 Freitag, 18. Juli 2014 6:54 06 Probleme beheben Problem mögliche Ursache / Lösung Gerät fährt direkt nach dem Einschalten trotz freier Fläche keine geraden Bahnen. Möglicherweise wird eines der Räder durch Verschmutzungen daran gehindert, frei zu drehen. Eine der Rundbürsten dreht sich nicht mehr. Möglicherweise wird diese Rundbürste durch Verschmutzungen daran gehindert, frei zu drehen. Rad von Verschmutzungen befreien. Falls erforderlich, hierfür vorsichtig eine Schere oder Pinzette einsetzen. Rundbürste ausbauen (Kapitel 6, „Gerät an Untergrund anpassen“) und von Verschmutzungen befreien. Falls erforderlich, hierfür vorsichtig eine Schere oder Pinzette einsetzen. Gerät lässt sich nicht laden. Netzteil ist nicht korrekt eingesteckt. Betriebsdauer verkürzt sich zunehmend. Möglicherweise werden die Räder durch Verschmutzungen daran gehindert, frei zu drehen. Prüfen, ob Netzteilstecker bzw. Netzteiladapter korrekt in ihren Buchsen sitzen (Kapitel 5, „Akku aufladen“). Rad von Verschmutzungen befreien. Falls erforderlich, hierfür vorsichtig eine Schere oder Pinzette einsetzen. Falls Sie das Problem anhand der obigen Tabelle nicht beheben können, rufen Sie unserer Servicehotline (siehe Kontaktdaten im Anhang dieser Gebrauchsanleitung) an. Gemeinsam mit unseren geschulten Servicemitarbeitern finden wir sicher eine Lösung. 16 Chill.book Seite 17 Freitag, 18. Juli 2014 6:54 06 Probleme beheben Ersatz- und Zubehörteile nachbestellen Ersatzteile oder Zubehör können Sie im Internet unter http://www.severin.com/go/to/8363 im Menü „Service / Ersatzteil-Shop“ bequem bestellen. Artikelnummer Beschreibung 6232048 4er Set Rundbürsten 5248048 Reinigungs-Set (Filter + Reingungspinsel) Über den nebenstehenden QR-Code können Sie auch direkt auf diese Website gelangen. Garantie Von den nachfolgenden Garantiebedingungen bleiben die gesetzlichen Gewährleistungsrechte gegenüber dem Verkäufer und eventuelle Verkäufergarantien unberührt. Sollte eine Reparatur erforderlich werden, setzen Sie sich telefonisch oder per Mail mit unserem Kundendienst in Verbindung. Die Kontaktdaten finden Sie im Anhang dieser Gebrauchsanleitung. Wenden Sie sich im Garantiefall direkt an den Händler. Zusätzlich gewährt SEVERIN eine Herstellergarantie von zwei Jahren ab Kaufdatum. In diesem Zeitraum beseitigen wir kostenlos alle Mängel, die nachweislich auf Material- oder Fertigungsfehlern beruhen und die Funktion wesentlich beeinträchtigen. Weitere Ansprüche sind ausgeschlossen. Von der Garantie ausgenommen sind: Schäden, die auf Nichtbeachtung der Gebrauchsanleitung, unsachgemäße Behandlung oder normalen Verschleiß zurückzuführen sind, ebenso leicht zerbrechliche Teile wie z. B. Glas, Kunststoff oder LEDs. Von der Garantie ausgenommen sind außerdem Batterien und Akkus die infolge normalen Verschleißes oder unsachgemäßer Handhabung defekt geworden sind bzw. deren Laufzeit sich verkürzt hat. Die Garantie erlischt bei Eingriff nicht von SEVERIN autorisierter Stellen. 17 Chill.book Seite 18 Freitag, 18. Juli 2014 6:54 06 Entsorgung Akku ausbauen 10 Entsorgung 1. Sicherstellen, dass das Gerät ausgeschaltet und das Netzteil nicht angeschlossen ist. 2. Geräte vorsichtig auf die Oberseite legen, so dass die Unterseite zugänglich ist. 3. Akkufachabdeckung abziehen (siehe Beschreibung auf Seite 10). 4. Akkusteckverbindung wie abgebildet trennen (siehe Detail). 5. Akku aus Akkufach nehmen (siehe Abbildung). 6. Akkufachdeckel wieder kräftig aufschieben, bis er hör- und spürbar einrastet. Akku und Gerät müssen nun separat voneinander entsorgt werden, Kapitel „Gerät und Akku separat entsorgen“. Gerät und Akku separat entsorgen Geräte und Akkus, die mit diesem Symbol gekennzeichnet sind, müssen getrennt vom Hausmüll entsorgt werden! Geräte und Akkus enthalten wertvolle Rohstoffe, die wiederverwertet werden können. Eine ordnungsgemäße Entsorgung schützt die Umwelt und die Gesundheit Ihrer Mitmenschen. Geben Sie das Gerät und den ausgebauten Akku separat zur Entsorgung an die entsprechenden Sammelstellen. 18 Chill.book Seite 19 Freitag, 18. Juli 2014 6:54 06 Thank you very much EN Dear Customers, 1 Thank you very much We wish you great joy with your high-quality SEVERIN product and we thank you for placing your trust in us. About this instruction manual This instruction manual includes important hints for your safety and the use of the appliance. If the instruction manual is not heeded, there can be injuries to people or damage to the appliance. Keep the instruction manual safe. If you give or sell the appliance to somebody else, give this person the instruction manual. Read this instruction manual completely before using the appliance for the first time. Table of contents Thank you very much ..................................... 19 Safety guidelines ............................................ 20 Activating the rechargeable battery ............. 25 Recharging the rechargeable battery ........... 26 Adjusting appliance for floor ......................... 27 Cleaning a room ............................................. 28 Emptying the dust container ......................... 29 Troubleshooting ............................................. 31 Disposal ........................................................... 34 19 Chill.book Seite 20 Freitag, 18. Juli 2014 6:54 06 Safety guidelines Safety of particular groups of people 2 Safety guidelines – This appliance may only be used by children over the age of 8 and by persons with reduced physical, sensory or mental capacities or a lack of experience and/or knowledge when they are supervised or if they have been instructed about the safe use of the appliance and have understood the risks resulting from the use of the appliance. – Children may not play with the appliance or stand or sit on the appliance. Cleaning and user maintenance may not be performed by children without supervision. – Keep children younger than 8 away from the appliance and adapter cord. – Keep packaging materials out of the reach of children and dispose of them. Otherwise they present a suffocation risk. Connect the appliance safely Since the appliance is operated with electrical current, there is a danger of electric shock. Therefore, heed the following: – Only connect the mains adapter to outlets that correspond to the details on the type plate of the mains adapter. – Check the appliance and mains adapter for possible damage before use. Never operate a defective appliance or an appliance with a defective mains adapter. – Never try to repair the appliance or its mains adapter yourself. To prevent hazards, repairs to the appliance and the mains adapter may only be made by our customer service. Give a defective appliance to a dealer or SEVERIN customer service for repair. 20 Chill.book Seite 21 Freitag, 18. Juli 2014 6:54 06 Safety guidelines – Do not immerse appliance or mains adapter in water or other liquids. Keep appliance and mains adapter away from rain and wet conditions. Do not operate the appliance outdoors or in rooms with high humidity. – Do not handle the mains adapter with wet hands. When unplugging the mains adapter from the outlet, always pull directly on the plug. – Make sure that the adapter cord is not kinked, crushed or run over and that it does not come into contact with sources of heat, humidity and sharp edges. Make sure that the adapter cord does not become a stumbling hazard. – Before cleaning or maintaining the appliance, as well as before changing accessories, switch off the appliance and unplug the mains adapter from the outlet. Safety when handling rechargeable batteries With improper handling of rechargeable batteries, there is a danger of injury and explosion. – Should it be necessary to replace the rechargeable battery, contact a dealer or SEVERIN customer service. Never replace the rechargeable battery yourself. Never replace with other rechargeable batteries or other batteries. – Before activating, using or removing the rechargeable battery, make sure that the mains adapter is unplugged from the outlet. – Never take rechargeable batteries apart, expose them to high temperatures or throw them in the fire. – Never subject rechargeable batteries to direct sunlight. - With a storage duration of up to 3 months, adhere to the following temperatures: -20 ― +45 °C. - With a storage duration of more than 1 year, adhere to the following temperatures: -20 ― +20 °C. 21 Chill.book Seite 22 Freitag, 18. Juli 2014 6:54 06 Safety guidelines – Never short-circuit rechargeable batteries, that is, never touch both poles at the same time, especially not with objects that conduct electricity. Store rechargeable batteries so that they cannot be short-circuited by other rechargeable batteries or metal objects during storage. – Only use the included mains adapter to charge the rechargeable battery. Never charge the rechargeable battery with another mains adapter. Only use the included mains adapter to charge the rechargeable battery for this appliance. – At the end of its life span, remove the rechargeable as described. Then take the rechargeable battery to an appropriate collection point nearby, thus ensuring safe and environmentally-appropriate disposal. Never throw rechargeable batteries away in household garbage! – In case of improper handling, liquid can escape from the rechargeable battery. Do not use rechargeable battery if it is damaged or if liquid escapes from it. - If liquid has escaped, avoid contact with the liquid. - If there is contact with the liquid, rinse immediately with a lot of water. In case of follow-up symptoms (regardless of what kind), seek a physician's advice. Intended use The appliance may only be used in households. The appliance may only be used for cleaning on level, normally-soiled hard floors. The best cleaning results are obtained in small and enclosed rooms. If the round brushes are not mounted, it can also be used on short-piled carpeting. Any other use is improper and is forbidden. 22 Chill.book Seite 23 Freitag, 18. Juli 2014 6:54 06 Safety guidelines In order to prevent injuries, fires and damage, the appliance may not be used to vacuum: – People, animals and plants. Always keep vacuum openings away from all body parts, hair and clothing. – Glowing or burning particles (such as ash, coals, charcoal, cigarettes, matches). – Explosively or flammable materials or toner. – Water and other liquids, e.g. damp carpet cleaners. – Pointy objects such as glass splinters, needles or construction waste. Also forbidden: – Independent alteration or repair of the appliance or its mains adapter. – Use without the correct insertion of the dust container, filter and cover. – Use in rooms where there are breakable object or objects that can tip over easily. Prepare rooms so that the use of the appliance will not cause damage. – Use, storage or charging outdoors. – The storage of objects on the appliance. 23 Chill.book Seite 24 Freitag, 18. Juli 2014 6:54 06 Unpacking 1. Unpack the appliance and accessories. 3 Unpacking 2. Check to ensure that delivery is complete (see figure). 1 2 7 3 6 4 5 1 CHILL robotic vacuum 5 Cleaning brush 2 Round brushes 6 Mains adapter 3 Replacement round brushes 7 Replacement filter 4 Rechargeable battery – not depicted: Instruction manual 24 Chill.book Seite 25 Freitag, 18. Juli 2014 6:54 06 Activating the rechargeable battery 1. Make sure that the appliance is switched off and the mains adapter is not connected. 4 Activating the rechargeable battery 2. Turn appliance carefully upside down so that the underside is accessible. 3. Pull off the rechargeable battery cover forcefully with both hands (see figure). 4. Connect rechargeable battery as shown (see detail). 5. Insert rechargeable battery in compartment (see figure). 6. Push rechargeable battery cover on forcefully until it audibly snaps in. The rechargeable battery is now activated and must be charged, page 26, „Recharging the rechargeable battery“. 25 Chill.book Seite 26 Freitag, 18. Juli 2014 6:54 06 Recharging the rechargeable battery It is best to charge the rechargeable battery before each use, especially after the appliance has not 5 Recharging the rechargeable battery been used for a while. This increases the life span of the rechargeable battery and ensures the longest cleaning cycles. 1. Make sure that the appliance is switched off. 2. Connect the mains adapter to the appliance (see figure). 3. Connect the mains adapter to the outlet (see detail). – The LED blinks. Wait approx. 6.5 hours until the LED lights up permanently. 6,5 h 4. Unplug the mains adapter from the outlet and appliance. Prepare appliance for use, page 27, „Adjusting appliance for floor“. 26 Chill.book Seite 27 Freitag, 18. Juli 2014 6:54 06 Adjusting appliance for floor 1. Make sure that the appliance is switched off. 6 Adjusting appliance for floor 2. Depending on the floor, attach or remove brushes: – If you want to clean hard floors, attach the round brushes (see figure). – If you want to clean short-pile carpeting, remove the brushes (see figure). 3. Put all 3 sensors in the correct position: – For light floors and flat steps, position 0 to 1. – For dark floors and higher steps, position 2 to 3. TIP: If the robot always moves backwards on dark floors, select position "3". 27 Chill.book Seite 28 Freitag, 18. Juli 2014 6:54 06 Cleaning a room Prepare room as follows: 7 Cleaning a room – Remove loose objects that the robot could push in front of itself. – Remove cables, draperies, and everything that could get entangled in the brushes. – Remove breakable objects or objects that can tip over easily. Switch the appliance on as follows: 1. Place appliance in the middle of the room to be cleaned. 2. Switch appliance on using the on/off switch (position "I" - see detail). The appliance will now clean the room according to the following pattern: The appliance will now clean until – the dust container is full and the LED – or until the rechargeable battery must be charged and the LED charging the rechargeable battery“. lights up, page 29, „Emptying the dust container“. lights up, page 26, „Re- In both cases, the appliance stops after a while. It will then emit a peep tone every minute – until you switch it off using the on/off switch (position "0") – or the rechargeable battery is discharged completely. If you do not intend to use the appliance any longer, then remove the rechargeable battery, page 34, „Removing the rechargeable battery“. 28 Chill.book Seite 29 Freitag, 18. Juli 2014 6:54 06 Emptying the dust container 1. Make sure that the appliance is switched off and the mains adapter is not connected. 8 Emptying the dust container 2. Remove the cover (see figure). 3. Use the handle to lift the dust container out of the appliance (see figure left). 4. Remove the dust container cover (see figure right). 29 Chill.book Seite 30 Freitag, 18. Juli 2014 6:54 06 Emptying the dust container 5. Remove the filter upwards from the dust container (see figure left). TIP: It is recommended that you use a vacuum cleaner for this. The vacuum cleaner will take up any escaping dust directly and also clean the filter efficiently. 6. Empty the dust container and clean of coarse dust together with the filter (see details). If necessary, wet-clean the dust container and filter: 24 h 30 Chill.book Seite 31 Freitag, 18. Juli 2014 6:54 06 Troubleshooting 9 Troubleshooting Using the table below, check whether you can remedy the problem: Problem Appliance cannot be switched on. Possible cause/Remedy Rechargeable battery is not activated. Activate the rechargeable battery, chapter 4, „Activating the rechargeable battery“. Rechargeable battery is completely discharged. Switch off the appliance (position "0") and charge rechargeable battery, chapter 5, „Recharging the rechargeable battery“. Appliance was switched on during charging (position "I"). Use the on/off switch to switch the appliance off (position "0") and then on again (position "I"). The appliance then starts up. Cover was removed while the appliance was still switched on. Use the on/off switch to switch the appliance off (position "0") and then on again (position "I"). The appliance then starts up. Cover is not fitted correctly. Switch off the appliance (position "0") and put the cover on again. LED " " lights up red. Rechargeable battery must be charged. Switch off the appliance (position "0") and charge rechargeable battery, chapter 5, „Recharging the rechargeable battery“. Appliance is not in contact with the floor. Place appliance on the floor. It now begins to clean right away. LED " " lights up red. Dust container is too full or filter is soiled. Appliance switches on but only moves backwards. The slider for setting the sensitivity of the sensors is on a setting for light floors, while the appliance is being used on a dark floor. Appliance stops of its own accord. Rechargeable battery must be charged. Appliance is stuck. Help the appliance manually by giving it a push. Switch off the appliance (position "0") and chapter 8, „Emptying the dust container“. Adjust setting of the slider for the setting of the sensitivity of the sensors, chapter 6, „Adjusting appliance for floor“. Switch off the appliance (position "0") and charge rechargeable battery, chapter 5, „Recharging the rechargeable battery“. 31 Chill.book Seite 32 Freitag, 18. Juli 2014 6:54 06 Troubleshooting Problem Possible cause/Remedy Appliance does It is possible that dirt is preventing one of the wheels from moving freely. not move in Free wheel of dirt. If necessary, carefully use a scissors or tweezers for this. straight lines directly after it is switched on. One of the round brushes no longer turns. It is possible that dirt is preventing this round brush from moving freely. Remove the round brush (chapter 6, „Adjusting appliance for floor“) and free it of dirt. If necessary, carefully use a scissors or tweezers for this. Appliance cannot be charged. Mains adapter is not plugged in correctly. Operating duration is becoming ever shorter. It is possible that dirt is preventing the wheels from moving freely. Check whether the mains adapter or adapter plug is seated properly in the outlet (chapter 5, „Recharging the rechargeable battery“). Free wheels of dirt. If necessary, carefully use a scissors or tweezers for this. If you cannot solve the problem using the table above, call our Service hotline (see appendix to this instruction manual). Together with our trained service employees, we are sure to find a solution. 32 Chill.book Seite 33 Freitag, 18. Juli 2014 6:54 06 Troubleshooting Ordering spare parts and accessories You can order spare parts or accessories on the Internet on our website http://www.severin.com/ go/to/8363 by using the "Service / Spare Parts Shop" menu. Item number Content 6232048 Round brushes, set of 4 5248048 Cleaning set (filter + cleaning brush) Use this QR code to reach this website directly. Warranty The legal warranty rights with respect to the seller and any seller warranties are unaffected by the following warranty conditions. If repair should be necessary, contact our customer service via telephone or mail. The contact data is in the appendix to this instruction manual. In case of warranty claim, contact the dealer directly. In addition, SEVERIN grants a manufacturer's warranty of two years from the purchase date. In this period, we will eliminate all defects due to material or manufacturing errors and which compromise the function. Other claims are excluded. Excepted from the warranty are: Damage that is due to non-observance of the instruction manual, improper handling or normal wear; also easily-breakable parts such as glass, plastic or LEDs. Excepted from the warranty are also the batteries and rechargeable batteries, which as a consequence of normal wear or improper handling have become defective or whose run-time has shortened. Intervention of people not authorised by SEVERIN voids the warranty. 33 Chill.book Seite 34 Freitag, 18. Juli 2014 6:54 06 Disposal Removing the rechargeable battery 10 Disposal 1. Make sure that the appliance is switched off and the mains adapter is not connected. 2. Turn appliance carefully upside down so that the underside is accessible. 3. Remove the rechargeable battery cover (see description on page 26). 4. Disconnect rechargeable battery as shown (see detail). 5. Remove rechargeable battery from compartment (see figure). 6. Push rechargeable battery cover on forcefully until it audibly snaps in. The rechargeable battery and appliance must now be disposed of separately from one another, chapter „Disposing of the appliance and rechargeable battery“. Disposing of the appliance and rechargeable battery Appliances and rechargeable batteries that are marked with this symbol must be disposed of separately from household garbage. Appliances and rechargeable batteries contain valuable raw materials that can be recycled. Proper disposal protects the environment and the health of your fellow men. Dispose of the appliance and the removed rechargeable battery separately in the appropriate collection locations. 34 Chill.book Seite 35 Freitag, 18. Juli 2014 6:54 06 Remerciements FR Chère cliente, cher client, 1 Remerciements Nous espérons que ce produit de qualité fabriqué par les soins de la maison SEVERIN vous donnera pleine et entière satisfaction, et nous vous remercions de votre confiance. Au sujet de cette notice Cette notice contient des informations importantes pour votre sécurité et pour l’utilisation optimale de l’appareil. En cas de non-respect des instructions, des personnes peuvent être blessées ou l’appareil endommagé. Conservez soigneusement cette notice. Faites-la suivre en cas de cession de l’appareil à un tiers. Veuillez lire l’intégralité de la notice avant la première utilisation. Sommaire Remerciements ............................................... 35 Consignes de sécurité ................................... 36 Activation de la batterie ................................. 41 Recharge de la batterie .................................. 42 Réglage de l'appareil selon le sol ................. 43 Nettoyage de la pièce ..................................... 44 Vider le réservoir à poussière ....................... 45 Résolution des pannes .................................. 47 Mise au rebut .................................................. 50 35 Chill.book Seite 36 Freitag, 18. Juli 2014 6:54 06 Consignes de sécurité Sécurité des personnes 2 Consignes de sécurité – Cet appareil peut être utilisé par des enfants à partir de 8 ans ainsi que par personnes aux facultés physiques, sensorielles ou mentales restreintes, ou ne possédant pas l'expérience et/ou les connaissances suffisantes si elles sont surveillées ou bien ont été instruites sur l'utilisation en toute sécurité de l'appareil et qu'elles ont compris les dangers associés. – Il doit être interdit aux enfants de jouer avec l’appareil, ainsi que de monter ou de s’asseoir dessus. Les enfants ne doivent pas être autorisés à nettoyer ou à effectuer l’entretien de l’appareil sans surveillance. – Il convient d’empêcher les enfants de moins de 8 ans de toucher à l’appareil et au cordon d’alimentation. – Stocker les emballages hors de portée des enfants ou les mettre à la poubelle pour éviter tout risque d’étouffement Branchement de l’appareil en toute sécurité Cet appareil fonctionnant grâce à une alimentation électrique, un risque d'électrocution existe. Il convient donc de respecter les consignes suivantes : – Brancher le bloc d'alimentation uniquement sur des prises de courant dont les caractéristiques correspondent aux indications de la plaque signalétique du bloc d'alimentation. – Vérifier avant usage que l’appareil et le cordon électrique sont exempts de défauts Ne jamais mettre en marche un appareil défectueux ou dont le bloc d’alimentation est défectueux. – Ne jamais essayer de pratiquer soi-même des réparations sur l’appareil ou le bloc d’alimentation. Pour éviter tout risque, les réparations doivent être effectuées exclusivement par notre service aprèsvente. Le cas échéant, il convient de remettre l’appareil défectueux à votre revendeur ou au service après-vente SEVERIN. 36 Chill.book Seite 37 Freitag, 18. Juli 2014 6:54 06 Consignes de sécurité – Ne jamais immerger l’appareil dans l’eau ou dans d’autres liquides. Garder l'appareil et le bloc d'alimentation à l'abri de la pluie et de l'humidité. Ne pas utiliser l’appareil en plein air ni dans des pièces très humides. – Ne pas toucher le bloc d'alimentation avec les mains humides. Pour débrancher le bloc d'alimentation de la prise, toujours le saisir par la fiche. – Veiller à ce que le câble du bloc d'alimentation ne soit ni vrillé, ni coincé, ni écrasé. Empêcher tout contact avec des sources de chaleur, d'humidité ou avec des objets tranchants. Veiller à ne pas laisser le câble du bloc d'alimentation dans le passage pour éviter tout risque de trébucher. – Avant le nettoyage ou l'entretien de l'appareil, ainsi qu'avant de remplacer un accessoire, éteindre l'appareil et s'assurer que le bloc d'alimentation n'est pas branché. Sécurité lors de l'utilisation de la batterie Un maniement incorrect de la batterie constitue un risque de blessure ou d'exposition. – Si le remplacement de la batterie est nécessaire, contacter un revendeur ou le service après-vente de SEVERIN. Ne jamais remplacer la batterie soi-même. Ne jamais remplacer la batterie par un accumulateur ou une autre batterie. – Avant l'activation, l'insertion ou le retrait de la batterie, vérifier que le bloc d'alimentation est débranché au niveau de la prise. – Ne jamais retirer la batterie ni l'exposer à des températures élevées, ni encore la jeter au feu. 37 Chill.book Seite 38 Freitag, 18. Juli 2014 6:54 06 Consignes de sécurité – Ne jamais exposer la batterie aux rayons directs du soleil. - En cas de durée d'entreposage jusqu'à 3 mois, respecter la plage de température suivante : -20 à +45 °C. - En cas de durée d'entreposage supérieure à 1 an, respecter la plage de température suivante : -20 à +20 °C. – Ne jamais court-circuiter la batterie, c'est-à-dire ne pas toucher les deux pôles en même temps, en particulier avec des objets conducteurs. Stocker la batterie de façon à ce qu'elle ne puisse pas être court-circuitée accidentellement par d'autres batteries ou objets métalliques. – Utiliser uniquement le bloc d'alimentation fourni pour la recharge de la batterie. Ne jamais charger la batterie avec un bloc d'alimentation différent. De même, ne pas utiliser le bloc d'alimentation fourni pour recharger autre chose que la batterie de cet appareil. – A l'issue de sa durée de vie, démonter la batterie comme décrit. Ensuite, apporter immédiatement la batterie à un point de collecte près de chez vous pour garantir son élimination conforme et respectueuse de l'environnement. Ne jamais jeter les batteries dans les déchets ordinaires ! – En cas de maniement incorrect, du liquide peut fuir de la batterie. Ne pas utiliser la batterie si elle est endommagée ou si du liquide s'en échappe. - Eviter tout contact avec les liquides fuyant d'une batterie. - Si cela se produit malgré tout, rincer abondamment à l'eau la partie concernée. En cas de manifestation quelconque, consulter un médecin. 38 Chill.book Seite 39 Freitag, 18. Juli 2014 6:54 06 Consignes de sécurité Utilisation conforme L'utilisation de cet appareil n'est autorisée que pour un usage domestique. L'appareil doit être passé exclusivement sur des sols durs, plats, et normalement sales. Les meilleurs résultats seront obtenus dans des pièces petites et qu'il est possible de fermer. Si les brosses rondes ne sont pas montées, l'appareil peut être utilisé sur un tapis à poil ras. Toute utilisation autre que celles décrites sera considérée comme non conforme et est interdite. Pour éviter tout risque de blessure, d'incendie, de dégâts matériels, l'aspiration des objets suivants est proscrite : – Personnes, animaux, plantes. Tenir en permanence les buses et les orifices d'aspiration éloignés de toute partie du corps, ainsi que des cheveux et des vêtements. – Particules incandescentes, (p. ex. : cendres, braises, charbon de bois, cigarettes, allumettes). – Matières explosives ou facilement inflammables, toner. – Eau et autres liquides, p. ex. les mousses nettoyantes pour tapis. – Objets pointus tels que du verre cassé, des clous ou des gravats. Sont également interdits : – Transformation ou réparation de l'appareil ou de son bloc d'alimentation par l'utilisateur. – Utilisation sans que le réservoir à poussière, le filtre et le couvercle soit correctement installés. – Utilisation dans des pièces contenant des objets fragiles ou susceptibles de se renverser facilement. Préparer les pièces de manière à ce que le passage de l'aspirateur robot ne puisse provoquer aucun dommage. – Utilisation, stockage ou recharge en extérieur. – Placement d'objets sur l'appareil. 39 Chill.book Seite 40 Freitag, 18. Juli 2014 6:54 06 Déballage 1. Déballez l'appareil et les accessoires. 3 Déballage 2. Vérifiez que la livraison est complète (voir figure). 1 2 7 3 6 4 5 1 Aspirateur robot CHILL 5 Pinceau de nettoyage 2 Brosses rondes 6 Bloc d'alimentation 3 Brosses rondes de rechange 7 Filtre de rechange 4 Batterie – non représenté: Mode d'emploi 40 Chill.book Seite 41 Freitag, 18. Juli 2014 6:54 06 Activation de la batterie 1. Assurez-vous que l'appareil est éteint et que le bloc d'alimentation n'est pas branché. 4 Activation de la batterie 2. Retournez prudemment l'appareil pour pouvoir accéder au dessous. 3. Retirez le cache de la batterie en tirant dessus fortement à deux mains (voir figure). 4. Branchez le connecteur de la batterie comme illustré (voir figure détaillée). 5. Faites glisser la batterie dans son compartiment (voir figure). 6. Repoussez le cache à sa place jusqu'à le sentir et l'entendre s'enclencher. La batterie est à présent activée et doit être rechargée, Page 42, „Recharge de la batterie“. 41 Chill.book Seite 42 Freitag, 18. Juli 2014 6:54 06 Recharge de la batterie Idéalement, rechargez la batterie avant chaque utilisation, notamment après une période d'arrêt 5 Recharge de la batterie prolongée. Cela permet d'augmenter la durée de vie de la batterie et de garantir des cycles de nettoyage aussi longs que possible. 1. Assurez-vous que l'appareil est éteint. 2. Branchez le bloc d'alimentation sur l'appareil (voir figure). 3. Branchez le bloc d'alimentation sur le secteur (voir figure détaillée). – La LED clignote. Attendez env. 6,5 heures jusqu'à ce que la LED soit allumée en continu. 6,5 h 4. Séparez le bloc d'alimentation du secteur et de l'appareil. Préparez l'appareil pour l'utilisation, Page 43, „Réglage de l'appareil selon le sol“. 42 Chill.book Seite 43 Freitag, 18. Juli 2014 6:54 06 Réglage de l'appareil selon le sol 1. Assurez-vous que l'appareil est éteint. 6 Réglage de l'appareil selon le sol 2. Selon le sol à aspirer, mettez les brosses ou retirez-les : – pour les sols durs, utilisez les brosses rondes (voir figure). – Pour nettoyer des tapis à poils ras, retirez les brosses (voir figure). 3. Mettre les 3 capteurs de chute simultanément sur la même position : – Pour les sols clairs et les niveaux faibles, position 0 à 1. – Pour les sols foncés et les niveaux élevés, position 2 à 3. CONSEIL : Si le robot fonctionne en permanence en marche arrière sur un sol foncé, choisissez le niveau « 3 ». 43 Chill.book Seite 44 Freitag, 18. Juli 2014 6:54 06 Nettoyage de la pièce Préparez la pièce comme suit : 7 Nettoyage de la pièce – Rangez les objets laissés libres au sol que le robot pourrait emporter avec lui. – Rangez les câbles, rideaux et tout ce qui serait susceptible de se prendre dans les brosses. – Eloignez les objets fragiles et ceux qui pourrait tomber facilement. Procédez comme suit pour allumer l'appareil : 1. Placez l'appareil au centre de la pièce. 2. Allumez l'appareil au niveau de l'interrupteur principal (position « I », voir le détail). L'appareil nettoie la pièce selon le modèle suivant : L'appareil fonctionne à présent – jusqu'à ce que le réservoir soit plein et que la LED Page 45, „Vider le réservoir à poussière“. – ou jusqu'à ce que la batterie soit déchargée et que la LED Page 42, „Recharge de la batterie“. s'allume, s'allume, Dans les deux cas, l'appareil finit par s'arrêter. Ensuite, il émet un bip toutes les minutes – jusqu'à ce que vous l'éteigniez à l'aide de l'interrupteur principal (position « 0 ») – ou jusqu'à ce que la batterie soit complètement vide. Si vous pensez ne pas utiliser l'appareil pendant quelques temps, retirez la batterie, Page 50, „Démontage de la batterie“. 44 Chill.book Seite 45 Freitag, 18. Juli 2014 6:54 06 Vider le réservoir à poussière 1. Assurez-vous que l'appareil est éteint et que le bloc d'alimentation n'est pas branché. 8 Vider le réservoir à poussière 2. Retirez le couvercle (voir figure). 3. Sortez le réservoir à poussière de l'appareil par la poignée (voir figure de gauche). 4. Retirez le couvercle du réservoir (voir figure de droite). 45 Chill.book Seite 46 Freitag, 18. Juli 2014 6:54 06 Vider le réservoir à poussière 5. Sortez le filtre du réservoir en le tirant vers le haut (voir figure de gauche). CONSEIL : Il est conseillé d'utiliser pour ce faire un aspirateur. Celui-ci aspire directement la saleté éventuelle et nettoie efficacement le filtre dans le même temps. 6. Videz le réservoir à poussière et le nettoyer rapidement à sec (voir figure détaillée). Si nécessaire, nettoyez à l'eau le réservoir à poussière et le filtre : 24 h 46 Chill.book Seite 47 Freitag, 18. Juli 2014 6:54 06 Résolution des pannes 9 Résolution des pannes Utilisez le tableau suivant pour vérifier si la panne peut être résolue : Panne Cause possible/solution La mise en La batterie n'est pas activée. marche de l'ap- Activer la batterie, Chapitre 4, „Activation de la batterie“. pareil est imLa batterie est complètement vide. possible. Eteindre l'appareil (position « 0 ») et recharger la batterie, Chapitre 5, „Recharge de la batterie“. L'appareil a été allumé (position « I ») pendant le processus de recharge. Eteindre l'appareil à l'aide de l'interrupteur (position « 0 »), puis le rallumer (position « I »). L'appareil se remet en marche tout de suite. Le couvercle a été retiré pendant qu'il était en marche. Eteindre l'appareil à l'aide de l'interrupteur (position « 0 »), puis le rallumer (position « I »). L'appareil se remet en marche tout de suite. Le couvercle n'est pas en place. Eteindre l'appareil (position « 0 ») et remettre le couvercle en place. La LED est allumée en rouge. La batterie doit être rechargée. Eteindre l'appareil (position « 0 ») et recharger la batterie, Chapitre 5, „Recharge de la batterie“. L'appareil ne touche pas le sol. Placer l'appareil au sol. Le nettoyage démarre immédiatement. La LED est allumée en rouge. Le réservoir à poussière est trop plein ou le filtre est encrassé. L'appareil démarre, mais il fonctionne uniquement en marche arrière. Le curseur pour le réglage de la sensibilité des capteurs de chute est réglé sur la position pour les sols clairs alors que l'appareil est utilisé sur un sol foncé. L'appareil s'arrête de luimême. La batterie doit être rechargée. L'appareil s'est bloqué. L'aider un peu à la main, en le poussant légèrement. Eteindre l'appareil (position « 0 »), Chapitre 8, „Vider le réservoir à poussière“. Changer la position du curseur pour régler la sensibilité des capteurs de chute, Chapitre 6, „Réglage de l'appareil selon le sol“. Eteindre l'appareil (position « 0 ») et recharger la batterie, Chapitre 5, „Recharge de la batterie“. 47 Chill.book Seite 48 Freitag, 18. Juli 2014 6:54 06 Résolution des pannes Panne Dès le démarrage, l'appareil ne se déplace pas en ligne droite alors qu'il n'y a pas d'obstacle. Cause possible/solution Il se peut que l'une des roues ne tourne pas parce qu'elle est encrassée. Nettoyer la roue en question. Si nécessaire, utiliser pour cela des ciseaux ou une pince. L'une des Il se peut que cette brosse ronde soit bloquée par de la saleté. brosses rondes Démonter la brosse ronde (Chapitre 6, „Réglage de l'appareil selon le sol“) ne tourne plus. et la nettoyer. Si nécessaire, utiliser pour cela des ciseaux ou une pince. La recharge de l'appareil est impossible. Le bloc d'alimentation n'est pas branché correctement. La durée de fonctionnement ne cesse de réduire. Il se peut les roues soient entravées par de la saleté. Vérifier que la fiche ou l'adaptateur du bloc d'alimentation sont bien enfichés (Chapitre 5, „Recharge de la batterie“). Nettoyer les roues concernées. Si nécessaire, utiliser pour cela des ciseaux ou une pince. Si le tableau ne permet pas de résoudre le problème, appelez notre ligne d'assistance technique (Vous trouverez ses coordonnées dans les annexes de cette notice). Avec l'aide de notre équipes de techniciens, nous trouverons certainement une solution. 48 Chill.book Seite 49 Freitag, 18. Juli 2014 6:54 06 Résolution des pannes Commande de pièces détachées ou d'accessoires Vous pouvez facilement commander des pièces détachées ou des accessoires s'effectuer par Internet, sur notre site http://www.severin.com/go/to/8363. Choisissez dans le menu sur notre page d'accueil la rubrique "Service/pièces détachées". N° d'art. Description 6232048 Brosse ronde (par 4) 5248048 Kit de nettoyage (filtre + pinceau de nettoyage) Le code QR ci-contre vous amène directement sur la page d'accueil de notre site. Garantie Les droits de garantie légaux vis-à-vis du vendeur et d'éventuelles garanties offertes par ce dernier persistent indépendamment des clauses de garantie définies ci-après. S'il est nécessaire de réparer l'appareil, contacter notre service après-vente par téléphone ou par courriel. Vous trouverez ses coordonnées dans les annexes de cette notice. De ce fait, adressez-vous directement au revendeur pour faire jouer la garantie. SEVERIN vous assure également la garantie du fabricant pendant deux années à partir de la date d'achat. Pendant cette période, nous réparerons gratuitement toutes les pannes imputables à un défaut de matériel ou de fabrication et qui entraveraient sensiblement le fonctionnement de l'appareil. Tout autre recours est exclu. Sont exclus de la garantie : les dommages causés par le non-respect des conditions d'utilisation, une manipulation incorrecte, l'usure normale, ainsi que les pièces fragiles (les parties en verre, en plastique ou les ampoules). Sont également exclus de la garantie les batteries et accumulateurs devenus défectueux ou à la durée de vie réduite à la suite d'une usure normale ou d'un maniement incorrect. La garantie est annulée en cas d'intervention d'un réparateur non agréé par SEVERIN. 49 Chill.book Seite 50 Freitag, 18. Juli 2014 6:54 06 Mise au rebut Démontage de la batterie 10 Mise au rebut 1. Assurez-vous que l'appareil est éteint et que le bloc d'alimentation n'est pas branché. 2. Retournez prudemment l'appareil pour pouvoir accéder au dessous. 3. Ouvrez le cache du compartiment de la batterie (voir description Page 42). 4. Débranchez le connecteur de la batterie comme illustré (voir figure détaillée). 5. Sortez la batterie de son logement (voir figure). 6. Repoussez le cache à sa place jusqu'à le sentir et l'entendre s'enclencher. La batterie et l'appareil doivent être mis au rebut séparément, Chapitre „Mise au rebut séparée de l'appareil et de la batterie“. Mise au rebut séparée de l'appareil et de la batterie Les appareils et batteries sur lesquels figurent ce symbole ne doivent pas être jetés avec les ordures ménagères. Ils contiennent des matières premières précieuses, susceptibles d'être recyclées. En les mettant au rebut de manière conforme, vous contribuez à la protection de l'environnement et de la santé d'autrui. Renseignezvous auprès de votre administration communale ou de votre revendeur pour savoir où le mettre au rebut. 50 Chill.book Seite 51 Freitag, 18. Juli 2014 6:54 06 Hartelijk dank NL Beste klant, 1 Hartelijk dank Wij wensen u veel plezier met dit kwaliteitsproduct van SEVERIN en willen u hartelijk bedanken voor uw vertrouwen. Over deze handleiding Deze handleiding bevat belangrijke aanwijzingen voor uw veiligheid en voor het gebruik van het apparaat. Bij niet-inachtneming van de handleiding kan lichamelijk letsel of schade aan het apparaat ontstaan. De handleiding goed bewaren. Bij doorgeven van het apparaat aan derden de handleiding meegeven. Handleiding voor het eerste gebruik volledig doorlezen. Inhoudsopgave Hartelijk dank .................................................. 51 Veiligheidsaanwijzingen ................................ 52 Accu activeren ................................................ 57 Accu opladen .................................................. 58 Apparaat aanpassen aan ondergrond .......... 59 Ruimte reinigen .............................................. 60 Stofreservoir legen ......................................... 61 Problemen verhelpen ..................................... 63 Verwijdering .................................................... 66 51 Chill.book Seite 52 Freitag, 18. Juli 2014 6:54 06 Veiligheidsaanwijzingen Veiligheid van bepaalde groepen personen 2 Veiligheidsaanwijzingen – Het apparaat kan door kinderen vanaf 8 jaar en ouder alsmede door personen met verminderde fysieke, sensorische of mentale vaardigheden of gebrek aan ervaring en/of kennis alleen gebruikt worden, als er toezicht op hen gehouden wordt of als zij in het veilige gebruik van het apparaat geïnstrueerd zijn en de daaruit resulterende gevaren begrepen hebben. – Kinderen mogen niet met het apparaat spelen of op het apparaat gaan zitten of staan. Reiniging en gebruikersonderhoud mag niet door kinderen zonder toezicht uitgevoerd worden. – Apparaat en stroomkabel buiten bereik van kinderen jonger dan 8 jaar houden. – Verpakkingsmaterialen buiten bereik van kinderen bewaren en verwijderen. Anders bestaat er verstikkingsgevaar. Apparaat veilig aansluiten Het apparaat wordt met elektrische stroom opgeladen, daarbij bestaat in principe gevaar van een elektrische schok. Let daarom in het bijzonder op het volgende: – Voeding alleen op stopcontacten aansluiten, die overeenkomen met de gegevens op het typeplaatje van de voeding. – Apparaat en voeding voor het gebruik controleren op evt. beschadigingen. Nooit een defect apparaat of een apparaat met defecte voeding gebruiken. – Nooit proberen om het apparaat of de voeding ervan zelf te repareren. Om gevaren te voorkomen mogen reparaties aan het apparaat en de voeding alleen door onze klantenservice uitgevoerd worden. Een defect apparaat of voeding voor reparatie aan een dealer of de SEVERIN-klantenservice overhandigen. 52 Chill.book Seite 53 Freitag, 18. Juli 2014 6:54 06 Veiligheidsaanwijzingen – Apparaat of voeding niet in water of andere vloeistoffen dompelen. Apparaat en voeding buiten bereik houden van regen of natheid. Apparaat niet gebruiken in de buitenlucht of ruimtes met hoge luchtvochtigheid. – Voeding niet met natte handen aanraken. Bij het uittrekken van de voeding uit het stopcontact altijd direct aan de voeding trekken. – Erop letten, dat de voedingskabel niet geknikt, ingeklemd of erover heen gereden wordt of met hittebronnen, vocht of scherpe randen in aanraking komt. Erop letten, dat de voedingskabel niet voor struikelgevaar zorgt. – Voor het reinigen of onderhouden van het apparaat alsmede voor het wisselen van toebehoren apparaat uitschakelen en ervoor zorgen, dat de voeding niet aangesloten is. Veiligheid bij de omgang met accu's Bij verkeerde omgang met accu's bestaat er letsel- en explosiegevaar. – Mocht het nodig zijn, om de accu te vervangen, contact opnemen met een dealer of de SEVERIN-klantenservice. Accu nooit zelf vervangen. Accu nooit door andere accu's of batterijen vervangen. – Voor het activeren, plaatsen of uitbouwen van de accu ervoor zorgen, dat de voeding uit het stopcontact getrokken is. – Accu nooit uit elkaar halen, aan hoge temperaturen blootstellen of in vuur gooien. – Accu's niet blootstellen aan direct zonlicht. - Bij een opslagduur van max. 3 maanden de volgende temperaturen aanhouden: -20 ― +45 °C. - Bij een opslagduur van langer dan 1 jaar de volgende temperaturen aanhouden: -20 ― +20 °C. 53 Chill.book Seite 54 Freitag, 18. Juli 2014 6:54 06 Veiligheidsaanwijzingen – Accu's nooit kortsluiten, d.w.z. niet beide polen tegelijkertijd aanraken, vooral niet met elektrisch geleidende voorwerpen. Accu's zo opslaan, dat ze ook bij de opslag niet door andere accu's of metalen voorwerpen kortgesloten worden. – Voor het opladen van de accu uitsluitend de meegeleverde voeding gebruiken. De accu nooit met een andere voeding opladen. De meegeleverde voeding wederom uitsluitend voor het opladen van de accu van dit apparaat gebruiken. – Accu na gebruikseinde uitbouwen zoals beschreven. Accu daarna direct naar een overeenkomstig inzamelpunt in uw omgeving brengen en zo zorgen voor een veilige en milieuvriendelijke verwijderen. Accu nooit met het huisvuil verwijderen! – Bij ondeskundige omgang kan vloeistof uit de accu komen. Accu niet langer gebruiken, als deze beschadigd is of er zelfs vloeistof naar buiten komt. - Indien vloeistof naar buiten is gekomen, contact met de vloeistof vermijden. - Indien er contact is geweest met de vloeistof, deze direct met veel water afspoelen. Bij nawerkingen (welke dan ook) een arts raadplegen. Gebruik volgens de voorschriften Het apparaat mag alleen in het huishouden gebruikt worden. Het apparaat mag alleen gebruikt worden voor het reinigen van effen, normaal verontreinigde harde vloeren. Daarbij worden de beste reinigingsresultaten behaald in kleine of gesloten ruimtes. Indien de ronde borstels niet gemonteerd zijn, kan het ook op laagpolig tapijt gebruikt worden. Elk ander gebruik geldt als verkeerd gebruik en is verboden. 54 Chill.book Seite 55 Freitag, 18. Juli 2014 6:54 06 Veiligheidsaanwijzingen Om letsel, brand en schade te voorkomen, mag het apparaat niet gebruikt worden voor het zuigen van: – Mensen, dieren of planten. Zuigopening altijd buiten bereik houden van lichaamsdelen, haar en kledingstukken. – Gloeiende, brandende of smeulende deeltjes (zoals as, kool, houtskool, sigaretten, lucifers). – Explosieve of licht ontvlambare stoffen of toners. – Water en andere vloeistoffen, bijv. vochtige tapijtreinigers. – Puntige voorwerpen zoals glassplinters, spijkers of puin. Verboden is bovendien: – Zelfstandig ombouwen of repareren van het apparaat of de voeding ervan. – Gebruik zonder dat stofreservoir, filter en deksel correct geplaatst zijn. – Gebruik in ruimtes, waarin breekbare voorwerpen staan of voorwerpen die gemakkelijk kunnen omvallen. Ruimtes zo voorbereiden, dat het gebruik van het apparaat geen schade kan veroorzaken. – Gebruik, opslag of opladen in de buitenlucht. – Het plaatsen van voorwerpen op het apparaat. 55 Chill.book Seite 56 Freitag, 18. Juli 2014 6:54 06 Uitpakken 1. Apparaten en toebehoren uitpakken. 3 Uitpakken 2. Controleren of levering volledig is (zie afbeelding). 1 2 7 3 6 4 5 1 Zuigrobot CHILL 5 Reinigingskwast 2 Ronde borstels 6 Voeding 3 Ronde borstels (reserve) 7 Reservefilter 4 Accu – niet afgebeeld: Handleiding 56 Chill.book Seite 57 Freitag, 18. Juli 2014 6:54 06 Accu activeren 1. Ervoor zorgen, dat het apparaat uitgeschakeld en de voeding niet aangesloten is. 4 Accu activeren 2. Apparaat voorzichtig op de bovenkant leggen, zodat de onderkant toegankelijk is. 3. Afdekking accuvak krachtig met beide handen verwijderen (zie afbeelding). 4. Accusteekverbinding aansluiten zoals afgebeeld (zie detail). 5. Accu in accuvak laten glijden (zie afbeelding). 6. Deksel accuvak er weer goed opschuiven, tot deze hoor- en merkbaar vastklikt. De accu is nu geactiveerd en moet opgeladen worden, pagina 58, „Accu opladen“. 57 Chill.book Seite 58 Freitag, 18. Juli 2014 6:54 06 Accu opladen Accu het beste voor elk gebruik opladen, vooral nadat deze langer niet gebruikt werd. 5 Accu opladen Dit verhoogt de levensduur van de accu en zorgt voor zo lang mogelijke reinigingscycli. 1. Ervoor zorgen dat het apparaat uitgeschakeld is. 2. Voeding op het apparaat aansluiten (zie afbeelding). 3. Voeding op stopcontact aansluiten (zie detail). – De LED knippert. Ca 6,5 uur wachten, tot de LED continu brandt. 6,5 h 4. Voeding uit stopcontact en apparaat trekken. Apparaat voorbereiden voor gebruik, pagina 59, „Apparaat aanpassen aan ondergrond“. 58 Chill.book Seite 59 Freitag, 18. Juli 2014 6:54 06 Apparaat aanpassen aan ondergrond 1. Ervoor zorgen dat het apparaat uitgeschakeld is. 6 Apparaat aanpassen aan ondergrond 2. Borstels afhankelijk van de ondergrond aanbrengen of verwijderen: – Als harde vloeren gereinigd moeten worden, ronde borstels aanbrengen (zie afbeelding). – Als laagpolige tapijten gereinigd moeten worden, borstels verwijderen (zie afbeelding). 3. Alle 3 valsensoren tegelijkertijd in dezelfde stand brengen. – Bij lichte vloeren en vlakke niveaus stand 0 tot 1. – Bij donkere vloeren en hogere niveaus stand 2 tot 3. TIP: Als de robot continu achteruit rijdt op donkere vloeren, instelling "3" selecteren. 59 Chill.book Seite 60 Freitag, 18. Juli 2014 6:54 06 Ruimte reinigen Ruimte als volgt voorbereiden: 7 Ruimte reinigen – Losse voorwerpen, die de robot voor zich uit zou kunnen schuiven, weghalen. – Kabels, gordijnen en alles wat in de borstels vast zou kunnen komen te zitten, weghalen. – Breekbare voorwerpen of voorwerpen die gemakkelijk kunnen omvallen, weghalen Apparaat als volgt inschakelen: 1. Apparaat in het midden van de te reinigen ruimte plaatsen. 2. Apparaat inschakelen met de aan/uit-schakelaar (stand "I", zie detail). Het apparaat reinigt de ruimte nu met het volgende patroon: Het apparaat reinigt nu zolang, – tot het stofreservoir vol is en de LED – of tot de accu opgeladen moet worden en de LED brandt, pagina 61, „Stofreservoir legen“. brandt, pagina 58, „Accu opladen“. In beide gevallen stopt het apparaat na een tijdje. Het geeft dan elke minuut een pieptoon af, – tot u het met de aan/uit-schakelaar uitschakelt (stand "0") – of de accu helemaal is leeggelopen. Als u van plan bent om het apparaat voor langere tijd niet te gebruiken, haal de accu eruit, pagina 66, „Accu uitbouwen“. 60 Chill.book Seite 61 Freitag, 18. Juli 2014 6:54 06 Stofreservoir legen 1. Ervoor zorgen, dat het apparaat uitgeschakeld en de voeding niet aangesloten is. 8 Stofreservoir legen 2. Deksel verwijderen (zie afbeelding). 3. Stofreservoir aan het handvat uit het apparaat tillen (zie afbeelding links). 4. Deksel stofreservoir wegnemen (zie afbeelding rechts). 61 Chill.book Seite 62 Freitag, 18. Juli 2014 6:54 06 Stofreservoir legen 5. Filter naar boven uit het stofreservoir nemen (zie afbeelding links). TIP: Aanbevolen wordt om daarbij een stofzuiger te gebruiken. Deze neemt vuil dat evt. naar buiten komt direct op en reinigt het filter eveneens efficiënt. 6. Stofreservoir legen en samen met het filter grof droog reinigen (zie details). Indien nodig stofreservoir en filter nat reinigen: 24 h 62 Chill.book Seite 63 Freitag, 18. Juli 2014 6:54 06 Problemen verhelpen 9 Problemen verhelpen Aan de hand van onderstaande tabel controleren, of het probleem verholpen kan worden: Probleem Apparaat kan niet ingeschakeld worden. Mogelijke oorzaak / oplossing Accu is niet geactiveerd. Accu activeren, hoofdstuk 4, „Accu activeren“. Accu is helemaal leeg. Apparaat uitschakelen (stand "0") en accu opladen, hoofdstuk 5, „Accu opladen“. Apparaat was bij opladen ingeschakeld (stand "I"). Apparaat met de aan/uit-schakelaar uit- (stand "0") en weer inschakelen (stand "I"). Het apparaat start vervolgens. Deksel werd weggenomen, terwijl het apparaat nog ingeschakeld was. Apparaat met de aan/uit-schakelaar uit- (stand "0") en weer inschakelen (stand "I"). Het apparaat start vervolgens. Deksel is niet correct geplaatst. Apparaat uitschakelen (stand "0") en deksel opnieuw plaatsen. LED " " brandt rood. Accu moet opgeladen worden. Apparaat uitschakelen (stand "0") en accu opladen, hoofdstuk 5, „Accu opladen“. Apparaat heeft geen contact met de vloer. Apparaat op de vloer plaatsen. Apparaat begint nu direct met reinigen. LED " " brandt rood. Stofreservoir is overvol of filter is verontreinigd. Apparaat start weliswaar, maar beweegt echter continu achteruit. Schuifregelaar voor de instelling van de gevoeligheid van de valsensoren staat op een stand voor lichte vloeren, terwijl het apparaat op een donkere vloer wordt gebruikt. Apparaat stopt vanzelf. Accu moet opgeladen worden. Apparaat heeft zich klemgereden. Met de hand een beetje helpen, door het apparaat een duwtje te geven. Apparaat uitschakelen (stand "0") en hoofdstuk 8, „Stofreservoir legen“. Stand van de schuifregelaar voor de instelling van de gevoeligheid van de valsensoren aanpassen, hoofdstuk 6, „Apparaat aanpassen aan ondergrond“. Apparaat uitschakelen (stand "0") en accu opladen, hoofdstuk 5, „Accu opladen“. 63 Chill.book Seite 64 Freitag, 18. Juli 2014 6:54 06 Problemen verhelpen Probleem Mogelijke oorzaak / oplossing Apparaat maakt direct na het inschakelen ondanks vrij oppervlak geen rechte banen. Mogelijk draait een van de wielen niet goed door verontreinigingen aan het wiel. Een van de ronde borstels draait niet meer. Mogelijk draait deze ronde borstel niet goed door verontreinigingen aan de borstel. Apparaat kan niet opgeladen worden. Voeding is niet correct ingestoken. Bedrijfsduur wordt steeds korter. Mogelijk draaien de wielen niet goed door verontreinigingen aan de wielen. Verontreinigingen van het wiel verwijderen. Indien nodig, hiervoor voorzichtig een schaar of pincet gebruiken. Ronde borstel uitbouwen (hoofdstuk 6, „Apparaat aanpassen aan ondergrond“) en verontreinigingen van de borstel verwijderen. Indien nodig, hiervoor voorzichtig een schaar of pincet gebruiken. Controleren, of voedingsstekker resp. voedingsadapter correct in de bussen zitten (hoofdstuk 5, „Accu opladen“). Verontreinigingen van het wiel verwijderen. Indien nodig, hiervoor voorzichtig een schaar of pincet gebruiken. Indien u het probleem aan de hand van de bovenstaande tabel niet kunt verhelpen, bel dan naar onze servicehotline (in de bijlage van deze handleiding). Samen met onze geschoolde servicemedewerkers vinden we zeker een oplossing. 64 Chill.book Seite 65 Freitag, 18. Juli 2014 6:54 06 Problemen verhelpen Reserveonderdelen en toebehoren nabestellen Reserveonderdelen en toebehoren kunt u eenvoudig bestellen via http://www.severin.com/go/to/ 8363 in het menu "Service / Reserveonderdelen-shop". Artikelnr. Beschrijving 6232048 Ronde borstel, set van 4 5248048 Reinigingsset (filter + reinigingskwast) Met de QR-code hiernaast komt u direct op onze homepage. Garantie De wettelijke garantierechten voor de verkoper en evt. verkopergaranties worden niet aangetast door de onderstaande garantievoorwaarden. Mocht reparatie nodig zijn, neem telefonisch of via e-mail contact op met onze klantenservice. De contactgegevens vindt u in de bijlage van deze handleiding. Neem bij garantiegevallen daarom direct contact op met de dealer. Bovendien geeft SEVERIN een fabrieksgarantie van twee jaar vanaf de datum van aankoop. In deze periode repareren wij kosteloos alle gebreken, die aantoonbaar veroorzaakt worden door materiaal- of productiefouten en die de werking aanzienlijk verminderen. Verdere claims zijn uitgesloten. Van garantie uitgesloten is: Schade, die terug te voeren is op de niet-inachtneming van de handleiding, ondeskundige behandeling of normale slijtage, evenals licht breekbare onderdelen zoals glas, kunststof of LED's. Van de garantie uitgesloten zijn bovendien batterijen en accu's die als gevolg van normale slijtage of ondeskundig gebruik defect zijn geraakt resp. waarvan de looptijd is verkort. De garantie komt te vervallen bij ingreep door instanties die niet door SEVERIN geautoriseerd zijn. 65 Chill.book Seite 66 Freitag, 18. Juli 2014 6:54 06 Verwijdering Accu uitbouwen 10 Verwijdering 1. Ervoor zorgen, dat het apparaat uitgeschakeld en de voeding niet aangesloten is. 2. Apparaat voorzichtig op de bovenkant leggen, zodat de onderkant toegankelijk is. 3. Afdekking accuvak verwijderen (zie beschrijving op pagina 58). 4. Accusteekverbinding scheiden zoals afgebeeld (zie detail). 5. Accu uit accuvak nemen (zie afbeelding). 6. Deksel accuvak er weer goed opschuiven, tot deze hoor- en merkbaar vastklikt. Accu en apparaat moeten nu afzonderlijk van elkaar verwijderd worden, hoofdstuk „Apparaat en accu afzonderlijk verwijderen“. Apparaat en accu afzonderlijk verwijderen Apparaten en accu's, die met dit symbool zijn aangeduid, moeten gescheiden van het huisvuil worden verwijderd! Apparaten en accu's bevatten waardevolle materialen, die gerecycled kunnen worden. Een correcte verwijdering beschermt het milieu en de gezondheid van de medemens. Breng het apparaat en de uitgebouwde accu afzonderlijk voor verwijdering naar de overeenkomstige inzamelpunten. 66 Chill.book Seite 67 Freitag, 18. Juli 2014 6:54 06 Muchas gracias ES Apreciada compradora, apreciado comprador, 1 Muchas gracias deseamos que disfrute con este producto de calidad de SEVERIN y le agradecemos su confianza. Sobre este manual de instrucciones Este manual de instrucciones contiene consejos importantes para su seguridad, así como sobre el uso del aparato. En caso de que no se sigan las instrucciones de este manual pueden producirse lesiones personales y daños materiales en el aparato. Conserve cuidadosamente este manual de instrucciones. En caso de que se realice la entrega del aparato a terceros, se debe entregar asimismo el manual de instrucciones. Es necesario leer el manual de instrucciones por completo antes del primer uso. Índice Muchas gracias ............................................... 67 Indicaciones de seguridad ............................ 68 Activación del acumulador eléctrico ............ 73 Carga del acumulador eléctrico .................... 74 Adaptación del aparato al suelo ................... 75 Limpieza del espacio ...................................... 76 Vaciado del depósito de polvo ...................... 77 Solución de problemas .................................. 79 Eliminación de residuos ................................ 82 67 Chill.book Seite 68 Freitag, 18. Juli 2014 6:54 06 Indicaciones de seguridad Seguridad de determinados grupos de personas 2 Indicaciones de seguridad – Este aparato puede ser utilizado por niños mayores de ocho años, así como por personas con capacidades físicas, sensoriales o mentales reducidas o con falta de experiencia o conocimientos bajo supervisión o si han sido debidamente instruidos sobre el uso seguro del aparato y los riesgos derivados del mismo. – Los niños no deben jugar con el aparato ni colocarse o sentarse encima. La limpieza y el mantenimiento no deben ser realizados por niños sin supervisión. – Los niños menores de ocho años deben mantenerse alejados del aparato y del cable eléctrico. – Mantenga los materiales de embalaje fuera del alcance de los niños y deséchelos. De lo contrario existe riesgo de asfixia. Conexión segura del aparato El aparato se carga con corriente eléctrica, por lo que existe riesgo de electrocución. Debe tener especial cuidado con lo siguiente: – Conecte la fuente de alimentación sólo a tomas de corriente que se correspondan con los datos indicados en la placa de características de la fuente de alimentación. – Revise posibles daños en el aparato y la fuente de alimentación antes de su uso. Lo utilice nunca un aparato defectuoso o con una fuente de alimentación defectuosa. – No intente nunca reparar por cuenta propia el aparato o su fuente de alimentación. Para evitar riesgos, las reparaciones del aparato y la fuente de alimentación deben ser realizadas exclusivamente por nuestro servicio de atención al cliente. Un aparato defectuoso o una fuente de alimentación defectuosa deben ser entregados a un comercio especializado o al servicio de atención al cliente de SEVERIN. 68 Chill.book Seite 69 Freitag, 18. Juli 2014 6:54 06 Indicaciones de seguridad – No sumerja en agua o algún otro líquido el aparato ni la fuente de alimentación. Mantenga el aparato y la fuente de alimentación alejados de la lluvia y la humedad. No ponga en funcionamiento el aparato al aire libre o en espacios con una elevada humedad ambiental. – No toque la fuente de alimentación con las manos mojadas. Para sacar la fuente de alimentación de la toma de corriente, tire siempre directamente de la fuente de alimentación. – Preste atención a que el cable de la fuente de alimentación no esté doblado, aprisionado ni pase nada por encima, tampoco debe entrar en contacto con fuentes de calor, humedad o bordes afilados. Preste atención a que el cable de la fuente de alimentación no pueda causar tropiezos. – Antes de limpiar o realizar el mantenimiento del aparato, así como antes de cambiar los accesorios, se debe apagar el aparato y asegurarse de que la fuente de alimentación no está conectada. Seguridad en el uso de acumuladores eléctricos En caso de uso incorrecto de los acumuladores eléctricos, existe peligro de lesiones y explosión. – Si es necesario sustituir el acumulador eléctrico, póngase en contacto con un comercio especializado o con el servicio de atención al cliente de SEVERIN. Nunca sustituya por cuenta propia el acumulador eléctrico Nunca sustituya el acumulador eléctrico por otros acumuladores o baterías. – Antes de activar, utilizar o desmontar el acumulador eléctrico, asegúrese de que la fuente de alimentación está desenchufada de la toma de corriente. – Nunca desarme los acumuladores eléctricos, los exponga a altas temperaturas ni los arroje al fuego. 69 Chill.book Seite 70 Freitag, 18. Juli 2014 6:54 06 Indicaciones de seguridad – No exponga los acumuladores eléctricos a la luz solar directa. - En caso de almacenamiento durante más de tres meses, respete las siguientes temperaturas: -20 – +45 °C - En caso de almacenamiento durante más de un año, respete las siguientes temperaturas: -20 – +20 °C – Nunca cortocircuite los acumuladores, es decir, no toque al mismo tiempo ambos polos, especialmente con objetos conductores de la electricidad. Almacene los acumuladores eléctricos de forma que no puedan cortocircuitarse a través de otros acumuladores u objetos metálicos. – Para cargar el acumulador eléctrico, utilice exclusivamente la fuente de alimentación incluida en el volumen de suministro. No cargue el acumulador en ningún caso con otra fuente de alimentación. La fuente de alimentación incluida en el volumen de suministro debe utilizarse asimismo únicamente para cargar el acumulador de este aparato. – Desmonte el acumulador eléctrico al finalizar su uso tal y como se describe. A continuación, entregue el acumulador de inmediato al punto de recogida correspondiente más cercano, a fin de facilitar una eliminación de residuos segura y respetuosa con el medio ambiente. Nunca arroje el acumulador a la basura doméstica. – En caso de uso incorrecto, puede salir líquido del acumulador. No continúe utilizando el acumulador eléctrico si está dañado o se sale algún líquido. - Si se ha salido algún líquido, evite el contacto con el mismo. - En caso de que se haya producido contacto con el líquido, enjuáguese de inmediato con abundante agua. Se aparece algún síntoma como consecuencia (no importa de qué tipo sea), acuda a un médico. 70 Chill.book Seite 71 Freitag, 18. Juli 2014 6:54 06 Indicaciones de seguridad Uso previsto El aparato debe utilizarse únicamente en el ámbito doméstico. El aparato debe utilizarse exclusivamente para la limpieza sobre un suelo duro, plano y con una suciedad normal. Los mejores resultados de limpieza se obtienen en espacios pequeños o cerrados. Si los cepillos redondos no están montados, se puede utilizar también sobre moquetas de pelo corto. Cualquier otro uso se considera no adecuado y está prohibido. Para prevenir lesiones, quemaduras o daños, el aparato no debe utilizarse para aspirar: – Sobre personas, animales o plantas. La abertura de aspiración siempre debe alejarse de cualquier parte del cuerpo, del pelo y de las prendas de vestir. – Partículas al rojo vivo, incandescentes o ardiendo (como por ejemplo, cenizas, carbón, brasas, cigarrillos o cerillas). – Materiales explosivos o fácilmente inflamables o tóner. – Agua y otros líquidos, por ejemplo producto limpiador de moquetas húmedo. – Objetos afilados como esquirlas de vidrio, clavos o escombros. También está prohibido: – Cambiar la estructura o reparar el aparato o su fuente de alimentación por cuenta propia. – El uso sin utilizar correctamente el depósito de polvo, el filtro y la tapa. – El uso en espacios con objetos frágiles o que puedan volcar fácilmente. Se deben disponer los espacios de forma que el uso del aparato no pueda causar ningún daño. – El uso, la conservación o la carga al aire libre. – La colocación de objetos sobre el aparato. 71 Chill.book Seite 72 Freitag, 18. Juli 2014 6:54 06 Desembalaje 1. Desembale los aparatos y los accesorios. 3 Desembalaje 2. Compruebe que se ha realizado la entrega completa (véase la ilustración). 1 2 7 3 6 4 5 1 Robot aspirador CHILL 5 Pincel de limpieza 2 Cepillos redondos 6 Fuente de alimentación 3 Cepillos redondos de repuesto 7 Filtro de repuesto 4 Acumulador eléctrico – No se encuentra en la ilustración: manual de instrucciones 72 Chill.book Seite 73 Freitag, 18. Juli 2014 6:54 06 Activación del acumulador eléctrico 1. Asegúrese de que el aparato está apagado y la fuente de alimentación no está conectada. 4 Activación del acumulador eléctrico 2. Coloqué los aparatos con cuidado sobre su lado superior, de forma que se pueda acceder al lado inferior. 3. Retire la cubierta del compartimento del acumulador hacia arriba con fuerza con ambas manos. 4. Conecte el enchufe del acumulador tal y como se indica (véase detalle). 5. Deslice el acumulador hacia el interior del compartimento para el acumulador (véase la ilustración). 6. Vuelva a cerrar con fuerza la tapa del compartimento hasta que se oiga y se note que encaja. El acumulador ya estará activado y puede cargarse, página 74, „Carga del acumulador eléctrico“. 73 Chill.book Seite 74 Freitag, 18. Juli 2014 6:54 06 Carga del acumulador eléctrico Lo ideal es cargar el acumulador antes de cada uso, especialmente si hace tiempo que no se ha 5 Carga del acumulador eléctrico utilizado. Esto prolonga la vida útil del acumulador y se obtienen ciclos de limpieza más largos. 1. Asegúrese de que el aparato está apagado. 2. Conecte la fuente de alimentación al aparato (véase la ilustración). 3. Enchufe la fuente de alimentación a la toma de corriente (véase detalle). – El LED parpadea. Espere aprox. 6,5 horas hasta que el LED permanente. quede encendido de forma 6,5 h 4. Desenchufe la fuente de alimentación de la toma de corriente y del aparato. Prepare el aparato para el uso, página 75, „Adaptación del aparato al suelo“. 74 Chill.book Seite 75 Freitag, 18. Juli 2014 6:54 06 Adaptación del aparato al suelo 1. Asegúrese de que el aparato está apagado. 6 Adaptación del aparato al suelo 2. Coloque o retire los cepillos dependiendo del suelo: – Si se va a limpiar un suelo duro, coloque los cepillos redondos (véase la ilustración). – Si se va a limpiar una moqueta o alfombra de pelo corto, retire los cepillos (véase la ilustración). 3. Coloque los tres sensores al mismo tiempo en la misma posición: – En caso de suelos claros y escalones planos, posición 0 a 1. – En caso de suelos oscuros y escalones elevados, posición 2 a 3. CONSEJO: Si el robot se desplaza hacia atrás de forma continua por suelos oscuros, seleccione la posición "3". 75 Chill.book Seite 76 Freitag, 18. Juli 2014 6:54 06 Limpieza del espacio Prepare el espacio como se indica a continuación: 7 Limpieza del espacio – Retire los objetos sueltos que pueda empujar el robot. – Retire de los cables, cortinas y todo lo que pueda quedar enganchado en los cepillos. – Retire los objetos frágiles y los que puedan volcar fácilmente. Conecte el aparato como se indica a continuación: 1. Coloque el aparato en el centro del espacio que se va a limpiar. 2. Encienda el aparato con el interruptor on/off (posición "I", véase detalle). El aparato limpie el espacio siguiendo el esquema que se indica a continuación: El aparato limpia únicamente – hasta que el depósito de polvo esté lleno y el LED depósito de polvo“. – o hasta que haya que cargar el acumulador y el LED acumulador eléctrico“. se encienda, página 77, „Vaciado del se encienda, página 74, „Carga del En ambos casos el aparato se detiene al cabo de un rato. Entonces emite un pitido cada minuto, – hasta que lo apague desde el interruptor on/off ( posición "0") – o hasta que el acumulador se haya descargado por completo. Si tiene la intención de no utilizar más el aparato, extraiga el acumulador, página 82, „Desmontaje del acumulador eléctrico“. 76 Chill.book Seite 77 Freitag, 18. Juli 2014 6:54 06 Vaciado del depósito de polvo 1. Asegúrese de que el aparato está apagado y la fuente de alimentación no está conectada. 8 Vaciado del depósito de polvo 2. Retire la tapa (véase la ilustración). 3. Levante el depósito de polvo por el asa para sacarlo del aparato (véase la ilustración de la izquierda). 4. Retire la tapa del depósito de polvo (véase la ilustración de la derecha). 77 Chill.book Seite 78 Freitag, 18. Juli 2014 6:54 06 Vaciado del depósito de polvo 5. Retire el filtro del depósito de polvo sacándolo hacia arriba (véase la ilustración de la izquierda). CONSEJO: Se recomienda utilizar un aspirador para ello. Este puede aspirar cualquier posible suciedad que salga y además limpia el filtro de forma eficiente. 6. Vacíe el depósito de polvo y limpie la suciedad más gruesa en seco junto con el filtro (véanse detalles). En caso necesario, moje el depósito de polvo y el filtro para limpiarlos: 24 h 78 Chill.book Seite 79 Freitag, 18. Juli 2014 6:54 06 Solución de problemas 9 Solución de problemas En la siguiente tabla puede consultar si se puede solucionar el problema. Problema El aparato no se enciende. Posible causa/solución El acumulador eléctrico no está activado. Activar el acumulador eléctrico, capítulo 4, „Activación del acumulador eléctrico“. El acumulador eléctrico está completamente descargado. Apagar el aparato (posición "0") y cargar el acumulador eléctrico, capítulo 5, „Carga del acumulador eléctrico“. El aparato estaba encendido durante el proceso de carga (posición "I"). Apague (posición "0") y vuelve a encender el aparato (posición "I") desde el interruptor on/off . A continuación el aparato comienza a funcionar. Se ha retirado la tapa mientras el aparato aún estaba encendido. Apague (posición "0") y vuelve a encender el aparato (posición "I") desde el interruptor on/off . A continuación el aparato comienza a funcionar. La tapa no está correctamente colocada. Apague el aparato (posición "0") y vuelva a colocar la tapa. El LED " " se enciende en rojo. Se debe cargar el acumulador eléctrico. Apague el aparato (posición "0") y cargue el acumulador eléctrico, capítulo 5, „Carga del acumulador eléctrico“. El aparato no tiene contacto con el suelo. Coloque el aparato sobre el suelo. Comenzará a limpiar directamente. El LED " " se enciende en rojo. El depósito de polvo está demasiado lleno o el filtro está sucio. El aparato comienza a funcionar pero se mueve siempre hacia atrás. El regulador deslizante para ajustar la sensibilidad de los sensores se encuentra en la posición para suelos claros, mientras el aparato se utiliza sobre un suelo oscuro. El aparato se detiene solo. Se debe cargar el acumulador eléctrico. El aparato se ha quedado atascado. Ayude con la mano empujando ligeramente el aparato. Apague el aparato (posición "0") y capítulo 8, „Vaciado del depósito de polvo“. Adapte la posición del regulador deslizante al ajuste de sensibilidad de los sensores, capítulo 6, „Adaptación del aparato al suelo“. Apague el aparato (posición "0") y cargue el acumulador eléctrico, capítulo 5, „Carga del acumulador eléctrico“. 79 Chill.book Seite 80 Freitag, 18. Juli 2014 6:54 06 Solución de problemas Problema Posible causa/solución El aparato no sigue una línea recta después de encenderlo a pesar de que la superficie está libre. Es posible que una de las ruedas quede atascada por la suciedad y no pueda girar libremente. Uno de los cepillos redondos ya no gira. Es posible que ese cepillo haya quedado atascado por la suciedad y no pueda girar libremente. El aparato no se carga. La fuente de alimentación no está correctamente enchufada. La duración del funcionamiento es cada vez más breve. Libere la suciedad de la rueda. Si es necesario, utilice para ello unas tijeras o pinzas con cuidado Desmonte el cepillo redondo (capítulo 6, „Adaptación del aparato al suelo“) y libérelo de la suciedad. Si es necesario, utilice para ello unas tijeras o pinzas con cuidado Compruebe si el conector de la fuente de alimentación o el adaptador de la misma están correctamente colocados en sus casquillos (capítulo 5, „Carga del acumulador eléctrico“). Es posible que las ruedas estén atascadas por la suciedad y no puedan girar libremente. Libere la suciedad de la rueda. Si es necesario, utilice para ello unas tijeras o pinzas con cuidado Sino puede solucionar el problema con la tabla anterior, llame a nuestra línea directa de atención telefónica (en el anexo de este manual de instrucciones). Junto con nuestros empleados de servicio técnico, debidamente formados, encontraremos una solución. 80 Chill.book Seite 81 Freitag, 18. Juli 2014 6:54 06 Solución de problemas Pedido de piezas de repuesto y accesorios Puede pedir cómodamente piezas de repuesto o accesorios por Internet en nuestra página web http://www.severin.com/go/to/8363 en el menú "Servicio técnico/tienda de repuestos". Nº de artículo Descripción 6232048 Juego de 4 cepillos redondos 5248048 Set de limpieza (filtro + pincel de limpieza) Por medio de este código QR puede acceder directamente a nuestra página web. Garantía Las siguientes condiciones de garantía no afectan a los derechos de garantía legal frente al vendedor y a otras posibles garantías del vendedor. Si resulta necesaria una reparación, póngase en contacto con nuestro servicio de atención al cliente por teléfono o por correo electrónico. Los datos de contacto puede consultarlos en el anexo de este manual de instrucciones. En caso de garantía, diríjase directamente al distribuidor. Además, SEVERIN concede una garantía de fabricantes de dos años a partir de la fecha de la compra. Durante ese plazo de tiempo eliminaremos de forma gratuita cualquier deficiencia que pueda demostrarse que se debe a un fallo de material o de fabricación e impida un funcionamiento normal. Queda excluido cualquier otro derecho de reclamación. Quedan excluidos de la garantía: Los daños que se deban a la inobservancia del manual de instrucciones, la manipulación incorrecta o el desgaste normal, así como los referidos a piezas frágiles como cristal, plástico o LED. Quedan excluidos además de la garantía las baterías y los acumuladores defectuosos a causa del desgaste normal o una manipulación incorrecta o cuya vida útil se haya acortado. La garantía se extingue en caso de intervención por parte de instancias no autorizadas por SEVERIN. 81 Chill.book Seite 82 Freitag, 18. Juli 2014 6:54 06 Eliminación de residuos Desmontaje del acumulador eléctrico 10 Eliminación de residuos 1. Asegúrese de que el aparato está apagado y la fuente de alimentación no está conectada. 2. Coloqué los aparatos con cuidado sobre su lado superior, de forma que se pueda acceder al lado inferior. 3. Retira la cubierta del compartimento del acumulador (véase la descripción en página 74). 4. Desconecte el enchufe del acumulador tal y como se indica (véase detalle). 5. Saque el acumulador de su compartimento (véase la ilustración). 6. Vuelva a cerrar con fuerza la tapa del compartimento hasta que se oiga y se note que encaja. El acumulador eléctrico y el aparato deben desecharse por separado, capítulo „Eliminación por separado del aparato y el acumulador eléctrico“. Eliminación por separado del aparato y el acumulador eléctrico Los aparatos y los acumuladores eléctricos identificados con este símbolo deben eliminarse por separado de la basura doméstica. Los aparatos de los acumuladores eléctricos contienen materia prima valiosa que puede reutilizarse. Una eliminación de residuos correcta protege el medio ambiente y la salud de sus congéneres. Entregue el aparato y el acumulador eléctrico desmontado por separado para una eliminación de desechos adecuada en los puntos de recogida correspondientes. 82 Chill.book Seite 83 Freitag, 18. Juli 2014 6:54 06 Grazie IT Gentile cliente, 1 Grazie grazie per la fiducia accordataci. Ci auguriamo che possa apprezzare appieno questo prodotto di qualità SEVERIN. Informazioni sulle presenti istruzioni per l'uso Le istruzioni per l'uso contengono importanti suggerimenti per la Sua sicurezza e per l'uso dell'apparecchio. Il mancato rispetto delle istruzioni per l'uso può causare lesioni alle persone o danni all'apparecchio. Conservare con cura le istruzioni per l'uso. Nel caso di cessione dell'apparecchio a terzi, consegnare anche le istruzioni per l'uso. Leggere attentamente tutte le istruzioni per l'uso precedentemente al primo uso. Indice Grazie ............................................................................ 83 Avvertenze di sicurezza .............................................. 84 Attivazione dell'accumulatore .................................... 89 Caricamento dell'accumulatore ................................. 90 Adattamento dell'apparecchio alla base da pulire ... 91 Pulizia del locale .......................................................... 92 Svuotamento del contenitore raccoglipolvere ......... 93 Eliminazione dei problemi .......................................... 95 Smaltimento ................................................................. 98 83 Chill.book Seite 84 Freitag, 18. Juli 2014 6:54 06 Avvertenze di sicurezza Sicurezza di determinati gruppi di persone 2 Avvertenze di sicurezza – I bambini a partire da 8 anni di età e le persone con abilità fisiche, sensoriali o cognitive ridotte o con scarsa esperienza e/o conoscenza possono usare questo apparecchio solo sotto sorveglianza, oppure se sono state istruite sul relativo uso sicuro e hanno compreso i rischi derivanti dallo stesso. – I bambini non devono giocare con l'apparecchio o salirci o sedercisi sopra. Salvo sotto sorveglianza, i bambini non possono eseguire la pulizia e la manutenzione dell'utilizzatore. – Tenere i bambini di età inferiore a 8 anni lontani dall'apparecchio e dal cavo di alimentazione. – Conservare e smaltire i materiali di imballo al di fuori della portata dei bambini. Diversamente sussiste il rischio d'asfissia. Collegamento sicuro dell'apparecchio Poiché l'apparecchio viene alimentato a corrente, di norma sussiste il rischio di scossa elettrica. Assicurarsi pertanto in particolare di quanto segue: – Collegare l'alimentatore alle prese di corrente solo se i dati della targhetta identificativa corrispondono a quelli dell'alimentatore. – Prima dell'uso verificare che apparecchio e alimentatore non presentino danneggiamenti. Non operare mai un apparecchio difettoso o con alimentatore difettoso. – Non cercare mai di riparare da sé l'apparecchio o il relativo alimentatore. Per evitare l'esposizione a rischi, le riparazioni all'apparecchio e all'alimentatore possono essere eseguite solo dalla nostra Assistenza Clienti. Consegnare l'apparecchio o l'alimentatore difettoso a un rivenditore qualificato o all'Assistenza Clienti di SEVERIN per la riparazione. 84 Chill.book Seite 85 Freitag, 18. Juli 2014 6:54 06 Avvertenze di sicurezza – Non immergere l'apparecchio o l'alimentatore in acqua o in altri liquidi. Tenere l'apparecchio e l'alimentatore lontani da pioggia e umidità. Non operare l'apparecchio all'aperto o in locali ad alto tasso di umidità dell'aria. – Non toccare l'alimentatore con le mani bagnate. Nell'estrarre l'alimentatore dalla presa di corrente, afferrare sempre direttamente l'alimentatore. – Assicurarsi che il cavo dell'alimentatore non venga piegato, schiacciato o premuto passandoci sopra e che il cavo non vada a contatto con fonti di calore, umidità o spigoli vivi. Assicurarsi che il cavo dell'alimentatore non sia causa di inciampo. – Prima di eseguire la pulizia o la manutenzione dell'apparecchio, nonché prima di cambiare un accessorio, disattivare l'apparecchio e assicurarsi che l'alimentatore non sia collegato. Sicurezza durante l'uso di accumulatori L'uso errato di accumulatori espone a rischio di lesioni e di esplosione. – Se è necessario sostituire l'accumulatore contattare un rivenditore qualificato o il Servizio Assistenza di SEVERIN. Non sostituire mai da sé gli accumulatori. Non sostituire mai l'accumulatore con altri accumulatori o batterie. – Prima di attivare, inserire o smontare l'accumulatore assicurarsi che l'alimentatore sia scollegato dalla presa. – Non disassemblare mai gli accumulatori, non esporli ad alte temperature né gettarli nel fuoco. – Non esporre gli accumulatori alla luce solare diretta. - In caso di stoccaggio fino a 3 mesi rispettare le seguenti temperature: -20 – +45 °C - In caso di stoccaggio oltre 1 anno rispettare le seguenti temperature: -20 – +20 °C 85 Chill.book Seite 86 Freitag, 18. Juli 2014 6:54 06 Avvertenze di sicurezza – Non cortocircuitare mai gli accumulatori, vale a dire non toccare contemporaneamente i due poli, in particolare non toccarli con oggetti conduttori di corrente elettrica. Stoccare gli accumulatori in modo che, anche durante lo stoccaggio, non possa verificarsi cortocircuito da altri accumulatori od oggetti metallici. – Per caricare l'accumulatore utilizzare esclusivamente l'alimentatore fornito in dotazione. In nessun caso caricare l'accumulatore con un altro alimentatore. Utilizzare l'alimentatore fornito in dotazione esclusivamente per caricare l'accumulatore di questo apparecchio. – L'accumulatore giunto a fine vita deve essere disassemblato come descritto. Dopo di che, l'accumulatore deve essere immediatamente conferito a un relativo centro di raccolta nelle vicinanze per lo smaltimento sicuro e sostenibile. Non smaltire mai gli accumulatori come rifiuto domestico! – L'uso non conforme potrebbe causare fuoriuscita di liquido dall'accumulatore. Se danneggiato o se fuoriesce del liquido, interrompere l'uso dell'accumulatore. - Se è fuoriuscito del liquido, evitare il contatto con il liquido. - In caso di contatto con il liquido, lavare immediatamente con abbondante acqua. In presenza di conseguenze (di qualsiasi tipo) consultare un medico. Uso conforme L'apparecchio può essere usato solo in ambiente domestico. L'apparecchio deve essere usato esclusivamente per la pulizia di pavimenti duri, planari e normalmente sporchi. I migliori risultati di pulizia si ottengono in locali piccoli o chiusi. Se non sono montate le spazzole rotonde, può essere usato anche su tappeti a pelo corto. Ogni altro utilizzo è ritenuto non conforme ed è vietato. 86 Chill.book Seite 87 Freitag, 18. Juli 2014 6:54 06 Avvertenze di sicurezza Al fine di prevenire lesioni, incendi e danni l'apparecchio non deve essere usato per aspirare: – Persone, animali o piante. Tenere la bocchetta di aspirazione sempre lontana da qualsiasi parte del corpo, capelli e indumenti. – Particelle incandescenti, infuocate o ardenti (come ad esempio cenere, carbone, carbone di legna, sigarette, fiammiferi). – Sostanze esplosive o facilmente infiammabili o toner. – Acqua e altri liquidi, ad esempio lavamoquette umidi. – Oggetti appuntiti come frantumi di vetro, chiodi o rifiuti edili. È inoltre vietato: – Trasformare o riparare autonomamente l'apparecchio o il relativo alimentatore. – Usare l'apparecchio senza aver applicato correttamente il contenitore raccoglipolvere, il filtro e il coperchio. – Usare l'apparecchio in locali in cui sono presenti oggetti fragili o tali da ribaltarsi facilmente. Predisporre i locali in modo che l'uso dell'apparecchio non possa causare alcun danno. – Usare, conservare o caricare l'apparecchio all'aperto. – Deporre oggetti sull'apparecchio. 87 Chill.book Seite 88 Freitag, 18. Juli 2014 6:54 06 Disimballaggio 1. Disimballare apparecchio e accessori. 3 Disimballaggio 2. Verificare che la fornitura sia completa (vedere la figura). 1 2 7 3 6 4 5 1 Robot aspiratore CHILL 5 Pennello di pulizia 2 Spazzole rotonde 6 Alimentatore 3 Spazzole rotonde di ricambio 7 Filtro di ricambio 4 Accumulatore – non raffigurato: Istruzioni per l 'uso 88 Chill.book Seite 89 Freitag, 18. Juli 2014 6:54 06 Attivazione dell'accumulatore 1. Assicurarsi che l'apparecchio sia disattivato e che l'alimentatore non sia collegato. 4 Attivazione dell'accumulatore 2. Appoggiare l'apparecchio con cautela sul lato superiore in modo che il lato inferiore sia accessibile. 3. Con entrambe le mani estrarre il coperchio del vano accumulatore (vedere la figura). 4. Collegare il connettore dell'accumulatore come illustrato (vedere il dettaglio). 5. Fare scorrere l'accumulatore nel vano accumulatore (vedere la figura). 6. Spingere ancora il coperchio del vano accumulatore fino a quando s'innesta in posizione in modo udibile e avvertibile. L'accumulatore adesso è attivato e deve essere caricato, Pagina 90, „Caricamento dell'accumulatore“. 89 Chill.book Seite 90 Freitag, 18. Juli 2014 6:54 06 Caricamento dell'accumulatore Meglio caricare l'accumulatore prima di ogni uso, in particolare dopo un lungo periodo di inattività. 5 Caricamento dell'accumulatore In questo modo la durata dell'accumulatore aumenta e vengono garantiti cicli di pulizia più lunghi possibili. 1. Assicurarsi che l'apparecchio sia disattivato. 2. Collegare l'alimentatore all'apparecchio (vedere la figura). 3. Collegare l'alimentatore alla presa (vedere il dettaglio). – Il LED lampeggia. Attendere ca. 6,5 ore fino a quando il LED è illuminato fisso. 6,5 h 4. Scollegare l'alimentatore dalla presa e dall'apparecchio. Preparare l'apparecchio per l'uso, Pagina 91, „Adattamento dell'apparecchio alla base da pulire“. 90 Chill.book Seite 91 Freitag, 18. Juli 2014 6:54 06 Adattamento dell'apparecchio alla base da pulire 1. Assicurarsi che l'apparecchio sia disattivato. 6 Adattamento dell'apparecchio alla base da pulire 2. Applicare o rimuovere le spazzole a seconda della base: – Se devono essere puliti pavimenti duri, applicare le spazzole rotonde (vedere la figura). – Se devono essere puliti tappeti a pelo corto, rimuovere le spazzole (vedere la figura). 3. Posizionare i 3 sensori di caduta contemporaneamente sulla stessa posizione: – per pavimenti chiari e gradini piani posizione da 0 a 1. – per pavimenti scuri e gradini più alti posizione da 2 a 3. SUGGERIMENTO: se su pavimenti scuri il robot si sposta continuamente indietro, selezionare la posizione "3". 91 Chill.book Seite 92 Freitag, 18. Juli 2014 6:54 06 Pulizia del locale Preparare il locale come segue: 7 Pulizia del locale – Rimuovere gli oggetti non fissati che il robot potrebbe spingere in avanti. – Rimuovere cavi, tende e tutto ciò che potrebbe impigliarsi nelle spazzole. – Rimuovere oggetti fragili o tali da ribaltare facilmente. Attivare l'apparecchio come segue: 1. Collocare l'apparecchio al centro del locale da pulire. 2. Attivare l'apparecchio dall'interruttore On/Off (posizione "I" - vedere il dettaglio). L'apparecchio adesso pulisce il locale secondo il seguente schema: l'apparecchio adesso pulisce finché – il contenitore raccoglipolvere è pieno e il LED s'illumina, Pagina 93, „Svuotamento del contenitore raccoglipolvere“. – oppure finché è necessario caricare l'accumulatore e il LED Pagina 90, „Caricamento dell'accumulatore“. s'illumina, In entrambi i casi l'apparecchio dopo breve tempo si arresta. In seguito l'apparecchio ogni minuto emette un segnale acustico – fino a quando viene disattivato dall'interruttore On/Off (posizione "0") – oppure fino a quando l'accumulatore si è scaricato completamente. Se s'intende lasciare l'apparecchio a lungo inutilizzato, rimuovere l'accumulatore, Pagina 98, „Disassemblaggio dell'accumulatore“. 92 Chill.book Seite 93 Freitag, 18. Juli 2014 6:54 06 Svuotamento del contenitore raccoglipolvere 1. Assicurarsi che l'apparecchio sia disattivato e che l'alimentatore non sia collegato. 8 Svuotamento del contenitore raccoglipolvere 2. Rimuovere il coperchio (vedere la figura). 3. Sollevare il contenitore raccoglipolvere dalla maniglia estraendolo dall'apparecchio (vedere la figura a sinistra). 4. Rimuovere il coperchio del contenitore raccoglipolvere (vedere la figura a destra). 93 Chill.book Seite 94 Freitag, 18. Juli 2014 6:54 06 Svuotamento del contenitore raccoglipolvere 5. Estrarre verso l'alto il filtro del contenitore raccoglipolvere (vedere la figura a sinistra). SUGGERIMENTO: si raccomanda di usare un'aspirapolvere. In questo modo l'eventuale impurità che fuoriesce viene raccolta e pulito anche in modo efficiente il filtro. 6. Svuotare il contenitore raccoglipolvere e pulire a secco grossolanamente insieme al filtro. Se necessario lavare il contenitore raccoglipolvere e il filtro: 24 h 94 Chill.book Seite 95 Freitag, 18. Juli 2014 6:54 06 Eliminazione dei problemi 9 Eliminazione dei problemi Verificare se è possibile eliminare il problema sulla base della tabella che segue: Problema Non è possibile attivare l'apparecchio. Possibile causa/soluzione L'accumulatore non è attivato. Attivare l'accumulatore, Capitolo 4, „Attivazione dell'accumulatore“. L'accumulatore è completamente scarico. Disattivare l'apparecchio (posizione "0") e caricare l'accumulatore, Capitolo 5, „Caricamento dell'accumulatore“. L'apparecchio era attivato durante la fase di caricamento (posizione "I"). Disattivare l'apparecchio dall'interruttore On/Off (posizione "0"), quindi riattivarlo (posizione "I"). L'apparecchio resta attivato. Il coperchio è stato rimosso mentre l'apparecchio era ancora attivato. Disattivare l'apparecchio dall'interruttore On/Off (posizione "0"), quindi riattivarlo (posizione "I"). L'apparecchio resta attivato. Il coperchio non è posizionato correttamente. Disattivare l'apparecchio (posizione "0") e riapplicare il coperchio. Il LED „ “ s'il- L'accumulatore deve essere caricato. lumina a luce Disattivare l'apparecchio (posizione "0") e caricare l'accumulatore, Capitolo rossa. 5, „Caricamento dell'accumulatore“. L'apparecchio non tocca il pavimento. Collocare l'apparecchio sul pavimento. Adesso inizia direttamente a pulire. Il LED „ “ s'illumina a luce rossa. Il contenitore raccoglipolvere è troppo pieno o il filtro è sporco. L'apparecchio si mette in funzione ma continua a spostarsi indietro. L'interruttore a cursore per l'impostazione della sensibilità dei sensori di caduta è posizionato su pavimenti chiari, mentre l'apparecchio viene usato su pavimenti scuri. L'apparecchio si arresta da solo. L'accumulatore deve essere caricato. L'apparecchio si è bloccato. Disattivare l'apparecchio (posizione "0") e Capitolo 8, „Svuotamento del contenitore raccoglipolvere“. Adattare la posizione dell'interruttore a cursore per l'impostazione della sensibilità dei sensori di caduta, Capitolo 6, „Adattamento dell'apparecchio alla base da pulire“. Disattivare l'apparecchio (posizione "0") e caricare l'accumulatore, Capitolo 5, „Caricamento dell'accumulatore“. Spingere leggermente con una mano l'apparecchio. 95 Chill.book Seite 96 Freitag, 18. Juli 2014 6:54 06 Eliminazione dei problemi Problema Possibile causa/soluzione Dopo l'attivaUna delle ruote probabilmente non gira liberamente a causa di sporco. zione l'appaRimuovere lo sporco dalla ruota. Se necessario usare con cautela una forbice recchio non se- o una pinzetta. gue alcuna traiettoria diritta nonostante lo spazio sia libero. Una delle Questa spazzola rotonda probabilmente non gira liberamente a causa dello spazzole roton- sporco. de non gira più. Smontare la spazzola rotonda (Capitolo 6, „Adattamento dell'apparecchio alla base da pulire“) e liberarla dallo sporco. Se necessario usare con cautela una forbice o una pinzetta. Non è possibile L'alimentatore non è inserito correttamente. caricare l'appa- Controllare se la spina dell'alimentatore o l'adattatore dell'alimentatore sono recchio. correttamente inseriti nella rispettiva presa.(Capitolo 5, „Caricamento dell'accumulatore“). La durata di funzionamento continua a ridursi. Le ruote probabilmente non girano liberamente a causa dello sporco. Liberare la ruota dallo sporco. Se necessario usare con cautela una forbice o una pinzetta. Qualora non sia stato possibile risolvere il problema sulla base della tabella di cui sopra, contattare la nostra Servicehotline (nell'Allegato alle presenti istruzioni per l'uso). Con i nostri esperti del servizio assistenza troveremo sicuramente una soluzione. 96 Chill.book Seite 97 Freitag, 18. Juli 2014 6:54 06 Eliminazione dei problemi Ordine di pezzi di ricambio e accessori I pezzi di ricambio e gli accessori possono essere ordinati accedendo alla Home Page del nostro sito Web http://www.severin.com/go/to/8363 al menu „Service / Acquisto ricambi“. Codice articolo Descrizione 6232048 Kit 4 spazzole rotonde 5248048 Kit di pulizia (filtro+ spazzolino di pulizia) Alla nostra Home Page è possibile accedere direttamente tramite il codice QR qui accanto. Garanzia Le condizioni di garanzia che seguono non pregiudicano i diritti alla prestazione in garanzia di legge nei confronti del venditore, né eventuali garanzie del venditore. Qualora si rendesse necessaria una riparazione, contattare telefonicamente o per e-mail la nostra Assistenza Clienti. I dettagli di contatto sono riportati nell'Allegato alle presenti istruzioni per l'uso. In caso di ricorso alla garanzia rivolgersi direttamente al rivenditore. SEVERIN concede inoltre una garanzia produttore di due anni a partire dalla data d'acquisto. In detto periodo viene effettuata senza spese l'eliminazione di tutti i difetti riconducibili in modo dimostrabile a difetti di materiale o di produzione e che compromettono in modo rilevante il funzionamento. Ogni altra rivendicazione è esclusa. Sono esclusi dalla garanzia: Danni riconducibili al mancato rispetto delle istruzioni per l'uso, all'uso non conforme o a normale usura, come pure particolari fragili come ad esempio vetro, plastica o lampadine o LED. Dalla garanzia sono inoltre esclusi batterie e accumulatori divenuti difettosi a seguito della normale usura o uso non conforme, o la cui durata si è ridotta. In caso d'intervento da parte di soggetti non autorizzati da SEVERIN la garanzia decade. 97 Chill.book Seite 98 Freitag, 18. Juli 2014 6:54 06 Smaltimento Disassemblaggio dell'accumulatore 10 Smaltimento 1. Assicurarsi che l'apparecchio sia disattivato e che l'alimentatore non sia collegato. 2. Appoggiare l'apparecchio con cautela sul lato superiore in modo che il lato inferiore sia accessibile. 3. Estrarre il coperchio del vano accumulatore (vedere la descrizione a Pagina 90). 4. Scollegare il connettore dell'accumulatore come illustrato (vedere il dettaglio). 5. Estrarre l'accumulatore dal vano accumulatore (vedere la figura). 6. Spingere ancora il coperchio del vano accumulatore fino a quando s'innesta in posizione in modo udibile e avvertibile. Accumulatore e apparecchio devono ora essere smaltiti separatamente. Capitolo „Smaltimento separato dell'apparecchio e dell'accumulatore“. Smaltimento separato dell'apparecchio e dell'accumulatore Gli apparecchi e gli accumulatori arrecanti questo simbolo devono essere smaltiti separatamente dai rifiuti domestici. Gli apparecchi e gli accumulatori contengono materie prime pregiate che possono essere riutilizzate. Lo smaltimento corretto protegge l'ambiente e la salute delle persone. Consegnare separatamente per lo smaltimento nel relativo centro di raccolta l'apparecchio e l'accumulatore disassemblati. 98 Chill.book Seite 99 Freitag, 18. Juli 2014 6:54 06 Mange tak DK Kære kunde 1 Mange tak Tillykke med dit kvalitetsprodukt fra firmaet SEVERIN – vi håber, du får glæde af det, og takker for din tillid. Om denne brugsanvisning Denne brugsanvisning indeholder vigtige tips for din sikkerhed og for brugen af apparatet. Hvis brugsanvisningen ikke følges, kan det medføre personskader eller beskadigelse af apparatet. Opbevar brugsanvisningen på et sikkert sted. Hvis apparatet videregives til tredjemand, skal brugsanvisningen følge med. Læs brugsanvisningen grundigt igennem før første ibrugtagning. Indholdsfortegnelse Mange tak ........................................................ 99 Sikkerhedsanvisninger ................................ 100 Aktivering af akku ......................................... 105 Opladning af akku ........................................ 106 Tilpasning af apparatet til underlaget ......... 107 Rengøring af rum .......................................... 108 Tømning af støvbeholder ............................. 109 Problemafhjælpning ..................................... 111 Bortskaffelse ................................................. 114 99 Chill.book Seite 100 Freitag, 18. Juli 2014 6:54 06 Sikkerhedsanvisninger Sikkerhed for bestemte persongrupper 2 Sikkerhedsanvisninger – Dette apparat kan anvendes af børn fra 8 år og ældre samt af af personer med nedsatte fysiske, sensoriske eller mentale evner eller mangel på erfaring og/eller viden, hvis de er under opsyn, eller er blevet instrueret i sikker brug af apparatet og har forstået de farer, der kan opstå ved det. – Børn må ikke lege med apparatet eller stille eller sætte sig på apparatet. Rengøring og brugervedligeholdelse må ikke foretages af børn uden opsyn. – Apparatet og netkablet skal holdes utilgængeligt for børn under 8 år. – Emballagematerialer skal opbevares og bortskaffes uden for børns rækkevidde. I modsat fald er der for kvælning. Sikker tilslutning af apparatet Da apparatet drives med elektrisk strøm, er der fare for elektrisk stød. Vær derfor især opmærksom på følgende: – Slut kun strømforsyningen til stikkontakter, som opfylder oplysningerne på strømforsyningens typeskilt. – Kontrollér apparatet og strømforsyningen for eventuelle skader før brugen. Anvend aldrig et defekt apparat eller en defekt strømforsyning. – Forsøg aldrig at reparere apparatet eller strømforsyningen selv. For at undgå farlige situationer skal reparationer på apparatet og strømforsyningen altid udføres af vores kundeservice. Et defekt apparat eller en defekt strømforsyning skal indleveres til reparation hos en forhandler eller hos SEVERINs kundeservice. 100 Chill.book Seite 101 Freitag, 18. Juli 2014 6:54 06 Sikkerhedsanvisninger – Sænk ikke apparatet eller strømforsyningen ned i vand eller andre væsker. Hold apparatet og strømforsyningen på sikker afstand af regn og fugt. Anvend ikke apparatet udendørs eller i rum med høj luftfugtighed. – Berør ikke strømforsyningen med våde hænder. Træk altid direkte i strømforsyningen, når du trækker den ud af stikkontakten. – Pas på, at strømforsyningens kabel ikke knækkes, kommer i klemme eller køres over eller kommer i kontakt med varmekilder, fugt eller skarpe kanter. Sørg for, at strømforsyningens kabel ikke trækkes, så man kan snuble over det. – Før rengøring eller vedligeholdelse af apparatet samt før udskiftning af tilbehør skal apparatet slukkes, og det skal kontrolleres, at strømforsyningen ikke er tilsluttet. Sikkerhed ved omgang med akkuer Ved forkert omgang med akkuer er der fare for personskader og eksplosion. – Hvis det skulle blive nødvendigt at udskifte akkuen, skal du kontakte en forhandler eller SEVERINs kundeservice. Udskift aldrig selv akkuen. Udskift aldrig akkuen med andre akkuer eller batterier. – Før aktivering, isætning eller udtagning af akkuen skal du kontrollere, at strømforsyningen er trukket ud af stikkontakten. – Adskil aldrig akkuer, udsæt dem aldrig for høje temperaturer, og brænd dem aldrig. – Udsæt ikke akkuer for direkte sollys. - Overhold følgende temperaturer ved en opbevaringstid på op til 3 måneder: -20 ― +45 °C. - Overhold følgende temperaturer ved en opbevaringstid på over 1 år: -20 ― +20 °C. 101 Chill.book Seite 102 Freitag, 18. Juli 2014 6:54 06 Sikkerhedsanvisninger – Kortslut aldrig akkuer, dvs. berør ikke begge poler på samme tid, især ikke med elektrisk ledende genstande. Opbevar akkuer, så de heller ikke kan kortsluttes af andre akkuer eller metalgenstand under opbevaringen. – Anvend kun den medfølgende strømforsyning til opladning af akkuen. Oplad under ingen omstændigheder akkuen med en anden strømforsyning. Anvend på samme måde kun den medfølgende strømforsyning til opladning af dette apparats akku. – Tag akkuen ud som beskrevet, når den er udtjent. Aflever derefter omgående akkuen på nærmeste kommunale genbrugsstation, så den bortskaffes sikker og miljømæssigt korrekt. Bortskaf aldrig akkuer sammen med almindeligt husholdningsaffald! – Ved ukorrekt omgang med akkuen kan der lække væske fra den. Anvend ikke akkuen længere, hvis den er beskadiget eller lækker væske. - Hvis akkuen lækker væske, skal du undgå kontakt med væsken. - Hvis du kommer i kontakt med væsken, skal du omgående skylle denne af med rigelige mængder vand. Hvis du oplever følgevirkninger (uanset hvilken type), skal du søge læge. Tilsigtet brug Apparatet må kun anvendes til privat brug. Apparatet må kun anvendes til rengøring på plane, normalt tilsmudsede hårde gulve. De bedste rengøringsresultater opnås i små eller lukkede rum. Hvis rundbørsterne ikke er monteret, kan apparatet også anvendes på kortluvede tæpper. Enhver anvendelse derudover er i strid med den tilsigtede brug og er forbudt. 102 Chill.book Seite 103 Freitag, 18. Juli 2014 6:54 06 Sikkerhedsanvisninger For at forebygge personskader, brand og skader må apparatet ikke anvendes på: – mennesker, dyr eller planter. Sørg for altid at holde sugeåbningen væk fra legemsdele, hår og tøj. – Glødende, brændende eller ulmende partikler, som f.eks. aske, kul, trækul, cigaretter, tændstikker. – Eksplosive eller let antændelige stoffer eller toner. – Vand og andre væsker, f.eks. fugtige tæpperensemidler. – Spidse genstand som f.eks. glassplinter, søm eller murbrokker. Endvidere er følgende forbudt: – Ombygning på eget initiativ eller reparation af apparatet eller dens strømforsyning. – Brug uden korrekt anvendelse af støvbeholder, filter og låg. – Anvendelse i rum med skrøbelige genstande eller genstande, som let kan vælte. Klargør rum, så anvendelsen af apparatet ikke kan forvolde nogen skader. – Brug, opbevaring eller opladning udendørs. – Placering af genstande oven på apparatet. 103 Chill.book Seite 104 Freitag, 18. Juli 2014 6:54 06 Udpakning 1. Udpak apparat og tilbehør. 3 Udpakning 2. Kontrollér, at du har modtaget alle dele (se billede). 1 2 7 3 6 4 5 1 Robotstøvsuger CHILL 5 Rengøringspensel 2 Rundbørster 6 Strømforsyning 3 Ekstra rundbørster 7 Reservefilter 4 Akku – ikke vist: Brugsanvisning 104 Chill.book Seite 105 Freitag, 18. Juli 2014 6:54 06 Aktivering af akku 1. Kontrollér, at apparatet er slukket, og at strømforsyningen ikke er tilsluttet. 4 Aktivering af akku 2. Læg apparatet forsigtigt på oversiden, så undersiden er tilgængelig. 3. Træk dækslet til akkurummet af med et solidt tag med begge hænder (se billede). 4. Tilslut akkustikforbindelsen som vist (se detaljeudsnit). 5. Lad akkuen glide på plads i akkurummet (se billede). 6. Skub dækslet til akkurummet på igen, og sørg for at det går både hør- og mærkbart i indgreb. Akkuen er nu aktiveret og skal oplades, side 106, „Opladning af akku“. 105 Chill.book Seite 106 Freitag, 18. Juli 2014 6:54 06 Opladning af akku Det er bedst at oplade akkuen før hver brug, især hvis den ikke har været brugt i længere tid. 5 Opladning af akku Dette forlænger akkuens levetid og giver længst mulige rengøringscykler. 1. Kontrollér, at apparatet er slukket. 2. Slut strømforsyningen til apparatet (se billede). 3. Slut strømforsyningen til en stikkontakt (se detaljeudsnit). – LED'en blinker. Vent ca. 6,5 timer, indtil LED'en lyser. 6,5 h 4. Træk strømforsyningen ud af stikkontakten og apparatet. Gør apparatet klar til brug, side 107, „Tilpasning af apparatet til underlaget“. 106 Chill.book Seite 107 Freitag, 18. Juli 2014 6:54 06 Tilpasning af apparatet til underlaget 1. Kontrollér, at apparatet er slukket. 6 Tilpasning af apparatet til underlaget 2. Sæt børster på eller fjern dem alt efter underlaget: – Ved rengøring af hårde gulve skal rundbørsterne sættes på (se billede). – Ved rengøring af kortluvede tæpper skal børsterne fjernes (se billede). 3. Sæt alle 3 faldsensorer i samme position samtidig – Ved lyse gulve og flade trin position 0 til 1. – Ved mørke gulve og højere trin position 2 til 3. Tip Hvis robotstøvsugeren konstant kører baglæns på mørke gulve, skal du vælge indstilling "3". 107 Chill.book Seite 108 Freitag, 18. Juli 2014 6:54 06 Rengøring af rum Klargør rummet på følgende måde: 7 Rengøring af rum – Fjern løse genstande, som robotstøvsugeren ville kunne skubbe foran sig. – Fjern kabler, gardiner og alt, hvad der ville kunne blive viklet ind i børsterne. – Fjern skrøbelige genstande eller genstande, som let kan vælte. Tænd apparatet på følgende måde: 1. Anbring apparatet i midten af det rum, som skal rengøres. 2. Tænd apparatet på tænd/sluk-knappen (position "I" – se detaljeudsnit). Apparatet rengør nu rummet efter følgende mønster: Apparatet rengør nu, – indtil støvbeholderen er fuld, og LED'en – eller indtil akkuen skal oplades, og LED'en lyser, side 109, „Tømning af støvbeholder“. lyser, side 106, „Opladning af akku“. I begge tilfælde stopper apparatet efter et stykke tid. Det udløser derefter et bip i minuttet, – indtil du slukker det på tænd/sluk-knappen (position "0") – eller indtil akkuen er kørt helt tom. Hvis du ved, at du ikke skal anvende apparatet i længere tid, skal du tage akkuen ud, side 114, „Afmontering af akku“. 108 Chill.book Seite 109 Freitag, 18. Juli 2014 6:54 06 Tømning af støvbeholder 1. Kontrollér, at apparatet er slukket, og at strømforsyningen ikke er tilsluttet. 8 Tømning af støvbeholder 2. Fjern dækslet (se billede). 3. Løft støvbeholderen ud af apparatet i grebet (se billedet til venstre). 4. Fjern låget til støvbeholderen (se billedet til højre). 109 Chill.book Seite 110 Freitag, 18. Juli 2014 6:54 06 Tømning af støvbeholder 5. Løft filtret op og ud af støvebeholderen (se billedet til venstre). Tip Det anbefales i den forbindelse at anvende en støvsuger. Denne opsuger eventuelt snavs med det samme, og rengør ligeledes filtret effektivt. 6. Tøm støvbeholderen, og foretag en tør grovrengøring af denne sammen med filtret (se detaljeudsnit). Rengør støvbeholder og filter med vand efter behov: 24 h 110 Chill.book Seite 111 Freitag, 18. Juli 2014 6:54 06 Problemafhjælpning 9 Problemafhjælpning Kontrollér ved hjælp af følgende tabel, om problemet kan afhjælpes Problem Mulig årsag / Løsning Apparatet kan ikke tændes. Akkuen er ikke aktiveret. Aktivér akku, kapitel 4, „Aktivering af akku“. Akku er helt tom. Sluk apparatet (position "0"), og oplad akkuen, kapitel 5, „Opladning af akku“. Apparatet var tændt under opladning (position "I"). Sluk apparatet på tænd/sluk-knappen (position "0"), og tænd det igen (position "I"). Apparat starter. Dækslet blev taget af, mens apparatet var tændt. Sluk apparatet på tænd/sluk-knappen (position "0"), og tænd det igen (position "I"). Apparat starter. Dækslet sidder ikke korrekt. Sluk apparatet (position "0"), og sæt dækslet på igen. LED'en " " lyser rødt. Akkuen skal oplades. Sluk apparatet (position "0"), og oplad akkuen, kapitel 5, „Opladning af akku“. Apparatet har ikke kontakt med gulvet. Stil apparatet på gulvet. Apparatet begynder med det samme at rengøre. LED'en " lyser rødt. " Apparatet starter ganske vist, men kører hele tiden baglæns. Støvbeholderen er overfyldt, eller filtret er tilsmudset. Sluk apparatet (position "0"), og kapitel 8, „Tømning af støvbeholder“. Skyderen til regulering af faldsensorernes følsomhed er indstillet til lyse gulve, selv om apparatet anvendes på et mørkt gulv. Tilpas skyderens position for at indstille faldsensorernes følsomhed, kapitel 6, „Tilpasning af apparatet til underlaget“. Apparatet standser af sig selv. Akkuen skal oplades. Apparatet er kørt fast. Hjælp ved at give apparatet et lille skub med hånden. Sluk apparatet (position "0"), og oplad akkuen, kapitel 5, „Opladning af akku“. 111 Chill.book Seite 112 Freitag, 18. Juli 2014 6:54 06 Problemafhjælpning Problem Mulig årsag / Løsning Apparatet kører ikke i lige baner, når den tændes, selv om der ikke er nogen forhindringer. Muligvis kan et af hjulene ikke dreje frit på grund af snavs. En af rundbørsterne roterer ikke længere. Muligvis kan en af rundbørsterne ikke dreje frit på grund af snavs. Apparatet kan ikke oplades. Strømforsyningen er ikke isat korrekt Driftstiden bliver kortere og kortere. Muligvis kan hjulene ikke dreje frit på grund af snavs. Fjern eventuel snavs fra hjulet. Anvend om nødvendigt forsigtigt en saks eller en pincet. Afmonter rundbørsten (kapitel 6, „Tilpasning af apparatet til underlaget“), og fjern eventuel snavs. Anvend om nødvendigt forsigtigt en saks eller en pincet. Kontrollér, om strømforsyningens stik eller strømforsyningsadapteren sidder korrekt i deres bøsninger (kapitel 5, „Opladning af akku“). Fjern eventuel snavs fra hjulene. Anvend om nødvendigt forsigtigt en saks eller en pincet. Hvis problemet ikke kan løses ved hjælp af ovenstående tabel, beder vi dig kontakte vores servicehotline (i tillægget til brugsanvisningen). Sammen med vores uddannede servicemedarbejdere finder vi en løsning på dit problem. 112 Chill.book Seite 113 Freitag, 18. Juli 2014 6:54 06 Problemafhjælpning Efterbestilling af reserve- og tilbehørsdele Reservedele eller tilbehør kan du nemt og bekvemt bestille på internettet på vores hjemmeside http://www.severin.com/go/to/8363 i menuen "Service / Reservedelsshop". Artikel-nr. Indhold 6232048 Rundbørste, sæt med 4 stk. 5248048 Rengøringssæt (filter + rengøringspensel) Via denne QR-kode kommer du direkte til vores hjemmeside. Garanti De lovbestemte garantirettigheder for forbrugere og eventuelle salgsgarantier forbliver uberørte af følgende garantibetingelser. Hvis det er nødvendigt at reparere, skal du kontakte vores kundeservice pr. telefon eller email. Kontaktoplysningerne finder du i tillægget til brugsanvisningen. Henvend dig derfor direkte til forhandleren i tilfælde af en garantisag. Endvidere yder SEVERIN en producentgaranti på to år fra købsdatoen. I denne periode afhjælper vi uden omkostninger alle mangler, som beviseligt skyldes materiale- eller produktionsfejl, og som forringer funktionen væsentligt. Yderligere krav udelukkes. Garantien dækker ikke: Skader, som skyldes manglende overholdelse af brugsanvisningen, forkert behandling eller normalt slid, ligeledes dele, som let går i stykker som f.eks. glas, kunststof eller LED'er. Garantien dækker endvidere ikke batterier og akkuer, som er blevet defekte eller hvis driftstid er blevet nedsat som følge af normalt slid eller forkert håndtering. Garantien bortfalder ved indgreb, der ikke er godkendt af SEVERIN. 113 Chill.book Seite 114 Freitag, 18. Juli 2014 6:54 06 Bortskaffelse Afmontering af akku 10 Bortskaffelse 1. Kontrollér, at apparatet er slukket, og at strømforsyningen ikke er tilsluttet. 2. Læg apparatet forsigtigt på oversiden, så undersiden er tilgængelig. 3. Træk dækslet af akkurummet (se beskrivelsen på side 106). 4. Afbryd akkustikforbindelsen som vist (se detaljeudsnit). 5. Tag akkuen ud af akkurummet (se billede). 6. Skub dækslet til akkurummet på igen, og sørg for at det går både hør- og mærkbart i indgreb. Akku og apparat skal nu bortskaffes separat, kapitel „Separat bortskaffelse af apparat og akku“. Separat bortskaffelse af apparat og akku Apparater og akkuer, som er mærket med dette symbol, må ikke bortskaffes sammen med almindeligt husholdningsaffald! Apparater og akkuer indeholder værdifulde råmaterialer, som kan genvindes. En korrekt bortskaffelse beskytter miljøet og dine medmenneskers sundhed. Bortskaf apparatet og den afmonterede akku separat på den kommunale genbrugsstation. 114 Chill.book Seite 115 Freitag, 18. Juli 2014 6:54 06 Dziękujemy PL Droga Klientko! Drogi Kliencie! 1 Dziękujemy Życzymy wiele radości z produktu marki SEVERIN i dziękujemy za okazane nam zaufanie. Informacje o instrukcji obsługi Niniejsza instrukcja obsługi zawiera ważne porady na temat bezpieczeństwa i obsługi urządzenia. Nieprzestrzeganie instrukcji obsługi może prowadzić do obrażeń ciała i uszkodzenia urządzenia. Proszę zachować instrukcję obsługi. Przy przekazywaniu urządzenia innej osobie należy także przekazać instrukcję. Przed pierwszym użyciem dokładnie przeczytać instrukcję obsługi. Spis treści Dziękujemy .................................................... 115 Wskazówki dotyczące bezpieczeństwa ...... 116 Aktywacja akumulatora ................................ 121 Ładowanie akumulatora ............................... 122 Dopasowanie urządzenia do podłoża ......... 123 Sprzątanie pomieszczenia ........................... 124 Opróżnianie zbiornika kurzu ....................... 125 Usuwanie problemów ................................... 127 Utylizacja ....................................................... 130 115 Chill.book Seite 116 Freitag, 18. Juli 2014 6:54 06 Wskazówki dotyczące bezpieczeństwa Bezpieczeństwo określonych grup osób 2 Wskazówki dotyczące bezpieczeństwa – Niniejsze urządzenia wolno użytkować dzieciom powyżej 8 lat oraz osobom o ograniczonej zdolności fizycznej, czuciowej lub intelektualnej i osobom nie mającym doświadczenia i/lub znajomości sprzętu, pod warunkiem że odbywa się to pod nadzorem lub po zapoznaniu się z zasadami bezpiecznego użytkowania sprzętu oraz ewentualnymi zagrożeniami z nim związanymi. – Dzieciom nie wolno bawić się urządzeniem, na niego stawać ani siadać. Bez nadzoru nie wolno dzieciom czyścić ani wykonywać prac konserwacyjnych przewidzianych dla użytkownika. – Dzieci poniżej 8 lat trzymać z dala od urządzenia i przewodu zasilającego. – Materiały opakowaniowe trzymać i utylizować poza zasięgiem dzieci. W innym przypadku istnieje niebezpieczeństwo uduszenia. Właściwie podłączyć urządzenie Urządzenie jest ładowane prądem elektrycznym i istnieje przy tym generalne zagrożenie porażenia prądem. Należy szczególnie zwracać uwagę na następujące punkty: – Należy podłączać zasilacz tylko do gniazdek odpowiadających danym na tabliczce znamionowej zasilacza. – Przed użyciem sprawdzić urządzenie i zasilacz pod kątem ewentualnych uszkodzeń. Nigdy nie używać uszkodzonego urządzenia lub urządzenia z uszkodzonym zasilaczem. – Nigdy nie próbować samodzielnej naprawy urządzenia lub jego zasilacza. Aby uniknąć zagrożeń, należy zlecać naprawy urządzenia i zasilacza wyłącznie naszemu serwisowi. Uszkodzone urządzenie lub zasilacz należy oddać do naprawy w sklepie specjalistycznym lub w serwisie SEVERIN. 116 Chill.book Seite 117 Freitag, 18. Juli 2014 6:54 06 Wskazówki dotyczące bezpieczeństwa – Nie zanurzać urządzenia i zasilacza w wodzie lub innych płynach. Nie wystawiać urządzenia i zasilacza na działanie deszczu i wilgoci. Nie używać urządzenia na wolnym powietrzu i w pomieszczeniach o wysokiej wilgotności. – Nie dotykać zasilacza mokrymi rękami. Przy wyciąganiu zasilacza z gniazda należy zawsze ciągnąć za zasilacz. – Zwracać uwagę na to, aby przewód zasilacza nie został załamany, zakleszczony, aby nic po nim nie przejechało i aby nie miał kontaktu ze źródłami wysokiej temperatury, wilgocią i ostrymi krawędziami. Uważać, aby przewód zasilacza nie powodował zagrożenia potknięciem. – Przed czyszczeniem lub konserwacją urządzenia oraz przed wymianą osprzętu należy wyłączyć urządzenie i upewnić się, że zasilacz nie jest podłączony. Bezpieczne obchodzenie się z akumulatorami Niewłaściwe obchodzenie się z akumulatorami grozi obrażeniami ciała i wybuchem. – W razie konieczności wymiany akumulatora należy zwrócić się do sklepu specjalistycznego lub serwisu SEVERIN. Nigdy nie wymieniać akumulatora samodzielnie. Nie zastępować akumulatora innymi akumulatorami lub bateriami. – Przed aktywacją, włożeniem lub wyjęciem akumulatora upewnić się, że zasilacz jest wyciągnięty z gniazdka. – Nigdy nie rozbierać akumulatorów, nie wystawiać na działanie wysokiej temperatury ani nie wrzucać w ogień. 117 Chill.book Seite 118 Freitag, 18. Juli 2014 6:54 06 Wskazówki dotyczące bezpieczeństwa – Nie wystawiać na bezpośrednie działanie promieni słonecznych. - W przypadku składowania do 3 miesięcy przestrzegać następujących temperatur: -20 – +45 °C - W przypadku składowania powyżej 1 roku przestrzegać następujących temperatur: -20 – +20 °C – Nigdy nie zwierać akumulatorów, tzn. nie dotykać równocześnie obu biegunów, szczególnie nie przedmiotami przewodzącymi prąd. Tak przechowywać akumulatory, aby podczas składowania nie doszło do ich zwarcia przez inne akumulatory lub metalowe przedmioty. – Do ładowania akumulatorów używać wyłącznie dostarczonego zasilacza. W żadnym wypadku nie ładować akumulatora innym zasilaczem. Z kolei dostarczony zasilacz stosować wyłącznie do ładowania akumulatora tego urządzenia. – Po zakończeniu okresu użytkowania wyjąć akumulator w opisany sposób. Następnie niezwłocznie oddać akumulator do odpowiedniego punktu zbiórki w pobliżu i w ten sposób zapewnić jego bezpieczną i ekologiczną utylizację. Nigdy nie wrzucać akumulatorów do odpadów domowych! – Niewłaściwe obchodzenie się może powodować wyciek z akumulatora. Nie stosować akumulatora, jeśli jest uszkodzony lub jeśli doszło do wycieku. - Jeśli dojdzie do wycieku, należy unikać kontaktu w wyciekłym płynem. - Jeśli dojdzie do kontaktu z płynem, należy go obficie spłukać. W przypadku wystąpienia następstw (obojętne jakiego rodzaju) należy udać się do lekarza. 118 Chill.book Seite 119 Freitag, 18. Juli 2014 6:54 06 Wskazówki dotyczące bezpieczeństwa Zastosowanie zgodne z przeznaczeniem Urządzenie wolno stosować jedynie w gospodarstwie domowym. Urządzenie wolno stosować jedynie do czyszczenia płaskich, normalnie zabrudzonych twardych podłóg. Najlepsze wyniki sprzątania uzyskuje się przy tym w małych, zwartych pomieszczeniach. Jeśli okrągłe szczotki nie są zamontowane, to wolno je stosować także na wykładzinach z krótkim włosiem. Każde inne zastosowanie jest niezgodne z przeznaczeniem i jest niedozwolone. Aby zapobiec obrażeniom ciała, pożarom i szkodom, nie wolno stosować urządzenia do odkurzania: – ludzi, zwierząt i roślin, (Otwór zasysający należy zawsze trzymać z dala od części ciała, włosów i odzieży.) – żarzących się, palących się lub tlących cząsteczek (np. popiół, węgiel, węgiel drzewny, papierosy, zapałki), – wybuchowych lub łatwopalnych materiałów lub tonerów, – wody lub innych płynów, np. środków do czyszczenia dywanów na mokro, – ostrych przedmiotów, takich jak odłamki szkła, gwoździe lub gruz budowlany. Ponadto zabronione są: – Samodzielna przebudowa oraz naprawy urządzenia i zasilacza. – Używanie bez poprawnie włożonego worka na pył, filtra i pokrywy. – Używanie w pomieszczeniach, w których stoją kruche lub łatwo przewracające się przedmioty. Tak przygotować pomieszczenia, aby stosowanie urządzenia nie mogło spowodować szkód. – Używanie, przechowywanie lub ładowanie na wolnym powietrzu. – Stawianie przedmiotów na urządzeniu. 119 Chill.book Seite 120 Freitag, 18. Juli 2014 6:54 06 Wypakowanie 1. Wypakować urządzenia i wyposażenie. 3 Wypakowanie 2. Sprawdzić kompletność dostawy (patrz ilustracja). 1 2 7 3 6 4 5 1 Robot odkurzający CHILL 5 Pędzel do czyszczenia 2 Okrągłe szczotki 6 Zasilacz 3 Zapasowe okrągłe szczotki 7 Zapasowy filtr 4 Akumulator – bez ilustracji: Instrukcja eksploatacji 120 Chill.book Seite 121 Freitag, 18. Juli 2014 6:54 06 Aktywacja akumulatora 1. Upewnić się, że urządzenie jest wyłączone i zasilacz sieciowy nie jest podłączony. 4 Aktywacja akumulatora 2. Położyć urządzenie dolną częścią do góry. 3. Silnym ruchem obiema rękami zdjąć pokrywkę schowka na akumulator (patrz ilustracja) 4. Podłączyć wtyk akumulatora zgodnie z ilustracją (patrz szczegół). 5. Wsunąć akumulator do schowka (patrz ilustracja). 6. Mocno nasunąć pokrywkę schowka na akumulator, aż do słyszalnego i odczuwalnego zatrzaśnięcia. Teraz akumulator jest aktywowany i należy go naładować, Strona 122, „Ładowanie akumulatora“. 121 Chill.book Seite 122 Freitag, 18. Juli 2014 6:54 06 Ładowanie akumulatora Najlepiej jest ładować akumulator przed każdym użyciem, szczególnie, gdy urządzenie długo nie 5 Ładowanie akumulatora jest stosowane. Zwiększa to żywotność akumulatora i zapewnia długie cykle czyszczenia. 1. Upewnić się, że urządzenie jest wyłączone. 2. Podłączyć zasilacz do urządzenia (patrz ilustracja). 3. Podłączyć zasilacz do gniazdka (patrz ilustracja). – LED miga. Odczekać ok. 6,5 godziny, aż LED będzie świecić światłem ciągłym. 6,5 h 4. Wyjąć zasilacz z gniazdka i z urządzenia. Przygotować urządzenie do użycia, Strona 123, „Dopasowanie urządzenia do podłoża“ 122 Chill.book Seite 123 Freitag, 18. Juli 2014 6:54 06 Dopasowanie urządzenia do podłoża 1. Upewnić się, że urządzenie jest wyłączone. 6 Dopasowanie urządzenia do podłoża 2. Zależnie od podłoża założyć lub ściągnąć szczotki. – Do czyszczenia twardych podłóg należy założyć szczotki (patrz ilustracja). – Do czyszczenia wykładzin z krótkim włosiem należy zdjąć szczotki (patrz ilustracja). 3. Umieścić równocześnie wszystkie 3 czujniki zabezpieczające przed spadnięciem w jednakowym położeniu: – przy jasnych podłogach i niskich stopniach: położenie 0 do 1. – przy ciemnych podłogach i wysokich stopniach: położenie 2 do 3. PORADA: Jeśli robot stale jedzie wstecz na ciemnych podłogach, wybrać ustawienie „3“. 123 Chill.book Seite 124 Freitag, 18. Juli 2014 6:54 06 Sprzątanie pomieszczenia Przygotować pomieszczenie w następujący sposób: 7 Sprzątanie pomieszczenia – Uprzątnąć luźne przedmioty, które robot mógłby przesuwać. – Uprzątnąć przewody, zasłony i wszystko, co mogłoby wkręcić się w szczotki. – Uprzątnąć kruche przedmioty lub takie, które mogłyby się łatwo przewrócić. Włączyć urządzenie w następujący sposób: 1. Ustawić urządzenie pośrodku sprzątanego pomieszczenia. 2. Włączyć urządzenie wyłącznikiem (położenie „I“ - patrz szczegół). Urządzenie sprząta teraz pomieszczenie według następującego wzoru: Urządzenie sprząta teraz tak długo, – aż napełni się worek na kurz i zaświeci się Strona 125, „Opróżnianie zbiornika kurzu“. dioda LED, – lub aż będzie wymagane naładowanie akumulatora i zaświeci się Strona 122, „Ładowanie akumulatora“. dioda LED, W obu przypadkach urządzenie zatrzymuje się po pewnym czasie. Co minutę wydaje piszczący dźwięk, – aż do wyłączenia wyłącznikiem (położenie „0“) – lub wyczerpania akumulatora. Jeśli urządzenie ma nie być używane przez dłuższy czas, to należy wyjąć akumulator, Strona 130, „Wyjęcie akumulatora“. 124 Chill.book Seite 125 Freitag, 18. Juli 2014 6:54 06 Opróżnianie zbiornika kurzu 1. Upewnić się, że urządzenie jest wyłączone i zasilacz sieciowy nie jest podłączony. 8 Opróżnianie zbiornika kurzu 2. Zdjąć pokrywę (patrz ilustracja). 3. Wyciągnąć za uchwyt zbiornik kurzu (patrz ilustracja po lewej). 4. Zdjąć pokrywę zbiornika kurzu (patrz ilustracja po prawej). 125 Chill.book Seite 126 Freitag, 18. Juli 2014 6:54 06 Opróżnianie zbiornika kurzu 5. Ze zbiornika kurzu wyjąć w górę filtr (patrz ilustracja po lewej). PORADA: Zaleca się korzystanie przy tym z odkurzacza. Odsysa on wydostający się kurz i efektywnie czyści filtr. 6. Opróżnić zbiornik kurzu i zgrubnie wyczyścić go wraz z filtrem (patrz szczegóły). W razie potrzeby wyczyścić zbiornik kurzu i filtr na mokro: 24 h 126 Chill.book Seite 127 Freitag, 18. Juli 2014 6:54 06 Usuwanie problemów 9 Usuwanie problemów Sprawdzić na podstawie poniższej tabeli, czy problem można usunąć: Problem Możliwa przyczyna / rozwiązanie Nie można włą- Akumulator nie jest aktywowany. czyć urządze- Aktywować akumulator, Rozdział 4, „Aktywacja akumulatora“. nia. Akumulator jest całkowicie wyczerpany. Wyłączyć urządzenie (położenie „0“) i naładować akumulator, Rozdział 5, „Ładowanie akumulatora“. Urządzenie było włączone podczas ładowania (położenie „I“). Wyłącznikiem wyłączyć urządzenie (położenie „0“) i ponownie włączyć (położenie „I“). Urządzenie rusza. Zdjęto pokrywę, podczas gdy urządzenie było jeszcze włączone. Wyłącznikiem wyłączyć urządzenie (położenie „0“) i ponownie włączyć (położenie „I“). Urządzenie rusza. Pokrywa nie jest nałożona prawidłowo. Wyłączyć urządzenie (położenie „0“) i ponownie nałożyć pokrywę. LED „ “ świe- Należy naładować akumulator. ci na czerwoWyłączyć urządzenie (położenie „0“) i naładować akumulator, Rozdział 5, no. „Ładowanie akumulatora“. Urządzenie nie ma kontaktu z podłogą. Postawić urządzenie na podłodze. Teraz zacznie od razu sprzątać. LED „ “ świeci na czerwono. Urządzenie pracuje, ale stale porusza się wstecz. Urządzenie samo się zatrzymuje. Urządzenie ugrzęzło. Zbiornik kurzu jest przepełniony lub filtr jest zabrudzony. Wyłączyć urządzenie (położenie „0“) i Rozdział 8, „Opróżnianie zbiornika kurzu“. Regulator suwakowy ustawiający czułość czujników zabezpieczających przed spadnięciem znajduje się w położeniu dla jasnych podłóg, podczas gdy urządzenie pracuje na ciemnej podłodze. Dopasować położenie regulatora suwakowego ustawiającego czułość czujników zabezpieczających przed spadnięciem, Rozdział 6, „Dopasowanie urządzenia do podłoża“. Należy naładować akumulator. Wyłączyć urządzenie (położenie „0“) i naładować akumulator, Rozdział 5, „Ładowanie akumulatora“. Pomóc ręką lekko popychając. 127 Chill.book Seite 128 Freitag, 18. Juli 2014 6:54 06 Usuwanie problemów Problem Mimo wolnej powierzchni urządzenie nie jedzie prosto bezpośrednio po włączeniu. Jedna z okrągłych szczotek nie obraca się. Możliwa przyczyna / rozwiązanie Być może jedno z kółek jest zabrudzone, co uniemożliwia mu swobodny obrót. Wyczyścić kółko. W razie potrzeby ostrożnie użyć nożyczek lub pęsety. Być może jest ona zabrudzona, co uniemożliwia swobodny obrót. Wymontować szczotkę (Rozdział 6, „Dopasowanie urządzenia do podłoża“) i wyczyścić ją. W razie potrzeby ostrożnie użyć nożyczek lub pęsety. Nie można naładować urządzenia. Zasilacz nie jest prawidłowo podłączony. Czas eksploatacji skraca się sukcesywnie. Być może zabrudzenie kółek uniemożliwia im swobodny obrót. Sprawdzić, czy wtyczka i adapter zasilacza są poprawnie osadzone w gniazdkach (Rozdział 5, „Ładowanie akumulatora“). Wyczyścić kółko. W razie potrzeby ostrożnie użyć nożyczek lub pęsety. Jeśli nie można usunąć problemu za pomocą poniższej tabeli, to należy zadzwonić na naszą gorącą linię (dane do kontaktów znajdują się w załączniku do niniejszej instrukcji obsługi). Wraz naszymi wyszkolonymi serwisantami na pewno znajdziemy rozwiązanie. 128 Chill.book Seite 129 Freitag, 18. Juli 2014 6:54 06 Usuwanie problemów Zamawianie części zamiennych i wyposażenia Części zamienne i wyposażenie można wygodnie zamawiać przez internet na naszej stronie http://www.severin.com/go/to/8363 w menu „Service / Ersatzteil-Shop“. Nr art. Opis 6232048 Rundbørste, sæt med 4 stk. 5248048 Rengøringssæt (filter + rengøringspensel) Za pomocą znajdującego się obok kodu QR można bezpośrednio wejść na naszą stronę domową. Gwarancja Poniższe warunki gwarancji nie naruszają ustawowych praw do świadczeń z tytułu rękojmi wobec sprzedawcy oraz ewentualnych gwarancji sprzedawcy. Jeśli wymagana jest naprawa, należy skontaktować się telefonicznie lub mailowo z naszym serwisem. Dane do kontaktów znajdują się w załączniku do niniejszej instrukcji obsługi. W przypadku objętym gwarancją proszę zwrócić się bezpośrednio do sprzedawcy. Dodatkowo SEVERIN udziela gwarancji producenta na dwa lata od daty zakupu. W tym okresie bezpłatnie usuwamy wszelkie wady, przy których udowodnione jest, że spowodowane są błędami materiałowymi lub produkcyjnymi i w znaczny sposób pogarszają działanie. Dalsze roszczenia są wykluczone. Gwarancją nie są objęte: szkody wynikłe z nieprzestrzegania instrukcji obsługi, niewłaściwego obchodzenia się lub normalnego zużycia, a także kruche części, takie jak szkło, tworzywo sztuczne czy diody LED. Gwarancją nie objęte są ponadto baterie i akumulatory, zepsute w wyniku normalnego zużycia lub niewłaściwego obchodzenia się lub których czas pracy uległ skróceniu. Gwarancja wygasa w razie manipulacji dokonywanych przez nieautoryzowane przez SEVERIN placówki. 129 Chill.book Seite 130 Freitag, 18. Juli 2014 6:54 06 Utylizacja Wyjęcie akumulatora 10 Utylizacja 1. Upewnić się, że urządzenie jest wyłączone i zasilacz sieciowy nie jest podłączony. 2. Położyć urządzenie dolną częścią do góry. 3. Zdjąć pokrywę schowka na akumulator (patrz opis na Strona 122) 4. Odłączyć wtyk akumulatora zgodnie z ilustracją (patrz szczegół). 5. Wyjąć akumulator ze schowka (patrz ilustracja) 6. Mocno nasunąć pokrywkę schowka na akumulator, aż do słyszalnego i odczuwalnego zatrzaśnięcia. Akumulator i urządzenie należy utylizować oddzielnie. Rozdział „Oddzielna utylizacja urządzenia i akumulatora“. Oddzielna utylizacja urządzenia i akumulatora Urządzeń i akumulatorów oznakowanych tym symbolem nie wolno utylizować z odpadami domowymi! Urządzenia i akumulatory zawierają cenne surowce, które można ponownie wykorzystać. Należyta utylizacja chroni środowisko i zdrowie ludzi. Urządzenie i wyjęty akumulator należy oddzielnie oddać do utylizacji w odpowiednim punkcie zbiórki. 130 Chill.book Seite 131 Freitag, 18. Juli 2014 6:54 06 Kundendienstzentralen Service Centres Centrales service-après-vente Oficinas centrales del servicio Centros de serviço Centrale del servizio clienti Service-centrales Centrale serviceafdelinger Centrala kundtjänstplatser Keskushuollot Servisné stredisko Centrala obstugi klientów Szerviz Κεντρικό σέρβις Deutschland Austria SEVERIN Service Degupa Am Brühl 27 Vertriebsgesellschaft m.b.H. 59846 Sundern Gewerbeparkstr. 7 Telefon (02933) 982-460 5081 Anif / Salzburg Telefax (02933) 982-480 Tel.: +43 (0) 62 46 73 58 10 [email protected] Fax:. +43 (0) 62 46 / 72 70 2 eMail: [email protected] 131 Chill.book Seite 132 Freitag, 18. Juli 2014 6:54 06 Belgique Bulgaria BVBA Dancal Elektro Noviz AG Kalkhoevestraat 1 Kahn Kubrat 1 Str. B-8790 Waregem BG-4000 Plovdiv Tel.: +32 56 71 54 51 Tel: +359 32 275 617, 275 614 Fax: +32 56 70 04 49 eMail: [email protected] Czech Republic Danmark BVZ Commerce s.r.o. F&H of Scandinavia A/S Parkerova c.p. 618 Gl. Skivevej 70 CZ 25067 Klecany DK-8800 Viborg Tel.: +420 233 55 94 74 Tel.: +45 8928 1300 Fax: +420 233 55 94 74 Fax: +45 8928 1301 eMail: [email protected] Espana Espana – Islas Canarias Severin Electrodomesticos España S.L. Comercial Alte S.L. S/N. CC. ‘Las Higueras’ C/Subida al Mayorazgo, 14 Plaza Miguel de Cervantes 38110 Santa Cruz de Tenerife 45217 UGENA Tel: +34 922 20 58 00 Tel: +34 925 51 34 05 Fax: +34 922 20 59 00 Fax: +34 925 54 19 40 eMail: [email protected] eMail: [email protected] Web: http://www.severin.es Estonia Tallinn: CENTRALSERVICE, Tammsaare tee 134B, tel: 654 3000 132 Chill.book Seite 133 Freitag, 18. Juli 2014 6:54 06 Finland France AV-Komponentti Oy SEVERIN France Sarl Koronakatu 1 A 4, rue de Thal 02210 Espoo CS 38 Tel.: +358 9 867 8020 F-67210 OBERNAI CEDEX Fax: +358 9 867 80250 Tel.: +33 3 88 47 62 08 Web: www.avkomponentti.fi Fax: +33 3 88 47 62 09 eMail: [email protected] Web: http://www.severin.fr Greece Greece BERSON Philippos Business Center C. Sarafidis Bros. S.A. Service Post of Thermi Agamemnonos 47 570 01 Thessaloniki, Greece 176 75 Kallithea, Athens Tel.: 0030-2310954020 Tel.: 0030-210 9478700 Italia Latvia Videoellettronica di Sgambati & SERVO Ltd. Gabrini C.S.N.C. Mr. Janis Pivovarenoks via Dino Col 52r-54r-56r, Tel: +371 7279892 I - 16149 Genova Green Number: 800240279 Tel.: 010/6 45 11 02 - 01041 86 09 Fax: 010/6 42 50 09 e-mail: [email protected] 133 Chill.book Seite 134 Freitag, 18. Juli 2014 6:54 06 Luxembourg Magyarország Ser-Tec TFK Elektronik Kft. Rue du Chateau d´Eau Gyar u.2 3364 Leudelange H-2040 Budaörs Tel.: +352 37 94 94 402 Tel.: (+36) 23 444 266 Fax: +352 37 94 94 400 Fax: (+36) 23 444 267 eMail: [email protected] Malta Nederland Crosscraft .Co .Ltd. E-Care Valletta Road Dijkgraaf 22 Paola, Malta NL-6921 RL Duiven Tel.:+356 21804885 Tel: +31 26 3193333 +356 79498434 Fax: +31 26 319 33 52 Fax:+356 21664812 Web: http://www.e-care.nl eMail:[email protected] Norway Polska F&H of Scandinavia A/S SERV- SERWIS SP. Z O.O. Trollåsveien 34 UL. WSCHODNIA 4 1414 Trollåsen 46-070 CHMIELOWICE K/OPOLA Tel: +47 9244 8641 Tel: +48 77 453 86 42 Fax: +47 6689 2070 Fax: +48 77 453 86 42 eMail: [email protected] eMail: [email protected] 134 Chill.book Seite 135 Freitag, 18. Juli 2014 6:54 06 Portugal Slovenia Auferma Comercio Internacional SA SEVTIS d.o.o. Aguda Parque Smartinska 130 Lago de Arcozelo No. 76 1000 Ljubljana Armazem H3 Tel: 00386 1 542 1927 P-4410 455 Arcozelo Fax: 00386 1 542 1926 Tel: +351 22 616 7300 Fax: +351 22 616 7325 Slowak Republic Svenska PREMT,s.r.o. Rakspecialisten HS Skladová 1 Möllevångsgatan 34 917 01 Trnava 214 20 Malmö Tel: +421 33 55 45 007 Tel.: +46 40 12 07 70 Fax: +421 33 55 45 007 Fax: +46 40 6 11 03 35 eMail: [email protected] eMail: [email protected] Switzerland VB Handels Sàrl GmbH Postfach 306 1040 Echallens Tel: 021 881 60 45 Fax 021 881 60 46 mail: [email protected] 135 Röhre 27 D-59846 Sundern Tel +49 2933 982 - 0 Fax +49 2933 982 - 333 [email protected] www.severin.com Seve-28450 - GBA - 18.07.2014 SEVERIN Elektrogeräte GmbH Technische Änderungen vorbehalten. / Model specifications are subject to change. Chill.book Seite 136 Freitag, 18. Juli 2014 6:54 06