1
Contents
Channel
Preference Features
Other Information
• Memorizing channels
1
• Executing initial setup
69
• Viewing the e-Manual
118
• Using Channel menu
6
• Setting the Time
70
• Using Self Diagnosis
119
• Blocking Programs
18
• Using the Sleep Timer
72
• Updating the Software
122
• Other Features
29
• Setting the On/Off Timer
73
• Changing the Use Mode
125
• Economical Solutions
78
• Viewing Contact Samsung
126
• Other Features
80
• Using the Sports Mode
127
• Using the Wireless Network
128
• Managing the Network Connected Devices
145
• Using the DLNA Functions (AllShare™)
148
Basic Features
• Changing the Preset Picture Mode
38
• Adjusting Picture Settings
39
• Changing the Picture Options
49
• Changing the Preset Sound Modes
60
• Using the Source List
89
• Adjusting Sound Settings
61
• Connecting a USB Device
90
• Using Media Play
97
Advanced Features
• Controlling Photo / Video / Music Playback
101
• Using the 3D function
110
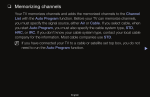
❑❑ Memorizing channels
Your TV memorizes channels and adds the memorized channels to the Channel
List with the Auto Program function. Before your TV can memorize channels,
you must specify the signal source, either Air or Cable. If you select cable, when
you start Auto Program, you must also specify the cable system type, STD,
HRC, or IRC. If you don’t know your cable system type, contact your local cable
company for the information. Most cable companies use STD.
NN If you have connected your TV to a cable or satellite set top box, you do not
need to run the Auto Program function.
English
▶
■■ Auto Program
OO MENUm → Broadcasting → Auto Program → ENTERE
Scans for channels automatically and stores them in the TV’s memory.
To start Auto Program, follow these steps:
1. Select Auto Program, and then press ENTERE.
2. Press the ENTERE button to select Start.
3. Select Both, Air, or Cable by highlighting, and then pressing ENTERE.
◀
▶
English
4. If you selected Cable, you must specify your cable systems. First, select
Digital Cable System, and then press ENTERE.
5. Select STD, HRC, or IRC, and then press ENTERE.
6. Repeat for Analog Cable System.
7. Select Scan, and then press ENTERE. Auto Program starts.
NN After all the available channels are stored, Auto Program removes scrambled
◀
channels. When done, the Auto Program menu then reappears. This
process can take up to 30 minutes.
English
▶
How to Stop Auto Programming
1. Press the ENTERE button to select Stop.
2. A message will ask Stop Auto Program? Select Yes by pressing the ◄ or ►
button.
◀
3. Press the ENTERE button.
NN If you select Change Settings, the antenna setting screen appears. You
can re-set the antenna settings and start channel search again.
NN Select Scan Again, and then press the ENTERE button to restart
channel search.
English
▶
■■ Antenna
OO MENUm → Broadcasting → Antenna → ENTERE
To change the source of your TV signal, follow these steps:
1. Select Antenna, and then press ENTERE.
2. Select the source of your TV signal, Air or Cable.
NN Selecting Air or Cable also changes the actual signal input from Air to Cable
or Cable to Air.
◀
▶
English
❑❑ Using the Channel menu
■■ Channel List
OO MENU → Broadcasting → Channel List → ENTERE
◀
The Channel List contains the channels your TV displays (Added channels) when
you press the channel button on your remote. On the Channel List screen, you
can also view channel information, Added Ch., and Favorites 1-5. Press the
►(Mode) button to change the channel mode.
NN When you press the CH LIST button, the Channel List screen is displayed at ▶
once.
English
Channel Mode
●● Air / Cable: Switch between Air and Cable.
●● Edit Favorites: Set channels you watch frequently as favorites. Add or
delete a selected channel in Favorites 1-5.
NN For detailed information about using Edit Favorites, refer to “Edit
Favorites”.
●● Favorites 1-5: Show all favorite channels, arranged in up to five groups.
◀
Each group has a separate screen.
NN The TV displays Favorites 1-5 only if you have added favorites using ▶
Edit Favorites.
●● Added Ch.: Show all added channels.
English
■■ Schedule Manager
OO MENUm → Broadcasting → Schedule Manager → ENTERE
You can schedule a channel to be displayed automatically at a selected time. In
addition, you can view, modify, or delete the scheduled viewing information.
NN You must set the current time first using the Time → Clock function in the
System menu to use this function.
◀
1. Select Schedule on the Schedule Manager screen, and then press the
ENTERE button. The Schedule Viewing menu appears.
2. Press the ◄/►/▲/▼ buttons to set each menu option.
●● Antenna: Select the desired broadcasting signal.
●● Channel: Select the desired channel.
English
▶
●● Repeat: Select Once, Manual, Sat~Sun, Mon~Fri or Everyday. If you
select Manual, you can set the day you want.
NN A check (c) mark indicates a day you selected.
●● Date: You can set a desired date.
NN Date is available only when you select Once in Repeat.
●● Start Time: You can set the start time you want.
NN If you want to edit or cancel a scheduled viewing, select the scheduled
◀
viewing on Schedule Manager. Then, press the ENTERE button and
select Edit or Remove.
English
▶
■■ Edit Channel
OO MENUm → Broadcasting → Edit Channel → ENTERE
You can add, edit, or delete channels from the Channel List.
Deleting a channel from the Channel List
1 Go to Edit Channel screen.
◀
2. Press the ▲/▼ buttons to select a channel, and then press the ENTERE
button. The (c) mark indicates the channel you’ve selected.
NN You can select more than one channel.
NN Press ENTERE button again to deselect the channel.
3. Press the { (Delete) button. The selected channel is deleted from the
Channel List.
English
▶
Adding a channel to the Channel List
1. On the Edit Channel screen, press the TOOLS button, and then select
Category.
◀
2. Select All and press the OK button. The All Channel List appears.
NN Your TV will display all channels, including channels you deleted from the
Channel List, in the All Channel List.
NN A gray-colored channel indicates the channel has been deleted from the
Channel List.
3. Select a deleted channel, and then press the { (Add) button.
English
▶
NN Using the colored and function buttons with the Edit Channel.
●● { Yellow (Delete / Add)
–– Delete: Deletes a channel from the channel list.
–– Add: Adds a deleted channel. It only appears when you select a deleted
channel in All.
●● } Blue (Select All / Deselect All): Selects or deselects all channels at
◀
once.
●●
(Go To): Goes directly to a channel when you press channel
numbers (0~9).
●● k (Page): Moves to the next or previous page.
English
▶
●● T (Tools): Displays the option menu. The option menu items that appear
may differ depending on the channel status and type.
–– Antenna: Selects the broadcasting signal, air or cable.
–– Category: Changes the channel mode. Select All, Added Ch.,
Recently Viewed, or Mostly Viewed. The channel mode you select is
displayed.
–– Edit Favorites: Go to Edit Favorites screen directly.
–– Rename Channel (analog channels only): Lets you assign a name of
◀
up to five characters to a channel. For example, Food, Golf, etc. This
makes it easier to find and select the channel.
–– Information: Displays details of the selected program.
English
▶
■■ Edit Favorites t
OO MENUm → Broadcasting → Edit Favorites → ENTERE
You can add, edit or delete favorite channels to or from one or more of 5 favorite
lists.
Adding a channel to Favorites 1-5
1. Go to the Edit Favorites screen.
◀
2. Press the ▲/▼ buttons to select a channel, and then press the ENTERE
button.
3. Choose a specific favorite list among Favorites 1-5 using the b (Change
Fav.) button, and then press the { (Add) button. The selected channel is
added to the favorites list you have chosen in Favorites 1-5.
NN A channel can be added to more than one of the five favorite lists in
Favorites 1-5.
English
▶
Deleting a channel from the Favorites 1-5
1. On the Edit Favorites screen, select a favorite list using b (Change Fav.)
button.
2. Move to favorite list, and then select the channel you want to delete.
◀
3. Press the { (Delete) button. The selected channel is deleted from Favorites
1-5.
NN If you want to change the favorite channel order, press the a (Change
order) button and change the order using the ▲/▼ buttons.
English
▶
NN Using the colored and function buttons with Edit Favorites.
●● a Red (Category / Change order)
–– Category: Changes the channel mode to All, Added Ch., Recently
Viewed, or Mostly Viewed, and then displays the selected channel
mode.
–– Change order: Changes the favorite channel order.
–– E (Done): Completes changing the channel order.
◀
●● b Green (Change Fav.): Changes the displayed favorite list.
●● { Yellow (Add / Delete)
–– Add: Adds selected channels to Favorites 1-5.
–– Delete: Deletes a favorite channel from Favorites 1-5.
●● } Blue (Select All / Deselect All): Selects or deselects all channels at
once.
English
▶
●●
(Go To): Goes directly to a channel when you press channel
numbers (0~9).
●● k (Page): Moves to next or previous page.
●● T (Tools): Displays the option menu. The option menu items that appear
may differ depending on the channel status and type.
–– Copy to Favorites: Edits the selected favorite channel in Favorites
1-5. You can add to or delete from favorite lists.
◀
––
––
––
––
Rename Favorites: Lets you assign names to favorite channels.
Antenna: Selects the broadcasting signal, air or cable.
Edit Channel: Go to Edit Channel screen directly.
Information: Displays details of a selected program.
English
▶
❑❑ Blocking Programs
■■ Program Rating Lock
OO MENUm → Broadcasting → Program Rating Lock → ENTERE
Prevent unauthorized users, such as children, from watching unsuitable programs.
Access blocked programs when you enter the default or a user defined 4-digit
PIN code.
◀
NN The PIN input screen appears before the setup screen appears.
NN Enter a 4-digit PIN. The default PIN is 0-0-0-0. Change the PIN using the
Change PIN option.
●● Program Rating Lock: When On, lets you block TV programs based on their
ratings.
English
▶
TV Rating: Lets you block TV programs based on their ratings. This function
allows you to control which TV programs your children can watch. TV Rating
displays a grid with locks. The following categories are on the left side:
–– TV-Y: Young children / TV-Y7: Children 7 and over / TV-G: General
audience / TV-PG: Parental guidance / TV-14: Viewers 14 and over / TVMA: Mature audience
The following categories are on top:
–– ALL / FV: Fantasy violence / V: Violence / S: Sexual situation / L: Adult
◀
Language / D: Sexually Suggestive Dialog
To block certain content, you select a lock, and press ENTERE (That
is, you “click it”.). For example, click the lock at the intersection of V and
TV-MA, and you block all programs that are rated violent and for mature
adults. The locks are also assigned to related groups. For example, if you
click TV-Y under ALL, then TV-Y7 will also automatically be blocked.
English
▶
Similarly, if you click TV-G under ALL, then all the categories in the young
adult group will be blocked (TV-G, TV-PG, TV-14 and TV-MA). The subratings (D, L, S, V) work similarly. So, if you block the L sub-rating in TVPG, then the L sub-ratings in TV-14 and TV-MA will automatically be
blocked.
NN To unblock a category, click the lock. To unblock all the categories in
a row, click the lock under ALL.
NN To watch a blocked program, you must enter the Security code when
◀
requested.
▶
English
Movie Rating (MPAA): You can block movies based on their MPAA rating.
The Motion Picture Association of America (MPAA) has implemented a rating
system that provides parents or guardians with advanced information on
which films are appropriate for children.
Movie Rating (MPAA) displays a column with locks and the following ratings
categories:
–– G: General audience (no restrictions). / PG: Parental guidance suggested.
◀
/ PG-13: Parents strongly cautioned. / R: Restricted. Children under 17
should be accompanied by an adult. / NC-17: No children under age 17. /
X: Adults only. / NR: Not rated.
English
▶
To block certain content, you select a lock, and press ENTERE (That
is, you “click it”.). For example, click the X lock and you block all X-rated
movies. The rating categories are also grouped so that clicking one
category blocks all the categories a parent would block along with it.
For example, if you block the PG-13 category, then R, NC-17 and X will
automatically be blocked also.
NN To unblock a category, click the lock.
◀
▶
English
Canadian English Rating: You can block TV programs based on their
Canadian English rating.
Canadian English Rating displays a column with locks and the following
ratings categories:
–– C: Programming intended for children under age 8. / C8+: Programming
◀
generally considered acceptable for children 8 years and over to watch
on their own. / G: General programming, suitable for all audiences. / PG:
Parental Guidance. / 14+: Programming contains themes or content
which may not be suitable for viewers under the age of 14. / 18+: Adult
programming.
English
▶
To block certain content, you select a lock, and press ENTERE (That
is, you “click it”.). For example, click the 18+ lock and you block all TV
programs rated 18+. The rating categories are also grouped so that
clicking one category blocks all the categories a parent would block along
with it. For example, if you block the G category, then PG, 14+ and 18+
will automatically be blocked.
NN To unblock a category, click the lock.
◀
▶
English
Canadian French Rating: You can block TV programs based on their French
Canadian rating.
Canadian French Rating displays a column with locks and the following
ratings categories:
–– G: General / 8 ans+: Programming generally considered acceptable for
◀
children 8 years and over to watch on their own. / 13 ans+: Programming
may not be suitable for children under the age of 13. / 16 ans+:
Programming is not suitable for children under the age of 16. / 18 ans+:
Programming restricted to adults.
English
▶
To block certain content, you select a lock, and press ENTERE (That is,
you “click it”.). For example, click the 18 ans+ lock and you block all TV
programs rated 18 ans+. The rating categories are also grouped so that
clicking one category blocks all the categories a parent would block along
with it. For example, if you block the 8 ans+ category, then 13 ans+, 16
ans+ and 18 ans+ will automatically be blocked also.
NN To unblock a category, click the lock.
◀
▶
English
Downloadable U.S. Rating: Parental restriction information you can use
while watching DTV channels.
NN NOTE
●● If information is not downloaded from the broadcasting station, the
◀
Downloadable U.S. Rating menu is deactivated.
●● Parental restriction information is automatically downloaded while you
watch DTV channels. It may take several seconds.
●● The Downloadable U.S. Rating menu is available for use after
information is downloaded from the broadcasting station. However,
depending on the information from the broadcasting station, it may
not be available for use.
English
▶
●● Parental restriction levels differ depending on the broadcasting
◀
station. The default menu name and Downloadable U.S. Rating
change depending on the downloaded information.
●● Even if you set the on-screen display to another language, the
Downloadable U.S. Rating menu will appear in English only.
●● Blocking one rating level will automatically block other categories that
deal with more sensitive material.
●● The rating titles (For example: Humor Level, etc.) and TV ratings (For
example: DH, MH, H, etc.) may differ depending on the broadcasting
station.
English
▶
❑❑ Other Features
■■ Channel Settings
OO MENUm → Broadcasting → Channel Settings → ENTERE
●● Fine Tune
(analog channels only)
◀
If the reception is clear, you do not have to fine tune the channel. This is done
automatically during the search and store operation. If the signal is weak or
distorted, fine tune the channel manually.
NN Fine tuned channels that have been saved are marked with an asterisk “*”
on the right-hand side of the channel number in the channel banner.
NN To reset the fine-tuning, select Reset.
English
▶
●● Clear Scrambled Channel
This function filters out scrambled channels after Auto Program is completed.
This process may take up to 20~30 minutes.
How to Stop the Clear Scrambled Channels Function
1. Press the ENTERE button to select Stop.
2. Press the l button to select Yes.
◀
3. Press the ENTERE button.
NN This function is only available in Cable mode.
English
▶
■■ Audio Options
OO MENUm → Broadcasting → Audio Options → ENTERE
●● Preferred Language
(digital channels only)
Use the ▲/▼ buttons to select a language, and then press ENTERE.
Digital-TV broadcasts can simultaneously transmit many audio tracks (for
example, simultaneous translations of the program into foreign languages).
◀
NN You can only select a language from among the ones being broadcast.
English
▶
●● Multi-Track Sound t
(analog channels only)
Select an option using the ▲/▼ buttons, and then press ENTERE.
Mono: Choose for channels that are broadcasting in mono or if you are
having difficulty receiving a stereo signal.
Stereo: Choose for channels that are broadcasting in stereo.
SAP: Choose to listen to the Separate Audio Program, which is usually a
foreign-language translation.
◀
NN Depending on the program being broadcast, you can listen to Mono,
Stereo, or SAP.
NN When the TV is tuned to a digital channel and you press the TOOLS
button, you can select a language from among the ones being broadcast.
English
▶
●● Visual Impaired
(digital channels only)
Adds a verbal description to the main audio to help the visually impaired.
◀
▶
English
■■ Caption t
(On-Screen Text Messages)
OO MENUm → Broadcasting → Caption → ENTERE
●● Caption: You can turn the caption function on or off. If captions are not
available, they will not be displayed on the screen.
NN The Caption feature does not work with devices connected to the TV
through the Component or HDMI input jacks.
◀
●● Caption Mode: You can select the desired caption mode.
NN The availability of captions depends on the program being broadcasted.
Default / CC1~CC4 / Text1~Text4: (analog channels only) The Analog
Caption function operates in either analog TV channel mode or when a signal
is supplied from an external device to the TV. (Depending on the broadcasting
signal, the Analog Caption function may or may not work with digital
channels.)
English
▶
Default / Service1~Service6 / CC1~CC4 / Text1~Text4: (digital channels
only) The Digital Captions function works with digital channels.
NN Service1~6 may not be available in digital caption mode depending on
the broadcast.
●● Digital Caption Options: (digital channels only)
Size: Options include Default, Small, Standard and Large.
Font Style: Options include Default and Styles 0 to 7.
◀
Font Color: You can change the color of the letters. Options include Default,
White, Black, Red, Green, Blue, Yellow, Magenta, and Cyan.
English
▶
Background Color: You can change the background color of the caption.
Options include Default, White, Black, Red, Green, Blue, Yellow, Magenta,
and Cyan.
Font Opacity: This adjusts the opacity of text. Options include Default,
Transparent, Translucent, Solid, and Flashing.
Background Opacity: This adjusts the opacity of the caption background.
Options include Default, Transparent, Translucent, Solid, and Flashing.
◀
Return to Default: This option sets Size, Font Style, Foreground Color,
Background Color, Foreground Opacity, and Background Opacity to their
defaults.
English
▶
NN NOTE
●● Digital Caption Options are available only when you can select
●●
●●
●●
●●
Default and Service1 ~ Service6 in Caption Mode.
The availability of captions depends on the program being broadcast.
The Default setting follows the standards set by the broadcaster.
You cannot set the Foreground and Background to the same color.
You cannot set both the Font Opacity and the Background Opacity
to Transparent.
◀
▶
English
❑❑ Changing the Preset Picture Mode
■■ Picture Mode t
OO MENUm → Picture → Picture Mode → ENTERE
Picture modes apply preset adjustments to the picture. Select a mode using the
▲/▼ buttons, and then press ENTERE.
NN When the TV is connected to a PC, you can only select Entertain and
◀
Standard.
●●
●●
●●
●●
●●
Dynamic: Suitable for a bright room.
Standard: Suitable for a normal room environment.
Natural for LED TV : Provides a display that is comfortable to the eye.
Movie: Suitable for watching movies in a dark room.
Entertain: Suitable for watching movies and games.
NN Entertain is only available when the TV is connected to a PC.
English
▶
❑❑ Adjusting Picture Settings
■■ Backlight for LED TV / Cell Light for PDP TV / Contrast / Brightness
/ Sharpness / Color / Tint (G/R)
OO MENUm → Picture → Cell Light → ENTERE
Your television has several options for adjusting picture quality. Select an option
using the ▲/▼/◄/► buttons, and then press ENTERE.
◀
NN NOTE
●● When you make changes to Backlight
/ Cell Light for PDP TV ,
Contrast, Brightness, Sharpness, Color or Tint (G/R), the OSD will be
adjusted accordingly.
English
for LED TV
▶
●● When the TV is connected to a PC, you can only make changes to
Backlight for LED TV / Cell Light for PDP TV , Contrast, Brightness, and
Sharpness.
●● You can adjust and store settings for each external device connected to
the TV.
●● Lowering picture brightness reduces power consumption.
◀
▶
English
■■ Picture Size t
OO MENUm → Picture → Picture Size → ENTERE
Picture Size provides various picture size and aspect ratio options. Select an
option using the ▲/▼/◄/► buttons, and then press ENTERE.
●● Picture Size: If you have a cable box or satellite receiver, it may have its own
set of screen sizes as well. However, we highly recommend you use your TV’s
16:9 mode most of the time.
16:9: Sets the picture to 16:9 wide screen mode.
◀
Zoom1: Magnifies the picture moderately. Cuts off the top and sides.
Zoom2: Magnifies the picture more than Zoom1.
Wide Fit: Enlarges the aspect ratio of the picture so it fits the entire screen.
English
▶
4:3: Sets the picture to 4:3 mode. For analog TV programs.
NN Do not set your TV to 4:3 format for a long time. The borders displayed
on the left and right, or top and bottom of the screen may cause image
retention (screen burn) which is not covered by the warranty.
Screen Fit: When your TV inputs HDMI (720p / 1080i / 1080p) or Component
(1080i / 1080p) signals, displays the full image without any cut-off.
◀
Smart View 1
for LED TV
: Reduces the original screen by 50%.
Smart View 2
for LED TV
: Reduces the original screen by 25%.
NN Note
●● Smart View 1 is enabled only in HDMI mode.
●● Smart View 2 is enabled only in DTV and HDMI modes.
English
▶
●● Position: Adjusts the picture position. Position is only available if Picture
Size is set to Zoom1, Zoom2, Wide Fit, or Screen Fit.
NN To use the Position function after selecting Zoom1, Zoom2 or Wide Fit,
follow these steps:
1. Select Position, and then press the ENTERE button.
2. Select the Position button, and then press ENTERE.
3. Press the ▲/▼ buttons to move the picture up or down.
◀
4. Press the ENTERE button.
NN If you want to reset the pictures to its original position, select Reset in the
Position screen, and then press ENTERE. The picture will be reset to
its default position.
English
▶
NN To use the Position function after selecting Screen Fit when connected
to an HDMI (1080i/1080p) or Component (1080i/1080p) source, follow
these steps:
1. Select Position, and then press the ENTERE button.
2. Select the Position button, and then press ENTERE.
3. Press the ▲/▼/◄/► buttons to move the picture.
◀
4. Press the ENTERE button.
NN If you want to reset the pictures to its original position, select Reset in the
Position screen, and then press ENTERE. The picture will be reset to
its default position.
English
▶
NN The picture size can vary depending on the input resolution when you
play content using Videos in Media Play.
NN HD (High Definition) is: 16:9 - 1080i/1080p (1920x1080) or 720p
(1280x720)
NN You can adjust and store settings for each external device you have
connected to an input on the TV.
NN Picture Sizes available by Input Source:
Input Source
◀
Picture Size
DTV (1080i, 1080p)
16:9, Wide Fit, 4:3, Screen Fit, Smart View 2
DTV (720p)
16:9, Wide Fit, 4:3, Smart View 2
DTV (480i, 480p)
16:9, Zoom1, Zoom2, 4:3, Smart View 2
ATV, AV
6:9, Zoom1, Zoom2, 4:3
Component (1080i, 1080p)
16:9, Wide Fit, 4:3, Screen Fit
Component (720p)
16:9, Wide Fit, 4:3
Component (480i, 480p)
16:9, Zoom1, Zoom2, 4:3
HDMI (720p, 1080i, 1080p)
16:9, Wide Fit, 4:3, Screen Fit, Smart View 1,
Smart View 2
English
▶
■■ PIP
OO MENUm → Picture → PIP → ENTERE
You can watch a program whose signal has passed through the TV’s tuner and
watch one external video source simultaneously. For example, if you have a cable
box connected to the Cable In jack, you can use PIP to watch programs from the
cable box and watch a movie from a Blu-ray player attached to the HDMI In jack.
NN NOTE
◀
●● For PIP sound, refer to the Sound Select instructions.
●● If you turn the TV off while watching in the PIP mode, the PIP function
is reset to off. When you turn your TV on, you must turn PIP on again to
watch in the PIP mode.
English
▶
●● You may notice that the picture in the PIP window becomes slightly
unnatural when you use the main screen to view a game or karaoke.
●● When Program Rating Lock is on, you cannot use PIP.
●● PIP Settings
The picture from the external video source will be in the main screen and
the picture from the TV’s tuner will be in the PIP sub-picture window.
Main picture
Sub picture
Component, HDMI
TV
◀
▶
English
●● PIP: Activate or deactivate the PIP function.
●● Antenna: Select either Air or Cable as the input source for the sub●●
●●
●●
●●
screen.
Channel: Select the channel for the sub-screen.
Size: Select a size for the sub-picture.
Position: Select a position for the sub-picture.
Sound Select: You can choose to listen to the sound from the Main
picture or the Sub picture.
◀
▶
English
❑❑ Changing the Picture Options
■■ Advanced Settings
OO MENUm → Picture → Advanced Settings → ENTERE
Advanced Settings are available in the Standard and Movie modes.
To use, select an option using the ▲/▼/◄/► buttons, and then press ENTERE.
NN When the TV is connected to a PC, you can only make changes to the White
◀
Balance and Gamma.
●● Dynamic Contrast: Adjusts the screen contrast.
●● Black Tone: Select the black level to adjust the screen depth.
●● Flesh Tone: Adjusts the amount of red in skin tones.
English
▶
●● RGB Only Mode: Displays the Red, Green and Blue color so you can make
fine adjustments to hue and saturation.
●● Color Space: Adjusts the range and variety of colors (the color gamut)
available to create images.
NN To adjust Color, Red, Green, Blue and Reset, set Color Space to
Custom.
●● White Balance: Adjusts the color temperature of the picture so that white
◀
objects look white (instead of, for example, slightly pink or slightly yellow) and
the overall color of the picture looks natural.
R-Offset / G-Offset / B-Offset: Adjusts each color’s (red, green, blue)
darkness.
R-Gain / G-Gain / B-Gain: Adjusts each color’s (red, green, blue) brightness.
Reset: Resets the White Balance to its default settings.
English
▶
●● 10p White Balance: Controls the white balance by adjusting the red, green,
and blue brightness over 10 specific intervals.
NN Available when the picture mode is set to Movie. The external input
(source) can be set to any input.
NN Some external devices may not support this function.
Interval: Select interval to adjust.
Red: Adjust the red level.
Green: Adjust the green level.
◀
Blue: Adjust the blue level.
Reset: Resets the 10p White Balance to its default settings.
●● Gamma: Adjusts the primary color intensity.
English
▶
●● Expert Pattern: By running the Expert Pattern function, you can calibrate
the picture without a generator or filter. If the OSD menu disappears or a
menu other than the Picture menu is opened, the TV saves the calibration
and the Expert Pattern window disappears.
NN While the Expert Pattern is running, the TV does not output sound.
NN Only enabled when you select a Component or HDMI source.
●● Motion Lighting: Reduces power consumption by reducing screen brightness
◀
when the picture on the screen is motionless.
NN This function is not supported in 3D mode.
NN When you change the Backlight
for PDP 4900 / LED 6100 series
/ Cell Light for PDP TV ,
Contrast, or Brightness, the TV sets Motion Lighting to Off.
NN Only available in Standard mode.
English
for LED TV
▶
■■ Picture Options
OO MENUm → Picture → Picture Options → ENTERE
Select an option using the ▲/▼/◄/► buttons, and then press ENTERE.
NN When the TV is connected to a PC, you can only make changes to Color
Tone.
●● Color Tone
NN Warm1 or Warm2 will be deactivated when the picture mode is
◀
Dynamic.
NN You can adjust and store settings for each external device connected to
an input on the TV.
English
▶
●● Digital Clean View: If the broadcast signal received by your TV is weak, you
can activate the Digital Clean View feature to reduce any static and ghosting
that may appear on the screen.
NN When the signal is weak, try each option in Digital Clean View until the
TV displays the best picture.
Auto Visualization: When you change from one analog channel to another,
displays the signal strength.
◀
NN Only available for analog channels.
NN When you press the INFO button, the TV displays the signal strength bar.
▶
NN When the bar is green, you are receiving the best possible signal.
●● MPEG Noise Filter: Reduces MPEG noise to provide improved picture
quality.
English
●● HDMI Black Level: Lets you select the black level on the screen to adjust the
screen depth.
NN Available only in HDMI mode (RGB signals).
●● Film Mode: Sets the TV so that it senses and then processes film signals
◀
from all sources automatically and adjusts the picture for optimum quality.
NN The Cinema Smooth function is only activated when an HDMI 24Hz
signal is inputted. for PDP TV
NN Available in TV mode and all external input modes which support SD (480i
/ 576i) and HD (1080i) signals except when connected to a PC.
NN If the screen does not seem natural, change the Film Mode option to
Off, Auto1, or Auto2.
English
▶
●● Auto Motion Plus
for LED 6100 series
: Enhances motion in fast moving scenes.
NN The info screen on your TV displays the resolution and frequency of the
incoming video signal (60Hz). This frequency is not the frequency of the
picture the TV is displaying when you have Auto Motion Plus on.
NN If noise occurs on the screen, please set Auto Motion Plus to Off.
If Auto Motion Plus is set to Custom, you can set Blur Reduction,
Judder Reduction, LED Clear Motion, or Reset manually.
Blur Reduction: Adjusts the blur reduction level of video from all sources.
◀
Judder Reduction: Adjusts the judder reduction level of video sources
playing movies.
LED Clear Motion: Optimizes the screen display for fast action scenes.
Reset: Restores settings to default values.
English
▶
●● Black optimizer
for PDP TV
: Deepens blacks on the screen and improves the
contrast ratio.
NN When the TV is connected to a PC, Black optimizer deactivated.
NN When the TV is operating other features, Black optimizer is deactivated.
(ex. Media Play, PIP)
◀
▶
English
■■ Picture Off
OO MENUm → Picture → Picture Off → ENTERE
The screen is turned off but the sound remains on. Press any button except the
volume button to turn on the screen.
◀
▶
English
■■ Reset Picture
OO MENUm → Picture → Reset Picture → ENTERE
Resets your current picture mode to its default settings.
◀
▶
English
❑❑ Changing the Preset Sound Modes
■■ Sound Mode
OO MENUm → Sound → Sound Mode → ENTERE
Use the ▲/▼ buttons to select an option, and then press ENTERE.
◀
●●
●●
●●
●●
●●
Standard: Selects the normal sound mode.
Music: Emphasizes music over voices.
Movie: Provides the best sound for movies.
Clear Voice: Emphasizes voices over other sounds.
Amplify: Increase the intensity of high-frequency sounds to allow a better
listening experience for the hearing impaired.
NN If Speaker Select is set to External Speaker, Sound Mode is disabled.
English
▶
❑❑ Adjusting Sound Settings
■■ Sound Effect
OO MENUm → Sound → Sound Effect → ENTERE
(standard sound mode only)
Use the ▲/▼ buttons to select an option, and then press ENTERE.
●● DTS TruSurround
◀
This function provides a virtual 5.1 channel surround sound experience
through a pair of speakers or headphones using HRTF (Head Related Transfer
Function) technology.
●● DTS TruDialog
This function allows you to increase the intensity of a voice over background
music or sound effects so that dialog can be heard more clearly.
English
▶
●● Equalizer
Use Equalizer to customize the sound setting for each speaker.
Balance: Adjusts the balance between the right and left speaker.
100Hz / 300Hz / 1kHz / 3kHz / 10kHz (Bandwidth Adjustment): Adjusts the
volume level of specific bandwidth frequencies.
Reset: Resets the equalizer to its default settings.
NN If Speaker Select is set to External Speaker, Sound Effect is disabled.
◀
▶
English
■■ 3D Audio
for PDP 4900 / LED 6100 series
OO MENUm → Sound → 3D Audio → ENTERE
3D audio technology that provides an immersive sound corresponding to the
effect of 3D video by utilizing audio depth control in perspective.
NN Available in only when the TV is displaying 3D images.
◀
▶
English
■■ Speaker Settings
OO MENUm → Sound → Speaker Settings → ENTERE
●● Speaker Select
If you are listening to the sound track of a broadcast or movie through an
external receiver, you may hear a sound echo caused by the difference in
decoding speed between the TV’s speakers and the speakers attached to
your audio receiver. If this occurs, set the TV to External Speaker.
◀
NN When you set Speaker Select to External Speaker, the TV’s speakers
are turned off. You will hear sound through the external speakers only.
When you set Speaker Select to TV Speaker, both the TV’s speakers
and the external speakers are on. You will hear sound through both.
English
▶
NN When Speaker Select is set to External Speaker, the VOLUME and
MUTE buttons will not operate and the sound settings will be limited.
NN If there is no video signal, both the TV’s speakers and the external
speakers will be mute.
●● Auto Volume
Normal equalizes the volume level on each channel, so that when you change
channels, the volume level is the same.
◀
Night equalizes and decrease the volume level on each channel, so each
channel is quieter. Night is useful at night, when you may want to keep the
volume low.
NN To use the volume control on a source device connected to the TV, set
Auto Volume to Off on the TV. Otherwise, there may be no change in the
volume when you adjust the volume control on the source device.
English
▶
■■ Digital Audio Out
OO MENUm → Sound → Digital Audio Out → ENTERE
Digital Audio Out outputs an uncompressed digital audio signal when you connect
the digital audio out jack on the back of the TV to a digital audio in jack on a
receiver or home theater.
●● Audio Format: You can select the Digital Audio output format. The available
◀
Digital Audio output format may differ depending on the input source.
NN By connecting the TV to a receiver or home theater with Dolby Digital
and 5.1ch speakers and selecting Dolby Digital, you can maximize your
interactive 3D sound experience.
English
▶
●● Audio Delay: Lets you correct timing mismatches between the audio track
and the video when you are watching the TV and listening to digital audio
output from the TV through an external device such as an AV receiver. When
you select Audio Delay, a slider appears. Use the ◄/► buttons to adjust the
slider, from 0ms ~ 250ms. Press ENTERE when done.
◀
▶
English
■■ Reset Sound
OO MENUm → Sound → Reset Sound → ENTERE
Reset all sound settings to the factory defaults. Select Reset Sound, press
ENTERE, select Yes in the pop-up, and then press ENTERE again.
◀
▶
English
❑❑ Executing initial setup
■■ Setup
OO MENUm → System → Setup → ENTERE
Configure the channels and set the time when you set up the TV for the first time
or when you reset the TV.
NN To execute the initial setup, follow the instructions displayed on the TV
◀
screen.
▶
English
❑❑ Setting the Time
■■ Time
OO MENUm → System → Time → ENTERE
NN The current time will appear every time you press the INFO button.
●● Clock: Set the clock to use the various timer features of the TV.
NN If you disconnect the power cord, you have to set the clock again.
◀
Clock Mode: Set the current time manually or automatically.
●● Auto: The TV sets the current time automatically using the time from a
digital channel.
NN You must have cable or an antenna connected to the TV to set the
time automatically.
●● Manual: Set the current time manually.
NN Depending on the broadcast station and signal, Auto may not set
the time correctly. If this occurs, set the time manually.
English
▶
Clock Set: Set the Date and Time.
Select Clock Set. Select Date or Time, and then press ENTERE. Use the
number buttons or the ▲/▼ buttons to enter numbers. Use the ◄/► buttons
to move from one entry field to the next. Press ENTERE when done.
NN Available only when Clock Mode is set to Manual.
DST: Switches the DST (Daylight Saving Time) function on or off.
NN This function is only available when the Clock Mode is set to Auto.
Time Zone: Select your time zone.
◀
NN This function is only available when the Clock Mode is set to Auto.
Time Offset for PDP 4900 series : Adjusts the time when your TV receives the
time information via Internet. Set the right time by selecting an offset.
NN The current time will be set through a network, if the TV fails to receive
the time information including the broadcast signal from TV stations. (ex:
Watching TV via set-top box, Satellite receiver, or etc)
English
▶
❑❑ Using the Sleep Timer
OO MENUm → System → Time → Sleep Timer → ENTERE
●● Sleep Timer t: Automatically shuts off the TV after a preset period of
time. (30, 60, 90, 120, 150 and 180 minutes).
NN Use the ▲/▼ buttons to select a period of time, and then press
ENTERE. To cancel the Sleep Timer, select Off.
◀
▶
English
❑❑ Setting the On/Off Timer
OO MENUm → System → Time → On Timer <or> Off Timer → ENTERE
Set On Timer so that your TV turns on automatically at a time and on a day of
your choosing.
●● On Timer: You can set up three separate On Timer configurations.
NN You must set the clock before you can use On Timer.
◀
Setup: Select Off, Once, Everyday, Mon~Fri, Mon~Sat, Sat~Sun or
Manual. If you select Manual, you can choose the days you want On Timer
to turn on your TV.
NN The c mark indicates days you’ve selected.
English
▶
Time: Set the hour, minute, am/pm. Use the number buttons or the ▲/▼
buttons to enter numbers. Use the ◄/► buttons to change entry fields.
Volume: Set the desired volume level. Use the ◄/► buttons to change the
volume level.
Source: To select the source of the content that will play when the TV turns
on. You can:
●● Select TV and have the TV display a specific air or cable channel.
●● Select USB and have the TV play back photo or audio files from a USB
◀
device.
●● Select a source on your TV to which you have connected a set-top box,
and have the TV display a channel from the set-top box.
NN The USB device must be connected to your TV before you can select
USB.
English
▶
NN If you select a source other than TV or USB, you must:
●● Have a cable or satellite set-top box attached to that source
●● Set the set-top box to the channel you want to watch when the TV
goes on
●● Leave the set-top box turned on.
NN When you select a source other than TV or USB, the Antenna and
Channel options will disappear.
Antenna (when the Source is set to TV): Select Air or Cable.
◀
Channel (when the Source is set to TV): Select the desired channel.
Music / Photo (when the Source is set to USB): Select a folder in the USB
device containing the music or photo files you want to play when the TV turns
on automatically.
English
▶
NN If there is no music file on the USB device or you don’t select a folder
containing a music file, the Timer function does not operate correctly.
NN If there is only one photo file in the USB, the Slide Show will not play.
NN A folder with a name that is too long cannot be selected.
NN Each USB device you use is assigned its own folder. When using more
◀
than one of the same type of USB device, make sure the folders assigned
to each USB device have different names.
NN We recommend that you use a USB memory stick or a multi card reader
when using On Timer.
NN The On Timer function may not work with USB devices that have a builtin battery, MP3 players, or PMPs made by some manufacturers because
these devices take a long time to be recognized.
English
▶
●● Off Timer: You can set up three separate Off Timer configurations.
NN You must set the clock before you can use Off Timer.
Setup: Select Off, Once, Everyday, Mon~Fri, Mon~Sat, Sat~Sun or
Manual. If you select Manual, you can choose the days you want Off Timer
to turn off your TV.
NN The c mark indicates days you’ve selected.
Time: Set the hour, minute, and am/pm. Use the number buttons or the ▲/▼
buttons to enter numbers. Use the ◄/► buttons to change entry fields.
◀
▶
English
❑❑ Economical Solutions
■■ Eco Solution
OO MENUm → System → Eco Solution → ENTERE
●● Energy Saving: Lets you adjust the brightness of the TV in order to reduce
◀
power consumption.
●● Eco Sensor: To enhance your power savings, the picture settings will
automatically adapt to the light in the room.
NN If you adjust Backlight for LED TV / Cell Light for PDP TV in the Picture
menu, Eco Sensor is set to Off.
English
▶
Min. Backlight for LED TV / Min Cell Light for PDP TV : When Eco Sensor is
On, lets you manually adjust the minimum screen brightness.
NN If Eco Sensor is On, the display brightness may change (become
slightly darker in most cases) depending on the surrounding light
intensity. You can control the screen’s minimum brightness with the Min.
Backlight for LED TV / Min Cell Light for PDP TV function.
●● No Signal Power Off : Sets how quickly the TV switches to standby mode if
◀
it is receiving no signal.
NN Disabled when an attached PC is in power saving mode.
●● Auto Power Off: The TV will automatically turn off if you don’t press a button
on the remote control or touch a button on TV’s front panel within 4 hours.
English
▶
❑❑ Other Features
■■ Menu Language
OO MENUm → System → Menu Language → ENTERE
Set the menu language.
1. Select Menu Language, and then press the ENTERE button.
◀
2. Choose a language, and then press the ENTERE button.
NN Choose English, Español, or Français.
English
▶
■■ Auto Protection Time
for LED TV
OO MENUm → System → Auto Protection Time → ENTERE
●● Auto Protection Time: If the screen remains idle with a still image for a certain
period of time defined by the user, the screen saver is activated to prevent the
formation of ghost images on the screen.
◀
▶
English
■■ Screen Burn Protection
for PDP TV
OO MENUm → System → Screen Burn Protection → ENTERE
To reduce the possibility of screen burn, this unit is equipped with Pixel Shift
screen burn prevention technology. Pixel Shift moves the picture slightly on
the screen. The Time function setting allows you to program the time between
movement of the picture in minutes.
Your TV has the following screen burn protection functions:
◀
●●
●●
●●
●●
Pixel Shift
Auto Protection Time
Scrolling
Side Gray
▶
English
●● Pixel Shift: Using this function, you can set the TV to move pixels minutely on
the PDP screen in a horizontal or vertical direction to minimize after images on
the screen.
NN Available Pixel Shift Settings and Optimum Settings
◀
Available Settings
Optimum Settings for TV/AV/
Component/HDMI
Horizontal
0~4 (pixels)
4
Vertical
0~4 (pixels)
4
Time (minute)
1~4 min
4 min
NN The Pixel Shift value may differ depending on the TV's size (in inches)
and the mode.
NN This function is not available in the Screen Fit mode.
●● Auto Protection Time: If the screen displays a still image for a certain period
of time you define, the TV activates the screen saver to prevent the formation
of burnt in ghost images on the screen.
English
▶
●● Scrolling: This function removes after-images on the screen by illuminating all
the pixels on the screen according to a pattern. Use this function when there
are after images or symbols on the screen, especially when you displayed a
still image on the screen for a long time.
NN The after-image removal function has to be executed for a long time
(approximately 1 hour) to remove after-images on the screen effectively.
If the after-image is not removed after you apply this function, apply the
function again.
NN Press any key on the remote control to cancel this feature.
◀
●● Side Gray: When you watch TV with the screen ratio set to 4:3, using the
Side Gray function can prevent damage to the edges of the screen by
adjusting the white balance on the extreme left and right sides.
English
▶
■■ Change PIN
OO MENUm → System → Change PIN → ENTERE
First, the PIN input screen appears. Enter the current or default PIN. Then, the
Change PIN screen appears. Choose any 4 digits for your PIN and enter them
in Enter New PIN. Re-enter the same 4 digits in Confirm New PIN. When the
Confirm screen appears, press the Close button. The TV has memorized your
new PIN.
NN Whenever you access the Change PIN function, the PIN input screen
◀
appears. Enter the current or default PIN.
NN The default PIN number for a new TV set is “0-0-0-0”.
NN If you forget the PIN code, press the remote control buttons in the following
sequence in Standby mode. This resets the PIN to “0-0-0-0” : MUTE → 8 →
2 → 4 → POWER (on)
English
▶
■■ General
OO MENUm → System → General → ENTERE
●● Game Mode: When you have connected a game console such as a
PlayStation™ or Xbox™ to the TV, you can enjoy a more realistic gaming
experience if you set Game Mode on.
NN NOTE
◀
●● Precautions and limitations for Game Mode:
–– Before disconnecting a game console and connecting another
external device, set Game Mode to Off.
–– If you display the TV menu in Game Mode, the screen shakes slightly.
English
▶
●● Game Mode is not available when you’ve set the input source to TV.
●● Set Game Mode to On only after connecting a game console. If you
turn Game Mode on before you have attached the game console, you
may notice reduced picture quality.
●● If Game Mode is On:
–– Picture Mode is set to Standard and Sound Mode is set to Movie.
●● Panel Lock: Lock or unlock all the keys on the panel.
●● Boot Logo: Enable/disable displaying the logo while the TV starts up.
◀
▶
English
■■ DivX® Video On Demand
OO MENUm → System → DivX® Video On Demand → ENTERE
Shows the registration code authorized for the TV. If you connect to the DivX
web site and register with 10-digit registration code, you can download the VOD
activation file. Once you play it using Media Play, the registration is completed.
NN For more information about DivX® VOD, visit “http://vod.divx.com”.
◀
▶
English
❑❑ Using the Source List
■■ Source List
OO MENUm → Applications → Source List→ ENTERE
NN When you press the SOURCE button, the Source screen is displayed at
once.
NN You can only choose external devices that are connected to the TV. In the
◀
Source list, connected inputs are highlighted.
NN For detailed information, refer to “Changing the Input Source” in the paper
User Manual.
English
▶
❑❑ Connecting a USB Device
1. Turn on your TV.
2. Connect a USB device containing photo, music, or movie files to the USB
port on the side of the TV.
3. A pop-up window appears. Select Photos, Videos, or Music, and then press
the ENTERE button.
◀
4. The Content screen appears, listing the contents of the device. Depending
on how the contents is arranged, you will see either folders, individual files, or
both.
5. If necessary, use the ▲/▼/◄/► buttons to select a folder, and then press the
ENTERE button.
English
▶
6. Select a file to view or play, and then press the ENTERE button.
7. For information about controlling playback, go to "Using Media Play" in the
e-Manual.
8. Press the RETURN button to exit a current screen and go to the previous
screen. Press the EXIT button to exit to the TV screen.
9. To disconnect the USB device, go to Disconnecting a USB Device in the
e-Manual.
◀
NN Even though the player will display folders for all Content Types, it will only display
files of the Content Type (Photos, Videos, or Music) you selected in Step 3. For
example, if you selected Music, you will only be able to see music files. You can
change this by pressing the RETURN button until you are back at the Content
Type Selection screen, and then selecting the Content Type (Photos, Videos, or
Music) again.
English
▶
NN The TV may not be able to play unlicensed multimedia files properly.
NN What you need to know before using a USB Device.
●● MTP (Media Transfer Protocol) is not supported.
●● Supported file systems are FAT and exFAT.
●● Certain types of USB Digital camera and audio devices may not be
◀
compatible with this TV.
●● The TV only supports sequential jpeg format.
●● The TV only supports USB Mass Storage Class (MSC) devices. MSC is a
Mass Storage Class Bulk-Only Transport device. Examples of MSCs are
Thumb drives and Flash Card Readers. USB HUBs are not supported.
Devices should be connected directly to the TV’s USB port.
English
▶
●● Before connecting your device to the TV, please back up your files to
●●
●●
●●
◀
●●
●●
●●
protect them from damage or loss of data. SAMSUNG is not responsible
for any data file damage or data loss.
The TV does not support HDDs (Hard Disk Drives) connected to the USB
port.
Do not disconnect the USB device while it is loading.
The higher the resolution of the image, the longer it takes to display on
the screen.
The maximum supported JPEG resolution is 15360 x 8640 pixels.
The TV displays the “Not Supported File Format”message when it encounters unsupported or corrupt files.
The USB Videos function does not support the scene search and
thumbnail functions.
English
▶
●● MP3 files with DRM that you have downloaded from a commercial site
●●
◀
●●
●●
●●
cannot be played. Digital Rights Management (DRM) is a technology that
supports the creation, distribution, and management of content in an
integrated and comprehensive way, including the protection of the rights
and interests of the content providers, the prevention of the illegal copying
of contents, as well as managing billings and settlements.
PTP connection mode is fully available only with digital cameras. When
connecting a smartphone or tablet to the TV using PTP mode, it may not
be recognized.
A USB device that requires high power (more than 500mA or 5V) may not
be supported.
If the TV receives no input during time set in Auto Protection Time, the
screen saver will run.
The power-saving mode of some external hard disk drives may be
released automatically when connected to the TV.
English
▶
●● If you use a USB extension cable, the TV may not recognize the USB
◀
device or may not be able to read the files on the device.
●● If a USB device connected to the TV is not recognized, the list of files on
the device is corrupted, or a file in the list is not played, connect the USB
device to a PC, re-format the device, and then copy the files onto the
device again.
●● If a file you deleted from your PC is still found on the USB device, reattach the USB device to your PC, delete the file, and then use the “Empty
the Recycle Bin” function on the PC to permanently delete the file.
●● If the number of files and folders saved on a USB storage device is over
approximately 4000, the files and folders may not appear and some
folders may not be opened.
English
▶
Disconnecting a USB Device
1. Press the SOURCE button.
2. Select the USB device, and then press the TOOLS button. The Tools menu
appears.
3. Select Remove USB, and then wait until the USB device is disconnected.
After the device is disconnected, remove the USB device from the TV.
NN To remove a USB device from the TV, we recommend that you use the
Remove USB function.
◀
▶
English
❑❑ Using Media Play
OO MENUm → Applications → Media Play → ENTERE
Enjoy photos, music, and movie files saved on a USB Mass Storage Class (MSC)
device.
1. Insert a USB device into the USB jack on the side of the TV.
2. Press the MEDIA.P button on your remote or select Media Play in the TV's
menu.
◀
3. The Content Type screen appears. Select Photos, Videos, or Music, and
then press the ENTERE button.
4. The Content screen appears, listing the contents of the device. Depending
on how the contents is arranged, you will see either folders, individual files, or
both.
English
▶
4. If necessary, use the ▲/▼/◄/► buttons to select a folder, and then press the
ENTERE button.
5. Select a file to view or play, and then press the ENTERE or ∂ button on
your remote.
6. For information about controlling playback, go to "Playing selected files" and
"Controlling Photo / Video / Music Playback" in the e-Manual.
7. Press the RETURN button to exit a current screen and go to the previous
screen. Press the EXIT button to exit to the TV screen.
◀
8. To disconnect the USB device, go to "Disconnecting a USB Device" in the
e-Manual.
English
▶
NN Even though the player will display folders for all Content Types, it will only display
files of the Content Type (Photos, Videos, or Music) you selected in Step 3. For
example, if you selected Music, you will only be able to see music files. You can
change this by pressing the RETURN button until you are back at the Content
Type Selection screen, and then selecting the Content Type (Photos, Videos, or
Music) again.
◀
▶
English
Playing selected files (Creating a play list)
These instructions apply to all content, Photos, Videos, and Music.
1. On a screen displaying content, press the ▲ button to select Options at the
top right of the screen, and then select Play Selected.
2. Select the desired files.
NN A check appears to the left of each selected file.
NN Press the ENTERE button again to deselect the file.
◀
3. Press the ▲ button to select Play at the top of the screen, and then press
the ENTERE button. The files you selected play.
NN You can select or deselect all files by selecting Select All / Deselect All,
and then pressing the ENTERE button.
English
▶
❑❑ Controlling Photo / Video / Music Playback
When playing a video or photo file, press the ENTERE button to display the
playback controls. The playback controls for music are displayed at the bottom
left of the screen automatically when you play a music file.
NN If the option menu is not displayed, press the TOOLS button.
NN You can also use ∂/∑/∫/π/µ buttons on the remote control during
playback to control playback.
◀
NN If you press the INFO button during playback, you can view the playback
information.
English
▶
Playback controls
hesebuttonsappearonthebottomofthescreenwhenyoupresstheENTERE
T
buttonwhileplayingbackphotosorvideos.Somearedisplayedautomaticallywhen
youplayamusicfile.
Button
◀
Operation
Photos
Videos
Music
/
Previous / Next
●
/
Start Slide Show / Stop Slide Show
●
Play / Pause
Mini Player*
●
●
/
Previous / Next
Mini Player*
●
●
/
Rewind / Fast forward
●
●
*WhenyousetBackground MusictoMini PlayerinPhotos,thesebuttonsappear.
English
▶
Content Settings buttons
●
Photos
hesebuttonsappearonthebottomofthescreenwhenyoupressthe
T
ENTEREbuttonwhileplayingbackphotos.
Button
◀
Operation
Slideshow Settings
YoucansettheSpeedandEffectsduringtheslideshow.
Zoom
Youcanzoominto(enlarge)imagesinfullscreenmode.
Rotate
Youcanrotateimagesinfullscreenmode.
Background Music /
Mini Player
oucansetbackgroundmusicwhenwatchingaslideshow./
Y
Youcancontrolsimpleplaybackmenus.
Settings
Picture Mode / Sound Mode:Youcanselectthepictureor
soundmode(Dynamic,Standard,etc./Standard,Movie,etc.)
Information:Youcanseedetailedinformationaboutthefile
beingplayed.
English
▶
NN During a slide show, all files in the file list are displayed in order.
NN When you press the ∂ (Play) button (or ▲ button → Options → Slide
Show) on a screen displaying photos, the slide show starts immediately.
NN During the slide show, you can adjust the slide show speed using π (REW)
or μ (FF) button.
●● Supported Photo Formats
NN For the details, refer to “Specifications” in the paper user's manual.
◀
▶
English
●
Videos
hesebuttonsappearonthebottomofthescreenwhenyoupressthe
T
ENTEREbuttonwhileplayingbackvideos.
Button
Operation
Search
Search Titles:Youcanselectandstartothervideofilesdirectly.
Search Time bar:Youcansearchthevideousingthe◄and►
buttonsatoneminuteintervalorbyenteringatimevaluedirectly.
◀
N TheSearch Time barmaynotbesupporteddependingonthe
inputsource.
Repeat Mode
Youcanautomaticallyplaymoviefilesrepeatedly.
Picture Size
Youcanadjustthepicturesizetoyourpreference.
English
▶
Button
Operation
Settings
Subtitle Settings:Youcanplayavideowithsubtitles.Thisfunction
onlyworksifthesubtitleshavethesamefilenameasthevideo.For
example,Bats.mp4andBats.smi
Picture Mode / Sound Mode:Youcanselectthepictureorsound
mode(Dynamic,Standard,etc./Standard,Movie,etc.)
Audio Language:Youcanchangetheaudiolanguageifthevideohas
morethanonelanguage.
Information:Youcanseedetailedinformationaboutthefilebeing
played.
◀
▶
English
NN If video time information is unknown, play time and the progress bar are not
displayed.
NN In video playback mode, you can watch movie clips contained in a game, but
you cannot play the game itself.
●● Supported Subtitle / Video Formats
NN For the details, refer to “Specifications” in the paper user's manual.
◀
▶
English
●
Music
hesebuttonsappearautomaticallyonthebottomleftofthescreenwhenyou
T
playamusicfile.
Button
◀
Operation
Repeat
Youcanautomaticallyplaymusicfilesrepeatedly.
Shuffle
Youcanplaythemusicfilesrandomly.
Sound Mode
Youcanselectthesoundmode(Standard,Movie,etc.).
N TheTVonlydisplaysthefileswithsupportedmusicfileextensions.Otherfile ▶
extensionsarenotdisplayed,eveniftheyaresavedonthesameUSBdevice.
N Ifthesoundisabnormalwhenyouplaymusicfiles,adjusttheEqualizer
intheSoundmenu.(Anover-modulatedmusicfilemaycauseasound
problem.)
● SupportedMusicFormats
N Forthedetails,referto“Specifications”inthepaperuser'smanual.
English
Setting the Encoding language
Set the encoding language if the text you want to view does not appear correctly.
1. Press the ▲ button to select Options at the top of music main screen and
select Encoding.
2. Select the desired encoding language.
◀
▶
English
❑❑ Using the 3D function
for PDP 4900 / LED 6100 series
Viewing TV using the 3D function
IMPORTANT HEALTH AND SAFETY INFORMATION FOR 3D PICTURES.
Read and understand the following safety information before using the TV’s 3D
function.
[[WARNING
◀
●● Some viewers may experience discomfort while viewing 3D TV such as
dizziness, nausea and headaches. If you experience any such symptoms,
stop viewing 3D TV, remove the 3D Active Glasses and rest.
●● Watching 3D images for an extended period of time may cause eye
strain. If you feel eye strain, stop viewing 3D TV, remove your 3D Active
Glasses and rest.
English
▶
●● A responsible adult should frequently check on children who are using the
3D function. If there are any reports of tired eyes, headaches, dizziness,
or nausea, have the child stop viewing 3D TV and rest.
●● Do not use the 3D Active Glasses for other purposes (such as general
eyeglasses, sunglasses, protective goggles, etc.)
●● Do not use the 3D function or 3D Active Glasses while walking or moving
around. Using the 3D function or 3D Active Glasses while moving around
may result in injuries due to running into objects, tripping, and/or falling.
Before using the 3D function...
◀
●● 3D Active Glasses from Samsung’s previous product (IR type) or other
manufacturers are not supported.
●● After the TV is initially powered on, it may take some time until the 3D display
is optimized.
English
▶
●● The 3D Active Glasses may not work properly if there is any other 3D product
◀
or electronic devices turned on near the glasses or TV. If there is a problem,
keep other electronic devices as far away as possible from the 3D Active
Glasses.
●● Be sure to stay within the viewing angle and optimum TV viewing distance
when watching 3D pictures. Otherwise, you may not be able to enjoy proper
3D effects.
●● The ideal viewing distance is three times or more the height of the screen. We
recommend sitting with your eyes level with the screen.
●● If you can not play 3D videos on your Blu-ray player, take out the disk and
then put it in again, or restart the Blu-ray player.
English
▶
■■ 3D
OO MENUm → Picture → 3D → ENTERE
This exciting new feature enables you to view 3D content.
NN "Full HD 3D Glasses™" Logo indicates compatibility between display
products and 3D Glasses which are compliant with the "Full HD 3D
Glasses™" format, and does not indicate the picture quality of display
products.
◀
NN Some 3D modes may not be available depending on the format of the image
source.
NN When you watch 3D images under flickering lighting such as a fluorescent
lamp (50Hz ~ 60Hz ) or a 3 wavelength lamp, you may notice some screen
flickering. If this occurs, dim or turn off the light.
English
▶
●● 3D Mode
If you want to feel the 3D effect fully, please put on the 3D Active Glasses
first, and then select a 3D Mode from the list below that provides the best 3D
viewing experience.
3D Mode
Off
Operation
Off
Turns the 3D function off.
2D → 3D
Changes a 2D image to 3D.
NN Some file formats may not be supported.
◀
Side by Side
Displays two images next to each other.
Top & Bottom
Displays one image above another.
NN 3D Mode is set to Off automatically when you access Media Play or the
e-Manual functions.
NN 3D Mode is set to a memorized configuration value automatically when
you change the input source.
English
▶
●●
●●
●●
●●
3D Perspective: Adjust the overall 3D perspective of the on-screen image.
Depth: Adjust overall depth.
L/R Change: Swap the left and right pictures.
3D → 2D: Displays the image for the left eye only.
NN This function is deactivated when 3D Mode set to “
◀
” or “
Off
”.
▶
English
Supported resolutions (16:9 only)
●● HDMI
Source
/
Frame Packing
◀
Resolution
Frequency (Hz)
1280 x 720p
59.94 / 60 Hz
1920 x 1080i
59.94 / 60 Hz
1920 x 1080p
23.98 / 24 / 29.97 / 30 / 59.94 / 60 Hz
1280 x 720p
59.94 / 60 Hz
1920 x 1080i
59.94 / 60 Hz
1920 x 1080p
23.98 / 24 / 29.97 / 30 Hz
English
▶
●● Components & DTV
Source
Components
DTV
◀
Resolution
Frequency (Hz)
1280 x 720p
59.94 / 60 Hz
1920 x 1080i
59.94 / 60 Hz
1920 x 1080p
23.98 / 24 / 29.97 / 30 / 59.94 / 60 Hz
1280 x 720p
59.94 / 60 Hz
1920 x 1080i
59.94 / 60 Hz
●● Videos / Photos (In Media Play)
For the details, refer to “Specifications” in the paper user's manual.
English
▶
❑❑ Viewing the e-Manual
■■ e-Manual
OO MENUm → Support → e-Manual → ENTERE
You can read instructions that explain how to use the features of your TV.
NN For detailed information about using the e-Manual Screen, refer to “How to
view the e-Manual” in the paper user's manual.
◀
▶
English
❑❑ Using Self Diagnosis
■■ Self Diagnosis
OO MENUm → Support → Self Diagnosis → ENTERE
●● Picture Test: Use to check for picture problems. Picture test displays a high
◀
definition picture that you can examine for flaws or faults.
Yes: Select Yes if the test picture does not appear or there is noise or
distortion in the test picture. There may be a problem with the TV. Contact
Samsung’s Call Center for assistance.
No: Select No if the test picture displays properly. There may be a problem
with your external equipment. Please check your connections. If the problem
persists, refer to the external device’s user manual.
English
▶
●● Sound Test: Use to check for sound problems. Sound test plays a built-in
◀
melody that tests both speakers.
NN If you hear no sound from the TV’s speakers, make sure Speaker Select
is set to TV Speaker in the Sound menu and then try the speakers again
before performing the sound test.
NN You will hear the melody during the test even if you have set Speaker
Select to External Speaker or have muted the sound by pressing the
MUTE button.
Yes: Select Yes if you can hear sound from only one speaker or from neither
speaker during the sound test. There may be a problem with the TV. Contact
Samsung’s Call Center for assistance.
No: Select No if you can hear sound from the speakers. There may be a
problem with your external equipment. Please check your connections. If the
problem persists, refer to the external device’s user manual.
English
▶
●● Signal Information: (digital channels only) The reception quality of over-
the-air HD channels is either perfect or the channels are unavailable. Signal
Information displays HD channel signal strength so you can adjust your
antenna to increase signal strength and receive HD channels.
●● Reset: Reset all settings to the factory defaults except network settings.
NN The PIN input screen appears before the setup screen.
NN Enter your 4-digit PIN or the default PIN (0000) if you have not set your
◀
own PIN. You can change the PIN using the Change PIN option. (MENU
→ System → Change PIN → ENTERE)
English
▶
❑❑ Updating the Software
■■ Software Update
OO MENUm → Support → Software Update → ENTERE
The Software Update menu lets you upgrade your TV’s software to the latest
version.
Current ver.: This is the software version already installed in the TV.
◀
●● Update now: You can perform a Software Update by downloading the latest
firmware from www.samsung.com to a USB memory device, attaching the
device to your TV, and then selecting Update now.
English
▶
To upgrade the software, follow these steps:
1. Visit www.samsung.com.
2. Click SUPPORT on the top right of the page.
3. Enter the product's model number into the search field. As you enter the
model number, a drop down will display products that match the model
number.
4. Left click your product's model number in the drop down list.
◀
5. On the page that appears, scroll down to and then click Firmware
Manuals & Downloads.
6. Click Firmware in the center of the page.
7. Click the ZIP button in the File column on the right side of the page.
8. Click Send in the first pop-up that appears. Click OK in the second popup to download and save the firmware file to your PC.
English
▶
9. Unzip the zip archive to your computer. You should have a single folder
with the same name as the zip file.
10. Copy the folder to a USB flash drive.
11. In the product’s menu, go to Support → Software Update.
12. Select Update now.
13. The product searches for the software on the USB drive. When it finds the
software, the Update Request pop-up appears.
◀
14. Select OK. The product upgrades the software, turns off, and then turns
on automatically.
NN Be careful not to turn off the power until the update is complete. The TV will
turn off and on automatically after completing the firmware update. When you
update software, all video and audio settings you have made will return to
their default settings. We advise you to write down your settings so that you
can easily reset them after the update.
English
▶
❑❑ Changing the Use Mode
■■ Use Mode
OO MENUm → Support → Use Mode → ENTERE
Select the Use Mode suitable for the location in which you will use the TV. We
strongly recommend you select Home Use.
NN If your TV has been unintentionally set to Store Demo, you can change the
◀
mode with this option.
●● Home Use: Home Use is the default setting.
●● Store Demo: Store Demo is for retail environments only. If you select Store
Demo, some functions will not work and the picture settings will be reset
every 30 minutes.
English
▶
❑❑ Viewing Contact Samsung
■■ Contact Samsung
OO MENUm → Support → Contact Samsung → ENTERE
View this information when your TV does not work properly or when you want to
upgrade the software. You can find information about our call centers and how to
download products and software.
◀
▶
English
❑❑ Using the Sports Mode
■■ Sports Mode
OO MENUm → Applications → Sports Mode → ENTERE
This mode provides optimized settings for watching sports.
NN This functions is not available on U.S and Canada.
NN When the Sports Mode is On, the picture and sound modes are set to
◀
Stadium automatically.
NN If you turn the TV off while watching Sports Mode, the Sports Mode will be
disable.
English
▶
❑❑ Using the Wireless Network
for PDP 4900 series
Using a wireless router or modem and the Samsung Wireless LAN Adapter
(WIS09ABGNX, WIS12ABGNX), you can connect your TV to a wireless network.
NN For detailed information about the wireless network connection, refer to the
paper user's manual.
NN NOTE
◀
●● If the wireless router or modem supports DHCP, your TV can use a DHCP
or static IP address to connect to the wireless network.
●● Select a channel for the wireless router or modem that is not currently
being used. If the channel set for the wireless router or modem is currently
being used by another device nearby, this will result in interference and
communication failure.
English
▶
●● You must use the “Samsung Wireless LAN Adapter” (WIS09ABGNX,
◀
WIS12ABGNX) to connect the TV to a wireless network. The Samsung
Wireless LAN Adapter and the USB extension Cable are sold
separately and are offered by selected retailers, E-commerce sites, and
SamsungParts.com.
●● Your TV supports only the following wireless network security protocols.
–– Authentication Mode: WEP, WPAPSK, WPA2PSK
–– Encryption Type: WEP, TKIP, AES
●● If you select the HIGH PURE THROUGHPUT (Greenfield) 802.11n mode
and the Encryption type is set to WEP or TKIP in your wireless router,
Samsung TVs will not support a connection in compliance with new Wi-Fi
certification specifications.
●● If your wireless router supports WPS (Wi-Fi Protected Setup), you can
connect to the network via PBC (Push Button Configuration) or PIN
(Personal Identification Number). WPS will automatically configure the
SSID and WPA key in either mode.
English
▶
●● If your router, modem, or device is not certified, it may not connect to the
◀
TV via the “Samsung Wireless LAN Adapter”.
●● Connection Methods : You can setup the wireless network connection in
four ways:
–– Auto Setup (Using the Auto Network Search function)
–– Manual Setup
–– WPS(PBC)
–– Wi-Fi Direct
●● Ensure the TV is turned off before you connect the Samsung Wireless
LAN Adapter.
●● The TV may not recognize the Samsung Wireless LAN Adapter if it is
connected to the TV using a USB hub or USB extension cable other than
the cable supplied.
English
▶
How to connect the Samsung Wireless LAN Adapter
You can connect the LAN Adapter in one of two ways:
1 Connect the LAN Adapter using the USB right angle adapter.
2 Connect the LAN Adapter via the USB extension cable.
1
2
or
◀
English
▶
NN The picture may appear corrupted or have static for some channels when the TV
is connected to the Samsung Wireless LAN Adapter. In such a case, connect the
Samsung Wireless LAN Adapter using the USB extension cable. Put the Adapter
in a place where it does not affect the picture.
NN The position of the USB port may differ depending on the model.
◀
▶
English
■■ Network Status
OO MENUm → Network → Network Status → ENTERE
You can check the your TV's current network and Internet status.
■■ Network Settings
OO MENUm → Network → Network Settings → ENTERE
Set the network connection to use AllShare™.
◀
NN You can only use the Internet to share content via AllShare™.
English
▶
■■ Auto Network Setup
Most wireless networks have an optional security system that requires devices
that access the network to transmit an encrypted security code called an Access
or Security Key. The Security Key is based on a Pass Phrase, typically a word or a
series of letters and numbers of a specified length you were asked to enter when
you set up wireless security for your wireless network. If you use this method of
setting up the network connection, and have a Security Key for your wireless
network, you will have to enter the Pass Phrase during the setup process.
◀
NN When you connect the Samsung Wireless LAN Adapter for the first time, the
Network setup screen appears immediately.
1. In the TV's menu, go to Network Settings screen.
(Network → Network Settings)
English
▶
2. The Network function searches for available wireless networks. When done, it
displays a list of the available networks.
3. In the list of networks, press the ▲/▼ buttons to select a network, and then
press ENTERE button.
NN If the wireless router is set to Hidden (Invisible), you have to select Add
Network, and then enter the correct network name and Security key to
establish the connection.
◀
4. If the Enter security key screen appears, go to step 5. If you select a wireless
router that does not have wireless security, go to step 6.
English
▶
5. Enter the security key using ▲/▼/◄/► buttons, and then select Done.
NN You can also enter numbers by pressing the number buttons.
NN You should be able to find the Pass Phrase on one of the set up screens
you used to set up your router or modem.
6. The network connection screen appears, and network set up is done.
NN If the Security key you enter fails, select Retry or IP Settings.
NN If you want to set up the connection manually, select IP Settings. For
◀
detailed manual set up instructions, refer to "Manual Network Setup".
NN If you select Change Network, you can select other wireless networks.
English
▶
WPS(PBC) Wireless Setup
If your router has a WPS(PBC) button, follow these steps.
1. In the TV's menu, go to the Network Settings screen.
(Network → Network Settings)
2. The Network function searches for available wireless networks. When done, it
displays a list of the available networks.
3. Scroll through the list. Find, and then select WPS(PBC).
◀
4. Press the WPS(PBC) button on your router within 2 minutes. Your TV
automatically acquires all the network setting values it needs and connects to
your network.
5. The network connection screen appears, and network set up is done.
English
▶
■■ Manual Network Setup
Use the Manual Network Setup when connecting your TV to a network that
requires a Static IP address.
NN You can get the network connection values from you Internet provider.
How to set up manually
To set up your TV’s wireless network connection manually, follow these steps.
1. In the TV's menu, go to the Network Settings screen.
◀
(Network → Network Settings)
2. The network function searches for available wireless networks. When done, it
displays a list of the available networks.
3. In the list of networks, select a network you want to connect to.
–– If the wireless router is set to Hidden (Invisible), you have to select Add
Network and enter the correct Network Name (SSID) and Security Key to
establish the connection.
English
▶
4. If the Enter security key screen appears, go to step 5. If you select a wireless
router that does not have wireless security, go to step 7.
5. To set wireless security for the router, enter the Security Key.
–– Enter the Security Key using the keyboard pop-up screen and your
remote.
–– You should be able to find the Pass Phrase on one of the set up screens
you used to set up your router.
◀
6. When finished, select Done. The network connection screen appears and the
verification process starts.
7. Select Stop. The verification process stops. Select IP Settings on the
network connection screen. The IP Settings screen appears.
8 Select IP Setting, and then set IP Setting to Enter manually.
9. Go to the IP Address entry field, and then select IP Address using your
remote.
English
▶
10. Enter the first portion of the IP Address (for example, 105) into the first entry
field using your remote. When done, go to the next field.
11. Enter the next portion of the IP Address. When done, go to the next field.
12. Repeat the entry process for each field in the IP Address.
–– If you make a mistake when entering a number, re-enter the number to
correct it.
13. When done, go to the Subnet Mask fields.
◀
14. Repeat the same entry process for Subnet Mask, Gateway, and DNS
Server.
15. When done, select OK. The network connection screen appears and the
verification process starts. When the connection has been verified, the "Your
wireless network and Internet connection are setup and ready to use."
message appears.
English
▶
If Your TV Fails to Connect to the Internet
If your TV fails to connect to the Internet, read the information below and view the
troubleshooting guide on the following pages.
Your TV may not be able to connect to the Internet because your ISP has permanently
registered the MAC address (a unique identifying number) of your PC or modem, which it
then authenticates each time you connect to the Internet as a way of preventing unauthorized
access. As your TV has a different MAC address, your ISP can not authenticate its MAC
address, and your TV can not connect.
◀
To resolve this problem, ask your ISP about the procedures required to connect devices other
than a PC (such as your TV) to the Internet.
If your Internet service provider requires an ID or password to connect to the Internet, your
TV may not be able to connect to the Internet. If this is the case, you must enter your ID or
password when connecting to the Internet.
The internet connection may fail because of a firewall problem. If this is the case, contact your
Internet service provider.
If you cannot connect to the Internet even after you have followed the procedures of your
Internet service provider, please contact Samsung Electronics.
English
▶
Troubleshooting a wireless network connection failure
If the wireless network connection fails, try the following solutions:
Issue
Solutions and Explanations
Wireless network
connection failed.
• No wireless router selected. Go to Network Settings to select your
router.
Unable to connect to
wireless router.
• Check if the router is turned on, and if it is on, try turning it off and on
again.
• Check if you need to enter a security key to use the router.
◀
▶
English
Issue
IP auto setting failed.
Solutions and Explanations
• Try the following to set your IP address automatically or set your IP
address manually by selecting IP Settings.
- Ensure DHCP server is enabled on the router, and then unplug and
plug-in the router.
- Check if you need to enter a security key to use the router.
- Contact your Internet Service Provider for more information.
Unable to connect to
the network.
◀
• Check if your IP address is set correctly in IP Settings.
• Check if you need to enter a security key to use the router.
• Contact your Internet Service Provider for more information.
English
▶
Issue
Connected to your
local network, but
cannot connect to the
Internet.
Solutions and Explanations
• Make sure your Internet LAN cable is connected correctly to the LAN
port of the router.
• Check the DNS settings in IP Settings.
• If the problem persists, contact your Internet Service Provider to access
the Internet.
Network setup
• Confirm that your router is connected to the Internet.
complete, but cannot
• If the problem persists, contact your Internet Service Provider to access
connect to the Internet.
the Internet.
◀
▶
English
❑❑ Managing the Network Connected Devices
for PDP 4900 series
■■ Wi-Fi Direct
OO MENUm → Network → Wi-Fi Direct→ ENTERE
Use to connect the TV to wireless mobile devices. Using this function, you can
connect wireless mobile devices with your TV directly without a wireless router.
◀
NN You can use this function only when the Samsung Wireless LAN Adapter is
connected to the TV.
NN Wi-Fi Direct only supports the Media Play function.
NN Wi-Fi Direct may not be supported by your mobile device, depending on the
device.
English
▶
How to connect a device to your TV using the Wi-Fi Direct function
NN To use this function, you must turn on the Wi-Fi Direct function on your
device.
1. In the TV's menu, go to Wi-Fi Direct. The TV starts to search for devices.
(Network → Wi-Fi Direct)
2. Select a device from the list that the TV displays, and then press ENTERE
button.
◀
3. When the connection message appears on your device, allow it.
NN If you want to disconnect the device, select the connected device, and press
the ENTERE button to select Disconnect.
English
▶
■■ AllShare Settings
OO MENUm → Network → AllShare Settings → ENTERE
Lets you allow a network connected device such as a smartphone or tablet to
share content with or control the TV using an application downloaded to the
mobile device. For details on set up options, refer to the “Using the AllShare
Settings Functions”.
■■ Device Name
◀
OO MENUm → Network → Device Name → ENTERE
Change the TV’s name.
NN When selecting User Input, you can key in a name for your TV manually. Use
▲/▼/◄/► buttons to select characters, and then select Done.
English
▶
❑❑ Using the DLNA Functions (AllShare™)
for PDP 4900 series
Via your network, you can play videos, photos, and music saved on your mobile
phone or on other devices (such as your PC) through your TV, and control
playback using controls on the TV via the network.
NN NOTE
◀
●● This model only supports the DLNA function in AllShare™.
●● First, connect your TV to your network. For detailed network connection
instructions, refer to “Network Settings”.
●● For more information, visit “www.samsung.com” or contact the Samsung
call center. Mobile devices may need additional software installed. For
details, refer to each device’s user’s guide.
●● If your Samsung TV connects to a non-Samsung DLNA server, a
compatibility issue may occur during video playback.
English
▶
NN By connecting your Samsung TV to a network via AllShare™, you can use
Samsung’s original functions, controls, and capabilities as follows:
––
––
––
––
––
––
◀
Playback of various video formats (DivX, MP4, 3GPP, AVI, ASF, MKV, etc.)
Bookmark function (to resume video playback)
Auto-chaptering (scene navigation)
Digital content management
Compatibility with various subtitle formats (SRT, SMI, SUB, TXT, TTXT)
And many others
NN To use Samsung's original DLNA functions fully, we recommend that you use ▶
the AllShare™ software provided with your TV.
English
Playing the media contents saved on the devices
1. Connect a mobile phone or another device which supports AllShare™ to your
network, and then select and play a media file on the device. A popup screen
appears on the bottom of your TV.
2. Select Allow to accept the connected device. The media contents of the
device can now be played on your TV.
NN You can find the allowed devices on AllShare Settings.
◀
▶
English
Using the Media Play function, play the media contents of the devices connected
to your TV through AllShare™.
1. Press the MEDIA.P button to select Media Play.
2. Press ▲/▼ button to select the desired category (Videos, Photos, or
Music), and then press the ENTERE button.
3. When the DLNA device is selected, press the ENTERE button again.
4. Press the ▲/▼/◄/► button to select the desired file.
◀
5. Press the ENTERE button.
▶
English
NN NOTE
●● Contents may not play on your TV depending on their resolution and
format.
●● The ENTERE and ◄/► buttons may not work depending on the type
of media content.
●● Using the mobile device, you can control the media playback. For details,
refer to each device's user’s guide.
◀
▶
English
Using the AllShare Settings function
OO MENUm → Network → AllShare Settings → Content Sharing →
ENTERE
Shows a list of mobile phones or connected devices which have been set up with
this TV to use the AllShare Settings function.
NN The AllShare Settings function is available in all devices which support DLNA
DMC.
◀
●● Allow / Deny: Allows/Blocks the devices.
●● Delete: Deletes the devices from the list.
NN This function only deletes the name of the devices from the list. If the
deleted device is turned on or tries to connect to the TV, it may appear
on the list again.
English
▶
Connecting to a PC through your network
You can play pictures, music, and videos saved on your PC via a network
connection through your TV using Media Play.
NN If you want to use Media Play to play files saved on your PC through your
TV, you should download “AllShare PC Software” and the AllShare user's
manual from “www.samsung.com”.
1. Connect your TV to your network. For network connection instructions, refer
to "Network Settings".
◀
–– We recommend you locate both TV and PC in same subnet. The first 3
parts of the IP address of the TV and PC should be the same and only
the last part (the host address) should be changed. (e.g. IP Address:
123.456.789.***)
English
▶
2. Connect the PC on which you will install or have installed AllShare PC
software and your TV to the same network.
NN Functions that are not supported by Media Play when the TV is connected
to a PC through a network:
●● Background music when playing a slide show.
●● The π (REW) or µ (FF) button while a movie is playing.
◀
NN The DivX DRM, Multi-audio, embedded caption is not supported.
NN Make sure AllShare PC Software is permitted by the firewall program on your
PC.
English
▶
NN When you use Media Play through a network connection, depending on the
functions of the server:
●● The sorting method may vary.
●● The π (REW), µ (FF) or ∑ (Pause) buttons may not work depending
on the content information.
NN When you play video through a network, the video may not run depending
on the network status. Also, when you play video over a network connection,
the video may not play smoothly.
◀
English