1
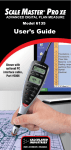
SCALE MASTER PRO
®
Introduction
The Scale Master Pro Multi-Scale Digital Plan
Measure has been specifically designed to
simplify takeoffs from architectural and
engineering drawings.
•
Finds linear measurements of any
shape
•
Finds rectangular areas and volumes
•
Converts between scales and
dimensions
•
Built-in push button counter
•
Subtract function
•
Six Custom Scales that let you define
and roll in any scale
TABLE OF CONTENTS
Getting Started
Key Definitions ................................................1
Operation Keys .............................................1
Setup Keys .....................................................3
Measuring Keys .............................................5
Function Keys ...............................................6
Using the Scale Master Pro
Adjusting the Wheel.........................................7
Preferences ........................................................8
Imperial/Metric Modes ................................ 10
Built-In Scales ................................................ 10
Imperial (Standard) Units ......................... 10
Metric Units ................................................ 11
Changing Modes ............................................ 11
Changing Scales ............................................. 12
Changing Units .............................................. 12
Locking Modes, Scales and Units ............... 12
Operation ....................................................... 13
Rolling a Measurement ................................. 14
Using the Memory Function ...................... 15
Additional Memory Functions................. 16
Programming Mode ...................................... 17
Setting Custom Scales ................................... 18
Rolling a Custom Scale.............................. 18
Entering a Custom Scale........................... 19
Setting a Height ............................................. 21
Finding Area and Volume ............................ 22
Finding Area ............................................... 22
Finding Volume.......................................... 22
Additional Area/Volume Functions ....... 23
Appendix
Error/Auto-Range Function ....................... 24
Interference .................................................... 24
Battery/Automatic Shut-Off ...................... 25
Battery Replacement ..................................... 25
Default Settings ............................................. 26
Specifications ................................................. 27
Repair and Return ......................................... 28
Warranty.......................................................... 29
FCC Class B ................................................... 30
Looking for New Ideas ................................ 30
Contact Us...................................................... 31
GETTING STARTED
Key Definitions
Operation Keys
[ON/CLEAR] – On/Clear
Turns power on. Press once to clear the
display. This will not clear the last rolled
measurement as it is a permanent value
and can be recalled to the main display at
any time by pressing [RCL] [RCL].
[SET] [ON/CLEAR] – Off
Turns power off. Turning power off clears
the display and semi-permanent values
(length, width, count). All permanent
values and settings, such as modes, scales
and units, remain intact. Holding down
the [ON/CLEAR] key for 2 seconds also
powers the unit off.
[ON/CLEAR] + [MODE] – Clear All
Clears all values, including memory.
Resets all permanent settings except
Preferences.
[SET] [ON/CLEAR] to turn the device off,
then [MODE] + [ON/CLEAR] –
Software Reset
Clears all values, including memory.
Resets all permanent settings, including
Preferences.
1 – Scale Master ® Pro
[RESET] – Hardware Reset
If your Scale Master Pro should ever “lock
up,” use a paperclip or similar size object
to press the RESET hole. Clears all values,
including memory. All permanent settings,
including Preferences, remain intact.
[SET] – Set Key
Used with other keys to access second
functions and place the Scale Master Pro into
programming mode. If in programming
mode already, pressing [SET] will store
the displayed value and exit programming
mode. A press of [SET] after rolling locks
the measurement. While locked, the
displayed value will not be affected by
rolling the Scale Master Pro. A second press
of [SET] will unlock the measurement.
[RCL] – Recall Key
Used to recall stored values. When you
press [RCL] [RCL], the last value rolled
is displayed, allowing roll to continue
from this value. Recalling any other value
disables measuring until the recalled value
is cleared with a press of [ON/CLEAR].
[IMP/MET] – Imperial/Metric Switch
Toggles between Imperial and Metric
modes.
User’s Guide – 2
[LOCK] – Lock Switch
The Lock Switch is located on the side
of the unit. When the lock is activated, a
lock symbol will be displayed in the LCD.
While active you cannot alter Scales,
Modes, Units, Preferences or the IMP/
MET (Imperial/Metric) switch. You also
cannot perform a Clear All or a Software
Reset. It is advised to use the Scale Master
Pro in the locked position unless you are
specifically setting or changing a setting.
Setup Keys
[MODE] – Mode Selection
Repeated presses of [MODE] will
scroll through the available modes. See
“Changing Modes” section.
[SUB] + [MODE] – Scroll Back Modes
Holding [SUB] and repeated presses of
[MODE] will scroll backward through the
available modes.
[SCALE] – Scale Selection
Repeated presses of [SCALE] will
scroll through the available scales. See
“Changing Scales” section.
[SUB] + [SCALE] – Scroll Back Scales
Holding [SUB] and repeated presses of
[SCALE] will scroll backward through the
available scales.
3 – Scale Master ® Pro
[UNITS] – Unit Selection
Repeated presses of [UNITS] will
scroll through the available units of
measurement. See “Imperial Units” and
“Metric Units” sections.
[SUB] + [UNITS] – Scroll Back Units
Holding [SUB] and repeated presses of
[UNITS] will scroll backward through the
available units.
[SET] [MODE] – Preferences
Accesses the preference settings. See
“Preferences” section.
[W] ([LxW]) – Left Arrow
Moves to the left when setting values
for custom scales and height. Will scroll
back through available settings within the
preferences.
[X] ([M+]) – Right Arrow
Moves to the right when setting values
for custom scales and height. Will scroll
forward through available settings within
the preferences.
[T] ([RCL]) – Down Arrow
Decreases the number when setting values
for custom scales and height. Will scroll
down through the preferences.
[S] ([COUNT]) – Up Arrow
Increases the number when setting values
for custom scales and height. Will scroll up
through the preferences.
User’s Guide – 4
Measuring Keys
[LxW] – Length/Width/Area
Enters the displayed measurement as
length. Once a length is entered, enters a
second measurement as width and displays
the total area. Repeated presses will scroll
through the following results:
1)
2)
3)
4)
5)
Area
Volume (if Height is entered)
Stored Height (if Height is entered)
Stored length
Stored width
[RCL] [LxW] – Length/Width Recall
Displays the length value. Additional
presses of [LxW] will display the width,
area, and volume values. On a clear display,
[LxW] can be pressed without [RCL].
[ON/CLEAR] + [LxW] –
Length/Width Clear
Clears the length and width.
[SET] [LxW] (H) – Height Set
Enters the height setting mode. See the
“Setting a Height” section.
[RCL] [SET] [LxW] – Height Recall
Displays the stored height value.
5 – Scale Master ® Pro
Function Keys
[M+] – Memory Plus
Adds the displayed value to the
accumulative value.
[RCL] [M+] – Memory Recall
Displays the value stored in accumulative
memory.
[ON/CLEAR] + [M+] – Memory Clear
Clears the accumulative memory value.
[SET] [M+] (M-) – Memory Minus
Subtracts the displayed value from the
accumulative memory. [SUB] + [M+] will
perform the same function.
[COUNT] – Count
Increases the count value by one.
[SUB] + [COUNT] – Count Subtract
Decreases the count value by one.
[RCL] [COUNT] – Count Recall
Displays the count value in the main
display.
[ON/CLEAR] + [COUNT] – Count Clear
Clears the count value.
[SUB] – Subtract Mode
Toggles subtract mode on and off. When
subtract mode is on, rolling forward or
backward will subtract from the displayed
measurement. Press [SUB] a second time
or press [ON/CLEAR] to turn subtract
mode off.
User’s Guide – 6
USING THE SCALE MASTER PRO
Rotate to Adjust Wheel
Adjusting the Wheel
The Celcon® polymer wheel can be adjusted
for each user’s preference. To adjust the
wheel, take a small, flat-head jeweler’s
screwdriver and slightly rotate the screw
located near the wheel tip. Rotating the
screw about 1/4 to 1/3 turn should be
sufficient. Rotating the screw within those
two values should adjust the wheel between
free spinning (which is too loose) to skidding
(which is too tight).
7 – Scale Master ® Pro
Preferences
Preferences allow customization of how
the Scale Master Pro functions during certain
operations. The following preferences are
available:
Button Beep (butn) – Toggles on or off
the beep sound that occurs at the press of a
button or during auto-count.
Beep, On
– Button beep on
Beep, Off
– Button beep off
Rolling Click (roll) – Toggles on or off the
clicking sound that occurs while rolling.
Clic, On
– Rolling click on
Clic, Off
– Rolling click off
Stored Value Display (Stor) – Toggles
whether the value remains displayed or is
cleared after being stored.
Clr Lcd
– Display cleared
No Clr
– Display not cleared
User’s Guide – 8
Setting Preferences:
1) Press [SET] [MODE] to access the
preferences.
2) Press the [COUNT] (S ) key to move
up or the [RCL] (T) key to move down
through the list of preferences.
3) When the preference to be changed is
displayed, press the [M+] (X ) key to
move forward or the [LxW] (W) key to
move backward through the settings for
the selected preference.
4) Once the desired setting is displayed,
press the [COUNT] (S ) or [RCL] (T )
key to move to another preference or
press [SET] to save and exit.
9 – Scale Master ® Pro
Imperial/Metric Modes
The Scale Master Pro is set up to use Imperial
(Standard) dimensional units by default. The
Scale Master Pro can be set to Metric Mode by
switching the IMP/MET switch to MET.
While in Metric mode, MET will remain lit
in the display.
Built-In Scales
Imperial (Standard) Units
Architect
ARCH
1 foot=
Engineer-I
ENGI
1 inch=
Engineer-II
ENGII
1 inch=
1/4”
3/8”
1/2”
3/4”
1/1 (1”)
3/2 (11/2”)
2/1 (2”)
3/1 (3”)
4/1 (4”)
1/32”
1/16”
3/32”
1/8”
3/16”
10.0’
20.0’
30.0’
40.0’
50.0’
60.0’
83.3’
100.0’
166.6’
200.0’
250.0’
300.0’
333.3’
400.0’
416.6’
500.0’
583.3’
600.0’
625.0’
666.6’
750.0’
1,000.0’
1,200.0’
2,000.0’
3,000.0’
User’s Guide – 10
Metric Units
Architect
ARCH
1:50
1:75
1:1
1:2
1:3
1:4
1:5
1:10
1:20
1:25
1:30
1:40
Engineer-I
ENGI
1:100.0
1:125.0
1:150.0
1:200.0
1:250.0
1:300.0
1:400.0
1:500.0
Engineer-II
ENGII
1:1,000
1:1,250
1:1,500
1:1,625
1:2,000
1:2,500
1:5,000
1:6,000
1:10k
1:12.5k
1:20k
1:25k
1:50k
Changing Modes
Repeated presses of the [MODE] key will
scroll through the list of available modes.
Holding [SUB] when pressing [MODE] will
scroll backward through the list of available
modes.
11 – Scale Master ® Pro
Changing Scales
Repeated presses of the [SCALE] key will
scroll through the list of available scales.
Holding [SUB] when pressing [SCALE] will
scroll backward through the list of available
scales.
Changing Units
Repeated presses of the [UNITS] key will
scroll through the list of available units.
Holding [SUB] when pressing [UNITS] will
scroll backward through the list of available
units.
Locking Modes, Scales and Units
Your Scale Master Pro comes equipped with
a lock switch that prevents inadvertently
changing drawing scales. When the lock is
activated, a lock symbol will be displayed in
the LCD. While active, the Mode, Scale and
Units cannot be revised.
User’s Guide – 12
Operation
13 – Scale Master ® Pro
Rolling a Measurement
To take a measurement with the Scale Master
Pro:
1) Turn the unit on. If the display does not
show zero (0), press the [ON/CLEAR]
key to clear the display.
2) Select your type of scale by pressing the
[MODE] key. Then press the [SCALE]
key to select your scale.
3) Begin rolling. The display will register
your measurements. When you roll the
unit, be sure to hold the unit upright
(see the first picture in the "Operation"
section).
Also make sure you start and stop at
the exact points you are measuring.
Otherwise your roll may not be
accurate (see the second picture in the
"Operation" section).
4) Press the [ON/CLEAR] key to clear the
display and begin a new measurement.
User’s Guide – 14
Using the Memory Function
The Memory function allows you to add
rolled or counted values. However, you
cannot add dimensioned (rolled) and nondimensioned (counted) values together.
To add rolled values:
1)
Roll the first value.* Press [M+]. The
Memory indicator “M” appears and the
value is added to Memory.
2)
Roll the next value. Press [M+]. This
value is added to your previous value
stored in Memory.
3)
You can continue to add values using
the [M+] key. Press [RCL] [M+] to
review the total in Memory.
*Note: For count values, you must press the
[COUNT] key to count your value. Then press
[RCL] [COUNT] to move the count value to the main
display. Press [M+] to add this value to Memory.
See the "Function Keys" section for
additional memory functions.
15 – Scale Master ® Pro
Additional Memory Functions
[SET] [M+]
Subtracts the value in the main display
from the value stored in Memory.
[RCL] [M+]
Displays the total accumulated value in
Memory. Repeated presses of [M+] will
toggle between total accumulated value,
number of entries in Memory, and
average value of all entries in Memory.
[ON/CLEAR] + [M+]
Clears the Memory register.
User’s Guide – 16
Programming Mode
The Scale Master Pro allows you to pre-set
frequently used values, including:
● Custom Scales (3 Imp/3 Met)
●
Height value
To begin setting values, press the [SET] key
and then the desired key to be programmed.
The following keys are used in programming
mode:
[UNITS] Toggles through available units.
[M+] (X ) Advances the cursor to the
next place to the right.
[LxW] (W) Moves the cursor back to the
next place to the left.
[COUNT] (S ) Increases the selected
value.
[RCL] (T) Decreases the selected value.
[ON/CLEAR] Exits without saving any
changes.
[SET] Exits and saves changes.
17 – Scale Master ® Pro
Setting Custom Scales
You can store six Custom Scales: three in
Imperial Mode and three in Metric Mode.
You can set a custom scale two ways: by
“rolling in” a known distance or by entering
the exact distance.
Rolling a Custom Scale
1) Press [MODE] until # OPEN (# being
a number 1-3) appears in the scale box
display.
2) Press [SET] [SCALE]. “ROLL” will appear
in the main display.
3) Roll desired distance. “ROLLING” now
appears in the main display.
4) Press [SCALE]. The annunciator will
begin flashing “FT IN” for Imperial
Mode, “M” for Metric Mode.
5) To change the units of measurement,
press [UNITS] until your desired units
appear. Press the [M+] (X) or the [LxW]
(W ) key to begin setting the distance.
The selected digit will start flashing.
(cont’d)
User’s Guide – 18
(cont’d)
6) Press [COUNT] (S) to increase or [RCL]
(T) to decrease the selected digit. Press
the [M+] (X) key to move to the next
digit to the right or the [LxW] (W) key to
move back to the left.
7) Once the desired value has been entered,
press [SET] to store value and exit the
programming mode.
Note: Pressing [ON/CLEAR] will exit the
programming mode without saving any value as
the Custom Scale.
Entering a Custom Scale
1) Press [MODE] until # OPEN (# being
a number 1-3) appears in the scale box
display.
2) Press [SET] [SCALE]. “ROLL” will appear
in the main display.
3) Press [SCALE] again. The annunciator
will begin flashing “FT IN” for Imperial
Mode. The left-most digit flashes for
Metric Mode.
Note: If in Metric Mode, skip to Step 5.
19 – Scale Master ® Pro
4) To change the units of measurement,
press [UNITS] until your desired units
appear. Press the [M+] (X) or the [LxW]
(W ) key to begin setting the distance.
The selected digit will start flashing.
5) In Imperial mode, the scale will be one
inch equals the distance you entered. In
Metric mode, entered scales are direct
ratios.
6) Press [COUNT] (S) to increase or [RCL]
(T) to decrease the selected digit. Press
the [M+] (X) key to move to the next
digit to the right or the [LxW] (W) key to
move back to the left.
7) Once the desired value has been entered,
press [SET] to store value and exit the
programming mode.
Press [RCL] [SCALE] while in custom
mode to display the current custom
scale.
User’s Guide – 20
Setting a Height
The height function is used to enter a height
value for finding volume.
To set a height:
1) Press [SET] [LxW] to access the height
function. The appropriate annunciator
will begin flashing “FT IN ” for Imperial
mode or “M” for Metric mode. An “H”
will appear in the display.
2) To change the units of measurement,
press [UNITS] until your desired units
appear. Press the [M+] (X) or the [LxW]
(W ) key to begin setting the distance.
The selected digit will start flashing.
3) Press [COUNT] (S) to increase or [RCL]
(T) to decrease the selected digit. Press
the [M+] (X) key to move to the next
digit to the right or the [LxW] (W) key to
move back to the left.
4) Once the desired value has been entered,
press the [SET] key to save and exit.
21 – Scale Master ® Pro
Finding Area and Volume
The Scale Master Pro can calculate Area and
Volume once you have your values set for
Length, Width, and (for Volume) Height.
Finding Area
1)
Roll the first side and press the [LxW]
key to store as Length.
2)
Roll the second side and press [LxW] to
store as Width. The main display will
show the calculated Area.
Finding Volume
To access Volume after you have your values
set for Length, Width, and Height, repeatedly
press the [LxW] key. The following results
will display:
1) Stored Length
2) Stored Width
3) Area
4) Volume*
5) Height*
*Volume and Height do not display if a Height
has not been set.
22 – User’s Guide
Additional Area/Volume Functions
[RCL] [LxW]
Displays the value stored in the Length
register. Repeated presses of the [LxW]
key will toggle through additional outputs
including Width, Area, and if Height is
stored, Height and Volume.
[ON/CLEAR] + [LxW]
Clears the values stored as Length and
Width.
23 – Scale Master ® Pro
APPENDIX
Error/Auto-Range Function
Error Message – If you make an incorrect
entry (such as trying to add dimensioned
and non-dimensioned values together),
the Scale Master Pro will display the word
“ERROR.” Press [ON/CLEAR] to clear.
Auto Range Function – If the value is too
large to display in the selected units of
measurement, the answer will be displayed
in the next larger measurement units
instead of showing an error (for example:
“10,000,000 MM” cannot be displayed, so
“10,000 M” will be displayed instead).
Interference
Exposure to direct light or close proximity
to cell phones and other electronic devices
may cause interference with the Scale
Master Pro device and result in erroneous
measurements.
User’s Guide – 24
Battery/Automatic Shut-Off
The Scale Master Pro is powered by two 3-Volt
CR-2032 Lithium batteries (6 volts total). To
conserve battery power, the unit will shut
itself off if it is not used for 4-6 minutes.
Press the [ON/CLEAR] key to restore power.
All registers and settings remain intact,
including all temporary registers.
Battery Replacement
To replace the batteries:
(1) To remove battery
door, release snap lock in
slot and lift;
(2) Remove batteries and
replace with new batteries
positive side up.
(3) To replace the door,
slide it at an angle and
push down.
25 – Scale Master ® Pro
Default Settings
The following are the factory defaults of the
Scale Master Pro:
Settings
Mode
Scale
Custom Scales
Linear
Area
Volume
Length
Width
Height
Count
Subtract Mode
Preferences
Button Beep
Rolling Click
Stored Value Display
Default
Imperial
Default
Metric
ARCH
1/4"
1”:1”
FT IN
SQ FT
CU YD
0-0
0-0
0-0
0
Off
ARCH
1:50
1:1
MM
SQ M
CU M
0.00
0.00
0.00
0
Off
Default
On
On
Clear LCD
User’s Guide – 26
Specifications
Power Source:
Two 3-Volt CR-2032 lithium batteries.
Approximately 400 hours normal use.
Display Method:
LCD with commas, annunciators and zero
suppression.
Display Capacity (Main Display):
9,999,999 (7 digits)
Resolution/Accuracy:
.025 Inch/99.75%
Note: Based on start/stop point and scale
magnitude, users typically experience ± 2% - 3%
rolling error.
Dimensions:
7.2” x 1.8” x 0.4”
182mm x 45mm x 10mm
27 – Scale Master ® Pro
Repair and Return
Warranty, Repair and Return Information
Return Guidelines:
1.
Please read the Warranty in this User's
Guide to determine if your Calculated
Industries product remains under
warranty before calling or returning any
device for evaluation or repairs.
2.
If your product won't turn on, check the
batteries as outlined in the User's Guide.
3.
If you need more assistance, please go to
our website listed below
4.
If you believe you need to return
your product, please call a Calculated
Industries representative between the
hours of 7:00am to 4:30pm Pacific Time
for additional information and a Return
Merchandise Authorization (RMA).
Call Toll Free: 1-800-854-8075
Outside USA: 1-775-885-4900
www.calculated.com/warranty
User’s Guide – 28
Warranty
Warranty Repair Service — USA
Calculated Industries (“CI”) warrants this product against
defects in materials and workmanship for a period of one
(1) year from the date of original consumer purchase in the
U.S. If a defect exists during the warranty period, CI, at its
discretion, will either repair (using new or remanufactured
parts) or replace (with a new or remanufactured unit) the
product at no charge.
THE WARRANTY WILL NOT APPLY TO THE
PRODUCT IF IT HAS BEEN DAMAGED BY MISUSE,
ALTERATION, ACCIDENT, IMPROPER HANDLING
OR OPERATION, OR IF UNAUTHORIZED REPAIRS
ARE ATTEMPTED OR MADE. SOME EXAMPLES
OF DAMAGES NOT COVERED BY WARRANTY
INCLUDE, BUT ARE NOT LIMITED TO, BATTERY
LEAKAGE, BENDING, A “BLACK INK SPOT” OR
VISIBLE CRACKING OF THE LCD, WHICH ARE
PRESUMED TO BE DAMAGES RESULTING FROM
MISUSE OR ABUSE.
To obtain warranty service in the U.S., please go to the
website. A repaired or replacement product assumes the
remaining warranty of the original product or 90 days,
whichever is longer.
Non-warranty Repair Service — USA
Non-warranty repair covers service beyond the warranty
period, or service requested due to damage resulting from
misuse or abuse.
Contact Calculated Industries at the number listed above
to obtain current product repair information and charges.
Repairs are guaranteed for 90 days.
Repair Service — Outside the USA
To obtain warranty or non-warranty repair service for
goods purchased outside the U.S., contact the dealer
through which you initially purchased the product. If
you cannot reasonably have the product repaired in your
area, you may contact CI to obtain current product repair
information and charges, including freight and duties.
29 – Scale Master ® Pro
Disclaimer
CI MAKES NO WARRANTY OR REPRESENTATION,
EITHER EXPRESS OR IMPLIED, WITH RESPECT
TO THE PRODUCT’S QUALITY, PERFORMANCE,
MERCHANTABILITY, OR FITNESS FOR A
PARTICULAR PURPOSE. AS A RESULT, THIS
PRODUCT, INCLUDING BUT NOT LIMITED TO,
KEYSTROKE PROCEDURES, MATHEMATICAL
ACCURACY AND PREPROGRAMMED MATERIAL,
IS SOLD “AS IS,” AND YOU THE PURCHASER
ASSUME THE ENTIRE RISK AS TO ITS QUALITY
AND PERFORMANCE. IN NO EVENT WILL CI
BE LIABLE FOR DIRECT, INDIRECT, SPECIAL,
INCIDENTAL, OR CONSEQUENTIAL DAMAGES
RESULTING FROM ANY DEFECT IN THE
PRODUCT OR ITS DOCUMENTATION.
The warranty, disclaimer, and remedies set forth above are
exclusive and replace all others, oral or written, expressed
or implied. No CI dealer, agent, or employee is authorized
to make any modification, extension, or addition to
this warranty. Some states do not allow the exclusion or
limitation of implied warranties or liability for incidental
or consequential damages, so the above limitation or
exclusion may not apply to you. This warranty gives you
specific rights, and you may also have other rights, which
vary from state to state.
FCC Class B
This equipment has been tested and found to comply with the
limits for a Class B calculating device, pursuant to Part 15 of
the FCC Rules.
Looking for New Ideas
Calculated Industries, a leading manufacturer of specialfunction calculators and digital measuring instruments, is
always interested in new product ideas in these areas. If you
have a new product idea, please visit our "Bright Idea" page
at www.calculated.com/brightidea.asp. For suggestions
about improving this product or other products, please visit
us at www.calculated.com under "Contact Us". Thank You.
User’s Guide – 30
Contact Us
Mail
Calculated Industries, Inc.
4840 Hytech Drive
Carson City, NV 89706 U.S.A.
Phone
(775) 885–4900
Fax
(775) 885–4949
E-mail
[email protected]
World Wide Web
www.calculated.com
31 – Scale Master ® Pro
Software copyrighted and licensed to
Calculated Industries by
Scale Master Technologies, LLC, 2009.
User’s Guide copyrighted by
Calculated Industries, 2009.
Scale Master® and Calculated Industries®
are registered trademarks of
Calculated Industries, Inc.
ALL RIGHTS RESERVED
CALCULATED INDUSTRIES®
4840 Hytech Drive
Carson City, NV 89706 U.S.A.
1-800-854-8075 or 1-775-885-4900
Fax: 1-775-885-4949
E-mail: [email protected]
www.calculated.com
Designed in the U.S.A.
Printed in China
10/08
UG6025E-A