Download Royal Sovereign ARP-1314
Transcript
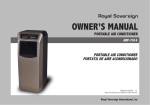
Owner’s Manual
ARP-1314
ARP-1314
portable air conditioner
ACONDICIONADOR DE AIRE PORTÁTIL
CONDITIONNE UR D' AIRE PORTABLE
Página en Español
17
Read and retain these instructions for future reference.
For any Customer Support needs, please choose the Support tab on
www.royalsovereign.com
Royal Sovereign International, Inc
portable air conditioner
ARP-1314
INTRODUCTION
Thank you for choosing Royal Sovereign to provide you and your family with all of the “Home Comfort” requirements for your home, apartment,
or office. This Portable Air Conditioner can be set-up in just minutes and can be easily moved from room to room. It is a multi-functional room
air comfort system that offers you Air Conditioning, Dehumidification and Air Circulation modes. This manual will provide you with valuable
information necessary for the proper care and maintenance for your new appliance. Please take a few moments and read the instructions
thoroughly. If properly maintained, your appliance will give you many years of trouble-free operation.
CONTENTS
Page
Precautions for use∙∙∙∙∙∙∙∙∙∙∙∙∙∙∙∙∙∙∙∙∙∙∙∙∙∙∙∙∙∙∙∙∙∙∙∙∙∙∙∙∙∙∙∙∙∙∙∙∙∙∙∙∙∙∙∙∙∙∙∙∙∙∙∙∙∙∙∙∙∙∙∙∙∙∙∙∙∙∙∙∙∙∙∙∙∙∙∙∙∙∙∙∙∙∙∙∙∙∙∙∙∙∙∙∙∙∙∙∙∙∙∙∙∙∙∙∙∙∙∙∙∙∙∙∙∙∙∙∙∙∙∙∙∙∙∙∙ 4
Identification of parts∙∙∙∙∙∙∙∙∙∙∙∙∙∙∙∙∙∙∙∙∙∙∙∙∙∙∙∙∙∙∙∙∙∙∙∙∙∙∙∙∙∙∙∙∙∙∙∙∙∙∙∙∙∙∙∙∙∙∙∙∙∙∙∙∙∙∙∙∙∙∙∙∙∙∙∙∙∙∙∙∙∙∙∙∙∙∙∙∙∙∙∙∙∙∙∙∙∙∙∙∙∙∙∙∙∙∙∙∙∙∙∙∙∙∙∙∙∙∙∙∙∙∙∙∙∙∙∙∙∙∙∙∙∙ 5
Installation instructions∙∙∙∙∙∙∙∙∙∙∙∙∙∙∙∙∙∙∙∙∙∙∙∙∙∙∙∙∙∙∙∙∙∙∙∙∙∙∙∙∙∙∙∙∙∙∙∙∙∙∙∙∙∙∙∙∙∙∙∙∙∙∙∙∙∙∙∙∙∙∙∙∙∙∙∙∙∙∙∙∙∙∙∙∙∙∙∙∙∙∙∙∙∙∙∙∙∙∙∙∙∙∙∙∙∙∙∙∙∙∙∙∙∙∙∙∙∙∙∙∙∙∙∙∙∙∙∙ 6~7
Operation∙∙∙∙∙∙∙∙∙∙∙∙∙∙∙∙∙∙∙∙∙∙∙∙∙∙∙∙∙∙∙∙∙∙∙∙∙∙∙∙∙∙∙∙∙∙∙∙∙∙∙∙∙∙∙∙∙∙∙∙∙∙∙∙∙∙∙∙∙∙∙∙∙∙∙∙∙∙∙∙∙∙∙∙∙∙∙∙∙∙∙∙∙∙∙∙∙∙∙∙∙∙∙∙∙∙∙∙∙∙∙∙∙∙∙∙∙∙∙∙∙∙∙∙∙∙∙∙∙∙∙∙∙∙∙∙∙∙∙∙∙∙∙∙∙ 8~11
Maintenance∙∙∙∙∙∙∙∙∙∙∙∙∙∙∙∙∙∙∙∙∙∙∙∙∙∙∙∙∙∙∙∙∙∙∙∙∙∙∙∙∙∙∙∙∙∙∙∙∙∙∙∙∙∙∙∙∙∙∙∙∙∙∙∙∙∙∙∙∙∙∙∙∙∙∙∙∙∙∙∙∙∙∙∙∙∙∙∙∙∙∙∙∙∙∙∙∙∙∙∙∙∙∙∙∙∙∙∙∙∙∙∙∙∙∙∙∙∙∙∙∙∙∙∙∙∙∙∙∙∙∙∙∙∙∙∙∙∙∙∙∙∙∙∙∙ 12
Troubleshooting∙∙∙∙∙∙∙∙∙∙∙∙∙∙∙∙∙∙∙∙∙∙∙∙∙∙∙∙∙∙∙∙∙∙∙∙∙∙∙∙∙∙∙∙∙∙∙∙∙∙∙∙∙∙∙∙∙∙∙∙∙∙∙∙∙∙∙∙∙∙∙∙∙∙∙∙∙∙∙∙∙∙∙∙∙∙∙∙∙∙∙∙∙∙∙∙∙∙∙∙∙∙∙∙∙∙∙∙∙∙∙∙∙∙∙∙∙∙∙∙∙∙∙∙∙∙∙∙∙∙∙∙∙∙∙∙∙∙∙∙ 13
Specifications∙∙∙∙∙∙∙∙∙∙∙∙∙∙∙∙∙∙∙∙∙∙∙∙∙∙∙∙∙∙∙∙∙∙∙∙∙∙∙∙∙∙∙∙∙∙∙∙∙∙∙∙∙∙∙∙∙∙∙∙∙∙∙∙∙∙∙∙∙∙∙∙∙∙∙∙∙∙∙∙∙∙∙∙∙∙∙∙∙∙∙∙∙∙∙∙∙∙∙∙∙∙∙∙∙∙∙∙∙∙∙∙∙∙∙∙∙∙∙∙∙∙∙∙∙∙∙∙∙∙∙∙∙∙∙∙∙∙∙∙∙∙∙∙ 14
Warranty∙∙∙∙∙∙∙∙∙∙∙∙∙∙∙∙∙∙∙∙∙∙∙∙∙∙∙∙∙∙∙∙∙∙∙∙∙∙∙∙∙∙∙∙∙∙∙∙∙∙∙∙∙∙∙∙∙∙∙∙∙∙∙∙∙∙∙∙∙∙∙∙∙∙∙∙∙∙∙∙∙∙∙∙∙∙∙∙∙∙∙∙∙∙∙∙∙∙∙∙∙∙∙∙∙∙∙∙∙∙∙∙∙∙∙∙∙∙∙∙∙∙∙∙∙∙∙∙∙∙∙∙∙∙∙∙∙∙∙∙∙∙∙∙∙∙∙∙∙∙∙ 15
Contact information∙∙∙∙∙∙∙∙∙∙∙∙∙∙∙∙∙∙∙∙∙∙∙∙∙∙∙∙∙∙∙∙∙∙∙∙∙∙∙∙∙∙∙∙∙∙∙∙∙∙∙∙∙∙∙∙∙∙∙∙∙∙∙∙∙∙∙∙∙∙∙∙∙∙∙∙∙∙∙∙∙∙∙∙∙∙∙∙∙∙∙∙∙∙∙∙∙∙∙∙∙∙∙∙∙∙∙∙∙∙∙∙∙∙∙∙∙∙∙∙∙∙∙∙∙∙∙∙∙∙∙∙∙∙∙ 16
Página en Español∙∙∙∙∙∙∙∙∙∙∙∙∙∙∙∙∙∙∙∙∙∙∙∙∙∙∙∙∙∙∙∙∙∙∙∙∙∙∙∙∙∙∙∙∙∙∙∙∙∙∙∙∙∙∙∙∙∙∙∙∙∙∙∙∙∙∙∙∙∙∙∙∙∙∙∙∙∙∙∙∙∙∙∙∙∙∙∙∙∙∙∙∙∙∙∙∙∙∙∙∙∙∙∙∙∙∙∙∙∙∙∙∙∙∙∙∙∙∙∙∙∙∙∙∙∙∙∙∙∙∙∙∙∙∙∙ 17
Precautions for use
Electrical Specifications and Power Cord
Check to ensure that the electrical service being used is adequate for the model you’ve chosen. The electrical rating of your new air conditioner is
defined on the serial plate of the unit. Please refer to the rating when checking electrical requirements to ensure they meet the electrical codes of
your location.
• Install the air conditioner according to the installation instructions supplied.
• Do not modify any part of this product.
• Do not insert any objects into the product or block the airflow in any way.
• Ensure that the power supply you use has an appropriate voltage rating.
• Only use a properly installed 3 pin, grounded AC socket that is rated 115V, 60Hz, 15 amps or more.
• If the electrical outlet you intend to use is not adequately grounded or protected by a time delay fuse or circuit breaker, you should have a
qualified electrician install the proper outlet.
• This unit uses a plug with a built-in fuse. Conduct a Power Plug Check (see page 8) before use to confirm normal operation.
• Do not use this unit with any extension cords or adapter plugs.
• If the cord or plug is damaged in any way, please call the Royal Sovereign Service Department ( see page 16.)
• Do not plug this cord into a loose electrical outlet.
• Turn the unit off and unplug, when cleaning the air conditioner, removing the filter or when the air conditioner will not be used for an extended time period.
General Use
• Do not block air outlets or intake with obstacles.
• Do not insert any objects into the air conditioner.
• Do not splash or pour water on the housing or control panel.
• Do not place heavy items or sit on unit.
• Make sure the drainage plug is installed on bottom of machine.
• Drain the unit when moving the air conditioner or when storing the unit.
4
ARP-1314
Identification of parts
1. Control panel
2. Air outlet
3. Handle
4. Caster wheel
5. Upper Air Filter
6. Air intake
7. Air Outlet
8. Upper Drain Outlet
9. Air intake
10. Lower Air Filter
11. Bottom tray drain outlet
12. Power cord outlet
A UTO
HEAT
FA N
DRY
COO
L
SWING
MODE
TIME F
R ON
TIME
R OFF
C
ION
SLEE
P
FA N
5
MED
L OW
HI
Installation
Unpack your New Portable Air Conditioner and let the machine stand upright for 2 hours before starting.
Unpack all parts listed below. If any parts are missing do not return this product to the place of purchase.
Please visit our website www.royalsovereign.com and click on the “Support” tab.
Accessories Include
1. Exhaust hose
2. Hose connector
3. Hose adapter
4. Window slider
5. Foam seal
6. Drainage hose
7. Remote control
Part 1: Exhaust hose, connector and adapter
1. Extend one end of the exhaust hose.
2. Take the hose connector and twist it counterclockwise onto one end of the exhaust hose.
3. Extend the opposite end of the exhaust hose.
4. Take the hose adapter and twist it counterclockwise onto the unused end of the exhaust hose.
Fig 1.
6
ARP-1314
Part 2: Attaching exhaust hose
1. Connect the hose connector to the air outlet by aligning the tabs on the hose to the PAC and snap it into place.
Part 3: Installing window slider kit
Fig 2.
1. Open the window and place the window slider on the inside edge of the window.
2. Adjust the window slider to the width of the window. For small width windows the inside slider may block the hole and need to be shortened using a plastic saw.
3. Insert a screw into the top of the window slider to secure it at the correct length.
4. Take window slider out and attach to exhaust hose by snapping the hose adapter into the hole on the window slider. Make sure that the tabs on the window slider are facing
outside.
5. Extend exhaust hose to desired length.
6. Place window slider and hose into the edge of the window.
7. Close window to secure slider.
8. Cut the foam seal to the window width and stuff the foam seal between the glass and the window.
Fig 3.
Fig 4.
7
Operation
Before Use
• Check to make sure the rubber drain plugs are securely plugged into the drain ports on the back of the unit to prevent water leaks
• Check to make sure that air conditioner has been properly vented out the window ( See Installation pg 7.)
• Check to make sure air conditioner is on a flat surface
• Conduct a Power Plug Check:
1. Press the RESET button on the power cord.
2. Plug cord into an electrical outlet.
3. Press the TEST button on the power cord. The RESET button should pop up.
4. Press the RESET button for use.
5. Do not use the air conditioner if the test fails. The green light on the power cord will turn on if the plug is working properly.
Note: If you turn the air conditioner off and immediately restart it, allow 3 minutes for the compressor to restart cooling.
In the event of a power failure, wait 3 minutes before restarting unit.
Control Panel
Buttons
Power button Timer button
Sleep mode button
Fan speed button
Mode button
Swing button
Temperature / Timer up button
Temperature / Timer down button
SWING
AUTO
HI
COOL
DRY
FAN
8
F
MODE
TIMER ON
C
TIMER OFF
MED
SLEEP
FAN
LOW
ARP-1314
Mode Descriptions
Selects the appropriate operating mode. Each time you press the button, a mode is selected in a sequence that goes from AUTO, COOL, DRY, FAN and HEAT(Only for models with
Heat function).
COOL mode
- Press the "MODE" button until the "COOL" indicator light comes on.
- Press the ADJUST buttons " " or " " to select your desired room temperature. The temperature can be set within a range of 62°F~88°F.
- Press the "FAN SPEED" button to choose the fan speed.
HEAT mode(Only for models with Heat function)
- Press the "MODE" button until the "HEAT" indicator light comes on.
- Press the ADJUST buttons " " or " " to select your desired room temperature. The temperature can be set within a range of 62°F~88°F.
- Press the "FAN SPEED" button to choose the fan speed. For some models, the fan speed can to cannot be adjusted under HEAT mode.
DRY mode
- Press the "MODE" button until the "DRY" indicator light comes on.
- Under this mode, you cannot select a fan speed or adjust the temperature. The fan motor operates at LOW speed.
- Keep windows and doors closed for the best dehumidifying effect.
- In DRY mode the unit does not need to be vented and you can connect a hose from the upper DRY mode drain outlet and drain water to a bucket for easy removal.
AUTO mode
- When you set the air conditioner in AUTO mode, it will automatically select cooling, heating(Only for models with Heat function), or fan only operation depending on what
temperature you have selected and the room temperature.
- The air conditioner will control room temperature automatically round the temperature point set by you.
- Under AUTO mode, you can not select the fan speed.
FAN mode
- Press the "MODE" button until the "FAN " indicator light comes on.
- Press the "FAN SPEED" button to choose the fan speed. The temperature cannot be adjusted.
9
TIMER operation
- When the unit is on, first press the Timer button, the TIMER OFF indicator light illuminates. It indicates the Auto Stop program is initiated.
- When the unit is off, first press the Timer button, the TIMER ON indicator light illuminates. It indicates the Auto Start program is initiated.
- Press or hold the UP or DOWN button to change the Auto time by 0.5 hour increments, up to 10 hours, then at 1 hour increments up to 24 hours. The control will count down the
time remaining until start.
- The selected time will register in 5 seconds and the system will automatically revert back to display the previous temperature setting.
- Turning the unit ON or OFF at any time or adjusting the timer setting to 0.0 will cancel the Auto Start/ Stop timed program.
- When the malfunction (E1 or E2) occurs, the Auto Start/Stop timed program will also be cancelled.
SLEEP operation
Press this button, the selected temperature will increase(cooling) or decrease(heating) by 2°F after 30 minutes. The temperature will then increase(cooling) or decrease (heating)
by another 2°F after an additional 30 minutes. This new temperature will be maintained for 7 hours before it returns to the originally selected temperature. This ends the Sleep
mode and the unit will continue to operate as originally programmed.
NOTE: This feature is unavailable under FAN or DRY mode.
Auto-Restart(on some models)
If the unit breaks off unexpectedly due to the power cut, it will restart with the previous function setting automatically when the power resumes.
Wait 3 minutes before resuming operation
After the unit has stopped, it cannot restart operation in the first 3 minutes. This is to protect the unit. Operation will automatically start after 3 minutes.
Air flow direction adjustment
The louver moves up at a 6° angle each time the SWING button is pressed until it moves to a position which would affect the cooling or heating effect of the air conditioner, it will
automatically change the swing direction.
If the SWING button is pressed for more than 2 seconds, the auto swing feature is activated.
10
ARP-1314
Remote Control
For first use: Remove the plastic from between the battery and the contacts.
To use: aim remote control at the sensor on the control panel
ON/OFF: Press to turn the unit on or off
Mode: Press to choose operation mode: Auto
Fan SPEED: Press to choose between Auto
/
Cool
Low
Dehumidify
Med
Fan
High fan speed
Temp: Press up or down to control room temperature or timer hours
ECONOMY: Press to set or cancel sleep mode operation
Timer ON/OFF: Press to set unit to automatically turn off or on with a timer
LED Display: Press this button to clear the display on the indoor unit, press it again to light the display.
SWING: Used to stop or start louver movement and set the desired up/down airflow direction.
RESET: Once the recessed RESET button is pressed, all of the current settings will be cancelled and the controller will return to the initial settings.
LOCK: Press this recessed button to lock all current settings, and the remote controller will not accept any operation except that of the LOCK.
Use the LOCK mode when you want to prevent settings from being changed accidentally.
Press the LOCK button again to cancel the LOCK function. A lock symbol will appear on
the remote controller display when the lock function is activated.
Remote Control Battery Installation
The remote controller is powered by two dry batteries housed in the rear part and protected by a cover.
1. Remove the cover by pressing and sliding off.
2. Remove the old batteries and insert the new batteries, placing the(+) and (-) ends correctly.
3. Reattach the cover by sliding it back into position.
NOTE: When the batteries are removed, the remote controller erases all programming.
After inserting new batteries, the remote controller must be reprogrammed.
11
Maintenance
Drainage
Occasionally, you may need to drain the unit. The LED display will show P1 when draining is necessary.
To drain:
1. Turn off the power to the unit and unplug.
2. Place a water tray under the drainage port to collect water.
3. Remove the rubber drainage plug.
4. Replace the plug, when drainage water stops flowing.
For continuous drainage into a floor drain:
1. Turn off the power to the unit and unplug.
2. Remove the rubber drainage plug from the upper drainage port
3. Attach the drainage hose to the secondary port.
4. Place other end of drainage hose into a floor drain.
5. Replace the rubber drainage plug after operation to prevent leaks.
Cleaning the filter
The filter should be cleaned about every 2 weeks to maintain proper airflow.
1. Turn off the power to the unit.
2. The upper air filter can be removed by pulling up from the top.
3. To remove the lower air filter, take out the 2 screws on the back and the 1 screw on the side.
4. Remove the filter.
5. Filter can be cleaned by a vacuum or soft cloth. If the filter is very dirty it can be washed with a mild
detergent and rinsed with water. Make sure filter is dry before replacement.
6. Replace filters and screws.
Note: Never run the unit without the filter in. The unit could be damaged.
12
ARP-1314
Cleaning the unit
1. Turn off the power to the unit and unplug.
2. Wipe down unit with a soft, dry, or damp cloth. A mild detergent can be used.
3. Never use a volatile substance such a gasoline or abrasive cleaners.
4. Do not splash water onto the unit.
Storing the air conditioner
If the unit will not be used for a long time, be sure to drain the air conditioner, clean the air filter, pull out the power supply plug and wrap around power cord hooks, and remove the
batteries from the remote control before storage. After draining, keep the air conditioner running on FAN mode for at least 8 hours to dry the unit completely to prevent mold.
Troubleshooting
Problem
POSSIBLE CAUSES
Unit does not Start when Pressing - P1 appears in the display
on/off Button
- Room temperature is lower than the set temperature.(Cooling mode)
- The windows or doors in the room are not closed.
- There are heat sources inside the room.
Not cool enough
- Exhaust air duct is not connected or blocked.
- Temperature setting is too high.
- Air filter is blocked by dust.
Noisy or vibration
- The ground is not level or not flat enough.
Gurgling sound
- The sound comes from the flowing of the refrigerant inside the air-conditioner.
- Overheat function has activated. When the temperature at the air outlet exceeds
Power shut off at Heating mode
70°C/158°F, the unit will stop.
Error Code
- E1: room temperature error
- E2: Evaporator temperature error
- E4: Display panel communication error
Unplug the unit and plug it back in. If error repeats, call for service
13
SUGGESTED REMEDIES
Drain the water in the bottom tray.
Reset the temperature.
Make sure all the windows and doors are closed.
Remove the heat sources if possible.
Connect the duct and make sure it can function properly.
Decrease the set temperature.
Clean the air filter.
Place the unit on a flat, level ground if possible.
It is normal.
Let the unit cool down and then restart unit.
SPECIFICATIONS
- Figures noted in the contents are for reference only; variation may result due to the application in different countries or regions, and shall be based on practical operation.
Model
ARP-1314
Cooling Capacity
13,500 BTU
Dehumidifying Capacity
3 pints per hour / 1.4 liters per hour
Standard Cooling Input Power / Current
1480W / 12A
Air Flow Volume (high/medium/low)
540 / 480 / 410(m³/h)
Voltage / Frequency
115V / 60HZ
Sound Pressure Level
53/50/47dB ( high/medium/low)
Net Weight
76 lbs / 34.5Kg
Unit Dimensions (W × D × H)
19.3 × 15.7 × 32(in) / 490 × 398 × 812(mm)
Packaging Dimensions (W × D × H)
22.2× 20 × 34.6(in) / 565 × 510 × 880(mm) Refrigerant
R410A
14
ARP-1314
ONE YEAR LIMITED WARRANTY
Royal Sovereign warrants each Portable Air Conditioner to be free from defects in material and workmanship. Our obligation under this warranty is limited to the repair or
replacement, free of charge, when delivered to an authorized Royal Sovereign service center, of any defective part(s) thereof, other than parts damaged in transit. This warranty
is in effect to the original purchaser, for a period of one year from the date of purchase and is not transferable. This warranty shall apply only if the air conditioner is used on
Alternating Current (AC) circuit, in accordance with the factory provided instructions which accompany it.
LIMITED FIVE YEAR WARRANTY (COMPRESSOR)
For a period of five years from the date of purchase, when this Royal Sovereign Portable Air Conditioner is operated and maintained according to the instruction manual provided
with the product, Royal Sovereign will supply a replacement compressor (parts only), free of charge, if the original compressor is determined to be defective in workmanship or
material. If repair becomes necessary, please contact our customer service center. You will be responsible for all freight, insurance, and any other transportation charges to get the
unit to our factory or service center. If shipping is required, be sure to pack the unit properly to avoid shipping damages, as we will not be responsible for such damages.
EXCLUSIONS
This warranty excludes and does not cover defects, malfunctions or failures of your Royal Sovereign Portable Air Conditioner, caused by repairs by unauthorized persons or service
centers, mishandling, improper installation, modification or unreasonable use including incorrect voltage, acts of God, or failure to provide reasonable and necessary maintenance.
This warranty is in lieu of any and all expressed warranties. In no event shall Royal Sovereign be liable for consequential or incidental damages. This limitation would not apply if you
live in a location thas does not permit the exclusion of limitation of incidental or consequential damages. This warranty gives you specific legal rights and you may also have other
rights which vary from state to state. This warranty is only valid in the continental United States and Canada.
15
ROYAL SOVEREIGN INTERNATIONAL, INC.
2 Volvo Drive Rockleigh, NJ 07647 USA
TEL : +1) 800-397-1025 FAX : +1) 201-750-1022
RS CANADA INC.
5610 Timberlea Blvd, Mississauga, L4W 4M6, CANADA
TEL : +1) 905-461-1095 TF: +1) 866 961-6673 Fax : +1) 905-461-1096
RS INTERNATIONAL AUSTRALIA PTY. LTD.
30 Prime Drive, Seven Hills, NSW 2147, AUSTRALIA
TEL : +61) 2-9674-2127
FAX : +61) 2-9674-2027
2013.06
Manual de instrucciones
ARP-1314
ARP-1314
portable air conditioner
ACONDICIONADOR DE AIRE PORTÁTIL
CONDITIONNE UR D' AIRE PORTABLE
Página en Español
17
Lea y guarde estas instrucciones para referencia futura.
Para cualquier necesidad de soporte técnico, seleccione la ficha Soporte en favor
www.royalsovereign.com
Royal Sovereign International, Inc
aire acondicionado portátil
ARP-1314
INTRODUCCIÓN
Gracias por elegir Royal Sovereign a usted y su familia con todos los requisitos "Comodidad en el hogar" para su casa, apartamento u oficina.
Este aire acondicionado portátil puede ser puesta en marcha en cuestión de minutos y se puede mover fácilmente de una habitación a otra. Se
trata de un sistema de confort del aire ambiente multifuncional que le ofrece aire acondicionado, deshumidificación y los modos de circulación de
aire. Este manual le proporcionará valiosa información necesaria para el cuidado y mantenimiento de su nuevo aparato. Por favor tómese unos
momentos y lea las instrucciones cuidadosamente. Si se mantienen adecuadamente, su aparato le dará muchos años de operación sin
problemas.
CONTENIDOS
Página
Precauciones para∙∙∙∙∙∙∙∙∙∙∙∙∙∙∙∙∙∙∙∙∙∙∙∙∙∙∙∙∙∙∙∙∙∙∙∙∙∙∙∙∙∙∙∙∙∙∙∙∙∙∙∙∙∙∙∙∙∙∙∙∙∙∙∙∙∙∙∙∙∙∙∙∙∙∙∙∙∙∙∙∙∙∙∙∙∙∙∙∙∙∙∙∙∙∙∙∙∙∙∙∙∙∙∙∙∙∙∙∙∙∙∙∙∙∙∙∙∙∙∙∙∙∙∙∙∙∙∙∙∙∙∙∙∙∙∙ 20
Identificación de los∙∙∙∙∙∙∙∙∙∙∙∙∙∙∙∙∙∙∙∙∙∙∙∙∙∙∙∙∙∙∙∙∙∙∙∙∙∙∙∙∙∙∙∙∙∙∙∙∙∙∙∙∙∙∙∙∙∙∙∙∙∙∙∙∙∙∙∙∙∙∙∙∙∙∙∙∙∙∙∙∙∙∙∙∙∙∙∙∙∙∙∙∙∙∙∙∙∙∙∙∙∙∙∙∙∙∙∙∙∙∙∙∙∙∙∙∙∙∙∙∙∙∙∙∙∙∙∙∙∙∙∙∙∙∙ 21
Instalación∙∙∙∙∙∙∙∙∙∙∙∙∙∙∙∙∙∙∙∙∙∙∙∙∙∙∙∙∙∙∙∙∙∙∙∙∙∙∙∙∙∙∙∙∙∙∙∙∙∙∙∙∙∙∙∙∙∙∙∙∙∙∙∙∙∙∙∙∙∙∙∙∙∙∙∙∙∙∙∙∙∙∙∙∙∙∙∙∙∙∙∙∙∙∙∙∙∙∙∙∙∙∙∙∙∙∙∙∙∙∙∙∙∙∙∙∙∙∙∙∙∙∙∙∙∙∙∙∙∙∙∙∙∙∙∙∙∙∙∙∙∙ 22~23
Operación∙∙∙∙∙∙∙∙∙∙∙∙∙∙∙∙∙∙∙∙∙∙∙∙∙∙∙∙∙∙∙∙∙∙∙∙∙∙∙∙∙∙∙∙∙∙∙∙∙∙∙∙∙∙∙∙∙∙∙∙∙∙∙∙∙∙∙∙∙∙∙∙∙∙∙∙∙∙∙∙∙∙∙∙∙∙∙∙∙∙∙∙∙∙∙∙∙∙∙∙∙∙∙∙∙∙∙∙∙∙∙∙∙∙∙∙∙∙∙∙∙∙∙∙∙∙∙∙∙∙∙∙∙∙∙∙∙∙∙∙∙∙∙ 24~27
Mantenimiento∙∙∙∙∙∙∙∙∙∙∙∙∙∙∙∙∙∙∙∙∙∙∙∙∙∙∙∙∙∙∙∙∙∙∙∙∙∙∙∙∙∙∙∙∙∙∙∙∙∙∙∙∙∙∙∙∙∙∙∙∙∙∙∙∙∙∙∙∙∙∙∙∙∙∙∙∙∙∙∙∙∙∙∙∙∙∙∙∙∙∙∙∙∙∙∙∙∙∙∙∙∙∙∙∙∙∙∙∙∙∙∙∙∙∙∙∙∙∙∙∙∙∙∙∙∙∙∙∙∙∙∙∙∙∙∙∙∙∙∙∙∙ 28
Solución de problemas∙∙∙∙∙∙∙∙∙∙∙∙∙∙∙∙∙∙∙∙∙∙∙∙∙∙∙∙∙∙∙∙∙∙∙∙∙∙∙∙∙∙∙∙∙∙∙∙∙∙∙∙∙∙∙∙∙∙∙∙∙∙∙∙∙∙∙∙∙∙∙∙∙∙∙∙∙∙∙∙∙∙∙∙∙∙∙∙∙∙∙∙∙∙∙∙∙∙∙∙∙∙∙∙∙∙∙∙∙∙∙∙∙∙∙∙∙∙∙∙∙∙∙∙∙∙∙∙∙∙ 29
Especificaciones∙∙∙∙∙∙∙∙∙∙∙∙∙∙∙∙∙∙∙∙∙∙∙∙∙∙∙∙∙∙∙∙∙∙∙∙∙∙∙∙∙∙∙∙∙∙∙∙∙∙∙∙∙∙∙∙∙∙∙∙∙∙∙∙∙∙∙∙∙∙∙∙∙∙∙∙∙∙∙∙∙∙∙∙∙∙∙∙∙∙∙∙∙∙∙∙∙∙∙∙∙∙∙∙∙∙∙∙∙∙∙∙∙∙∙∙∙∙∙∙∙∙∙∙∙∙∙∙∙∙∙∙∙∙∙∙∙∙∙∙ 30
Garantía∙∙∙∙∙∙∙∙∙∙∙∙∙∙∙∙∙∙∙∙∙∙∙∙∙∙∙∙∙∙∙∙∙∙∙∙∙∙∙∙∙∙∙∙∙∙∙∙∙∙∙∙∙∙∙∙∙∙∙∙∙∙∙∙∙∙∙∙∙∙∙∙∙∙∙∙∙∙∙∙∙∙∙∙∙∙∙∙∙∙∙∙∙∙∙∙∙∙∙∙∙∙∙∙∙∙∙∙∙∙∙∙∙∙∙∙∙∙∙∙∙∙∙∙∙∙∙∙∙∙∙∙∙∙∙∙∙∙∙∙∙∙∙∙∙∙∙∙∙∙∙ 31
Contacto Inforamtion∙∙∙∙∙∙∙∙∙∙∙∙∙∙∙∙∙∙∙∙∙∙∙∙∙∙∙∙∙∙∙∙∙∙∙∙∙∙∙∙∙∙∙∙∙∙∙∙∙∙∙∙∙∙∙∙∙∙∙∙∙∙∙∙∙∙∙∙∙∙∙∙∙∙∙∙∙∙∙∙∙∙∙∙∙∙∙∙∙∙∙∙∙∙∙∙∙∙∙∙∙∙∙∙∙∙∙∙∙∙∙∙∙∙∙∙∙∙∙∙∙∙∙∙∙∙∙∙∙∙∙∙∙ 32
Precauciones de uso
Especificaciones eléctricas y cable de alimentación
Compruebe que el servicio eléctrico que se utiliza es el adecuado para el modelo que usted ha elegido. La clasificación eléctrica de su nuevo
aparato de aire acondicionado se define en la placa de serie de la unidad. Por favor refiérase a la calificación al comprobar los requisitos eléctricos
para asegurarse de que cumplen con los códigos de electricidad de su localidad.
• Instale el aparato de aire acondicionado de acuerdo con las instrucciones de instalación proporcionadas.
• No modificar ningún componente de este producto.
• No introduzca ningún objeto en el producto o bloquear el flujo de aire de ninguna manera.
• Asegúrese de que la fuente de alimentación que utiliza tiene una calificación adecuada tensión.
• Utilice solamente un pasador instalado correctamente 3, toma de CA con conexión a tierra que está clasificado 115V, 60 Hz, 15 amperios o más.
• Si la toma de corriente eléctrica que va a utilizar no está adecuadamente conectado a tierra o protegido por un fusible de retardo o un disyuntor,
usted debe tener un electricista calificado para que instale un tomacorriente adecuado.
• Esta unidad utiliza un enchufe con un fusible incorporado. Llevar a cabo una verificación de Plug Power (ver página 9) antes del uso para asegurar un funcionamiento normal.
• No utilice esta unidad con todos los cables de extensión o enchufes adaptadores.
• Si el cable o el enchufe están dañados de alguna manera, por favor llame al Departamento de Servicio al Royal Sovereign (consulte la página 16.)
• No conecte este cable a una toma de corriente floja.
• Apague la unidad y desenchufe, al limpiar el acondicionador de aire, eliminando el filtro o cuando no se utilizará el aire acondicionado durante un período de tiempo prolongado.
Uso general
• No bloquee las salidas de aire o la ingesta de obstáculos.
• No introduzca ningún objeto en el aire acondicionado.
• No rocíe ni vierta agua en el panel de la vivienda o el control.
• No coloque objetos pesados, o sentarse en la unidad.
• Asegúrese de que el tapón de drenaje está instalada en la parte inferior de la máquina.
• Vaciar la unidad cuando se mueve el aire acondicionado o al guardar el aparato.
20
ARP-1314
Identificación de las piezas
1. panel de control
2. salida de aire
3. manejar
4. rueda rueda
5. Superior del filtro de aire
6. toma de aire
7. salida de aire
8. Outlet Drain superior
9. toma de aire
10. Baja del filtro de aire
11. Desagüe bandeja inferior
12. Salida del cable de alimentación
A UTO
HEAT
FA N
DRY
COO
L
SWING
MODE
TIME F
R ON
TIME
R OFF
C
ION
SLEE
P
FA N
21
MED
L OW
HI
instalación
Saque su nuevo acondicionador de aire portátil y dejar que la máquina en posición vertical durante
2 horas antes de comenzar.
Desembale todas las piezas que se indican a continuación. Si falta alguna pieza, no devuelva este
producto al lugar de compra.
Por favor visite nuestro sitio web www.royalsovereign.com y haga clic en la pestaña "Compatibilidad".
Accesorios Incluir
1. manguera de escape
2. conector de manguera
3. adaptador de manguera
4. ventana corredera
5. espuma sello
6. manguera de desagüe
7. mando a distancia
Parte 1: tubo de escape, el conector y el adaptador
1. Extender un extremo de la manguera de escape.
2. Tome el conector de la manguera y gire hacia la izquierda en un extremo de la manguera de escape.
3. Extender el extremo opuesto de la manguera de escape.
4. Tome el adaptador de la manguera y gire hacia la izquierda en el extremo no utilizado de la manguera de escape.
Fig 1.
22
ARP-1314
Parte 2: Conexión de la manguera de escape
1. Conecte el conector de la manguera a la salida de aire, alineando las lengüetas de la manguera para la
PAC y que encaje en su lugar.
Parte 3: Instalación de equipo deslizador de la ventana
Fig 2.
1. Abra la ventana y coloque el deslizador de la ventana en el borde interior de la ventana.
2. Ajuste el deslizador de la ventana a la anchura de la ventana. Para las ventanas pequeñas ancho del control deslizante en el interior puede bloquear el agujero y ser
necesario acortar utilizando un plástico vio.
3. Insertar un tornillo en la parte superior del deslizador de la ventana para asegurarlo a la longitud correcta.
4. Tome deslizador de la ventana y adjuntar a la manguera de escape mediante el ajuste del adaptador de la manguera en el orificio de la ventana deslizante. Asegúrese de que
las pestañas de la ventana deslizante se enfrentan fuera.
5. Extienda la manguera de escape a la longitud deseada.
6. Coloque deslizador de la ventana y de la manguera en el borde de la ventana.
7. Cierre la ventana para asegurar slider.
8. Corte el sello de espuma a la anchura de la ventana y rellenar el sello de espuma entre el vidrio y la ventana.
Fig 3.
Fig 4.
23
operación
Antes del uso
• Asegúrese de que los tapones de drenaje de goma están bien conectados a los orificios de drenaje en la parte posterior de la unidad para evitar fugas de agua
• Asegúrese de que el aire acondicionado ha sido ventilado adecuadamente por la ventana (Consulte Instalación pg 7).
• Compruebe que el aire acondicionado esté en una superficie plana
• Llevar a cabo un tapón de verificación de energía:
1. Pulse el botón RESET en el cable de alimentación.
2. Enchufe el cable en una toma de corriente.
3. Pulse el botón de prueba del cable de alimentación. El botón RESET debe aparecer.
4. Pulse el botón RESET para su uso.
5. No utilice el aire acondicionado si la prueba falla. La luz verde en el cable de alimentación se encenderá si el enchufe funciona correctamente.
Nota: Si enciende el acondicionador de aire y de inmediato reinicia, espere 3 minutos para que el compresor se reinicie enfriamiento.
En el caso de un fallo de alimentación, espere 3 minutos antes de reiniciar la unidad.
Panel de control
Buttons
Power button Timer button
Sleep mode button
Fan speed button
Mode button
Swing button
Temperature / Timer up button
Temperature / Timer down button
SWING
AUTO
HI
COOL
DRY
FAN
24
F
MODE
TIMER ON
C
TIMER OFF
MED
SLEEP
FAN
LOW
ARP-1314
Descripciones de los modos
Selecciona el modo de funcionamiento apropiado. Cada vez que se pulsa el botón, se selecciona un modo en la siguiente secuencia: AUTO, COOL DRY, FAN y calor (Sólo para los
modelos con función de calor).
modo COL
- Pulse el botón "MODE" hasta que el indicador "COOL" se enciende.
- Pulse los botones ajustan " " o " " para seleccionar la temperatura deseada. La temperatura se puede ajustar en un rango de 62 °F a 88 °F.
- Pulse el botón "FAN SPEED" para seleccionar la velocidad del ventilador.
Modo HEAT (Sólo para los modelos con función de calor)
- Pulse el botón "MODE" hasta que el indicador "HEAT" se enciende.
- Pulse los botones ajustan " " o " " para seleccionar la temperatura deseada. La temperatura se puede ajustar en un rango de 62 °F a 88 °F.
- Pulse el botón "FAN SPEED" para seleccionar la velocidad del ventilador. En algunos modelos, la velocidad del ventilador no se puede ajustar en el modo CALOR.
el modo DRY
- Pulse el botón "MODE" hasta que el indicador "DRY" se enciende.
- En este modo, no se puede seleccionar la velocidad del ventilador o ajustar la temperatura. El motor del ventilador funciona a baja velocidad.
- Mantenga las ventanas y puertas cerradas para el mejor efecto de deshumidificación.
- En el modo DRY la unidad no tiene que tener una salida y se puede conectar una manguera desde la salida de drenaje modo DRY superior y vaciar el agua de un cubo para
facilitar su extracción.
el modo AUTO
- Cuando se programa el aire acondicionado en el modo AUTO, se seleccionará automáticamente refrigeración, calefacción (Sólo para los modelos con función de calor), o sólo
ventilador en función de lo temperatura seleccionada y la temperatura ambiente.
- El aire acondicionado controla automáticamente la temperatura ambiente alrededor de la temperatura programada por usted.
- En el modo AUTO, no se puede seleccionar la velocidad del ventilador.
el modo FAN
- Pulse el botón "MODE" hasta que el indicador "FAN" se enciende.
- Pulse el botón "FAN SPEED" para seleccionar la velocidad del ventilador. La temperatura no se puede ajustar.
25
Operación de temporizador
- Cuando la unidad está encendida, primero pulse el botón del temporizador, el temporizador apagado la luz indicadora se ilumina. Se indica que se inició el programa de parada
automática.
- Cuando la unidad está apagada, primero pulse el botón del temporizador, el temporizador SOBRE luz indicadora se ilumina. Indica que se inicie el programa Auto Start.
- Pulse o mantenga pulsado el botón UP o DOWN para cambiar el tiempo de Auto por incrementos de 0,5 horas, hasta 10 horas, y luego en incrementos de 1 hora hasta 24
horas. El control de la cuenta regresiva del tiempo restante hasta el inicio.
- El tiempo seleccionado se registrará en 5 segundos y el sistema volverá automáticamente a mostrar la configuración de la temperatura anterior.
- Encendido de la unidad o desactivar en cualquier momento o el ajuste de la configuración del temporizador de 0.0, se cancelará la función Auto Start / Stop programa asignado.
- Cuando se produce el fallo de funcionamiento (E1 o E2), la función Auto Start / Stop programa temporizada también se cancelará.
SLEEP operación
Pulse el botón, la temperatura seleccionada aumentará (refrigeración) o disminución (calefacción) en un 2 ° F después de 30 minutos. La temperatura entonces aumentará
(enfriamiento) o disminuir (calefacción) por otro 2 ° C después de 30 minutos adicionales. Esta nueva temperatura se mantuvo durante 7 horas antes de que vuelva a la
temperatura seleccionada originalmente. Esto termina el modo de sueño y la unidad seguirá funcionando según lo programado originalmente.
NOTA: Esta función no está disponible con el modo FAN o DRY.
Auto-Restart (en algunos modelos)
Si la unidad se interrumpe de forma inesperada debido al corte de suministro eléctrico, se reiniciará con la configuración de la función anterior de manera automática cuando se
restablece el suministro eléctrico.
Espere 3 minutos antes de reanudar la operación
Después de que la unidad se ha detenido, el compresor no se reiniciará la operación en los primeros 3 minutos. Esto es para proteger la unidad. La operación se iniciará
automáticamente después de 3 minutos.
Ajuste de la dirección del flujo de aire
La persiana se mueve en la posición 6 º de ángulo cada vez que se pulsa el botón SWING hasta que se mueva a una posición que afecte a la refrigeración o el efecto de
calentamiento del aire acondicionado, cambiará automáticamente la dirección del swing.
Si se pulsa el botón SWING para más de 2 segundos, la función de oscilación automática se activa.
26
ARP-1314
Control Remoto
Para el primer uso: Retire el plástico entre la batería y los contactos.
Modo de empleo: apunte el control remoto hacia el sensor del panel de control
ON/OFF: Pulse para encender la unidad o fuera
Modo: presione para seleccionar el modo de funcionamiento: Auto
Velocidad del ventilador: Presione para seleccionar entre Auto
/
ventilador
Baja
fresco
Med
deshumidificación
Alta velocidad de ventilador
Temp: Oprima hacia arriba o hacia abajo para controlar la temperatura ambiente o la hora del temporizador
ECONOMÍA: Presione para ajustar o cancelar el funcionamiento en modo de reposo
Timer ON/OFF: Pulse para ajustar la unidad para apagar automáticamente o con un temporizador
Display LED: Pulse este botón para borrar la pantalla de la unidad interior, pulse de nuevo para encender la pantalla.
GIRO: Se utiliza para detener o iniciar el movimiento de las palas y configurar la dirección del flujo de aire arriba / abajo deseada.
RESET: Una vez que se pulsa el botón empotrado RESET, todos los ajustes actuales quedarán anuladas y el controlador volverá a la
configuración inicial.
LOCK: Presione este botón empotrado para bloquear todos los ajustes actuales y el control remoto no aceptará ninguna operación
excepto la del bloqueo.
Utilice el modo LOCK cuando desea evitar que los ajustes sean cambiados por error.
Pulse el botón LOCK de nuevo para cancelar la función de bloqueo. Un símbolo de un candado
aparecerá en visualizar el mando a distancia cuando se activa la función de bloqueo.
Instalación de las pilas del mando a distancia
El mando a distancia es alimentado por dos pilas secas alojados en la parte trasera y protegida por una
cubierta.
1. Retire la tapa presionando y deslizando.
2. Retire las baterías usadas e inserte las pilas nuevas, colocando el (+) y (-) finaliza correctamente.
3. Vuelva a colocar la tapa deslizándola en su posición.
NOTA: C uando se retiran las baterías, los borra del mando a distancia toda la programación.
Después de introducir las pilas, el control remoto debe ser reprogramado
27
MANTENIMIENTO
drenaje
En ocasiones, es posible que tenga que drenar la unidad. La pantalla LED mostrará P1 durante el drenaje es necesario.
Para descargar:
1. Apague la unidad y desenchufe.
2. Coloque una bandeja de agua debajo de la salida de drenaje para recoger el agua.
3. Retire el tapón de drenaje de goma.
4. Vuelva a colocar el tapón, cuando el agua de drenaje deja de fluir.
Para el drenaje continuo en un desagüe en el suelo:
1. Apague la unidad y desenchufe.
2. Retire el tapón de drenaje de goma de la conexión de drenaje superior.
3. Conecte la manguera de drenaje para el puerto secundario.
4. Coloque el otro extremo de la manguera de drenaje en un desagüe en el suelo.
5. Vuelva a colocar el tapón de drenaje de goma después de la operación para evitar fugas.
Limpieza del filtro
El filtro debe limpiarse aproximadamente cada 2 semanas para mantener el flujo de aire adecuado.
1. Apague la alimentación de la unidad.
2. El filtro de aire superior se puede retirar tirando hacia arriba de la parte superior
3. Para quitar el filtro de aire inferior, saque los 2 tornillos de la parte posterior y el tornillo 1 en el lado
4. Quite el filtro.
5. Filtro se puede limpiar con una aspiradora o un paño suave. Si el filtro está muy sucio se puede lavar con
un detergente suave y se enjuagó con agua. Asegúrese de que el filtro esté seco antes de la sustitución.
6. Reemplace los filtros y los tornillos.
NotA: Nunca haga funcionar la unidad sin el filtro pulg La unidad podría estar dañada.
28
ARP-1314
Limpieza de la unidad
1. Apague la unidad y desenchufe.
2. Limpie la unidad con un paño suave y seco o húmedo. Un detergente suave puede ser utilizado.
3. Nunca use una sustancia volátil de gasolina tales o productos de limpieza abrasivos.
4. No salpique agua sobre la unidad.
Almacenamiento del aparato de aire acondicionado
Si no va a utilizar la unidad durante mucho tiempo, asegúrese de drenar el acondicionador de aire, limpie el filtro de aire, desenchufe el cable de alimentación y el abrigo alrededor
de los ganchos del cable de alimentación y retire la pilas del mando a distancia antes de su almacenamiento. Después del drenaje, mantener el aire acondicionado funcionando en
el modo FAN durante al menos 8 horas para secar completamente la unidad para evitar el moho.
Solución de problemas
PROBLEMA
CAUSAS POSIBLES
Soluciones sugeridas
Unidad no se inicia al - P1 aparece en la pantalla
pulsar ON / OFF
- La temperatura ambiente es inferior a la temperatura programada. (Enfriamiento ∙ modo)
- Las puertas o ventanas de la habitación no se cierran.
- Hay fuentes de calor dentro de la habitación.
No es lo
- Aire escape conducto es no conectados o bloqueado.
suficientemente fría
- Ajuste de la temperatura es demasiado alta.
- El filtro de aire está obstruido por el polvo.
Ruido y vibraciones - El suelo no está nivelado o no lo suficientemente plana.
ruido en el sonido - El sonido proviene del flujo del refrigerante en el interior del acondicionador de aire.
Energía apagado en - Función de sobrecalentamiento ha activado. Cuando la temperatura en la salida de aire
superior a 70 °C/158 °F, la unidad se detendrá.
el modo calefacción
Código de error
- E1 error de temperatura ambiente
- E2 error de temperatura del evaporador
- E4 error de comunicación panel de visualización
Desenchufe la unidad y vuelva a conectarla Si se repite el error, llame al servicio técnico
29
Escurrir el agua en la bandeja inferior.
Restablecer la temperatura.
Asegúrese de que todas las ventanas y puertas estén cerradas.
Retire las fuentes de calor, si es posible.
Conecte el ducto y asegúrese de que pueda funcionar correctamente.
Disminuya la temperatura programada.
Limpie el filtro de aire.
Coloque la unidad sobre una superficie plana, el nivel si es posible.
Es normal.
Deje que la unidad se enfríe y reinicie la unidad.
ESPECIFICACIONES
- Las cifras observadas en el contenido son sólo de referencia; variación puede resultar debido a la aplicación en los diferentes países o regiones, y se basará en el funcionamiento
práctico.
"Residuos eléctricos no se deben tirar con la basura doméstica. Por favor recicle donde existan instalaciones. Consulte con su autoridad local o minorista para el reciclaje de
consejo ".
Modelo
ARP-1314
Capacidad de enfriamiento
13,500 BTU
Deshumidificación Capacidad
3 litros por hora / 1.4L / h
Estándar de refrigeración Potencia de entrada
1480W actuales / 12A
Air Flow volumen (alto / medio / bajo)
540 / 480 / 410(m³/h)
Voltaje / Frecuencia
115V / 60HZ
Sound Pressure Level 53/50/47dB
53/50/47dB (alta / media / baja)
Peso neto
76 libras / 34.5Kg
Unidad Dimensiones (W × D × H)
19.3 × 15.7 × 32(in) / 490 × 398 × 812(mm)
Embalaje Dimensiones (W × D × H)
22.2× 20 × 34.6(in) / 565 × 510 × 880(mm) Refrigerante
R410A
30
ARP-1314
UN AÑO DE GARANTÍA LIMITADA
Royal Sovereign garantiza que cada acondicionador de aire portátil está libre de defectos en materiales y mano de obra. Nuestra obligación bajo esta garantía se limita a la
reparación o sustitución, sin cargo alguno, cuando se entrega a un centro autorizado de Royal Sovereign de servicios, de cualquier pieza defectuosa (s) de los mismos a excepción
de partes dañadas durante el transporte. Esta garantía está en vigor para el comprador original, por un período de un año desde la fecha de compra y no es transferible. Esta
garantía es válida únicamente si el aire acondicionado se utiliza en el circuito de corriente alterna (AC), de acuerdo con la instrucciones de fábrica que lo acompañan.
LIMITADA DE CINCO AÑOS GARANT Í (compresor)
Durante un período de cinco años a partir de la fecha de compra, cuando este Real acondicionador de aire portátil es operado y mantenido de acuerdo con el manual de
instrucciones suministrado con el producto, Royal Sovereign suministrará un compresor de repuesto (solo partes), de forma gratuita, si el compresor original se determinó que
presenta defectos de fabricación o de material. Si la reparación se hace necesario, por favor póngase en contacto con nuestro centro de servicio al cliente. Usted será responsable
de todos los fletes, seguros y otros gastos de transporte para llegar la unidad a nuestra fábrica o centro de servicio. Si se requiere el envío, asegúrese de empacar la unidad
adecuadamente para evitar daños durante el transporte, ya que no seremos responsables de dichos daños.
EXCLUSIONES
Esta garantía excluye y no cubre defectos, averías o fallas de la Royal Sovereign aire acondicionado portátil, causados por reparaciones efectuadas por personas no autorizadas o
los centros de servicio, por mal uso, modificación o uso no razonable, incluyendo voltaje incorrecto, actos de Dios, o si no se proporcionar mantenimiento razonable y necesario.
Esta garantía se ofrece en lugar de cualquier y todas las garantías expresadas. En ningún caso el Royal Sovereign será responsable por daños indirectos o incidentales. Esta
limitación no se aplica si usted vive en un lugar thas no permitir la exclusión de la limitación de los daños incidentales o consecuentes. Esta garantía le otorga derechos legales
específicos y usted también puede tener otros derechos que varían de estado a estado. Esta garantía sólo es válida en los Estados Unidos continentales.
31
ROYAL SOVEREIGN INTERNATIONAL, INC.
2 Volvo Drive Rockleigh, NJ 07647 USA
TEL : +1) 800-397-1025 FAX : +1) 201-750-1022
RS CANADA INC.
5610 Timberlea Blvd, Mississauga, L4W 4M6, CANADA
TEL : +1) 905-461-1095 TF: +1) 866 961-6673 Fax : +1) 905-461-1096
RS INTERNATIONAL AUSTRALIA PTY. LTD.
30 Prime Drive, Seven Hills, NSW 2147, AUSTRALIA
TEL : +61) 2-9674-2127
FAX : +61) 2-9674-2027
2013.06
This document in other languages
- español: Royal Sovereign ARP-1314


