1
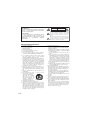
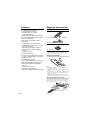
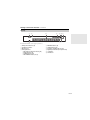
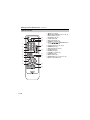
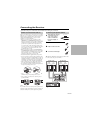
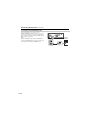
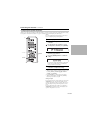
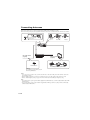
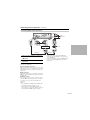
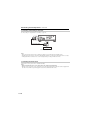
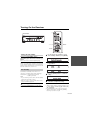
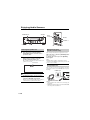
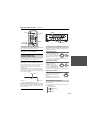
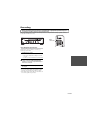
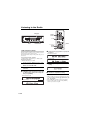
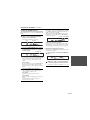
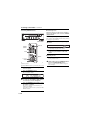
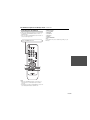
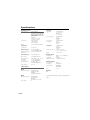
Contents Introduction ..................................En-2 Connections .............................. En-11 Enjoying Audio Sources...... En-19 Thank you for purchasing an Onkyo Stereo Receiver. Please read this manual thoroughly before making connections and plugging in the unit. Following the instructions in this manual will enable you to obtain optimum performance and listening enjoyment from your new Stereo Receiver. Please retain this manual for future reference. Appendix Troubleshooting ..................... En-32 Specifications ......................... En-34 En WARNING: TO REDUCE THE RISK OF FIRE OR ELECTRIC SHOCK, DO NOT EXPOSE THIS APPARATUS TO RAIN OR MOISTURE. CAUTION: TO REDUCE THE RISK OF ELECTRIC SHOCK, DO NOT REMOVE COVER (OR BACK). NO USER-SERVICEABLE PARTS INSIDE. REFER SERVICING TO QUALIFIED SERVICE PERSONNEL. WARNING AVIS RISK OF ELECTRIC SHOCK DO NOT OPEN RISQUE DE CHOC ELECTRIQUE NE PAS OUVRIR The lightning flash with arrowhead symbol, within an equilateral triangle, is intended to alert the user to the presence of uninsulated “dangerous voltage” within the product’s enclosure that may be of sufficient magnitude to constitute a risk of electric shock to persons. The exclamation point within an equilateral triangle is intended to alert the user to the presence of important operating and maintenance (servicing) instructions in the literature accompanying the appliance. Important Safety Instructions 1. 2. 3. 4. 5. 6. 7. 8. 9. 10. 11. 12. 13. 14. En-2 Read these instructions. Keep these instructions. Heed all warnings. Follow all instructions. Do not use this apparatus near water. Clean only with dry cloth. Do not block any ventilation openings. Install in accordance with the manufacturer’s instructions. Do not install near any heat sources such as radiators, heat registers, stoves, or other apparatus (including amplifiers) that produce heat. Do not defeat the safety purpose of the polarized or grounding-type plug. A polarized plug has two blades with one wider than the other. A grounding type plug has two blades and a third grounding prong. The wide blade or the third prong are provided for your safety. If the provided plug does not fit into your outlet, consult an electrician for replacement of the obsolete outlet. Protect the power cord from being walked on or pinched particularly at plugs, convenience receptacles, and the point where they exit from the apparatus. Only use attachments/accessories specified by the manufacturer. Use only with the cart, stand, PORTABLE CART WARNING tripod, bracket, or table specified by the manufacturer, or sold with the apparatus. When a cart is used, use caution when moving the cart/ apparatus combination to avoid injury from tip-over. S3125A Unplug this apparatus during lightning storms or when unused for long periods of time. Refer all servicing to qualified service personnel. Servicing is required when the apparatus has been damaged in any way, such as power-supply cord or plug is damaged, liquid has been spilled or objects have fallen into the apparatus, the apparatus has been exposed to rain or moisture, does not operate normally, or has been dropped. 15. Damage Requiring Service Unplug the apparatus from the wall outlet and refer servicing to qualified service personnel under the following conditions: A. When the power-supply cord or plug is damaged, B. If liquid has been spilled, or objects have fallen into the apparatus, C. If the apparatus has been exposed to rain or water, D. If the apparatus does not operate normally by following the operating instructions. Adjust only those controls that are covered by the operating instructions as an improper adjustment of other controls may result in damage and will often require extensive work by a qualified technician to restore the apparatus to its normal operation, E. If the apparatus has been dropped or damaged in any way, and F. When the apparatus exhibits a distinct change in performance this indicates a need for service. 16. Object and Liquid Entry Never push objects of any kind into the apparatus through openings as they may touch dangerous voltage points or short-out parts that could result in a fire or electric shock. The apparatus shall not be exposed to dripping or splashing and no objects filled with liquids, such as vases shall be placed on the apparatus. Don’t put candles or other burning objects on top of this unit. 17. Batteries Always consider the environmental issues and follow local regulations when disposing of batteries. 18. If you install the apparatus in a built-in installation, such as a bookcase or rack, ensure that there is adequate ventilation. Leave 20 cm (8") of free space at the top and sides and 10 cm (4") at the rear. The rear edge of the shelf or board above the apparatus shall be set 10 cm (4") away from the rear panel or wall, creating a fluelike gap for warm air to escape. Precautions 1. Recording Copyright—Unless it’s for personal use only, recording copyrighted material is illegal without the permission of the copyright holder. 2. AC Fuse—The AC fuse inside the unit is not userserviceable. If you cannot turn on the unit, contact your Onkyo dealer. 3. Care—Occasionally you should dust the unit all over with a soft cloth. For stubborn stains, use a soft cloth dampened with a weak solution of mild detergent and water. Dry the unit immediately afterwards with a clean cloth. Don’t use abrasive cloths, thinners, alcohol, or other chemical solvents, because they may damage the finish or remove the panel lettering. 4. Power WARNING BEFORE PLUGGING IN THE UNIT FOR THE FIRST TIME, READ THE FOLLOWING SECTION CAREFULLY. AC outlet voltages vary from country to country. Make sure that the voltage in your area meets the voltage requirements printed on the unit’s rear panel (e.g., AC 230 V, 50 Hz or AC 120 V, 60 Hz). The power cord plug is used to disconnect this unit from the AC power source. Make sure that the plug is readily operable (easily accessible) at all times. For models with [POWER] button, or with both [POWER] and [ON/STANDBY] buttons: Pressing the [POWER] button to select OFF mode does not fully disconnect from the mains. If you do not intend to use the unit for an extended period, remove the power cord from the AC outlet. For models with [ON/STANDBY] button only: Pressing the [ON/STANDBY] button to select Standby mode does not fully disconnect from the mains. If you do not intend to use the unit for an extended period, remove the power cord from the AC outlet. 5. Preventing Hearing Loss Caution Excessive sound pressure from earphones and headphones can cause hearing loss. 6. Batteries and Heat Exposure Warning Batteries (battery pack or batteries installed) shall not be exposed to excessive heat as sunshine, fire or the like. 7. Never Touch this Unit with Wet Hands—Never handle this unit or its power cord while your hands are wet or damp. If water or any other liquid gets inside this unit, have it checked by your Onkyo dealer. 8. Handling Notes • If you need to transport this unit, use the original packaging to pack it how it was when you originally bought it. • Do not leave rubber or plastic items on this unit for a long time, because they may leave marks on the case. • This unit’s top and rear panels may get warm after prolonged use. This is normal. • If you do not use this unit for a long time, it may not work properly the next time you turn it on, so be sure to use it occasionally. For U.S. models FCC Information for User CAUTION: The user changes or modifications not expressly approved by the party responsible for compliance could void the user’s authority to operate the equipment. NOTE: This equipment has been tested and found to comply with the limits for a Class B digital device, pursuant to Part 15 of the FCC Rules. These limits are designed to provide reasonable protection against harmful interference in a residential installation. This equipment generates, uses and can radiate radio frequency energy and, if not installed and used in accordance with the instructions, may cause harmful interference to radio communications. However, there is no guarantee that interference will not occur in a particular installation. If this equipment does cause harmful interference to radio or television reception, which can be determined by turning the equipment off and on, the user is encouraged to try to correct the interference by one or more of the following measures: • Reorient or relocate the receiving antenna. • Increase the separation between the equipment and receiver. • Connect the equipment into an outlet on a circuit different from that to which the receiver is connected. • Consult the dealer or an experienced radio/TV technician for help. En-3 Precautions—Continued For Canadian Models For European Models NOTE: THIS CLASS B DIGITAL APPARATUS Declaration of Conformity We declare, under our sole responsibility, that this product complies with the standards: – Safety – Limits and methods of measurement of radio disturbance characteristics – Limits for harmonic current emissions – Limitation of voltage changes, voltage fluctuations and flicker – RoHS Directive, 2011/65/EU COMPLIES WITH CANADIAN ICES-003. For models having a power cord with a polarized plug: CAUTION: TO PREVENT ELECTRIC SHOCK, MATCH WIDE BLADE OF PLUG TO WIDE SLOT, FULLY INSERT. Modèle pour les Canadien REMARQUE: CET APPAREIL NUMÉRIQUE DE LA CLASSE B EST CONFORME À LA NORME NMB-003 DU CANADA. Sur les modèles dont la fiche est polarisée: ATTENTION: POUR ÉVITER LES CHOCS ÉLECTRIQUES, INTRODUIRE LA LAME LA PLUS LARGE DE LA FICHE DANS LA BORNE CORRESPONDANTE DE LA PRISE ET POUSSER JUSQU’AU FOND. For British models Replacement and mounting of an AC plug on the power supply cord of this unit should be performed only by qualified service personnel. IMPORTANT The wires in the mains lead are coloured in accordance with the following code: Blue: Neutral Brown: Live As the colours of the wires in the mains lead of this apparatus may not correspond with the coloured markings identifying the terminals in your plug, proceed as follows: The wire which is coloured blue must be connected to the terminal which is marked with the letter N or coloured black. The wire which is coloured brown must be connected to the terminal which is marked with the letter L or coloured red. IMPORTANT The plug is fitted with an appropriate fuse. If the fuse needs to be replaced, the replacement fuse must approved by ASTA or BSI to BS1362 and have the same ampere rating as that indicated on the plug. Check for the ASTA mark or the BSI mark on the body of the fuse. If the power cord’s plug is not suitable for your socket outlets, cut it off and fit a suitable plug. Fit a suitable fuse in the plug. En-4 Contents Important Safety Instructions............................ 2 Precautions ......................................................... 3 Features ............................................................. 6 Supplied Accessories ....................................... 6 Installing the Batteries............................................... 6 Aiming the Remote Controller.................................. 6 Getting to Know the Receiver ........................... 7 Front Panel ................................................................ 7 Rear Panel ................................................................. 8 Display ...................................................................... 9 Remote Controller................................................... 10 Connecting the Receiver ................................. 11 Speaker Connection Precautions............................. 11 Connecting the Speaker Cables............................... 11 Connecting a Powered Subwoofer .......................... 12 Configuring the Speaker Impedance ....................... 13 Recording ..........................................................23 Recording the Input Source .....................................23 Listening to the Radio ......................................24 Radio Frequency Setup............................................24 Listening to AM/FM Stations..................................25 Using RDS (European model only).........................28 iPod/iPhone Playback via Onkyo Dock ..........30 Using the Onkyo Dock ............................................30 Controlling Your iPod/iPhone .................................31 Troubleshooting ...............................................32 Power .......................................................................32 Audio .......................................................................32 Tuner........................................................................32 Remote Controller ...................................................32 Recording ................................................................33 Others ......................................................................33 Specifications ...................................................34 Connecting Antennas ...................................... 14 Connecting Your Components........................ 15 About Connections.................................................. 15 Connecting Onkyo Components....................... 17 Connecting a Recording Component ...................... 18 Connecting the Power Cord .................................... 18 Turning On the Receiver.................................. 19 Turning On and Standby ......................................... 19 Auto Standby........................................................... 19 Enjoying Audio Sources .................................. 20 Selecting the Speaker Set ........................................ 20 Muting the Receiver (remote controller only)........................................ 20 Using Headphones .................................................. 20 Setting the Display Brightness ................................ 21 Using the Sleep Timer (remote controller only)........................................ 21 Using the Tone and Balance Controls..................... 21 Displaying the Tone Level ...................................... 21 Setting the DIRECT Function ................................. 22 Setting the Digital Audio Input (for European model)............................................ 22 En-5 Features Supplied Accessories ❑ 50 Watts/Channel @ 8 Ω (FTC) (For North American Model) Make sure you have the following accessories: ❑ 90 Watts/Channel @ 6 Ω (IEC) (For European Model) ❑ WRAT (Wide Range Amplifier Technology) ❑ Discrete Amplifier Output Stage Circuitry Remote controller and two batteries (AAA/R03) ❑ Massive EI Transformer ❑ High-Current, Low-Impedance Drive ❑ Direct Mode ❑ 5 Analog Audio Inputs and 1 Output Indoor FM antenna ❑ 3 Digital Audio Inputs (1 Optical, 2 Coaxial) (European Model only) ❑ Phono Input for Turntable Connection ❑ Independent Bass, Treble, and Balance Controls AM loop antenna ❑ Subwoofer Pre-Out * In catalogs and on packaging, the letter at the end of the product name indicates the color. Specifications and operation are the same regardless of color. ❑ Speaker A/B Terminals ❑ Remote Interactive (RI) Input for Integrated Control of Compatible Onkyo Components Installing the Batteries ❑ Headphone Jack ❑ 40 FM/AM Random Presets ❑ Preset Station Naming (Up to 8 Characters) ❑ RDS (PS/PTY/RT) (European Model only) ❑ 3-Mode Display Dimmer (Normal/Dim/ Dimmer) ❑ Sleep Timer (via Remote) ❑ Battery-Free Memory Back-up ❑ Full-Sized, Full-Function RI Remote Control Notes: • If the remote controller doesn’t work reliably, try replacing the batteries. • Don’t mix new and old batteries or different types of batteries. • If you intend not to use the remote controller for a long time, remove the batteries to prevent damage from leakage or corrosion. • Expired batteries should be removed as soon as possible to prevent damage from leakage or corrosion. Aiming the Remote Controller When using the remote controller, point it toward the receiver’s remote control sensor, as shown below. Remote control sensor TX-8020 Approx. 5 m (16 ft.) En-6 Getting to Know the Receiver Front Panel a 2 3 4 j k l 5 6 78 m n o 9 pq For detailed information, see the pages in parentheses. a b c d e f ON/STANDBY button (19, 30, 32) SPEAKERS A and B buttons (20) DISPLAY button (27, 29) DIMMER button (21) SETUP button (13, 19, 22, 24, 27) TUNING /, PRESET /buttons (25, 26, 29) g ENTER button (29) h RETURN button (13, 19, 22, 24, 27) i VOLUME control (20) j k l m n o p q PHONES jack (20) DIRECT, TONE buttons (21, 22) INPUT selector (20, 23, 24, 25) BASS control (21) TREBLE control (21) BALANCE control (21) MEMORY button (26) TUNING MODE button (25, 26, 32) En-7 Getting to Know the Receiver—Continued Rear Panel North American model a b 3 4 3 4 678 9 j 5 European model a b 5 678 9 j k For detailed information, see the pages in parentheses. a REMOTE CONTROL jack (17) b FM ANTENNA jack and AM ANTENNA terminal (14) c d e f g En-8 SUBWOOFER PRE OUT jack (12) SPEAKERS A and B terminals (11) h i j k DOCK IN jacks (16) TAPE IN/OUT jacks (16, 18) TV IN jacks (16) DIGITAL IN (OPTICAL, COAXIAL) jacks (European model only) (16) PHONO IN (MM) jacks and GND terminal (16) CD IN jacks (16) BD/DVD IN jacks (16) See “Connecting the Receiver” for connection ( pages 11 to 18). Getting to Know the Receiver—Continued Display 1 2 3 4 567 9j 8 For detailed information, see the pages in parentheses. a b c d A/B speaker indicators (20) Headphone indicator Message area Tuning indicators • RDS indicator (European model) (28) • AUTO indicator (25) • TUNED indicator (25) • FM STEREO indicator (25, 32) e f g h i j MUTING indicator (32) SLEEP indicator (21) ASb (Auto Standby) indicator (19) Digital input indicator (European model) ch indicator Hz indicator En-9 Getting to Know the Receiver—Continued Remote Controller For detailed information, see the pages in parentheses. a j k l b 3 4 m n 5 6 7 o p 8 9 q r En-10 a b c d e f g h button (13, 19, 22) i j k l m n o p q r SETUP button (13, 19, 22, 24, 27) INPUT SELECTOR buttons (20, 23, 25, 31) Number buttons (25, 26) D.TUN button (25, 26) CLEAR button (27) BASS / buttons (21) TREBLE / buttons (21) Arrow []/[]/[]/[] and ENTER buttons (13, 19, 22, 24, 26, 27, 31) DIMMER button (21) DISPLAY button (27, 28, 29) SLEEP button (21) MUTING button (20) VOLUME + /– buttons (20) TONE button (21) DIRECT button (22) RETURN button (13, 19, 22, 24, 27, 31) DOCK Control buttons (31) Connecting the Receiver Disconnect the power cord from the electrical outlet before making any connections. Speaker Connection Precautions The receiver allows you to connect two sets of speakers. When two sets of speakers are connected, you can select which speaker set outputs sound or use both sets to output sound simultaneously. ( page 20 about “Speakers A” and “Speakers B”) • When you connect one set of speakers to either SPEAKERS A or SPEAKERS B terminal posts, or when you connect two sets of speakers to both speaker terminal posts and output sound only from either speaker set, use speakers whose impedance is 4 to 16 Ω, and set the speaker impedance setting on the receiver to 4 or 6 Ω ( page 13). When the impedance of the speaker to be used is less than 6 Ω, set the speaker impedance to 4 Ω. • When you connect speakers to both SPEAKERS A and SPEAKERS B terminal posts and output sound from both speaker sets simultaneously, use speakers whose impedance is 8 to 16 Ω. Set the speaker impedance setting on the receiver to 4 Ω. • Read the instructions supplied with your speakers. • Pay close attention to speaker wiring polarity. In other words, connect positive (+) terminals only to positive (+) terminals, and negative (–) terminals only to negative (–) terminals. If you get them the wrong way around, the sound will be out of phase and will sound unnatural. • Unnecessarily long or very thin speaker cables may affect the sound quality and should be avoided. • Be careful not to short the positive and negative wires. Doing so may damage the receiver. Connecting the Speaker Cables 1 Strip about 5/8" (15 mm) of insulation from the ends of the speaker cables, and twist the bare wires tightly, as shown. 2 Unscrew the terminal. 3 Fully insert the bare wire. 4 Screw the terminal tight. 5/8" (15 mm) The following illustration shows which speaker should be connected to each pair of terminals. Speaker set A Right speaker – + Speaker set B Left speaker – + Right speaker – + Left speaker – + • Don’t connect more than one cable to each speaker terminal. Doing so may damage the receiver. • Don’t connect a speaker to more than one pair of speaker terminals. Note: If you make an incorrect setting for the speakers or the impedance values, the built-in protection circuit may be activated resulting in no sound output from speakers. Receiver En-11 Connecting the Receiver—Continued Connecting a Powered Subwoofer Using a suitable cable, connect the receiver’s SUBWOOFER PRE OUT to the input on your powered subwoofer. If your subwoofer is unpowered and you’re using an external amplifier, connect the SUBWOOFER PRE OUT to the amp’s input. Note: SUBWOOFER PRE OUT is linked to SPEAKER A’s On/Off. When SPEAKER A is selected, the audio signal will output from the SUBWOOFER PRE OUT. En-12 Powered subwoofer Connecting the Receiver—Continued Configuring the Speaker Impedance On the receiver, the factory default for speaker impedance is “6 Ω”. If you need to change the speaker impedance setting, read “Speaker Connection Precautions” on page 11 carefully before performing the procedure below. Note: Be sure to minimize the volume level on the receiver before configuring the speaker impedance. ENTER 1 2 Press the [] button to turn on the power. 3 Use the arrow []/[] buttons to select “SP Impedance,” and then press [ENTER]. 4 Change the impedance value to “4 Ω” using the arrow []/[] buttons. 5 Press the [ENTER] button to confirm the setting. SETUP Press the [SETUP] button on the remote controller. If you want to change the impedance setting back to the factory default setting of 6 Ω, follow the same procedure described above. 6 Press the [SETUP] button on the remote controller to complete the setting. Notes: • This procedure can also be performed on the receiver by using [SETUP], TUNING []/[], PRESET []/[], and [ENTER]. • Press [RETURN] to return to the previous menu. • This procedure will be cancelled if the [SETUP] button is pressed before step 5. Setting example: If you’re using only one of the speaker sets connected to SPEAKERS A or B, choose the 4 Ω setting if each speaker’s impedance is 4 Ω to less than 6 Ω, or choose the 6 Ω setting if each speaker’s impedance is 6 Ω or more. If you’re using both of the speaker sets connected to SPEAKERS A and B, choose the 4 Ω setting if each speaker’s impedance is 8 to 16 Ω. En-13 Connecting Antennas This section explains how to connect the supplied indoor FM antenna and AM loop antenna. The receiver won’t pick up any radio signals if no antenna is connected, so you must connect the antenna to use the tuner. Insert the plug fully into the jack. Push Indoor FM antenna (supplied) Thumbtacks, etc. Insert wire Release AM loop antenna (supplied) Assembling the AM loop antenna Caution: Be careful that you don’t injure yourself when using thumbtacks. Notes: • Once your receiver is ready for use, you’ll need to tune into a radio station and position the antenna to achieve the best possible reception. • Keep the AM loop antenna as far away as possible from your receiver, TV, speaker cables, and power cords. • Refer to “Radio Frequency Setup” on page 24 for more information on switching the frequency setup. Tips: • If you cannot achieve good reception with the supplied indoor FM antenna, try a commercially available outdoor FM antenna instead. • If you cannot achieve good reception with the supplied indoor AM loop antenna, try using it with a commercially available outdoor AM antenna. En-14 Connecting Your Components About Connections Connecting components : Audio Receiver Blu-ray Disc/ DVD player CD player TV, projector, etc. • Before making any connections, read the manuals supplied with your components. • Don’t connect the power cord until you’ve completed and double-checked all connections. • Push plugs in all the way to make good connections Right! (loose connections can cause noise or malfunctions). Wrong! • To prevent interference, keep audio cable away from power cords and speaker cables. Cables and Jacks Signal Cable Jack Optical digital audio (European model only) Audio Coaxial digital audio (European model only) Description OPTICAL COAXIAL Optical digital connections allow you to enjoy digital sound. The audio quality is the same as coaxial. Orange Coaxial digital connections allow you to enjoy digital sound. The audio quality is the same as optical. L White Analog audio connections (RCA) carry analog audio. R Red Analog audio (RCA) Notes: • The receiver does not support multichannel audio input. The PCM signal can be input only to digital input terminals. Make sure that PCM is selected on the playback component. • The receiver’s optical digital jacks have shutter-type covers that open when an optical plug is inserted and close when it’s removed. Push plugs in all the way. Caution: To prevent shutter damage, hold the optical plug straight when inserting and removing. En-15 Connecting Your Components—Continued . Illustration below shows European model No. Jack Connectable components 1 PHONO IN Turntable 2 CD IN CD player, Turntable 3 BD/DVD IN Blu-ray Disc/DVD player 4 DOCK IN RI dock 5 TAPE IN Cassette tape deck 6 TV IN TV DIGITAL IN (OPTICAL, COAXIAL) 7 (European model only) OPTICAL: TV COAXIAL: CD, BD/DVD Notes: • Refer to the connected component’s instruction manual for details. • Connect a turntable (MM) that has a built-in phono preamp to CD IN, or connect it to PHONO IN with the phono preamp turned off. If your turntable (MM) doesn’t have a phono preamp, connect it to PHONO IN. If your turntable has a moving coil (MC) type cartridge, you’ll need a commercially available MC head amp or MC transformer to connect to PHONO IN. See your turntable’s manual for details. If your turntable has a ground wire, connect it to the GND screw. With some turntables, connecting the ground wire may produce an audible hum. If this happens, disconnect it. • If your Blu-ray Disc/DVD player has both main stereo and multichannel outputs, be sure to connect the main stereo output using connection 3. En-16 Connecting Your Components—Continued Connecting Onkyo Components Analog audio cable Analog audio cable e.g., CD player cable 1 Make sure that each Onkyo component is connected with an analog audio cable ( page 16). 2 Make the connection (see the illustration). Dock cable • Connect only Onkyo components to jacks. Connecting other manufacturer’s components may cause a malfunction. • Some components may not support all functions. Refer to the manuals supplied with your Onkyo components. With (Remote Interactive), you can use the following special functions: ■ System On/Auto Power On When you start playback on a component connected via , while the receiver is on Standby, the receiver will automatically turn on and select that component as the input source. ■ Direct Change When playback is started on a component connected via , the receiver automatically selects that component as the input source. ■ Remote Control You can use the receiver’s remote controller to control your other Dock, pointing the remote controller at the receiver’s remote control sensor instead of the component. Notes: • Use only cables for connections. cables are supplied with Onkyo players (CD, etc.). • Some components have two jacks. You can connect either one to the receiver. The other jack is for connecting additional -capable components. En-17 Connecting Your Components—Continued Connecting a Recording Component See “Recording” for an explanation of recording ( page 23). Analog audio cable Cassette tape deck, CDR, etc. Notes: • The receiver must be turned on for recording. Recording is not possible while it’s in Standby mode. • For European model, sources connected to a digital input cannot be recorded. Only analog inputs can be recorded. • DTS signals will be recorded as noise, so don’t attempt analog recording of DTS CDs or LDs. Connecting the Power Cord Connect the receiver’s power cord to a suitable wall outlet. Notes: • Before connecting the power cord, connect all of your speakers and components. • Turning on the receiver may cause a momentary power surge that might interfere with other electrical equipment on the same circuit. If this is a problem, plug the receiver into a different branch circuit. En-18 Turning On the Receiver M MON/STANDBY &(#5 ENTER SETUP Turning On and Standby 3 Use the arrow []/[] buttons to select “Auto Standby,” and then press [ENTER]. 4 Switch the ASb On/ASb Off using the arrow []/[] buttons. Press the [ON/STANDBY] button. Alternatively, press the remote controller’s [] button. The receiver comes on, and the display lights up. To turn the receiver off, press the [ON/STANDBY] button, or press the remote controller’s [] button. The receiver will enter Standby mode. To prevent any loud surprises when you next turn on the receiver, always turn down the volume before you turn it off. or Auto Standby When “Auto Standby” is set to “On,” the receiver will automatically enter Standby mode if there is no operation for 30 minutes with no audio signal input. Default setting: Off (North American model) On (European model) Notes: • If you’re listening at a low volume, the Auto Standby function may detect this as silence. • With some sources, the Auto Standby function may activate itself during playback. 1 2 Press the [] button to turn on the power. Press the [SETUP] button on the remote controller. 5 Press the [ENTER] button to confirm the setting. 6 Press the [SETUP] button on the remote controller to complete the setting. Notes: • This procedure can also be performed on the receiver by using [SETUP], TUNING []/[], PRESET []/ [], and ENTER. • Press [RETURN] to return to the previous menu. • This procedure will be cancelled if the [SETUP] button is pressed before step 5. En-19 Enjoying Audio Sources SPEAKERS A, B VOLUME INPUT SELECTOR MUTING VOLUME + / – PHONES INPUT Selecting the Speaker Set 1 2 Rotate the receiver’s [INPUT] selector, or press the remote controller’s INPUT SELECTOR buttons to select the source you want to hear. Use the [SPEAKERS A] and [SPEAKERS B] buttons on the receiver to select the speaker set that you want to use. The A and B speaker indicators show whether each speaker set is on or off. A,B Indicators Muting the Receiver (remote controller only) You can temporarily mute the output of the receiver. Press the remote controller’s [MUTING] button. The receiver is muted. To unmute the receiver, press the [MUTING] button again. Note: The Mute function will be cancelled if the remote controller’s VOLUME [+]/[–] buttons are pressed or the receiver is set to Standby. Using Headphones You can connect a pair of stereo headphones (1/4-inch phone plug) to the receiver’s PHONES jack for private listening. PHONES jack 3 4 Start playback on the selected component. To adjust the volume, use the receiver’s [VOLUME] control, or the remote controller’s VOLUME [+]/[–] buttons. Turn the control clockwise to turn up the volume or counterclockwise to turn down the volume. Notes: • Always turn down the volume before connecting your headphones. • While the headphones plug is inserted in the PHONES jack, the speakers are turned off. En-20 Enjoying Audio Sources—Continued DIMMER SLEEP DIMMER TONE TONE BASS [F]/[H] BASS TREBLE BALANCE TREBLE [F]/[H] Setting the Display Brightness Using the Tone and Balance Controls You can adjust the brightness of the display. This section explains the following functions that can be used with any input source. Press the [DIMMER] button repeatedly to select: dim, dimmer, or normal brightness. Adjusting the Bass Using the Sleep Timer (remote controller only) With the sleep timer, you can set the receiver so that it turns off automatically after a specified period. Press the remote controller’s [SLEEP] button repeatedly to select the required sleep time. You can set the sleep time from 90 to 10 minutes in 10 minute steps. At this time, by using the remote controller’s []/[] buttons, you can set the time in 1 minute steps. The SLEEP indicator appears on the display when the sleep timer has been set, as shown. The specified sleep time appears on the display for about 5 seconds; then the previous display reappears. SLEEP Indicator To cancel the sleep timer, press the [SLEEP] button repeatedly until the SLEEP indicator disappears. To check the remaining sleep time, press the [SLEEP] button. Note that if you press the [SLEEP] button while the sleep time is being displayed, you’ll shorten the sleep time by 10 minutes. You can adjust the Bass sounds by rotating the [BASS] control on the receiver or pressing the remote controller’s BASS []/ [] buttons. You can set the level from –6 to +6. Set it higher to make them louder. Set it lower to make them quieter. Adjusting the Treble You can adjust the Treble sounds by rotating the [TREBLE] control on the receiver or pressing the remote controller’s TREBLE []/[] buttons. You can set the level from –6 to +6. Set it higher to make them louder. Set it lower to make them quieter. Adjusting the Balance The [BALANCE] control is used to control the relative volume level of the left and right speaker systems. Note: If headphones are connected, the BALANCE control has no effect. Displaying the Tone Level You can check the tone level by pressing the [TONE] button repeatedly. The display will change as follows each time you press the [TONE] button. Current input source “TONE MODE” display Bass tone level Treble tone level En-21 Enjoying Audio Sources—Continued M &(#5 MON/STANDBY TONE DIRECT ENTER DIRECT SETUP Setting the DIRECT Function Press the [DIRECT] button. The message “DIRECT MODE” appears. When the DIRECT function is on, the tone controls are bypassed, so you can enjoy pure sound. To cancel the DIRECT function, press the [TONE] button again, and the message “TONE MODE” appears. The tone controls can be used to adjust the sound. You can configure whether the DIRECT function is applied or not for input sources individually. 1 2 Press the [] button to turn on the power. 3 Use the arrow []/[] buttons to select “Digital Input,” and then press [ENTER]. 4 Press the arrow []/[] buttons to select the input that you want to change the assignment. Setting the Digital Audio Input (for European model) If you connect a component to a digital audio input, you must assign that input to an input selector. For example, if you connect your RI Dock to the OPTICAL, you must assign “OPT” to the “DOCK” input selector. Here are the default assignments. Input selector BD/DVD TV TAPE DOCK CD Default assignment COAX2 OPT ––––– ––––– COAX1 TONE Press the [SETUP] button on the remote controller. For example, select “DOCK” to assign to “OPT”. 5 Press the arrow []/[] buttons to select an input terminal. For example, select “OPT”. 6 Press the [ENTER] button to confirm the setting. Select if the component is connected to an analog audio input. 7 Press the [SETUP] button on the remote controller to complete the setting. Note: The maximum sampling rate for PCM signals from a digital input (optical and coaxial) is 96 kHz/24 bit. Notes: • This procedure can also be performed on the receiver by using [SETUP], TUNING []/[], PRESET []/ [], and [ENTER]. • Press [RETURN] to return to the previous menu. • This procedure will be cancelled if the [SETUP] button is pressed before step 6. COAX1, COAX2, OPT: Select the corresponding digital audio input, to which the component has been connected. –––––: En-22 Recording Unless you have the full consent of the copyright holder, copyright laws prohibit using your recordings for anything other than personal enjoyment! This section explains how to record the selected input source to a component with recording capability, and how to record audio from different sources. INPUT SELECTOR INPUT Recording the Input Source Audio sources can be recorded to a recorder (e.g., cassette tape deck, CDR). 1 Prepare the recorder: • Set the recorder so that it’s ready for recording. • If necessary, adjust the recording level on the recorder. • See the recorder’s manual for more information. 2 Use the receiver’s [INPUT] selector, or the remote controller’s INPUT SELECTOR buttons to select the component that you want to record from. 3 Start playback on the component selected in step 1. Notes: • If you select another input source during recording, the newly selected input source will be recorded. • The volume, balance, mute and tone controls have no effect on the signal being recorded. En-23 Listening to the Radio TUNING F/H Number buttons D.TUN INPUT TUNING MODE &/(/#/5/ ENTER ENTER SETUP Radio Frequency Setup 4 For radio tuning to work properly, you must specify the radio frequency step used in your area. Note that when this setting is changed, all radio presets are deleted. North American model (AM/FM): 10 kHz/200 kHz (default setting) or 9 kHz/ 50 kHz European model (AM): 9 kHz (default setting) or 10 kHz 1 Use the receiver’s [INPUT] selector, or the remote controller’s INPUT SELECTOR buttons to select AM or FM. 2 Press the [SETUP] button on the remote controller. 3 Use the arrow []/[] buttons to select “AM/FM FreqStep” (North American model) or “AM Freq Step” (European model), and then press [ENTER]. North American model European model En-24 Use the arrow []/[] buttons to specify the frequency. North American model European model 5 Press the [ENTER] button to confirm the setting. 6 Press the [SETUP] button on the remote controller to complete the setting. Notes: • This procedure can also be performed on the receiver by using [SETUP], TUNING []/[], PRESET []/ [], and [ENTER]. • Press [RETURN] to return to the previous menu. • This procedure will be cancelled if the [SETUP] button is pressed before step 5. Listening to the Radio—Continued Listening to AM/FM Stations With the built-in tuner, you can enjoy AM and FM radio stations. 1 Use the receiver’s [INPUT] selector, or the remote controller’s INPUT SELECTOR buttons to select AM or FM. The frequency changes in 0.05 MHz steps (or 0.05 MHz to 0.2 MHz for North American model) for FM, and 9 kHz (or 10 kHz) steps for AM. When tuned to a station, the TUNED indicator appears. When tuned to a stereo FM station, the FM STEREO indicator also appears. TUNED FM STEREO In this example, FM has been selected. Band Frequency (Actual display depends on the country.) 2 Press the [TUNING MODE] button so that the AUTO indicator appears or disappears from the display. Tuning to Weak FM Stereo Stations If the signal from a stereo FM station is weak, it may be impossible to get good reception. In this case, switch to Manual Tuning mode and listen to the station in mono. ■ Tuning into Stations by Frequency You can tune to AM and FM stations directly by entering the appropriate frequency. AUTO indicator 1 Auto Tuning To activate this mode, press the [TUNING MODE] button to turn on the “AUTO” indicator. In this mode, you will receive the broadcast in stereo sound. Manual Tuning To activate this mode, press the [TUNING MODE] button to turn off the “AUTO” indicator. In this mode, you will receive the broadcast in monaural sound. 3 Press the remote controller’s [D.TUN] button twice. (Actual display depends on the country.) 2 Within 8 seconds, use the number buttons to enter the frequency of the radio station. For example, to tune to 87.50 (FM), press 8, 7, 5, 0. Press the TUNING [] or [] button. You can also use the remote controller’s arrow []/[] buttons to tune the radio. Auto Tuning Searching stops when a station is found. Manual Tuning The frequency stops changing when you release the button. Press the buttons repeatedly to change the frequency one step at a time. En-25 Listening to the Radio—Continued ■ Selecting Presets Presetting AM/FM Stations PRESET C/U To select a preset, use the remote controller’s arrow []/[] buttons or the receiver’s PRESET []/[] buttons. ■ Selecting Preset by entering Preset number You can tune to AM and FM stations directly by entering the appropriate preset number. MEMORY TUNING MODE 1 Press the remote controller’s [D.TUN] button. DISPLAY Number buttons (Actual display depends on the country.) 2 D.TUN Within 8 seconds, use the number buttons to enter the preset number of the radio station. ■ Deleting Presets ENTER &/(/#/5 1 Select the preset that you want to delete. 2 While holding down the [MEMORY] button, press the [TUNING MODE] button. See the previous section. SETUP You can store up to 40 of your favorite AM/FM radio stations as presets. Presetting FM/AM stations is performed by the receiver. 1 Tune to the AM/FM station that you want to store as a preset. 2 Press the [MEMORY] button. 3 While the preset number flashes (about 8 seconds), use the PRESET []/[] buttons to select a preset from 1 through 40. 4 Press the [MEMORY] button again to store the station or channel. The preset number flashes. The station or channel is stored and the preset number stops flashing. Repeat this procedure for all of your favorite AM/ FM radio stations. En-26 The preset is deleted and its number disappears from the display. Listening to the Radio—Continued ■ Name Edit select “Shift,” and press the ENTER button to make the other character string pattern appear. You can enter a custom name for radio preset for easy identification. When entered, the custom name will appear on the display. The custom name is edited using the character input screen. 1 㼍 㼚 㻝 㼧 㻿 Select the preset that you want to edit the name. 2 Press the [SETUP] button on the remote controller. 3 Use the arrow []/[] button to select “Name Edit,” and then press [ENTER]. 4 1 㼎 㼛 㻞 㼩 㼔 㼏 㼜 㻟 㻂 㼕 㼐 㼑 㼒 㼝 㼞 㼟 㻠 㻡 㻢 㻦 㻎 㻨 㼒 㼠 㻨 㻮 㻻 㻬 㼉 㼔 㻯 㻼 㻏 䠸 㼕 㻰 㻽 㻐 㻧 㼒 㼓 㼠 㻣 㻪 㻙 㼔 㼡 㻤 㻫 㻙 㼕 㼢 㻥 㻿 㻪 㼖 㼣 㻜 㼜 㻮 㼗 㼘 㼙 㼤 㼥 㼦 㻙 㻩 䠼 㼍 㼏 㼑 㻿 㻻 㻷 㻱 㻲 㻳 㻴 㻾 㻿 㼀 㼁 㻑 䠺 㻒 㻖 䇻 㻘 㻚 㻛 㼠 㻨 㻙 㻙 㻵 㼂 㻔 㻿 㻪 㻶 㼃 㻕 㼜 㻮 㻷 㼄 㼋 㼍 㻿 2 㻭 㻺 㻍 㼇 㻿 㻸 㼅 㻗 㼏 㻹 㼆 䡚 㼑 㻻 㻷 Shift*1: Switches the displayed character. Use the arrow []/[]/[]/[] button to select a character, and then press [ENTER]. (Left)/(Right): Select these to move the cursor within the Name input area. Repeat this step to enter up to 8 characters. Space: Enters a space character. BS (Back Space)*2: “Back Space” moves the cursor backward one character space. In addition, “Back Space” deletes the character to the left of the cursor. 5 OK: Specifies that the entry is complete. When you’ve finished editing the name and want to store it, be sure to use the arrow []/[]/[]/[] button to select “OK” and then press [ENTER]. If you fail to do this, the name won’t be saved. See the following table for information about the character strings that can be input. There are two patterns of character string: pattern 1 containing mainly lowercase characters, and pattern 2 containing mainly uppercase characters. You can use the / buttons to select character strings within each pattern. Use the / buttons to select the character that you want to input, and press the ENTER button. If the displayed character string pattern does not contain the character you want to input, use the / buttons to display the [Shift BS OK] character string, use the / buttons to Tips: *1 You can also perform this on the remote controller by using [D.TUN]. *2 By pressing [CLEAR] on the remote controller, you can delete all characters in the input. 6 Press the [SETUP] button on the remote controller to complete the setting. Notes: • This procedure can also be performed on the receiver by using [SETUP], TUNING []/[], PRESET []/ [], and [ENTER]. • Press [RETURN] to return to the previous menu. • This procedure will be cancelled if the [SETUP] button is pressed before step 5. ■ Switching the Display When receiving AM or FM, you can press the remote controller’s [DISPLAY] button to switch the display between the name you specified in Name Edit and the frequency that’s being received. En-27 Listening to the Radio—Continued Using RDS (European model only) RDS only works in areas where RDS broadcasts are available. When tuned into an RDS station, the RDS indicator appears. RDS indicator ■ What is RDS? RDS stands for Radio Data System and is a method of transmitting data embedded in FM radio signals. It was developed by the European Broadcasting Union (EBU) and is available in most European countries. Many FM stations use it these days. In addition to displaying text information, RDS can also help you find radio stations by type (e.g., news, sport, rock, etc.). The receiver supports three types of RDS information: PS (Program Service) When tuned to an RDS station that’s broadcasting PS information, the station’s name will be displayed. RT (Radio Text) When tuned to an RDS station that’s broadcasting text information, the text will be shown on the display ( page 29). PTY (Program Type) This allows you to search for RDS radio stations by type ( page 29). Notes: • In some cases, the text characters displayed on the receiver may not be identical to those broadcast by the radio station. Also, unexpected characters may be displayed when unsupported characters are received. This is not a malfunction. • If the signal from an RDS station is weak, RDS data may be displayed intermittently or not at all. ■ Switching the Display When tuned to RDS stations, you can press the remote controller’s [DISPLAY] button to switch the information shown in the display. The display will change as follows each time you press the [DISPLAY] button. PS Preset name (if you edited) Frequency RT PTY* TONE/DIRECT display* * If you don’t press the [DISPLAY] button for 3 seconds, the display will change to PS. En-28 RDS Program Types (PTY) Type None News reports Current affairs Information Sport Education Drama Culture Science and technology Varied Pop music Rock music Middle of the road music Light classics Serious classics Other music Weather Finance Children’s programmes Social affairs Religion Phone in Travel Leisure Jazz music Country music National music Oldies music Folk music Documentary Alarm test Alarm Display NONE NEWS AFFAIRS INFO SPORT EDUCATE DRAMA CULTURE SCIENCE VARIED POP M ROCK M EASY M LIGHT M CLASSICS OTHER M WEATHER FINANCE CHILDREN SOCIAL RELIGION PHONE IN TRAVEL LEISURE JAZZ COUNTRY NATION M OLDIES FOLK M DOCUMENT TEST ALARM Listening to the Radio—Continued Displaying Radio Text (RT) Finding Stations by Type (PTY) DISPLAY DISPLAY PRESET C/U ENTER When tuned to an RDS station that’s broadcasting text information, the text can be displayed. Use the [DISPLAY] button to display RT. The RT information scrolls across the display. Notes: • The message “Waiting” may appear while the receiver waits for the RT information. • If the message “No Text Data” appears on the display, no RT information is available. You can search for radio stations by type. 1 Use the [DISPLAY] button to display PTY. 2 Use the PRESET []/[] buttons to select the type of program you want. The current program type appears on the display. Note: If you tuned to another station than RDS, “Not RDS” will appear. See the table on page 28. Note: If you don’t press the buttons for 3 seconds, the display will return to the previous display. 3 To start the search, press [ENTER]. 4 When a station you want to listen to is found, press [ENTER]. The receiver searches until it finds a station of the type you specified, at which point it stops briefly before continuing with the search. If no stations are found, the message “Not Found” appears. En-29 iPod/iPhone Playback via Onkyo Dock Using the Onkyo Dock Dock is sold separately. Models sold are different depending on the region. For the latest information on Onkyo Dock components, see the Onkyo web site at: http://www.onkyo.com Before using an Onkyo Dock, update your iPod/ iPhone with the latest software, available from the Apple web site. For supported iPod/iPhone models, see the instruction manual of the Onkyo Dock. RI Dock With the RI Dock, you can easily play the music stored on your Apple iPod/iPhone through the receiver and enjoy great sound. You can even use the receiver’s remote controller to operate your iPod/iPhone. Notes: • Connect the RI Dock to the receiver with an cable ( page 17). • Set the RI Dock’s RI MODE switch to “HDD” or “HDD/DOCK”. ■ System Function System On When you turn on the receiver, the RI Dock and your iPod/iPhone turn on automatically. In addition, when the RI Dock and iPod/iPhone are on, the receiver can be turned on by pressing [ON/STANDBY]. Auto Power On If you start iPod/iPhone playback while the receiver is on Standby, the receiver will automatically turn on and select your iPod/iPhone as the input source. Direct Change If you start iPod/iPhone playback while listening to another input source, the receiver will automatically switch to the input to which the RI Dock is connected. Other Remote Controllers You can use the remote controller that came with the receiver to control other iPod/iPhone functions. The available functionality depends on the receiver. iPod/iPhone Alarm If you use the Alarm function on your iPod/iPhone to start playback, the receiver will turn on at the specified time and select your iPod/iPhone as the input source automatically. Notes: • Linked operations do not work with video playback or when the alarm is set to play a sound. • If you use your iPod/iPhone with any other accessories, iPod/iPhone playback detection may not work. En-30 Operating Notes • Use the receiver’s volume control to adjust the playback volume. • While your iPod/iPhone is inserted in the RI Dock, its volume control has no effect. • If you do adjust the volume control on your iPod/ iPhone while it’s inserted in the RI Dock, be careful that it’s not set too loud before you reconnect your earphones. Note: On the iPod with video and iPod nano (1st generation), the click wheel is disabled during playback. iPod/iPhone Playback via Onkyo Dock—Continued Controlling Your iPod/iPhone See the Dock’s instruction manual for more information. • Set the RI Dock’s RI MODE switch to “HDD” or “HDD/DOCK”. • You can control your iPod/iPhone when “DOCK” is selected as the input source. Press the DOCK button first. Available buttons: 1 /, ENTER 2 REPEAT 3 SHUFFLE 4 RETURN 5 MENU 6 /, , Note: Some buttons may not be available depending on your RI Dock. 1 2 3 4 5 6 Notes: • With some iPod/iPhone models or generations, or some RI Docks, certain buttons may not work as expected. • For details on operating your iPod/iPhone, please refer to the instruction manual of the RI Dock En-31 Troubleshooting If you have any trouble using the receiver, look for a solution in this section. If you can’t resolve the issue yourself, try resetting the receiver before contacting your Onkyo dealer. To reset the receiver to its factory defaults, turn it on and, while holding down the [TUNING MODE] button, press the [ON/STANDBY] button. Note that resetting the receiver will delete your radio presets and custom settings. Power Can’t turn on the receiver • Make sure that the power cord is plugged into the electric outlet properly. • Unplug the power cord from the electric outlet, wait 5 seconds or more, then plug it in again. Audio There’s no sound or it’s very quiet • Make sure the speaker set A or B is on ( page 20). • Make sure that all audio connecting plugs are pushed in all the way ( page 15-18). • Make sure that the polarity of the speaker cables is correct, and that the bare wire is in contact with the metal part of each speaker terminal ( page 11). • Make sure that the speaker cables are not shorting. • Make sure that the inputs and outputs of all components are connected properly. • Make sure that the correct input source is selected ( page 20). • If the MUTING indicator is shown on the display, press the remote controller’s [MUTING] button to unmute the receiver ( page 20). • If your turntable uses an MC cartridge, you must connect an MC head amp, or an MC transformer and a phono preamp. • While a pair of headphones is connected to the PHONES jack, no sound is output from the speakers. ( page 20). Noise can be heard • Using cable ties to bundle audio cables with power cords, speaker cables, and so on may degrade the audio performance; do not bundle audio cables together with power cords or speaker cables. • An audio cable may be picking up interference. Try repositioning your cables. En-32 The tone controls have no effect • If the DIRECT is turned on, the tone controls have no effect. Press the [TONE] button to turn the function off. Tuner Reception is noisy, stereo FM reception suffers from hiss, or the FM STEREO indicator doesn’t appear • Relocate your antenna. • Move the receiver away from your TV or computer. • Listen to the station in mono ( page 24). • When listening to an AM station, operating the remote controller may cause noise. • Passing cars and airplanes can cause interference. • Concrete walls weaken radio signals. • If nothing improves the reception, install an outdoor antenna. Remote Controller The remote controller doesn’t work • Make sure that the batteries are installed with the correct polarity ( page 6). • Install new batteries. Don’t mix different types of batteries or old and new batteries ( page 6). • Make sure that the remote controller is not too far away from the receiver, and that there’s no obstruction between the remote controller and the receiver’s remote control sensor ( page 6). • Make sure that the receiver is not subjected to direct sunshine or inverter-type florescent lights. Relocate if necessary ( page 6). Can’t control other components • If it is an Onkyo component, make sure that the cable and analog audio cable are connected properly. Connecting only an cable won’t work ( page 17). • With some components, certain buttons may not work as expected, and some may not work at all. • To control an Onkyo component that’s connected via , point the remote controller at the receiver. Troubleshooting—Continued Recording Can’t record • On your recorder, make sure the correct input is selected. • To prevent signal loops and damage to the receiver, input signals are not fed through to outputs with the same name (e.g., TAPE IN to TAPE OUT). Others The functions don’t work • To use , you must make an connection and an analog audio connection (RCA) between the component and receiver, even if they are connected digitally ( page 17). The receiver contains a microcomputer for signal processing and control functions. In very rare situations, severe interference, noise from an external source, or static electricity may cause it to lockup. In the unlikely event that this happens, unplug the power cord from the wall outlet, wait at least five seconds, and then plug it back in again. Onkyo is not responsible for damages (such as CD rental fees) due to unsuccessful recordings caused by the unit’s malfunction. Before you record important data, make sure that the material will be recorded correctly. Before disconnecting the power cord from the wall outlet, set the receiver to Standby. En-33 Specifications Amplifier Section Rated Output Power General (North American) 50 watts minimum continuous power per channel, 8 Ω loads, 2 channels driven from 20 Hz to 20 kHz with a maximum total harmonic distortion of 0.08 % (FTC) Power Supply (North American) AC 120 V, 60 Hz (European) AC 230 V, 50 Hz Power Consumption (North American) 180 W (European) 170 W No-sound Power Consumption (North American) 30 W (European) 35 W Stand-by Power Consumption (North American) 0.15 W (European) 0.25 W Dimensions (W × H × D) 435 × 150 × 328.5 mm (17-1/8" × 5-7/8" × 12-15/16") Weight 7.3 kg (16.1 lbs.) (European) 2 ch × 90 W at 6 Ω, 1 kHz, 1 ch driven of 1 % (IEC) Dynamic Power 180 W (3 Ω, Front) 160 W (4 Ω, Front) 100 W (8 Ω, Front) THD +N (Total Harmonic Distortion +Noise) 0.03 % (20 Hz–20 kHz, half power) Damping Factor 60 (1 kHz, 8 Ω) Input Sensitivity and Impedance (Un balance) 200 mV/ 47 kΩ (LINE) 2.5 mV/ 47 kΩ (PHONO MM) Rated RCA Output Level and Impedance 200 mV/ 2.2 kΩ (REC OUT) Maximum RCA Output Level and Impedance 2 V/2.2 kΩ (REC OUT) ■ Audio Inputs Analog Inputs PHONO, CD, DOCK, TAPE, TV, BD/DVD Digital Inputs (European model only) OPTICAL: TV COAXIAL: CD, BD/DVD Phono Overload 70 mV (MM, 1 kHz, 0.5%) Frequency Response 10 Hz–100 kHz/ +1 dB–3 dB (CD) Tone Control Characteristics ±11 dB, 100 Hz (BASS) ±11 dB, 10 kHz (TREBLE) Signal to Noise Ratio 100 dB (CD, IHF-A) 80 dB (PHONO MM, IHF-A) Analog Outputs TAPE Speaker Impedance 4 Ω–16 Ω Pre Outputs SUBWOOFER Speaker Outputs SPEAKERS A SPEAKERS B Phones 1 (6.3 ø) ■ Audio Outputs Tuner Section ■ FM Tuning Frequency Range (North American) 87.5 MHz–107.9 MHz (European) 87.5 MHz–108.0 MHz, RDS ■ AM Tuning Frequency Range (North American) 530 kHz–1710 kHz (European) 522/530 kHz–1611/1710 kHz Preset Channel 40 En-34 ■ Others 1 Specifications and features are subject to change without notice. Memo 2-1, Nisshin-cho, Neyagawa-shi, OSAKA 572-8540, JAPAN http://www.onkyo.com/ The Americas 18 Park Way, Upper Saddle River, N.J. 07458, U.S.A. For Dealer, Service, Order and all other Business Inquiries: Tel: 201-785-2600 Fax: 201-785-2650 http://www.us.onkyo.com/ For Product Support Team Only: 1-800-229-1687 http://www.us.onkyo.com/ Europe Liegnitzerstrasse 6, 82194 Groebenzell, GERMANY Tel: +49-8142-4401-0 Fax: +49-8142-4208-213 http://www.eu.onkyo.com/ Meridien House, Ground floor, 69 - 71 Clarendon Road, Watford, Hertfordshire, WD17 1DS, United Kingdom Tel: +44 (0)8712-00-19-96 Fax: +44 (0)8712-00-19-95 China (Hong Kong) Unit 1033, 10/F, Star House, No 3, Salisbury Road, Tsim Sha Tsui Kowloon, Hong Kong. Tel: 852-2429-3118 Fax: 852-2428-9039 http://www.hk.onkyo.com/ (Mainland) 1301, 555 Tower, No.555 West NanJing Road, Jing’an District, Shanghai, China 200041, Tel: 86-21-52131366 Fax: 86-21-52130396 http://www.cn.onkyo.com/ Asia, Oceania, Middle East, Africa Please contact an Onkyo distributor referring to Onkyo SUPPORT site. http://www.intl.onkyo.com/support/ The above-mentioned information is subject to change without prior notice. Visit the Onkyo web site for the latest update. I1306-1 SN 29401517 (C) Copyright 2013 Onkyo Corporation Japan. All rights reserved. * 2 9 4 0 1 5 1 7 *