1
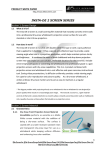
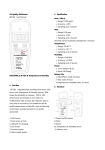
Insta-DE 2 Series Dry-Erase Front Projection Screen Film Installation Guide Product Features Award winning and GREENGUARD certified VersaWhite material. 1.1 gain with 180 degree wide viewing angle. Special anti-scratch layer to ensure long use as a dry-erase/projection screen. Anti-reflection diffusion surface eliminates glare and hot-spot while using a projector. Application Advantages Instantly converts flat surfaces/walls into a dry-erase whiteboard projection screen. Includes adhesive black velveteen border to enhance contrast and overall appearance. Perfect dry-erase and projection solution for today's short throw projectors. Ideal and effective instructional presentation tool in the classroom, boardroom, and training facilities. Product specifications Specifications: Color display Thickness Material composition Weight Gain Viewing Angle Rev012513-JA White 2.1mm High molecular weight copolymer of Terephthalic acid ethyl esters 1m2/377g 1.1 180∘ 1 What’s in the package Please make sure all parts listed below are included. a b c d e Parts List QTY a. Insta-DE 2 Screen Material Film Roll b. Self-stick cradle c. Whiteboard pens d. High density eraser e. Microfiber cleaning cloth f. Black velvet border adhesive strip roll 1 1 2 2 1 1 f Notes: For best results and maximum product longevity, ALWAYS and ONLY use a high density whiteboard Eraser. Preparation The Insta-DE 2 product is to be solely installed on flat surfaces. Prepare the flat wall/surface by cleaning the entire area. Do not install if any imperfections are found on the surface such as drilled holes, glue/tape residue, dents, etc. We recommend sanding the area first to make sure you have a clean flat and smooth surface. Failure to remove such imperfections can damage the product. The dry erase function of this product requires a smooth writeable surface and Elite Screens is not responsible should these instructions are not be properly followed. Take the Insta-DE 2 film roll out of the package and unroll it on a clean surface and lay it on its front side. Installation using Spray Adhesive Recommended spray type: 3M™ Super 77™ Multipurpose Adhesive (not included) Two people minimum are required for installation. 1. Begin by marking the area of the screen size to be installed on the wall or surface. 2. Carefully unroll the material and use a strip of duct tape to hold the left or right side edge to the installation location. Note: The back side of the Insta-DE2 is shiny. Rev012513-JA 2 ATTENTION: Handle with care to avoid permanent damage to this product 3. Once the edge has been tapped, apply the spray adhesive to both the wall and on the back of the InstaDE2 material. We recommend applying the film in 1 foot increments for best results. 4. Wait until the spray adhesive is dry before attaching the material to the wall. Do not attach the material to the wall if the spray adhesive is still wet. This is to avoid creating air pockets (bubbles) as the adhesive will try to escape when the Insta-DE2 material is attached to the wet surface. 5. Once the spray adhesive has been dried (surface and material should feel sticky), begin to unroll and attach the material to the wall. 6. Smoothen out the material with a smoothing tool (not included). Use an upward and downward motion to remove any air bubbles and assure the material is attached. 7. Repeat the process throughout the rest of the material. 8. Use a soft damp cloth to clean and remove any residue. Caution: The spray adhesive is meant to be permanent for the life of the product. Adhesive black velvet border installation 1. Measure the top/bottom and left/right sides of the Insta-DE2 screen to obtain the required length of the velvet border you will need to use for bordering your screen. Rev012313-JA www.elitescreens.com 3 2. Peel a small portion off of the velvet border and place it about half an inch over the white area of the screen. Continue to peel off and roll out the remainder of the velvet border until you have reached the end and cut the edge. Note: For best results, we recommend cutting the edge in a 45° angle. 3. Repeat the process for the remainder of the sides until all sides are bordered as shown below. Safety Precautions: A. Avoid using sharp objects directly on the screen which can result in permanently damaging the product and voiding your warranty. B. Creases or wrinkles caused by improper installation are not removable. Handle with care. For local Elite Screens contact or Technical Support, please visit www.elitescreens.com Rev012313-JA www.elitescreens.com 4