1
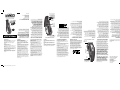
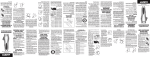
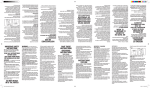
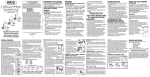
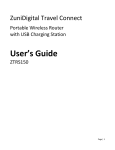
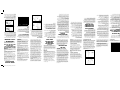
Oil both
areas
11/7/12 2:37 PM
The appliance is also supplied with 2 taper
guides. The taper guides can be used above
the ear to get a clean line.
• Attach either the left or right guide
depending on which ear you are cutting
above.
• Angle the clipper and gently stroke around
the ear towards the back of the neck.
Fig. 2
Remove comb guide
Fig. 1
GRADE
3mm
#1
In order to maintain the optimum capacity of the
rechargeable batteries, the appliance has to be
fully discharged every 6 months approximately.
Then recharge the appliance to full capacity,
again for 3 hours.
6mm
#2
9.5mm
#3
13mm
#4
16mm
#5
19mm
#6
22mm
#7
25mm
#8
This appliance is supplied with 8 comb guides
and a left and right ear taper guide:
COMB GUIDES
Attach comb
guide
• To attach a comb guide, ensure the
appliance is switched off. Position the comb
guide over the front of the clipper blade and
slide over the head. Push and click the rear of
the comb guide into position (see Fig.1).
• To remove the comb guide, ensure the
appliance is switched off. Push the tab on the
rear of the comb guide away from the head
and lift off (see Fig.2).
MEDIDAS DE
SEGURIDAD
IMPORTANTES
CUTTING LENGTH
PRESERVING THE BATTERIES
6. Siempre desconecte el aparato inmediatamente después de usarlo, excepto cuando la
está cargando.
7. Siempre respete las especificaciones
eléctricas.
Siempre que use aparatos eléctricos, especialmente en la presencia de niños, debe tomar
precauciones básicas de seguridad, entre las
cuales las siguientes:
Be careful not to use too much oil and don’t oil
your clipper more than necessary, as this could
damage the motor. (Never attempt to oil the
motor bearing, as it is permanently lubricated).
KEEP OIL OUT OF REACH OF CHILDREN
NO TRATE DE
ALCANZAR LA
UNIDAD EN EL AGUA
IMPORTANT! It is highly recommended before
each use to oil the blades with the oil provided.
This ensures optimum cutting performance.
For the first use you will need to use the oil
supplied with the product, unscrew the cap
and cut off the very end of the plastic tube with
a pair of scissors to release the oil.
To oil the blades ensure the unit is switched
on. Gently squeeze the oil tube and apply 2
drops of oil onto the blades. Leave the unit on
for a few seconds to allow the oil to thoroughly
spread the length of the blades. Switch off the
unit and remove any excess oil by gently
dabbing with a cloth.
OILING INSTRUCTIONS
ADVERTENCIA –
• Insert the adapter into the base of the
appliance, plug into a suitable outlet and
switch on. The blue LED charging light will go
on when the adapter is correctly inserted into
the appliance and connected to an outlet.
• Once the appliance is fully charged the blue
LED charging light will stop flashing but remain
on, unplug the adapter from the outlet.
Oil both
areas
CORDLESS OPERATION
17. Este adaptador cumple con la Sección
15 de la Normativa FCC. Su funcionamiento
está sujeto a las dos condiciones siguientes:
1) Este adaptador no puede causar ninguna
interferencia perjudicial, y 2) Este adaptador
debe aceptar cualquier interferencia recibida,
incluso alguna interferencia que pudiera
ocasionar una operación no deseada.
ADVERTENCIA: Se advierte que las
modificaciones no aprobadas expresamente
por la autoridad competente en materia de
conformidad podrían rescindir el permiso del
usuario para operar el equipo.
GUARDE ESTAS
INSTRUCCIONES
INSTRUCCIONES
DE OPERACIÓN
MODO DE EMPLEO
• Ensure the appliance is switched off.
• Connect the adaptor to the base of the
appliance and plug the adapter into a suitable
outlet.
• The blue LED charging light will flash when
the adapter is correctly inserted into the
appliance and connected to an outlet.
• The appliance is now ready for use.
NOTE: The appliance should not be used for
longer than 20 minutes when operated with
the cord.
CORDED OPERATION
WARNING: If the charging light suddenly starts
to flash rapidly then the appliance is faulty. If this
happens then please stop charging and remove
the adapter from the outlet and contact our
Customer Care Center for further advise (see the
“warranty” section of the information booklet).
LEA TODAS LAS
INSTRUCCIONES
ANTES DE USARLO
MANTÉNGALO ALEJADO
DEL AGUA
PARA USO
DOMÉSTICO SOLAMENTE
PELIGRO –
CARACTERÍSTICAS
• Uso con cable o inalámbrico - Utilice el
aparato con cable, o cárguelo para mayor
comodidad y control durante el uso.
• Motor liviano con batería de iones de litio
para un corte potente y un rendimiento
energético sostenido.
• Cuchillas de acero endurecido de calidad
superior diseñadas con precisión con un
ángulo de corte único y súper afilado que
garantiza un corte suave y sin esfuerzo.
• Cuerpo liviano para mayor manejabilidad.
• Ajuste de longitud de corte.
• Una carga completa de 3 horas ofrece una
autonomía de 75 minutos.
• Una carga rápida de 15 minutos ofrece una
autonomía de 15 minutos.
Su conjunto incluye 10 guías de distintos
largos (incluso guías para cortar el cabello
alrededor de las orejas), tijeras de peluquero,
un peine de peluquero, un peine de modelado,
una capa grande y una caja de almacenaje.
IMPORTANT
Only use the adapter supplied with this
appliance. This clipper is so easy to use, but
before you do anything you must take your
time to charge the unit for 3 hours before its
first use. Even if you want to use it plugged in
straight from an outlet, this initial supercharge
ensures optimum power performance to give
smooth fast cutting every time. Maximum
battery capacity will only be reached after
3 charging/discharging cycles. A full
charge will provide approximately 75 minutes
use. When the clipper is about to run out of
power, the charging indicator will flash and
you will have approximately 3 minutes of use
remaining. A 15 minute quick charge will
provide approximately 15 minutes use.
When charging the appliance the blue LED
charging light will flash slowly and continuously until the battery has fully charged, then
the blue LED charging light will stop flashing
but remain on.
CHARGING THE APPLIANCE
INSTRUCTIONS
FOR USE
Also included are 10 attachment combs for
different hair lengths (including left and right
ear taper combs), barber scissors, a barber
comb with straight teeth, styling comb with
angled teeth, a full-length barber cape, and a
deluxe case for easy storage. It also comes
with lubricating oil, a cleaning brush and a
blade guard for easy maintenance and
protection of the clipper blades.
La cortadora Conair es una cortadora de cabello
de calidad profesional con batería de iones de
litio que proporciona un rendimiento energético
sostenido con o sin cable. Sus cuchillas de acero
endurecido han sido diseñadas con precisión
con un ángulo de corte único y súper afilado
que garantiza un corte suave y sin esfuerzo en
cualquier longitud/tipo de cabello.
Aceite lubricante, un cepillo de limpieza y un
protector de cuchillas le permitirán mantener
su cortadora en condición óptima.
INSTRUCCIONES
DE USO
INSTRUCCIONES DE CARGA
• Cord or Cordless operational clipper - use
corded for continuous power while plugged
into the outlet or use cordless for total flexibility
and control.
• Lithium-ion technology with lightweight DC
motor for powerful cutting action and sustained
power performance.
• Precision-engineered high grade hardened
steel blades with unique super sharp cutting
angle for smooth, effortless cutting.
• Lightweight for easy handling during use.
• Taper control for custom settings.
• 3 hour full charge for approximately 75
minutes of use.
• 15 minute quick charge for approximately
15 minutes of use.
FEATURES
The Conair Clipper is a professional grade hair
clipper with Lithium Ion technology to give
sustained power performance for cord or cordless use. The precision-engineered hardened
steel blades have a unique super sharp cutting
angle for smooth, effortless cutting on any hair
length or type.
USER MANUAL
SAVE THESE
INSTRUCTIONS
OPERATING
INSTRUCTIONS
IMPORTANTE
Utilice el adaptador sector proveído únicamente. Esta cortadora es muy fácil de usar,
pero será necesario cargarla durante 3 horas
antes del primer uso. Esta primera "súper
carga" es imprescindible, aunque desee usar
el aparato con cable, y garantiza un desempeño óptimo y resultados rápidos, cada vez
que lo use. Nota: La batería recargable
alcanzará su capacidad máxima después
de 3 ciclos de carga/descarga. Una carga
completa dará al aparato una autonomía de
75 minutos. Si el indicador de carga empieza
a parpadear durante el uso, esto significa que
le queda solamente 3 minutos de autonomía a
la cortadora. Una carga rápida dará al aparato
una autonomía de 15 minutos.
La luz de carga azul parpadeará lentamente
durante la carga. Una vez cargada la batería, la
luz permanecerá encendida.
ADVERTENCIA: Si de repente la luz de carga
empieza a parpadear rápidamente, esto
significa que el aparato está defectuoso. Si
esto ocurriera, desconecte el adaptador y llame
a nuestro servicio post-venta para más
información (ver la sección "garantía").
OPERACIÓN CON CABLE
10. Never operate the appliance with the
air openings blocked or while on a soft
surface, such as a bed or couch, where the
air openings may be blocked. Keep the air
openings free of lint, hair, and other debris.
11. Always attach plug to appliance first, then
to outlet. To disconnect, turn all controls to
“OFF”, then remove plug from outlet.
12. Avoid skin contact with moving blade.
13. When using the appliance with its cord,
be mindful of tangles or kinks in the cord. If
the cord does become tangled during use,
turn the unit off and straighten cord before
operating again.
14. Do not short the polarity (output cord),
ensure jack is plugged into the unit before
plugging the adapter into outlet.
15. This power unit is intended to be correctly
oriented in vertical floor mount position.
16. For connection to a supply not in the
U.S.A., use an attachment plug adapter of the
proper configuration for the power outlet.
17. The adapter complies with Part 15 of
the FCC Rules. Operation is subject to the
following two conditions: (1) the adapter
may not cause harmful interference, and (2)
the adapter must accept any interference
received, including interference that may
cause undesired operation.
WARNING: Changes or modifications to this
unit not expressly approved by the party
responsible for compliance could void the
user’s authority to operate the equipment.
7. No coloque el aparato sobre ninguna
superficie mientras esté funcionando.
8. No utilice este aparato con guías o cuchillas
rotas o dañadas. Esto podría provocar una
herida. Asegúrese de que las cuchillas estén
debidamente alineadas antes de usarlo. (Véase
la sección "Instrucciones de mantenimiento").
9. No utilice el aparato en exteriores, ni lo haga
funcionar donde se estén usando productos en
aerosol (spray) o donde se esté administrando
oxígeno.
10. Nunca bloquee las aberturas de aire ni
coloque el aparato sobre una superficie blanda,
como una cama o un sofá, donde se puedan
obstruir. Mantenga las aberturas libres de
pelusas, cabellos y elementos similares.
11. Siempre conecte el cable al aparato
antes de conectarlo a la toma de corriente.
Siempre apague el aparato (OFF) antes de
desconectarlo.
12. Evite que las cuchillas toquen la piel
cuando están moviendo.
13. Siempre asegúrese de que el cable del
aparato no esté enredado. Si el cable se
enredara durante el uso, apague el aparato
inmediatamente y enderécelo.
14. No cortocircuite el cordón. Siempre conecte
el cordón al aparato antes de enchufar el
adaptador en la toma de corriente.
15. El adaptador siempre debe usarse en
posición vertical.
16. Puede que sea necesario utilizar un
adaptador de enchufe (no incluido) para conectar
el aparato fuera de los Estados Unidos.
LUBRIFICACIÓN
• Asegúrese de que el aparato esté apagado.
• Conecte el cable a la base del aparato y
luego enchufe el adaptador en una toma de
corriente.
• La luz de carga empezará a parpadear, lo
que indica que el aparato está debidamente
conectado y está cargando.
• El aparato está listo.
NOTA: No utilice el aparato durante más de 20
minutos con cable.
OPERACIÓN INALÁMBRICA
¡IMPORTANTE! Le recomendamos que
lubrique las cuchillas antes de cada uso,
usando el aceite provisto. Esto asegurará un
rendimiento óptimo. Antes de usar el aceite por
primera vez, retire la tapa y corte la punta del
tubo con tijeras.
Encienda el aparato. Presione suavemente el
tubo y vierta dos gotas de aceite sobre las
cuchillas. Deje el aparato encendido durante
unos segundos para repartir el aceite sobre las
cuchillas. Apague el aparato y seque el exceso
de aceite con un paño.
• Conecte el cable a la base del aparato y
luego enchufe el adaptador en una toma de
corriente. La luz de carga empezará a
parpadear, lo que indica que el aparato está
debidamente conectado y está cargando.
• Una vez cargada la batería, la luz permanecerá encendida. Entonces, desconecte el
adaptador.
WARNING –
Para reducir el
riesgo de quemaduras, electrocución, incendio
o heridas:
1. Nunca deje el aparato desatendido
mientras esté conectado. No jale, retuerza ni
enrolle el cable alrededor del aparato.
2. Este aparato no debería ser usado por
o cerca de niños o personas con alguna
discapacidad.
3. Utilice este aparato únicamente con el
propósito para el cual fue diseñado y solamente
según las instrucciones. Sólo use accesorios
recomendados por el fabricante. No utilice una
extensión con este aparato.
4. No utilice este aparato si el cordón o la
clavija estuviesen dañados, después de que
hubiese funcionado mal o que se hubiese
caído o si estuviese dañado. Regrese el
aparato a un centro de servicio autorizado
para su revisión y reparación.
5. Mantenga el cable alejado de superficies
calientes.
6. Nunca deje caer ni inserte ningún objeto en
ninguna de las aberturas del aparato.
To reduce the risk of
burns, electric shock, fire, or injury to persons:
1. This appliance should never be left
unattended when plugged in. Do not pull,
twist, or wrap line cord around appliance.
2. This appliance should not be used by, on
or near children or individuals with certain
disabilities.
3. Use this appliance only for its intended
purpose as described in this manual. Do not
use attachments not recommended by the
manufacturer. Do not use an extension cord to
operate this appliance.
4. Never operate this appliance if it has a
damaged cord or plug, if it is not working
properly or if it has been dropped or
damaged, or dropped into water. Return the
appliance to a service center for examination
and repair.
5. Keep the cord away from heated surfaces.
6. Never drop or insert any object into any
opening on this appliance.
7. Do not place appliance on any surface while
it is operating.
8. Do not use this appliance with a damaged
or broken comb or with teeth missing from the
blades as injury may occur. Before use, make
certain blades are aligned properly. (See taking
care of your trimmer).
9. Do not use outdoors or operate where
aerosol (spray) products are being used or
where oxygen is being administered.
Cualquier aparato enchufado
permanece bajo tensión, aunque esté apagado.
Para reducir el riesgo de muerte o herida por
descarga:
1. Desconecte el aparato antes de limpiarlo.
2. No coloque ni guarde el aparato donde pueda
caer o ser empujado a una bañera o un lavabo.
3. No lo use en el baño o la ducha.
4. No coloque el aparato ni lo deje caer al agua
u otro líquido.
5. No trate de alcanzar el aparato después
de que hubiese caído al agua. Desconéctelo
inmediatamente. Utilícelo en un lugar seco únicamente. No lo exponga a ningún tipo de líquido,
a la lluvia o al vapor.
No use demasiado aceite y no lubrique el
aparato más de lo necesario. Esto podría dañar
el motor. Tampoco intente lubricar las piezas
del motor, las cuales son lubricadas de por
vida. MANTENGA EL ACEITE FUERA DEL
ALCANCE DE LOS NIÑOS.
VIDA ÚTIL
Para lograr un desempeño óptimo y mantener la
capacidad de las baterías recargables, le
recomendamos que descargue completamente
el aparato cada 6 meses. Después, vuelva a
cargar el aparato durante 3 horas, hasta su
capacidad máxima.
hc1100_12pg129346_ib_final.indd 1
DO NOT REACH
INTO THE WATER
live, even when the switch is off.
To reduce the risk of death or injury by electric
shock:
1. Unplug this appliance before cleaning.
2. Do not place or store appliance where it can
fall or be pulled into a tub or sink.
3. Do not use while bathing or in a shower.
4. Do not place in, or drop into water or other
liquids.
5. Do not reach for an appliance that has fallen
into water. Unplug immediately. Dry location
use only or expose to liquid, vapor or rain.
6. Except when charging, always unplug this
appliance from electrical outlet immediately
after using.
7. Never operate the adapter if the specification is out of the rating.
READ ALL INSTRUCTIONS
BEFORE USING
KEEP AWAY FROM WATER
FOR HOUSEHOLD USE ONLY
DANGER – any appliance is electrically
When using electrical appliances, especially
when children are present, take basic safety
precautions, including the following:
IMPORTANT SAFETY
INSTRUCTIONS
• Antes de instalar una guía, asegúrese de que
el aparato esté apagado. Ensarte la guía
deseada sobre la parte delantera de las
cuchillas. Jale la guía hacia atrás y presione la
parte trasera hasta que haga clic para sujetarla
(Fig. 1).
• Antes de retirar la guía, asegúrese de que el
aparato esté apagado. Empuje la lengüeta hacia
arriba y alce la guía (Fig. 2).
Sujeción de
las guías
GUÍAS
Lubrique
ambas
áreas
Su conjunto incluye 10 guías de distintos largos,
incluso guías para cortar el cabello alrededor de
las orejas.
Fig. 1
Remoción de las guías
No. 8
25 mm
No. 7
22 mm
No. 6
19 mm
No. 5
16 mm
No. 4
13 mm
No. 3
9.5 mm
No. 2
6 mm
No. 1
3 mm
GUÍA
LONGITUD DE CORTE
Lubrique
ambas
áreas
Fig. 2
Este aparato también incluye dos guías para
cortar el cabello alrededor de las orejas.
• Instale la guía deseada: la guía (R) para cortar
el cabello alrededor de la oreja derecha o la guía
(L) para cortar el cabello alrededor de la oreja
izquierda.
• Sostenga la cortadora a un ángulo y corte el
cabello suavemente alrededor de la oreja, hacia
la nuca.
On/Off
switch
High Power
Motor
Taper
Control
IN NO EVENT SHALL CONAIR BE LIABLE
FOR ANY SPECIAL, INCIDENTAL, OR
CONSEQUENTIAL DAMAGES FOR BREACH
OF THIS OR ANY OTHER WARRANTY,
EXPRESS OR IMPLIED, WHATSOEVER.
Some states do not allow the exclusion or
limitation of special, incidental, or consequential damages, so the above limitation
may not apply to you.
IB-11227
©2012 Conair Corporation
Service Center
Conair Corporation
Service Department
7475 North Glen Harbor Blvd.
Glendale, AZ 85307
HC1100 CORD/CORDLESS CLIPPER
11/7/12 2:37 PM
Model HC1100
For your safety and continued enjoyment
of this product, always read the instruction
booklet carefully before using.
Instruction Booklet
Please register this product at:
www.conair.com/registration
ANY IMPLIED WARRANTIES, OBLIGATIONS,
OR LIABILITIES, INCLUDING BUT NOT
LIMITED TO THE IMPLIED WARRANTY
OF MERCHANTABILITY AND FITNESS
FOR A PARTICULAR PURPOSE, SHALL BE
LIMITED IN DURATION TO THE 36 MONTH
DURATION OF THIS WRITTEN, LIMITED
WARRANTY. Some states do not allow
limitations on how long an implied warranty
lasts, so the above limitations may not apply
to you.
To obtain service under this warranty, return
the defective product to the service center
listed below, together with your purchase
receipt and $5.00 for postage and handling.
California residents need only provide proof
of purchase and should call 1-800-366-0937
for shipping instructions. In the absence of a
purchase receipt, the warranty period shall
be 36 months from the date of manufacture.
Stainless steel,
self-sharpening
blades
Conair will repair or replace (at our option)
your unit free of charge for 36 months from
the date of purchase if the appliance is
defective in workmanship or materials.
LIMITED THREE YEAR WARRANTY
Full Power
Cord-Free
Cutting
This warranty gives you specific legal rights,
and you may also have other rights, which
vary from state
to state.
FUNCIONAMIENTO
This appliance contains Lithium Ion batteries.
To protect the environment this appliance and
its batteries must be disposed of safely. At the
end of its life, please take this appliance to a
recycling center, where the internal rechargeable battery should be removed by a
professional and recycled separately. For
more information about the recycling of
electrical and battery operated appliances
please contact your local council office or
your household waste disposal service. For
specific enquiries regarding the replacement
of batteries in this product please contact our
Conair Customer Care Line.
CORD/CORDLESS CLIPPER
LITHIUM ION
AJUSTE DE LONGITUD DE CORTE
• El ajuste de longitud de corte proporciona
más longitudes de corte, para cortes
personalizados.
• Para obtener un corte más largo, deslice la
palanca hacia abajo.
• Para obtener un corte más corto, deslice la
palanca hacia arriba.
BATTERY DISPOSAL
• Regular cleaning will maintain the high
performance of your appliance.
• Switch off and remove the power cord if
connected.
• Use the cleaning brush supplied to brush
away any hair and debris. Do not use a sharp
object to clean the trimmer blade.
• Gently blow away any hair trapped beneath
the blades.
• Ensure you clean the blades after each use
and before storing away.
• It is highly recommended to oil the blades
from time to time with the oil provided. This
ensures optimum cutting performance. For
the first use you will need to use the oil
supplied with the product, unscrew the cap
and cut off the very end of the plastic tube
with a pair of scissors to release the oil.
• To oil the blades ensure the unit is switched
on. Gently squeeze the oil tube and apply 2
drops of oil onto the blades. Leave the unit on
for a further few seconds to allow the oil to
thoroughly spread the length of the blades.
• Switch off the unit and remove any excess
oil by gently dabbing with a cloth.
CONTORNEO
Para delinear el corte (por ej. la nuca y las
patillas), retire la guía.
• Sostenga la cortadora al revés, de tal
manera que la parte delantera del aparato
apunte hacia su cabeza.
• Sostenga la cortadora recta contra las
sienes o la nuca, presione ligeramente las
cuchillas contra la piel y deslice la cortadora
lentamente hacia abajo. Esto proporcionará
un acabado limpio y preciso.
CLEANING & MAINTENANCE
LIMPIEZA Y MANTENIMIENTO
• Una limpieza regular asegurará un
funcionamiento óptimo.
• Apague y desconecte el aparato.
• Limpie el cabezal de corte con el cepillo de
limpieza provisto. No utilice objetos filosos
para limpiar las cuchillas.
• Sople sobre el cabezal para eliminar los
pelos atrapados bajo las cuchillas.
• Limpie las cuchillas después de cada uso y
antes de guardar el aparato.
• Le recomendamos que lubrique las
cuchillas regularmente, usando el aceite
provisto. Esto asegurará un rendimiento
óptimo. Antes de usar el aceite por primera
vez, retire la tapa y corte la punta del tubo
con tijeras.
• Encienda el aparato. Presione suavemente
el tubo y vierta dos gotas de aceite sobre las
cuchillas. Deje el aparato encendido durante
unos segundos para repartir el aceite sobre
las cuchillas.
Apague el aparato y seque el exceso de
aceite con un paño.
RECICLAJE DE LAS PILAS
Este aparato contiene una batería de iones de
litio. Para proteger el medio ambiente, estas
baterías y el aparato deben reciclarse según
las leyes vigentes al final de su vida útil. Al
final de su vida útil, lleve el aparato a un
centro de reciclaje donde un profesional
removerá la batería recargable para reciclarla
por separado. Para más información acerca
del reciclaje de los aparatos eléctricos y de
las baterías, comuníquese con las autoridades locales en materia de reciclaje y
eliminación de desechos. Para más información sobre el reemplazo de las baterías,
comuníquese con nuestro servicio de
atención al cliente.
GARANTÍA LIMITADA DE TRES AÑOS
CORTADORA RECARGABLE HC1100
OUTLINING
• To tidy up the edges around your cut e.g.
neckline and sideburns, detach the comb
guides.
• Hold the appliance upside down, so the
front of the clipper is facing towards your
head.
• Hold the clipper straight on your sideburns
or neckline and move the clipper downwards.
This will give you a clean, smooth finish.
PARA DEJAR EL CABELLO MÁS LARGO EN
LA PARTE SUPERIOR DE LA CABEZA:
• Instale la guía deseada. Su cortadora
incluye 8 guías, numeradas de 1 a 8.
• Encienda la cortadora. Las cuchillas
empezarán a mover.
• Sostenga la cortadora con los dientes
apuntando hacia abajo. Mueva la cortadora
poco a poco hacia arriba y hacia fuera, en
dirección opuesta al crecimiento del pelo.
Repita, sección por sección, desde la parte
delantera de la cabeza y los costados hasta la
parte trasera de la cabeza.
• Después, vuelva a acortar la parte trasera y
los costados con una guía más corta.
• Empezando en la nuca, sostenga la
cortadora ligeramente contra el cabello, con
los dientes de la guía apuntando hacia arriba
y planos contra la cabeza. Corte el cabello en
la parte trasera, pasando la cortadora
gradualmente hacia arriba y hacia fuera.
• Repita en los costados, siempre con los
dientes apuntando hacia arriba y moviendo la
cortadora hacia arriba y hacia fuera.
FOR A SHORTER BACK AND SIDES, WITH
LENGTH ON THE TOP
• Attach the longer comb guide as required
for the top of your hair – your clipper is
supplied with 8 comb guides (grades 1-8).
Each comb guide is labelled.
• Switch the clipper on and the blades will
start to move.
• Hold the clipper to the front of your hair
with the teeth pointing towards the back of
your head and move the clipper towards your
crown. Repeat as necessary, moving in rows
from the front and the sides of your head to
the back.
• If you then wish to take the back and sides
of your hair to a shorter length, switch off the
appliance and attach a shorter comb guide.
• Starting at the nape of the neck, with the
comb guide flat against the head, move the
clipper upwards and outwards over the area
you want to take shorter.
• Repeat on the sides of the hair, starting with
the teeth of the clipper pointing upwards and
comb guide flat against the area above the
ear, again moving the clipper upwards and
outwards.
PARA LOGRAR UN CORTE UNIFORME:
• Instale la guía deseada. Su cortadora
incluye 8 guías, numeradas de 1 a 8.
• Encienda la cortadora. Las cuchillas
empezarán a mover.
• Empezando en la nuca, sostenga la
cortadora ligeramente contra el cabello, con
los dientes de la guía apuntando hacia arriba
y planos contra la cabeza.
• Mueva la cortadora poco a poco hacia
arriba y hacia fuera, en dirección opuesta al
crecimiento del pelo. La guía ayudará a alzar
el cabello mientras las cuchillas cortan el
cabello a la longitud deseada.
• Una vez alcanzada la longitud deseada en
la parte posterior de la cabeza, comience a
cortar el cabello en la parte superior y los
costados.
• Sostenga la cortadora con los dientes
apuntando hacia abajo. Mueva la cortadora
poco a poco hacia arriba y hacia fuera, en
dirección opuesta al crecimiento del pelo.
Repita, sección por sección, desde la parte
delantera de la cabeza y los costados hasta la
parte trasera de la cabeza.
• Esto logrará un corte uniforme en toda la
cabeza.
Cuchillas autoafilantes de
acero inoxidable
Ajuste de
longitud
de corte
Motor de
alta potencia
Botón de
encendido/
apagado
Conair reparará o remplazará (a su opción)
su aparato sin cargo por un período de 36
meses a partir de la fecha de compra si presentara defectos de materiales o fabricación.
Para obtener servicio técnico bajo esta
garantía, regrese su aparato al Centro de
Servicio indicado a continuación, junto con
su recibo de compra y un cheque o giro
postal de US$5.00 por gastos de manejo
y envío. Los residentes de California sólo
necesitan dar una prueba de compra y deben
llamar al 1-800-366-0937 para recibir
instrucciones de envío. En ausencia del recibo de compra, el período de garantía será de
36 meses a partir de la fecha de fabricación.
CUALQUIER GARANTÍA, OBLIGACIÓN
O RESPONSABILIDAD IMPLÍCITAS,
INCLUYENDO PERO NO LIMITADAS
A LA GARANTÍA IMPLÍCITA DE
COMERCIABILIDAD Y APTITUD PARA
UN PROPÓSITO ESPECÍFICO, ESTARÁN
LIMITADAS POR LOS 36 MESES DE LA
PRESENTE GARANTÍA ESCRITA. Algunos
Estados no permiten limitaciones sobre la
duración de una garantía implícita, de modo
que las limitaciones mencionadas pueden no
regir para usted.
FOR AN ALL OVER EVEN CUT:
• Attach a comb guide as required – your
clipper is supplied with 8 comb guides
(grades 1-8). Each comb guide is labelled.
• Switch the clipper on and the blades will
start to move.
• Starting at the nape of the neck, hold the
clipper with the teeth of the clipper pointing
upwards, ensuring that the comb guide is
resting flat against the head.
• Slowly move the clipper upwards and
outwards through the hair towards your
crown, against the direction of the hair
growth. The comb guide will help to lift the
hair and the blades will cut the hair at the
desired length.
• Once the desired length is achieved at the
back of the hair, start clipping the top and
sides.
• Hold the clipper to the front of your hair
with the teeth pointing towards the back of
your head, and move the clipper towards your
crown. Repeat as necessary, moving in rows
from the front and the sides of your head to
the back.
• You should achieve an even length cut all
over your head.
CLIPPING
PREPARACIÓN
• Asegúrese de que las cuchillas estén
limpias antes de cada uso.
• Para lograr resultados óptimos, el cabello
debería estar limpio, seco y desenredado.
• Asegúrese de que el aparato esté cargado,
o enchúfelo en una toma de corriente.
NOTA: No utilice el aparato durante más de
20 minutos con cable.
hc1100_12pg129346_ib_final.indd 2
12PG129346
3-hour full charge for
75 minutes of use or
15-minute quick charge
for 15 minutes of use.
QUICKCHARGE
QUIC
QUICK
K CHARGE
CONAIR NO SERÁ RESPONSABLE, EN
NINGÚN CASO, POR NINGÚN DAÑO
ESPECIAL, INCIDENTAL O CONSECUENTE
DEBIDO AL INCUMPLIMIENTO DE ESTA O
CUALQUIER OTRA GARANTÍA, EXPRESA O
IMPLÍCITA. Algunos Estados no permiten la
exclusión o limitación de daños especiales,
incidentales o consecuentes, de modo que
las limitaciones mencionadas pueden no
regir para usted.
Esta garantía le otorga derechos legales
específicos y usted puede tener otros
derechos que varían de un Estado a otro.
CARG RÁPIDA
CARGA
IONES DE LITIO
CORTADORA RECARGABLE
Plena
potencia,
sin cable
Para registrar su producto, visítenos en:
www.conair.com/registration
Manual de instrucciones
©2012 Conair Corporation
Centro de servicio
Conair Corporation
Service Department
7475 North Glen Harbor Blvd.
Glendale, AZ 85307
Una carga completa de
3 horas ofrece una
autonomía de 20 minutos;
una carga rápida de
15 minutos ofrece una
autonomía de 15 minutos.
PREPARATION FOR USE
• Always inspect the appliance before use to
ensure the clipper blades are free from hair,
debris etc.
• For best performance, use on clean, dry hair
that has been combed until tangle-free.
• Ensure the appliance is sufficiently charged
or plugged into an outlet.
NOTE: The appliance should not be used for
longer than 20 minutes when operated from
an outlet.
TAPER CONTROL
• The taper control provides a variety of total
settings for custom cuts.
• To increase the cutting length, push the
lever down.
• To reduce the cutting length, push the
lever up.
12PG129346
Para su seguridad y para disfrutar plenamente
de este producto, siempre lea las instrucciones
cuidadosamente antes de usarlo.
Modelo HC1100
IB-11227