1
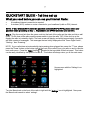
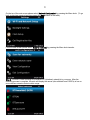
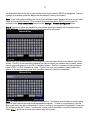
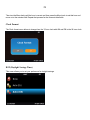
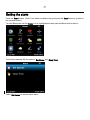
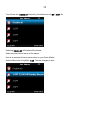
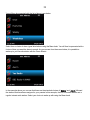
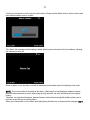
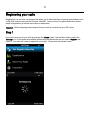
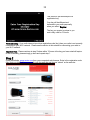
Mondo By Grace Digital User’s Guide Model No. GDI-IRC6000 ____________________________________________________________ 2 User’s Guide Table of Contents IMPORTANT Safety Instructions and Warnings ............................................................................ 4 QUICKSTART Guide .................................................................................................................... 7 What you need before you can use your Internet radio ............................................................. 7 Contents ................................................................................................................................... 11 Radio connections, controls & remote control functions ........................................................... 12 Displays icons .......................................................................................................................... 15 Steps to Connect Your Radio to Your Wireless Network ............................................................... 16 Step 1 - Power up the radio ................................................................................................ 16 Step 2 - Connect to the wireless network ............................................................................. 13 Step 3 - Connect to the wireless network ............................................................................. 14 Choosing a radio station to listen to .......................................................................................... 19 Choosing a Pandora radio station ............................................................................................. 21 Changing the volume ................................................................................................................ 21 Storing a radio station in a preset ............................................................................................. 22 Playing a preset radio station.................................................................................................... 22 Requesting a station that is currently unavailable ..................................................................... 23 Stations which allow you to choose what you listen to............................................................... 24 Setting the clock ....................................................................................................................... 25 Setting the alarm ...................................................................................................................... 27 Setting the sleep timer .............................................................................................................. 32 Configuring ‘My Stuff’ .................................................................................................................... 33 Registering an account on Grace Digital Audio’s website.......................................................... 34 Configuring ‘My Profile’ ............................................................................................................. 35 Configuring ‘My Stations’ .......................................................................................................... 36 Configuring ‘My Streams’.......................................................................................................... 36 Configuring ‘My Podcasts’ ........................................................................................................ 36 Configuring ‘My Pandora’ ......................................................................................................... 37 Accessing Pandora Feedback Menu ........................................................................................ 38 SiriusXM ...................................................................................................................................... 38 Dar.FM, Live365 VIP, MP3tunes ................................................................................................... 38 3 Settings Menu ............................................................................................................................... 39 Network Configuration .............................................................................................................. 39 Properties ................................................................................................................................. 39 Stereo Mode ............................................................................................................................. 39 Network Firmware Upgrade ...................................................................................................... 39 Speaker .................................................................................................................................... 39 Language ................................................................................................................................. 39 Factory Reset ........................................................................................................................... 40 Hard Reboot ............................................................................................................................. 40 Register .................................................................................................................................... 40 Clock Set up ............................................................................................................................. 40 Backlight .................................................................................................................................. 40 Equalization .............................................................................................................................. 41 Name Your Radio ..................................................................................................................... 41 WiFi Strength ........................................................................................................................... 41 Media Player ................................................................................................................................. 42 UPnP Servers........................................................................................................................... 42 USB Media ............................................................................................................................... 44 Playback Mode ......................................................................................................................... 44 Queue ...................................................................................................................................... 44 Troubleshooting ............................................................................................................................ 46 Specifications ............................................................................................................................... 47 License Information and Warranty................................................................................................. 47 Customer Service and Support .................................................................................................... 48 Appendix ...................................................................................................................................... 49 Using the USB connection as a USB-Ethernet connection ........................................................... 49 4 Important Safety Instructions and Warnings Please read before installation If this Internet radio has been moved from a cold place, (e.g. a cold car trunk) to a warm place, then there is a possibility that moisture may condense inside the product. In these conditions DO NOT PLUG IN. To avoid the damage that can be caused to the radio by powering on in these circumstances, please simply allow the product to stand in a warm room for 2-3 hours before first use. This will help any moisture evaporate and prevent unnecessary damage to your Internet radio. POWER PLUG Ensure that the power plug is easily accessible. COVERS Do not remove any fixed covers as this may expose dangerous voltages. VENTILATION The ventilation holes on the casing of your Internet radio prevent it from overheating. Do not block or cover these holes, especially with cloth or paper. Please allow a minimum distance of 5cm around the apparatus for sufficient ventilation. DAMAGE Never use your Internet radio if it is damaged in any way. Always place your Internet radio on a flat level surface. Please to not position the radio in any location which may be subject to strong vibration. TEMPERATURE Avoid extremes of temperature, either hot or cold, place your Internet radio well away from heat sources such as radiators or gas/electric fires. HIGH HUMIDITY Do not use this apparatus in humid or tropical climates. MOISTURE Do not allow your Internet radio to be exposed to rain, moisture or dust. If any liquid is spilt into your Internet radio it can cause serious damage. If you spill any liquid into your Internet radio switch it off at the mains immediately and contact your supplier. CAUTION: Do not open any covers. Do not attempt any repair yourself. Only qualified personnel may carry out repair work. 5 WARNING: To reduce the risk of fire or electrical shock, do not expose the product to rain or moisture. The product should not be exposed to any dripping or splashing liquid. Objects filled with liquids, such as vases, should not be placed on the product. No open flame sources, such as lighted candles, should be placed on the product. Keep the remote control battery away from children. It may cause a fire or a chemical burn if mishandled. Do not recharge, disassemble, heat above 100° C (212° F), or incinerate. Dispose of used batteries promptly. Replace only with a battery of the correct type and model number. CAUTION: please READ and FOLLOW the important safety instructions carefully 1. Please retain these safety instructions for future reference. 2. Please follow these instructions. These instructions contain information for your safety. 3. Please heed the safety warnings on the product and in the user’s guide. Failure to do so could result in injury or damage to the product. 4. Power source - the product only be connected to a power supply of the type specified in the user’s guide or as marked on the product. 5. Power cord protection – protect the power cord from damage. Do not walk on the power cord. Please take care not to let the power cord become pinched, particularly at plug. 6. Water and moisture - the product should not be used near water (for example, near a bathtub, washbowl. kitchen sink, laundry tub, in a wet basement. or near a swimming pool. etc) 7. Heat - keep the product away from heat sources such as radiators, heat registers, stoves or other appliances that produce heat. 8. Damage requiring service - the product should be serviced by qualified service personnel If: a) The power supply cord or the plug has been damaged: or b) Objects have fallen or liquid has been spilled into the product: or c) The product has been exposed to rain: or d) The product does not appear to operate normally or exhibits a marked performance change: e) Or the product has been dropped, or the enclosure damaged. 13. Servicing - the user should not attempt to service the product. All servicing should be referred to qualified service personnel. 14. Unplug the power adapter during lightning storms or when unused for long periods of time. ADVISORY This Product is intended for North American markets. The GRACE Wireless Internet Radio GDIIRC6000 is in compliance with the essential requirements and other relevant provisions of 6 Directive 1999/5/EC ADVISORY FCC Compliance and Advisory Statement: This device complies with Part 15 of the FCC Rules. Operation is subject to the following two conditions: 1) this device may not cause harmful interference, and 2) this device must accept any interference received, including interference that may cause undesired operation NOTE: This equipment has been tested and found to comply with the limits for a Class B digital device, pursuant to Part 15 of the FCC Rules. These limits are designed to provide reasonable protection against harmful interference in a residential installation. This equipment generates uses and can radiate radio frequency energy and, If not installed and used in accordance with the instructions, may cause harmful interference to radio communications. However, there is no guarantee that interference will not occur in a particular installation. If this equipment does cause harmful interference to radio or television reception, which can be determined by turning the equipment off and on, the user is encouraged to try to correct the interference by one or more of the following measures: To comply with FCC RF exposure compliance requirements, a separation distance of at least 20 cm must be maintained between the antenna of this device and all persons. This device must not be co-located or operating in conjunction with any other antenna or transmitter.” WARNING This product may contain chemicals listed in Proposition 65 (http://www.oehha.ca.gov/prop65/prop65_list/Newlist.html) that may be known to cause cancer, birth defects or other reproductive harm 7 QUICKSTART GUIDE - 1st time set up What you need before you can use your Internet Radio: A broadband internet connection is required. A wireless (Wi-Fi) modem or router connected to your broadband (cable or DSL) internet. NOTE: IF your wireless (Wi-Fi) network is password protected (WEP or WPA), please obtain your password before proceeding to Step 1. All passwords are UPPER and lower case sensitive. Step 1: Plug the round jack from the power cord into the back of the radio and the other end into a wall outlet. On the front of the radio press the power switch to turn the radio “ON” (If the clock is on the display the radio is in standby mode). The main screen will display and within approximately 4 seconds will flash a series of messages. The messages that are briefly displayed will be ‘Grace Digital Audio’, ‘Starting…’ then ‘Scanning’. NOTE: If your radio does not automatically start scanning when plugged into power the 1st time, please press the ‘Power’ button on the bottom right of the front of the radio to turn your radio on and to view the main radio menu. Press the ‘Home’ button located at the top middle of the front panel. This button can be easily identified by the symbol of a house. This button will always return you to the main menu. Home screen with the ‘Settings’ icon highlighted Turn the Menu knob on the front of the radio to right until the ‘Settings’ icon is highlighted. Now press the Menu knob inwards to select ‘settings’. 8 On the top of the next screen please select ‘Network Configuration’ by pressing the Menu knob. (To go back to previous menus at any time press the ‘Back’ button on the radio). From the next screen please select ‘Scan for networks’ by pressing the Menu knob inwards. Step 2: The radio is now scanning for available Wi-Fi (wireless) network(s) in your area. After the scanning process is complete, the radio will display the names (also referred to as ESSID’s) of one or more wireless networks that are within range. 9 Scroll the Menu knob to the left or right until the name of your network (ESSID) is highlighted. After you highlight your network, press the Menu knob dial inwards to select your network. Note: If your radio does not display the name of your wireless network please make sure you are within range of your wireless network. If your network does not broadcast its ESSID you can enter it in manually in the ‘Enter network name’ section of the ‘Settings’ / ‘Network Configuration’ menu. Step 3: If there is a private key needed for your wireless network the display will now briefly display ‘Enter WPA key’ and then the text entry screen shown below will appear. Please enter your wireless network’s key using this screen and select ‘Enter’ at the bottom right of the screen. This ‘Key’ is the same key (password) you use to connect any wireless device (laptop, mobile phones, game console etc) to your Wi-Fi (wireless) network. This key or password is also sometimes called a ‘WEP’ or ‘WPA’ password or ‘code’. If you do not know your password, please contact the person or company that set up your Wi-Fi (wireless) network to obtain your password. Note: All passwords are UPPER and lower case sensitive. Thus letters must be entered correctly using upper or lower case as was used to set the password originally. To enter in your password, scroll the Menu knob dial to the right or left until the 1st letter or number in your password is highlighted. Press the dial inward to select the 1st letter. Continue this process until the final letter or number is selected, then select ‘Enter’, which can be found at the bottom right of the screen. 10 Note: If you make a mistake at anytime, press the ‘Back’ button to erase the letter(s) or number(s) then select the correct entry. Once you have selected ‘Enter’ the radio will display ‘connecting to ….’, followed by a series of messages. When the radio has successfully connected the main menu will be displayed. If the main menu is not displayed and instead you see the Clock please push in the power button to display the main menu. Step 4: You are now connected to your Wi-Fi network and the internet. To listen to a station, choose the ‘Internet Radio’ icon on the main menu. Home screen with the ‘Home’ icon highlighted You can always return to the Home screen by pressing the ‘Home’ button located at the top middle of the front panel. This button can be easily identified by the symbol of a house. Once you select ‘Internet Radio’ you will be presented with 6 options. Scroll down the screen to see the last two. The radio will display various search methods: ‘Local’, ‘Search’ ‘Location’, ‘Genre’, ‘College Stations’ and ‘Weather’. Choose the option you desire and continue through the menu until you see a list of stations. Select the station by pressing the Menu knob inward when the station’s name is highlighted. After the station finishes buffering turn the volume up on the radio until you hear the music out of the built in speaker. 11 If you are unable to listen to the station you selected please try other stations (pressing the ’Back’ button will take you to the previous menu to choose another station). Some stations may not currently be online. An example of a popular internet radio station. At any time, pressing the ‘Home’ button with the picture of the House located at the top middle of the front panel, will take you to the main menu. Similarly, the ‘Now Playing’ button, located just below the ‘Home’ button, will take you to a description of the current station or service. These two buttons should be extremely helpful to your navigation. Press and hold any preset button whilst the station of your choice is playing to assign that station to the preset. NOTE: you do NOT need to register your radio to listen to our over 50,000 free radio stations. However, If you would like to register your radio to experience premium music selections (such as Pandora) please refer to the ‘Registering your radio / creating an account at www.grace.reciva.com’ section of this manual. You can only register your radio and create an account If you radio is successfully connected to your Wi-Fi network and internet connection. In the box Mondo Internet Radio (GDI-IRD6000) Remote Control (featuring Pandora) User’s Guide AC Power Adapter (UL approved) 3.5 mm to RCA Cable 12 Radio connections & remote control functions FRONT PANEL Home – Now Playing – displays the currently active radio station Preset 1-10 - press to play any of the 10 programmable presets Shift - allows access to presets 6 - 10 Back - go to the previous menu screen, or delete entry characters Menu knob – turn to move through menu and push to select. In standby it controls displays the radio’s main home screen the backlight. Power – push to power unit on / off (standby). Push and hold for reboot Stop / Mode / Rewind /Play / Pause buttons – control media player functions Pandora buttons - (functions only when playing Pandora stations) o Thumbs up / Down – like or dislike a Pandora song o Menu – displays Pandora interactive menu o Play / Pause - pause and resume Pandora songs o Skip – go to the next Pandora song (max 6 skips an hour) 13 BACK PANEL AC Power Jack – to connect to the included AC power adapter USB Port – play music from USB flash drive or use as Ethernet LAN connection (Ethernet Adapter required for LAN connection. Refer to APPENDIX for details) Auxiliary Input Jack – connect to optional audio devices, iPhone, cd etc RCA Component Output Jacks – connect to home stereo or other devices Wi-Fi Antenna – (802.11n) built internally inside the cabinet Headset jack – (on the side of the radio) for private listening. Note: by default the music coming out of the headset jack is mono. To listen to stereo headset music on the radio select the ‘Settings’ icon from the home page, then select ‘Stereo Mode’ and finally ‘Set to Stereo’. For best sound out of the front speaker select ‘Set to Mono’ (mono mixes the left and right channel and sends it out the front speaker). TOP of the radio Volume / Mute – turn to control volume, push in to mute / un-mute the volume Snooze / sleep timer – press to set the sleep timer. When the radio alarm is in operation you can press this button to snooze the alarm. 14 REMOTE CONTROL Standby / ON BACK Press to return to Menu Quick-key to Main Menu Pandora “Thumbs Down” selection Pandora “Skip Song” selection Pandora “Thumbs Up” selection Mute Volume Up & Volume Down … Preset 1 to 10 Alarm / Timer Play / Pause Stop Next / Previous Media Queue: media player files Extra features: Pandora menu/ 15 Display icons Small icons displayed at the very top of the display are: 1 2 3 4 5 6 1. Media Player; Shuffle 2. Media Player; Repeat 3. Shift key pressed; allows you to access presets 6 to 10 4. One or more alarms have been set. 5. Wi-Fi network strength: This shows the relative strength of your Wi-Fi signal. 1 is a weak signal and 4 is a very strong signal. You can enter the radio’s ‘Settings’ menu then select ‘Wi-Fi Strength’ for a more precise numeric number. 6. When the optional battery is installed this icon will blink while charging. It will be displayed as a solid white battery when it is completely charged. The icon will not be displayed when a battery is not connected. 16 Steps to connect your radio to your Wireless Network Getting Started Step 1 - Power up the radio (use these instructions if the Quick Start guide at the beginning of this manual did not suffice). To power your radio connect the AC Power on the back of your Grace Digital Mondo Radio to a wall power outlet. The radio can be switched between ‘on’ and standby with the power button on the radio. Once powered on, the display on the front of the radio will light up and show the Grace Digital Audio splash screen followed by ‘Starting’, ‘Scanning’ and then A ‘Select network’ message with a list of the available wireless networks should appear underneath this heading. If the radio does not find a wireless network router, the display will show ‘No networks found’: If this happens after subsequent attempts you should setup your wireless access point working - see the instructions supplied with your wireless network. 17 Step 2 - Connect to the wireless network Select the ESSID for your wireless network from the list of networks and press the Menu knob. If your network is not configured to require a password (encryption code), the screen should display Then if either a WPA or a WEP password is required you should briefly see the following screen. This indicates that the network is using one of the encryption systems: Wired Equivalent Privacy (WEP) or Wi-Fi Protected Access (WPA or WPA2). You therefore need to enter the correct WEP or WPA password on your MONDO radio to communicate with your network. Only the person who set up the network initially knows this password; If that person is not please consult the individual or company that set up your home or office network. You may also want to contact Customer Service of your internet provider or the manufacturer of your wireless router to obtain a default password they may have programmed. 18 After approximately 3 seconds, a screen keyboard will be displayed for entering your password To enter the password, use the Menu knob to select each letter/number/symbol of the password in turn, pressing the Menu knob after each letter is highlighted. Note; WEP and WPA passwords are UPPER and lower case sensitive and MUST be entered exactly After entering the final letter/number/symbol, scroll to the bottom of the screen and select ‘Enter’ by highlighting it and then pressing the large Menu knob inward. Hint; Use the ’Back’ button (to be found to the left of the Menu knob) to erase any incorrect characters that you may have entered. If the display now shows: ’Invalid key’ or ’Network Error’, then you have probably entered an incorrect password. Please try again or contact the person who set up your wireless network. Once the password is entered correctly, your MONDO radio will connect to your wireless network. Furthermore, your radio will connect to the selected network each time you turn it on without the need to re-enter the wireless key. Your wireless key as well as your radio’s presets will be saved in your Grace radio even If a power outage occurs. 19 Choosing a radio station to listen to Premium Music Services Please contact the Premium Music Service provider to ensure you have an active account (user name and password) to use on Internet radios. For SiriusXM subscribers you can enter your SiriusXM user name and password directly on the radio directly for all other Free and Pay Premium music services go to grace.reciva.com to register your radio and to enter in your premium service user name and password. Internet Radio Stations 1. Press the ‘Home’ button to bring up the main menu. NOTE: If you get lost at any point you can select the ‘Back’ button to go one level back in the menu or the ‘Home’ button to get to the main menu. 2. The main menu will display the following icons: ‘Internet Radio’, ‘Pandora’, ‘iHeartRadio’, ‘SiriusXM’, ‘Local’, ‘Music Services’, ‘My Stuff’, ‘Media Player’, ‘Alarm’, ‘WeatherBug’, ‘Aux In’ and ‘Settings’. 3. With the ‘Internet Radio’ icon highlighted, press the Menu knob. 4. Turn the Menu knob to choose from ’Local’, ‘Search’, ‘Location’, ‘Genre’, ‘College Stations’ and ‘Weather’. 5. Highlight and the item of your choice by turning the Menu knob, and then press the Menu knob to select it. Location Selecting ‘Location’ will present a list of countries together with their appropriate country flags. Highlight and select the country of your choice by turning and pressing the Menu knob. You will be presented with a screen showing ‘All Stations’ or ‘By Genre’. [All Stations] Selecting ‘[All Stations]’ allows you to choose from the list of stations from that country. [By Genre] Selecting ‘[By Genre]’ allows you to choose from a list of genres that are presented for that country. A list of stations will then be displayed that correspond to that genre. Choose a station from the list. 20 Genre Selecting ‘Genre’ will present a list of genres. Highlight and select the genre of your choice by turning and pressing the Menu knob. You will be presented with a screen showing ‘All Stations’ or ‘By Location’. [All Stations] Selecting ‘[All Stations]’ allows you to choose from the list of stations from that genre. [By Location] Selecting ‘[By Location]’ allows you to choose from a list of countries that are presented for that genre. A list of stations will then be displayed that correspond to that genre. Choose a station from the list. Please note that some radio stations do not broadcast 24 hours per day, and some stations are not always on-line. Some stations have on-demand and/or Podcast content listed appropriately in sub menu(s). For more information about this type of service please read the “Stations which enable you to choose what you listen to” section later in this manual. 21 Playing a Pandora radio station Before you can use this feature you must first register your radio on the Grace Radio web site grace.reciva.com . Please see ‘registering your radio’. After registration is complete you can enter in your Pandora user name (typically an email address) and password in the “see extra features” of the website. Please check out www.pandora.com to find out more about this popular service. To use the Pandora service, (once you have registered your radio and entered your Pandora user name and password on the website), please select ’Pandora’ from the Home screen. You will then be presented with two options; ‘Stations’ and ‘Create Station’. Stations Select ‘Station’ to choose any of the Pandora stations that you have created on your Pandora account. Create Station Select ‘Create Station’ and enter the name of your favorite artist on the text input screen and select ‘Enter’. This will create a new station in your Pandora account, which will be available from the web as normal, or on your Grace Mondo Radio under ‘Pandora’, ‘Stations’. Changing the volume The volume knob is located on top of the radio. Turn the knob clockwise to increase the volume. You can press the volume knob inwards to mute / un-mute the volume. 22 Storing a radio station in a preset Preset on Radio When a station is playing, press and hold a preset button until the message below is displayed (approximately 2 seconds). If you want to set presets 6-10 press the ‘Shift’ button briefly (the shift light in the upper portion of the display will light up) then press and hold the preset button (approximately 2 seconds). An example the ‘Assigned to Preset…’ message. Preset on Remote Control When a station is playing, press and hold one of the numbers (1-10) on the remote control until ‘assigned to preset #’ is displayed. Please note presets 1-10 are the same for the remote & radio and can be stored using either the radio or remote. Playing a preset radio station When your radio is powered on and connected to your Wi-Fi network, press the preset button on the radio to play a preset station. Note that from time to time radio stations change their internet location (URL). If the preset no longer works go into the ‘Internet Radio’, ‘Search’ section of the radio. Type in the call sign of the station you want to listen to and select that station. If it plays, then use this new listing of the station to save over the current preset i.e. while the station is playing, press and hold the preset for 1-2 seconds to override the previously saved station. It is also possible to assign a Pandora station to a preset by pressing and holding the preset during playback. 23 Requesting a station that is currently unlisted If you want to listen to a particular radio station which is not listed in the Reciva stations database, you can visit the Grace Digital Audio web site at grace.reciva.com/addstation and enter in a request to add the station to the list. Note; you must have an account on this site to be able to perform this function. Add a station on the website Please note that some radio stations do not pass the automated audio stream quality test so we are not able to add every request. Typically we can add a station within 10 business days if the station provides us a quality stream. You can check back on our web site periodically to see if the station has been added. 24 Stations which allow you to choose what you listen to Some radio stations can provide a number of options associated with their station; for example, some stations enable you to listen to programs that have already been broadcast. When you select a radio station that has this ability, the station does not start playing immediately, but instead the display shows: An example of a choice of different ‘Live’ streams and ‘On demand’ Streams. Selecting ’On Demand’ will bring up a list of the available on demand content from that station. After selecting a program to listen to you will be presented with a screen like this; Start Time 00:00:00 By turning the Menu knob you can start part way through the content rather than at the beginning, or simply press the Menu knob to start right at the beginning of the content. 25 Setting the clock Use the ‘Home’ button to return to the Home screen. (Note: If you make a mistake at any point, press the ‘Back’ button to go back to the previous screen.) From the Home screen select the ‘Settings’ icon. Select ‘Clock Setup’ from the list of available menu items. You are now presented with three options; ‘Set Time/Date’, ‘Clock Format’ and ‘DST’. Set Date/Time Selecting ‘Set Date/Time’ will take you to a list of available time zones. Turn the Menu knob until the correct time zone is seen on the display. Push the Menu knob to set your time zone. 26 Then turn the Menu knob until the hour is correct and then press the Menu knob to set that hour and move on to the minutes field. Repeat that process for the time and date fields. Clock Format The Clock format menu allows to change from the 12 hour clock with AM and PM to the 24 hour clock. DST (Daylight Savings Time) This menu allows you to set your preference for daylight savings. 27 Setting the alarm Press the ‘Home’ button. (Note: If you make a mistake at any point press the ‘Back’ button to go back to the previous screen.) Turn the Menu knob until the ‘Alarm’ icon is highlighted and then press the Menu knob to select it. You will be presented with two options; ‘Set Alarms’ and ‘Sleep Timer’. Select ‘Set Alarms’ to see the alarms menu. 28 You will now see ‘Disable All’ followed by five further items ‘1 Off’, ‘2 Off’. Etc Selecting ‘Disable All’ will disable all the alarms. Select any other field to set up to five alarms. Here is an example of how to set an alarm on your Grace Mondo; Use the Menu knob to highlight ‘1 Off’. The item changes to read 29 Press the Menu knob to select this alarm. You will then be presented with the following screen. Turn the Menu knob until the hour setting is correct and AM/PM is correct and then press the Menu knob Please note that it will scroll though 12 hours of AM and then 12 hours of PM. Next, turn the Menu knob until the minute setting is correct and then press the Menu knob to enter those details. 30 You will then be presented with the list of alarm types below. Select from a choice of alarm types listed above using the Menu knob. You will then be presented with a choice of how you want the alarm to sound. As you can see from the screen below, it is possible to wake up to your favorite station with the Grace Mondo. In the example above you can see that there are the standard choices of ‘Buzzer’ and ‘Aux in’ followed the stations that have been assigned to your presets In this example, there is a Pandora station and a regular internet radio station. Select your choice to wake up with using the Menu knob. 31 Finally you are invited to set the volume for the alarm. Please use the Menu knob to set the volume and then press the Menu knob to confirm. The ‘Alarm Set’ message will be displayed briefly before you are returned to the list of alarms, showing the alarms you have set. When an alarm is set, the Alarm icon will be displayed in the header (top of the display) of the radio. NOTE: If you set a station to be used as the alarm, if that station is unavailable for whatever reason when the alarm was due to sound, after trying for sixty seconds, the radio will fall back to the regular buzzer. Therefore, for optimal performance, please choose a radio station that typically buffers quickly and is normally on air during your waking hours. When your Alarm turns on, the radio’s back light display will also turn on and show the message ‘Alarm’. 32 To disable the alarm simply press the power button. Alternatively you can snooze the alarm by pressing the large snooze bar on top of the radio. To disable all the alarms select ‘Disable All’ from the Alarms menu. Setting the sleep timer To set the sleep timer, simply press the large snooze / sleep timer button on top of the radio during normal operation. You will then be able to scroll the Menu knob from between 30 seconds and 99 hours. When the desired time is reached, Press the Menu knob. At this point the display on the radio will go blank (the backlight will be set to zero), to give you the best chance of getting to sleep. You can press any key to return to the standby back light setting. Sound continues once you have set the sleep timer until the allotted time has expired. At that point the radio will enter standby but with the back light remaining at the zero setting. Once the sleep timer has expired and the radio has entered Standby mode the Menu knob can be used to adjust the backlight from maximum down to zero (blank screen). This setting is not saved as a back light setting. Alternatively you can set the sleep timer from the Alarms menu with exactly the same functionality. Please note; the back light settings remain unaffected by the sleep timer function. 33 Registering your radio Registration is a one-time only process that allows you to take advantage of exciting extra features such as My Stuff, and services such as Pandora, SiriusXM. Once you have completed these three simple steps to registration you should never have to repeat them. Important Before beginning please ensure that your radio is connected to your WiFi router. Step 1 Go to the main menu of your radio by pressing the ‘Home’ button. Use the Menu knob to select the ‘Settings’ icon. Scroll down the available options using the Menu knob until you reach ‘Register’ and select it. Your radio will create a registration code (key). Please write this number down. 34 This picture is just an example of a registration key. Your key will be different and delivered to your radio personally when you select ‘Register’. The key you receive is unique to you and is only valid for 12 hours. Troubleshooting If you radio does not provide a registration code (key) then your radio is not currently connected to your Wi-Fi network. Please see the section in this manual on connecting your radio to your Wi-Fi network. Important Note Please continue to step 2 below within 12 hours ot the key you have noted will expire. In this eventuality, please simply go back and repeat step 1. Step 2 Open the website, grace.reciva.com from your computer’s web browser. Enter in the registration code (key) that you obtained from your radio onto the web site and choose ‘submit’ on the web site. 35 Note The web site will show the ‘serial number’ of your radio after you choose submit, not your registration code (key). You do not need to note this number. Please proceed to creating your account on the web site. Step 3 Power the radio off and on by pressing and holding the power button, or alternatively select ‘Hard Reboot’ from the ‘Settings’ menu. That’s it! Your radio is now registered and associated with this web site. Choose the ‘My Stuff’ icon on the Home screen of the radio to access your personalized content. Making the most of My Stuff Important Note Please complete the previous section ‘Registering your radio / creating an account’ before starting this section. This section will cover how to set up your own stations list, create a new station, add a private stream to your radio, access your Pandora and Sirius accounts from the radio, and much more. Configuring ‘My Profile’ Once logged into your Grace Digital Audio account, you can edit your account’s details from your ‘My Profile’ section. 36 On a computer please navigate to grace.reciva.com using your browser. Log in and click on the ‘My Profile’ link in the top right hand corner of the web page to view your account’s current password. Manage My stuff My Stations Often we find that people want to create their own list of stations from around the world that they can access from a single place on the radio. To facilitate this we have created My Stations. On the Grace website, please log in and then click on ‘Manage My Stuff’, and then click on ‘My Stations’. From this section of the website you are able to search for your favorite stations and add them to your personal ‘My Stations’ list. Organize them in folders and keep personal notes about the station. Next time you use your radio, under the My Stuff icon you will find My Stations. Selecting My Stations will show the stations you placed in My Stations. My Streams and My Podcasts If you want to listen to a station or podcast that is not in the Reciva stations list, and you know the streaming url for the station, then you can add it to your own personal list of stations. This is entirely personal to you. On the Grace website, please log in and then click on ‘Manage My Stuff’, and then click on ‘My Streams’ or ‘My Podcasts’. From this section of the website you are able to search for your personal audio content provided you know the streaming url. As with My Stations you can organize your list into folders and keep personal notes about the content. Next time you use your radio, under the My Stuff icon you will find My streams. Selecting My Streams will show the stations you placed in My Streams, and similarly selecting My Podcasts will give you your podcasts. 37 Pandora You can now access the hugely popular Pandora music service from your Grace Mondo Radio. Please Note…This service is currently only available in the United States of America. Before you start You must have a Pandora account; The Grace Mondo allows you to use Pandora directly from the Radio. In order to use this feature you must have an active Pandora account. You can set up a Pandora account easily from either the Pandora website; www.pandora.com or the Grace Digital website; grace.reciva.com. You must have registered your Radio; You must complete the steps in ‘Registering your radio’ section of this manual before you can use Pandora on the Grace Digital Mondo Radio. Important Note Grace Digital is not affiliated in any way with Pandora nor do we guarantee any of Pandora’s services or streams. Please see Pandora’s web site for information on how to update and activate your Pandora services. If you have any questions, concerns or problems with Pandora’s services please contact Pandora directly. Now follow these simple steps to start using Pandora on your Grace Mondo Radio. Step 1 Log in to your Grace Digital Audio account at grace.reciva.com and select ‘See Extra Features’. Step 2 Are you already a Pandora User? Select Pandora, and in the ‘Already a Pandora User’ section enter your email and Pandora Password. Wait quarter of an hour and then reboot the radio by plugging and unplugging from the power supply with no batteries inserted. Or do you need to set up a Pandora account? Go to www.pandora.com and create an account, or alternatively you can create a Pandora account on grace.reciva.com by clicking ‘See Extra Features’ and then clicking on ‘PANDORA’. After that you will need to repeat steps one and two of this section. 38 Accessing Pandora Feedback Menu While listening to one of your Pandora radio stations choose the ‘Mode’ button on the internet radio or ‘Extra Features’ on the remote control to access the following familiar Pandora controls via your Radio.; Track Details Bookmark Track Bookmark Artist Give Feedback Skip Explain Track Alternatively for ease of use you can also use the bespoke ‘Thumbs up’ or ‘Thumbs Down’ buttons on your Grace Mondo Radio during Pandora playback, and skip up to six songs an hour using the ‘>>|’ button. SiriusXM To access SiriusXM you must have a valid SiriusXM subscription that enables Internet Radio listening. Please check with www.siriusxm.com to ensure you have the correct type of account. After confirmation, once the radio is connected to your broadband network select ‘SiriusXM’ on the home page of the radio. You will be promoted to enter in your ‘Username’. After selecting the appropriate letters / numbers select ‘enter’. Then you will be promoted to enter in your ‘Password’. After your have entered in your password select ‘enter’. Your radio will now show the SiriusXM menu. At anytime you can change the SiriusXM account by accessing the SiriusXM and scrolling to the bottom of the menu and selecting ‘Change Username’. ___________________________________________________________________________________ Dar.FM, Live365 VIP, MP3tunes To access the above services please see our web site www.grace.reciva.com and select ‘ see extra features’. After your service is enabled you will then find the services in ‘manage my stuff’ at www.grace.reciva.com . The above services will show under the ‘Music Services’ Icon on your radio’s home screen. 39 Settings You are able to adjust various settings on your Grace Mondo Radio. These can be found by selecting the ‘Settings’ icon from the Home page of the radio. Please Note If you make a mistake at any point, press the ‘Back’ button to go back to the previous screen. Network Configuration Enables you to scan again for connection to another wireless network, or to manually configure the network parameters. Use this if you take the Internet radio to another building where you want to use it, or if you change your wireless router. Properties Details of the exact software release, serial numbers and other radio specifications. Stereo Mode Set the radio to Mono or Stereo. By default from the factory the radio is set to Mono to optimize the performance of the single speaker. Choose Stereo if you regularly listen via the headphone jack and would prefer a Stereo listening experience out of the headphone. Network Firmware Upgrade Use this option to download new firmware for the radio from the Grace Digital Audio portal on the Internet. If there is new firmware available, then the radio will prompt you If you want to download it or not. Note, at this stage, you can press the radio’s ‘Back’ button to cancel the radio beginning a firmware upgrade. Important Note A Firmware upgrade may take several minutes, so do not switch off the power to the radio until the operation is complete otherwise the radio may become permanently damaged. Speaker Use this control to switch off the speaker. This feature is useful if you are using the RCA out to route the audio to your HiFi. You can simply mute the speaker or turn it off with this features. Language This control allows you to change the display language. After you change the language the radio will reboot. 40 Factory Reset Puts all the settings back to their defaults as they were when the unit left the factory. If you perform a factory reset on your radio you will lose all your presets and your wireless network connection. Please note that your radio’s serial number will still be registered with your Grace Digital internet radio account (assuming you already registered the radio). Any premium station passwords, my stuff stations and podcast that were saved on our web site will be saved and re-associate with your radio after you power back on, log onto your network. Hard Reboot Selecting this menu item will reboot the radio. You can also reboot the radio By unplugging and pressing and holding the power button until the display turns off, then release the power button. Register This will display a key that can be used to register the radio on the Grace Digital Audio Customer portal: grace.reciva.com. See the ‘Registering your radio’ section of this user manual for more details. Clock Set up Change the time format of the radio, and set the local time zone. Backlight Selecting this option will alter the Internet radio’s backlight brightness. Note that in Standby mode you can use the Menu knob to adjust the back light up or down. 1. After selecting the ‘Backlight’ menu item, the radio will display its list of three menu modes: ‘Inactive’, ‘Active’ and ‘Standby’. These three states are explained below: • The radio gets into its ‘inactive’ state when there is no button pressed for 30 seconds. • The ‘active’ state is when there is user activity. • ‘Standby’ is the state when the radio has been turned off. The standby back light setting can be reduced to zero (a blank screen). 2. Rotate the knob to highlight the desired menu mode and press SELECT. 41 3. The radio will now display the current backlight value for this menu mode. You can alter this value by rotating the knob to increase or decrease it. 4. If you have installed the optional battery pack, setting the display as dim as possible will increase battery life. 5. For beside use, you can set inactive and standby status to a brightness of ‘0’. This will turn the display off. Then select the active setting to 1-30 depending on your preference. At anytime during the night you can rotate the Menu knob or press any knob on the radio and the light will briefly display before going back to the inactive status backlight setting. Equalization You can change the Bass or Treble or select one of the 6 presets. Name Your Radio This menu allows you to change the name of your device as it is seen by the free iPhone and Android remote control apps. You can name your device any name you want so other UPnP devices will be able to view the name. Such as Greg’s Kitchen Radio, bedroom, den etc. WiFi Strength This menu will show the signal strength of your Wi-Fi access point as it is seen by the internet radio. This feature can assist you in locating of your internet radio for optimal performance. 42 Media Player Your Grace Mondo can also play music stored on your PC, or a USB memory stick. Select Media Player from the Home Screen using the Menu knob. UPnP Servers You can play content from your laptop, PC or other UPnP enabled storage device using the ‘UPnP servers’ menu option. When you select ‘UPnP Servers’ the radio display will present a list of the media servers available on your network. If there are no servers shown on your list, please check the following 1) You have a PC, laptop or other storage device running switched on and connected to the same network as the radio. 43 2) 3) Your PC laptop or other storage device has audio content stored on it. It is running some type of UPnP media server software such as Windows Media player or TVersity (there are many free and premium servers available to choose from on the web). 4) a. Windows Vista Check that your media server is set to enable sharing. In Windows Media Player 11, right click on the black bar at the top and select tools, then options and then select the library tab from the available tabs. Click the configure sharing button and then the settings button. You will be presented with a dialog titled ‘Media Sharing – Default Settings’ (see below). Tick the check box at the bottom titled ‘Allow new devices and computers automatically (not recommended)’, and press OK. 44 b. Windows 7 In Windows 7, please select ‘Control Panel’ and then ‘Network and Sharing Center’. On the top left hand side of the screen you should see three options listed – select the last one called ‘Change advanced sharing settings’. Under ‘Home or Work (Current Profile)’ about half way done the list there is a section titled ‘Media Streaming’. You might see ‘Media Streaming is On’ or ‘Media 45 Streaming is Off’ but whichever is presented select ‘Choose media streaming options’ at the middle of that sub section. If you are presented with a screen like the one above showing a button captioned ‘Turn on media streaming’ please select it. This will enable media streaming from your PC or laptop to the radio using the UPnP industry protocol. You should now be presented with a list of UPnP enabled devices on the network, and at least one of them should be a Grace Digital radio. Please ensure that the drop down beside it is set to allowed, then press OK and then exit the menu. 46 Now return to the radio and select UPnP Servers from the Media Player Menu and you should be presented with a list of the available servers on your network, one of which should be the PC or laptop that you have just configured. To play content please select a device from the list and go through the menus on the radio to choose content to play. Select the name of the actual content to play it, or alternatively Press and Hold the Menu knob to add the content to the media queue on the radio. Playback can be paused by pressing the play/pause button, or select Forward or reverse to move between songs or stop to halt playback. USB Media To play audio content from a USB memory device, insert the device into the USB socket in the rear of the device. Select Media Player from the Home screen and then select USB Media. You will be presented with a menu showing the contents of the memory device. Simply select the name of the content to play it, or alternatively Press and Hold the Menu knob to add the content to the media queue. Playback can be paused by pressing the play/pause button. The other media buttons also work as you would expect them to. Please note Currently we only support drives formatted with FAT32 file system. FAT32 is limited to a disk size of 2TB and a file size of 4GB. The maximum number of files supported is 268,435,437. However, the radio is limited by its available memory and processor speed as you would expect of this type of device. This means that the practical limit for the radio is much lower than the ultimate FAT32 limit. Available memory varies depending on usage, and although the radio is equipped with an ARM 9 processor running at 266 MHz, the radio can be slow if there are very large numbers of files on the drive. To avoid these limitation please access large media collections via a UPnP Media server rather than directly via the USB socket. Playback Mode This menu item allows you select Shuffle and Repeat for the items in the play back queue. If you select Shuffle or Repeat an appropriate icon will be shown at the top of the screen. Queue 47 Select ‘Queue’ to view and clear the play back queue. ‘Clear Queue’ can be found at the end of the list of content in the queue. 48 Other Cool Stuff Please note this manual is for the current shipping version of software (FIRMWARE). We periodically release new software (FIRMWARE) with new features and move some menu items around that may reorganize your current menu layout. Please have fun and look around at all the features, enjoy listening to premium music content ( SiriusXM, Live365, Dar.FM), talk radio, kids programs, music, NPR, BBC, iHeeartRadio, and sports from around the world, and check with us periodically for feature and content updates. Other really cool stuff Don’t forget if you have an iPhone , Touch, iPad or Android device you can download our free remote control apps from their respective sites. A few notes on the apps: They are free and we upgrade them a 2-3 times a year. Your device must be on the exact same Wi-Fi network as our radio is or it won’t find the radio. You will not be able to control our radio if your phone is only on your cellular 2/3/4g network. You have to be connected to the same home or office Wi-Fi network. The radio has to be powered on or in standby mode. If the power switch is turned off on the back the remote app won’t be able to find it because – it’s not on the Wi-Fi network if the power is completely turned off. If you have more than one Grace Internet Radio you can change the name of the radio so you know which radio you are controlling when you turn the app on. Go to the radio’s main menu and select ‘settings’ then select ‘UPnP’ then ‘device name’. By default the name is ‘Grace Digital’ but you can change it to ‘Bedroom’, ‘Den’, ‘kitchen’ ... Now you have a true multi-room audio system for a fraction of the cost of competitors! 49 Troubleshooting Please read the User’s Guide carefully to ensure proper use of your system and to enjoy your MONDO RADIO’s basic and advanced features. Please keep this User’s Guide for future reference. If you experience any trouble with your wireless internet radio MONDO RADIO, then you may find it useful to visit the help section on our webpage: www.gracesupport.com/ If you have trouble connecting your Grace Mondo Radio to your wireless network, these steps may help to resolve the problem: 1. Confirm a Wi-Fi connected PC can access and browse the internet (web) using the same network. 2. Check that a DHCP server is available, or that you have configured a static IP address on your Grace Mondo Radio. You can configure a static IP address on the radio by selecting the ‘Settings’ icon from the Home screen and then selecting – ‘Network Configuration’ then ‘Edit Configuration’, and then select ‘No’ for ‘Auto (DHCP)’. 3. Check that your network’s firewall is not blocking any outgoing ports. As a minimum your Grace Mondo Radio needs access to UDP and TCP ports 80, 554, 1755, 5000, 6000 and 7070. 4. Check your access point does not restrict connections to particular MAC addresses. You can view your Grace Mondo’s MAC address by selecting the ‘Settings’ icon from the Home screen, then select ‘Network Configuration’ and then ‘View Configuration’. The MAC address is listed in on the screen. 5. If you have an encrypted network, check that you have entered the correct key or pass phrase into your Grace Mondo Radio. Remember that text-format keys are case sensitive. If, when attempting to connect to an encrypted network, your radio displays: ‘Wireless error’ followed by a 5-digit number, then please ensure that you enter the correct pass phrase for the network. If the problem persists, then you may need to consult your network configuration. If your radio can connect to the network successfully, but is unable to play particular stations, it may be due to one of the following causes: 1. The station is not broadcasting at this time of the day (remember location may be different time zone) 2. The station has reached the maximum allowed number of simultaneous listeners. 3. The station is not broadcasting anymore. 4. The radio stations URL on our web site is out of date. 5. The internet connection between the server (often located in a different country) and your radio is slow. 50 . Specifications 802.11n Wi-Fi (WEP, WPA 1 & WPA 2 compliant) Class-D digital amplifier, 12 watts @ 6ohm TFT full color display 100 - 240V, 12V 2A switching power adapter 3” woofer with forward bass port and 1” tweeter Weight: 2.5lbsDimensions: 10.5” x 5.8” x 5.4” * Specifications subject to change without notice License Information and Warranty This product contains software licensed under version 2 of the GNU Public License and version 2.1 of the GNU Lesser Public License. This product includes technology owned by Microsoft Corporation and under a license from Microsoft Licensing GP. Use or distribution of such technology outside of this product is prohibited without a license from Microsoft Corporation and/or Microsoft Licensing, GP as applicable. Your Internet Radio is guaranteed against original defects in materials, manufacture and workmanship for one year from the date of purchase. Under the manufacturer’s limited warranty, repair of any defect or, at the company’s discretion, replacement of the faulty component(s) without charge for parts or labor, is agreed. This warranty does not imply any acceptance by Grace Digital, retailers or its agents for consequential loss or damage and specifically excludes fair wear and tear, accident, misuse of unauthorized modification. This warranty is applicable in the United States only and does not in any way limit the customer’s legal rights. Claims and enquiries under the warranty for Grace products purchased outside the USA should be addressed to the local importers or distributors. If you have reason to claim under the warranty please contact your dealer in the first instance. Please retain all original packaging materials for possible future use. We suggest that you complete details of purchase now and keep this information in a safe place for future reference. Grace Digital provides their Canadian, Central & South American dealers, distributors, and retailers with a 1 year warranty. 51 Warranty (continued) Your MONDO RADIO (GDI-IRD6000) is supported by a limited manufacturer’s warranty for product defects in material or workmanship that may be evident under normal use for 1 year from date of purchase from an authorized franchisee or dealer. The warranty stated herein is the only warranty applicable to this product. All other warranties, expressed or implied are hereby disclaimed and are limited by the written limited warranties contained herein. Except as provided herein, the manufacturer shall have no liability or responsibility to a customer or any other person or entity with respect to any liability, loss or damage caused directly or indirectly by use or performance of the product or arising out of any breach of this warranty, including, but not limited to, any damages resulting in inconvenience, loss of time, data, property, or profit or any indirect, special, incidental, or consequential damages, even If the manufacturer has been advised of the possibility of such damages. In the event of a product defect during the warranty period, return of the product and your sales receipt as proof of purchase date for your GDI-IRD6000 unit is required and shall, at the discretions of the manufacturer, result in: (a) correction of the defect by repair without charge for parts and labor; (b) replacement with the same or similar design; or (c) refund for the purchase price If purchased directly and returned within 30 days of purchase. All replaced parts and products, and products, on which a refund may be made, become the property of the manufacturer. New or reconditioned parts/ products should be warranted for the remainder of the original warranty period. The warranty does not cover: (a) damage or failure caused by or attributed to acts of God, abuse, accident, misuse, improper installation or improper maintenance, alteration, lightning or excessive voltage or current; (b) any repairs other than those provided by a GDI-IRD6000 authorized service facility; (c) consumables such as fuses or batteries; (d) cosmetic damage; (e) transportation, shipping or insurance costs; (f) costs of product removal, installation, set-up, service adjustment or re-installation. Customers are responsible for any shipping costs related to product return, repair and/or refund. Warranty terms may be revised without notification at the discretion of the manufacturer. Customer Service and Support For questions regarding your product please visit us at: www.gracedigitalaudio.com or contact us at: http://www.gracesupport.com/ __________________________________________________________________________________________ 52 APPENDIX Using the USB Port as a USB-Ethernet Connection Your radio is equipped with 801.11n Wi-Fi card for a wireless connection to your wireless router that is connected to your internet service. Your radio may also connect using the USB port with the use of the Grace Digital USB-Ethernet adaptor (separate USB-Ethernet adaptor purchase required) . Once you have a Grace Digital USB-Ethernet adapter, remove the power from the radio then insert into the USB port, plug the radio back into the power. After the radio boots up please go to the main menu and select ‘settings’ then ‘Network Config’ then a new menu item will be displayed named ‘ Wired / wireless’. Select this menu and select ‘wired only’. Your radio will now connect to your Ethernet connection. IMPORTANT If you boot up (power on) the radio without a USB-Ethernet adaptor connected to the radio's USB socket, the radio will only recognize a USB thumb drive connected to the USB socket. If a USB-Ethernet adaptor is connected to the radio after the unit is booted up, the unit will NOT recognize the connection. To have the unit recognize the USB-Ethernet adaptor connection, the unit must then be rebooted (powered off and powered back on) while the adaptor connected to the USB port. The radio will be able to access a USB thumb drive when the USB-Ethernet adaptor is removed and when a thumb drive is connected to the USB socket. ©2010 Grace Digital Inc. San Diego, CA