1
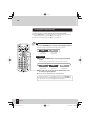
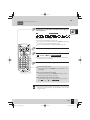
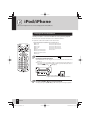
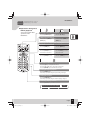
COMPACT HI-FI COMPONENT SYSTEM
R-K731
INSTRUCTION MANUAL
Decla
Declaration of Conformity with regard to
the EMC Directive 2004/108/EC
Manufacturer:
JVC Kenwood Corporation
3-12 Moriya-cho, Kanagawa-ku, Yokohama-shi, Kanagawa, 221-0022 Japan
EU Representative’s:
Kenwood Electronics Europe BV
Amsterdamseweg 37, 1422 AC UITHOORN, The Netherlands
© B60-5877-08/00 (E) LVT2280-002A
R-K731_E.indb 1
2011/10/07 14:08:34
Safety Precautions
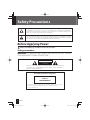
THE LIGHTNING FLASH WITH ARROWHEAD SYMBOL, WITHIN AN EQUILATERAL TRIANGLE,
IS INTENDED TO ALERT THE USER TO THE PRESENCE OF UNINSULATED “DANGEROUS
VOLTAGE” WITHIN THE PRODUCT’S ENCLOSURE THAT MAY BE OF SUFFICIENT MAGNITUDE TO
CONSTITUTE A RISK OF ELECTRIC SHOCK TO PERSONS.
THE EXCLAMATION POINT WITHIN AN EQUILATERAL TRIANGLE IS INTENDED TO ALERT
THE USER TO THE PRESENCE OF IMPORTANT OPERATING AND MAINTENANCE (SERVICING)
INSTRUCTIONS IN THE LITERATURE ACCOMPANYING THE APPLIANCE.
Before Applying Power
Caution: Read this page carefully to ensure safe operation.
Safety precautions
WARNING : TO PREVENT FIRE OR ELECTRIC SHOCK, DO NOT EXPOSE
THIS APPLIANCE TO RAIN OR MOISTURE.
CAUTION
RISK OF ELECTRIC SHOCK
DO NOT OPEN
CAUTION: TO REDUCE THE RISK OF ELECTRIC SHOCK, DO NOT REMOVE COVER
(OR BACK). NO USER-SERVICEABLE PARTS INSIDE. REFER SERVICING TO
QUALIFIED SERVICE PERSONNEL.
The marking of products using lasers
CLASS 1
LASER PRODUCT
The marking this product has been classified as Class 1. It means that
there is no danger of hazardous radiation outside the product.
Location: Back panel
2
R-K731
R-K731_E_01.indd 2
2011/11/10 16:18:31
Safety Precautions
IMPORTANT SAFETY INSTRUCTIONS
Caution: Read this page carefully to ensure safe operation.
Read These Instructions
5. Ventilation
– All the safety and operating instructions should
be read before the product is operated.
– Slots and openings in the cabinet are provided
for ventilation and to ensure reliable operation of
the product and to protect it from overheating.
Do not block any ventilation openings. Install in
accordance with the manufacturer’s instructions.
The openings should never be blocked by placing
the product on a bed, sofa, rug, or other similar
surface. This product should not be placed in a
built-in installation such as a bookcase or rack
unless proper ventilation is provided or the
manufacturer’s instructions have been adhered to.
Keep These Instructions
– The safety and operating instructions should be
retained for future reference.
Heed All Warnings
– All warnings on the product and in the operating
instructions should be adhered to.
Follow All Instructions
– All operating and use instructions should be
followed.
1. Clean only with dry cloth
– Unplug this product from the wall outlet before
cleaning. Do not use liquid cleaners or aerosol
cleaners. Use a damp cloth for cleaning.
2. Attachments
– Only use attachments/accessories specified by
the manufacturer.
3. Do not use this apparatus near water
– This product shall not be exposed to dripping
and splashing – for example, near a bath tub,
wash bowl, kitchen sink, or laundry tub; in a wet
basement; or near a swimming pool; and the like.
Do not place an object containing liquid, such as a
flower vase, on the appliance.
4. Accessories
– Use only with the cart, stand, tripod, bracket, or
table specified by the manufacturer, or sold with
the apparatus. When a cart is used, use caution
when moving the cart/apparatus combination to
avoid injury from tip-over.
6. Power Sources
– This product should be operated only from the
type of power source indicated on the product. If
you are not sure of the type of power supply to
your home, consult your product dealer or local
power company.
7.
CAUTION – Polarization
– Do not defeat the safety purpose of the polarized
or grounding-type plug. A polarized plug has two
blades with one wider than the other. A grounding
type plug has two blades and a third grounding
prong. The wide blade or the third prong are
provided for your safety. If the provided plug does
not fit into your outlet, consult an electrician for
replacement of the obsolete outlet.
8. Power Cord Protection
– Protect the power cord from being walked on
or pinched particularly at plugs, convenience
receptacles, and the point where they exit from
the apparatus.
Continued to next page
English
R-K731_E_01.indd 3
3
2011/11/10 16:18:32
Safety Precautions
IMPORTANT SAFETY INSTRUCTIONS
9. Lightning
16. Wall or Ceiling Mounting
– Unplug this apparatus during lightning storms or
when unused for long periods of time.
– This product should be mounted to a wall
or ceiling only as recommended by the
manufacturer.
10. Overloading
– Do not overload wall outlets, extension cords, or
integral convenience receptacles as this can result
in a risk of fire or electric shock.
11. Object and Liquid Entry
– Never push objects of any kind into this product
through openings as they may touch dangerous
voltage points or short-out parts that could result
in a fire or electric shock. Never spill liquid of any
kind on the product.
12. Servicing
– Do not attempt to service this product yourself
as opening or removing covers may expose you
to dangerous voltage or other hazards. Refer all
servicing to qualified service personnel.
17. Heat
– Do not install near any heat sources such as
radiators, heat registers, stoves, or other apparatus
(including amplifiers) that produce heat. Do not
place a flaming object, such as a candle or lantern,
or near the product.
18. Power Lines
– An outside antenna system should not be located
in the vicinity of overhead power lines or other
electric light or power circuits, or where it can fall
into such power lines or circuits. When installing an
outside antenna system, extreme care should be
taken to keep from touching such power lines or
circuits as contact with them might be fatal.
13. Damage Requiring Service
– Refer all servicing to qualified service personnel.
Servicing is required when the apparatus has been
damaged in any way, such as power-supply cord or
plug is damaged, liquid has been spilled or objects
have fallen into the apparatus, the apparatus has
been exposed to rain or moisture, does not operate
normally, or has been dropped.
14. Replacement Parts
– When replacement parts are required, be sure
the service technician has used replacement parts
specified by the manufacturer or have the same
characteristics as the original part. Unauthorized
substitutions may result in fire, electric shock, or
other hazards.
15. Safety Check
– Upon completion of any service or repairs to
this product, ask the service technician to perform
safety checks to determine that the product is in
proper operating condition.
4
R-K731
R-K731_E.indb 4
2011/10/07 14:08:35
Safety Precautions
Notes:
Item 7 is not required except for grounded or
polarized equipment.
Information on Disposal of Old Electrical
and Electronic Equipment and Batteries
(applicable for EU countries that have
adopted separate waste collection
systems)
Products and batteries with the
symbol (crossed-out wheeled bin)
cannot be disposed as household
waste.
Old electrical and electronic
equipment and batteries should be
recycled at a facility capable of
handling these items and their
waste byproducts.
Contact your local authority for
details in locating a recycle facility
nearest to you.
Proper recycling and waste disposal
will help conserve resources whilst
preventing detrimental effects on
our health and the environment.
Notice: The sign "Pb" below the
symbol for batteries indicates
that this battery contains
lead.
English
R-K731_E.indb 5
5
2011/10/07 14:08:35
What the R-K731 Can Do
Various recording formats
Disc Playback
As well as music CDs, the system will also play discs containing recorded audio files (MP3/
WMA/AAC).
High-quality sound reproduction of iPod/iPhone music
iPod/iPhone Playback Function
With this system, the amplifier receives digital signals of iPod/iPhone music as input. This
realizes the reproduction of high-quality sound minimizing the deterioration of sound quality.
Supports for USB connection, PC connection, analog input and digital input
External Input
The system supports the playback of a USB flash memory and USB mass storage class
compliant digital audio player. In addition, as well as analog input terminals for cassette
decks and PC input terminal for playing its contents, the R-K731 also features a sampling rate
converter compliant digital input terminal for digital tuners etc.
Choose your favorite audio quality
Digital Signal Processor Function
This includes “TONE”, which you can use to select detailed audio characteristics for the low-,
mid- and high-range bands, as well as “D-BASS”, which allows you to adjust super-bass effect.
6
R-K731
R-K731_E.indb 6
2011/10/07 14:08:36
Contents
Before Using the
System
Be sure to read these precautions.
Safety Precautions……………………… 2
Accessories ………………………………… 8
Installing the System ……………………… 9
Connecting the System ………………… 10
Component Names and Functions …… 14
How to Use This Manual ………………… 18
Basic Operation ………………………… 20
Important Information ………………… 22
To ensure safety, read the items by this
mark carefully.
Procedures by Input Source
P.25
This chapter explains how to connect and use
the system with the different input sources.
• CD
• iPod/iPhone
• USB
• Receiving Radio Broadcasts
• Radio Data System
• PC
• External Components
• D.AUDIO
Audio Settings
P.51
This chapter explains how to tailor the system
to your audio preferences.
• Digital Signal Processor
• Supreme EX
• Balance
• Rec Out Level
Component Settings
P.59
This chapter explains how to select the settings
for the system.
• Setting the System Clock • Display Settings
• Setting the Timer
• Auto Power Save (A.P.S.)
Maintenance
P.69
This chapter explains how to store and maintain your system so that it continues to give
pleasure for many years to come.
• Messages
• Glossary of Terms
• Troubleshooting
• Care and Storage
• Specifications
English
R-K731_E.indb 7
7
2011/10/07 14:08:36
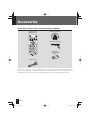
Accessories
Check that all accessories are present in the package.
Remote control
(RC-RP0706E: 1)
AM loop antenna (1)
FM indoor antenna (1)
Batteries for
remote control
(R03: 2)
Power cord (1)
If any accessories are missing, or if the unit is damaged or fails to operate, notify your dealer immediately. If the unit was
shipped to you directly, notify your shipper immediately. Kenwood recommends that you retain the original carton and
packing materials in case you need to move or ship the unit in the future. Keep this manual handy for future reference.
8
R-K731
R-K731_E.indb 8
2011/10/07 14:08:36
Installing the System
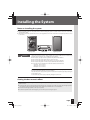
Notes on installing the system
z Always install the system on a flat, stable surface. When installing the system on a stand of some sort, be sure to check the
strength of the stand.
z The magnets used in the speakers may cause color irregularities on TV or PC screens. Do not set up the speakers too close
to a TV or PC.
Left speaker
CAUTION
Main unit
Right speaker
Observe the following cautions when installing the system. Insufficient heat radiation may
build up internal heat and cause a malfunction or fire hazard.
z Do not place any object on the system that may hinder heat radiation.
z Do not place the system upside-down or lay it on its side.
z Do not cover the system with a cloth or place it on a carpet or blanket.
z Do not place the system in a narrow space that hinders the ventilation.
z Leave the spaces specified below around the cabinets of the main unit.
Top panel: 50 cm or more
Side panel: 10 cm or more
Back panel: 10 cm or more
Install the system so the power outlet is easily accessible, and unplug the power cord from
the power outlet immediately in case of any trouble.
Note that the power supply to the system is not shut down completely by simply setting the
power switch to OFF.
To shut down the power supply completely, unplug the power cord.
Getting the best acoustic effect
The sound will vary depending on the positioning of the speakers. To get the best possible sound quality, note the
guidelines below.
z Ensure that the areas around the left and right speakers are as identical as possible. Set up the left and right speakers
away from the wall and hang thick curtains on any windows to minimize echoes or reverberation.
z Place the left and right speakers as far apart as possible.
z Position the speakers at the same height as your ears when you are using the system.
English
R-K731_E.indb 9
9
2011/10/07 14:08:37
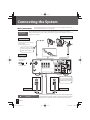
Connecting the System
Main Connections
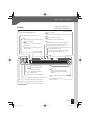
Caution for
Connection
Ensure that all the cords are securely connected. Loose or incomplete connections may
result in noise interference or no sound at all.
Do not plug the AC power cord into an AC wall outlet until all the connections are completed.
Before disconnecting any cords or cables, always turn the system off and unplug the power cord
from the AC wall outlet.
AM loop antenna
FM indoor antenna
Push into the slot.
1 Connect to [FM75Ω].
2 Find the location that gives the
best reception.
3 Fix the antenna in place.
Directly point to the
location and direction that
give the best reception.
AC power cord
z Insert the plug
firmly all the
way into the AC
wall outlet.
To AC wall outlet
For mor e inf ormation,
see <Connecting Other
Accessories (Commercially
Available Units)> on P.12-13.
Right speaker
Caution for outdoor antenna
installation
10
Left speaker
Since antenna installation requires skill and experience, always consult your dealer
before installation. The antenna should be located away from power lines. If the
antenna falls over, contact with a power line creates the risk of electric shock.
R-K731
R-K731_E.indb 10
2011/10/07 14:08:37
Connecting the System
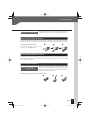
Microcomputer malfunctions
If the system is connected correctly and still does not operate
normally or shows display errors, reset the microcomputer. (P.73)
Connecting the AM loop antenna
The antenna supplied with the system is for indoor use. Place it as far as possible away from the main unit,
your TV set, the speaker cords and the power cord and point it in the direction that gives the best reception.
z Connecting the antenna cord
1
2
3
As shown on the right, connect the AM
antenna cord to the [AM] terminal.
Connecting the FM indoor antenna
The antenna supplied with the system is a basic antenna for indoor use. For stable signal reception, the
use of an outdoor antenna (commercially available) is recommended. To connect an outdoor antenna, first
remove the indoor antenna.
Connecting the speakers
Notes on connecting the
speaker cords
Never short-circuit the positive (+) and negative (–) ends of the
speaker cords. (Do not touch the + and - cords together.) Mistakenly reversing the positive and negative polarity will result in
unnatural sound and unclear sound.
z Connecting the speaker cords to the main unit
1
2
3
English
R-K731_E_02.indd 11
11
2011/10/11 15:18:26
Connecting the System
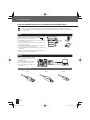
Connecting Other Accessories (Commercially Available Units)
z When connecting a related system component, read the instruction manual that comes with the component too.
z Ensure that all the cords are securely connected. Loose or incomplete connections may result in noise interference or
no sound at all.
USB
Connect a USB flash memory, USB mass storage class compliant
digital audio players or an iPod/iPhone to the [USB
] connector on the front panel of the main unit.
z The iPod/iPhone can be charged once it is connected when
the main unit is turned on.
z For more information on which models of iPod/iPhone can
be connected, see P.32.
z Depending on the device being connected, it may take
some time for the system to recognize it.
z Some USB devices may not be recognized or cannot play
certain files.
z With some models, a USB connection mode selection screen
will appear. Select "Storage (MSC)" mode.
Digital
audio
player
USB flash
memory
iPod/
iPhone
PC IN
Connect a PC running Windows® 7/Vista/
XP and equipped with a USB terminal to
the [PC IN] terminal.
Use a commercially available USB cable
(Type A – Type B) for the connection.
z Use a USB cable with a length of no
more than 3 m.
PC
USB cable
(commercially available)
Types of USB Connectors
TypeA
12
TypeB
Mini-B
R-K731
R-K731_E_02.indd 12
2011/11/10 16:18:52
Connecting the System
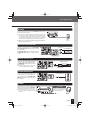
D.AUDIO
Connect digital audio players to the [D.AUDIO] terminal on the
front panel of the main unit.
z If you connect a Kenwood player that supports digital audio
link using the dedicated cable PNC-150 (sold separately), you
can control the player from the main unit and the remote
control. (P.48) Other portable players can be connected using
a 3.5 mm stereo mini-plug cable (commercially available).
z When you are not using the digital audio player, unplug the miniplug cable from the main unit.
Digital
audio
player
AUX PLAY IN/AUX REC OUT
Connect a cassette deck, etc. to the [AUX PLAY
IN] or [AUX REC OUT] terminal on the rear panel
of the main unit.
z [AUX PLAY IN] inputs an analog audio signal.
z [AUX REC OUT] outputs an analog audio signal.
Audio OUT Cassette deck, etc.
Audio IN
DIGITAL IN (PCM signals)
Connect the optical digital output terminals
on components such as digital tuners to
the [DIGITAL IN] terminal on the rear panel
of the main unit.
z Set the digital audio output on
connected components to “PCM”.
Digital tuner, etc.
Optical digital output
(PCM signals)
SUB WOOFER PRE OUT
Connect a subwoofer with a built-in amplifier (such as the optional SW-40HT/
sold separately) to the [SUB WOOFER
PRE OUT] terminal on the rear panel of
the main unit.
Powered subwoofer
PHONES
Plug headphones equipped with a 3.5
mm stereo mini-plug into the [PHONES]
jack on the front panel of the main unit.
z When headphones are connected,
no sound will be output from the
speakers.
CAUTION
Excessive sound pressure from
earphones or headphones
can cause hearing loss.
English
R-K731_E.indb 13
13
2011/10/07 14:08:38
Component Names and Functions
Main unit
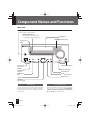
Power (P.21)
Turns the system on or off (Standby).
STANDBY/TIMER indicator
Red: Lights in normal Standby mode.
Orange: Lights in Timer Standby mode.
Display (P.15)
SUPREME EX indicator (P.56)
Remote sensor
(P.17)
USB connector
(P.12, 32, 34)
INPUT SELECTOR (P.21)
D.AUDIO
input terminal
(P.13, 48)
Volume knob (P.20)
PHONES jack
(P.13)
E (P.21, 33, 35, 49)
CD slot (P.21, 26)
F (P.35, 39, 49)
L (P.26)
G/H
(P.33, 35, 39, 49)
Standby Mode
While the [STANDBY/TIMER] indicator on the main unit
is lit, the system is using very weak current to maintain
the built-in memory. This is called Standby mode. When
the main unit is in this mode, you can turn it on using the
remote control.
14
One-touch Operation
This system features a convenient one-touch operation
function. In Standby mode, pressing any of the following
keys will turn on system power: [TUNER/BAND],
[CDE], [USBE], [D.AUDIOE], [PC IN], [DIN1/2], or [AUX] of the remote control.
R-K731
R-K731_E.indb 14
2011/10/07 14:08:38
Component Names and Functions
Displays shown in this manual
may differ from the actual displays.
Display
Lights to indicate the type of the audio file
being played (WAV/WMA/MP3/AAC)
Lights in folder playback mode. (P.29, 35)
AUTO
Lights during auto tuning. Turns off during
manual tuning. (P.39)
TUNED
Lights when you are tuned to the radio
station. (P.39)
ST.
Lights when you are receiving the stereo
broadcast. (P.39)
Lights when settings, such as the sound
quality, are completed.
D-BASS
Lights when a super-bass (D-BASS) level is selected. (P.52)
TONE
Lights when a TONE is set. (P.53)
MUTE
Flashes when the sound is muted. (P.20)
A.P.S.
Lights when Auto Power Save (A.P.S.) is set. (P.68)
Lights in program playback mode. (P.29, 30, 35, 36)
Lights in the PTY
search mode. (P.43)
Shows numbers and text.
Lights when playback is
paused. (P.27, 33, 35)
Lights during playback.
(P.26, 32, 34)
Lights when the CD is inserted. (P.26)
Lights during iPod/iPhone connection. (P.32)
Lights during USB connection. (P.34)
Lights in random playback mode. (P.29, 35)
Lights during all-tracks repeat playback of CD, USB
or iPod/iPhone. (P.29, 33, 35)
The message “1” is also displayed during singletrack repeat playback. (P.29, 33, 35)
MHz
Lights when displaying the FM reception
frequency.
kHz
Displays the AM reception frequency.
Lights when displaying the sampling
frequency.
Displayed while the sleep timer is set.
(P.61)
Displayed while the program
timer is set. (P.62)
Lights during PC connection. (P.44)
Lights when Supreme EX is on. (P.56)
English
R-K731_E.indb 15
15
2011/10/07 14:08:38
Component Names and Functions
Remote control
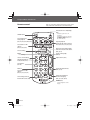
CD EJECT (P.26)
Selects input source.
Starts playback.
(P.21, 26, 32, 34, 38, 44, 46, 48)
Selects tracks or radio
stations.
(P.27, 33, 35, 38, 49)
Remote control keys with the same names as keys on the
main unit have the same functions as the main unit keys.
Turns the unit on or off (Standby).
(P.21)
Turns the system on or off
(Standby).
Turns the main unit on when the
[STANDBY/TIMER] indicator on
the main unit is lit.
Stops the playback.
Selects the radio station selection
mode. (P.27, 29, 30, 35, 36, 39, 49)
Selects a setting.
Skips back or forward through the
tracks and selects the radio station.
(P.27, 35, 39)
ENTER
Fixes a setting.
Sets the sound quality.
(P.52-55)
Uses for several settings.
Adjusts volume. (P.20)
Switches the playback
mode (P.29-31, 35-37)
Sets the timer.
(P.61-66)
Numbers
Selects tracks or radio
stations.
(P.27, 30, 31, 36, 38, 41)
Clears settings. (P.31, 37)
Performs PTY search. (P.43)
Selects the playback mode.
(P.29, 33, 35)
Switches the information
shown on the display.
(P.27, 33, 35, 39, 42, 49)
DIMMER (P.67)
Sets the brightness of the
display.
16
R-K731
R-K731_E.indb 16
2011/10/07 14:08:38
Component Names and Functions
Using the remote control
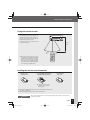
After plugging the main unit into an AC
wall outlet, press the power [K] key on
the remote control to turn the system on.
After the system powers up, press the key
for the function you want to use.
Point the remote control at the remote
sensor when using it.
Approx.
6m
Approx.
Approx.
30q
30q
z The remote control may not operate
correctly if direct sunlight or light from
a high-frequency fluorescent lamp
(such as an inverter type) is shining
on the remote sensor. If this happens,
move the system to a different location
to avoid this type of malfunction.
Loading the remote control batteries
1 Remove the
battery cover.
2 Load the AAA-size batteries
supplied with the system.
3 Close the battery cover.
z Check the polarity of the
batteries (UV) when
loading them.
z The batteries supplied with the system are for operational testing and may
last only for a short time.
z When replacing the batteries, always load 2 new batteries.
CAUTION
Do not leave the battery near fire or under direct sunlight. A fire, explosion or excessive heat
generation may result.
English
R-K731_E.indb 17
17
2011/10/07 14:08:38
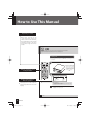
How to Use This Manual
Operation procedure
While this system can be
controlled from either the
remote control or the main unit,
the explanations in this manual
primarily describe operation
procedures using the remote
control.
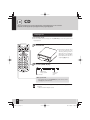
CD
This section explains how to play a CD. As well as normal playback, you can use folder
playback, random playback, repeat playback and program playback.
Playing a CD
Insert and play the CD.
If a disc is already inserted, simply press the [CDE] key to turn the system on and
begin playback.
1
Insert the CD.
Insert the disc with the label
s i d e f a c i n g u p w a rd s. Th e
“Reading” message flashes
while the unit is reading the
information on the CD. When
the installation of the disc is
complete, “ ” lights up.
Remote control keys used
in the procedure
2
Press the [CDE] key.
Track number
during playback
Display shown during or
after an operation
A CD is inserted
Elapsed time
of current
track
To eject the CD
z The displays shown in this instruction
manual may differ from the actual
displays.
Stop playback and press the [CD EJECT] key on the remote control
or the [L] key on the main unit.
Track numbers may not be displayed correctly when the following types of discs
are played.
– Discs recorded in multiple sessions
26
18
R-K731
R-K731
R-K731_E.indb 18
2011/10/07 14:08:39
How to Use This Manual
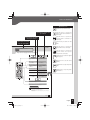
Operation icons
Explains the procedure for CDs.
Explanations of main unit
procedures
Explains how to operate the
system when a USB device is
connected.
Explanations of remote
control procedures
Related functions that
may also be helpful
Related
Information
Explains how to operate the
system when an iPod/iPhone is
connected.
Explains the procedure for the
radio.
D.AUDIO
Adjusting the Digital Audio Player Input Level R P.50
Audio Settings R P.51 onwards
Explains how to operate the
system when an external
component is connected.
Operations during digital audio player playback
Explains the procedure for digital
audio players.
Pausing and resuming playback
Press the [D.AUDIOE]
key.
Press the [E] key.
Explains how to set the sound
quality.
Stopping playback
Press the [F] key.
Explains how to operate the
system when a PC is connected.
Press the [F] key.
Skipping forward/back
Hold down the [G] or
[H] key.
Explains how to set up component
units.
Hold down the [G] or
[H] key.
Skipping tracks, skipping back, skipping to the start
Explains how to carry out system
maintenance.
Skip a track
Press the [H] key.
Press the [H] key.
Skip back to the previous track
Press the [G] key two or
more times in succession.
Press the [G] key two or
more times in succession.
Return to the start of the track
Press the [G] key once.
Press the [G] key once.
Selecting the folder
Press the [A] or [B] key.
Switching display contents
Press the [DISPLAY] key to shift the selection.
"D.AUDIO"
Day/Clock
Skipping a folder is not possible if the playback is from a selection of tracks on the digital audio player.
Some functions may not work depending on the connected
component.
English
49
English
R-K731_E.indb 19
19
2011/10/07 14:08:39
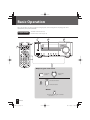
Basic Operation
This section describes some basic procedures for using the system, such as tuning the radio and playing audio from a
CD, iPod/iPhone, PC IN, USB and a D.AUDIO.
Preparations
Check the connections. (P.10-13)
Have the remote control ready. (P. 17)
1
2
3
1
3
Adjusting the volume level
Lowers the
volume
Increases the
volume
Increases the volume
Lowers the volume
Mute
z Press this key again to unmute
the sound.
20
R-K731
R-K731_E.indb 20
2011/10/07 14:08:40
Basic Operation
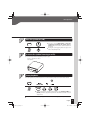
1
Turn the system on (off ).
z Pressing the [ TUNER/BAND], [CDE],
[USBE], [D.AUDIOE], [PC IN], [AUX] or
[D-IN1/2] key on the remote control also turns on
the power.
z Pressing the power [K] key when the system is on
turns it off (Standby mode).
2
Insert a disc (when listening to a CD).
To use other components for playback, proceed to step 3.
Insert a CD with the label
side upwards.
3
Start playback.
Press the Play/Pause key for the input source. See <Procedures by Input Source> (P.25-50) for details.
z If you connect the external components to the [PC IN], [D-IN1] or
[D-IN2] terminal, playback operation should be started on each
component.
z You can select the sound quality you want. See <Audio Settings> (P.51-58) for details.
English
R-K731_E.indb 21
21
2011/10/07 14:08:40
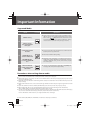
Important Information
Supported Media
Media
USB flash memory
USB
Explanation
Icon in this manual
z Never connect any other device besides a USB flash memory,
USB mass storage class compliant digital audio player or iPod/
USB] terminal. Note that Kenwood will
iPhone to the [
not be held liable for any losses related to malfunction, damage,
or data loss due to connection of any other type of device.
USB mass storage
class compliant digital
audio player
CD
Commercially available
music CDs
z You may not be able to play discs that do not conform to the CD
standard, such as Copy Control CDs.
CD-R/CD-RW discs recorded in CD-DA format
z Discs must be finalized during writing.
MP3/WMA/AAC files
recorded on CD-R/CD-RW
discs
PC
Windows 7/Vista/XP
machine equipped with
USB terminal
z Depending on the equipment or recording mode used for recording onto a CD-R or CD-RW disc, and depending on the type
of CD-R or CD-RW disc used, you may not be able to play the
disc on this system.
z Connect a PC running Windows 7/Vista/XP to the [PC IN] terminal using a USB cable (commercially available).
Precautions when writing data to media
z Discs recorded in Packet Write mode or UDF (Universal Disc Format) cannot be played.
z When writing data to a disc, always close the session or finalize the disc. The disc may not play properly if you do not close
the session or finalize the disc.
z Depending on the specifications of the writing software used, the recorded folder names and file names may not be displayed correctly.
z Playback for multi-session discs or discs that contain large numbers of folders may take longer to begin than for normal
discs.
z If you write audio files and music CD tracks (CD-DA format) to the same disc, the disc may not play correctly.
z Before writing audio files to a disc, check that the files play back correctly on the PC being used to write the files.
After you finish writing, check that the written files are played back correctly.
z Use the correct file extensions (mp3, wma, m4a, wav) in the names of audio files. Files without file extensions will not play.
Also, do not use audio file extensions (mp3, wma, m4a, wav) for files that are not audio files.
For more information on file extensions, see <Supported Audio Files> on the right.
z In this manual, MP3, WMA, AAC and WAV files are referred to collectively as “audio files”.
22
R-K731
R-K731_E.indb 22
2011/10/07 14:08:40
Important Information
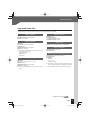
Supported Audio Files
On this system, you can play the audio file types listed below (MP3, WMA, AAC and WAV).
MP3 files (CD/USB)
Extension: .mp3
Sampling frequency: 32/44.1/48 kHz
Bit rate: 32 k – 320 kbps
WAV files (USB only)
Extension: .wav
Sampling frequency:
8/16/22.05/24/32/44.1/48 kHz
Quantization bit rate: 8/16-bit
WMA files (CD/USB)
File format:
Windows Media™ Audio 9 compliant
Extension: .wma
Sampling frequency: 32/44.1/48 kHz
Bit rate: 32 k - 320 kbps
z Files created using functions in Windows Media™ Player
9 or later cannot be played.
- WMA Professional
- WMA Lossless
- WMA Voice
AAC files (CD/USB)
File format:
MPEG-4 AAC (created in iTunes™ 4.1 to 10.4)
Extension: .m4a
Sampling frequency: 32/44.1/48 kHz
Bit rate: 32 k - 320 kbps
z Files encoded using Apple’s Lossless Encoder cannot be
played.
CD file system
ISO 9660 Level 1, ISO 9660 Level 2, Joliet, Romeo
Number of file limits
Max. files/folders: 999 in total
Max. folders: 255
Maximum number of displayable characters
File names: 64 (including file extension)
Folder names: 64
Tag display:
ID3 TAG
Ver1.0, 1.1: 30
Ver2.2, 2.3, 2.4: 64
z This system is capable of displaying alphanumeric characters. Other character types are displayed as asterisks (*).
z Tags for WAV files cannot be displayed on this system.
Continued to next page
English
R-K731_E_02.indd 23
23
2011/10/26 9:58:20
Important Information
Supported Audio Files (continued)
Other notes
z Note that even where audio files comply with the
above standards, playback may fail due to factors such
as the disc characteristics or recording conditions.
z Playback also may fail depending on the specifications
of the encoding software or the settings used for encoding.
z DRM (Digital Rights Management) files cannot be
played.
z Audio files encoded using VBR (Variable Bit Rate) may
use bit rates that fall outside the supported range.
Audio files with bit rates outside the supported range
cannot be played.
z Please back up audio files to be used in the system.
Certain conditions while using a USB device can cause
contents stored on the USB device to be lost. Please
note that Kenwood will not be held liable for any losses
arising out of loss of stored data.
z “Made for iPod” and “Made for iPhone” mean that an electronic
accessory has been designed to connect specifically to iPod or
iPhone, respectively, and has been certified by the developer to
meet Apple performance standards. Apple is not responsible for
the operation of this device or its compliance with safety and
regulatory standards. Please note that the use of this accessory
with iPod or iPhone may affect wireless performance.
z iPhone, iPod, iPod classic, iPod nano, and iPod touch are trademarks of Apple Inc., registered in the U.S. and other countries.
z Microsoft and Windows Media are either registered trademarks
or trademarks of Microsoft Corporation in the United States and/
or other countries.
Handling Discs
Handling precautions
Hold a CD taking care not to touch the played surface.
Discs playable on the system
This system can play back a CD, CD-ROM, CD-R, CD-RW
or the audio part of a CD-EXTRA disc.
Notes on CD-ROM/CD-R/CD-RW discs
If the CD-ROM, CD-R or CD-RW disc being used has a
printable label surface, the label surface may cause
sticking that makes it impossible to remove the disc
from the system. To prevent malfunction of the system,
do not use such a disc.
Cautions on CD discs
Always use a disc carrying the
marking.
A disc without this marking may be unable to be
played back correctly.
The disc rotates at a high speed during playback.
Never use a cracked, chipped or greatly warped disc.
Otherwise, damage or malfunction of the player may
result.
Also, do not use a disc with a non-circular shape as this
may result in malfunction.
Notes on transporting or moving the system
Before transporting or moving this unit, take the following actions:
1 Remove any CDs from the unit.
2 Press the [CDE] key and check to make sure that the message "No Disc" appears on the display.
3 Wait a few seconds and then turn the system off.
4 If there are any other components connected to the system, check to make sure they are all turned off before
disconnecting the cables.
24
R-K731
R-K731_E.indb 24
2011/10/07 14:08:41
Procedures by Input Source
This chapter explains the operation procedures for each input
source.
This manual explains the operations assuming that you will
use the remote control. Some buttons on the main unit are
the same as those on the remote control. You can use either
button in this case.
For information on the sound quality settings and component
settings regardless of the input source, see "Audio Settings" (P.51)
and "Component Settings" (P.59). If an error is displayed or a
problem arises, see "Maintenance" (P.69).
CD
• Playing a CD ………………………………………………………
• Selecting Folder Playback Mode …………………………………
• CD Random Playback Mode ……………………………………
• CD Repeat Playback Mode ………………………………………
• CD Program Playback Mode ……………………………………
26
29
29
29
30
iPod/iPhone
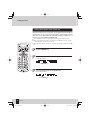
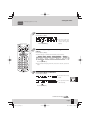
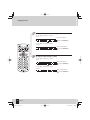
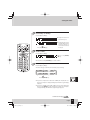
• Playing from an iPod/iPhone …………………………………… 32
USB
• Playing Back from a USB Device ………………………………… 34
• Program Playback Mode of Audio Files in the USB Device …… 36
Receiving Radio Broadcasts
• Listening to FM/AM Radio ……………………………………… 38
• Presetting Stations Automatically (Auto Memory) …………… 40
• Presetting Stations Manually (Manual Preset) ………………… 41
Radio Data System
• PS (Program Service) Name Display …………………………… 42
• Searching for a Desired Program Type (PTY Search) …………… 43
PC
• Connecting a PC and Playing Its Contents ……………………… 44
• Adjusting the Volume Using a PC ……………………………… 45
External Components
• Playback from External Components …………………………… 46
• Adjusting the External Component Input Level………………… 47
D.AUDIO
• Playing from a Digital Audio Player …………………………… 48
• Adjusting the Digital Audio Player Input Level ………………… 50
English
R-K731_E.indb 25
25
2011/10/07 14:08:41
CD
This section explains how to play a CD. As well as normal playback, you can use folder
playback, random playback, repeat playback and program playback.
Playing a CD
Insert and play the CD.
z If a disc is already inserted, simply press the [CDE] key to turn the system on and
begin playback.
1
Insert the CD.
z Insert the disc with the label
s i d e f a c i n g u pw a rd s. T h e
“Reading” message flashes
while the unit is reading the
information on the CD. When
the installation of the disc is
complete, “ ” lights up.
2
Press the [CDE] key.
Track number
during playback
A CD is inserted
Elapsed time
of current
track
To eject the CD
Stop playback and press the [CD EJECT] key on the remote control
or the [L] key on the main unit.
z Track numbers may not be displayed correctly when the following types of discs
are played.
– Discs recorded in multiple sessions
26
R-K731
R-K731_E.indb 26
2011/10/07 14:08:41
CD
Related
Information
Information
z Audio Settings R P.51 onwards
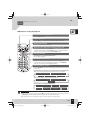
Operations during CD playback
Pausing and resuming playback
Press the [CDE] key.
Stopping playback
Press the [F] key. For information on the Resume function, see below.
Skipping forward/back
Hold down the [I] key or [J] key.
Skipping tracks, skipping back, skipping to the start
To skip to the next track: Press the [H] key.
To return to an earlier track: Press the [G] key two or more times in succession.
To return to the beginning of a track: Press the [G] key once.
Selecting the folder
CD-R/CD-RW discs containing MP3/WMA/AAC files
Press the [A] or [B] key.
Specifying a track number
To play the 3rd track, press the [3] key and then press the [ENTER] key.
To play the 17th track, press the [1], [7] keys and then press the [ENTER] key.
To play the 123rd track, press the [1], [2] and [3] keys.
Switching display contents
Press the [DISPLAY] key. The mode changes as shown below each time you
press the key.
CD-R/CD-RW discs recorded in the commercially available music CD/CD-DA format
During Program playback/CD track playback/All-tracks repeat playback
Elapsed time for the track number
Day/Clock
Remaining time for the track number
Total remaining time
Total elapsed time
During Random playback/single-track repeat playback
Elapsed time for the track number
Remaining time for the track number
Day/Clock
CD-R/CD-RW discs containing MP3/WMA/AAC files
Elapsed time for the track number
File name
Day/Clock
Artist name
Folder name
TAG
Album name
Title
MP3/WMA/AAC
z When you stop playback by pressing the [F] key, the track being played is stored and pressing the
[CDE] key restarts playback from the beginning of that track. (Resume function)
z The Resume function is cancelled if you switch to another input source during playback.
English
R-K731_E_03.indd 27
27
2011/10/26 9:58:59
CD
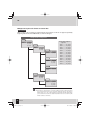
Playback sequence for folders and track files
MP3/WMA/AAC
When you play a disc containing recorded audio files, the track files on the disc are played sequentially
beginning with the files in the ROOT folder, as shown in the figure.
Sample folder configuration
Folder name
ROOT
Track file name
Track file playback
sequence
F0_1.mp3
F0_2.mp3
F0_3.mp3
Track 1 .............F0_1.mp3
Track 2 .............F0_2.mp3
Folder name
Folder 2
Track file name
Track 3 .............F0_3.mp3
F1_1.mp3
F1_2.mp3
Track 4 .............F1_1.mp3
Folder name
Folder 3
Track file name
F2_1.mp3
Track 5 .............F1_2.mp3
Track 6 .............F2_1.mp3
Track 7 .............F3_1.mp3
Track 8 .............F3_2.mp3
Track 9 .............F5_1.mp3
Track 10 ..........F5_2.mp3
Folder name
Folder 4
Track file name
Track 11 ..........F6_1.mp3
F3_1.mp3
F3_2.mp3
Track 12 ..........F6_2.mp3
Track 13 ..........F6_3.mp3
Folder name
Track file name
Folder 5
Folder name
Folder 6
Track file name
F5_1.mp3
F5_2.mp3
Folder name
Folder 7
Track file name
F6_1.mp3
F6_2.mp3
F6_3.mp3
z A folder that does not contain any tracks cannot be selected.
z Audio files are played back in accordance with the sequence where these files
are recorded into the CD. You can specify the playback sequence by adding a
number from "01" to "99" at the beginning of each folder and file name before
you record the files onto the disc. (A (ROOT) folder that does not contain any file
will be counted as one folder.)
28
R-K731
R-K731_E.indb 28
2011/10/07 14:08:42
CD
Related
Information
Information
• RPage
Supported
XX Audio Files R P.23, 24
z
Audio XX
Settings R P.51 onwards
z
• RPage
Selecting Folder Playback Mode
MP3/WMA/AAC
This mode plays only the files in the selected folder.
z If the CD is already playing, press the [F] key to stop playback.
1
2
Press the [P.MODE] key to select the folder playback mode.
z The mode changes as shown below each time you press the key.
N lit
PGM lit
PGM unlit
Folder playback mode
Program playback
mode
Cancel program
playback mode
Press the [A ] or [B ] key to select the folder to be
played.
CD Random Playback Mode
This mode plays the tracks in the CD or in a folder in a random sequence.
z If the CD is already playing, press the [F] key to stop playback. When there are
folders in the CD, select a folder you want to play back and then use the procedure below during playback.
1
Press the [RANDOM] key.
The mode changes as shown below each time you press the key.
lit
Random playback
mode
unlit
Random playback off
z Pressing the [G] key skips back to the beginning of the track being
played.
CD Repeat Playback Mode
This mode plays the tracks on a CD repeatedly.
1
Press the [CDE] key to play the tracks you want to
repeat.
2
Press the [REPEAT] key to begin repeat playback.
The mode changes as shown below each time you press the key.
lit
Single-track repeat
playback
z If you press the [REPEAT] key during program playback, "
peat playback begins for all the programmed tracks.
lit
All-tracks repeat
playback
unlit
Repeat playback off
" and "PGM" light up on the display and re-
z If you press the [REPEAT] key during random playback to activate all-tracks repeat playback, " " and " "
light up on the display and random playback begins with a different sequence once the current random
sequence ends.
English
R-K731_E_03.indd 29
29
2011/10/26 9:59:09
CD
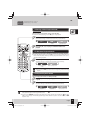
CD Program Playback Mode
You can select up to 30 tracks and play them in the order you like.
z Press the [CDE] key to switch the input source to CD. Playback begins when you
switch the input source, so press the [F] key to stop playback.
z If the CD is already playing, press the [F] key to stop playback.
1
CD
Press the [P.MODE] key to select program playback mode.
The mode changes as shown below each time you press the key.
PGM lit
PGM unlit
Program
playback mode
Cancel program
playback mode
MP3/WMA/AAC
1 Press the [P.MODE] key to select program playback
mode.
The mode changes as shown below each time you press the key.
N lit
Folder
playback mode
PGM lit
PGM unlit
Program
playback mode
Cancel program
playback mode
2 Press the [A ] or [B ] key to select the folder to be
used for program playback.
You can also use number keys to select the folder.
To select folder number 3, press the [3] key and then press the [ENTER] key.
For folder number 17, press the [1], [7] keys and then press the [ENTER] key.
For folder number 123, press the [1], [2], and then the [3] key.
30
R-K731
R-K731_E.indb 30
2011/10/07 14:08:42
CD
Related
Information
Information
• RPage
CD Repeat
XX Playback ModeR P.29
z
• RPage XX
2
Press the [A ] or [B ] key to select the track or file you
want to listen to.
CD
MP3/WMA/AAC
When Track 10 is selected as
program track 1.
When folder number 5 and file number 58 are
selected.
z You can also use number keys to select the file.
z If you enter the wrong information, press the [CLEAR] key before you
proceed to step 3. Then enter the information again.
z Proceed to step 3 within 20 seconds after selecting a track or file.
3
Press the [ENTER] key.
4
To select two or more tracks, repeat steps 2 and 3
( CD ), or steps 1-2 to 3 ( MP3/WMA/AAC ).
z You can select up to 30 tracks. If you attempt to select more tracks, the
“Program Full” message is displayed.
5
Press the [CDE] key to begin playback.
To cancel program mode
Stop playback and press the [P.MODE] key so that "PGM" is no longer displayed.
To remove a track from a program
Stop playback and then press the [CLEAR] key. Each time you press
the key, the last programmed track is cleared.
To add a track to the end of the program
If you are already playing a CD, stop playback and carry out steps 2
and 3 ( CD ) or steps 1-2 to 3 ( MP3/WMA/AAC ).
z If you turn the system off, switch to another input source or remove the
CD for which program playback is set, the information in the specified
program is erased.
English
R-K731_E_03.indd 31
31
2011/10/26 9:59:20
iPod/iPhone
This section explains how to connect and play from an iPod/iPhone.
Playing from an iPod/iPhone
Use this procedure to connect an iPod/iPhone to the system for playback.
z Also refer to the instruction manual that comes with the iPod/iPhone.
z Update the software for iPod/iPhone to the latest version.
Supported models of iPod/iPhone (As of October 2011)
z iPhone 4S
z iPhone 4
z iPhone 3GS
z iPhone 3G
z iPhone
z iPod touch 4th Generation
z iPod touch 3rd Generation
z iPod touch 2nd Generation
z iPod touch
1
z iPod nano 6th Generation
z iPod nano 5th Generation
z iPod nano 4th Generation
z iPod nano 3rd Generation
z iPod nano 2nd Generation
z iPod classic
Connect an iPod/iPhone to the [USB
front panel of the main unit.
] connector on the
z The iPod/iPhone can be charged once it is connected when the main unit is
turned on.
z If an input source other than “USB” is selected when the iPod/iPhone is
” on the display lights up. When you switch the input source to
connected, “
” will light up.
“USB” and start playback, “
USB cable for iPod/iPhone
(Supplied with iPod/iPhone or commercially available)
2
Press the [USBE] key to begin playback.
z Simply pressing the [USBE] key turns on the system and begins playback.
32
R-K731
R-K731_E_04.indd 32
2011/10/26 9:59:54
iPod/iPhone
Related
Information
z Supported Audio Files R P.23, 24
z Audio Settings R P.51 onwards
Operations during iPod/
iPhone playback
You can also perform these
operations on the
iPod/iPhone.
Pausing and resuming playback
Press the [USBE] key.
Press the [E] key.
Skipping forward/back
Hold down the [G] or
[H] key.
Hold down the [G] or
[H] key.
Skipping tracks, skipping back, skipping to the start
Skip a track
Press the [H] key.
Press the [H] key.
Skip back to the previous track
Press the [G] key 2 or
more times in succession.
Press the [G] key 2 or more
times in succession.
Return to the start of the track
Press the [G] key once.
Press the [G] key once.
Select the iPod menu
Press the [C] key to call up the iPod menu.
Press the [A] or [B] key to select the desired menu.
Press the [ENTER] key to determine the selection.
Setting the repeat playback
Press the [REPEAT] key.
Each time you press the key, the repeat setting is changed.
Setting the random
Press the [RANDOM] key.
Each time you press the key, the random setting is changed.
Switching display contents
Press the [DISPLAY] key to shift the selection.
Elapsed time for the track number
Day/Clock
Album name
Title
Artist name
English
R-K731_E.indb 33
33
2011/10/07 14:08:43
USB
This section explains how to connect a USB flash memory or USB mass storage class compliant digital
audio player ("USB device") and play back audio files from it.
Playing Back from a USB Device
Connect a USB flash memory or USB mass storage class compliant digital audio player to the USB connector and play back audio files from it.
z Also refer to the instruction manual that comes with the USB device you are connecting.
z Supported Files
WAV
MP3
WMA
AAC
See <Supported Audio Files> for details. (P.23, 24)
1
2
Connect a USB device to the [USB
front panel of the main unit.
] connector on the
Press the [USBE] key to begin playback.
z Simply pressing the [USBE] key turns on the system and begins playback.
z After folders or files are searched, playback begins with the smallest file number.
See P.28 for information on the playback sequence when there are multiple folders or files on the connected device.
z If no playable files are found, playback does not start.
z When playback resumes on a digital HDD audio player, sound may jump due to
the mechanism specific to HDD.
z The Resume function is cancelled if you switch to another input source during
playback.
z When you connect/disconnect a USB device, make sure the system is not performing any operation or that the power is turned off.
34
R-K731
R-K731_E.indb 34
2011/10/07 14:08:43
USB
Related
Information
z Supported Audio Files R P.23, 24
z Audio Settings R P.51 onwards
Operations during
USB device playback
Pausing and resuming playback
Press the [USBE] key.
Press the [E] key.
Stopping playback
Press the [F] key.
Press the [F] key.
Skipping forward/back
Press the [I] or [J] key.
Press the [G] or [H] key.
Skipping tracks, skipping back, skipping to the start
Skip a track
Press the [H] key.
Press the [H] key.
Skip back to the previous track
Press the [G] key 2 or
more times in succession.
Press the [G] key 2 or more
times in succession.
Return to the start of the track
Press the [G] key once.
Press the [G] key once.
Selecting the folder
Press the [A] or [B] key.
Selecting folder playback mode or program playback mode
Press the [P.MODE] key to shift the selection.
N lit
Folder playback
mode
PGM lit
PGM unlit
Program playback
mode
Cancel program
playback mode
Repeat playback mode
Press the [REPEAT] key to shift the selection.
lit
lit
Single-track repeat
playback
All-tracks/folders
repeat playback
unlit
Repeat playback off
Random playback mode
Press the [RANDOM] key to shift the selection.
lit
unlit
Random playback mode
Random playback off
Switching display contents
Press the [DISPLAY] key to shift the selection.
Elapsed time for the track number
File name
Folder name
TAG
Day/Clock
Album name
Artist name
Title
* Tags for WAV files cannot be displayed on this system.
English
R-K731_E_04.indd 35
35
2011/10/26 10:00:05
USB
Program Playback Mode of Audio Files in the USB Device
You can select up to 30 tracks and play them in the order you like.
z Press the [USBE] key to switch the input source to USB. Playback begins when you
switch the input source, so press the [F] key to stop playback.
z If the USB device is already playing, press the [F] key to stop playback.
1
1 Press the [P.MODE] key to select program playback
mode.
The mode changes as shown below each time you press the key.
N lit
Folder
playback mode
PGM lit
Program
playback mode
PGM unlit
Cancel program
playback mode
2 Press the [A] or [B] key to select the folder to be used
for program playback.
You can also use number keys to select the folder.
To select folder number 3, press the [3] key and then press [ENTER] key.
For folder number 17, press the [1], [7] keys, and then press [ENTER] key.
For folder number 123, press the [1], [2], and then the [3] key.
2
Press the [A] or [B] key to select the track or file you want
to listen to.
When folder number 5 and file number 58 are selected.
z You can also use number keys to select the file.
z If you enter the wrong information, press the [CLEAR] key before you proceed
to step 3. Then enter the information again.
z Proceed to step 3 within 20 seconds after selecting a track or file.
3
36
Press the [ENTER] key.
R-K731
R-K731_E.indb 36
2011/10/07 14:08:44
USB
4
To select two or more tracks, repeat steps 1-2 to 3.
z You can select up to 30 tracks. If you attempt to select more tracks, the
“Program Full” message is displayed.
5
Press the [USBE] key to begin playback.
To cancel program mode
Stop playback and press the [P.MODE] key so that "PGM" is no longer displayed.
To remove a track from a program
Stop playback and then press the [CLEAR] key. Each time you press
the key, the last programmed track is cleared.
To add a track to the end of the program
If you are already playing an audio file, stop playback and carry out
steps 1-2 to 3.
z If you turn the system off, switch to another input source or remove the
USB device for which program playback is set, the information in the
specified program is erased.
English
R-K731_E_04.indd 37
37
2011/10/26 10:00:14
Receiving Radio Broadcasts
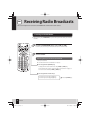
This section explains how to listen to the FM/AM radio and memorize radio stations.
Listening to FM/AM Radio
z Simply pressing the [TUNER/BAND] key turns on the system and allows you to listen to
the radio.
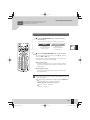
1
Press the [TUNER/BAND] key to select "FM" or "AM".
Each time you press the key, the band switches between "FM" and "AM".
2
Select a station.
Choosing from preset stations (Preset Call)
Select a preset station.
z See P.40 and P.41 for more information on presets.
Selecting with the [P.CALL] keys
To display the next stored station: Press the [G] or [H] key.
To run through the sequence of stored stations at intervals of roughly 0.5
seconds: Press and hold the [G] or [H] key.
Selecting with the number keys
To select P03, press the [0], and [3] keys.
To select P17, press the [1], and [7] keys.
38
Press the [ENTER] key.
R-K731
R-K731_E.indb 38
2011/10/07 14:08:44
Receiving Radio Broadcasts
Related
Information
z Presetting Stations Automatically (Auto Memory) R P.40
z Presetting Stations Manually (Manual Preset) R P.41
z Audio Settings R P.51 onwards
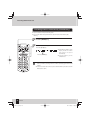
Choosing from stations that are not preset (Auto/ Manual Tuning)
1 Press the [AUTO/MONO] key to select Auto tuning or
Manual tuning.
The mode changes as shown below each time you press the key.
AUTO lit
AUTO unlit
Auto tuning
(Select this mode when
reception is good.)
Manual tuning
(Select this mode when
reception is poor.)
2 Press the [TUNINGI/J] key to select a station.
When you operate on the main unit, press the [F] key and then
press the [I] or [J] key.
When the station is tuned, “TUNED” lights up on the display. If you
are receiving a stereo signal, “ST.” also lights up.
Using Auto tuning
The radio automatically tunes in to the next station each time
you press the key. Repeat this step until you are tuned in to your
preferred station.
Using Manual tuning
Press the key until the desired station is tuned or until you reach
the desired frequency.
z There is no sound while Auto/Manual tuning is in progress.
z Auto tuning provides stereo reception while manual tuning provides
monaural reception.
z The display changes as shown below each time you press the [DISPLAY] key.
FM:
Program service name R Preset No. R Day/Clock
When the program service name is not stored:
Preset No. R “No PS” R Day/Clock
AM:
Preset No. R Day/Clock
English
R-K731_E.indb 39
39
2011/10/07 14:08:45
Receiving Radio Broadcasts
Presetting Stations Automatically (Auto Memory)
z Up to 40 stations can be preset in the system.
z For use of the Radio Data System function, stations must be memorized by Auto
Memory.
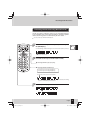
1
Press the [MODE] key.
2
Select “Auto Memory”.
Press the [C] or [D] key.
z “Auto Memory” flashes on the
display and the receivable
radio stations are preset
automatically.
Press the [ENTER] key.
z A preset frequency can be
rewritten later.
z Radio Data System stations are given priority during auto presetting. If there is
memory left after presetting, this unit continues presetting regular FM and AM
stations.
z A broadcast station that cannot be preset with Auto Memory should be set with
Manual preset. (P.41)
40
R-K731
R-K731_E.indb 40
2011/10/07 14:08:45
Receiving Radio Broadcasts
Related
Information
• RPage XX
• RPage XX
Presetting Stations Manually (Manual Preset)
Use this procedure to make the station you are currently listening to
a preset number. If the selected preset number is already assigned a
station, the existing station is overwritten by the new station.
z You can preset up to 40 FM and AM stations.
1
Tune in the station you want to preset, and then press
the [ENTER] key.
Use Auto Tuning or Manual Tuning to tune in the desired station. (See P.39)
The preset number flashes.
2
Select the desired preset number (P01 to P40).
Selecting with the [A] or [B] key.
Selecting with the number keys
To select P03, press the [0], and [3] keys.
To select P17, press the [1], and [7] keys.
The currently selected preset number flashes.
z If the selected preset number is already assigned a station, the existing
station is overwritten by the new station.
3
Press the [ENTER] key.
3 seconds later
English
R-K731_E.indb 41
41
2011/10/07 14:08:45
Radio Data System
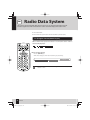
This system is designed for Radio Data System reception. It can extract the information from the
broadcast signal for use with various functions such as automatic display of the station name.
z Select the FM band.
z Preset Radio Data System stations with the Auto Memory function. (P.40)
PS (Program Service) Name Display
When a Radio Data System broadcast is received, the station name is
automatically displayed.
To switch the displays
Press the [DISPLAY] key.
z The mode changes as shown below each time you press the key.
PS (Program Service Name)
Frequency
Clock
z Some stations may not be provided or be given different names depending on
countries or areas.
42
R-K731
R-K731_E_05.indd 42
2011/11/10 16:19:17
Radio Data System
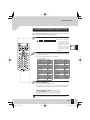
Searching for a Desired Program Type (PTY Search)
The tuner automatically searches for a station which is currently
broadcasting a specified program type (genre).
1
Press the [PTY] key.
z When a Radio Data
System broadcast is
received, the program
type is shown on the
display. If no PTY data is
available, or if the station
is not a Radio Data
System station, “None” is
displayed.
2
Press the [A] or [B] key to select the desired program type.
z Select it while “PTY” is lit.
z Use the program type table for your convenience.
Program type table
Program Type Name
Pop Music
Rock Music
Easy Listening Music
Light Classical Music
Serious Classical Music
Other Music
News
Current Affairs
Information
Sport
Education
Drama
Culture
Science
Varied
3
Display
Pop M
Rock M
Easy M
Light M
Classics
Other M
News
Affairs
Info
Sport
Educate
Drama
Culture
Science
Varied
Program Type Name
Weather
Finance
Children’s programs
Social Affairs
Religion
Phone In
Travel
Leisure
Jazz Music
Country Music
National Music
Oldies Music
Folk Music
Documentary
Display
Weather
Finance
Children
Social
Religion
Phone In
Travel
Leisure
Jazz
Country
Nation M
Oldies
Folk M
Document
Press the [ENTER] key.
z No sound is heard while “PTY” is flashing.
z If a program of the desired type is found, that program is received and
the program type name display changes to the station name display.
To cancel the PTY search
Press the [PTY] key.
z If a program of the desired type cannot be found, “No Program” flashes,
then after several seconds the display returns to the original display.
English
R-K731_E.indb 43
43
2011/10/07 14:08:45
PC
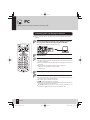
On this system you can listen to the music stored in your PC.
Connecting a PC and Playing Its Contents
z Prepare a USB cable (Type A – Type B) for use in connection of the PC to this system
(See P.12).
1
Connect the USB port of the PC to the [PC IN] terminal on
the rear panel of the main unit using the USB cable.
z Turn this system off before connecting the PC to it.
2
3
Turn the PC on.
Turn this system on.
z The driver software is installed automatically in the PC, which recognizes this
system as “USB speaker”.
z Do not disconnect the USB cable while the PC is detecting the connection of
this system.
z If the PC does not recognize this system in a few seconds, try to:
– Disconnect the USB cable and connect it again.
– Reboot the PC
4
5
Press the [PC IN] key.
Control the PC software and open an audio file.
z The audio file should be selected on the PC. For the operations of the PC, refer
to the manuals for your PC and the software.
z The volume can be controlled on this system.
” is displayed while the PC is connected.
z “
z This system is compatible with 32 kHz/44.1 kHz/48 kHz sampling frequencies.
It can receive 16-bit stereo/monaural data.
z The [PC IN] terminal of this system is used exclusively for input. It is not
possible to record the audio played on this system into the PC.
44
R-K731
R-K731_E_06.indd 44
2011/11/10 16:19:39
PC
Related
Information
z Connecting Other Accessories (Commercially Available Units) R P.12, 13
z Audio Settings R P.51 onwards
Adjusting the Volume Using a PC
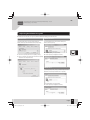
z If the audio is not heard or is very low, check the Windows settings as described below.
Windows XP
Open the [Start] menu, select [Control Panel] and
double-click on [Sound and Audio Devices Properties].
Windows Vista
Open the [Start] menu, select [Control Panel] and
double-click on [Sound].
z From [Playback], select [Speakers].
z Click on [Levels] and adjust the volume.
z Click on the [Audio] tab and select [USB Speakers].
z Click on [Volume] and adjust the volume. If the [Mute]
checkbox is checked, uncheck it.
Windows 7
Open the [Start] menu, select [Control Panel] and click on
[Hardware and Sound] and then click on [Sound].
z From [Playback], select [Speakers].
z Click on [Levels] and adjust the volume.
English
R-K731_E_06.indd 45
45
2011/10/11 10:55:44
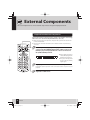
External Components
This section explains how to connect external components to the system and play back tracks.
Playback from External Components
Connect the external component to the system as described in <Connecting
Other Accessories (Commercially Available Units)> (P.12, 13).
z When connecting external components, always turn this system and the external components off beforehand.
z Also refer to the instruction manual that comes with the external component being
connected.
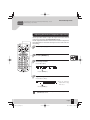
1
Press the [D-IN1/2] key to perform playback from a device
connected to the [DIGITAL IN] terminal, while you press the
[AUX] key to perform playback from a device connected to
the [AUX PLAY IN] terminal.
z When a digital component is
selected, the input signal sampling frequency is displayed.
z The system will play PCM
(32, 44.1, 48, 88.2, 96 kHz)
digital signals.
2
Begin playback on the connected external component.
Perform the required operation on the connected external component to start
playback.
3
46
Adjust the volume level.
R-K731
R-K731_E.indb 46
2011/10/07 14:08:47
External Components
Related
Information
z Connecting Other Accessories (Commercially Available Units) R P.12, 13
z Audio Settings R P.51 onwards
Adjusting the External Component Input Level
Use the procedure below to adjust the input level for the external
component connected to the [AUX PLAY IN] terminal.
Use this adjustment when the volume from an external component is
noticeably higher or lower than other input sources at the same volume setting.
1
Press the [AUX] key.
2
Press the [MODE] key.
3
Select "Input Level".
Press the [C] or [D] key.
Press the [ENTER] key.
4
Adjust the Input Level.
Press the [A] or [B] key.
z You can adjust the
input level in a range
from -3 to 5.
Press the [ENTER] key.
z Signals input via the [AUX PLAY IN] terminal will not be output from the
[AUX REC OUT] terminal.
English
R-K731_E.indb 47
47
2011/10/07 14:08:47
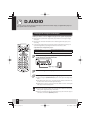
D.AUDIO
You can connect a Kenwood digital audio player (referred to hereafter simply as "digital audio player") to
the system and use it to play tracks.
Playing from a Digital Audio Player
Use this procedure to connect a digital audio player to the system and play tracks.
z Always turn this system and the digital audio player off before connecting the digital
audio player.
z Also refer to the instruction manual that comes with the digital audio player you are
connecting.
z Connecting the digital audio player using the dedicated cable PNC-150 allows you to
operate the digital audio player using the main unit or the remote control.
Compatible Kenwood digital audio players
HDD audio player
Memory audio player/recorder
HD20GA7
M1GC7, MGR-A7, MGR-E8
1
Connect the digital audio player to the [D.AUDIO] terminal
on the front panel of the main unit.
2
Turn on the digital audio player.
3
Press the [D.AUDIOE] key to begin playback.
z Simply pressing the [D.AUDIOE] key turns on the system and begins playback.
z If the digital audio player is not connected using the dedicated cable PNC-150,
use the controls on the connected digital audio player.
z If playback does not start, select a desired artist, album or others on the digital
audio player and then start playback.
z If you use the dedicated cable for the connection, the volume and sound quality
settings on the digital audio player are disabled.
z When you have finished using the digital audio player, disconnect the player’s
connection cable from the [D.AUDIO] terminal.
48
R-K731
R-K731_E.indb 48
2011/10/07 14:08:47
D.AUDIO
Related
Information
z Adjusting the Digital Audio Player Input Level R P.50
z Audio Settings R P.51 onwards
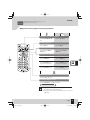
Operations during digital audio player playback
Pausing and resuming playback
Press the [D.AUDIOE]
key.
Press the [E] key.
Stopping playback
Press the [F] key.
Press the [F] key.
Skipping forward/back
Hold down the [G] or
[H] key.
Hold down the [G] or
[H] key.
Skipping tracks, skipping back, skipping to the start
Skip a track
Press the [H] key.
Press the [H] key.
Skip back to the previous track
Press the [G] key two or
more times in succession.
Press the [G] key two or
more times in succession.
Return to the start of the track
Press the [G] key once.
Press the [G] key once.
Selecting the folder
Press the [A] or [B] key.
Switching display contents
Press the [DISPLAY] key to shift the selection.
"D.AUDIO"
Day/Clock
z Skipping a folder is not possible if the playback is from a selection of tracks on the digital audio player.
z Some functions may not work depending on the connected
component.
English
R-K731_E.indb 49
49
2011/10/07 14:08:47
D.AUDIO
Adjusting the Digital Audio Player Input Level
Use the procedure below to adjust the input level for the external component connected to the [D.AUDIO] terminal.
Use this adjustment when the volume from an external component is noticeably higher or lower than other input sources at the same volume setting.
1
Press the [D.AUDIOE] key.
2
Press the [MODE] key.
3
Select "Input Level".
Press the [C] or [D] key.
Press the [ENTER] key.
4
Adjust the Input Level.
Press the [A] or [B] key.
z You can adjust the input level
in a range from -3 to 5.
Press the [ENTER] key.
z If you adjust the input level for D.AUDIO, the output level from the [AUX REC
OUT] terminal will also change.
50
R-K731
R-K731_E.indb 50
2011/10/07 14:08:48
Audio Settings
Use the procedures in this chapter to specify the sound quality
settings for your stereo system.
You can use the system's sound quality function to customize the
sound to your own preferences.
Digital Signal Processor
• Adjusting Super-Bass Tones (D-BASS)…………………………… 52
• Adjusting the Range Levels (TONE) …………………………… 53
Supreme EX
• Setting Supreme EX ……………………………………………… 56
Balance
• Adjusting the Speaker Volume Balance ………………………… 57
Rec Out Level
• Adjusting the Recording Output Level ………………………… 58
English
R-K731_E.indb 51
51
2011/10/07 14:08:48
Digital Signal Processor
The system has a digital signal processor (DSP), which allows you to adjust the impact of super-bass tones
and the levels of low-, mid-, and high-range tones.
This provides more detailed settings that allow you to adjust the sound to your own preferences.
Adjusting Super-Bass Tones (D-BASS)
This feature lets you tailor the impact of super-bass tones to your own preferences.
1
Press the [D-BASS] key.
2
Press the [A] or [B] key to adjust the level.
z While the "D-BASS" is flashing
on the display, you can adjust
the level in a range from 0
(Off ) to 10. Higher numbers
give more pronounced superbass tones.
z The “D-BASS” flashes while
setting is in progress.
3
Press the [ENTER] key.
z If you set level 1 or higher, the “D-BASS” lights.
52
R-K731
R-K731_E.indb 52
2011/10/07 14:08:48
Digital Signal Processor
Adjusting the Range Levels (TONE)
You can adjust the low-, mid- and high-range tones to match your
preferences (TONE).
1
Press the [TONE] key, and then select [Bass] from the
range levels (Bass: low-range tones, Mid: mid-range
tones, Treble: high-range tones).
2
Press the [A] or [B] key to adjust the low tones (Bass)
level.
z The "TONE" flashes
while setting is in
progress. While the
"TONE" is flashing, you
can adjust the level in
a range from -8 to +8.
Continued to next page
English
R-K731_E.indb 53
53
2011/10/07 14:08:48
Digital Signal Processor
3
Press the [TONE] key, and then select [Mid].
4
Press the [A] or [B] key to adjust the mid tones (Mid) level.
z The "TONE" flashes while setting is in progress. While the
"TONE" is flashing, you can adjust the level in a range from
-8 to +8.
54
R-K731
R-K731_E.indb 54
2011/10/07 14:08:48
Digital Signal Processor
5
Press the [TONE] key, and then select [Treble].
6
Press the [A] or [B] key to adjust the high tones
(Treble) level.
z The "TONE" flashes
while setting is in
progress.While the
"TONE" is flashing, you
can adjust the level in
a range from -8 to +8.
7
Press the [ENTER] key.
z If you set a level other than 0, the "TONE" is displayed.
z If you do not need to adjust all the range levels, press the [ENTER] key
to end the settings after you have finished the range level adjustments
you want to make.
English
R-K731_E.indb 55
55
2011/10/07 14:08:48
Supreme EX
Supreme EX is Kenwood's original sound quality enhancement technology and is used for playing CDs
and audio files or for playback using components connected to a digital input terminal.
Setting Supreme EX
1
Press the [MODE] key.
2
Select “SPRM Set”.
Press the [C] or [D] key.
z The “SPRM Set” flashes while
setting is in progress.
Press the [ENTER] key.
3
Select “On“ or “Off “.
Press the [A] or [B] key.
z “SPRM EX” lights when “SPRM
On” is selected, while it turns
off when “SPRM Off” is selected.
Press the [ENTER] key.
z The Supreme EX function operates when “CD”, “D-IN1”, “D-IN2”, “USB” or “PC IN”
(44.1 kHz, 48 kHz) is selected.
z The [SUPREME EX] indicator will light up while the Supreme EX function is
activated.
z When “D-IN1” or “D-IN2” is selected, the “SPRM EX“ does not light if the input
signal frequency is 96 kHz or 88.2 kHz.
56
R-K731
R-K731_E_08.indd 56
2011/11/10 16:20:24
Balance
Related
Information
Use this procedure to adjust the volume balance for the left and right speakers.
Adjusting the Speaker Volume Balance
1
Press the [MODE] key.
2
Select "Balance".
Press the [C] or [D] key.
Press the [ENTER] key.
3
Adjust the balance.
Press the [A] or [B] key.
Press the [ENTER] key.
English
R-K731_E.indb 57
57
2011/10/07 14:08:49
Rec Out Level
If the audio recorded on the component connected to the [AUX REC OUT] terminal is distorted or too low,
adjust the recording output level.
Adjusting the Recording Output Level
1
Select the input source to be output at the recording output.
2
Press the [MODE] key.
3
Select “Rec Out Level”.
Press the [C] or [D] key.
Press the [ENTER] key.
4
Adjust the recording output level.
Press the [A] or [B] key.
z You can adjust the level in a
range from -5 to +3.
Press the [ENTER] key.
58
R-K731
R-K731_E.indb 58
2011/10/07 14:08:49
Component Settings
This chapter explains basic timekeeping settings, as well as
settings for the timer, display, and other functions which provide
more extensive usage of this product.
Setting the System Clock……………………………………60
Setting the Timer
• Setting the Sleep Timer (SLEEP) ………………………………… 61
• Setting the Program Timer (Timer Set) ………………………… 62
Display Settings
• Setting the Display Brightness (DIMMER) ……………………… 67
• Turning the Display Saver ON/OFF ……………………………… 67
Auto Power Save (A.P.S.) ……………………………………68
English
R-K731_E.indb 59
59
2011/10/07 14:08:50
Setting the System Clock
Set the system clock to the correct time and the day of the week.
1
Press the [MODE] key.
2
Select "Time Adjust".
Press the [C] or [D] key.
Press the [ENTER] key.
3
Set the day of the week.
Press the [A] or [B] key.
Press the [ENTER] key.
4
Set the time.
Use the [A] or [B] key to set the “hour”.
Press the [ENTER] key.
Use the [A] or [B] key to set the "minute".
Press the [ENTER] key.
z The currently set day of the week and time are displayed.
z If you make a mistake, repeat the procedure from the beginning.
z When you want to return to the previous step during the setting procedure,
press the [C] key.
z If there is a power failure or the system is unplugged from the wall outlet for
some time, set the time again.
z Pressing the [F] key on the remote control or on the main unit while the system
is in the Standby mode will display the time for 5 seconds.
z If the system clock time setting is not correct, the Program Timer will not start
playback at the correct time.
z As a certain margin of error is allowed for the clock, it is recommended that you
check and adjust the clock at regular intervals.
60
R-K731
R-K731_E.indb 60
2011/10/07 14:08:50
Setting the Timer
Related
Information
A Sleep Timer automatically turns the system off after a set interval, while a
Program Timer starts playback at a specified time.
Setting the Sleep Timer (SLEEP)
This function automatically turns the system off after a set interval.
You can set an interval from 10 to 120 minutes.
1
Press the [SLEEP] key.
Each time you press the key, the interval changes as follows.
The next setting after 120 minutes is timer off.
10
20
Off
30
120
60
90
("Q" unlit)
Sleep Timer on
Time setting
z While the Sleep Timer is running, you can check the
remaining time by pressing the [SLEEP] key.
To cancel the Sleep Timer
Press the power [K] key to turn the system off (Standby)
or press the [SLEEP] to turn off "Q".
Continued to next page
English
R-K731_E.indb 61
61
2011/10/07 14:08:50
Setting the Timer
Setting the Program Timer (Timer Set)
This function allows you to use the timer to start playback automatically at a
specified time. You can set two timers ("Program 1" and "Program 2") at the
same time. You can play back from a radio, CD, iPod/iPhone, USB device, or
external component (AUX PLAY IN, DIGITAL IN).
z Set the system clock to the correct time before performing this procedure. (See P.60)
z Make sure the times for "Program 1" and "Program 2" are different by at least 1 minute
to ensure that their operations do not overlap.
z When you want to return to the previous step during the setting procedure, press the [C]
key.
1
Press the [MODE] key.
2
Select "Timer Set".
Press the [C] or [D] key.
Press the [ENTER] key.
3
Select "Program 1 Set" or "Program 2 Set”.
Press the [A] or [B] key.
Press the [ENTER] key.
62
R-K731
R-K731_E.indb 62
2011/10/07 14:08:50
Setting the Timer
Related
Information
RP.XX the System Clock R P.60
z Setting
z RP.XX
4
Select "On" or "Off ".
Press the [A] or [B] key.
z Selecting "Off " ends
the procedure and
restores the original
display.
Press the [ENTER] key.
5
Select the day (or days) on which the Program Timer
will run.
Press the [A] or [B] key.
The mode changes as shown below each time you press the key.
Everyday
Sunday
Sat-Sun
Monday
Tue-Sat
Tuesday
Mon-Fri
Wednesday
Saturday
Thursday
Friday
Press the [ENTER] key.
z If you selected "Everyday", "Mon-Fri", "Tue-Sat" or "Sat-Sun", proceed to
step 7.
6
Select "Every Week" or "Onetime".
Press the [A] or [B] key.
z The timer runs every
week.
z The specified timer
runs once only.
Press the [ENTER] key.
Continued to next page
English
R-K731_E.indb 63
63
2011/10/07 14:08:51
Setting the Timer
7
Specify the "On" (start time) setting.
Use the [A] or [B] key to set the
"hour".
z The "hour" flashes.
Press the [ENTER] key.
Use the [A] or [B] key to set the
"minute".
z The "minute" flashes.
Press the [ENTER] key.
8
Specify the "Off " (end time) setting.
Use the [A] or [B] key to set the
"hour".
z The "hour" flashes.
Press the [ENTER] key.
Use the [A] or [B] key to set the
"minute".
z The "minute" flashes.
Press the [ENTER] key.
64
R-K731
R-K731_E.indb 64
2011/10/07 14:08:51
Setting the Timer
Related
Information
z RP.XX
z RP.XX
9
Select "Play" or "AI Play".
Press the [A] or [B] key.
z Playback is at the volume set in step 10.
z Playback begins at the
specified time and the
volume gradually increases to the level set
in step 10.
Press the [ENTER] key.
10
Set the volume.
Press the [A] or [B] key.
Press the [ENTER]
key.
z You cannot use the [VOLUME] key to set the volume.
11
Select the input source.
Press the [A] or [B] key.
The mode changes as shown below each time you press the key.
TUNER
CD
USB
AUX
D-IN2
D-IN1
Press the [ENTER] key.
z If you select an input source other than "TUNER", this completes the settings and "Complete" is displayed briefly, after which the original display
reappears.
z If you select "TUNER", use the [A] or [B] to select a preset number and
then press the [ENTER] key. This completes the settings and "Complete"
is displayed briefly, after which the original display reappears.
Continued to next page
English
R-K731_E.indb 65
65
2011/10/07 14:08:51
Setting the Timer
12
Press the power [K] key to turn the power off.
z The [STANDBY/TIMER] indicator on the main unit lights orange.
z If the indicator lights red, set the clock to the correct time.
To turn a timer off or on
z When the system is turned on, press the [TIMER] key.
The setting changes each time you press the [TIMER] key.
1 lit
Program 1 on
1 2 unlit
Timer off
2 lit
Program 2 on
1 2 lit
Program 1 and 2 on
z The [STANDBY/TIMER] indicator will flash orange if there was a power
failure or the system was unplugged from the wall outlet for some
time. If this happens, set the system clock to the correct time again.
(See P.60)
z To modify the program settings, reconfigure the timer settings from the beginning.
z When the system is in Standby mode, you can confirm the timer setting (on or
off ) for 5 seconds by pressing the [F] key.
66
R-K731
R-K731_E.indb 66
2011/10/07 14:08:51
Display Settings
Related
Information
Use these settings to adjust the brightness of the display.
Setting the Display Brightness (DIMMER)
Use this procedure to adjust the display brightness. Adjust the
brightness according to your preferences and the conditions in the
room.
1
Press the [DIMMER] key.
z Each time you press the key, the display changes its brightness.
Turning the Display Saver ON/OFF
If the system is not used at all for a set period, this function scrolls the
display to prevent burn-in of the text on the display and uneven display brightness.
1
Press the [MODE] key.
2
Select "Display Saver".
Press the [C] or [D] key.
Press the [ENTER] key.
3
Select "On" or "Off ".
Press the [A] or [B] key.
z The display saver is
active.
z The display saver is
disabled.
Press the [ENTER] key.
z When you are playing from a CD or USB, the display saver is activated
if the system is not used at all for 10 minutes after the playback stops.
If you selected another input source, the display saver is activated if the
system is not used at all for 10 minutes after the last key is pressed.
English
R-K731_E_10.indd 67
67
2011/10/11 11:29:21
Auto Power Save (A.P.S.)
Auto Power Save (A.P.S.) automatically turns the system off if no operation is performed for 30 minutes after a CD or a USB connected device stops playing.
1
Press the [MODE] key.
2
Select "A.P.S. Set".
Press the [C] or [D] key.
z "A.P.S." flashes on the display.
Press the [ENTER] key.
3
Select "On" or "Off ".
Press the [A] or [B] key.
z "A.P.S." lights up on the display.
z "A.P.S." turns off.
Press the [ENTER] key.
z If the input source is “TUNER“, “D.AUDIO”, “D-IN1”, “D-IN2”, “AUX”, “iPod” or “PC IN”,
Auto Power Save operates when the volume is set to 0 (VOLUME 0) or MUTE
is set to on. When recording on external components, turn A.P.S. off or adjust
volume to above 1.
68
R-K731
R-K731_E_10.indd 68
2011/11/10 16:20:48
Maintenance
This chapter explains what to do when error messages appear
on the display or when problems arise. It also describes how to
store and maintain the system so it continues to give pleasure for
many years to come.
Messages ……………………………………………………70
Glossary of Terms ……………………………………………70
Troubleshooting ……………………………………………71
Care and Storage ……………………………………………74
Specifications ………………………………………………75
English
R-K731_E.indb 69
69
2011/10/07 14:08:52
Messages
Displayed Message
Meaning
No Disc
There is no CD inserted.
RInsert a CD.
No Program
No tracks are programmed.
RProgram the tracks you want to listen to. (See P.30, 36)
RCancel program mode and use normal playback. (See P.31, 37)
Program Full
An attempt was made to program a 31st track.
RYou can program only up to 30 tracks. (See P.31, 37)
Not Support
An iPod/iPhone that is not supported with this device is connected. (See P.32)
Non-PCM
The [DIGITAL IN] terminal on the rear panel of the main unit is receiving non-PCM
input signals. (See P.13)
Unlock
The component connected to the [DIGITAL IN] or [PC IN] terminal on the rear panel of
the main unit is not turned on. Alternatively, there is no signal input.
––– kHz
The sampling frequency of the input PCM signals is outside the playable range.
............
There is no TAG information. (See P.23)
Glossary of Terms
Term
70
Meaning
Page
AAC
An abbreviation for "Advanced Audio Coding". This is a compression standard that
applies only to the audio component in image compression methods used for digital
broadcasting, etc.
23
Bit rate
A value indicating the amount of information processed per second. The higher the bit
rate, the better the sound quality.
23
CD-DA
Refers to music CDs. Almost all discs normally referred to as "CDs" are actually CD-DA
discs.
22
MP3
An audio compression method developed by Germany's Fraunhofer IIS, which achieves
high rates of data compression by discarding data not readily audible to humans. MP3
can compress data down to rates of approximately 1/11 (128 kbps) while retaining
sound quality equivalent to a music CD.
23
Sampling
frequency
A value that indicates the number of times per second analog signals are sampled for
conversion to digital signals. The sampling frequency for music CDs is 44.1 kHz. Normally, the higher the sampling frequency, the better the sound quality.
23
TAG information
Information included in audio files, such as title, artist, album, and genre.
23
USB
A standard for the interface to connect peripheral devices to a computer. This system
supports USB 1.1 and 2.0.
22
USB mass storage
class
A standard for computer control of a USB device. It also makes it possible for a computer to recognize a connected USB device as an external storage device.
22
WMA
An abbreviation for the "Windows Media™ Audio" audio compression and encoding
system developed by Microsoft Corporation of the U.S.
23
R-K731
R-K731_E.indb 70
2011/10/07 14:08:52
Troubleshooting
Whenever the system is not operating as expected, check the following tables to see if you can
resolve the problem yourself before requesting service.
Amplifier/ Speakers
Symptoms
No sound output
Solution
Ref. page
z Check all connections as described in <Connecting the
System>.
z Increase the volume.
z Cancel the MUTE setting.
z Unplug any headphones plugged into the main unit.
10-13
[STANDBY/TIMER] indicator is flashing red and
there is no sound.
z One of the speaker cords is short-circuited. Unplug the
power cord and then reconnect the speaker cord.
z There may be an internal problem. Turn off the power to
the main unit, unplug the power cord and request repairs.
—
No sound from the
headphones
z Check that the headphone plug is inserted correctly.
z Increase the volume.
z Cancel the MUTE setting.
13
20
20
There is no sound from
"D-IN1" or “D-IN2”.
z Check all connections as described in <Connecting the
System>.
z Check whether "PCM" is selected for the digital audio
output setting on the connected component.
13
No sound from one of
the speakers
z Check all connections as described in <Connecting the
System>.
z Check the volume balance for the left and right speakers.
10
The clock display is
flashing.
z Set the clock as described in <Setting the System Clock>.
60
The timer does not
work.
z Set the clock as described in <Setting the System Clock>.
z Set a start time and end time for the program timer.
60
62
Solution
Ref. page
20
20
13
57
Tuner
Symptoms
No radio reception
z Connect the antennas.
z Select the broadcast band (AM or FM).
z Tune the radio to the frequency of the desired station.
10
38
38
Interference (noise)
z Install an outdoor antenna away from roads.
z Turn off any electrical appliances that may be causing
interference.
z Move the system away from the TV.
—
Preset stations cannot
be called
z Preset radio stations with Auto Memory again.
z Manually preset stations with frequencies that you can
receive.
40
41
English
R-K731_E.indb 71
71
2011/10/07 14:08:52
Troubleshooting
CD
Symptoms
Solution
Ref. page
A CD does not play back
when loaded.
z Load the disc correctly with the label side facing upwards.
z Clean the disc. (See <Care and Storage>.)
z Allow any condensation to evaporate. (See <Be careful
against condensation>.)
26
74
74
No sound output
z Press the [CDE] key.
z Clean the disc. (See <Care and Storage>.)
26
74
Playback skips.
z Clean the disc. (See <Care and Storage>.)
74
Some audio files can't
play back.
z The system will not play audio files that are corrupted.
z Make sure the audio file is supported for playback on the
system.
Delay until playback
starts.
z There may be a delay prior to playback if there are large
numbers of folders.
TAG information is not
displayed correctly.
z Refer to <Supported Audio Files> to check which TAG
information can be displayed on this system.
23, 24
28
23, 24
USB
Symptoms
Solution
Ref. page
No sound output when a
USB flash memory or USB
audio player is connected.
z Plug in the USB flash memory correctly.
z Connect the USB cable correctly.
z Check to make sure the USB audio player is turned on.
12
34
The iPod/iPhone does
not provide sound.
z The iPod/iPhone is not properly connected. Remove the
iPod/iPhone from the system, and then connect it again.
32
The iPod/iPhone cannot
be charged.
z The iPod/iPhone is not properly connected. Remove the
iPod/iPhone from the system, and then connect it again.
32
Components connected to the D.AUDIO terminal
Symptoms
The main unit and remote
control cannot control a
Kenwood digital audio player.
Solution
z Connect the player using the dedicated cable PNC-150.
z Check whether the connected model is compatible.
Ref. page
13
48
Remote control
Symptoms
The remote control does
not work.
72
Solution
z Load new batteries.
z Use the remote control within its effective range.
Ref. page
17
17
R-K731
R-K731_E.indb 72
2011/10/07 14:08:52
Troubleshooting
PC
Symptoms
Solution
Ref. page
The PC does not recognize
this system.
z Connect the PC and this system properly using a USB
cable.
z If a USB hub is used in the connection, check if the
hub is functioning properly. Alternatively, change the
connected port.
12
No audio output or too
low level.
z Set the PC properly.
45
Audio is interrupted.
z The audio may be interrupted if the PC is used for an
operation that imposes a burden on the CPU during
the audio output. Avoid executing operations that may
impose a burden on the CPU.
z The audio may be interrupted if a USB cable is connected
to or disconnected from another USB connector of the
PC. Do not connect or disconnect the USB cables to
other equipment during audio playback.
—
Audio is noisy.
z Noise may be noticeable if the system is installed near
a source of strong magnetic waves (TV, etc.). Install the
system away from a source of strong magnetic waves.
9
Resetting the microcomputer
Symptoms
Microcomputer malfunction (the system
does not work, the
display is faulty, etc.).
Solution
z Malfunctions may occur due to an external cause or because a connection cord was unplugged while the system was turned on.
Use the procedure below to reset the microcomputer.
1 Unplug the power cord from the AC
wall outlet.
2 Plug the power cord back in while
holding down the power [K] key on
the main unit.
3 Upon the start of the microcomputer
resetting, the display shown on the
right appears.
4 When finish resetting, it turns to
Standby Mode.
z Bear in mind that resetting erases any
stored information and restores the
system's default settings.
English
R-K731_E.indb 73
73
2011/10/07 14:08:53
Care and Storage
Care and storage of main unit
Keep the system out of the following locations
z Areas exposed to direct sunlight.
z Areas subjected to excessive humidity or dust.
z Areas exposed to direct heat from heating
equipment.
Be careful against condensation
Extreme differences between system temperature
and air temperature can cause water droplets
(condensation) to form on the system. The system
will not operate properly while condensation is
present. If condensation forms, do not use the system for a few hours to allow the condensation to
dry.
Take special care against condensation when the
system is moved between two locations of very
different temperatures, or into a room where high
humidity is present.
When the main unit becomes dirty
Care and storage of CDs
Storing a CD
If you do not plan to use a CD for a long time, remove it from the main unit and store it in its case.
Cleaning a CD
z When a disc is contaminated with fingerprints or
other stains, wipe it gently in the radial direction
using a soft dry cloth.
z Do not use a phonograph record cleaner, lacquer thinner, benzine or alcohol to clean CDs.
z Do not use any disc accessory (stabilizer, protective sheet, protective ring, etc.) or lens cleaner.
Other cautions
z Do not write on a CD with a pencil or ballpoint
pen.
z Do not use a CD if its sticker or label is peeling
or if any adhesive is coming out from under the
sticker or label.
z Do not affix paper, stickers or labels to CDs.
When the front panel or case gets dirty, wipe it
with a soft dry cloth. Never use lacquer thinner,
benzine, alcohol or contact revitalizer, which will
cause discoloration or deformation.
74
R-K731
R-K731_E_11.indd 74
2011/10/11 10:56:10
Specifications
Main unit
[Amplifier]
Effective output power during STEREO operation ..... 50 W+50 W
RMS (1kHz, 10%T.H.D., 6 Ω)
Tone control characteristics
BASS ...........................................................................±8 dB (at 100 Hz)
MID ................................................................................±8 dB (at 1 kHz)
TREBLE.......................................................................±8 dB (at 10 kHz)
D-Bass (+10) ........................................................+10 dB (55 Hz, Vol. 60)
Input terminals (Sensitivity/Impedance)
LINE (AUX) .................................................................. 300 mV / 47 kΩ
LINE (D.AUDIO) .......................................................... 300 mV / 47 kΩ
Output terminals (Level/Impedance)
SUB WOOFER PRE OUT ....................................................... 2 V / 1 kΩ
LINE (AUX) .............................................................................. 2 V / 1 kΩ
Notes:
z Kenwood follows a policy of continuous advancements in
development. For this reason specifications may be changed
without notice.
z Sufficient performance may not be exhibited at extremely
cold locations (where water freezes).
[Digital unit]
Sampling frequencies ......32 kHz, 44.1 kHz, 48 kHz, 88.2 kHz, 96 kHz
Supreme EX (CD, D-IN, USB, PC IN)
Playable frequencies .................................................... 1 Hz - 48 kHz
Digital input terminals (Sensitivity/Wave length)
Optical .......................................–15 dBm – –24 dBm, 660 nm ±30 nm
[USB]
Usable USB device........................................... USB Mass storage class
Interface .............................. USB2.0 (Full speed) USB1.1 compatible
File system.................................................................................... FAT 16/32
Supply current ...............................................................................Max. 1 A
[Tuner]
FM tuner
Reception frequency range ...................... 87.5 MHz to 108 MHz
Antenna impedance ............................................75 Ω unbalanced
AM tuner
Reception frequency range ....................... 531 kHz to 1,602 kHz
[CD player]
Scanning method.................................................Semiconductor laser
[Power supply, etc.]
Standby power consumption .......................................... 0.5 W or less
Power consumption ........................................................................... 65 W
Dimensions
Width .......................................................................................... 245 mm
Height......................................................................................... 104 mm
Depth.......................................................................................... 309 mm
Weight (net).........................................................................................5.7 kg
English
R-K731_E_11.indd 75
75
2011/11/11 15:17:15
For your records
Record the serial number, found on the back of the unit,
in the spaces designated on the warranty card, and
in the space provided below. Refer to the model and
serial numbers whenever you call upon your dealer for
information or service on this product.
Model
Serial Number
1111KMYMODCDT
R-K731_E_11.indd 76
2011/10/26 10:01:14