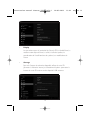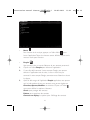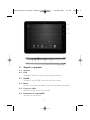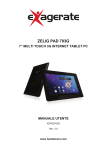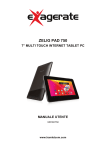
1
Instruction manual dServe 9703C Multi
14-05-2012
13:15
Instruction Manual
Handleiding
DSRV 9703C
Pagina 1
Instruction manual dServe 9703C Multi
14-05-2012
13:15
© 2012, dServe Technology B.V.
ALL RIGHTS RESERVED.This manual contains material protected under International
and Federal Copyright Laws and Treaties. Any unauthorized reprint or use of this
material is prohibited. No part of this manual may be reproduced or transmitted in
any form or by any means, electronic or mechanical, including photocopying, recording,
or by any information storage and retrieval system without explicit written permission
from dServe Technology B.V.
Pagina 2
Instruction manual dServe 9703C Multi
14-05-2012
13:15
Instruction Manual
1 What's Included
The following components are included with your purchased product:
- 9.7 inch Tablet PC
- Power Adapter
- USB Cable
- Instruction Manual
2 Getting Started
Before operating your Tablet PC for the first time, please read this manual
carefully and follow the instructions as below.
3 Battery charging
The tablet is equipped with a built-in rechargeable Lithium battery. It is
suggested to fully charge the battery before use.
We strongly recommend to use the power adapter included in the
packaging, using other adapter may damage the tablet and void the
warranty.
Charging Process
- Connect the power adapter to your tablet, and plug the power adapter
to the nearest electrical outlet.
- Users can still use the tablet while it is being charged.
3
ENGLISH
Pagina 3
Instruction manual dServe 9703C Multi
14-05-2012
13:15
1
2
3
4
5
6
7
8
9
10
11
4 Appearance and buttons
4.1
4.2
4.3
4.4
4.5
Camera
ESC
Tapping on ESC button will return the previous interface.
HOME
Tapping on HOME button will return to the main interface.
Menu
During operations, tap Menu button to show you the menu options.
Headphone Socket
3.5 mm standard earphone jack
4
Pagina 4
Instruction manual dServe 9703C Multi
14-05-2012
13:15
4.6
HDMI output interface
HDMI output interface
4.7 Mini USB
Mini USB port: you can use it to connect to PC for data
transmission, charging or connection with external USB devices.
4.8 TF Card Slot
Micro SD card slot
4.9 Volume +,VolumePress on the Volume +,Volume - buttons to increase or decrease the
sound volume.
4.10 Power Switch
Turn on/off tablet
5
Turn ON/OFF Tablet
5.1
Turn On: after the battery has been fully charged, press & hold the
power switch for around 3 seconds to turn on the device. Screen
lock will be showed after starting up.
Turn Off: When the tablet is ON, press & hold the power switch for
around 3 seconds and the system will popup out power off option,
tap on it to turn the tablet off.
Lock screen: quickly press Power Switch and release to lock
screen.
Unlock screen: slide the lock icon rightward onto the unlock icon to
unlock the screen and go to main interface; Slide the lock icon
leftward onto the camera icon to open camera.
5.2
5.3
5.4
5
ENGLISH
Pagina 5
Instruction manual dServe 9703C Multi
6
14-05-2012
13:15
Pagina 6
Instruction manual dServe 9703C Multi
14-05-2012
13:15
Remarks:
- When battery power has been used up, the tablet will shut down itself
automatically.
- If you illegally turn off the device, restart will scan and restore the disk,
it may take longer time to enter into system.
6 Connection with PC
6.1 Use the USB cable provided to connect the tablet with PC, device will
pop up the USB connection window, click “Turn on USB storage”
to connect to PC, in the connection mode, you can copy or delete the
file on the device or the file on the memory device.
7
ENGLISH
Pagina 7
Instruction manual dServe 9703C Multi
14-05-2012
13:15
7 Tablet Operation Interface
7.1 After starting up, you will enter into below main screen interface
7.2 In the main interface, you can manage main interface software icons:
press the icon and hold it for 3 seconds, then you can drag anywhere
in the main interface.
7.3 Delete icons: press the icon and hold it for 3 seconds, and drag the
icon onto the “Remove” icon, then you can delete that icon from
desktop.
8
Pagina 8
Instruction manual dServe 9703C Multi
14-05-2012
13:15
7.4 Touch the screen and hold for around 4 seconds, the dialog box
“Choose wallpaper from” will pop out as shown below:
You can choose the wallpaper from different sources and change the
wallpaper.
9
ENGLISH
Pagina 9
Instruction manual dServe 9703C Multi
14-05-2012
13:15
7.5 Status Bar Descriptions
From left to right: Back to previous interface, Back to main interface,
Display the Apps performed previously, Menu key, USB connected, USB
connected, USB debugging connected,TF-card information, Current
time, battery charge icons, current time.
7.6 Quick Guide For Touch Operations
- No matter which interface you are on the screen, you can go back to
main screen by tapping the key
located at the left bottom
corner of the main screen.
[Attention] The key
functions as back to main screen
interface.
- During options, by tapping the back key
at the left bottom
corner of the touch screen, you can return to previous screen
interface.
- During operations, by tapping the menu key
on the left bottom
corner of touch screen, the screen will pop out the below interface:
- Click
to see all history of Apps performed previously.
10
Pagina 10
Instruction manual dServe 9703C Multi
-
14-05-2012
13:15
In the main interface, you can touch the icon
to see all the
APPS, tap on any App icon and hold it for around 3 seconds, you can
drag that App icon onto main screen interface.
8 Basic Settings
8.1 WIRELESS & NETWORKS
- Wi-Fi
Tap on setting icon, then ap on the “OFF” to open Wi-Fi, All available
Wi-Fi networks will be listed, tap on your Wi-Fi network and start to
connect. If the Wi-Fi network does not need a password, tap "connect"
to start the connection. If the Wi-Fi network needs a password, then
input the password and tap “connect” to start the connection. If the
Wi-Fi network has been successfully connected before, that
information will be stored.
Connection will be done automatically. Once your tablet connects to
Wi-Fi successfully, the Wi-Fi icon
will appear on the status bar at
the below of the screen.
11
ENGLISH
Pagina 11
Instruction manual dServe 9703C Multi
-
14-05-2012
Data Usage
Select to turn on/off Mobile data, Set mobile data limit.
12
13:15
Pagina 12
Instruction manual dServe 9703C Multi
-
14-05-2012
13:15
More…
Select to turn on/off Airplane mode, to setup Ethernet connection,
VPN and Mobile networks.
8.2 DEVICE
- Sound
Settings on Volume, Ringtone & Notifications, you can also tick to select
or untick to unselect for Vibrate and ring,Touch sounds, Screen lock
sound and Vibrate on touch.
13
ENGLISH
Pagina 13
Instruction manual dServe 9703C Multi
14-05-2012
13:15
-
Display
Settings on LCD Panel brightness, Wallpaper, Auto-rotate screen, sleep,
Font size, Accelerometer coordinate system, Screen adaption.
-
Storage
To view the available storage space, Erase SD card(format the internal
memory) and select the option of enabling media scanning of external
SD card or external USB devices
14
Pagina 14
Instruction manual dServe 9703C Multi
14-05-2012
13:15
[Remarks]:
1. If you want to safely remove the Micro SD card or USB flash drive,
please tap on the option “Unmount SD card”, and confirm the
selection, after this, you can safely remove SD card/USB host.
2. Make sure to tick the option of “Enable media scanning on extsd” and
“Enable media scanning on usbhost 1”, this way, your tablet can scan
and display the files in the external TF card and USB devices.
-
Battery
To know the battery usage information
15
ENGLISH
Pagina 15
Instruction manual dServe 9703C Multi
-
14-05-2012
13:15
Apps
To Manage the applications.Tap on the directories(DOWNLOAD, ON
SD CARD, RUNNING or ALL) and select the application which you
want to uninstall, you will enter into the following interface, tap on
Uninstall, then you can remove that application from tablet.
8.3. PERSONAL
- Accounts & sync
To set up the account and synchronization information.
16
Pagina 16
Instruction manual dServe 9703C Multi
14-05-2012
13:15
-
Location services
Options for you to select “Google's location service” and “Location &
Google search”
-
Security
Settings for Screen lock, Owner info, Encrypt tablet, Make passwords
visible, Device administrators, Unknown sources,Trusted credentials,
Install from SD card.
17
ENGLISH
Pagina 17
Instruction manual dServe 9703C Multi
-
14-05-2012
13:15
Language & keyboard
Language selection, text input and automatic error correction option,
select your desired Keyboard & Input methods, and settings on Text-tospeech output, Pointer speed.
- Backup & reset
Option of for backup & restore, erase personal data.
Warning: once you perform the “Factory data reset”, it will
erase all personal data in tablet, make sure to back up your
personal data before performing this function.
18
Pagina 18
Instruction manual dServe 9703C Multi
14-05-2012
13:15
8.4 SYSTEM
- Date & time
You can use network-provided time or time zone, or you can manually
setup date, time, select time zone and you can also select time format
and date format
-
Accessibility
TalkBack provides spoken feedback help blind and low-vision users.You
need to download this application from Android Market.
19
ENGLISH
Pagina 19
Instruction manual dServe 9703C Multi
14-05-2012
13:15
You can also setup system settings here.You can choose the options of
Large text, Auto-rotate screen, Speak passwords,Touch & hold delay
time and Install web scripts.
-
Developer options
Some advanced settings for the tablet.
-
About tablet
Additional informations about the Tablet
20
Pagina 20
Instruction manual dServe 9703C Multi
14-05-2012
13:15
9 Apps Installation
You can download the Apps from Android Market and install them
online, or you can install the Apps from your Micro SD card or USB
devices. Just tap on the App and run the installation, you can finish the
installation and run that App right away.
10 Introductions of Typical Applications
-
Browser
After connecting your tablet to Wi-Fi network, tap the Browser icon
on desktop to open web browser.The following interface pops up
immediately:
Then you can start web surfing now, during web surfing, tap
on the
menu icon located at the right top corner of the screen to get more
options:
New window: to open up new window of web browser
Bookmarks: to see the Bookmarks, Most visited websites and History
Windows: to see different windows of web surfing
Refresh: to refresh the page
More: more options of “Add bookmark”, “Find on page”, “Select text”,
“Page info”, “Share page”, “Downloads”, “Settings”.
21
ENGLISH
Pagina 21
Instruction manual dServe 9703C Multi
14-05-2012
13:15
-
Calculator
The tablet is with built-in calculator, tap on the Calculator icon to
carry out your calculations.
-
Calendar
Users can use the Calendar to check date, time and memorandum or
add memorandum etc. But before doing this, you have to sign in the
Google Account.
1 Tap on the Calendar icon, then a dialog box of “New a Google
Account” will pop up.Tap “Next” to go the next step.
2 If you do not have a Google Account, then tap “Create” to create
a new Google account, if you already had a Google Account, tap
on “Sign in” to go to next step.
3 Input Gmail address and password, then tap “Next” to go forward.
4 After you finish the setup, the interface will automatically exit and
return to the main interface.Tap on the Calendar icon again to
check date, time and add memorandum etc.Tap on the menu
button to popup more setting options of 1 Day, 7 Weeks, Agenda,
Today, More, see the screen interface as below:
22
Pagina 22
Instruction manual dServe 9703C Multi
-
14-05-2012
13:15
Camera
Tap on the Camera icon to run the application
The camera is located at the right of tablet top, aim at it when you
take photo or video.Tap
to start to take photo or video.
If you want to take photo, tap the icon
to take photo; if you want to
take video, tap on the icon
to take video.
The photos or videos will be saved automatically to internal memory,
select “File Manager”, then select folder “DCIM”, select “Camera” to find
the photos or videos just took.
23
ENGLISH
Pagina 23
Instruction manual dServe 9703C Multi
14-05-2012
13:15
You can also view your previous photos or videos by tapping on the
photo icon at the top right corner of screen. When you view the
photos or videos, tap on it to display more options of slideshow,
delete, share, zoom in/out, clip, rotating, or set as wallpaper etc.
-
Clock
Tap on the Clock icon to run the application.
After running the Clock application, you can setup alarm clock
24
Pagina 24
Instruction manual dServe 9703C Multi
14-05-2012
13:15
-
Dev Tools
Development tools provided by Android.
-
Downloads
Tap to check all downloaded history.
-
Email
You can enter one or more personal email address which you would
like to access through this tablet.
25
ENGLISH
Pagina 25
Instruction manual dServe 9703C Multi
14-05-2012
13:15
Tap on Email icon to setup your email account according to the
procedures.You can receive or send e-mails after setup.
To read emails, tap on the Email icon, if you setup only one email
account, it opens immediately, if you have setup multiple accounts, they
will be listed in the Accounts screen.Tap on the desired email
account, and then tap “Inbox”, all emails will be listed, tap on the email
which you want to open.You can also Reply, Forward or Delete
the emails.
On the Inbox screen, you can Compose New Email, type on menu
icon
for more settings on your Email account.
-
File Manager
Tap on File Manager icon to browse the files saved in your memory
devices(Local, SD card or U-Disk).You can view the files by categories.
Tap on corresponding memory devices(Local, SD card or U-Disk) to
see the files inside.Tapping on the file and hold it for 3 seconds, you
will have the options of: Delete File, Rename File, Copy File,
Move File and Email File.You can also Copy, Move or Paste files
between each memory device.You can have the options of Delete
26
Pagina 26
Instruction manual dServe 9703C Multi
14-05-2012
13:15
Folder, Rename Folder, Copy Folder, Move Folder, Zip Folder
when you tap on a folder and hold it for 3 seconds.
How to copy file: to copy a file: tap on the file and hold it for 3
seconds, select Copy, then tap&hold on the folder which your file
needs to be copied into, select “Paste into folder” to copy your file
into that folder.
-
Play Store
After you signed in the Google Account(mentioned above), tap on the
Play Store icon, and accept the Google Play Terms of Service to
enter into play shop.You can download more apps from the Android
market.
If you want to download apps from Android market, tap on the app
icon which you want to download, follow the procedures to download
the app and install it onto you tablet.
-
Movie Studio
Tap on Movie Studio icon to run the application, you have to Create
New Project first, then tap on “ADD” to Record a video, Take a
photo, Import video clip or import image.
27
ENGLISH
Pagina 27
Instruction manual dServe 9703C Multi
14-05-2012
13:15
-
Music
To play the music, tap on the Music
icon to run the application.
All songs will be listed and tap on your desired song to play it.
-
People
You can create an address book of your personal contacts.
1. Tap on the People application icon to run the application.
2. If you already logged into your Google account, then you can run
the application right away, if you have not logged into your Google
account, please log into your Google account by following the steps.
3. After entering into People application, you can see the all your
contacts informations, you can also Search, Add, Edit your
contacts.Tap on the menu icon
to display below options:
Share: to share contacts
Delete: to delete the contacts
Contacts to display: to select the options for contacts display.
Import/Export: import/Export contacts.
Accounts: sync your accounts
Settings: display options for your contacts
28
Pagina 28
Instruction manual dServe 9703C Multi
4.
-
14-05-2012
13:15
In the Contacts screen, tap on the desired contact, then tap
the “star” icon at the right side of screen to add the Contact to
Favorites.
Phone
This Tablet does not support Phone function.
29
ENGLISH
Pagina 29
Instruction manual dServe 9703C Multi
14-05-2012
13:15
-
Search
Search the APK files in your tablet or search online.
To search online, please tap on the icon
-
Sound Recorder
To start the sound recorder, tap on the Sound Recorder icon to run
the application.
Tap on the icon
to start recording.
Tap on the icon
to stop recording.
Once you stopped the recording, system will prompt:
Discard
Done
Tap on Discard to discard the recording;Tap on Done to save the
recording.
The recorded files can be found at root directory of folder File
Manager.
30
Pagina 30
Instruction manual dServe 9703C Multi
-
14-05-2012
13:15
Video Player
To play the videos, tap on the Video Player icon to run the
application.
All videos will be listed and tap on your desired video to play it.
11 Forced shutdown
In case of your tablet was down and you are unable to turn it off according
to standard procedures, press the power switch and hold it for 7 seconds,
the tablet will be turned off.
31
ENGLISH
Pagina 31
Instruction manual dServe 9703C Multi
14-05-2012
13:15
12 Factory Reset
To restore the tablet to original factory settings and erase all personal
informations, tap on “Settings” > “Backup&reset” > “Factory data reset”.
Warning: After resetting the device, Google account, data, system settings,
and downloaded applications will be removed from your tablet.
13 Battery Management
The battery is not fully charged from factory, so it is recommended that
you charge the battery for at least 6 hours before you start to use the
device.
The rechargeable battery is designed and manufactured to be used and
recharged frequently. As same with all of lithium batteries, the capacity of
the battery reduces each time it is charged. However, you can still try to
prolong the battery's lifetime by following the suggestions below:
- Use your Tablet at least once a week.
- Fully charge the battery regularly.
- Never leave the battery fully discharged for a long period of time.
- Always keep the device and the battery away from heat and moisture.
14 Charge Battery
Plug the power adapter into an electrical wall outlet and then connect to
the device to fully charge the battery before use.
When fully charged, the battery icon displays as:
A fully discharged battery will take you approximately 6 hours, but you can
use the device while it is being charged.
Do not use other adapters than the one provided in your packaging, it may
cause damage to the Lithium battery inside.
Do not attempt to open the tablet to replace the battery inside, this will
damage the tablet and void the warranty.
32
Pagina 32
Instruction manual dServe 9703C Multi
14-05-2012
13:15
15 Important Safety Precautions
Always follow these basic safety precautions when using your Tablet.This
reduces the risk of fire, electric shock, and injury.
- Do not expose this product to rain or moisture.
- Keep the device out of direct sunlight and heat sources.
- Do not place other objects on LCD screen, as it may crush and
damage the LCD screen.
- Do not use any sharp objects to touch the LCD screen, as this will
scratch the screen.
- Only use the AC adapter included with the device. Using any other
power adapters will damage your tablet and void the warranty.
- Do not attempt to dismantle the tablet by yourself to do any repair,
this will damage the tablet and void the warranty.
16 Clean Your Device
To clean fingerprints or dust from the screen, we recommend to use soft,
non-abrasive and non-corrosive cloth for cleaning, such as a camera lens
cloth.
33
ENGLISH
Pagina 33
Instruction manual dServe 9703C Multi
14-05-2012
13:15
Frequently Asked Questions
Android
Q: What Android OS version is on my Device?
A: Android 4.0.3
Basic Functionality
Q: Do I have to charge the battery before use?
A: You should charge the battery for at least 6 hours, but you can use the
device while it's being charged. Use the included power adapter to
charge.
Email
Q: Can I use any of my personal email addresses to send/receive email?
A: The device supports POP3 accounts. Some free email accounts are not
supported on mobile devices. Check with your email provider to see if
you account is supported.
Media Cards
Q: Which media cards are compatible with my Device?
A: Micro SD cards.
Music
Q: What type of music files can I play on my device?
A: MP2, MP3, WAV, AAC, WMA
Q: How do I add music files to my device?
A: Copy the music files from your PC, Micro SD card or USB storage
device directly to your device.
34
Pagina 34
Instruction manual dServe 9703C Multi
14-05-2012
13:15
Photos
Q: What type of photo files can I view on my device?
A: JPEG, BMP, GIF, PNG
Q: How do I add photo files to my device?
A: Copy the photos from your PC, Micro SD card or USB storage device
directly to your device.
Videos
Q: What type of video files can I play on my device?
A: Video Decoding (Full HD)Support all formats of video,such as
H.264, H. 263,VC-1, MPEG-1, 2,4, DIVX-3, 4, 5, 6£¨XVID, H263,
WMV7/8,VP6, AVS,and other popular video formats.
Q: Can I play YouTube videos on my device?
A: Yes, you can run the YouTube application icon to play the videos
Q: How do I add video files to my device?
A: Copy the video files from your PC, Micro SD card or USB storage
device directly to your device.
Wi-Fi
Q: Do I need a Wi-Fi adapter to connect to the Internet?
A: No, the Wi-Fi adapter is built-in to the device.
35
ENGLISH
Pagina 35
Instruction manual dServe 9703C Multi
14-05-2012
13:23
Pagina 1
Handleiding
1 Wat krijgt u geleverd?
De
-
volgende items zijn meegeleverd bij uw aankoop:
9.7 inch Tablet PC
Voedingsadapter
USB Kabel
Gebruiksaanwijzing
2 Aan de slag
Lees eerst deze handleiding zorgvuldig door alvorens uw tablet-pc in
gebruik te nemen, en volg de instructies op zoals hieronder
beschreven.
3 Het opladen van de batterij
De tablet is uitgerust met een ingebouwde oplaadbare Lithium batterij.
Het is raadzaam de batterij volledig op te laden voor gebruik.
Alleen de meegeleverde adapter gebruiken. Het gebruik van een
andere adapter kan de tablet beschadigen en hiermee vervalt de
garantie.
Laadproces
- Sluit de adapter aan op de tablet en steek de voedingsadapter in
het dichtstbijzijnde stopcontact.
- De tablet kan gewoon gebruikt worden tijdens het opladen.
1
NEDERLANDS
Instruction manual dServe 9703C Multi
14-05-2012
13:23
1
2
3
4
5
6
7
8
9
10
11
4
Uiterlijk en knoppen
4.1
4.2
Camera
ESC
Door te tikken op de ESC knop bladert u terug naar de vorige
interface.
HOME
Door te tikken op de HOME knop keert u terug naar het hoofdmenu.
Menu
Door op de Menu-knop te tikken worden de menuopties zichtbaar.
Hoofdtelefoonaansluiting
Standaard 3,5 mm hoofdtelefoon aansluiting
4.3
4.4
4.5
2
Pagina 2
Instruction manual dServe 9703C Multi
14-05-2012
13:23
Pagina 3
4.6
HDMI output interface
HDMI uitgang
4.7 Mini USB
Mini USB-aansluiting: om de tablet op de PC aan te sluiten voor
datatransmissie, voor het opladen of om verbinding te maken met
externe USB-apparaten
4.8 TF Kaartgleuf
Micro SD kaartgleuf
4.9 Volume +,VolumeDruk op de Volume +,Volume - knoppen voor het verhogen of
verlagen van het geluidsvolume.
4.10 Aan/Uit schakelaar
Voor het in/uitschakelen van de tablet
5
Tablet In- en Uitschakelen
5.1
Inschakelen: nadat de batterij volledig is opgeladen, houdt u de
schakelaar ongeveer 3 seconden ingedrukt om het apparaat te
activeren. Het scherm slot wordt zichtbaar na het opstarten.
Uitschakelen: Als de tablet is ingeschakeld, houdt u de schakelaar
ongeveer 3 seconden ingedrukt en het systeem zal de optie
'uitschakelen' in een venster zichtbaar maken.Tik hierop om de tablet
uit te schakelen.
Scherm vergrendelen: Druk kort op de Aan/Uit schakelaar om het
scherm te vergrendelen.
Scherm ontgrendelen: sleep het slotje naar rechts naar het open-slot
pictogram om het scherm te ontgrendelen en naar het hoofdmenu
te gaan, Sleep het slot icoontje naar links naar het camera-icoontje
om de camera te activeren.
5.2
5.3
5.4
3
NEDERLANDS
Instruction manual dServe 9703C Multi
4
14-05-2012
13:23
Pagina 4
Instruction manual dServe 9703C Multi
14-05-2012
13:23
Pagina 5
Opmerkingen:
- Wanneer de batterijspanning te laag wordt, schakelt de tablet zichzelf
automatisch uit.
- Indien het apparaat niet op de juiste wijze is afgesloten, zal opnieuw
opstarten een scan en herstel van de schijf in gang zetten. Het kan
langer duren om toegang tot het systeem te verkrijgen.
6 Verbinding met de PC
6.1 Gebruik de meegeleverde USB-kabel om de tablet met de PC te
verbinden. Het USB verbindingsvenster wordt zichtbaar. Om verbinding
met de PC tot stand te brengen, tikt u op “Turn on USB storage”.
In de 'connection mode' kunt u de bestanden op het apparaat of de
bestanden op het opslag medium kopiëren of deleten.
5
NEDERLANDS
Instruction manual dServe 9703C Multi
14-05-2012
13:23
7 Tablet Gebruikersinterface
7.1 Na het opstarten komt u in het onderstaande Hoofdscherm.
7.2 In het hoofdscherm kunt u de software iconen beheren: druk
gedurende 3 seconden op een icoon.Vervolgens kunt u het overal
heen slepen in het scherm.
7.3 Iconen verwijderen: druk gedurende 3 seconden op een icoon en sleep
het icoon naar de “Remove” icoon,Vervolgens kunt u het icoon
verwijderen van uw bureaublad.
6
Pagina 6
Instruction manual dServe 9703C Multi
14-05-2012
13:23
Pagina 7
7.4 Raak het scherm aan en druk gedurende ongeveer 4 seconden. Het
venster “Choose wallpaper from” wordt zichtbaar zoals hieronder
weergegeven:
U kunt een achtergrond kiezen vanaf verschillende bronnen en uw
achtergrond wijzigen.
7
NEDERLANDS
Instruction manual dServe 9703C Multi
14-05-2012
13:23
7.5 Statusbalk functies
Van links naar rechts:Terug naar vorig menu,Terug naar hoofdmenu,
Laat eerder uitgevoerde App's zien, Menu knop, USB aangesloten, USB
aangesloten, USB foutopsporing,TF-kaart informatie,Tijdsaanduiding,
batterij iconen.
7.6 Korte handleiding voor tikhandelingen
- Ongeacht welk venster actief is, kunt u altijd terug naar het
hoofdmenu door op de
knop te tikken welke zich in de
linkerbenedenhoek van het hoofdscherm bevindt.
[Let op] De
knop brengt u altijd terug naar het hoofdmenu.
- Ongeacht welk venster actief is, kunt u door in de linker
benedenhoek op de
knop te tikken altijd terug naar een vorig
scherm.
- Ongeacht welk venster actief is, kunt u door in de linker benedenhoek
van het touchscherm op de
knop te tikken, het onderstaande
scherm oproepen:
- Tik op
om een lijst van alle eerder uitgevoerde App's te zien.
8
Pagina 8
Instruction manual dServe 9703C Multi
-
14-05-2012
13:23
Pagina 9
In het hoofdmenu kunt u op de
icoon tikken om alle App's te
zien, druk gedurende ongeveer 3 seconden op een APP icoon, dan
kunt u deze slepen naar het hoofdmenu.
8 Basic Settings
8.1 DRAADLOOS & NETWERKEN
- Wi-Fi
Tik op het setting icoon, tik vervolgens op “OFF” om Wi-Fi te openen.
Er verschijnt een lijst van alle beschikbare WIFI netwerken, tik op het
gewenste WIFI netwerk en maak zo uw keuze. Indien het Wi-Fi
netwerk geen wachtwoord vereist, tikt u “connect” om te verbinden.
Indien het Wi-Fi netwerk wel een wachtwoord vereist, typ dan eerst
het wachtwoord en tik “connect” om te verbinden. Indien met het WiFi netwerk reeds eerder succesvol verbinding tot stand werd gebracht,
is deze informatie opgeslagen.Verbinding wordt dan automatisch tot
stand gebracht. Indien uw tablet succesvol een verbinding heeft
gemaakt met Wi-Fi, wordt het Wi-Fi icoon
zichtbaar in de
statusbalk onderaan het scherm.
9
NEDERLANDS
Instruction manual dServe 9703C Multi
-
14-05-2012
13:23
Data Usage
Selecteer deze optie om mobiele data aan / uit te schakelen en om
een mobiele datalimiet in te stellen.
10
Pagina 10
Instruction manual dServe 9703C Multi
14-05-2012
13:23
Pagina 11
-
More…
Selecteer deze optie om vliegtuigmodus aan / uit te inschakelen en om
Ethernet-verbinding,VPN en mobiele netwerken in te stellen.
8.2 APPARAAT
- Sound
Instellingen van Volume, Ringtoon & Meldingen, u kunt tikken om te
selecteren of nogmaals tikken om te deselecteren voor Trilfunctie en
bellen,Touch geluiden, Schermvergrendelingsgeluid en trillen bij aanraking.
11
NEDERLANDS
Instruction manual dServe 9703C Multi
14-05-2012
13:23
-
Display
Instellingen voor LCD-scherm helderheid, Achtergrond, Auto-rotate
scherm, slaapstand, Lettergrootte, Accelerometer coordinatie,
Schermaanpassingen.
-
Storage
Om de beschikbare opslagruimte te bekijken, Erase SD card (intern
geheugen formateren) en selecteer de optie “enabling media scanning
of external SD card or external USB devices”
12
Pagina 12
Instruction manual dServe 9703C Multi
14-05-2012
13:23
Pagina 13
[Opmerkingen]:
1. Voor het veilig verwijderen van de Micro SD-kaart of USB flash drive,
tikt u op de optie “Unmount SD card”, en bevestigt u de selectie.
Daarna kunt u de SD-kaart / USB-host veilig verwijderen.
2. Zorg ervoor dat u de opties “Enable media scanning on extsd” en
“Enable media scanning on usbhost 1” aanvinkt. Op deze manier kan
uw tablet de bestanden op de externe external TF card and USB
devices lezen en tonen.
-
Battery
Dit geeft een indicatie over de tijd dat de batterij nog spanning levert.
13
NEDERLANDS
Instruction manual dServe 9703C Multi
-
14-05-2012
13:23
Apps
Het beheren van de Applicaties.Tik op de mappen (DOWNLOAD,
ON SD CARD, RUNNING of ALL) en selecteer de applicatie die u
wilt de-installeren.Vervolgens opent het volgende scherm.Tik op
Uninstall, zo kunt u de applicatie van uw tablet verwijderen.
8.3. PERSONAL
- Accounts & sync
Voor het instellen van de account- en synchronisatie-informatie.
14
Pagina 14
Instruction manual dServe 9703C Multi
14-05-2012
13:23
-
Location services
Opties voor het instellen van “Google's location service” en “Location
& Google search”
-
Security
Instellingen voor schermbeveiliging, Info eigenaar, Encrypt tablet, Make
passwords visible, Device administrators, Unknown sources,Trusted
credentials, Install from SD card.
15
Pagina 15
NEDERLANDS
Instruction manual dServe 9703C Multi
-
14-05-2012
13:23
Language & keyboard
Taalkeuze, tekstinvoer en optie voor automatische foutcorrectie.
Selecteer het gewenste Keyboard & Input methodes, en instellingen
voor Tekst-naar-spraak, Cursor snelheid.
- Backup & reset
Opties voor back-up & restore, wissen van persoonlijke gegevens.
Waarschuwing: het uitvoeren van de optie “Factory data reset”,
wist alle persoonlijke gegevens in de tablet. Maak een back-up van
uw persoonlijke gegevens alvorens deze functie uit te voeren.
16
Pagina 16
Instruction manual dServe 9703C Multi
14-05-2012
13:23
Pagina 17
8.4 SYSTEM
- Date & time
U kunt de klok automatisch synchroniseren met een tijdserver op het
internet, of u kunt de datum, tijd en tijdzone handmatig instellen en ook
kunt u kiezen hoe de tijd en datum wordt weergegeven.
-
Accessibility
TalkBack geeft gesproken feedback om blinde en slechtziende gebruikers
te helpen. U dient deze toepassing te downloaden van de Android Markt.
17
NEDERLANDS
Instruction manual dServe 9703C Multi
14-05-2012
13:23
U kunt hier ook systeeminstellingen wijzigen. U kunt kiezen voor de
opties Large text, Auto-rotate screen, Speak passwords,Touch & hold
delay time en Install web scripts.
-
Developer options
Diverse geavanceerde instellingen voor de tablet.
-
About tablet
Aanvullende informatie over de Tablet.
18
Pagina 18
Instruction manual dServe 9703C Multi
14-05-2012
13:23
Pagina 19
9 Apps Installation
U kunt App's downloaden van de Android Markt en online installeren,
of u kiest voor het installeren van App's vanaf uw Micro SD card of
USB device.Tik simpelweg op de App en kies voor installeren. U kunt
direct na het afronden van de installatie gebruik maken van de App.
10 Introducties van Specifieke Toepassingen
-
Browser
Na verbinding te hebben genaakt met een Wi-Fi netwerk, tikt u op het
Browser icoon op het bureaublad om de web browser te openen.
Het volgende scherm wordt onmiddellijk zichtbaar:
U kunt nu beginnen met surfen op het web.Tijdens het surfen op het web,
tikt u op het
menu icoon in de rechter bovenhoek voor meer opties:
New window: voor het openen van een nieuw venster in de browser
Bookmarks: voor het zichtbaar maken van bladwijzers, vaak bezochte
websites en Geschiedenis
Windows: om andere geopende vensters van de browser te zien
Refresh: voor het opnieuw laden van de pagina
More: meer opties zoals “Add bookmark”, “Find on page”, “Select text”,
“Page info”, “Share page”, “Downloads”, “Settings”.
19
NEDERLANDS
Instruction manual dServe 9703C Multi
14-05-2012
13:23
-
Calculator
De tablet heeft een ingebouwde rekenmachine.Tik op het Calculator
icoon voor het uitvoeren van uw berekeningen.
-
Calendar
Gebruikers kunnen gebruik maken van de kalender om de datum, tijd en
memo's te controleren of memo's toe te voegen etc. U dient aangemeld
te zijn bij een Google-account om hiervan gebruik te kunnen maken.
1 Tik op het Calendar icoon, dan opent zich het venster “New
Google Account”.Tik “Next” om naar de volgende stap te gaan.
2 Indien u nog geen Google Account heeft, tikt u “Create” voor het
aanmaken van een nieuwe Google account. Indien u reeds een
Google Account heeft, tikt u op “Sign in” voor de volgende stap.
3 Typ e-mailadres en wachtwoord.Tik op “Next” om verder te gaan.
4 Nadat u de set-up heeft voltooid, sluit het venster automatisch en u
keert u terug in het hoofdvenster.Tik opnieuw op het Calendar icoon
om datum en tijd te controleren en memo's toe te voegen etc.Tik
op de Menuknop om te kunnen kiezen uit meer opties zoals 1 Day,
7 Weeks, Agenda,Today, More. Zie het hieronder weergegeven:
20
Pagina 20
Instruction manual dServe 9703C Multi
-
14-05-2012
13:23
Pagina 21
Camera
Tik op het Camera icoon om de applicatie te starten.
De camera bevindt zich rechts bovenaan op de tablet. Richt hiermee
wanneer u een foto of een video maakt.Tik
als u een foto of een
video wilt maken.Voor het maken van een foto tikt u op het
icoon.
Voor het maken van een video tikt u op het
icoon.
De foto's of video's worden automatisch opgeslagen in het interne
geheugen, selecteer “File Manager”, en vervolgens “DCIM”.
21
NEDERLANDS
Instruction manual dServe 9703C Multi
14-05-2012
13:23
Selecteer “Camera” om de foto's en video's te zien die u zojuist heeft
gemaakt. U kunt ook uw oude foto's of video bekijken door te tikken
op het foto icoon in de rechterbovenhoek van het scherm. Wanneer u
de foto's of video's bekijkt, tikt u erop om meer opties te zien zoals
slideshow, delete, share, zoom in/out, clip, rotating, or set as wallpaper
etc.
-
Clock
Tik op het Clock icoon om de applicatie te starten.
Na het uitvoeren van de Clock applicatie kunt u de wekker instellen.
22
Pagina 22
Instruction manual dServe 9703C Multi
14-05-2012
13:23
-
Dev Tools
Development tools meegeleverd met het Android besturingssysteem.
-
Downloads
Tik hierop om de download geschiedenis te zien.
-
Email
U kunt één of meer persoonlijke e-mailadressen instellen waartoe u
toegang wilt hebben met deze tablet.
23
Pagina 23
NEDERLANDS
Instruction manual dServe 9703C Multi
14-05-2012
13:23
Tik op het Email icoon om uw e-mailaccount te configureren
overeenkomstig de procedures. Direct hierna kunt u e-mails ontvangen
en verzenden.
Voor het benaderen van e-mail, tikt u op het Email icoon. Indien u
slechts 1 e-mailaccount heeft geconfigureerd, zal deze direct worden
geopend. Indien u meerdere accounts heeft geconfigureerd, worden deze
getoond in het Accounts scherm.Tik op de gewenste e-mailaccount, tik
vervolgens op “Inbox”. Alle e-mails worden zichtbaar in een lijst.Tik op
de e-mail die u wilt openen. U kunt ook voor Reply, Forward of
Delete kiezen.
In het inbox scherm kunt u kiezen voor Compose New Email.Tik op
het menu icon
voor meer instellingen van uw e-mailaccount.
-
File Manager
Tik op het File Manager icoon om de bestanden opgeslagen op uw
geheugenapparaat te doorzoeken (Lokaal, SD kaart of U-schijf). U kunt
de bestanden rangschikken per categorie.
Tik op het betreffende geheugenapparaat (Lokaal, SD kaart of U-Schijf)
om de bestanden te zien. Gedurende 3 seconden op een bestand
drukken geeft de opties: Delete File, Rename File, Copy File,
24
Pagina 24
Instruction manual dServe 9703C Multi
14-05-2012
13:23
Pagina 25
Move File en Email File. U kunt de bestanden ook Copy, Move of Paste
tussen de geheugenapparaten onderling. De opties Delete Folder, Rename
Folder, Copy Folder, Move Folder, Zip Folder maakt u zichtbaar door
gedurende 3 seconden op een map te drukken.
Voor het kopiëren van een bestand drukt u gedurende 3 seconden op het
bestand, selecteer Copy.Vervolgens drukt u 3 seconden op de map waarnaar u
de bestanden wilt kopiëren. Selecteer “Paste into folder” om uw bestand
naar de betreffende folder te kopiëren.
-
Play Store
Nadat u op uw Google Account (eerder omschreven) bent ingelogd, tikt u
op het Play Store icoon, en accordeert u de Google Play Terms of
Service om de play shop te bezoeken. Meer App's kunt u downloaden van
de Android markt.Voor het downloaden van App's van de Android markt,
tikt op het icoon van de App die u wilt downloaden.Volg nu de procedure
voor het downloaden van de App en installeer deze op uw tablet.
-
Movie Studio
Tik op het Movie Studio icoon om de applicatie op te starten. U dient
eerst een nieuw project aan te maken.Tik vervolgens op “ADD” voor
Record a
video, Take a
photo,
Import video
clip of
import
image.
25
NEDERLANDS
Instruction manual dServe 9703C Multi
14-05-2012
13:23
-
Music
Om muziek te luisteren, tikt u op het Music
icoon om de applicatie
op te starten. Alle nummers verschijnen in een lijst.Tik op het gewenste
nummer om af te spelen.
-
People
U kunt een adresboek aanmaken met uw persoonlijke contacten.
1. Tik op het People icoon om de applicatie op te starten.
2. Indien reeds aangemeld met uw Google account, kunt u de applicatie
direct opstarten. Indien nog niet aangemeld bent bij uw Google
account, meld u dan aan met uw Google account met de standaard
procedure.
3. Na het opstarten van de People applicatie, ziet u de gegevens van
alle contacten. U kunt uw contacten ook Search, Add, Edit.Tik op
het menu icoon
om de onderstaande opties zichtbaar te maken:
Share: om contacten te delen
Delete: om contacten te verwijderen
Contacts to display: Opties voor contacten zichtbaar maken
Import/Export: contacten in/exporteren.
26
Pagina 26
Instruction manual dServe 9703C Multi
4.
-
14-05-2012
13:23
Pagina 27
Accounts: synchroniseer uw accounts
Settings: Weergave opties voor uw contacten
In het Contacts scherm, tikt u op het relevante contact,Tik
vervolgens op het “star” icoon aan de rechterzijde om aan
favorieten toe te voegen.
Phone
Dit Tablet ondersteunt de telefoonfunctie niet.
27
NEDERLANDS
Instruction manual dServe 9703C Multi
14-05-2012
13:23
-
Search
Zoek naar APK bestanden op uw tablet of zoek online.
Voor online zoeken, dient u op het
icoon te tikken.
-
Sound Recorder
Voor het opnemen van geluid, tikt u op het Sound Recorder icoon om
de applicatie op te starten.
Tik op het
icoon om te beginnen met opnemen.
Tik op het
icoon om opnemen te stoppen.
Nadat u het opnemen heeft gestopt, geeft het systeem de boodschap:
Discard
Done
Tik op Discard om de opname te verwijderen;Tik op Done op de
opname op te slaan.
De opgenomen bestanden zijn te vinden in de root-directory van de
map File Manager.
28
Pagina 28
Instruction manual dServe 9703C Multi
-
14-05-2012
13:23
Pagina 29
Video Player
Voor het afspelen van video's, tikt u op het Video Player icoon om
de applicatie op te starten. Alle video's verschijnen in een lijst.Tik om
de gewenste video om af te spelen.
11 Geforceerd Uitschakelen
In het geval uw tablet bijna leeg is en u er niet in slaagt het apparaat uit te
schakelen volgens de standaard procedures, houdt u de aan/uit schakelaar
gedurende 7 seconden ingedrukt. De tablet schakelt nu uit.
29
NEDERLANDS
Instruction manual dServe 9703C Multi
14-05-2012
13:23
12 Fabrieksinstellingen Resetten
Om de tablet te herstellen naar fabrieksinstellingen en het wissen van alle
persoonlijke informatie, tikt u op “Settings”> “Backup&reset” > “Factory data
reset”.
Waarschuwing: Na het resetten van uw apparaat zijn, Google account, data,
systeem instellingen, en gedownloade applicaties verwijderd van uw tablet.
13 Batterij Beheer
De batterij is in de fabriek niet volledig opgeladen. Het is derhalve raadzaam
de batterij gedurende minstens 6 uur op te laden alvorens het apparaat te
gebruiken.
De oplaadbare batterij is geschikt voor frequent gebruik en om vaak te
worden opgeladen. Zoals geldt voor alle lithium batterijen, vermindert de
capaciteit van de batterij elke keer dat hij wordt opgeladen. U kunt echter
proberen de levensduur van de batterij te verlengen door het opvolgen van
de onderstaande suggesties:
- Gebruik de Tablet minstens één keer per week.
- Laad de batterij regelmatig volledig op.
- Laat de batterij nooit gedurende langere volledig ontladen.
- Houd het apparaat en de batterij uit de buurt van warmte en vocht.
14 Opladen van de Batterij
Steek de adapter in een stopcontact en sluit het apparaat aan om de batterij
volledig op te laden voor gebruik.
Wanneer volledig opgeladen, ziet de batterij-icoon er zo uit:
Een volledig lege batterij opladen duurt ongeveer 6 uur, maar u kunt het
apparaat gebruiken terwijl het wordt opgeladen. Gebruik geen andere
adapters dan de meegeleverde, daar dit kan leiden tot schade aan de Lithium
batterij. Probeer niet om de tablet te openen om de batterij in te vervangen.
Dit leidt tot beschadiging van de tablet en hiermee vervalt de garantie.
30
Pagina 30
Instruction manual dServe 9703C Multi
14-05-2012
13:23
Pagina 31
15 Belangrijke Veiligheidsinstructies
Volg altijd deze basis veiligheidsinstructies bij het gebruik van de Tablet. Dit
vermindert risico op brand, elektrische schokken of lichamelijk letsel.
- Dit product niet blootstellen aan regen of vocht.
- Houd het apparaat buiten bereik van direct zonlicht en andere
warmtebronnen.
- Plaats geen voorwerpen op het LCD-scherm, daar dit het LCD scherm
kan breken of beschadigen.
- Gebruik geen scherpe voorwerpen om het LCD scherm aan te raken,
daar dit krassen op het scherm veroorzaakt
- Gebruik alleen de AC-adapter meegeleverd met het apparaat. Het
gebruik van andere voedingsadapters kan schade toebrengen aan de
tablet en hiermee vervalt de garantie.
- Probeer niet om de tablet te openen om zelf een reparatie uit te
voeren, daar dit tot beschadiging van de tablet leidt en hiermee vervalt
de garantie.
16 Het Reinigen van uw Apparaat
Om vingerafdrukken of stof van het scherm te verwijderen, raden wij u aan
een zachte, niet-schurende en niet-corrosieve doek te gebruiken voor het
reinigen, zoals een cameralens doek.
31
NEDERLANDS
Instruction manual dServe 9703C Multi
14-05-2012
13:23
Vaak Gestelde Vragen
Android
V: Welk Android OS is op mijn apparaat geïnstalleerd?
A: Android 4.0.3
Basis Functionaliteit
V: Moet ik de batterij opladen alvorens het apparaat in gebruik te nemen?
A: De batterij dient minimaal gedurende 6 uur te worden opgeladen,
maar u kunt het apparaat gebruiken terwijl het wordt opgeladen.
Gebruik de meegeleverde adapter om op te laden.
E-mail
V: Kan ik e-mail verzenden/ontvangen via mijn persoonlijke
e-mailadressen?
A: Het apparaat ondersteunt POP3-accounts. Sommige gratis
e-mailaccounts worden niet ondersteund op mobiele apparaten. Neem
contact op met uw e-mailprovider om te zien of uw account wordt
ondersteund.
Geheugen Kaarten
V: Welke geheugenkaarten zijn compatibel met mijn apparaat?
A: Micro SD kaarten.
Muziek
V: Wat voor soort muziekbestanden kan ik afspelen op mijn apparaat?
A: MP2, MP3, WAV, AAC, WMA
V: Hoe kan ik muziekbestanden toevoegen aan mijn apparaat?
A: Kopieer de muziekbestanden van uw pc, Micro SD-kaart of USBopslagapparaat direct naar uw apparaat.
32
Pagina 32
Instruction manual dServe 9703C Multi
14-05-2012
13:23
Pagina 33
Foto's
V: Welk type fotobestanden kan ik bekijken op mijn apparaat?
A: JPEG, BMP, GIF, PNG
V: Hoe kan ik foto's toevoegen aan mijn apparaat?
A: Kopieer de video-bestanden van uw pc, Micro SD-kaart of
USB-opslagapparaat direct naar uw apparaat.
Videos
V: Wat voor soort videobestanden kan ik afspelen op mijn apparaat?
A: Video Decoding (Full HD) ondersteunt alle formaten van video, zoals
H. 264, H. 263,VC-1, MPEG-1, 2,4, DIVX-3, 4, 5, 6, XVID, H263, WMV7
/ 8,VP6, AVS, en andere populaire videoformaten.
V: Kan ik YouTube-video's afspelen op mijn apparaat?
A: Ja, u kunt het YouTube-applicatie icoon aantikken om de video's af te
spelen
V: Hoe kan ik videobestanden toevoegen aan mijn apparaat?
A: Kopieer de videobestanden van uw pc, Micro SD-kaart of USBopslagapparaat direct naar uw apparaat.
Wi-Fi
V: Heb ik een Wi-Fi-adapter nodig om verbinding met internet tot stand
te brengen?
A: Nee, de Wi-Fi adapter is ingebouwd in het apparaat.
33
NEDERLANDS
Instruction manual dServe 9703C Multi
14-05-2012
13:33
Pagina 1
Handleiding
1 Wat krijgt u geleverd?
De
-
volgende items zijn meegeleverd bij uw aankoop:
9.7 inch Tablet PC
Voedingsadapter
USB Kabel
Gebruiksaanwijzing
2 Aan de slag
Lees eerst deze handleiding zorgvuldig door alvorens uw tablet-pc in
gebruik te nemen, en volg de instructies op zoals hieronder
beschreven.
3 Het opladen van de batterij
De tablet is uitgerust met een ingebouwde oplaadbare Lithium batterij.
Het is raadzaam de batterij volledig op te laden voor gebruik.
Alleen de meegeleverde adapter gebruiken. Het gebruik van een
andere adapter kan de tablet beschadigen en hiermee vervalt de
garantie.
Laadproces
- Sluit de adapter aan op de tablet en steek de voedingsadapter in
het dichtstbijzijnde stopcontact.
- De tablet kan gewoon gebruikt worden tijdens het opladen.
1
NEDERLANDS
Instruction manual dServe 9703C Multi
14-05-2012
13:33
1
2
3
4
5
6
7
8
9
10
11
4
Uiterlijk en knoppen
4.1
4.2
Camera
ESC
Door te tikken op de ESC knop bladert u terug naar de vorige
interface.
HOME
Door te tikken op de HOME knop keert u terug naar het hoofdmenu.
Menu
Door op de Menu-knop te tikken worden de menuopties zichtbaar.
Hoofdtelefoonaansluiting
Standaard 3,5 mm hoofdtelefoon aansluiting
4.3
4.4
4.5
2
Pagina 2
Instruction manual dServe 9703C Multi
14-05-2012
13:33
Pagina 3
4.6
HDMI output interface
HDMI uitgang
4.7 Mini USB
Mini USB-aansluiting: om de tablet op de PC aan te sluiten voor
datatransmissie, voor het opladen of om verbinding te maken met
externe USB-apparaten
4.8 TF Kaartgleuf
Micro SD kaartgleuf
4.9 Volume +,VolumeDruk op de Volume +,Volume - knoppen voor het verhogen of
verlagen van het geluidsvolume.
4.10 Aan/Uit schakelaar
Voor het in/uitschakelen van de tablet
5
Tablet In- en Uitschakelen
5.1
Inschakelen: nadat de batterij volledig is opgeladen, houdt u de
schakelaar ongeveer 3 seconden ingedrukt om het apparaat te
activeren. Het scherm slot wordt zichtbaar na het opstarten.
Uitschakelen: Als de tablet is ingeschakeld, houdt u de schakelaar
ongeveer 3 seconden ingedrukt en het systeem zal de optie
'uitschakelen' in een venster zichtbaar maken.Tik hierop om de tablet
uit te schakelen.
Scherm vergrendelen: Druk kort op de Aan/Uit schakelaar om het
scherm te vergrendelen.
Scherm ontgrendelen: sleep het slotje naar rechts naar het open-slot
pictogram om het scherm te ontgrendelen en naar het hoofdmenu
te gaan, Sleep het slot icoontje naar links naar het camera-icoontje
om de camera te activeren.
5.2
5.3
5.4
3
NEDERLANDS
Instruction manual dServe 9703C Multi
4
14-05-2012
13:33
Pagina 4
Instruction manual dServe 9703C Multi
14-05-2012
13:33
Pagina 5
Opmerkingen:
- Wanneer de batterijspanning te laag wordt, schakelt de tablet zichzelf
automatisch uit.
- Indien het apparaat niet op de juiste wijze is afgesloten, zal opnieuw
opstarten een scan en herstel van de schijf in gang zetten. Het kan
langer duren om toegang tot het systeem te verkrijgen.
6 Verbinding met de PC
6.1 Gebruik de meegeleverde USB-kabel om de tablet met de PC te
verbinden. Het USB verbindingsvenster wordt zichtbaar. Om verbinding
met de PC tot stand te brengen, tikt u op “Turn on USB storage”.
In de 'connection mode' kunt u de bestanden op het apparaat of de
bestanden op het opslag medium kopiëren of deleten.
5
NEDERLANDS
Instruction manual dServe 9703C Multi
14-05-2012
13:33
7 Tablet Gebruikersinterface
7.1 Na het opstarten komt u in het onderstaande Hoofdscherm.
7.2 In het hoofdscherm kunt u de software iconen beheren: druk
gedurende 3 seconden op een icoon.Vervolgens kunt u het overal
heen slepen in het scherm.
7.3 Iconen verwijderen: druk gedurende 3 seconden op een icoon en sleep
het icoon naar de “Remove” icoon,Vervolgens kunt u het icoon
verwijderen van uw bureaublad.
6
Pagina 6
Instruction manual dServe 9703C Multi
14-05-2012
13:33
Pagina 7
7.4 Raak het scherm aan en druk gedurende ongeveer 4 seconden. Het
venster “Choose wallpaper from” wordt zichtbaar zoals hieronder
weergegeven:
U kunt een achtergrond kiezen vanaf verschillende bronnen en uw
achtergrond wijzigen.
7
NEDERLANDS
Instruction manual dServe 9703C Multi
14-05-2012
13:33
7.5 Statusbalk functies
Van links naar rechts:Terug naar vorig menu,Terug naar hoofdmenu,
Laat eerder uitgevoerde App's zien, Menu knop, USB aangesloten, USB
aangesloten, USB foutopsporing,TF-kaart informatie,Tijdsaanduiding,
batterij iconen.
7.6 Korte handleiding voor tikhandelingen
- Ongeacht welk venster actief is, kunt u altijd terug naar het
hoofdmenu door op de
knop te tikken welke zich in de
linkerbenedenhoek van het hoofdscherm bevindt.
[Let op] De
knop brengt u altijd terug naar het hoofdmenu.
- Ongeacht welk venster actief is, kunt u door in de linker
benedenhoek op de
knop te tikken altijd terug naar een vorig
scherm.
- Ongeacht welk venster actief is, kunt u door in de linker benedenhoek
van het touchscherm op de
knop te tikken, het onderstaande
scherm oproepen:
- Tik op
om een lijst van alle eerder uitgevoerde App's te zien.
8
Pagina 8
Instruction manual dServe 9703C Multi
-
14-05-2012
13:33
Pagina 9
In het hoofdmenu kunt u op de
icoon tikken om alle App's te
zien, druk gedurende ongeveer 3 seconden op een APP icoon, dan
kunt u deze slepen naar het hoofdmenu.
8 Basic Settings
8.1 DRAADLOOS & NETWERKEN
- Wi-Fi
Tik op het setting icoon, tik vervolgens op “OFF” om Wi-Fi te openen.
Er verschijnt een lijst van alle beschikbare WIFI netwerken, tik op het
gewenste WIFI netwerk en maak zo uw keuze. Indien het Wi-Fi
netwerk geen wachtwoord vereist, tikt u “connect” om te verbinden.
Indien het Wi-Fi netwerk wel een wachtwoord vereist, typ dan eerst
het wachtwoord en tik “connect” om te verbinden. Indien met het WiFi netwerk reeds eerder succesvol verbinding tot stand werd gebracht,
is deze informatie opgeslagen.Verbinding wordt dan automatisch tot
stand gebracht. Indien uw tablet succesvol een verbinding heeft
gemaakt met Wi-Fi, wordt het Wi-Fi icoon
zichtbaar in de
statusbalk onderaan het scherm.
9
NEDERLANDS
Instruction manual dServe 9703C Multi
-
14-05-2012
13:33
Data Usage
Selecteer deze optie om mobiele data aan / uit te schakelen en om
een mobiele datalimiet in te stellen.
10
Pagina 10
Instruction manual dServe 9703C Multi
14-05-2012
13:33
Pagina 11
-
More…
Selecteer deze optie om vliegtuigmodus aan / uit te inschakelen en om
Ethernet-verbinding,VPN en mobiele netwerken in te stellen.
8.2 APPARAAT
- Sound
Instellingen van Volume, Ringtoon & Meldingen, u kunt tikken om te
selecteren of nogmaals tikken om te deselecteren voor Trilfunctie en
bellen,Touch geluiden, Schermvergrendelingsgeluid en trillen bij aanraking.
11
NEDERLANDS
Instruction manual dServe 9703C Multi
14-05-2012
13:33
-
Display
Instellingen voor LCD-scherm helderheid, Achtergrond, Auto-rotate
scherm, slaapstand, Lettergrootte, Accelerometer coordinatie,
Schermaanpassingen.
-
Storage
Om de beschikbare opslagruimte te bekijken, Erase SD card (intern
geheugen formateren) en selecteer de optie “enabling media scanning
of external SD card or external USB devices”
12
Pagina 12
Instruction manual dServe 9703C Multi
14-05-2012
13:33
Pagina 13
[Opmerkingen]:
1. Voor het veilig verwijderen van de Micro SD-kaart of USB flash drive,
tikt u op de optie “Unmount SD card”, en bevestigt u de selectie.
Daarna kunt u de SD-kaart / USB-host veilig verwijderen.
2. Zorg ervoor dat u de opties “Enable media scanning on extsd” en
“Enable media scanning on usbhost 1” aanvinkt. Op deze manier kan
uw tablet de bestanden op de externe external TF card and USB
devices lezen en tonen.
-
Battery
Dit geeft een indicatie over de tijd dat de batterij nog spanning levert.
13
NEDERLANDS
Instruction manual dServe 9703C Multi
-
14-05-2012
13:33
Apps
Het beheren van de Applicaties.Tik op de mappen (DOWNLOAD,
ON SD CARD, RUNNING of ALL) en selecteer de applicatie die u
wilt de-installeren.Vervolgens opent het volgende scherm.Tik op
Uninstall, zo kunt u de applicatie van uw tablet verwijderen.
8.3. PERSONAL
- Accounts & sync
Voor het instellen van de account- en synchronisatie-informatie.
14
Pagina 14
Instruction manual dServe 9703C Multi
14-05-2012
13:33
-
Location services
Opties voor het instellen van “Google's location service” en “Location
& Google search”
-
Security
Instellingen voor schermbeveiliging, Info eigenaar, Encrypt tablet, Make
passwords visible, Device administrators, Unknown sources,Trusted
credentials, Install from SD card.
15
Pagina 15
NEDERLANDS
Instruction manual dServe 9703C Multi
-
14-05-2012
13:33
Language & keyboard
Taalkeuze, tekstinvoer en optie voor automatische foutcorrectie.
Selecteer het gewenste Keyboard & Input methodes, en instellingen
voor Tekst-naar-spraak, Cursor snelheid.
- Backup & reset
Opties voor back-up & restore, wissen van persoonlijke gegevens.
Waarschuwing: het uitvoeren van de optie “Factory data reset”,
wist alle persoonlijke gegevens in de tablet. Maak een back-up van
uw persoonlijke gegevens alvorens deze functie uit te voeren.
16
Pagina 16
Instruction manual dServe 9703C Multi
14-05-2012
13:33
Pagina 17
8.4 SYSTEM
- Date & time
U kunt de klok automatisch synchroniseren met een tijdserver op het
internet, of u kunt de datum, tijd en tijdzone handmatig instellen en ook
kunt u kiezen hoe de tijd en datum wordt weergegeven.
-
Accessibility
TalkBack geeft gesproken feedback om blinde en slechtziende gebruikers
te helpen. U dient deze toepassing te downloaden van de Android Markt.
17
NEDERLANDS
Instruction manual dServe 9703C Multi
14-05-2012
13:33
U kunt hier ook systeeminstellingen wijzigen. U kunt kiezen voor de
opties Large text, Auto-rotate screen, Speak passwords,Touch & hold
delay time en Install web scripts.
-
Developer options
Diverse geavanceerde instellingen voor de tablet.
-
About tablet
Aanvullende informatie over de Tablet.
18
Pagina 18
Instruction manual dServe 9703C Multi
14-05-2012
13:33
Pagina 19
9 Apps Installation
U kunt App's downloaden van de Android Markt en online installeren,
of u kiest voor het installeren van App's vanaf uw Micro SD card of
USB device.Tik simpelweg op de App en kies voor installeren. U kunt
direct na het afronden van de installatie gebruik maken van de App.
10 Introducties van Specifieke Toepassingen
-
Browser
Na verbinding te hebben genaakt met een Wi-Fi netwerk, tikt u op het
Browser icoon op het bureaublad om de web browser te openen.
Het volgende scherm wordt onmiddellijk zichtbaar:
U kunt nu beginnen met surfen op het web.Tijdens het surfen op het web,
tikt u op het
menu icoon in de rechter bovenhoek voor meer opties:
New window: voor het openen van een nieuw venster in de browser
Bookmarks: voor het zichtbaar maken van bladwijzers, vaak bezochte
websites en Geschiedenis
Windows: om andere geopende vensters van de browser te zien
Refresh: voor het opnieuw laden van de pagina
More: meer opties zoals “Add bookmark”, “Find on page”, “Select text”,
“Page info”, “Share page”, “Downloads”, “Settings”.
19
NEDERLANDS
Instruction manual dServe 9703C Multi
14-05-2012
13:33
-
Calculator
De tablet heeft een ingebouwde rekenmachine.Tik op het Calculator
icoon voor het uitvoeren van uw berekeningen.
-
Calendar
Gebruikers kunnen gebruik maken van de kalender om de datum, tijd en
memo's te controleren of memo's toe te voegen etc. U dient aangemeld
te zijn bij een Google-account om hiervan gebruik te kunnen maken.
1 Tik op het Calendar icoon, dan opent zich het venster “New
Google Account”.Tik “Next” om naar de volgende stap te gaan.
2 Indien u nog geen Google Account heeft, tikt u “Create” voor het
aanmaken van een nieuwe Google account. Indien u reeds een
Google Account heeft, tikt u op “Sign in” voor de volgende stap.
3 Typ e-mailadres en wachtwoord.Tik op “Next” om verder te gaan.
4 Nadat u de set-up heeft voltooid, sluit het venster automatisch en u
keert u terug in het hoofdvenster.Tik opnieuw op het Calendar icoon
om datum en tijd te controleren en memo's toe te voegen etc.Tik
op de Menuknop om te kunnen kiezen uit meer opties zoals 1 Day,
7 Weeks, Agenda,Today, More. Zie het hieronder weergegeven:
20
Pagina 20
Instruction manual dServe 9703C Multi
-
14-05-2012
13:33
Pagina 21
Camera
Tik op het Camera icoon om de applicatie te starten.
De camera bevindt zich rechts bovenaan op de tablet. Richt hiermee
wanneer u een foto of een video maakt.Tik
als u een foto of een
video wilt maken.Voor het maken van een foto tikt u op het
icoon.
Voor het maken van een video tikt u op het
icoon.
De foto's of video's worden automatisch opgeslagen in het interne
geheugen, selecteer “File Manager”, en vervolgens “DCIM”.
21
NEDERLANDS
Instruction manual dServe 9703C Multi
14-05-2012
13:33
Selecteer “Camera” om de foto's en video's te zien die u zojuist heeft
gemaakt. U kunt ook uw oude foto's of video bekijken door te tikken
op het foto icoon in de rechterbovenhoek van het scherm. Wanneer u
de foto's of video's bekijkt, tikt u erop om meer opties te zien zoals
slideshow, delete, share, zoom in/out, clip, rotating, or set as wallpaper
etc.
-
Clock
Tik op het Clock icoon om de applicatie te starten.
Na het uitvoeren van de Clock applicatie kunt u de wekker instellen.
22
Pagina 22
Instruction manual dServe 9703C Multi
14-05-2012
13:33
-
Dev Tools
Development tools meegeleverd met het Android besturingssysteem.
-
Downloads
Tik hierop om de download geschiedenis te zien.
-
Email
U kunt één of meer persoonlijke e-mailadressen instellen waartoe u
toegang wilt hebben met deze tablet.
23
Pagina 23
NEDERLANDS
Instruction manual dServe 9703C Multi
14-05-2012
13:33
Tik op het Email icoon om uw e-mailaccount te configureren
overeenkomstig de procedures. Direct hierna kunt u e-mails ontvangen
en verzenden.
Voor het benaderen van e-mail, tikt u op het Email icoon. Indien u
slechts 1 e-mailaccount heeft geconfigureerd, zal deze direct worden
geopend. Indien u meerdere accounts heeft geconfigureerd, worden deze
getoond in het Accounts scherm.Tik op de gewenste e-mailaccount, tik
vervolgens op “Inbox”. Alle e-mails worden zichtbaar in een lijst.Tik op
de e-mail die u wilt openen. U kunt ook voor Reply, Forward of
Delete kiezen.
In het inbox scherm kunt u kiezen voor Compose New Email.Tik op
het menu icon
voor meer instellingen van uw e-mailaccount.
-
File Manager
Tik op het File Manager icoon om de bestanden opgeslagen op uw
geheugenapparaat te doorzoeken (Lokaal, SD kaart of U-schijf). U kunt
de bestanden rangschikken per categorie.
Tik op het betreffende geheugenapparaat (Lokaal, SD kaart of U-Schijf)
om de bestanden te zien. Gedurende 3 seconden op een bestand
drukken geeft de opties: Delete File, Rename File, Copy File,
24
Pagina 24
Instruction manual dServe 9703C Multi
14-05-2012
13:33
Pagina 25
Move File en Email File. U kunt de bestanden ook Copy, Move of Paste
tussen de geheugenapparaten onderling. De opties Delete Folder, Rename
Folder, Copy Folder, Move Folder, Zip Folder maakt u zichtbaar door
gedurende 3 seconden op een map te drukken.
Voor het kopiëren van een bestand drukt u gedurende 3 seconden op het
bestand, selecteer Copy.Vervolgens drukt u 3 seconden op de map waarnaar u
de bestanden wilt kopiëren. Selecteer “Paste into folder” om uw bestand
naar de betreffende folder te kopiëren.
-
Play Store
Nadat u op uw Google Account (eerder omschreven) bent ingelogd, tikt u
op het Play Store icoon, en accordeert u de Google Play Terms of
Service om de play shop te bezoeken. Meer App's kunt u downloaden van
de Android markt.Voor het downloaden van App's van de Android markt,
tikt op het icoon van de App die u wilt downloaden.Volg nu de procedure
voor het downloaden van de App en installeer deze op uw tablet.
-
Movie Studio
Tik op het Movie Studio icoon om de applicatie op te starten. U dient
eerst een nieuw project aan te maken.Tik vervolgens op “ADD” voor
Record a
video, Take a
photo,
Import video
clip of
import
image.
25
NEDERLANDS
Instruction manual dServe 9703C Multi
14-05-2012
13:33
-
Music
Om muziek te luisteren, tikt u op het Music
icoon om de applicatie
op te starten. Alle nummers verschijnen in een lijst.Tik op het gewenste
nummer om af te spelen.
-
People
U kunt een adresboek aanmaken met uw persoonlijke contacten.
1. Tik op het People icoon om de applicatie op te starten.
2. Indien reeds aangemeld met uw Google account, kunt u de applicatie
direct opstarten. Indien nog niet aangemeld bent bij uw Google
account, meld u dan aan met uw Google account met de standaard
procedure.
3. Na het opstarten van de People applicatie, ziet u de gegevens van
alle contacten. U kunt uw contacten ook Search, Add, Edit.Tik op
het menu icoon
om de onderstaande opties zichtbaar te maken:
Share: om contacten te delen
Delete: om contacten te verwijderen
Contacts to display: Opties voor contacten zichtbaar maken
Import/Export: contacten in/exporteren.
26
Pagina 26
Instruction manual dServe 9703C Multi
4.
-
14-05-2012
13:33
Pagina 27
Accounts: synchroniseer uw accounts
Settings: Weergave opties voor uw contacten
In het Contacts scherm, tikt u op het relevante contact,Tik
vervolgens op het “star” icoon aan de rechterzijde om aan
favorieten toe te voegen.
Phone
Dit Tablet ondersteunt de telefoonfunctie niet.
27
NEDERLANDS
Instruction manual dServe 9703C Multi
14-05-2012
13:33
-
Search
Zoek naar APK bestanden op uw tablet of zoek online.
Voor online zoeken, dient u op het
icoon te tikken.
-
Sound Recorder
Voor het opnemen van geluid, tikt u op het Sound Recorder icoon om
de applicatie op te starten.
Tik op het
icoon om te beginnen met opnemen.
Tik op het
icoon om opnemen te stoppen.
Nadat u het opnemen heeft gestopt, geeft het systeem de boodschap:
Discard
Done
Tik op Discard om de opname te verwijderen;Tik op Done op de
opname op te slaan.
De opgenomen bestanden zijn te vinden in de root-directory van de
map File Manager.
28
Pagina 28
Instruction manual dServe 9703C Multi
-
14-05-2012
13:33
Pagina 29
Video Player
Voor het afspelen van video's, tikt u op het Video Player icoon om
de applicatie op te starten. Alle video's verschijnen in een lijst.Tik om
de gewenste video om af te spelen.
11 Geforceerd Uitschakelen
In het geval uw tablet bijna leeg is en u er niet in slaagt het apparaat uit te
schakelen volgens de standaard procedures, houdt u de aan/uit schakelaar
gedurende 7 seconden ingedrukt. De tablet schakelt nu uit.
29
NEDERLANDS
Instruction manual dServe 9703C Multi
14-05-2012
13:33
12 Fabrieksinstellingen Resetten
Om de tablet te herstellen naar fabrieksinstellingen en het wissen van alle
persoonlijke informatie, tikt u op “Settings”> “Backup&reset” > “Factory data
reset”.
Waarschuwing: Na het resetten van uw apparaat zijn, Google account, data,
systeem instellingen, en gedownloade applicaties verwijderd van uw tablet.
13 Batterij Beheer
De batterij is in de fabriek niet volledig opgeladen. Het is derhalve raadzaam
de batterij gedurende minstens 6 uur op te laden alvorens het apparaat te
gebruiken.
De oplaadbare batterij is geschikt voor frequent gebruik en om vaak te
worden opgeladen. Zoals geldt voor alle lithium batterijen, vermindert de
capaciteit van de batterij elke keer dat hij wordt opgeladen. U kunt echter
proberen de levensduur van de batterij te verlengen door het opvolgen van
de onderstaande suggesties:
- Gebruik de Tablet minstens één keer per week.
- Laad de batterij regelmatig volledig op.
- Laat de batterij nooit gedurende langere volledig ontladen.
- Houd het apparaat en de batterij uit de buurt van warmte en vocht.
14 Opladen van de Batterij
Steek de adapter in een stopcontact en sluit het apparaat aan om de batterij
volledig op te laden voor gebruik.
Wanneer volledig opgeladen, ziet de batterij-icoon er zo uit:
Een volledig lege batterij opladen duurt ongeveer 6 uur, maar u kunt het
apparaat gebruiken terwijl het wordt opgeladen. Gebruik geen andere
adapters dan de meegeleverde, daar dit kan leiden tot schade aan de Lithium
batterij. Probeer niet om de tablet te openen om de batterij in te vervangen.
Dit leidt tot beschadiging van de tablet en hiermee vervalt de garantie.
30
Pagina 30
Instruction manual dServe 9703C Multi
14-05-2012
13:33
Pagina 31
15 Belangrijke Veiligheidsinstructies
Volg altijd deze basis veiligheidsinstructies bij het gebruik van de Tablet. Dit
vermindert risico op brand, elektrische schokken of lichamelijk letsel.
- Dit product niet blootstellen aan regen of vocht.
- Houd het apparaat buiten bereik van direct zonlicht en andere
warmtebronnen.
- Plaats geen voorwerpen op het LCD-scherm, daar dit het LCD scherm
kan breken of beschadigen.
- Gebruik geen scherpe voorwerpen om het LCD scherm aan te raken,
daar dit krassen op het scherm veroorzaakt
- Gebruik alleen de AC-adapter meegeleverd met het apparaat. Het
gebruik van andere voedingsadapters kan schade toebrengen aan de
tablet en hiermee vervalt de garantie.
- Probeer niet om de tablet te openen om zelf een reparatie uit te
voeren, daar dit tot beschadiging van de tablet leidt en hiermee vervalt
de garantie.
16 Het Reinigen van uw Apparaat
Om vingerafdrukken of stof van het scherm te verwijderen, raden wij u aan
een zachte, niet-schurende en niet-corrosieve doek te gebruiken voor het
reinigen, zoals een cameralens doek.
31
NEDERLANDS
Instruction manual dServe 9703C Multi
14-05-2012
13:33
Vaak Gestelde Vragen
Android
V: Welk Android OS is op mijn apparaat geïnstalleerd?
A: Android 4.0.3
Basis Functionaliteit
V: Moet ik de batterij opladen alvorens het apparaat in gebruik te nemen?
A: De batterij dient minimaal gedurende 6 uur te worden opgeladen,
maar u kunt het apparaat gebruiken terwijl het wordt opgeladen.
Gebruik de meegeleverde adapter om op te laden.
E-mail
V: Kan ik e-mail verzenden/ontvangen via mijn persoonlijke
e-mailadressen?
A: Het apparaat ondersteunt POP3-accounts. Sommige gratis
e-mailaccounts worden niet ondersteund op mobiele apparaten. Neem
contact op met uw e-mailprovider om te zien of uw account wordt
ondersteund.
Geheugen Kaarten
V: Welke geheugenkaarten zijn compatibel met mijn apparaat?
A: Micro SD kaarten.
Muziek
V: Wat voor soort muziekbestanden kan ik afspelen op mijn apparaat?
A: MP2, MP3, WAV, AAC, WMA
V: Hoe kan ik muziekbestanden toevoegen aan mijn apparaat?
A: Kopieer de muziekbestanden van uw pc, Micro SD-kaart of USBopslagapparaat direct naar uw apparaat.
32
Pagina 32
Instruction manual dServe 9703C Multi
14-05-2012
13:33
Pagina 33
Foto's
V: Welk type fotobestanden kan ik bekijken op mijn apparaat?
A: JPEG, BMP, GIF, PNG
V: Hoe kan ik foto's toevoegen aan mijn apparaat?
A: Kopieer de video-bestanden van uw pc, Micro SD-kaart of
USB-opslagapparaat direct naar uw apparaat.
Videos
V: Wat voor soort videobestanden kan ik afspelen op mijn apparaat?
A: Video Decoding (Full HD) ondersteunt alle formaten van video, zoals
H. 264, H. 263,VC-1, MPEG-1, 2,4, DIVX-3, 4, 5, 6, XVID, H263, WMV7
/ 8,VP6, AVS, en andere populaire videoformaten.
V: Kan ik YouTube-video's afspelen op mijn apparaat?
A: Ja, u kunt het YouTube-applicatie icoon aantikken om de video's af te
spelen
V: Hoe kan ik videobestanden toevoegen aan mijn apparaat?
A: Kopieer de videobestanden van uw pc, Micro SD-kaart of USBopslagapparaat direct naar uw apparaat.
Wi-Fi
V: Heb ik een Wi-Fi-adapter nodig om verbinding met internet tot stand
te brengen?
A: Nee, de Wi-Fi adapter is ingebouwd in het apparaat.
33
NEDERLANDS
Instruction manual dServe 9703C Multi
14-05-2012
13:42
Manuel d’instruction
1
-
2
Ce qui est inclus
Les éléments suivants sont livrés avec votre achat :
Tablet PC 9.7 pouces
Adaptateur d’alimentation
Câble USB
Mode d’emploi
Mise en route
Avant d’utiliser votre Tablet PC pour la première fois, lisez
attentivement ce manuel et suivez les instructions ci-dessous.
3
Chargement de la batterie
La Tablet PC est équipée d’une batterie au lithium, intégrée et
rechargeable. Il est recommandé de charger complètement la batterie
avant l’utilisation.
Utiliser uniquement l’adaptateur d’alimentation inclus dans la livraison,
un autre adaptateur pourrait endommager la Tablet PC et annuler la
garantie.
Processus de chargement
Branchez l’adaptateur à votre Tablet PC, et branchez l’adaptateur
d’alimentation sur la prise électrique la plus proche.
La Tablet PC peut être utilisée sans problèmes pendant son
chargement.
1
FRENCH
Pagina 1
Instruction manual dServe 9703C Multi
14-05-2012
13:42
1
2
3
4
5
6
7
8
9
10
11
4
Aspect visuel et boutons
4.1
4.2
Caméra
ESC
Utiliser le bouton ESC pour revenir à la fenêtre précédente.
ACCUEIL
Utiliser le bouton ACCUEIL pour revenir à la fenêtre principale.
Menu
Pendant les opérations, cliquez sur le bouton MENU pour visualiser
les options du menu.
Branchement casque
Branchement d’écouteurs standard (3,5 mm)
4.3
4.4
4.5
2
Pagina 2
Instruction manual dServe 9703C Multi
14-05-2012
13:42
4.6
Sortie HDMI
Sortie HDMI
4.7 Mini USB
Mini port USB : permet de vous connecter à un PC pour la
transmission de données, le téléchargement ou la connexion avec des
périphériques USB externes.
4.8 Fente pour carte TF
Emplacement pour carte Micro SD
4.9 Volume +,VolumeCliquez sur les boutons Volume +,Volume - pour augmenter ou
diminuer le volume sonore.
4.10 Bouton de démarrage
Allumer / Eteindre la Tablet PC
5
Allumer / Eteindre la Tablet PC
5.1
Allumer : après que la batterie est complètement chargée, cliquez et
maintenez le bouton de démarrage pendant environ 3 secondes
pour allumer l’appareil. Le verrouillage de l’écran sera affiché après le
démarrage.
Eteindre : lorsque la Tablet PC est allumée, cliquez et maintenez
l’interrupteur d’alimentation pendant environ 3 secondes et le
système affichera l’option « Arrêter » dans une fenêtre, cliquez pour
éteindre la Tablet PC.
Verrouiller l’écran : appuyez et relâchez rapidement le Bouton de
démarrage.
Déverrouiller l’écran : glissez l’icône de verrouillage vers la droite sur
l’icône de déverrouillage afin d’accéder à la fenêtre principale ; glissez
l’icône de verrouillage vers la gauche sur l’icône caméra pour activer
la caméra.
5.2
5.3
5.4
3
FRENCH
Pagina 3
Instruction manual dServe 9703C Multi
4
14-05-2012
13:42
Pagina 4
Instruction manual dServe 9703C Multi
14-05-2012
13:42
Remarques :
Lorsque la batterie est déchargée, la Tablet PC s’éteint
automatiquement.
Si vous n’éteignez pas l’appareil correctement, le redémarrage
entraînera l’analyse et la restauration du disque, ce qui peut prendre
plus de temps pour accéder au système.
6
6.1
Connexion au PC
Utilisez le câble USB fourni à la livraison pour connecter la Tablet PC
au PC, la fenêtre de connexion USB apparaîtra ; cliquez sur « Turn
on USB storage » pour se connecter au PC, dans le mode de
connexion vous pouvez copier ou supprimer le fichier sur le
périphérique ou sur le dispositif de mémoire.
5
FRENCH
Pagina 5
Instruction manual dServe 9703C Multi
14-05-2012
13:42
7 Bureau de l’utilisateur
7.1
7.2
7.3
Après le démarrage, vous entrez dans la fenêtre principale ci-dessous
Dans cette fenêtre, vous pouvez gérer les principales icônes du
logiciel : appuyez sur l’icône pendant 3 secondes, vous pouvez alors le
faire glisser n’importe où dans la fenêtre principale.
Supprimer des icônes : appuyez sur l’icône pendant 3 secondes, puis
faites le glisser sur l’icône « Remove », vous pouvez alors supprimer
cette icône de votre bureau.
6
Pagina 6
Instruction manual dServe 9703C Multi
7.4
14-05-2012
13:42
Touchez l’écran et maintenez enfoncé pendant environ 4 secondes, la
boîte de dialogue « Choose wallpaper from » apparaîtra comme
montré ci-dessous:
Vous pouvez choisir le fond d’écran à partir de sources différentes et
le changer autant que voulu.
7
FRENCH
Pagina 7
Instruction manual dServe 9703C Multi
14-05-2012
13:42
7.5
Descriptions barre d’outils
De gauche à droite : Retour à la fenêtre précédente, Retour à la
fenêtre principale, Afficher les opérations récentes,Touche menu, USB
connectée, USB connectée, anti-bug USB connecté, Information carte
TF, Horloge, Icônes de recharge de batterie, horloge.
7.6
-
Guide rapide pour les opérations tactiles
Peu importe la fenêtre ouverte à l’écran, vous pouvez revenir à
l’écran principal en appuyant sur la touche
située dans le
coin inférieur gauche de l’écran principal.
[Attention]: La touche
vous fera toujours revenir à l’écran
principal.
Au cours des différentes options, en cliquant sur la touche retour
dans le coin inférieur gauche
de l’écran tactile, vous pouvez
revenir à l’écran précédent.
Pendant les opérations, en cliquant sur la touche de menu
dans le coin inférieur gauche de l’écran tactile, la fenêtre ci-dessous
s’affichera:
Cliquez
pour voir tout l’historique des opérations effectuées
précédemment.
-
-
-
8
Pagina 8
Instruction manual dServe 9703C Multi
-
14-05-2012
13:42
Dans la fenêtre principale, vous pouvez toucher l’icône
pour
voir tous les APPS, appuyez sur n’importe quelle application et
maintenez pendant environ 3 secondes, vous pouvez alors faire
glisser cette application sur le bureau.
8 Réglages de Base
8.1
-
WIRELESS & NETWORKS
Wi-Fi
Cliquez sur l’icône ‘Settings’, puis sur « OFF » pour ouvrir une
connexion Wi-Fi, une liste de tous les réseaux Wi-Fi disponibles
apparaîtra, cliquez sur votre réseau Wi-Fi et commencez la
connexion. Si le réseau Wi-Fi n’a pas besoin de mot de passe, cliquez
sur « connect » pour lancer la connexion. Si le réseau Wi-Fi a besoin
d’un mot de passe, entrez le et cliquez sur « connect » pour lancer la
connexion. Si le réseau Wi-Fi avait déjà été connecté avec succès, les
informations sont stockées et la connexion sera effectuée
automatiquement. Une fois votre Tablet PC connectée au réseau WiFi, l’icône Wi-Fi
s’affiche sur la barre d’outils en bas de l’écran.
9
FRENCH
Pagina 9
Instruction manual dServe 9703C Multi
-
14-05-2012
Data Usage
Sélectionnez cette option pour activer / désactiver les données
mobiles et Instaurer une limite aux données mobiles.
10
13:42
Pagina 10
Instruction manual dServe 9703C Multi
-
14-05-2012
13:42
More…
Sélectionnez cette option pour activer / désactiver le mode Avion,
pour configurer une connexion Ethernet,VPN et des réseaux
mobiles.
8.2DEVICE
-
Sound
Réglages concernant le Volume, la Sonnerie & les Notifications ; vous
pouvez également cocher pour sélectionner ou décocher pour
désélectionner les options Vibrer et sonner, Le son au toucher, Le son
de verrouillage de l’écran et Vibrer au toucher.
11
FRENCH
Pagina 11
Instruction manual dServe 9703C Multi
14-05-2012
13:42
-
Display
Les paramètres pour la luminosité de l’écran LCD, Le fond d’écran, La
rotation automatique d’écran, La veille, La taille des polices, La
coordination de l’accéléromètre du système, Les modifications de
l’écran.
-
Storage
Pour voir l’espace de mémoire disponible, effacez la carte SD
(formater la mémoire interne) et sélectionnez l’option : permettre la
lecture de carte SD externe ou de dispositifs USB externes.
12
Pagina 12
Instruction manual dServe 9703C Multi
14-05-2012
13:42
[Remarques]:
1.
Si vous voulez retirer en toute sécurité la carte Micro SD ou une clé
USB, cliquez sur l’option « Unmount SD card », et confirmez la
sélection, après cela, vous pouvez retirer en toute sécurité la carte
SD / clé USB d’un tiers.
2.
Assurez-vous de cocher l’option « Enable media scanning on extsd »
et « Enable media scanning on usbhost 1 », de cette façon, votre
Tablet PC permet de lire et d’afficher les fichiers dans la carte
externe TF et les périphériques USB.
-
Battery
Permet de connaître le temps restant d’utilisation de la batterie
13
FRENCH
Pagina 13
Instruction manual dServe 9703C Multi
-
14-05-2012
13:42
Apps
Pour gérer les applications. Cliquez sur les répertoires
(DOWNLOAD, ON SD CARD, RUNNING ou ALL) et sélectionnez
l’application que vous souhaitez désinstaller, une fenêtre s’ouvre,
cliquez sur ‘Uninstall’, puis vous pouvez supprimer cette application de
votre Tablet PC.
8.3 PERSONAL
-
Accounts & sync
Pour configurer les informations de compte et de synchronisation.
14
Pagina 14
Instruction manual dServe 9703C Multi
14-05-2012
13:42
-
Location services
Options pour vous permettre de sélectionner le « Google’s location
service » et « Location & Google search ».
-
Security
Réglages pour le Verrouillage de l’écran, Les infos du propriétaire,
Crypter la Tablet PC, Rendre visible les mots de passe, Les
administrateurs de périphériques, Sources inconnues, Informations
d’identification de compétence, Installer à partir d’une carte SD.
15
FRENCH
Pagina 15
Instruction manual dServe 9703C Multi
-
14-05-2012
13:42
Language & keyboard
Sélection de la langue, la saisie de textes et l’option de correction
automatique ; sélectionnez les modes de clavier et de saisie souhaités
et les paramètres pour Texte-vers-parole,Vitesse du pointeur.
Backup & reset
Option de sauvegarde et de restauration, effacer les données
personnelles.
Attention : une fois que vous effectuez l’opération « Factory
data reset », toutes les données à caractère personnel seront
effacées, assurez-vous de sauvegarder vos données personnelles
avant d’effectuer cette fonction.
16
Pagina 16
Instruction manual dServe 9703C Multi
14-05-2012
13:42
8.4 SYSTEM
-
Date & time
Vous pouvez synchroniser l’horloge automatiquement avec le serveur
internet, ou vous pouvez configurer manuellement la date, l’heure, le
fuseau horaire, et vous pouvez également sélectionner le format
dates/heure.
-
Accessibility
Talkback donne des informations vocales pour aider les utilisateurs
aveugles et malvoyants.Vous devez télécharger l’application sur
Android Market.
17
FRENCH
Pagina 17
Instruction manual dServe 9703C Multi
14-05-2012
13:42
Vous pouvez également configurer les paramètres du système ici.
Vous pouvez choisir les options de texte Gros caractère, Rotation
automatique de l’écran, Mots de passe oraux,Toucher & maintien du
temps de pause et Installer des scripts web.
-
Developer options
Divers paramètres avancés pour la Tablet PC.
-
About tablet
Informations complémentaires sur la Tablet PC.
18
Pagina 18
Instruction manual dServe 9703C Multi
9
14-05-2012
13:42
Apps Installation
Vous pouvez télécharger Apps sur Android Market et l’installer en
ligne, ou vous pouvez l’installer depuis votre carte Micro SD ou vos
périphériques USB. Il suffit de cliquer sur les Apps et lancer
l’installation, vous pouvez utiliser les Apps aussitôt l’installation
terminée.
10 Introductions d’Applications Spécifiques
-
Navigateur
Après avoir connecté votre Tablet PC au réseau Wi-Fi, cliquez sur
l’icône browser sur le bureau pour ouvrir le navigateur internet. La
fenêtre suivante apparaît immédiatement:
Ensuite, vous pouvez commencer à surfer sur le web, en surfant,
cliquez sur l’icône du menu
situé en haut à droite de l’écran pour
obtenir plus d’options:
New window: pour voir les Signets, Les sites les plus visités et
L’historique
Windows: pour voir les différentes fenêtres de navigation ouvertes
Refresh: pour actualiser la page
Refresh: pour actualiser la page
More: plus d’options comme « Add bookmark », « Find on page »,
« Select text », « Page info», « Share page », « Downloads »,
« Settings ».
19
FRENCH
Pagina 19
Instruction manual dServe 9703C Multi
14-05-2012
13:42
-
Calculator
La Tablet PC possède une calculatrice intégrée, cliquez sur l’icône
Calculator pour effectuer vos calculs :
-
Calendar
Les utilisateurs peuvent utiliser le Calendrier pour vérifier la date,
l’heure et les mémos ou en rajouter etc. Mais avant cela, vous devez
créer un compte Google.
Cliquez sur l’icône Calender, puis la boîte de dialogue « New Google
Account » apparaîtra. Cliquez sur « Next » pour passer à l’étape
suivante.
Si vous ne possédez pas de compte Google, cliquez sur « Create »
pour créer un nouveau compte Google, si vous avez déjà un compte
Google, cliquez sur « Sign in » pour aller à l’étape suivante.
Rentrez votre adresse et mot de passe Email, puis cliquez sur
« Next » pour continuer.
Lorsque vous avez terminé la configuration, la fenêtre se fermera
automatiquement pour revenir à la fenêtre principale. Cliquez de
nouveau sur l’icône Calendrier pour vérifier la date, l’heure, pour
rajouter des mémos etc. Cliquez sur la touche Menu pour choisir
davantage d’options de réglage, tel que 1 Jour, 7 Semaines, Agenda,
Aujourd’hui, Plus ; consultez la fenêtre comme affichée ci-dessous :
1
2
3
4
20
Pagina 20
Instruction manual dServe 9703C Multi
-
14-05-2012
13:42
Appareil photo
Cliquez sur l’icône de la caméra pour lancer l’application.
La caméra est située en haut à droite de la Tablet PC, visez dans
cette direction quand vous faites une photo ou une vidéo. Cliquez
sur
pour prendre des photos ou pour faire une vidéo ;Pour
prendre une photo, cliquez sur l’icône
; Pour faire une vidéo,
cliquez sur l’icône
.
Les photos ou vidéos seront automatiquement sauvegardées dans la
mémoire interne, sélectionnez « File Manager », puis sélectionnez le
dossier « DCIM », sélectionnez « Camera » pour trouver les photos
ou vidéos que vous venez de prendre.
21
FRENCH
Pagina 21
Instruction manual dServe 9703C Multi
14-05-2012
13:42
Vous pouvez également visualiser vos photos ou vidéos précédentes
en cliquant sur l’icône photo dans le coin supérieur droit de l’écran.
Lorsque vous regardez des photos ou des vidéos, cliquez dessus pour
afficher plus d’options : diaporama, supprimer, partager, zoom
avant/arrière, clip vidéo, rotation, ou utiliser comme fond d’écran, etc.
-
Clock
Tap Cliquez sur l’icône Clock pour lancer l’application.
Après le démarrage de l’application Horloge, vous pouvez
configurer le réveil.
22
Pagina 22
Instruction manual dServe 9703C Multi
14-05-2012
13:42
-
Dev Tools
Les outils de développement fournis par Android.
-
Downloads
Cliquez sur ce pour vérifier tout l’historique téléchargé.
-
Email
Vous pouvez entrer une ou plusieurs adresses email personnelles
auxquelles vous souhaitez accéder sur la Tablet PC.
23
FRENCH
Pagina 23
Instruction manual dServe 9703C Multi
14-05-2012
13:42
Cliquez sur l’icône Email pour configurer votre compte email selon les
procédures.Vous pouvez recevoir ou envoyer des emails immédiatement
après. Pour lire des emails, cliquez sur l’icône Email, si vous avez configuré
un seul compte email, il s’ouvre immédiatement, si vous avez installé des
comptes multiples, ils seront listés dans la fenêtre Accounts. Cliquez sur le
compte de messagerie souhaitée, puis cliquez sur « Inbox », tous les
courriels seront affichés, cliquez sur l’email que vous souhaitez ouvrir.Vous
pouvez également Répondre,Transférer ou Supprimer les emails.
Dans la fenêtre Boîte de réception, vous pouvez Composer de nouveaux
emails, cliquez sur l’icône
du menu pour plus de réglages dans votre
compte email.
-
File Manager
Cliquez sur l’icône File manager pour parcourir les fichiers enregistrés
dans vos emplacements de mémoire (Disque interne, carte SD ou Disque
externe).Vous pouvez afficher les fichiers par catégories. Cliquez sur les
emplacements de mémoire correspondants (Disque interne, carte SD ou
Disque externe) pour voir les fichiers existants. En appuyant pendant 3
secondes, vous obtiendrez les options suivantes : Delete File, Rename
File, Copy File, Move File et Email File.Vous pouvez également
Copier, Déplacer ou Coller des fichiers entre chaque emplacement de
24
Pagina 24
Instruction manual dServe 9703C Multi
14-05-2012
13:42
mémoire.Vous pouvez avoir les options Delete Folder, Rename
Folder, Copy Folder, Move Folder, Zip Folder lorsque vous appuyez
sur un dossier pendant 3 secondes. Pour copier un fichier: Restez appuyé
sur le fichier pendant 3 secondes, sélectionnez Copy, puis appuyez sur le
dossier dans lequel votre fichier doit être copié, sélectionnez « Paste into
folder » afin de copier votre fichier dans ce dossier.
-
Play Store
Après avoir créé un compte Google (comme mentionné plus haut),
appuyez sur l’icône Play Store, et acceptez les Conditions d’utilisation de
Google Play afin d’entrer dans la boutique.Vous pouvez télécharger d’autres
applications via Android Market. Si vous voulez télécharger des applications
depuis l’Android Market, cliquez sur l’application que vous voulez
télécharger, suivez les procédures pour télécharger l’application et l’installer
sur votre Tablet PC.
-
Movie Studio
Appuyez sur l’icône Movie Studio pour exécuter l’application : vous devez
créer d’abord un nouveau projet, puis cliquez sur « ADD » pour
Enregistrer une vidéo, Prendre une photo, Importer un clip
vidéo ou Importer une image.
25
FRENCH
Pagina 25
Instruction manual dServe 9703C Multi
14-05-2012
13:42
-
Music
Pour écouter de la musique, appuyez sur l’icône Music
pour
lancer l’application.Toutes les chansons seront affichées, cliquez sur le
morceau voulu pour l’écouter.
-
People
Vous pouvez créer un carnet d’adresses de vos contacts personnels.
Cliquez sur l’icône People pour démarrer l’application.
Si vous êtes déjà connecté à votre compte Google, vous pouvez
démarrer l’application tout de suite, si vous ne vous êtes pas
connecté à votre compte Google, connectez-vous d’abord en suivant
les étapes.
Après le démarrage de l’application People application, vous pouvez
voir les informations de tous vos contacts, vous pouvez également
Chercher, Ajouter, Modifier vos contacts. Cliquez sur l’icône
menu pour afficher les options ci-dessous :
Share: pour partager des contacts
Delete: pour supprimer des contacts
Contacts to display: les options pour l’affichage des contacts
1.
2.
3.
26
Pagina 26
Instruction manual dServe 9703C Multi
4.
-
14-05-2012
13:42
Import/Export: Importer/Exporter des contacts
Accounts: synchroniser vos comptes
Settings: Affichage des options de vos contacts :
Dans la fenêtre Contacts, cliquez sur le contact désiré, puis appuyez
sur l’icône « étoile » à la droite de l’écran pour ajouter le contact aux
Favoris.
Phone
La Tablet PC ne comprend pas la fonction Téléphone
27
FRENCH
Pagina 27
Instruction manual dServe 9703C Multi
14-05-2012
13:42
-
Search
Rechercher des fichiers APK dans votre tablet PC, recherche en ligne.
Pour effectuer une recherche en ligne, appuyez sur l’icône
.
-
Enregistrement de Sons
Pour démarrer l’enregistreur de sons, cliquez sur l’icône Sound
Recorder pour lancer l’application.
Appuyez sur l’icône
pour lancer l’enregistrement.
Appuyez sur l’icône
pour arrêter l’enregistrement.
Une fois que vous avez arrêté l’enregistrement, le système affichera:
Discard
Done
Appuyez sur Discard pour effacer l’enregistrement ; Appuyez sur
Done pour sauvegarder l’enregistrement.
Les fichiers enregistrés peuvent être trouvés dans le répertoire du
dossier. File Manager.
28
Pagina 28
Instruction manual dServe 9703C Multi
-
14-05-2012
13:42
Lecteur vidéo
Pour lire les vidéos, cliquez sur l’icône Lecteur vidéo Video Player
pour lancer l’application.Toutes les vidéos seront affichées, cliquez sur
la vidéo désirée pour la lire.
11 Arrêt forcé
Dans le cas où votre tablette est presque à plat et que vous êtes
incapable de l’éteindre conformément aux procédures standard,
appuyez sur le bouton de démarrage et maintenez-le pendant 7
secondes, la Tablet PC s’éteindra
29
FRENCH
Pagina 29
Instruction manual dServe 9703C Multi
14-05-2012
13:42
12 Réinitialiser
Pour restaurer les réglages de la Tablet PC d’origine et effacer toutes les
informations personnelles, cliquez sur « Settings »? « Backup&reset » ? «
Factory data reset ». Attention: Après la réinitialisation du système, votre
compte Google, les données, les paramètres du système et les applications
téléchargées seront effacés de votre Tablet PC.
13 Gestion de la Batterie
La batterie n’est pas entièrement chargée dans l’usine, il est donc
recommandé de charger la batterie pendant au moins 6 heures avant de
commencer à utiliser l’appareil. La batterie rechargeable est conçue et
fabriquée pour être utilisée et rechargée fréquemment. Comme c’est le cas
de toutes les batteries au lithium, la capacité de la batterie diminue à
chaque fois qu’elle est chargée. Cependant, vous pouvez essayer de
prolonger la durée de vie de la batterie en suivant les indications ci-dessous:
Utilisez votre tablet PC au moins une fois par semaine.
Rechargez complètement la batterie de manière régulière.
Ne jamais laisser la batterie complètement déchargée pendant trop
longtemps.
Toujours garder l’appareil et la batterie à l’abri de la chaleur et de
l’humidité.
14 Charge de la batterie
Branchez l’adaptateur sur une prise électrique murale, puis connectez-le à
l’appareil pour charger complètement la batterie avant utilisation. La
batterie peut aussi être chargé via le câble USB. Lorsqu’elle est
complètement chargée, l’icône de la batterie affiche comme suit:
Le chargement complet d’une batterie vous prendra environ 6 heures, mais
vous pouvez utiliser l’appareil pendant qu’il se charge. Ne pas utiliser
d’autres adaptateurs que celui prévu dans votre livraison, ceci pourrait
30
Pagina 30
Instruction manual dServe 9703C Multi
14-05-2012
13:42
causer des dommages à la batterie au lithium. Ne tentez pas d’ouvrir la
Tablet PC pour remplacer la batterie, cela pourrait endommager la Tablet
PC et annuler la garantie.
15 Mesures de sécurité importantes
Respectez toujours ces précautions de sécurité élémentaires quand vous
utilisez votre Tablet PC. Ceci réduit le risque d’incendie, d’électrocution et
de blessures.
Ne pas exposer ce produit à la pluie ou à l’humidité.
Keep the device out of direct sunlight and heat sources.
Ne pas placer d’autres objets sur l’écran LCD, ce qui peut écraser et
endommager l’écran LCD.
Ne pas utiliser d’objets pointus pour toucher l’écran LCD, cela
pourrait Rayer l’’ecran.
N’utilisez que l’adaptateur d’alimentation fourni avec l’appareil.
L’utilisation de tout autre adaptateur peut endommager votre tablette
et annuler la garantie
Ne pas essayer de démonter la Tablet PC par vous-même pour faire
une réparation quelconque, cela pourrait endommager la Tablet PC
et annuler la garantie.
16 Nettoyage
Pour nettoyer les traces de doigts ou la poussière sur l’écran, nous vous
recommandons d’utiliser un chiffon doux, non abrasif et non corrosif pour
le nettoyage, par exemple un chiffon pour la lentille d’un appareil photo.
31
FRENCH
Pagina 31
Instruction manual dServe 9703C Multi
14-05-2012
13:42
Foire Aux Questions
Androïde
Q: Quelle est la version Androïde OS de mon appareil ?
R:
Androïde 4.0.3
Fonctionnalités de Base
Q: Dois-je charger la batterie avant de l’utiliser ?
R:
Vous devez charger la batterie pendant au moins 6 heures, mais vous
pouvez utiliser l’appareil pendant qu’il est en cours de chargement.
Utilisez l’adaptateur secteur fourni dans la livraison. Cet appareil peut
aussi être chargé via le câble USB.
Email
Q: Puis-je utiliser n’importe laquelle de mes adresses email personnelles
pour envoyer/recevoir des courriels ?
R:
La Tablet PC peut recevoir les comptes POP3. Certains comptes de
courriel gratuits ne sont pas acceptés sur les appareils mobiles.
Vérifiez auprès de votre fournisseur de messagerie pour voir si votre
compte est accepté.
Cartes mémoire
Q: Quelles sont les cartes mémoire compatibles avec mon appareil ?
R:
Les cartes Micro SD.
32
Pagina 32
Instruction manual dServe 9703C Multi
14-05-2012
13:42
Music
Q: Quel type de fichiers audio puis-je écouter sur mon appareil ?
R:
MP2, MP3, WAV, AAC, WMA
Q: Comment ajouter des fichiers audio sur ma Tablet PC ?
R:
Copiez les fichiers audio depuis votre PC, carte Micro SD ou
périphérique USB directement sur votre appareil.
Photos
Q: Quel type de fichiers photo puis-je voir sur mon appareil ?
R:
JPEG, BMP, GIF, PNG
Q:
R:
Comment ajouter des fichiers photo sur mon appareil ?
Copiez les photos depuis votre PC, carte Micro SD ou périphérique
USB directement sur votre appareil.
Videos
Q: Quel type de fichiers vidéo puis-je lire sur mon appareil ?
R:
Le Décodage vidéo (Full HD) supporte tous les formats de vidéo,
tels que H. 264,H. 263,VC-1, MPEG-1, 2,4,DIVX-3, 4, 5, 6?XVID, H263,
WMV7/8,VP6, AVS, et autres formats vidéo usuels.
Q: Puis-je lire des vidéos YouTube sur mon appareil ?
R:
Oui, vous pouvez utiliser l’icône d’application YouTube pour lire les
vidéos
Q: Comment ajouter des fichiers vidéo sur mon appareil ?
R:
Copiez les fichiers vidéo depuis votre PC, carte Micro SD ou
périphérique USB directement sur votre appareil.
Wi-Fi
Q: Ai-je besoin d’un adaptateur Wi-Fi pour me connecter à Internet ?
R:
Non, l’adaptateur Wi-Fi est intégré à l’appareil
33
FRENCH
Pagina 33
Instruction manual dServe 9703C Multi
14-05-2012
13:48
Manuale di Istruzioni
1 Cos’è incluso
I seguenti componenti sono inclusi nel prodotto da voi acquistato:
Tablet PC da 9.7 pollici
Alimentatore di rete
Cavo USB
Manuale di istruzioni
2 Per Cominciare
Prima di utilizzare il vostro Tablet PC per la prima volta, leggete
attentamente questo manuale e seguite le istruzioni che seguono.
3 Carica della batteria
Il tablet è dotato di una batteria al Litio ricaricabile integrata. Si consiglia di
caricare completamente la batteria prima dell’uso.
Si consiglia vivamente di usare l’alimentatore incluso nella confezione, un
diverso adattatore può danneggiare il tablet e invalidare la garanzia.
Processo di ricarica
Collegate l’alimentatore al vostro tablet, e attaccate l’alimentatore
stesso alla presa elettrica più vicina.
Gli utenti possono comunque usare il tablet mentre questo è in
carica.
1
ITALIAN
Pagina 1
Instruction manual dServe 9703C Multi
14-05-2012
13:48
1
2
3
4
5
6
7
8
9
10
11
4
Aspetto e pulsanti
4.1
4.2
Camera
ESC
Toccando il tasto ESC si torna alla precedente schermata.
HOME
Toccando il tasto HOME si torna alla schermata iniziale.
Menu
Durante le operazioni, toccando il tasto Menu compaiono le opzioni.
Presa per cuffia
Spinotto standard da 3.5 mm per cuffia
Interfaccia di uscita HDMI
Interfaccia di uscita HDMI
4.3
4.4
4.5
4.6
2
Pagina 2
Instruction manual dServe 9703C Multi
14-05-2012
13:48
4.7
Mini USB
La porta Mini USB può essere utilizzata per connettersi al PC per lo
scambio di dati, per la ricarica o per connettersi a unità esterne USB.
4.8 TF Card Slot
Slot per scheda Micro SD.
4.9 Volume +,VolumePremere sui pulsanti Volume +,Volume – per aumentare o diminuire
il volume del suono.
4.10 Interruttore di alimentazione
Accendere/Spegnere il tablet.
5
Accendere/Spegnere il Tablet
5.1
Accensione: dopo che la batteria è stata completamente caricata,
tenere premuto l’interruttore di alimentazione per circa 3 secondi
per accendere il dispositivo. Dopo l’avvio comparirà il blocco dello
schermo.
Spegnimento: quando il tablet è acceso, tenere premuto l’interruttore
di alimentazione per circa 3 secondi e il sistema farà comparire
l’opzione per lo spegnimento, toccarla per spegnere il tablet.
Blocco dello schermo: premere brevemente il tasto di accensione e
rilasciare per bloccare lo schermo.
Sblocco dello schermo: trascinare l’icona del lucchetto verso destra
sull’icona dello sblocco per sbloccare lo schermo e accedere
all’interfaccia principale; trascinare l’icona del lucchetto verso sinistra
sull’icona della fotocamera per aprire la fotocamera.
5.2
5.3
5.4
3
ITALIAN
Pagina 3
Instruction manual dServe 9703C Multi
4
14-05-2012
13:48
Pagina 4
Instruction manual dServe 9703C Multi
14-05-2012
13:48
Osservazioni:
Quando la batteria è scarica, il tablet si spegne automaticamente.
Se spegnete il dispositivo irregolarmente, il riavvio eseguirà la
scansione e il ripristino del disco e può essere necessario più tempo
per entrare nel sistema.
6
Collegamento con PC
6.1
Utilizzare il cavo USB in dotazione per collegare il tablet con un PC, il
dispositivo mostrerà la finestra di connessione USB, cliccare su “Attiva
archiviazione USB” per connettersi al PC; in modalità connessione, è
possibile copiare o eliminare file sul dispositivo o file sul dispositivo di
memoria.
5
ITALIAN
Pagina 5
Instruction manual dServe 9703C Multi
14-05-2012
13:48
7
Interfaccia Operativa del Tablet
7.1
7.2
Dopo l’avvio, si entra nella seguente schermata principale d’interfaccia.
Nell’interfaccia principale, è possibile gestire le icone del software
della interfaccia principale: tenere premuta per 3 secondi l’icona,
quindi è possibile trascinarla in qualsiasi punto dell’interfaccia
principale.
Eliminare le icone: tenere premuta un’icona per 3 secondi e
trascinarla sull’icona “Remove”, quindi si può cancellare questa icona
dal desktop.
7.3
6
Pagina 6
Instruction manual dServe 9703C Multi
7.4
14-05-2012
13:48
Toccare lo schermo e tenerlo premuto per circa 4 secondi, apparirà
la finestra di dialogo “Choose wallpaper from” come illustrato di
seguito:
È possibile scegliere lo sfondo da fonti diverse e modificare lo sfondo.
7
ITALIAN
Pagina 7
Instruction manual dServe 9703C Multi
7.5
7.6
-
-
-
-
14-05-2012
13:48
Descrizioni della Barra di Stato
Da sinistra a destra:Torna all’interfaccia precedente,Torna all’
interfaccia principale,Visualizza le Applicazioni eseguite in precedenza,
Tasto Menu, USB collegato, USB debugging collegato, informazioni TFcard, Ora attuale, icone di carica della batteria, ora corrente.
Guida rapida per le operazioni tattili
Non importa quale interfaccia appaia sullo schermo, si può tornare
alla schermata principale toccando il tasto
che si trova
nell’angolo in basso a sinistra della schermata principale.
[Attenzione] Il tasto
funziona come torna all’interfaccia
della schermata principale.
Durante le opzioni, premendo il tasto indietro
nell’angolo in
basso a sinistra dello schermo, si può ritornare alla precedente
schermata d’interfaccia.
Durante le operazioni, premendo il tasto menu
nell’angolo in
basso a sinistra dello schermo, lo schermo mostrerà la seguente
interfaccia:
Cliccare
per vedere tutta la storia delle applicazioni eseguite
in precedenza.
8
Pagina 8
Instruction manual dServe 9703C Multi
14-05-2012
13:48
-
Nell’interfaccia principale è possibile toccare l’icona
per
visualizzare tutte le applicazioni, toccare qualsiasi icona App e tenerla
premuta per circa 3 secondi, potete trascinare quell’icona App sulla
schermata d’interfaccia principale.
8
Impostazioni di base
8.1
-
WIRELESS & NETWORKS
Wi-Fi
Toccate l’icona Settings, poi premete su “OFF” per aprire Wi-Fi.Tutte
le reti Wi-Fi disponibili saranno elencate, toccate la vostra rete Wi-Fi
e cominciate la connessione. Se la rete Wi-Fi non ha bisogno di una
password, toccate “connect” per avviare la connessione. Se la rete
Wi-Fi ha bisogno di una password, inserite la password e premete
“connect” per avviare la connessione. Se vi siete già connessi con
successo ad una rete Wi-Fi, le informazioni saranno memorizzate. La
connessione avverrà automaticamente. Una volta che il tablet si
connette con successo alla rete Wi-Fi, l’icona Wi-Fi
apparirà
sulla barra di stato posta in basso nello schermo.
9
ITALIAN
Pagina 9
Instruction manual dServe 9703C Multi
-
14-05-2012
13:48
Data Usage
Selezionare per attivare/disattivare Mobile data, fissare il limite dei
Mobile data.
10
Pagina 10
Instruction manual dServe 9703C Multi
-
14-05-2012
13:48
More…
Selezionare per attivare/disattivare la modalità Aereo, per configurare
le connessioni Ethernet,VPN e reti Mobile.
8.2 DEVICE
-
Sound
Impostazioni Volume, Suonerie & Notifiche, è anche possibile
selezionare o deselezionare la Vibrazione e suono, i suoni al tocco, il
suono al blocco dello schermo e la vibrazione al tocco.
11
ITALIAN
Pagina 11
Instruction manual dServe 9703C Multi
14-05-2012
13:48
-
Display
Impostazioni per luminosità pannello LCD, sfondo, auto-rotazione
dello schermo, modalità di sospensione, dimensione caratteri, sistema
di coordinate dell’accelerometro, adattamento schermo.
-
Storage
Per vedere lo spazio di memoria disponibile, cancellare una SD card
(formattare la memoria interna) e selezionare l’opzione che permette
la scansione di una SD card o di dispositivi USB esterni.
12
Pagina 12
Instruction manual dServe 9703C Multi
14-05-2012
13:48
[Commento]:
1.
Se volete rimuovere in sicurezza la Micro SD card o la penna USB,
toccate l’opzione “Unmount SD card”, e confermate la scelta, quindi,
potete rimuovere in sicurezza la SD card/penna USB ospite.
2.
Assicuratevi di spuntare l’opzione “Enable media scanning on extsd” e
“Enable media scanning on usbhost 1”, così il tablet può esplorare e
visualizzare i file dei dispositivi TF card e USB estern.
-
Battery
Per conoscere le informazioni sull’utilizzo della batteria.
13
ITALIAN
Pagina 13
Instruction manual dServe 9703C Multi
-
14-05-2012
Apps
Per gestire le applicazioni.Toccare le directory (DOWNLOAD, ON
SD CARD, RUNNING o ALL) e selezionare l’applicazione che si
vuole disinstallare, entrerete nella seguente interfaccia, toccate
Uninstall, quindi potete rimuovere tale applicazione dal tablet.
8.3 PERSONAL
-
13:48
Accounts & sync
Per impostare l’account e le informazioni di sincronizzazione.
14
Pagina 14
Instruction manual dServe 9703C Multi
-
-
14-05-2012
13:48
Location services
Opzioni per selezionare “Google’s location service” e “Location &
Google search”.
Security
Impostazioni per blocco dello schermo, informazioni sul proprietario,
crittografia del tablet, password visibili, amministratori del sistema, fonti
sconosciute, credenziali attendibili, installazione da scheda SD.
15
ITALIAN
Pagina 15
Instruction manual dServe 9703C Multi
-
14-05-2012
13:48
Language & keyboard
Selezione della lingua, opzione per inserimento testo e correzione
automatica degli errori, selezionare tastiera e metodi di inserimento
desiderati, e le impostazioni per la sintesi vocale, velocità del
puntatore.
-
Backup & reset
Opzione per backup e ripristino, cancellare dati personali.
Attenzione: quando si esegue il “Factory data reset”, verranno
cancellati tutti i dati personali nel tablet, assicurarsi di eseguire
il backup dei dati personali prima di eseguire questa funzione.
16
Pagina 16
Instruction manual dServe 9703C Multi
14-05-2012
13:48
8.4 SYSTEM
-
Date & time
È possibile utilizzare l’ora fornita dalla rete o il fuso orario, oppure
potete impostare manualmente la data, l’ora, selezionare il fuso orario
e anche selezionare il formato dell’ora e della data.
-
Accessibility
TalkBack fornisce un feedback vocale per aiutare gli utenti non
vedenti e ipovedenti. Potete scaricare questa applicazione da Android
Market.
17
ITALIAN
Pagina 17
Instruction manual dServe 9703C Multi
14-05-2012
13:48
Qui è inoltre possibile configurare le impostazioni di sistema. È
possibile scegliere le opzioni per testo di grandi dimensioni, autorotazione dello schermo, password pronunciate, durata del Touch &
hold e installare gli script web.
-
Developer options
Alcune impostazioni avanzate per il tablet.
-
About tablet
Informazioni aggiuntive circa il Tablet.
18
Pagina 18
Instruction manual dServe 9703C Multi
9
14-05-2012
13:48
Installazione Applicazioni
È possibile scaricare le applicazioni da Android Market ed installarle
online, oppure dalla vostra Micro SD card o dai dispositivi USB. Basta
toccare l’App ed eseguire l’installazione, completata questa è subito
possibile eseguire l’applicazione.
10 Introduzione alle Applicazioni più Comuni
-
Browser
Dopo aver collegato il tablet alla rete Wi-Fi, toccare l’icona Browser
sul desktop per aprire il browser del web. Immediatamente compare
la seguente interfaccia:
Ora dunque si può iniziare la navigazione web, durante la quale per
ottenere ulteriori opzioni va toccata l’icona del menu
che si trova
nell’angolo superiore destro dello schermo:
New window: per aprire una nuova finestra del browser web
Bookmarks: per vedere i segnalibri, i siti web più visitati e la storia
Windows: per visualizzare varie finestre di navigazione web
Refresh: per aggiornare la pagina
More: ulteriori opzioni di “Add bookmark”, “Find on page”, “Select
text”, “Page info”, “Share page”, “Downloads”, “Settings”.
19
ITALIAN
Pagina 19
Instruction manual dServe 9703C Multi
14-05-2012
13:48
-
Calcolatrice
Il tablet ha una calcolatrice incorporata, toccare l’icona Calculator
per effettuare i calcoli:
-
Calendario
Gli utenti possono utilizzare il Calendario per verificare la data, l’ora e
i promemoria o aggiungere promemoria ecc. Ma prima di fare
questo, si devono registrare sull’Account di Google.
Toccate l’icona Calender, quindi apparirà la finestra di dialogo “New
Google Account”.Toccate “Next” per passare alla fase successiva.
Se non disponete di un account di Google, toccate “Create” per
creare un nuovo account di Google, se avete già un account di
Google, premere su “Sign in” per passare alla fase successiva.
Inserite indirizzo e password di Email, quindi premete “Next” per
andare avanti.
Al termine della configurazione, l’interfaccia si chiude
automaticamente e si ritorna all’interfaccia principale.Toccate di
nuovo l’icona Calendario per verificare la data, l’ora e aggiungere
promemoria ecc.Toccate il pulsante del menu per far apparire
ulteriori opzioni di impostazione di Giorno, Settimana, Mese, Agenda,
Oggi, Ulteriori opzioni, vedrete una schermata come la seguente:
1
2
3
4
20
Pagina 20
Instruction manual dServe 9703C Multi
-
14-05-2012
13:49
Camera
Toccate l’icona Camera per eseguire l’applicazione.
La fotocamera si trova in alto a destra del tablet, tenetene conto
quando scattate le foto o girate un video.Toccate
per iniziare a
riprendere foto o video.
Se volete fare una foto, toccate l’icona
per scattarla, se volete
girare un video, toccate l’icona
per riprendere.
Le foto o i video saranno salvati automaticamente nella memoria
interna, selezionate “File Manager”, quindi la cartella “DCIM”, e poi
“Camera” per trovare le foto o i video appena girati.
21
ITALIAN
Pagina 21
Instruction manual dServe 9703C Multi
14-05-2012
13:49
Potete inoltre visualizzare le foto o i video precedenti toccando
l’icona foto nell’angolo in alto a destra dello schermo. Quando
visualizzate le foto o i video, premete su di essa per visualizzare le
ulteriori opzioni di Presentazione, Elimina, Condividi, Zoom in/out,
Ritaglia, Ruota, o Imposta come sfondo, ecc.
-
Orologio
Toccate l’icona Clock per eseguire l’applicazione.
Dopo aver eseguito l’applicazione Orologio, potete impostare la
sveglia.
22
Pagina 22
Instruction manual dServe 9703C Multi
14-05-2012
13:49
-
Dev Tools
Strumenti di sviluppo forniti da Android.
-
Downloads
Toccare per controllare la storia di tutti i file scaricati.
-
Email
Potete inserire uno o più indirizzi di posta elettronica personale a cui
desiderate accedere tramite il presente tablet.
23
ITALIAN
Pagina 23
Instruction manual dServe 9703C Multi
14-05-2012
13:49
Toccate l’icona Email per configurare l’account di posta elettronica
secondo le procedure. Dopo l’impostazione potete ricevere o inviare
e-mail. Per leggere le email, toccate l’icona Email, se impostate un
solo account di posta elettronica, questo si apre immediatamente, se
avete impostato più account, essi saranno elencati nella schermata
degli Accounts.Toccate l’account di posta elettronica desiderato,
quindi toccate “Inbox”, saranno elencate tutte le email, toccate quella
che desiderate aprire. Potete anche Reply , Forward o Delete le
email. Nella schermata Posta in arrivo, potete Comporre Nuove
Email, toccate l’icona menu
per ulteriori impostazioni sul vostro
account Email.
-
File Manager
Toccate l’icona File Manager per sfogliare i file salvati nei vostri
dispositivi di memoria (locale, SD card o U-Disk). Potete visualizzare i
file per categorie.
Toccate i relativi dispositivi di memoria (locale, SD card o U-Disk) per
vedere i file che contengono.Toccando su un file e tenendo premuto
per 3 secondi, avrete le seguenti opzioni: Delete File, Rename
File, Copy File, Move. Potete anche Copiare, Spostare o Incollare
24
Pagina 24
Instruction manual dServe 9703C Multi
14-05-2012
13:49
file tra i dispositivi di memoria.Toccando su una cartella e tenendo
premuto per 3 secondi potete avere le opzioni Delete Folder,
Rename Folder, Copy Folder, Move Folder, Zip Folder.
Come copiare file: per copiare un file, toccate sul file e tenete
premuto per 3 secondi, selezionate Copy, quindi toccate la cartella
dove il file deve essere copiato e tenete premuto, per copiare il file in
quella cartella selezionate “Paste into folder”.
-
Play Store
Dopo essere entrati nell’account di Google (già menzionato), toccate
l’icona Play Store, e accettate i Termini di Servizio di Google Play
per entrare nel Play Store. Ulteriori applicazioni le potete scaricare da
Android Market. Se volete scaricare applicazioni da Android Market,
toccate l’icona della app che si desidera scaricare, seguite le
procedure per scaricarla e installatela sul vostro tablet.
-
Movie Studio
Toccate l’icona Movie Studio per eseguire l’applicazione, innanzitutto
create un nuovo progetto, poi toccate ADD per Registrare un video,
Scattare una foto, Importare video clip o Importare immagini.
25
ITALIAN
Pagina 25
Instruction manual dServe 9703C Multi
14-05-2012
13:49
-
Musica
Per riprodurre la musica, toccate l’icona Music
per eseguire
l’applicazione. Saranno elencati tutti i brani e per riprodurre quello da
voi desiderato toccatelo.
-
People
Potete creare una rubrica dei vostri contatti personali.
Toccate l’icona dell’applicazione People per eseguire l’applicazione.
Se siete già nel vostro account di Google, allora potete eseguire
subito l’applicazione, se non avete avuto accesso al vostro account di
Google, fatelo seguendo la procedura.
Dopo essere entrati nell’applicazione People, potete vedere le
informazioni di tutti i vostri contatti, potete anche Cercare,
Aggiungere, Modificare i vostri contatti.Toccate l’icona menu
per visualizzare le seguenti opzioni:
Share: per condividere i contatti.
Delete: per cancellare i contatti.
Contacts to display: per selezionare le opzioni di visualizzazione
dei contatti.
1.
2.
3.
26
Pagina 26
Instruction manual dServe 9703C Multi
4.
-
14-05-2012
13:49
Import/Export: Importazione/Esportazione di contatti.
Accounts: sincronizzare i vostri account.
Settings: opzioni di visualizzazione per i contatti.
Nella schermata Contatti, toccate il contatto desiderato, quindi
toccate l’icona “stella” sul lato destro dello schermo per aggiungere il
contatto ai Preferiti.
Telefono
Questo Tablet non supporta la funzione telefono.
27
ITALIAN
Pagina 27
Instruction manual dServe 9703C Multi
14-05-2012
13:49
-
Ricerca
Cerca i file APK nel vostro tablet oppure online.
Per effettuare una ricerca online, toccate l’icona .
-
Registratore di Suoni
Per avviare il registratore di suoni, toccate l’icona Sound Recorder per
eseguire l’applicazione.
Toccate l’icona
per avviare la registrazione.
Toccate l’icona
per interrompere la registrazione.
Una volta interrotta la registrazione, il sistema mostrerà:
Discard
Done
Toccate Discard per eliminare la registrazione; toccate Done per
salvare la registrazione.
I file registrati possono essere trovati nella directory principale della
cartella File Manager.
28
Pagina 28
Instruction manual dServe 9703C Multi
-
14-05-2012
13:49
Riproduttore Video
Per riprodurre i video, toccate l’icona Video Player per eseguire
l’applicazione. Saranno elencati tutti i video; toccate il video
desiderato per riprodurlo.
11 Arresto Forzato
Nel caso in cui il tablet non funzioni e non riuscite a spegnerlo secondo le
procedure standard, premete l’interruttore di alimentazione per 7 secondi, il
tablet si spegnerà.
29
ITALIAN
Pagina 29
Instruction manual dServe 9703C Multi
14-05-2012
13:49
12 Ripristino Impostazioni Predefinite
Per ripristinare nel tablet le impostazioni di fabbrica originali e cancellare
tutti i dati personali, toccate “Settings”? “Backup&reset” ? “Factory data
reset”. Attenzione: dopo il ripristino del dispositivo, l’account di Google, i
dati, le impostazioni di sistema e le applicazioni scaricate saranno rimossi dal
vostro tablet.
13 Gestione della Batteria
La batteria non viene completamente caricata in fabbrica, per cui vi
consigliamo di caricare la batteria per almeno 6 ore prima di iniziare a
utilizzare il dispositivo.
La batteria ricaricabile è stata progettata e realizzata per essere utilizzata e
ricaricata frequentemente. Come avviene per tutte le batterie al litio, la
capacità della batteria si riduce ogni volta che viene caricata.Tuttavia, potete
ancora tentare di prolungare la durata della batteria seguendo i
suggerimenti qui sotto:
Utilizzate il Tablet, almeno una volta alla settimana.
Con regolarità caricate completamente la batteria.
Non lasciate mai la batteria completamente scarica per un lungo
periodo di tempo.
Mantenete sempre il dispositivo e la batteria lontano dal calore e
dall’umidità.
14 Carica della Batteria
Collegate l’alimentatore ad una presa elettrica al muro e poi connettetelo al
dispositivo per caricare completamente la batteria prima dell’uso.
Potete caricare la batteria utilizzando il cavo USB.
Quando è completamente carica, l’icona della batteria appare come:
Una batteria completamente scarica richiederà circa 6 ore di carica, ma il
dispositivo può comunque essere utilizzato mentre è sotto carica.
30
Pagina 30
Instruction manual dServe 9703C Multi
14-05-2012
13:49
Non utilizzate adattatori diversi da quello fornito nella confezione, si
possono causare danni alla batteria al Litio interna.
Non tentate di aprire il tablet per sostituire la batteria all’interno, questo
potrebbe danneggiare il tablet e invalidare la garanzia.
15 Importanti Precauzioni per la Sicurezza
Seguite sempre queste basilari precauzioni di sicurezza quando utilizzate il
vostro Tablet. Questo riduce il rischio di incendio, scosse elettriche e lesioni.
Non esporre questo prodotto alla pioggia o all’umidità.
Keep the device out of direct sunlight and heat sources.
Non appoggiare altri oggetti sullo schermo LCD, in quanto questo si
può schiacciare e danneggiare.
Non utilizzate alcun oggetto appuntito per toccare lo schermo LCD,
in quanto questo potrebbe graffiare lo schermo.
Utilizzate solo l’adattatore AC fornito con il dispositivo. L’uso di
qualsiasi altro adattatore di corrente potrebbe danneggiare il vostro
tablet e invalidare la garanzia.
Non tentate di smontare il tablet da soli per fare qualsiasi riparazione,
questo potrebbe danneggiare il tablet e invalidare la garanzia.
16 Pulizia del Dispositivo
Per rimuovere le impronte digitali o la polvere dallo schermo, si consiglia di
utilizzare per la pulizia un panno morbido, non abrasivo e non corrosivo, ad
esempio un panno per obbiettivi fotografici.
31
ITALIAN
Pagina 31
Instruction manual dServe 9703C Multi
14-05-2012
13:49
Domande Frequenti
Android
D: Quale versione del sistema operativo Android si trova sul mio
dispositivo?
R:
Android 4.0.3
Basic Functionality
D: Devo caricare la batteria prima dell’uso?
R:
Devi caricare la batteria per almeno 6 ore, ma puoi utilizzare il
dispositivo mentre è in ricarica. Usa l’adattatore di alimentazione in
dotazione per ricaricare; questo dispositivo può essere ricaricato
tramite il cavo USB.
Email
D: Posso usare qualunque mio indirizzo e-mail personale per
inviare/ricevere e-mail?
R:
Il dispositivo supporta gli account POP3. Alcuni account gratuiti di
posta elettronica non sono supportati su dispositivi mobili.Verifica
con il tuo provider di posta elettronica per vedere se il tuo account è
supportato.
Media Cards
D: Quali schede di memoria sono compatibili con il mio dispositivo?
R:
Micro SD cards.
32
Pagina 32
Instruction manual dServe 9703C Multi
14-05-2012
13:49
Musica
D: Che tipo di file musicali posso riprodurre sul mio dispositivo?
R:
MP2, MP3, WAV, AAC, WMA
D: Come faccio ad aggiungere file musicali nel dispositivo?
R:
Copia i file musicali dal PC, Micro SD card o dispositivo di
archiviazione USB direttamente sul tuo dispositivo.
Foto
D:
R:
D:
R:
Che tipo di file di foto posso vedere sul mio dispositivo?
JPEG, BMP, GIF, PNG
Come faccio ad aggiungere i file di foto nel dispositivo?
Copia le foto dal PC, Micro SD card o dispositivo di archiviazione
USB direttamente sul tuo dispositivo.
Videos
D: Che tipo di file video posso riprodurre sul mio dispositivo?
R:
Video Decoding (Full HD) Supporta tutti i formati di video, come ad
esempio H. 264,H. 263,VC-1, MPEG-1, 2,4,DIVX-3, 4, 5, 6?XVID,
H263, WMV7/8,VP6, AVS, e di altri popolari formati video.
D: Posso riprodurre i video di YouTube sul mio dispositivo?
R:
Sì, puoi eseguire l’icona dell’applicazione YouTube per riprodurre i
video
D: Come faccio ad aggiungere i file video nel mio dispositivo?
R:
Copia i file video dal PC, Micro SD card o dispositivo di archiviazione
USB direttamente sul tuo dispositivo.
Wi-Fi
D: Ho bisogno di un adattatore Wi-Fi per la connessione a Internet?
R:
No, l’adattatore Wi-Fi è incorporato nel dispositivo.
33
ITALIAN
Pagina 33
Instruction manual dServe 9703C Multi
14-05-2012
14:10
Manual de Instrucciones
1 Qué Incluye
Los siguientes componentes se incluyen en el producto adquirido:
9.7 pulgadas Tablet PC de
Adaptador de corriente
Cable USB
Manual de instrucciones
2 Primeros pasos
Antes de utilizar su Tablet PC por primera vez, por favor, lea atentamente
este manual y siga las siguientes instrucciones.
3 Carga de la batería
El tablet está equipado con una batería de litio recargable incorporada. Se
recomienda cargar completamente la batería antes de utilizarla.
Es muy recomendable utilizar el adaptador de alimentación incluido en el
embalaje, utilizar otro adaptador puede dañar el tablet y anular la garantía.
El proceso de carga
Conecte el adaptador de corriente a su tablet, y conecte el
adaptador de alimentación al enchufe eléctrico más cercano.
Los usuarios pueden usar el tablet mientras se esté cargando.
1
SPANISH
Pagina 1
Instruction manual dServe 9703C Multi
14-05-2012
14:10
1
2
3
4
5
6
7
8
9
10
11
4
Apariencia y botones
4.1
4.2
Cámara
ESC
Presione el botón ESC para regresar a la interfaz anterior.
INICIO
Presione el botón INICIO para regresar a la interfaz principal.
Menú
Durante las operaciones, presione el botón Menú para ver las
opciones del menú.
Toma de auriculares
Toma de auricular estándar de 3,5 mm
4.3
4.4
4.5
2
Pagina 2
Instruction manual dServe 9703C Multi
14-05-2012
14:10
4.6
Interfaz HDMI de salida
Interfaz HDMI de salida
4.7 Mini USB
Puerto mini-USB: se puede usar para conectar a un PC para la
transmisión de datos, carga o para conexión con dispositivos USB
externos.
4.8 Ranura de tarjeta TF
Ranura para tarjeta Micro SD
4.9 Volumen +,VolumenPresione los botones Volumen +,Volumen - para aumentar o
disminuir el volumen del sonido.
4.10 Interruptor de encendido
Encender / apagar el tablet
5
Encender / Apagar Tablet
5.1
Encendido: cuando la batería esté completamente cargada, presione y
mantenga presionado el botón de encendido durante unos 3
segundos para encender el dispositivo. Se mostrará el bloqueo de
pantalla después de la puesta en marcha.
Apagado: cuando el tablet esté encendido, presione y mantenga
presionado el botón de encendido durante unos 3 segundos y el
sistema mostrará la opción emergente de apagado, pulse en ella para
apagar el tablet.
Bloquear pantalla: presione rápidamente el Interruptor de
alimentación y suéltelo para bloquear la pantalla.
Desbloquear la pantalla: deslice el icono de bloqueo hacia la derecha
hacia el icono de desbloqueo para desbloquear la pantalla y acceder
a la interfaz principal, deslice hacia la izquierda el icono de bloqueo
hacia la cámara para abrir la cámara.
5.2
5.3
5.4
3
SPANISH
Pagina 3
Instruction manual dServe 9703C Multi
4
14-05-2012
14:10
Pagina 4
Instruction manual dServe 9703C Multi
14-05-2012
14:10
Observaciones:
Cuando la batería se haya agotado, el tablet se apagará
automáticamente.
Si apaga el dispositivo de forma incorrecta, reinicio escaneará y
restaurará el disco, puede tardar más tiempo en entrar en el sistema.
6
Conexión con el PC
6.1
Utilice el cable USB suministrado para conectar el tablet con el PC, el
dispositivo abrirá la ventana de conexión USB, haga clic en “Activar
el dispositivo de almacenamiento USB” para conectar al PC,
en el modo de conexión, puede copiar o borrar el archivo en el
dispositivo o el archivo en el dispositivo de memoria.
5
SPANISH
Pagina 5
Instruction manual dServe 9703C Multi
14-05-2012
14:11
7
Interfaz de Operación del Tablet
7.1
Después de iniciar, entrará en el interfaz de la pantalla principal que
se muestra a continuación.
En el interfaz principal, puede administrar los iconos principales de la
interfaz de software: pulse el icono y manténgalo pulsado durante 3
segundos, transcurridos los 3 segundos lo podrá arrastrar a cualquier
lugar de la interfaz principal.
Eliminar iconos: pulse el icono y manténgalo pulsado durante 3
segundos, y arrastre el icono al icono “Remove”, a continuación,
podrá eliminar ese icono del escritorio.
7.2
7.3
6
Pagina 6
Instruction manual dServe 9703C Multi
7.4
14-05-2012
14:11
Pulse la pantalla y mantenga pulsado durante unos 4 segundos, el
cuadro de diálogo “Choose wallpaper from” se mostrará como se
muestra a continuación:
Usted puede elegir el fondo de escritorio de diferentes fuentes y
cambiarlo.
7
SPANISH
Pagina 7
Instruction manual dServe 9703C Multi
14-05-2012
14:11
7.5 Descripciones de la Barra de Estado
7.6
-
-
-
-
De izquierda a derecha:Volver a la interfaz anterior,Volver a la
interfaz principal, Mostrar las aplicaciones ejecutadas con anterioridad,
Tecla de Menú, USB conectado, depuración de USB conectado,
información de la tarjeta TF, Hora actual, iconos de carga de la
batería, Hora actual.
Guiana rápida para las operaciones táctiles
No importa en qué interfaz se encuentre en la pantalla, usted puede
regresar a la pantalla principal pulsando la tecla
situada en la
esquina inferior izquierda de la pantalla principal.
[Advertencia] Las tecla
le lleva a la interfaz de la pantalla
principal.
En opciones, al pulsar la tecla de retroceso
en la esquina
inferior izquierda de la pantalla táctil, puede volver a la interfaz de
pantalla anterior.
Durante las operaciones, al pulsar la tecla de menú
en la esquina
inferior izquierda de la pantalla táctil, la pantalla mostrará la siguiente
interfaz:
Haga clic
para ver todo el historial de aplicaciones
ejecutadas con anterioridad.
8
Pagina 8
Instruction manual dServe 9703C Multi
14-05-2012
14:11
-
En la interfaz principal, puede pulsar el icono
para ver todas
las aplicaciones, pulse en un icono de aplicación y manténgalo
pulsado durante unos 3 segundos, usted puede arrastrar el icono de
aplicación a la interfaz de la pantalla principal.
8
Configuración Básica
8.1
-
WIRELESS & NETWORKS
Wi-Fi
Pulse el icono setting, a continuación, pulse “OFF” para abrir Wi-Fi, se
mostrarán todas las redes Wi-Fi disponibles, pulse su red Wi-Fi y
empezará a conectarse. Si la red Wi-Fi no necesita una contraseña,
pulse en “connect” para iniciar la conexión. Si la red Wi-Fi necesita
una contraseña, introduzca la contraseña y pulse “Connect” para
iniciar la conexión. Si la red Wi-Fi se ha conectado correctamente
antes, esa información será almacenada.
La conexión se realizará automáticamente. Una vez el tablet se
conecte a la red Wi-Fi con éxito, el icono Wi-Fi
aparecerá en la
barra de estado en la parte inferior de la pantalla.
9
SPANISH
Pagina 9
Instruction manual dServe 9703C Multi
-
14-05-2012
14:11
Data Usage
Seleccione esta opción para activar / desactivar los Datos de móvil,
Establecer el Límite de datos de móvil.
10
Pagina 10
Instruction manual dServe 9703C Multi
14-05-2012
14:11
-
More…
Seleccione esta opción para activar / desactivar el modo de vuelo,
para configurar una conexión de Ethernet,VPN y redes móviles.
8.2
-
DEVICE
Sound
Ajustes del Volumen,Tono y Notificaciones, también se puede marcar
para seleccionar o desmarcar para anular la selección de Vibración y
Llamada, sonido de Bloqueo de pantalla, y vibración al tacto.
11
SPANISH
Pagina 11
Instruction manual dServe 9703C Multi
14-05-2012
14:11
-
Display
Ajustes en el brillo del panel LCD, Fondo de escritorio, Auto-rotación
de pantalla, Modo de suspensión,Tamaño de la fuente, Sistema de
coordenadas del acelerómetro, Adaptación de la pantalla.
-
Storage
Para ver el espacio de almacenamiento disponible, Borrar la tarjeta
SD (formato de la memoria interna) y seleccionar la opción para
permitir el escaneo de contenido multimedia de tarjeta SD externa o
dispositivos USB externos.
12
Pagina 12
Instruction manual dServe 9703C Multi
14-05-2012
14:11
[Observaciones]:
1.
Si desea eliminar de forma segura la tarjeta Micro SD o unidad flash
USB, por favor, pulse sobre la opción “Unmount SD card”, y
confirmar la selección, después de esto, puede quitar la tarjeta SD /
USB host.
2.
Asegúrese de marcar la opción de “Enable media scanning on extsd
1” y “Enable media scanning on usbhost 1”, de esta manera, el tablet
puede escanear y mostrar los archivos en la tarjeta TF externa y
dispositivos USB.
-
Battery
Para obtener información sobre el uso de la batería
13
SPANISH
Pagina 13
Instruction manual dServe 9703C Multi
14-05-2012
14:11
-
Apps
Para gestionar las aplicaciones. Pulse en los directorios
(DOWNLOAD, ON SD CARD, RUNNING o ALL) y seleccione la
aplicación que desee desinstalar, entrará en la siguiente interfaz, pulse
en Desinstalar, entonces podrá eliminar la aplicación del tablet.
8.3
-
PERSONAL
Accounts & sync
Para configurar la información de la cuenta y la sincronización.
14
Pagina 14
Instruction manual dServe 9703C Multi
14-05-2012
14:11
-
Location services
Opciones para que seleccione “Google’s location service” y “Location
& Google search”
-
Security
Configuración de bloqueo de pantalla, Información del propietario,
Encriptación del tablet, Hacer visibles las contraseñas, Administradores
del dispositivo, fuentes desconocidas, Credenciales de confianza,
Instalar desde una tarjeta SD.
15
SPANISH
Pagina 15
Instruction manual dServe 9703C Multi
-
14-05-2012
14:11
Language & keyboard
Selección de idioma, introducción de texto y la opción de corrección
automática de errores, seleccionar sus métodos de entrada y teclado
preferidos, y configuración de la salida de texto a voz, la velocidad del
puntero.
Backup & reset
Opción de copia de seguridad y restauración, borrar los datos personales.
Advertencia: una vez que se realice el “Factory data reset”, se borrarán
todos los datos personales en el tablet, asegúrese de hacer copias de
seguridad de sus datos personales antes de ejecutar esta función.
16
Pagina 16
Instruction manual dServe 9703C Multi
14-05-2012
14:11
8.4
-
SYSTEM
Date & time
Usted puede utilizar la hora o zona horaria proporcionada a través de
la red, o puede configurar manualmente la fecha, la hora, seleccionar la
zona horaria y también puede seleccionar el formato de hora y fecha.
-
Accessibility
TalkBack proporciona ayuda de voz a los usuarios ciegos y con visión
reducida. Usted necesitará descargar esta aplicación desde Android
Market.
17
SPANISH
Pagina 17
Instruction manual dServe 9703C Multi
14-05-2012
14:11
También puede configurar la configuración del sistema aquí. Puede
elegir las opciones de Texto grande, Auto-rotación de pantalla,
Contraseñas de voz,Tiempo de retraso de pulsar y mantener e
instalación de secuencias de comandos web.
-
Developer options
Algunas configuraciones avanzadas para el tablet.
-
About tablet
Información adicional sobre el tablet.
18
Pagina 18
Instruction manual dServe 9703C Multi
9
14-05-2012
14:11
Instalación de Aplicaciones
Puede descargar las aplicaciones desde Android Market e instalarlas
en línea, o bien puede instalar las aplicaciones desde su tarjeta Micro
SD o dispositivos USB. Sólo tiene que pulsar sobre la aplicación y
ejecutar la instalación, puede finalizar la instalación y ejecutar esa
aplicación de inmediato.
10 Introducciones de aplicaciones típicas
-
Navegador
Después de conectar el tablet a la red Wi-Fi, pulse el icono del
explorador en el escritorio para abrir el navegador web. La siguiente
interfaz aparece de inmediato:
Ahora podrá comenzar a navegar por la red, durante la navegación
por Internet, pulse sobre el icono del menú
situado en la esquina
superior derecha de la pantalla para acceder a más opciones:
New window: para abrir una nueva ventana del navegador web
Bookmarks: para ver los Marcadores, sitios web más visitados y el
historial.
Windows: para ver distintas ventanas de navegación por la Web
Refresh: para actualizar la página.
More: más opciones de “Add bookmark”, “Find on page”, “Select
text”, “Page info”, “Share page”, “Downloads”, “Settings”.
19
SPANISH
Pagina 19
Instruction manual dServe 9703C Multi
14-05-2012
14:11
-
Calculadora
El tablet tiene una función de calculadora incorporada, pulse sobre el
icono de Calculator para realizar sus cálculos:
-
Calendario
Los usuarios pueden utilizar el calendario para comprobar la fecha, la hora
y para ver notas, añadir notas, etc. Pero antes de hacer esto, usted tiene
que iniciar sesión en su cuenta de Google.
Pulse el icono Calender, a continuación, aparecerá un cuadro de diálogo
de “New Google Account”. Pulse “Next” para ir al siguiente paso.
Si no tiene una cuenta de Google, a continuación, pulse “Create” para
crear una nueva cuenta de Google, si usted ya tenía una cuenta de
Google, pulse en “Sign in” para ir al siguiente paso.
Introduzca la dirección y contraseña de Email, a continuación, pulse
“Next” para seguir adelante.
Después de terminar la instalación, la interfaz saldrá de forma automática
y volverá a la interfaz principal. Pulse en el icono Calendario de nuevo
para comprobar la fecha, hora y añadir nota, etc. Pulse en el botón de
menú para ver más opciones de configuración de 1 Día, 7 semanas,
Agenda, Hoy, Más, consulte la interfaz de pantalla de la siguiente manera:
1
2
3
4
20
Pagina 20
Instruction manual dServe 9703C Multi
-
14-05-2012
14:11
Cámera
Pulse sobre el icono Camera para ejecutar la aplicación.
La cámara se encuentra a la derecha de la parte superior del tablet,
apunte con ella cuando haga una foto o grabe con vídeo. Pulse
para empezar a hacer una foto o grabar un vídeo.
Si quiere hacer una foto, pulse sobre el icono
para hacer la foto,
si desea grabar un vídeo, pulse sobre el icono
para grabar un
vídeo. Las fotos o vídeos se guardarán automáticamente en la
memoria interna, seleccione “File Manager”, a continuación, seleccione
la carpeta “DCIM”, seleccione “Camera” para encontrar las fotos o
vídeos que acaba de hacer.
21
SPANISH
Pagina 21
Instruction manual dServe 9703C Multi
14-05-2012
14:11
También puede ver sus fotos o vídeos anteriores pulsando en el
icono de foto en la esquina superior derecha de la pantalla. Al ver las
fotos o los vídeos, pulse en él para ver más opciones de pase de
diapositivas, borrar, compartir, acercarse/alejarse, clip, rotación, o
establecer como fondo de pantalla, etc.
-
Reloj
Pulse sobre el icono Clock para ejecutar la aplicación.
Después de ejecutar la aplicación Reloj, puede configurar el
despertador.
22
Pagina 22
Instruction manual dServe 9703C Multi
14-05-2012
14:11
-
Dev Tools
Las herramientas de desarrollo proporcionadas por Android.
-
Downloads
Pulsar para ver todo el historial de descargas.
-
Correo electrónico
Puede introducir una o más direcciones de correo electrónico
personales a las que les gustaría acceder a través de este tablet.
23
SPANISH
Pagina 23
Instruction manual dServe 9703C Multi
14-05-2012
14:11
Pulse en el icono EMAIL para configurar su cuenta de correo electrónico
de acuerdo a los procedimientos. Podrá enviar o recibir correo después de
la instalación. Para leer mensajes de Correo electrónico, pulse en el
icono de correo electrónico, si usted configura una sola cuenta de correo
electrónico, se abrirá inmediatamente, si ha configurado varias cuentas, se
mostrarán en la pantalla de Accounts. Pulse en la cuenta de correo
electrónico que desee y luego pulse “Bandeja de entrada”, se mostrarán
todos los mensajes de correo electrónico en la lista, pulse en el correo
electrónico que desee abrir.También puede Responder, Reenviar o Borrar
los mensajes de correo electrónico. En la pantalla de Bandeja de entrada,
puede Redactar Nuevo Correo Electrónico, pulse el icono de menú
para obtener más opciones en su cuenta de correo electrónico.
-
Administrador de archivos
Pulse en el icono de File Manager para navegar por los archivos
guardados en los dispositivos de memoria (Local,Tarjeta SD o disco-U).
Podrá ver los archivos por categorías. Pulse sobre los dispositivos de
memoria correspondientes Local,Tarjeta SD o Disco U-) para ver los
archivos en su interior. Al pulsar en el archivo y mantenerlo pulsado
durante 3 segundos, tendrá las opciones de: Delete File, Rename File,
Copy File, Move File y Email File.También puede Copiar, Mover o
24
Pagina 24
Instruction manual dServe 9703C Multi
14-05-2012
14:11
Pegar archivos entre los dispositivos de memoria. Usted puede tener las
opciones de Delete Folder, Rename Folder, Copy Folder, Move
Folder, Zip Folder al tocar en una carpeta y mantenerla pulsada
durante 3 segundos. Cómo copiar archivos: para copiar un archivo, pulse
en el archivo y mantenga pulsado durante 3 segundos, seleccione Copy, a
continuación, toque y mantenga en la carpeta en la que quiere copiar su
archivo, seleccione “Paste into folder” para copiar el archivo en esa
carpeta.
-
Play Store
Después de iniciar sesión en su cuenta de Google (mencionado
anteriormente), pulse sobre el icono de Play Store, y acepte las
Condiciones de servicio de Google Play para entrar en Play Store. Puede
descargar más aplicaciones desde Android Market.
Si desea descargar aplicaciones desde Android Market, pulse sobre el
icono de la aplicación que desee descargar, siga los procedimientos para
descargar la aplicación e instalarla en su tablet.
-
Movie Studio
Pulse en el icono de Movie Studio para ejecutar la aplicación, primero
tendrá que crear nuevo proyecto, a continuación, pulse en “ ADD “ para
Grabar un video,
Tomar una foto,
Importar un clip de
vídeo o Importar una
imagen.
25
SPANISH
Pagina 25
Instruction manual dServe 9703C Multi
-
-
1.
2.
3.
14-05-2012
Música
Para reproducir música, pulse sobre el icono Music
la aplicación.
14:11
para ejecutar
Contactos
Usted puede crear una libreta de direcciones de sus contactos
personales.
Pulse sobre el icono de la aplicación People para ejecutar la
aplicación.
Si ya ha iniciado sesión en su cuenta de Google, podrá ejecutar la
aplicación de inmediato, si no ha accedido a su cuenta de Google,
por favor, inicie sesión en su cuenta de Google, siguiendo los pasos.
Después de entrar en la aplicación de Contactos, podrá ver la
Información de todos los contactos, también puede Buscar, Añadir,
Editar sus contactos. Pulse en el icono menú
para mostrar las
siguientes opciones:
Share: compartir contactos
Delete: para eliminar los contactos
Contacts to display: para seleccionar las opciones de visualización
26
Pagina 26
Instruction manual dServe 9703C Multi
4.
-
14-05-2012
14:11
de los contactos
Import/Export: importación/exportación de contactos
Accounts: sincronizar sus cuentas
Settings: opciones de visualización de sus contactos
En la pantalla de Contactos, pulse en el contacto deseado, luego
pulse en el icono “estrella” en la parte derecha de la pantalla para
añadir el Contacto a Favoritos.
Teléfono
Este tablet no ofrece la función de teléfono.
27
SPANISH
Pagina 27
Instruction manual dServe 9703C Multi
-
-
14-05-2012
Buscar
Busque en los archivos APK en el tablet o en línea.
Para buscar en línea, por favor, pulse sobre el icono
14:11
.
Grabadora de sonidos
Para iniciar la grabadora de sonidos, pulse sobre el icono de
Grabadora de Sonidos para ejecutar la aplicación.
Pulse en el icono
para iniciar la grabación.
Pulse en el icono
para detener la grabación.
Una vez que detenga la grabación, el sistema le pedirá:
Discard
Done
Pulse sobre el botón Discard para borrar la grabación; pulse en
Done para guardar la grabación.
Los archivos grabados se pueden encontrar en el directorio raíz de la
carpeta de File Manager.
28
Pagina 28
Instruction manual dServe 9703C Multi
-
14-05-2012
14:11
Reproductor de Vídeo
Para reproducir los vídeos, pulse en el icono Video Player de vídeo
para ejecutar la aplicación. Se mostrarán todos los vídeos y pulse en
el vídeo que desee reproducir.
11 Apagado Forzado
En el caso de el tablet no responda y no pueda apagarlo de acuerdo con
los procedimientos normales, pulse el interruptor de encendido/apagado y
manténgalo pulsado durante 7 segundos, el tablet se apagará.
29
SPANISH
Pagina 29
Instruction manual dServe 9703C Multi
14-05-2012
14:11
12 Restablecimiento a Valores de Fábrica
Para restablecer el tablet a la configuración original de fábrica y borrar toda
la información de carácter personal, pulse en “Settings”? “Backup&reset” ?
“Factory data reset”. Advertencia: Después de reiniciar el dispositivo, la
cuenta de Google, los datos, las configuraciones del sistema y las
aplicaciones descargadas será eliminadas de su tablet.
13 Gestión de la Batería
La batería no viene completamente cargada de fábrica, por lo que se
recomienda cargar la batería durante al menos 6 horas antes de empezar a
usar el dispositivo.
La batería recargable está diseñada y fabricada para ser utilizada y recargada
con frecuencia. Como con todas las baterías de litio, la capacidad de la
batería se reduce cada vez que se carga. Sin embargo, todavía puede tratar
de prolongar la vida útil de la batería siguiendo las siguientes sugerencias:
Utilice su Tablet al menos una vez a la semana.
Cargue la batería con regularidad.
Nunca deje la batería totalmente descargada durante un largo
período de tiempo.
Mantenga siempre el dispositivo y la batería lejos del calor y la
período humedad.
14 Carga de la Batería
Conecte el adaptador de alimentación a una toma de corriente eléctrica y
luego conecte el dispositivo para cargar completamente la batería antes de
utilizarlo. Puede cargar la batería mediante el cable USB.
Cuando esté completamente cargada, el icono de la batería se muestra
como:
Una batería completamente descargada le llevará aproximadamente 6
horas, pero puede usar el dispositivo mientras se esté cargando.
30
Pagina 30
Instruction manual dServe 9703C Multi
14-05-2012
14:11
No utilice otros adaptadores distintos del provisto con el dispositivo, ya que
puede causar daños a la batería de litio interior.
No intente abrir el tablet para reemplazar la batería en su interior, esto
puede dañar el tablet y anular la garantía.
15 Precauciones de seguridad importantes
Siempre siga las precauciones básicas cuando utilice el Tablet. Esto reduce el
riesgo de incendio, descarga eléctrica y lesiones.
No exponga este producto a la lluvia o la humedad.
Mantenga el dispositivo fuera de la luz solar directa y fuentes de
calor.
No coloque otros objetos en la pantalla LCD, ya que puede aplastar
y dañar la pantalla LCD.
No utilice ningún objeto afilado para tocar la pantalla LCD, ya que
esto rayará la pantalla.
Sólo utilice el adaptador de CA que se incluye con el dispositivo. El
uso de cualquier otro adaptador de corriente puede dañar el tablet y
anular la garantía.
No intente desmontar el tablet para hacer cualquier reparación, esto
podría dañar el tablet y anular la garantía.
16 Limpieza del dispositivo
Para limpiar las huellas o el polvo de la pantalla, se recomienda utilizar un
paño suave, no abrasivo y no corrosivo para su limpieza, tales como un
paño de lente de cámara.
31
SPANISH
Pagina 31
Instruction manual dServe 9703C Multi
14-05-2012
14:11
Preguntas más frecuentes
Android
P:
¿Qué versión del sistema operativo Android tiene mi dispositivo?
R:
Android 4.0.3
Funcionalidad básica
P:
¿Tengo que cargar la batería antes de su uso?
R:
Debe cargar la batería durante al menos 6 horas, pero puede usar el
dispositivo mientras se esté cargando. Utilice el adaptador de
corriente incluido para cargar, este dispositivo se puede cargar
mediante el cable USB
Correo electrónico
P:
¿Puedo utilizar cualquiera de mis direcciones de correo electrónico
personales para enviar / recibir correo electrónico?
R:
El dispositivo es compatible con cuentas POP3. Algunas cuentas de
correo electrónico gratuito no son compatibles con dispositivos
móviles. Consulte con su proveedor de correo electrónico para ver si
es compatible.
Tarjetas de contenido multimedia
P:
¿Qué tarjetas de memoria son compatibles con mi dispositivo?
R:
Tarjetas Micro SD.
Wi-Fi
P:
¿Necesito un adaptador Wi-Fi para conectarme a Internet?
R:
No, el adaptador Wi-Fi está incorporado en el dispositivo. este
dispositivo no se puede cargar mediante el cable USB.
32
Pagina 32
Instruction manual dServe 9703C Multi
14-05-2012
14:11
Música
P:
¿Qué tipo de archivos de música se pueden reproducir en el
dispositivo?
R:
MP2, MP3, WAV, AAC, WMA
P:
¿Cómo puedo añadir archivos de música a mi dispositivo?
R:
Copie los archivos de música desde su PC, tarjeta Micro SD o un
dispositivo de almacenamiento USB directamente a su dispositivo.
Fotos
P:
¿Qué tipo de archivos de fotos puedo ver en mi dispositivo?
R:
JPEG, BMP, GIF, PNG
P:
¿Cómo puedo añadir archivos de fotos a mi dispositivo?
R:
Copie las fotos desde su PC, tarjeta Micro SD o un dispositivo de
almacenamiento USB directamente a su dispositivo.
Vídeos
P:
¿Qué tipo de archivos de vídeo se pueden reproducir en el
dispositivo?
R:
Decodificación de vídeo (Full HD) Soporta todos los formatos de
vídeo, tales como H. 264, H. 263,VC-1, MPEG-1, 2,4, DIVX-3, 4, 5, 6,
XVID, H.263, WMV7/8,VP6, AVS, y otros formatos de vídeo
populares.
P:
¿Puedo reproducir vídeos de YouTube en mi dispositivo?
R:
Sí, puede ejecutar el icono de la aplicación de YouTube para
reproducir los vídeos
P:
¿Cómo puedo añadir archivos de vídeo a mi dispositivo?
R:
Copie los archivos de vídeo desde su PC, tarjeta Micro SD o un
dispositivo de almacenamiento USB directamente a su dispositivo.
33
SPANISH
Pagina 33
Instruction manual dServe 9703C Multi
14-05-2012
dServe technology.com
P.O. Box 1864, 1200 BW Hilversum | The Netherlands
[email protected] | www.dservetechnology.com
14:11
Pagina 36