1
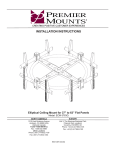
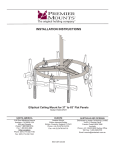
INSTALLATION INSTRUCTIONS Elliptical Ceiling Mount for 37˝ to 63˝ Flat Panels Model: ECM-3763S NORTH AMERICA 3130 East Miraloma Avenue Anaheim, CA 92806 USA USA and Canada Phone: 1.800.368.9700 Fax: 1.800.832.4888 Other Locations Phone: (001).714.632.7100 Fax: (001).714.632.1044 EUROPE Unit 3, The Moorings Business Park, Channel Way, Longford, Coventry, CV6 6RH, UK Phone: +44 (0)24 7664 4105 Fax: +44 (0)24 7664 4165 9531-007-024-04 ECM-3763S Contents Installation Tools........................................................................................................................................................ 3 Parts List................................................................................................................................................................... 3 Mounting Hardware................................................................................................................................................... 4 Features.................................................................................................................................................................... 5 Selecting the Appropriate Mounting Hardware............................................................................................. 7 Griplate™ Washer Installation...................................................................................................................... 8 Nylon Spacer Installation.............................................................................................................................. 8 Flat Panel Installation................................................................................................................................................ 9 Cable Management................................................................................................................................................. 10 Tilt Positioning......................................................................................................................................................... 11 Optional Mounting Configurations and Accessories................................................................................................ 11 Technical Specifications.......................................................................................................................................... 12 Warranty.................................................................................................................................................................. 13 Disclaimer................................................................................................................................................................ 13 Weight Capacity Maximum flat panel weight: 175 lbs. THE CEILING STRUCTURE MUST BE CAPABLE OF HOLDING FIVE (5) TIMES THE WEIGHT OF THE FLAT PANEL AND MOUNT. IF NOT, THEN THE CEILING STRUCTURE MUST BE REINFORCED. Warning Statements INSTALL THE MOUNT ACCORDING TO THE INSTRUCTIONS PROVIDED BY PREMIER MOUNTS. PERFORM ALL STRUCTURAL REINFORCEMENTS BEFORE ATTACHING THE FLAT PANEL TO THE CEILING MOUNT. USE THE APPROPRIATE LIFTING DEVICE WHEN LIFTING THE FLAT PANEL INTO PLACE. PRIOR TO THE INSTALLATION OF THIS PRODUCT, THE INSTALLATION INSTRUCTIONS MUST BE READ AND COMPLETELY UNDERSTOOD TO PREVENT PERSONAL INJURY AND PROPERTY DAMAGE. KEEP THESE INSTALLATION INSTRUCTIONS IN AN EASILY ACCESSIBLE LOCATION FOR FUTURE REFERENCE. PREMIER MOUNTS DOES NOT WARRANT AGAINST DAMAGE CAUSED BY THE USE OF ANY PREMIER MOUNTS PRODUCT FOR PURPOSES OTHER THAN THOSE FOR WHICH IT WAS DESIGNED OR DAMAGE CAUSED BY UNAUTHORIZED ATTACHMENTS OR MODIFICATIONS, AND IS NOT RESPONSIBLE FOR ANY DAMAGES, CLAIMS, DEMANDS, SUITS, ACTIONS OR CAUSES OF ACTION OF WHATEVER KIND RESULTING FROM, ARISING OUT OF OR IN ANY MANNER RELATING TO ANY SUCH USE, ATTACHMENTS OR MODIFICATIONS. SAFETY MEASURES MUST BE PRACTICED AT ALL TIMES DURING THE ASSEMBLY OF THIS PRODUCT. USE PROPER SAFETY GEAR AND TOOLS FOR THE ASSEMBLY PROCEDURE TO PREVENT PERSONAL INJURY. At least two qualified people should perform the assembly procedure. Personal injury and/or property damage can result from dropping or mishandling the flat panel. Be aware of the mounting environment. If drilling and/or cutting into the mounting surface, always make sure that there are no electrical wires in the ceiling. Cutting or drilling into an electrical line may cause serious personal injury. Make sure there are no water or natural gas lines inside the ceiling where the mount is to be located. Cutting or drilling into a water or gas line may cause severe property damage or personal injury. This product is intended for indoor use only. Use of this product outdoors could lead to product failure and/or serious personal injury. Do not install near sources of high heat. Do not install on a structure that is prone to vibration, movement or chance of impact. Contact Premier Mounts with any questions: (800) 368-9700 [email protected] Page 2 Visit the Premier Mounts website at http://www.mounts.com Installation Instructions ECM-3763S Installation Tools The following tools may be required depending upon your particular installation. They are not included. Tape Measure Protective Eye Wear Phillips Tip Screwdriver Pencil Ladder Parts List Make sure your Premier Mounts product has the following hardware and components before beginning installation. If there are parts missing and/or damaged, stop the installation and call Premier Mounts at (800) 368-9700. ECM-3763S Mount Hardware Elliptical Tlit Mount (Qty 1) Mounting Bracket Arms (Qty 2) Decorative Covers (Qty 2) M4 x 8mm Pan Combo Screws (Qty 2) M6 x 25mm Pan Combo Screws (Qty 2) Thread Depth Indicator (Qty 1) Installation Instructions Visit the Premier Mounts website at http://www.mounts.com Page 3 ECM-3763S Parts List (cont’d) Mounting Hardware Standard Hardware M4 x 16mm Pan Combo Screw (Qty 6) M4 x 25mm Pan Combo Screw (Qty 6) M6 x 30mm Pan Combo Screw (Qty 6) M6 x 45mm Pan Combo Screw (Qty 6) M4 x 30mm Pan Combo Screw (Qty 6) M5 x 16mm Pan Combo Screw (Qty 6) M5 x 25mm Pan Combo Screw (Qty 6) M8 x 16mm Pan Combo Screw (Qty 6) M8 x 25mm Pan Combo Screw (Qty 6) M5 x 30mm Pan Combo Screw (Qty 6) M8 x 30mm Pan Combo Screw (Qty 6) M6 x 16mm Pan Combo Screw (Qty 6) M8 x 45mm Pan Combo Screw (Qty 6) M6 x 25mm Pan Combo Screw (Qty 6) M8 x 70mm Pan Combo Screw (Qty 4) Universal Spacers (Qty 24) Griplate™ Washers (Qty 8) Page 4 Visit the Premier Mounts website at http://www.mounts.com Installation Instructions ECM-3763S Features Perfect for digital signage applications, the ECM-3763S suspends a single 37”-63” display from the ceiling and attaches to 1.5” NPT pipe. It works with optional brackets for mini PCs and digital media players. The ECM-3763S mounts displays right out of the box - no adapters are needed. Digital Media Options Optional brackets for mini PCs and digital media players/servers Rotating 360° swivel Dynamic Viewing 15° of tilt facilitates strategic placement of flat-panel Decorative Cover Provides a clean, stylish presentation with no visible mounting hardware Centered Ultra-thin design keeps center of gravity close to flat-panel to reduce deflection Cable Routing Integrated cable management keeps installation clean and uncluttered Elliptical Signature design adds both aesthetics and rigidity Installation Instructions Visit the Premier Mounts website at http://www.mounts.com Page 5 Attaching the ECM-3763S to the Ceiling Adapter ECM-3763S Step 1 A 1.5” NPT threaded pipe must be firmly secured to the ceiling structure before performing the following steps. The Pan Combo set screw must be backed out in order for the 1.5” NPT threaded pipe to attach to the threaded coupler. 1.5” NPT Threaded Pipe (not included) ®® Align the ECM-3763S threaded coupler with the threaded end of the 1.5” NPT threaded pipe. Thread the ECM-3763S onto the 1.5” NPT threaded pipe and rotate the ECM-3763S coupler clockwise until the coupler is fully threaded onto the 1.5” NPT threaded pipe. Pan Combo Set Screw Minimum four (4) complete turns The coupler must be threaded onto the 1.5” NPT threaded pipe a minimum of four (4) complete turns. ECM-3763S Step 2 Once the ECM-3763S has been firmly threaded to the 1.5” NPT threaded pipe, use a screwdriver to tighten the Pan Combo set screw on the threaded coupler. Ensure that all connections are secure and tight before proceeding to the next step. Proceed to the “Selecting the Appropriate Mounting Hardware” section. 1.5” NPT Threaded Pipe (not included) Pan Combo Set Screw 1.5” NPT Threaded Coupler Screwdriver Page 6 Visit the Premier Mounts website at http://www.mounts.com Installation Instructions ECM-3763S Selecting the Appropriate Mounting Hardware Insert a small straw or toothpick into the threaded ®® ¯¯ °° ±± inserts found on the bottom or top of the projector. Use a pencil to mark the depth of the threaded insert on the small straw or toothpick. Mark the straw or toothpick 1/8” above the depth of the threaded insert, as shown in Figure 1. Insert the small straw or toothpick into the remaining threaded inserts to compare and verify their depth using the straw or toothpick’s 1/8” allowance mark. Locate the correct diameter screw for the threaded insert. If the screw you selected is longer than the 1/8” allowance mark on the small straw or toothpick, as shown in Figure 2 and Figure 3, do not use this screw. The screw length must not bypass the mark. Marking the 1/8” Allowance ²² Test each size of the screws provided. ±± Small Straw or Toothpick The correct screws should thread easily into the mounting point and not pull out when tension is applied. Proceed to the “Griplate™ Washer Installation” section. Small Straw or Toothpick Installation Instructions Depth Plus 1/8” Allowance Mark Visit the Premier Mounts website at http://www.mounts.com Small Straw or Toothpick Depth Plus 1/8” Allowance Mark Page 7 ECM-3763S Griplate™ Washer Installation Premier Mounts’ Griplate™ Washers are designed to accommodate the various M4, M5, M6 and M8 hole sizes required by flat panels. For Griplate™ installation, the dimples must be facing the flat panel for the lower mounting points. For the upper mounting points, the dimples must be facing away from the flat panel. M8 M6 M5 M4 Do not place excessive pressure on the back of the flat panel, as this may damage your flat panel. The Griplate™ Washer must be installed between the head of the mounting screw and the mounting bracket as shown. Does your flat panel have: ●● Recessed mount points? ●● Uneven mount points? ●● A curved back? ●● Any obstruction near the mount point? If Yes, you must install nylon spacers. Remove the mounting brackets, Griplate™ washers, and mounting screws from the back of the flat panel. Proceed to the “Nylon Spacer Installation” section. If No, skip to the “Flat Panel Installation” section. Mounting Screw Griplate™ Washer Mounting Bracket Flat Panel Nylon Spacer Installation Premier Mounts’ nylon spacers allow you to attach the mounting bracket to flat panels which have recessed or uneven mount points. Each nylon spacer will add distance between the mounting bracket and your flat panel. Nylon Spacer Mount Point The nylon spacers must only be installed between the mounting bracket and your flat panel. The nylon spacers will fit M4, M5, M6 and M8 screw sizes. Proceed to the “Flat Panel Installation” section. Page 8 Visit the Premier Mounts website at http://www.mounts.com Installation Instructions ECM-3763S Flat Panel Installation Step 1 Install the mount according to the instructions provided by Premier Mounts. Perform all structural reinforcements before attaching the flat panel to the ceiling mount. Do not release the flat panel until the mounting bracket arms are fully resting on the elliptical mounting bar. Raise the mounting bracket arms and the attached flat panel over the elliptical mounting bar of the ECM-3763S. The cable access ports face the rear of the flat panel. It may be easier to pre-wire any cables prior to flat panel installation (see Page 10). Mounting Bracket Arms Elliptical Mounting Bar Step 2 Lower and center the mounting bracket arms with the attached flat panel onto the elliptical mounting bar of the ECM-3763S. Do not release the flat panel until the mounting bracket arms are resting fully on the elliptical mounting bar. Step 3 Insert and tighten an M6 x 25mm Pan Combo screw ®® (larger mounting hole). Repeat Step 1 for the other mounting bracket arm. Do not over-tighten these screws. Proceed to “Attaching the Decorative Covers” section. Installation Instructions Visit the Premier Mounts website at http://www.mounts.com M6 x 25mm Screw Page 9 Attaching Decorative Covers ECM-3763S first Step 1 When attaching the decorative covers, verify the direction of the covers. The smaller mounting hole should be in position above the larger mounting hole. ®® Place the first decorative cover over the first mounting bracket arm and push firmly into place. Repeat Step 1 for the second decorative cover and mounting bracket arm. Mounting Bracket Arm Decorative Cover Step 2 ®® Align the mounting holes. Insert and tighten an M4 x 8mm Pan Combo screw (smaller mounting hole). The decorative cover should easily go over the M6 x 25mm Pan Combo screw. °° Repeat Step 2 for the second decorative cover. Do not over-tighten these screws. M4 x 8mm Screw Screwdriver Cable Management Route cables through the cable access holes and to their respective locations. The cables can then be routed through the coupler, up the ceiling adapter (not included) and into the ceiling to a pre-determined source. To Ceiling Ceiling Adapter Coupler Source or A/V Cable Page 10 Visit the Premier Mounts website at http://www.mounts.com Installation Instructions ECM-3763S Tilt Positioning Adjusting the Flat Panel Friction Tilt Angle ®® ¯¯ Place one hand at the center top edge of the flat panel. Place the other hand on the center bottom edge of the flat panel. Using the upper hand, gently pull the top of the flat panel towards you while the lower hand gently pushes the bottom of the flat panel away from you. Adjusting the Flat Panel to the Original Position ®® ¯¯ Place one hand at the center top edge of the flat panel. Place the other hand on the center bottom edge of the flat panel. Using the upper hand, gently push the top of the flat panel towards the wall while the lower hand gently pulls the bottom of the flat panel away from the wall. If additional tilt friction is required, tighten the lower nut and lower bolt only, to increase the tilt friction. Lower Bolt Lower Nut Optional Mounting Configurations and Accessories The ECM-3763S is designed for use with either a standard piece of 1.5” NPT pipe or a variety of ceiling mount adapters from Premier Mounts. Please refer to the ceiling mount adapter installation instructions when mounting. Contact Premier Mounts at (800) 368-9700 with any questions. To view the complete line of our products, visit us at www.mounts.com. Installation Instructions Visit the Premier Mounts website at http://www.mounts.com Page 11 ECM-3763S Technical Specifications All measurements are in inches(mm). Page 12 Visit the Premier Mounts website at http://www.mounts.com Installation Instructions ECM-3763S Warranty PREMIER MOUNTS LIMITED LIFETIME WARRANTY What and Who is Covered by this Limited Warranty and for How Long Premier Mounts warrants this product to be free from defects in material and workmanship for the lifetime of the original owner of this product. The limited warranty is valid only for the original purchaser of the product. What Premier Mounts Will Do At the sole option of Premier Mounts, Premier Mounts will repair or replace any product or product part that is defective. If Premier Mounts chooses to replace a defective product or part, a replacement product or part will be shipped to you at no charge, but you must pay any labor costs. What is Not Covered; Limitations PREMIER MOUNTS DISCLAIMS ANY LIABILITY FOR DAMAGE TO MOUNTS, ADAPTERS, DISPLAYS, PROJECTORS, OTHER PROPERTY, OR PERSONAL INJURY RESULTING, IN WHOLE OR IN PART, FROM IMPROPER INSTALLATION, MODIFICATION, USE OR MISUSE OF ITS PRODUCTS. PREMIER MOUNTS DISCLAIMS ALL OTHER WARRANTIES, EXPRESS OR IMPLIED, INCLUDING WARRANTIES OF MERCHANTABILITY AND FITNESS FOR A PARTICULAR PURPOSE. PREMIER MOUNTS IS NOT RESPONSIBLE FOR INCIDENTAL OR CONSEQUENTIAL DAMAGES, INCLUDING BUT NOT LIMITED TO, INABILITY TO USE ITS PRODUCTS OR LABOR COSTS FOR REMOVING AND REPLACING DEFECTIVE PRODUCTS OR PARTS. SOME STATES DO NOT ALLOW THE EXCLUSION OR LIMITATION OF INCIDENTAL OR CONSEQUENTIAL DAMAGES, SO THE ABOVE LIMITATION OR EXCLUSION MAY NOT APPLY TO YOU. What Customers Must Do for Limited Warranty Service If you discover a problem that you think may be covered by the warranty you MUST REPORT it in writing to the address below within thirty (30) days. Proof of purchase (an original sales receipt) from the original consumer purchaser must accompany all warranty claims. Warranty claims must also include a description of the problem, the purchaser’s name, address, and telephone number. General inquiries can be addressed to Premier Mounts Customer Service at 1-800368-9700. Warranty claims will not be accepted over the phone or by fax. Premier Mounts Attn: Warranty Claim 3130 East Miraloma Ave. Anaheim, CA 92806 How State Law Applies THIS WARRANTY GIVES YOU SPECIFIC LEGAL RIGHTS, AND YOU MAY ALSO HAVE OTHER RIGHTS WHICH VARY FROM STATE TO STATE. Disclaimer Premier Mounts intends to make this manual accurate and complete. However, Premier Mounts makes no claim that the information contained herein covers all details, conditions or variations, nor does it provide for every possible contingency in connection with the installation or use of this product. The information contained in this document is subject to change without notice or obligation of any kind. Premier Mounts makes no representation of warranty, expressed or implied, regarding the information contained herein. Premier Mounts assumes no responsibility for accuracy, completeness or sufficiency of the information contained in this document. ©Premier Mounts 2010 Installation Instructions Visit the Premier Mounts website at http://www.mounts.com Page 13