1
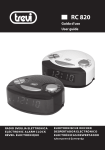
RC 850 BL
1
AM/FM ALARM CLOCK
ITALIANO
SVEGLIA CON LA SUONERIA
12
2
4
3
Portare il controllo volume (9) su OFF.
Portare il selettore (1) su AUTO, l'indicatore (11) si illuminerà.
5
6
SPEGNIMENTO DELLA SVEGLIA
7
9
11
13
8
10
1. Selettore sveglia: ON/OFF/AUTO; Accesa/Spenta/Sveglia con
radio o buzzer.
2. Tasto TIME, regolazione orario
3. Tasto SLEEP, spegnimento programmato
4. Tasto ALM, regolazione allarme
5. Tasto HOUR, regolazione ore
6. Tasto MIN, regolazione minuti
7. Tasto SNOOZE, spegnimento temporaneo
8. Controllo sintonia
9. Controllo VOLUME
10.Vano batterie
11.Indicatore allarme inserito
12.Selettore DIMMER, regolazione luminosità
13.Selettore AM/FM
INSTALLAZIONE
Inserire la spina del cavetto di alimentazione in una presa di corrente
230V - 50Hz; il display lampeggera’ fino a quando non avrete
regolato l’ora.
RADIO
- Accendete la radio portando il selettore (1) su ON.
- Selezionate la gamma d’onda desiderata col controllo AM/FM
(13).
- Sintonizzatevi sulla vostra stazione preferita con il controllo (8).
- Regolate il volume con il controllo (9).
OROLOGIO
Premere contemporaneamente il tasto TIME (2) e HOUR (5) per
regolare l’ora; i pulsanti TIME (2) e MIN (6) per regolare i minuti.
Sul display viene visualizzata l’ora impostata.
SVEGLIA
Premere contemporaneamente i pulsanti ALM(4) e HOUR (5) per
regolare l’ora di sveglia; I pulsanti ALM(4) e MIN (6) per regolare
i minuti. Premendo il tasto ALM(4) viene visualizzato sul display
l’orario di sveglia.
SVEGLIA CON LA RADIO
Sintonizzatevi sulla stazione desiderata con il controllo (8).
Dopo aver regolato l’orario di sveglia, portare il selettore (1) su
AUTO, l'indicatore (11) si illuminerà. Regolare il volume al livello
desiderato. All’orario stabilito la radio si accenderà.
Per disinserire la sveglia (suoneria o radio) portare il selettore (1) su
OFF.
Se desiderate spegnere momentaneamente la sveglia, premere
il pulsante SNOOZE (7); l’interruzione dura 9 minuti, trascorsi i quali
la sveglia si riaccende. L’operazione puo’ essere ripetuta diverse
volte entro un’ora di tempo.
FUNZIONE SLEEP
Il pulsante SLEEP (3) vi permette di programmare lo spegnimento
della radio fino ad un massimo di 1 ora e 59 minuti. Questa regolazione
viene effettuata a radio accesa.
- Portare il selettore (1) su OFF.
- Regolare il tempo di spegnimento premendo contemporanea
mente i tasti SLEEP (3) e MIN (6) oppure SLEEP (3) e HOUR(5).
- Per disinserire anzitempo la funzione SLEEP e’ sufficiente
premere il tasto SNOOZE (7).
FUNZIONE DIMMER
La funzione DIMMER vi permette di impostare la luminosità.
- Spostando il selettore DIMMER (12) in posizione LO il display
emetterà una luminosità minore.
- Spostando il selettore DIMMER (12) in posizione HI il display
emetterà una luminosità maggiore.
BATTERIA TAMPONE ANTI BLACK-OUT
Per mantenere in funzione l’orologio e la memorizzazione dell’orario
di sveglia anche durante una momentanea mancanza di energia
elettrica, inserire una batteria a 9V nell’apposito vano (10) sul
fondo dell’apparecchio. Vi consigliamo di sostituire questa batteria
ogni 6 mesi.
Se in caso di interruzione elettrica l’apparecchio mostri sul display
un orario sbagliato e lampeggiante sostituire la batteria 9V.
Alimentazione: ................. 2 batterie formato “AA”
Dimensioni: ...................... 190 x 95 x 45 mm
Avvertenze per il corretto smaltimento del prodotto.
Il simbolo riportato sull'apparecchiatura indica che il rifiuto deve
essere oggetto di "raccolta separata" pertanto il prodotto non deve
essere smaltito insieme ai rifiuti urbani.
L'utente dovrà consegnare il prodotto presso gli appositi "centri di
raccolta differenziata" predisposti dalle amministrazioni comunali,
oppure consegnarlo al rivenditore contro acquisto di un nuovo
prodotto.
La raccolta differenziata del rifiuto e le successive operazioni di
trattamento, recupero e smaltimento favoriscono la produzione di
apparecchiature con materiali riciclati e limitano gli effetti negativi
sull'ambiente e sulla salute causati da una gestione impropria del
rifiuto.
Lo smaltimento abusivo del prodotto comporta l'applicazione di
sanzioni amministrative.
1
1
RC 850 BL
1
AM/FM ALARM CLOCK
12
WAKE TO RADIO
2
3
4
6
7
5
8
9
11
10
LOCATION OF CONTROL 10
1.
2.
3.
4.
5.
6.
On/Off/Auto
Time Set
Alarm Set/Off
Sleep
Snooze button
Hour
ENGLISH
7. Minute
8. Volume Control / Buzzer
9. Band Switch
10. Tuning Control
11. AUTO indicator
12. HI-LO Dimmer
WARNING : TO REDUCE THE RISK OF FIRE OR ELECTRIC SHOCK, DO NOT
EXPOSE THIS APPLIANCE TO RAIN OR MOISTURE.
CAUTION : THE CLOCK RADIO MUST NOT BE USED IN ANY ENVIRONMENT
WHERE IT MAY BE SUBJECT TO THE DRIPPING OR SPLASHING OR WATER
OR OTHER LIQUIDS.
DO NOT CONNECT THE ANTENNA WIRE ON THE BACK OF THIS SET TO ANY
OUTDOOR ANTENNA
Mains plug is used as the disconnect device. It shall remain readily
operable and should not be obstructed during intended used. To
be completely disconnected the apparatus from supply mains, the
mains plug of the apparatus shall be disconnected from the mains
socket outlet completely.
BOTTOM OF SET : Battery compartment for 9 volt (6LR61) battery
(not included) for temporary time storage.
ELECTRONIC CLOCK OPERATION
1.
2.
Plug the AC line cord into 230V AC home outlet
The set is now working as an electronic clock and it will flash
the clock figures to show you it is not set correctly.
3. To set the correct time, depress the Time Set Button (2) and
Hour Button (6) simultaneously, release the buttons
approximately before the correct time is reached. Now depress
the Minute Button (7) and the Time Set Button (2)
simultaneously, to set the readout to the correct time precisely.
RADIO OPERATION
1. Slide the ON/OFF/AUTO Switch (1) to "ON" position.
2. Slide Band Switch (9) to FM or AM position.
3. Turn the Volume Control (8) to desired volume.
4. Turn the Tuning Control (10) to select your favorite station.
5. Antenna
For AM reception, this radio incorporates a highly sensitive ferrite
core bar antenna.
For FM reception, this set is specially equipped with an external
wire as FM antenna. Be sure to untwist it to its fullest length for
peak performance.
2
2
Having selected your station and set the volume at the desired
level, proceed as follows :
1. Slide the ON/OFF/AUTO Switch (1) to "AUTO" position.
2. Press the Alarm Set Button (3) and whilst this button is
depressed, press the Hour Button (6) and then the Minute Button
(7) until the time is reached at which you wish to wake. The wake
up time is now entered into the timer memory. To check the wake
up time, simply press the Alarm Set Button (3) and the clock will
show the present time. The preset wake up time will continue
to be registered in the time memory and the radio will switch on
by itself at the same time the next day. To switch the radio off,
simply press the Alarm Off Button (3).
When wake to radio is set, but want to listen radio before alarm
time set. Press SLEEP button (4) once will turn radio on and
press SNOOZE button (5) once will turn radio off.
WAKE TO BUZZER
Set the controls as for "Wake to Radio" but volume control (8) to
BUZZER position. The buzzer can then be switched off by pressing
the Alarm Off Button (3) or it can be converted to the radio by
selecting switch (1) to "ON" position.
SLEEP TO RADIO
The radio can be set to play and to switch off automatically for a
length of time from 1 minute to 1 hour 59 minutes by following this
procedure - With all the controls preset in the "Wake to Radio"
positions, depress the Sleep Button (4) and press the Minute
Button (7) to count down to the desired sleep time. To switch off
the radio before the end of the registered sleep time period, simply
press the Snooze Button (5).
SNOOZE CONTROL
The Snooze Button (5) allows the user an extra sleep time of about
9 minutes after radio alarm is switched on at the preset wake up
time.
SPECIFICATION
Power Source .......................... : 230V ~ 50Hz
DC battery ............................... : 9V (1 x 9V 6LR61 Not included)
Radio Frequency ...................... : AM 530-1600kHz:
: FM 88-108MHz
Power Consumption ................. : 5W
Precautions for correct disposal of the product.
The symbol shown on the equipment indicates that waste must
be disposed of in "separate collection" and so the product must not
be disposed of together with urban waste.
The user must take the product to special "separate waste
collection centres" provided by local government, or deliver it to
the retailer against the purchase of a new product.
Separate collection of waste and subsequent treatment, recycling
and disposal operations promotes the production of equipment
with recycled materials and limits negative effects on the
environment and on health caused by improper handling of waste.
Illegal disposal of the product leads to the enforcement of
administrative penalties.
RC 850 BL
1
AM/FM ALARM CLOCK
RÉVEIL AVEC LA SONNERIE
12
2
4
3
Apporter le contrôle de volume (9) à OFF.
Apporter le sélecteur (1) d’AUTO, le marqueur (11) s’allume
5
6
ARRÊT DU RÉVEIL
7
9
11
13
8
10
1.
2.
3.
4.
5.
6.
7.
8.
9.
10.
11.
12.
13.
FRANCAISE
Sélecteur des fonctions : ON/OFF/AUTO ; Allumé/
Éteint/Réveil avec radio ou vibreur
Touche TIME, réglage de l’heure
Touche SLEEP, arrêt programmé
Touche ALM SET, réglage/arrêt de la sonnerie
Touche HOUR, réglage des heures
Touche MIN, réglage des minutes
Touche SNOOZE, arrêt temporaire
Bouton d’accord
Bouton de réglage VOLUME, réglage du volume
Logement des piles
Indicateur de sonnerie activé
Sélecteur DIMMER
Sélecteur AM/FM
INSTALLATION
Introduire la fiche du câble d’alimentation dans une prise de courant
230V - 50Hz ; l’afficheur clignotera tant que vous n’aurez pas réglé
l’heure.
RADIO
- Allumer la radio en amenant le sélecteur (1) sur ON.
- Sélectionner la gamme d'onde choisie avec le sélecteur AM/FM
(13).
- Syntoniser la station choisie au moyen du bouton d'accord (8).
- Régler le volume par le dispositif de réglage (9).
HORLOGE
Appuyer en même temps sur la touche TIME (2) et HOUR (5) pour
régler l’heure ; sur les boutons TIME (2) et MIN (6) pour régler les
minutes. L’écran affiche l’heure configurée.
RÉVEIL
Appuyer en même temps sur les touches ALM(4) et HOUR (5) pour
régler l’heure de réveil; sur les touches ALM(4) et MIN (6) pour
régler les minutes. En appuyant sur la touche ALM(4), l’écran
affiche l’heure de réveil.
RÉVEIL AVEC LA RADIO
Syntonisez la station de votre choix.
Après avoir réglé l’heure de réveil, amener le sélecteur (1) sur
AUTO, l’indicateur (11) s’allumera. Régler le volume au niveau
voulu. La radio s’allumera à l’heure fixée.
Pour désactiver l’alarme (buzzer ou radio) apportent le sélecteur
(1) à OFF.
Si vous désirez arrêter momentanément le réveil, appuyer sur la
touche SNOOZE (7); l’arrêt dure 9 minutes, passé ce délai le réveil
s’active à nouveau. L’opération peut être répétée plusieurs fois
en l’espace d’une heure.
FONCTION SLEEP
La touche SLEEP (3) vous permet de programmer l’arrêt de la radio
jusqu’à un maximum d’1 heure et 59 minutes. Ce réglage
s’effectue avec la radio allumée.
- Amener le sélecteur (1) sur OFF.
- Régler le temps d’arrêt en appuyant en même temps sur les
touches SLEEP (3) et MIN (6) ou bien SLEEP (3) et HOUR (5).
- Pour désactiver la fonction SLEEP avant le temps configuré, il
suffit d’appuyer sur la touche SNOOZE (7).
FONCTION DIMMER
La fonction d’atténuation permettent de régler la luminosité.
- Placer le sélecteur DIMMER (12) par la position LO, ils
permettent d’émettre une faible luminosité.
- Placer le sélecteur DIMMER (12) par la position HI, celles-ci
permettent d’émettre une luminosité élevée.
PILE TAMPON ANTI BLACK-OUT
Pour que l’horloge et la mémorisation de l’heure de réveil restent
en fonction même lors d’une coupure de courant électrique
momentanée, introduire une pile de 9V dans le logement spécifique
(10) sur le fond de l’appareil. Nous vous conseillons de remplacer
cette pile tous les six mois.
Si, en cas de coupure de courant, l’appareil affiche sur l’écran un
horaire incorrect et clignotant, remplacer la pile 9V.
Alimentation : .......................... 2 piles de format « AA »
Dimensions : ........................... 190 x 95 x 45 mm
Recommandations pour l'élimination correcte du
produit.
Le symbole figurant sur l'appareil indique que le produit fait l'objet
d'une " collecte séparée ". C'est pourquoi, le produit ne doit pas
être éliminé avec les déchets urbains.
L'utilisateur doit remettre le produit auprès de " décharges
spécialisées de collecte séparée " prévues par les autorités
locales, ou bien le rendre au revendeur quand il achètera un nouvel
appareil équivalent.
La collecte séparée du produit et les opérations successives de
traitement, recyclage et élimination favorisent la production
d'appareils composés par des matériaux recyclés ainsi que
permettent d'éviter des effets négatifs sur l'environnement et sur
la santé des personnes suite à une gestion impropre du déchet.
Toute élimination abusive du produit entraîne l'application de
sanctions administratives.
3
3
RC 850 BL
1
AM/FM ALARM CLOCK
WECKEN MIT DEM LÄUTWERK
12
2
4
3
Bringen Sie die Lautstärkeregelung (9) auf OFF.
Den Selektor (1) auf AUTO zu bringen, der Marker (11), leuchtet
auf.
5
6
7
AUSSCHALTEN DES WECKERS
9
11
13
8
10
1.Funktionswahlschalter: ON/OFF/AUTO; Ein/Aus/Wecken
mit Radio oder Summerton
2.Taste TIME, Zeiteinstellung
3.Taste SLEEP, programmierte Ausschaltung
4.Taste ALM SET, Alarmeinstellung/-ausschaltung
5.Taste HOUR, Stundeneinstellung
6.Taste MIN, Minuteneinstellung
7.Taste SNOOZE, zeitweilige Unterbrechung des Weckers
8.Abstimmung-Regler
9.Regler VOLUME, Lautstärkeregler
10.Batteriefach
11.Anzeige Alarm ein
12.Schalter DIMMER
13.Schalter AM/FM
INSTALLATION
Das Speisekabel an einer Steckdose 230V - 50Hz anschließen; das
Display wird blinken, bis die Uhr eingestellt wird.
RADIO
- Radio einschalten, indem der Wahlschalter (1) auf ON gestellt
wird.
- Gewünschten Wellenbereich AM/FM(13) einstellen.
- Mit Hilfe des Schalters (8) gewünschten Sender einstellen.
- Lautstärke mit dem Schalter (9) einstellen.
ZEITEINSTELLUNG
Für die Stundeneinstellung die Tasten TIME (2) und HOUR (5) bzw.
für die Minuteneinstellung die Tasten TIME (2) und MIN(6)
gleichzeitig drücken. Die eingestellte Uhrzeit wird auf dem Display
angezeigt.
EINSTELLUNG DER WECKZEIT
Für die Stundeneinstellung des Weckers die Tasten ALM(4) und
HOUR (5) bzw. für die Minuteneinstellung die Tasten ALM(4) und
MIN (6) gleichzeitig drücken. Durch Drücken der Taste ALM(4)
wird die Weckzeit auf dem Display angezeigt.
WECKEN MIT RADIO
Den gewünschten Sender abstimmen.
Nach Einstellen der Weckzeit den Wahlschalter (1) auf AUTO
stellen. Die Anzeige (11) wird leuchten. Die gewünschte Lautstärke
einstellen. Das Radio wird sich zur eingestellten Uhrzeit einschalten.
4
4
DEUTSCH
Zum Ausschalten des Alarms (Buzzer oder Radio) bringen Sie den
Selector (1) auf OFF.
Für eine zeitweilige Unterbrechung des Weckers, die Taste
SNOOZE (7) drücken; eine Unterbrechung dauert 9 Minuten, dann
schaltet sich der Wecker wieder ein. Dieser Vorgang kann
innerhalb von einer Stunde mehrmals wiederholt werden.
SLEEP-FUNKTION
Die Taste SLEEP (3) ermöglicht die Programmierung der
Ausschaltzeit des Radios bis max. 1 Stunde und 59 Minuten. Diese
Einstellung erfolgt bei eingeschaltetem Radio.
- Den Wahlschalter (1) auf OFF stellen.
- Um die Ausschaltzeit zu programmieren, die Tasten SLEEP (3)
und MIN (6) oder SLEEP (3) und HOUR (5) gleichzeitig drücken.
- Durch Drücken der Taste SNOOZE (7) kann die Funktion SLEEP
vorzeitig ausgeschaltet werden.
DIMMER-FUNKTION
Die Dimmer-Funktion ermöglichen, um die Helligkeit eingestellt.
- Schalten Sie den Wählschalter DIMMER (12) von LO Position,
erlauben diese eine geringe Helligkeit aussenden.
- Schalten Sie den Wählschalter DIMMER (12) durch HI
Position, erlauben diese eine hohe Helligkeit aussenden.
STROMAUSFALLSICHERE BATTERIE
Um die Uhrzeit bzw. die eingestellte Weckzeit bei einem
eventuellen Stromausfall gespeichert zu halten, eine Batterie mit
9V ins entsprechende Fach (10) an der unteren Seite des Geräts
einlegen. Es wird empfohlen, diese Batterie alle 6 Monate
auszuwechseln.
Blinkt nach einem Stromausfall eine falsche Uhrzeit auf dem
Display, so ist die Batterie zu ersetzen.
Stromversorgung: .................... 2 „AA“ Batterien
Abmessungen: ......................... 190 x 95 x 45 mm
Hinweise zur ordnungsgemäßen Entsorgung des
Produkts.
Das auf dem Gerät angebrachte Symbol weist darauf hin, dass
das Altgerät "getrennt zu sammeln" ist und das Produkt daher nicht
zusammen mit dem Gemeindeabfall entsorgt werden darf.
Der Benutzer muss das Produkt zu den entsprechenden, von der
Gemeindeverwaltung eingerichteten "Wertstoffsammelstellen"
bringen oder dem Händler beim Kauf eines neuen Produkts
übergeben.
Die getrennte Müllsammlung und anschließende Aufbereitung,
Wiederverwertung und Entsorgung fördern die Herstellung von
Geräten unter Verwendung wiederverwerteter Materialien und
vermindern die negativen Auswirkungen auf die Umwelt und
Gesundheit in Folge einer falschen Müllverwaltung.
Die widerrechtliche Entsorgung des Produkts führt zur Auferlegung
von Verwaltungsstrafen.
RC 850 BL
1
AM/FM ALARM CLOCK
DESPERTAMIENTO CON ALARMA
12
2
4
3
Llevar el control de volumen (9) OFF.
Traer el selector (1) a automático, ilumina el marcador (11).
5
6
APAGADO DEL DESPERTADOR
7
9
11
13
8
1.
2.
3.
4.
5.
6.
7.
8.
9.
10.
11.
12.
13.
10
Selector de funciones: ON/OFF/AUTO; Encendido/Apagado/
Despertador con radio o buzzer
Tecla TIME, regulación horaria
Tecla SLEEP, apagado programado
Tecla ALM, regulación/apagado de alarma
Tecla HOUR, regulación horas
Tecla MIN, regulación minutos
Tecla SNOOZE, apagado temporal
Control de sintonía
Control VOLUMEN, regulación de volumen
Compartimento baterías
Indicador de alarma activado
Selector de DIMMER
Selector de AM/FM
INSTALACIÓN
Enchufe el cable de alimentación en una toma de corriente 230V
- 50Hz; la pantalla destellará hasta cuando no habrá regulado la
hora.
RADIO
-
ESPANOL
Encender la radio colocando el selector (1) en posición ON.
Seleccionar la gama de onda mediante el control AM/FM (13).
Sintonizar la emisora que se desea escuchar mediante el
control (8).
Regular el volumen mediante el control (9).
RELOJ
Presione contemporáneamente la tecla TIME (2) y HOUR (5) para
regular la hora; los pulsadores TIME (2) y MIN (6) para regular los
minutos. En la pantalla se visualiza la hora introducida.
DESPERTADOR
Presione contemporáneamente los pulsadores ALM(4) y HOUR
(5) para regular la hora del despertador. Los pulsadores ALM (4)
y MINUTE (6) para regular los minutos. Presionando la tecla ALM
(4) se visualiza en la pantalla el horario del despertador.
DESPERTAMIENTO CON LA RADIO
Sintonice con la emisora deseada.
Después de haber regulado el horario del despertador, ponga el
selector (1) en AUTO, el indicador (11) se iluminará. Regule el
volumen al nivel deseado. La radio se encenderá a la hora
establecida.
Para desactivar la alarma (zumbador o radio) llevar el selector (1)
OFF.
Si desea apagar momentáneamente el despertador, presione el
pulsador SNOOZE (7); la interrupción dura 9 minutos, transcurridos
los cuales el despertador se enciende de nuevo. La operación
puede repetirse varias veces dentro de una hora de tiempo.
FUNCIÓN SLEEP
El pulsador SLEEP (3) le permite programar el apagado de la radio
hasta un máximo de 1 hora y 59 minutos. Esta regulación se debe
efectuar con la radio encendida.
- Ponga el selector (1) en OFF.
- Regule el tiempo de pagado presionando contemporáneamente
las teclas SLEEP (3) y MINUTE (6) o bien SLEEP (3) y HOUR (5)
- Para desactivar en su tiempo la función SLEEP es suficiente
presionar la tecla SNOOZE (7).
LUZ DE BAJA TENSIÓN
La función de atenuación permite ajustar el brillo.
- Cambie el selector DIMMER (12) por la posición LO,
permiten emitir un brillo bajo.
- Cambie el selector DIMMER (12) por la posición HI,
permiten emitir un brillo alto.
BATERÍA TAMPÓN ANTI BLACK-OUT
Para mantener en funcionamiento el reloj y la memorización del
horario del despertador también durante una momentánea falta de
energía eléctrica, debe introducir una batería de 9V en el
compartimento correspondiente (10) del fondo del aparato. Le
aconsejamos sustituir esta batería cada 6 meses.
En el caso de una interrupción eléctrica el aparato muestra en la
pantalla un horario incorrecto e intermitente, sustituya la batería
9V.
Alimentação: ............................ 2 baterias formato “AA”
Dimensões: .............................. 190 x 95 x 45 mm
Advertencias para la correcta eliminación del producto.
El símbolo que aparece en el aparato indica que el residuo debe
ser objeto de "recogida selectiva" por tanto el producto no se debe
eliminar junto con residuos urbanos.
El usuario deberá entregar el producto a los "centros de recogida
selectiva" creados por las administraciones municipales o bien al
distribuidor cuando adquiera un nuevo producto.
La recogida selectiva del residuo y las sucesivas operaciones de
tratamiento, recuperación y eliminación favorecen la fabricación
de aparatos con materiales reciclados y limitan los efectos
negativos en el medio ambiente y la salud causados por una
gestión incorrecta del residuo.
La eliminación abusiva del producto da lugar a la aplicación de
sanciones administrativas.
5
5
RC 850 BL
1
AM/FM ALARM CLOCK
DESPERTADOR COM ALARME
12
2
4
3
Trazer o controle de volume (9) para OFF.
Trazer o seletor (1) para AUTO, o marcador (11) acende.
5
6
DESLIGAMENTO DO DESPERTADOR
7
9
11
13
8
10
1.
2.
3.
4.
5.
6.
7.
8.
9.
10.
11.
12.
13.
Selector funções: ON/OFF/AUTO; Ligado/Desligado/
Despertador com rádio ou buzzer
Tecla TIME, regulação horário
Tecla SLEEP, desligamento programado
Tecla ALM, regulação/desligamento alarme
Tecla HOUR, regulação horas
Tecla MIN, regulação minutos
Tecla SNOOZE, desligamento momentâneo
Controle sintonia
Controle VOLUME, regulação volume
Compartimento baterias
Indicador alarme inserido
Selector DIMMER
Selector AM/FM
INSTALAÇÃO
Introduzir a ficha do cabo de alimentação em uma tomada de
corrente 230V - 50Hz; o display irá lampejar até quando não terá
sido regulada a hora.
RÁDIO
-
Ligue o rádio colocando o selector (1) em ON.
Seleccionar a gama de onda desejada com o controle AM/FM (13).
Sintonizar a estação preferida com o controle (8).
Regular o volume com o controle (9).
RELÓGIO
Premir contemporaneamente a tecla TIME (2) e HOUR (5) para
regular a hora; as teclas TIME (2) e MIN (6) para regular os minutos.
No display será visualizada a hora programada.
DESPERTADOR
Premir contemporaneamente as teclas ALM(4) e HOUR (5) para
regular a hora do despertador; as teclas ALM(4) e MINUTE (6)
para regular os minutos. Premendo a tecla ALM(4) é visualizado
no display o horário do despertador.
DESPERTADOR COM O RÁDIO
Sintonizar-se na emissora desejada.
Após ter programado o horário do despertador, colocar o selector
(1) em AUTO, o indicador (11) irá iluminar-se.
6
6
PORTUGUESE
Para desligar o alarme (Sirene ou rádio) trazem o seletor (1) para
fora.
Caso se deseje desligar momentaneamente o despertador, premir
a tecla SNOOZE (7); a interrupção dura 9 minutos, após esse
período de tempo, o despertador se reacenderá. A operação pode
ser repetida várias vezes durante uma hora.
FUNÇÃO SLEEP
A tecla SLEEP (3) permite programar o desligamento do rádio por
um máximo de 1 hora e 59 minutos. Esta regulação deve ser
efectuada com o rádio ligado.
- Colocar o selector (1) em OFF.
- Regular o tempo de desligamento premindo contemporane
amente as teclas SLEEP (3) e MINUTE (6) ou SLEEP (3) e
HOUR (5)
- Para desinserir antecipadamente a função SLEEP, é suficiente
premir a tecla SNOOZE (7).
FUNÇÃO DIMMER
A função Dimmer permite ajustar o brilho.
- Regule o selector de DIMMER (12) pela posição LO, estas
permitem a emitir um brilho baixo.
- Regule o selector de DIMMER (12) pela posição HI, estas
permitem a emitir um brilho elevado.
BATERIA TAMPÃO ANTI BLACK-OUT
Para manter em funcionamento o relógio e a memorização do
horário do despertador mesmo durante uma momentânea falta de
energia eléctrica, introduzir uma bateria de 9V no específico
compartimento (10) situado no fundo do aparelho. Recomendase a substituição desta bateria a cada 6 meses. Se no caso de
uma interrupção eléctrica o aparelho mostra no display um horário
errado e lampejante, substituir a bateria de 9v.
Alimentação: ............................
2 baterias formato “AA”
Dimensões: ..............................
190 x 95 x 45 mm
Advertências para a correcta demolição do produto.
O símbolo indicado na aparelhagem indica que o resíduo deve ser
objecto de "recolha separada" portanto o produto não deve ser
desmantelado junto dos resíduos urbanos.
O utilizador deverá entregar o produto nos apropriados "centros de
recolha diferenciada" predispostos pelas administrações comunais,
ou entregá-lo ao revendedor em troca de uma compra de um novo
produto.
A recolha diferenciada do resíduo e as sucessivas operações de
tratamento, recuperação e
desmantelamento
favorecem a produção de aparelhagens com materiais reciclados
e limitam os efeitos negativos no ambiente e na saúde causados
por uma gestão imprópria do resíduo.
O desmantelamento abusivo do produto comporta a aplicação de
sanções administrativas.
RC 850 BL
1
AM/FM ALARM CLOCK
12
2
4
3
5
6
7
9
11
13
8
10
1.
Epilogšaj leitourgièn ON/OFF/AUTO AnammšnosbhstÒ-Xupnht¾ri me radiÒfwno ¾ buzzer
2. Pl¾ktro TIME, rÚqmish tou wrar…ou
3. Pl¾ktro SLEEP,programmatismšnh apenergopo…hsh
4. Pl¾ktro ALM, rÚqmish-apenergopo…hsh tou
xupnhthrioÚ
5. Pl¾ktro HOUR, rÚqmish twn wrèn
6. Pl¾ktro MIN, rÚqmish twn leptèn
7. Pl¾ktro SNOOZE, proswrinÒ sb¾simo
8. /Elegcoj sunton…aj
9. /Elegcoj VOLUME, rÚqmish thj šntashj
10. Cèroj gia tij mpatar…ej
11. De…kthj tou energopoihmšnou xupnhthrioÚ
EGKATASTASH
Eis£gete thn pr…za tou kalwd…ou trofodÒthshj se mia
paroc¾ reÚmatoj twn 230V - 50Hz: h oqÒnh qa anabosb¾nei
mšcri na ruqm…sete thn èra.
RADIOFWNO
1. Ana¢bete to radio¢fwno fe¢rnontaV ton diako¢pth
epilogh¢V twn leitourgiw¢n (1) sthn qe¢sh ON.
2. Epile¢gete se poio¢ ku¢ma sucnoth¢twn
epiqumei¢te na suntonistei¢te me ton diako¢pth
ele¢gcou FM (13).
3. Suntoni¢zeste ston agaphme¢no saV staqmo¢ me
ton diako¢pth ele¢gcou (8).
4. Ruqmi¢ste thn e¢ntash tou h¢cou me ton diako¢pth
ele¢gcou (9).
ROLOI
Pišste tautÒcrona ta pl¾ktra TIME(2) kai HOUR (5),
gia na ruqm…sete thn èra: ta pl¾ktra TIME(2) kai
MIN(6), gia na ruqm…sete ta lept£. Sthn oqÒnh
optikopoie…tai h programmatismšnh èra.
XUPNHTHRI
Pišste tautÒcrona ta pl¾ktra ALARM SET/OFF (4)
kai HOUR (5), gia na ruqm…sete thn èra afÚpnhshj: ta
pl¾ktra ALARM SET/OFF (4) kai MINUTE (6), gia na
ruqm…sete ta lept£. Pišzontaj to pl¾ktro ALARM
SET/OFF (4) sthn oqÒnh optikopoie…tai to
programmatismšno wr£rio afÚpnhshj:
HELLENIKA
XUPNHMA ME TO RADIOFWNO
Óõíôïíéóôåßôå óôïí åðéèõìçôü óôáèìü ìå ôïí Ýëåã÷ï (8).
öïý ñõèìßóåôå ôçí þñá áöýðíéóçò, ãõñßóôå ôï äéáêüðôç
(1) óôç èÝóç AUTO, ï äåßêôçò (11) èá áíÜøåé. Ñõèìßóôå
ôçí Ýíôáóç óôï åðéèõìçôü åðßðåäï. ÖïñÜ ðïõ èá
ñõèìßóåôå ôï ñáäéüöùíï.
XUPNHMA ME KOUDOUNISMA
Ãõñßóôå ôï ñõèìéóôÞ Ýíôáóçò (9) óôç èÝóç OFF.
Ãõñßóôå ôï äéáêüðôç (1) óôç èÝóç AUTO, ï äåßêôçò (11)
èá áíÜøåé.
SBHSIMO TOU XUPNHTHRIOU
Ãéá íá áöïðëßóåé ôï óõíáãåñìü (óåéñÞíá Þ ñáäéüöùíï)
üôé ï åðéëïãÝáò (1) OFF.
Ean epiqume…te na sb¾sete proswrin£ to xupnht¾ri,
pišste to pl¾ktro SNOOZE (7): h diakop¾ diarke… 9
lept£, met£ apÒ ta opo…a to xupnht¾ri an£bei p£li. H
diadikas…a aut¾ mpore… na epanalhfqe… perissÒterej
foršj mšsa sth di£rkeia miaj èraj.
LEITOURGIA SLEEP
To pl¾ktro SLEEP (3) saj epitršpei na programmat…sete
to sb¾simo tou radiofènou mšcri to anètato Òrio thj
1 èraj kai 59 leptèn. Aut¾ h rÚqmish g…netai me to
radiÒfwno anammšno.
- Fšrte ton epilogša (1) sth qšsh OFF.
- Ruqm…ste to crÒno sbhs…matoj pišzontaj tautÒcrona
ta pl¾ktra SLEEP (3) kai MINUTE (6) ¾
SLEEP (3) kai HOUR (5).
- Gia na apenergopoi¾sete prin apÒ ton
prokaqorismšno crÒno th leitourg…a SLEEP, arke… na
pišsete to pl¾ktro SNOOZE (7).
DIMMER ËÅÉÔÏÕÑÃÉÁ
Ç ëåéôïõñãßá ñåïóôÜôç åðéôñÝðåé íá ñõèìßóåôå ôç
öùôåéíüôçôá.
ÅíåñãïðïéÞóôå ôï DIMMER åðéëïãÝá (12) áðü ôç èÝóç
LO, áõôÝò åðéôñÝðïõí íá åêðÝìðåé ìéá ÷áìçëÞ
öùôåéíüôçôá.
ÅíåñãïðïéÞóôå ôï DIMMER åðéëïãÝá (12) áðü ôç èÝóç
HI,áõôÝò åðéôñÝðïõí íá åêðÝìðåé õøçëÞ öùôåéíüôçôá.
Ôñïöïäïóßá éó÷ýïò: .......... 2 ìðáôáñßåò ôýðïõ “AA”
ÄéáóôÜóåéò: ........................ 190 x 95 x 45 mm
ÐñïåéäïðïéÞóåéò ãéá ôç óùóôÞ äéÜèåóç ôïõ ðñïúüíôïò.
Ôï óýìâïëï ðïõ áðåéêïíßæåôáé åðÜíù óôç óõóêåõÞ õðïäåéêíýåé üôé
ôï áðüâëçôï ðñÝðåé íá áðïôåëÝóåé áíôéêåßìåíï “÷ùñéóôÞò óõëëïãÞò”
ùò åê ôïýôïõ ôï ðñïúüí äåí ðñÝðåé íá äéáôßèåôáé ìáæß ìå ôá áóôéêÜ
áðüâëçôá.
Ï ÷ñÞóôçò èá ðñÝðåé íá ðáñáäþóåé ôï ðñïúüí óôá åéäéêÜ “êÝíôñá
äéáöïñïðïéçìÝíçò óõëëïãÞò” ðïõ Ý÷ïõí äéåõèåôçèåß áðü ôéò äçìïôéêÝò
äéïéêÞóåéò, Þ íá ôï ðáñáäþóåé óôï êáôÜóôçìá ðþëçóçò ìå ôçí áãïñÜ
åíüò íÝïõ ðñïúüíôïò.
Ç äéáöïñïðïéçìÝíç óõëëïãÞ ôïõ áðïâëÞôïõ êáé ïé áêüëïõèåò
åðåìâÜóåéò åðåîåñãáóßáò, áíÜêôçóçò êáé äéÜèåóçò âïçèïýí ôçí
ðáñáãùãÞ óõóêåõþí ìå áíáêõêëùìÝíá õëéêÜ êáé ðåñéïñßæïõí ôéò
áñíçôéêÝò åðéðôþóåéò ãéá ôï ðåñéâÜëëïí êáé ôçí õãåßá ðïõ ðñïêáëïýíôáé
áðü ôçí áêáôÜëëçëç äéá÷åßñéóç ôïõ áðïâëÞôïõ.
Ç áõèáßñåôç äéÜèåóç ôïõ ðñïúüíôïò óõíåðÜãåôáé ôçí åöáñìïãÞ
äéïéêçôéêþí êõñþóåùí.
7
7
ATTENZIONE
CAUTION
ATTENTION
RISCHIO DI SCOSSE
ELETTRICHE
NON ESPORRE
A PIOGGIA E UMIDITÀ
DANGER OF ELECTRIC SHOCK!
DO NOT EXPOSE TO
RAIN OR HUMIDITY
DANGER DE DECHARGES ELECTRIQUES
NE PAS EXPOSER A LA PLUIE
NI A L’HUMIDITE
ATTENZIONE: NON APRIRE L'APPARECCHIO. ALL'INTERNO NON VI SONO COMANDI
MANIPOLABILI DALL'UTENTE NE PARTI DI RICAMBIO. PER TUTTE LE OPERAZIONI DI
SERVIZIO RIVOLGERSI AD UN CENTRO DI ASSISTENZA AUTORIZZATO TREVI
CAUTION: TO REDUCE THE RISK OF ELECTRIC SHOCK, DO NOT REMOVE COVER OR
BACK. NO USER SERVICEABLE PERTS INSIDE. REFER SERVICING TO QUALIFIED
PERSONNEL ONLY.
ATTENTION: NE PAS OUVRIR L’APPAREIL. SON INTERIEUR NE CONTIENT AUCUNE
COMMANDE DESTINEE A L’UTILISATEUR NI DE PIECES DE RECHANGE. POUR TOUTE
OPERATION D’ASSISTANCE CONTACTER UN CENTRE D’ASSISTANCE AGREE TREVI.
ACHTUNG
ATENCION
ATENÇÃO
GEFAHR ELEKTRISCHER SCHLÄGE
NICHT DER FEUCHTIGKEIT
UND DEM REGEN AUSSETZEN
PELIGRO DE CHOQUES ELECTRICOS
NO EXPONER A LLUVIA Y
PERIGO DE CHOQUES ELÉTRICOS
NÃO EXPOR A CHUVA E UMIDADE
ACHTUNG: DAS GERÄT NICHT ÖFFNEN. IM INNERN BEFINDEN SICH KEINE VOM
BENUTZER SELBST INSTANDSETZBAREN TEILE UND AUCH KEINE ERSATZTEILE. FÜR
JEGLICHESERVICEARBEITEN,WENDENSIESICHBITTEANEINETREVIAUTORISIERTEN
KUNDENDIENSTSTELLE.
ATENCION: NO ABRIR EL APARATO, EN SU INTERIOR NO HAY MANDOS QUE PUEDAN
SER MANIPULADOS POR EL USUARIO NI PARTES DE REPUESTO. PARA TODAS LAS
OPERACIONES DE SERVICIO DIRIGIRSE A UN CENTRO DE ASISTENCIA AUTORIZADO
TREVI.
ATENÇÃO:NÃOABRIROAPARELHO.NOINTERIORDOMESMONÃOEXISTEMCOMANDOS
OUPEÇASDESUBSTITUIÇÃOQUEPOSSAMSERMANIPULADOSPELOUSUÁRIO.EMCASO
DE EVENTUAL OPERAÇÃO DE SERVIÇO, DIRIGIR-SE A UM CENTRO DE ASSISTÊNCIA
AUTORIZADOTREVI
ΠΡΟΣΟΧΗ
UK PLUG ONLY
WIRES CONNECTIONS TO A THREE-PIN PLUG
ΚΙΝ∆ΥΝΟΣ ΗΛΕΚΤΡΟΠΛΗΞΙΑΣ
ΜΗΝ ΕΚΘΕΤΕΤΕ
ΣΕ ΒΡΟΧΗ ΚΑΙ ΥΓΡΑΣΙΑ
ΠΡΟΣΟΧΗ: ΜΗΝ ΑΝΟΙΓΕΤΕ ΤΗΝ ΣΥΣΚΕΥΗ. ∆ΕΝ ΥΠΑΡΧΟΥΝ ΣΤΟ
ΕΣΩΤΕΡΙΚΟ ΤΗΣ ΕΝΤΟΛΕΣ ΠΟΥ ΝΑ ΜΠΟΡΕΙ ΝΑ ΧΕΙΡΙΣΤΕΙ Ο
ΚΑΤΑΝΑΛΩΤΗΣ ΟΥΤΕ ΑΝΤΑΛΛΑΚΤΙΚΑ ΤΜΗΜΑΤΑ. ΓΙΑ
ΟΠΟΙΑ∆ΗΠΟΤΕ ΕΡΓΑΣΙΑ ΑΠΕΥΘΥΝΘΕΙΤΕ ΣΕ ΕΝΑ ΑΠΟ ΤΑ
ΕΞΟΥΣΙΟ∆ΟΤΗΜΕΝΑ ΚΕΝΤΡΑ ΑΝΤΙΠΡΟΣΩΠΕΙΑΣ ΤΡΕςΙ.
The wires in this mains lead are coloured in accordance with the
following wiring codes:
Blue: ....................................................... Neutral
Brown: ................................................... Live
The wires in this mains lead must be connected to the terminals
in the plug as follows:
Blue wire: ............................................. N or Black
Brown wire: ......................................... L or Red
Neither wire is to be connected to the earth (E or :) terminal
of three-pin plug.
Should the fuse fail in the plug remove the plug form the wall socket and replace the fuse with a 3 Amp.
ASTA approved BS 1362 fuse.
DICHIARAZIONE DI CONFORMITÀ
SI DICHIARA CHE:
L'apparecchio Radiosveglia marca
TREVI modello RC 850 BL
risponde alle prescrizioni dell'art. 2 comma 1
del D.M. 28 agosto 1995, n° 548
Rimini, 7/12/2010
TREVI S.p.A.
Strada Consolare Rimini-San Marino, 62
47924 Rimini (Rn) Italy
Trevi S.p.A. - Strada Consolare Rimini-San Marino, 62
47924 Rimini (Rn) Italy
Tel. 0541/756420 - Fax 0541/756430
www.trevi.it - E-mail: [email protected]
MADE IN CHINA