1
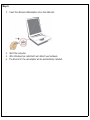
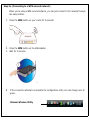
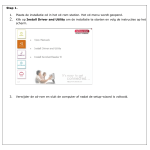
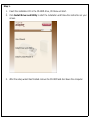
Step 1.
1.
Insert the installation CD in the CD-ROM drive, CD-Menu will start.
2.
Click Install Driver and Utility to start the installation and follow the instruction on your
screen.
3.
After the setup wizard has finished remove the CD-ROM and shut down the computer.
Step 2.
1.
Insert the Wireless USB adapter into a free USB slot.
2.
3.
4.
Start the computer.
After Windows has restarted it will detect new hardware.
The drivers for the usb-adapter will be automatically installed.
Step 3a. (Connecting to a WPS secured network)
When you’re using a WPS secured network, you can just connect to the network through
two easy buttons.
1.
Press the WPS button on your router for 2 seconds:
2.
Press the WPS button on the USB adapter.
Wait for 2 minutes.
3.
4.
If the connection attempt is successful the configuration utility icon will change color to
green.
Sitecom Wireless Utility
Step 3b. (Connecting to a wireless network without WPS)
Note:
1.
You can skip this step if you’ve followed step 3a to connect to your network.
After installing the software, the wireless configuration utility icon will show up the icon
tray.
Sitecom Wireless Utility
2.
Double click on the configuration utility icon.
3.
Click Network and then click the Refresh button.
The wireless adapter will now search for the available networks in the area.
5.
Select the network you wish to connect to and click Add to Profile.
You will see a new screen, fill in the data required and click “ok”.
If the connection attempt is successful the configuration utility icon will change color to
green.
Sitecom Wireless Utility
4.