1
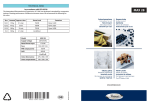
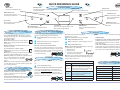
QUICK REFERENCE GUIDE
GB
DIGITAL DISPLAY
The display includes a 24-hour clock and
indicator symbols.
GRILL BUTTON
Use to select Grill function.
MAX 38
CONTROL PANEL
CRISP BUTTON
Use to select Crisp function.
CLOCK BUTTON
Use to set the 24-hour clock.
MICROWAVE BUTTON
Use to set the desired
microwave power level.
JET START BUTTON
Use to start the cooking
process or invoke the Jet
Start function.
STOP BUTTON
Press to stop or reset any of
the oven functions.
GRILL COMBI BUTTON
Use to select Grill Combi function.
PAUSE OR STOP COOKING
TO PAUSE COOKING:
THE COOKING CAN BE PAUSED to check, turn or stir the
food by opening the door. The setting will be maintained for 5 minutes.
TO CONTINUE COOKING:
CLOSE THE DOOR and press the Jet Start button
ONCE. The cooking is resumed from where it
was paused.
PRESSING THE START BUTTON TWICE will increase the
time by 30 seconds.
IF YOU DON’T WANT TO CONTINUE COOKING:
REMOVE THE FOOD, close the door and press the
STOP button.
NOTE: After cooking ends, the fan and cavity lamp is
on before pressing STOP button, it’s normal.
A BEEP WILL SIGNAL once a minute for 5 minutes when
the cooking is finished. Press the STOP
button or open the door to cancel the
signal.
NOTE: The oven will only hold the settings for 60
seconds if the door is opened and then closed after
the cooking is finished.
CHILD LOCK/TOUCH LOCK
THIS AUTOMATIC SAFETY FUNCTION IS ACTIVATED 2 MINUTES
AFTER the oven has returned to “stand by
mode“. In this mode the door and touch
button are locked.
THE DOOR MUST BE OPENED AND CLOSED e.g. putting
food into it, before the safety lock is released.
Else the display will show “DOOR“.
-/+ BUTTON
Use to increase/decrease the cook
time or the weight of food.
MEMO BUTTON
Use to recall stored favourite
setting.
COOK & REHEAT WITH MICROWAVES
USE THIS FUNCTION for normal cooking and reheating,
such as vegetables, fish, potatoes and meat.
q
PRESS THE POWER BUTTON repeatedly to set the
power.
w
e
PRESS +/- BUTTON to set the cooking time.
PRESS THE JET START BUTTON.
ONCE THE COOKING PROCESS HAS BEEN STARTED:
The time can easily be increased in 30-second steps
by pressing the Start button. Each press increases the
time with 30 seconds. You may also alter the time by
pressing +/- button to increase
or decrease the time.
JET START
THIS FUNCTION IS UUSE
USED
SED
D ffor
or q
qui
quick
uickk reheating
reh
ehea
heati
ting
ti
ng of
of food
food
fo
d with
a high water content such as clear soups, coffee or
tea.
q
PRESS THE JET START BUTTON.
THIS FUNCTION AUTOMATICALLY STARTS with maximum microwave power level and the cooking time set to
30 seconds. Each additional press increases the time
with 30 seconds. You may also alter the time by
pressing +/- button to increase or decrease the time
after the function has started.
JET DEFROST BUTTON
Use to select Jet Defrost
function.
JET DEFROST
USE THIS FUNCTION for defrosting
g Meat, Poultry
Poultr
ltryy and
and Fish.
Fish
sh.
h JET
JET Defrost
Defros
Def
frostt should
shou
sh
hould
ld only
only
l be used
use if the net weight is
between 100 g- 1.5 kg.
ALWAYS PLACE THE FOOD on the glass turntable.
FROZEN FOODS:
IF THE WEIGHT IS LESSER OR GREATER THAN RECOMMENDPRESS THE JET DEFROST BUTTON.
ED WEIGHT: Follow the procedure for “Cook &
PRESS +/- BUTTON to set the weight of the food.
Reheat with microwaves” and choose 160 W
when defrosting.
PRESS THE JET START BUTTON.
IF THE FOOD IS WARMER than deep-freeze temperMIDWAY THROUGH THE DEFROSTING PROCESS the oven stops
ature (-18°C), choose lower weight of the food.
and prompts you to TURN FOOD.
IF THE FOOD IS COLDER than deep-freeze temperaOpen the door.
ture (-18°C), choose higher weight of the food.
Turn the food.
Close the door and restart by
pressing the Start button.
q
w
e
NOTE: The oven continues automatically after 2 min.
if the food hasn’t been turned. The defrosting time
will be longer in this case.
MICROWAVES ONLY
POWER
REHEATING OF BEVERAGES, water, clear soups,
coffee, tea or other food with a high
JET
(700 W) water content. If the food contains egg
or cream choose a lower power.
500 W
TECHNICAL SPECIFICATION
SUGGESTED USE:
MORE CAREFUL COOKING e.g. high protein
sauces, cheese and egg dishes and to
finish cooking casseroles.
SUPPLY VOLTAGE
230 V/50 HZ
RATED POWER INPUT
1500 W
FUSE
10 A (UK 13 A)
MW OUTPUT POWER
700 W
GRILL
650 W
350 W
SIMMERING STEWS, melting butter.
OUTER DIMENSIONS (HXWXD)
360 X 392 X 350
160 W
DEFROSTING. Softening butter, cheeses.
INNER DIMENSIONS (HXWXD)
149 X 290 X 290
QUICK REFERENCE GUIDE
GB
CLOCK
KITCHEN TIMER
when
hen you ne
need
ed
d a kkitchen
itchen
h timer
USE THIS FUNCTION wh
to measure exact time for various purposes such
as cooking eggs or letting the dough rise before
baking etc.
q
w
e
PRESS THE CLOCK BUTTON.
PRESS +/- BUTTON TO SET THE TIME to measure.
PRESS THE JET START BUTTON.
FLASHING COLONS indicate that the timer is running.
AN ACOUSTIC SIGNAL will be heard when the timer has
finished to count down.
ONE PRESS ON THE CLOCK BUTTON displays how much is
left on the Timer. It’s displayed for 3 seconds and
then returns to displaying the cooking time (If you
are currently cooking).
TO STOP THE KITCHEN TIMER when it is operating in the
background of another function, you must first
recall it to the foreground by pressing the Clock
button and then stop it by pressing the Stop button.
q
PRESS THE CLOCK BUTTON (3 seconds)
d ) until
til the
th leftl ft
hand digit (hours) flicker.
w
e
PRESS +/- BUTTON to set the hours.
r
t
PRESS +/- BUTTON to set the minutes.
PRESS THE CLOCK BUTTON AGAIN. (The two right
hand digits (minutes) flicker).
PRESS THE CLOCK BUTTON AGAIN.
THE CLOCK IS SET and in operation.
IF YOU WISH TO REMOVE THE CLOCK from the display once
it has been set, simply press the Clock button again
for 3 seconds and then press the Stop button.
TO REINSTATE THE CLOCK, follow the above procedure.
NOTE: KEEP THE DOOR OPEN WHILE SETTING THE CLOCK. This
gives you 5 minutes to complete the setting of the
Clock. Otherwise, each step must be accomplished
within 60 seconds.
USE THIS FUNCTION TO quickly give a pleasant brown
surface to the food.
q
w
e
PRESS THE GRILL BUTTON.
w
e
PRESS +/- BUTTON to set the cooking time.
PRESS THE JET START BUTTON.
DURING COOKING TIME, the MW power can be changed
any time by pressed “Combi“ button, and It is possible to adjust the cook time by pressing +/- button.
GRILL COMBI
SUGGESTED USE:
POWER
PRESS +/- BUTTON to set the cooking time.
350 - 500 W
COOKING Poultry & Lasagne
PRESS THE JET START BUTTON.
160 - 350 W
COOKING Fish & frozen gratins
DURING COOKING TIME, It is possible to adjust the cook
time by pressing +/- button.
USE THIS FUNCTION TO cook quiches,
ches, pizzas and
d other
oth
therr dough
dough
doug
h based
based
base
d food.
food.
d Also
Al ideal for roasting
r
meat, fish and
frying bacon, eggs, potatoes, etc.
q
w
e
ENSURE that the Crisp-plate is correctly placed in
the middle of the Glass turntable.
PRESS THE CRISP BUTTON.
PRESS +/- BUTTON to set the cooking time.
THE OVEN AND THE CRISP-PLATE become very hot
when using this function.
PRESS THE JET START BUTTON.
IT IS NOT POSSIBLE TO CHANGE OR SWITCH the Power level or
Grill on/off, when using the Crisp function.
DO NOT PLACE THE HOT CRISP-PLATE on any surface
susceptible to heat.
DURING COOKING TIME, It is possible to adjust the cook
time by pressing +/- button.
THE OVEN AUTOMATICALLY use Microwaves and Grill in
order to heat the Crisp-plate. This way the Crispplate will rapidly reach its working temperature and
begin to brown and crisp the food.
BE CAREFUL, NOT TO TOUCH the ceiling beneath the
Grill element.
USE OVEN MITTENS
or the special Crisp handle supplied when removing the hot Crisp-plate.
ONLY USE the supplied Crisp plate with this function. Other available Crisp plates on the
market will not give the correct result
when using this function.
GRILL COMBI
USE THIS FUNCTION TO cookk such
such
h food
food
d as Gratin’s,
Gratin’s
Lasagne, Poultry and Baked potatoes.
q PRESS THE COMBI BUTTON repeatedly to set the
power.
GRILL
MAX 38
CRISP
160 W
0W
MEMORY
THE MEMORY FUNCTION PROVIDESS you wi
with
ith an e
ith
eas
easy
asyy wa
as
wayy to
to q
quickly
uiick
ckl
kly
ly recall
rrec
ecal
allll a preferred
pref
efe
ferred
d setting.
se
THE PRINCIPLE OF THE MEMORY FUNCTION is to store whatever setting that is currently displayed.
HOW TO USE A STORED SETTING:
q
w
PRESS THE MEMO BUTTON.
PRESS THE JET START BUTTON.
WHEN THE APPLIANCE is plugged in or after a power
failure, your Memo function will have stored
1 minute at full microwave power as default
setting.
HOW TO STORE A SETTING:
q
w
e
SELECT any function.
PROGRAM your settings.
PRESS AND KEEP THE MEMO BUTTON PRESSED for 3
seconds until an acoustic signal is heard. The
setting is now stored. You may reprogram
the memory as many times as you wish.
COOKING Meat
BROWNING only during cooking
ENSURE THAT THE UTENSILS used are heat resistant and ovenproof before grilling with them.
DO NOT USE PLASTIC utensils when grilling. They will melt. Items of wood or paper are
not suitable either.
4 6 1 9 6 6 2 0 4 2 3 1