1
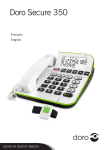
Doro Secure 350
English
1
20
2
19
18
3
4
17
5
16
15
14
6
7
13
8
English
1. Microphone level
2. Additional alert equipment
3. Phonebook
4. Alarm key
5. Powerful amplification
(boost)
6. Tone control
7. Volume control
8. Cordless alarm pendant
9. Recall key
10. Menu key
9 10 11
11.
12.
13.
14.
15.
16.
17.
18.
19.
20.
12
Delete/back
Handsfree/headset key
Speed dial keys
Call log
Scroll keys
Confirm/0
Display
Missed call indicator
Power supply
Telephone cord socket
English
Contents
Installation ................................................................................ 1
Connection .......................................................................... 1
Batteries ............................................................................. 1
Cordless pendant ................................................................. 1
Basic setup ......................................................................... 2
Wall mounting ..................................................................... 6
Operation................................................................................... 6
Making a call....................................................................... 6
Answering a call .................................................................. 8
Call timer ............................................................................ 8
Volume control..................................................................... 8
Pillow shaker ....................................................................... 9
Keypad characters................................................................ 9
Phonebook .......................................................................... 9
Speed dial...........................................................................11
Caller ID and call log............................................................12
Alarm function ...........................................................................13
Alarm message ....................................................................14
Activate the alarm................................................................14
Others .......................................................................................15
Troubleshooting ...................................................................15
Care and Maintenance..........................................................15
Warranty .............................................................................16
Specifications ......................................................................16
Declaration of Conformity .....................................................16
English
Installation
This device is intended for the analogue telephone network lines in
AT, BE, BG, CH, CY, CZ, DE, DK, EE, ES, FI, FR, GB, GR, HU, IE, IS,
IT, LV, LT, LU, MT, NL, NO, PL, PT, RO, SI, SK, SE.
Connection
1.
2.
3.
4.
5.
Connect the curly cord to the handset and then to the socket
marked q on the unit.
Connect the mains adapter to an electrical wall socket and then
to the socket marked DC 9V/300mA on the unit.
Connect the telephone line cord to a network wall socket and
then to the socket marked K on the unit.
Lift the handset and listen for the dial tone.
Position the cables in the grooves underneath the unit.
Note!
Use supplied telephone line cord, an existing cord from a previous
phone may not be compatible.
Batteries
The unit is powered with the provided mains adapter and has batteries
as backup in the event of a power cut. 4 AA alkaline batteries are
needed for full functionality in the event of a power cut. Typical
is displayed,
backup time, 15 hours with new batteries. When
replace all 4 batteries. Use only AA alkaline batteries of good quality
(not included).
Note!
Before installing or changing the batteries, make sure that the phone is
not connected to the telephone network.
1.
2.
Remove the battery cover and insert the batteries ensuring correct
battery polarity is observed.
Replace the battery cover and reconnect the telephone line cord.
Cordless pendant
The range of the cordless pendant varies depending on the
environment in which it is used. Walls, floors, furniture and other
obstacles may limit contact between the pendant and the phone.
1
English
Check that the pendant is always in contact with the phone by
activating the alarm in different places around the premises.
See Basic setup/PENDANT, p. 3 how to register (pair) a pendant.
Changing batteries in the cordless pendant
If the cordless pendant ceases to function, change the batteries. Use
only 1 x 12 V (A23, LR23) Alkaline battery of good quality.
1.
2.
3.
Use a Phillips screwdriver to loosen the screws on the back and
separate the parts gently.
Replace the battery, take care to follow the markings for plus
and minus terminals.
Reassemble the parts and screw together.
Basic setup
Before using the phone for the first time, the following basic settings
should be made.
To enter the setup menu press W (under the lid). After confirming a
setting with 0, the next setting is automatically displayed. To skip to
the next setting, press v/V.
The phone will return to standby mode after 30 seconds of inactivity
.
or when pressing
Press W to enter the setup menu.
TIME/DATE
1.
2.
3.
4.
5.
Use v/V to scroll to TIME/DATE. Press 0.
Scroll to the desired hour (00-23) with v/V. Press 0.
Scroll to the desired minute with v/V. Press 0.
Scroll to the desired day with v/V. Press 0.
Scroll to the desired month with v/V. Press 0.
LANGUAGE
1.
2.
Scroll to LANGUAGE. Press 0.
Select the desired language for display and voice function, then
confirm with 0.
STORE NO.
Store contacts in Phonebook. Please see Phonebook, p. 9 for
instructions.
2
English
NAME REC
Record a name to be read aloud. Please see Phonebook, p. 9 for
instructions.
PENDANT
(cordless alarm key)
The cordless alarm pendant can be used to answer an incoming call
or to make an alarm call. The phone comes equipped with 2 cordless
pendants which are already paired. Test that the pendants are working
with the phone in idle mode, press and hold the alarm key and the
phone will beep to confirm successful pairing.
Pairing a cordless alarm pendant
1. Scroll to PENDANT. Press 0.
2. Select PAIRING. Press 0.
3. Press and hold the key on the pendant until OK is displayed.
Repeat the steps if you need to pair further pendants.
5 pendants can be paired simultaneously to the phone.
If you attempt to pair a new pendant when 5 pendants are already
paired, FULL will be displayed.
Note!
When adding a new unit (with 5 pendants already paired, FULL) you
must first delete all the paired units and then pair one by one (there is
no option to delete paired units individually).
Delete paired pendants
1. Scroll to PENDANT. Press 0.
2. Select DELETE ?. Press 0.
VOICE
When ON is selected, a recorded voice is played with key presses
and alert messages.
Set the voice function ON/OFF, then confirm with 0.
RING MEL
Select the required ringer melody, then confirm with 0.
3
English
RING VOL
Select the required ringer volume, then confirm with 0.
BOOST LOCK
The powerful amplification (boost) is by default set to switch OFF after
every call, this can be changed so the amplification stays switched ON.
CAUTION
BOOST LOCK = ON should only be activated if all users have impaired
hearing and require powerful amplification.
ALARM FUNC
The alarm function will call the contacts stored as "alarm contacts" in
the phonebook and play a recorded alarm message when you press
on the phone, or the alarm key on the cordless
the alarm key
pendant. See also Alarm function, p.13.
Use v/V to set the alarm call function ON or OFF, confirm with 0.
QUIET AL.
In quiet alarm mode, no voice or tone signal is heard when the alarm
call is made (see above). See also Alarm function, p.13.
Use v/V to set the alarm mode to quiet (ON) or normal (OFF) and
confirm with 0.
AL.MESSAGE
Record the alarm message that will be played for the contacts stored
as "alarm contacts" in the phonebook when activating the alarm
function. See also Alarm function, p.13.
Note!
The alarm message should include your name, address, and how to
activate the speakerphone.
Example: "This is an emergency call from John Smith on 10, Long
Street, Middleton. I require immediate assistance. Press zero key to
connect this call."
1.
Scroll to AL.MESSAGE.
4
English
2.
3.
Press and hold 0 to record a new alarm message (max. 30
seconds). Start recording at the tone, and release 0 when
finished. Speak clearly and about 15–20 cm from the keypad.
Alternatively, press 0 briefly to play the recorded alarm message.
Press 0 to confirm and continue.
RING LIGHT
To alert you to incoming calls, a flashing light can be activated when
the phone is ringing.
Select ON/OFF and confirm with 0.
CONTRAST
Select a suitable display contrast setting (1–4), and confirm with 0.
KEYTONE
Enable/disable the keytone beep.
Select ON/OFF and confirm with 0.
FLASH
Select the flash key time (100/300/600 ms.) and confirm with 0.
The standard setting is 100 for most countries, 300 for
France/Portugal, 600 for New Zealand.
N CALL LED
Enable/disable the LED indicator for new calls.
Select ON/OFF and confirm with 0.
TONE/PULSE
Select either TONE or PULSE dialling mode, and confirm with 0.
Note!
If unsure of which mode to use, select TONE as this works in most
locations.
SERVICES
key 1 and 2 can be programmed with service number.
1. Scroll to SERVICES. Press 0.
5
English
2.
3.
Select 1 or 2. Press 0.
Enter the required number and confirm with 0.
To dial, press and hold 1 or 2 and press
or lift the handset.
Wall mounting
The phone can be wall mounted using the included wall mount
bracket and two screws (not included).
WARNING
Make sure that no cables, water pipes or gas pipes are located inside
the wall before drilling into it.
1.
2.
3.
4.
5.
6.
Drill two holes in the wall, vertically 83 mm apart.
Insert the screws, allowing them to project ~5 mm out from the
wall.
Unplug and remove the handset.
Fit the guide tabs on the bracket into the slots on the back of the
phone, then slide the bracket upwards until it snaps into place.
Position the phone so that the screws on the wall fit into the
slots in the bracket, then slide the phone downwards until it is
hanging on the screws.
Reconnect the handset and place it in the cradle.
Operation
Making a call
Regular dialling
1.
2.
Pick up the handset.
Enter the desired number.
Handsfree
The handsfree function allows you to make a call without using the
handset.
1.
Press
to activate the speakerphone. The LED on the key will
light up.
2.
Dial the desired phone number using the keypad. Press
to terminate the call.
6
again
English
Note!
If you wish, you can switch between handset and handsfree mode by
simply pressing
or lifting the handset. Please remember that in
handsfree mode it is only possible for one person at a time to talk.
Pre-dialling
This allows you to enter and change a phone number before it is
dialled.
1.
Enter the desired phone number. Mistakes can be erased by
.
pressing
2.
Lift the handset, press 0 or press
3.
Hang up the handset or press
to dial the number.
to terminate the call.
Dialling from the call log
1.
2.
Press
to display the most recent call.
Use v/V to scroll through the last 15 incoming and outgoing
calls.
= Incoming call
= Outgoing call
3.
Lift the handset, press 0 or press
number.
to dial the displayed
Speed dial
1.
Press one of the speed dialling keys A-G. The stored phone
number is displayed.
2.
Lift the handset, press 0 or press
to dial.
Dialling from the phonebook
1.
2.
Press b to open the phonebook.
Use v/V to browse through the phonebook, or enter the first
character in the name to quick search (see Keypad characters,
p. 9 ).
3.
Lift the handset or press to dial.
Alternatively, press 0, and the displayed number is dialled
automatically, in handsfree mode.
7
English
Answering a call
Lift the handset to answer an incoming call, or press .
You can also answer in handsfree mode by pressing the key on the
cordless pendant.
Call timer
The display shows the current time when in standby mode. During a
call the display will show a call timer instead, indicating the duration
of the call. The call duration is displayed for 5 seconds after the
call has been terminated.
Volume control
This product can adjust the sound, using the controls, in a number
of ways:
Normal volume control for the handset.
v/V
Change frequency range/tone level and quality.
PLEASE NOTE! Only works when the powerful
amplification is active.
Press the key to activate powerful amplification. The
amplification is normally deactivated at the end of each
call to avoid harming people with normal hearing. This
safety function is adjustable, see BOOST LOCK, p. 4 .
Handsfree volume control.
WARNING
The handset volume can be very loud. Powerful amplification should
only be used by people with impaired hearing ability.
Microphone adaptation
The microphone level can to be adjusted.
0
+4
–4
standard setting
higher sending sound
lower sending sound
Note!
0 is default and should be kept unless there is a special need.
8
English
Pillow shaker
A pillow shaker such as Doro HearPlus 55v can be connected to the
socket
.
Keypad characters
key
1
2
3
4
5
6
7
8
9
*
0
#
Letters/Symbols
[Space character] + & - / X 1
ABCÅÄÆæåäß2
DEFë3
GHIï4
JKL5
MNOÑñÖö6
PQRS7
TUVÜü8
WXYZ9
`@()*<>
,. : ? =0
$_%! ; #
Phonebook
99 phone numbers (max. 22 digits) with names (max. 10 letters) can
be stored in the phonebook. When the memory is full, MEM. FULL is
displayed. If you subscribe to a caller ID service, the name allocated
to the caller in the phonebook will be displayed for incoming calls.
You can also record a name (NAME REC) to be read aloud with the
phonebook entry (instead of the caller’s phone number, if VOICE=ON).
Storing contacts
1.
Press W, use v/V to scroll to STORE NO.. Press 0.
9
English
2.
3.
4.
5.
6.
Enter a phone number. Use v/V to move the cursor and
to erase if needed. Use # to insert a pause in the number.
Press 0 to confirm. A blinking cursor is displayed on the second
line on the display.
Enter a name for the contact (see Keypad characters, p. 9 ).
Press 0 to confirm.
Select ALARM ON or ALARM OFF. Press 0 to confirm.
IMPORTANT!
Select ALARM ON if the contact should be stored as an "alarm
contact". See Alarm function, p.13.
7.
If ALARM ON is selected, AL.POS? is displayed. Select the
required location (1-30) by pressing v/V. Press 0 to confirm.
Note!
AL.POS? sets the dialling order of an alarm call.
8.
9.
SAVED is displayed and then NAME REC. You can now record a
name to be read aloud with the entry.
To record, press and hold 0 until a tone is heard, say the name,
then release the key (or else the unit stops after 4 seconds).
Speak clearly and about 15–20 cm from the phone.
If you select ALARM OFF, press 0, SAVED is displayed and
then NAME REC.
Repeat steps 2–9 to store another contact, or press and hold
to exit.
Note!
Selecting location (AL.POS?) is very important because this determines
the chronological order of the phone numbers that will be dialled in
case of emergency. Location 1 will be dialled first, then 2, then 3 etc.
If you choose to overwrite a location, the previously stored number will
be set to one location “after” the location you just set.
Editing contacts
1.
2.
3.
Press b.
Use v/V to select desired contact.
Press and hold W for two seconds. A blinking cursor is displayed
in the first digit of the selected number.
10
English
4.
5.
6.
7.
8.
9.
Use v/V to move the cursor and
to erase if needed. Use
# to insert a pause in the number.
Press 0 to confirm. A blinking cursor is displayed in the first
letter of the name.
Use v/V to move the cursor and
to erase if needed.
Enter a name for the contact (see Keypad characters, p. 9 ).
Press 0 to confirm.
See Storing contacts, p. 9 on how to complete the contact.
Note!
Editing a contact will delete the current name recording.
Deleting from the phonebook
1.
2.
Press b.
Use v/V to select desired contact.
• To delete single contacts, press
. DELETE ? is displayed.
Press and hold
for two seconds. Contact is deleted and
next contact in the phonebook is shown.
• To delete all contacts in the phonebook, press and hold
until DEL ALL? is displayed. Press and hold
for
2 seconds.
Speed dial
The phone has 7 speed dialling keys (A – G) that can be used for
numbers that are dialled frequently.
Storing speed dial numbers
1.
2.
3.
Enter a phone number (up to 22 digits) using the keypad.
Press and hold one of the speed dialling keys A – G until
SAVED is displayed.
Repeat steps 1–2 for the remaining speed dialling keys.
Deleting speed dial numbers
Speed dial numbers can not be deleted, they can only be replaced
by storing a new number.
11
English
Caller ID and call log
Caller ID allows you to see who is calling before you answer and to
see who has called in your absence. If the number is stored in the
phonebook, the name is also shown.
Note!
The Caller ID function must be subscribed. Please contact your network
operator for more information.
The call log will store the last 15 incoming and 15 outgoing calls.
On the display, incoming (answered and unanswered) calls are
indicated with
and outgoing calls with . Received calls are stored
chronologically. When the memory is full, the oldest number will be
deleted automatically as each new call is logged. The number and
time of each call is displayed. For calls older than 24 hours, the date
of the call is displayed instead of the time.
If the Call indicator function N CALL LED = ON, a red blinking light
indicates that an unanswered call has been received since the call
log was last checked.
Messages
Apart from phone numbers, the display can show:
NO NUMBER
PRIVATE
T
No information received, e.g. an international call.
The call comes from a withheld number or a PBX.
New (missed call) number received.
Message indication (sent from your network
operator)*.
*Message indication can be deleted manually by pressing down
for a few seconds in standby mode.
Deleting numbers from the call log
1.
2.
3.
4.
Press
.
Use v/V to select desired number.
To delete single contacts, press
. DELETE ? is displayed.
Press
for two seconds.
To delete all contacts in the phonebook, press and hold
until DEL ALL? is displayed.
12
English
5.
Press
until (two seconds) EMPTY is displayed.
Note!
This deletes the Caller ID memory, not the Phonebook memory.
Transferring numbers to the phonebook
1.
2.
3.
4.
5.
6.
7.
8.
9.
Press
.
Use v/V to select desired number.
Press and hold W for two seconds. A blinking cursor is displayed
in the first digit of the selected number.
Use v/V to move the cursor and
to erase if needed. Use
# to insert a pause in the number.
Press 0 to confirm. A blinking cursor is displayed in the first
letter of the name.
Use v/V to move the cursor and
to erase if needed.
Enter a name for the number to be stored (see Keypad characters,
p. 9 ).
Press 0 to confirm.
See Storing contacts, p. 9 on how to complete the contact.
Alarm function
The alarm function allows you to get immediate help from the contacts
stored as "alarm contacts" in the phonebook.
IMPORTANT!
At least one alarm contact (ALARM ON) must be stored in the
phonebook.
Always let your recipients know that you added them to your list
of "alarm contacts" and that they may be contacted in case of an
emergency.
An alarm call is only possible with the phone powered by the mains or
by the backup batteries.
13
English
Alarm message
(AL.MESSAGE)
A pre-recorded message “This is an emergency call, to accept this
call, press zero.” This message will be played unless you decide to
record your own message.
The alarm message should include your name, address, and how to
activate the speakerphone.
Example of an alarm message:
"This is an emergency call from John Smith on 10, Long Street,
Middleton. I require immediate assistance. Press zero key to connect
this call." See AL.MESSAGE, p. 4 how to record your own message.
Activate the alarm
1.
2.
3.
4.
When the alarm key on the cordless pendant (or the alarm key
on the phone) is pressed for more than one second, the key
on the phone blinks continuously. The phone beeps loudly for 15
seconds. During this time you can stop the procedure by pressing
any of the alarm keys for more than three seconds.
Otherwise the alarm sequence will start:
The phone dials the first alarm number. Each alarm contact will
be called in succession, and the recipient will hear your recorded
alarm message. The most important number should have the
first alarm position (AL.POS?).
If the called party answers and accepts the call within 60 seconds
by pressing 0 (zero), the call is connected (in handsfree mode),
and the alarm sequence stops.
If the call is not answered and accepted within 60 seconds, the
next number is dialled.
The phone is kept in handsfree mode, unless the user presses the
handsfree key or the cordless alarm key. The alarm sequence
stops only when all the alarm numbers have been dialled.
14
English
IMPORTANT!
•
•
•
•
The only way to stop the alarm sequence is if the called party
accepts the call within 60 seconds by pressing 0 (zero), or
when all the alarm numbers have been dialled.
The receiver of the alarm call, the alarm contact, can disconnect
the call immediately by pressing 1 2 after having accepted
the call with 0.
Automatic calls to police, fire brigade etc. are not normally
allowed. Therefore, you should not program these numbers as
alarm contacts. Some private security companies can accept
automatic calls from their clients. Always contact the security
company before programming in its number.
Check regularly that the alarm call function is properly set up
and functional.
Others
Troubleshooting
Check that the telephone cord is undamaged and properly plugged in. Disconnect
any additional equipment, extension cords and other phones. If the problem is
resolved, the fault is with some other equipment.
Test the equipment on a known working line (e.g. at a neighbour’s house). If the
equipment works there the fault is probably with your telephone line. Please inform
your network operator.
Care and Maintenance
CAUTION
Only use batteries, mains adapter and accessories that have been
approved for use with this particular model. Connecting other
accessories may be dangerous and may invalidate the phone's type
approval and guarantee. The mains adapter is the disconnect device
between the product and mains power. The mains socket outlet must
be close to the equipment and easily accessible.
Your unit is a technically advanced product and should be treated with the greatest
care. Negligence may void the warranty.
•
Protect the unit from moisture. Rain/snowfall, moisture and all types of
liquid can contain substances that corrode the electronic circuits. If the unit
15
English
•
•
•
•
•
•
gets wet, you should remove the battery and allow the unit to dry completely
before you replace it.
Do not use or keep the unit in dusty, dirty environments. The unit’s moving
parts and electronic components can be damaged.
Do not keep the unit in warm places. High temperatures can reduce the lifespan
for electronic equipment, damage batteries and distort or melt certain plastics.
Do not keep the unit in cold places. When the unit warms up to normal
temperature, condensation can form on the inside which can damage the
electronic circuits.
Do not try to open the unit in any other way than that which is indicated here.
Do not drop the unit. Do not knock or shake it either. If it is treated roughly the
circuits and precision mechanics can be broken.
Do not use strong chemicals to clean the unit.
The advice above applies to the unit, battery and other accessories. If the unit is
not working as it should, please contact the place of purchase for service. Don’t
forget the receipt or a copy of the invoice.
Warranty
This product is guaranteed for a period of 12 months from the date of purchase. In
the unlikely event of a fault occurring during this period, please contact the place of
purchase. Proof of purchase is required for any service or support needed during the
guarantee period.
This guarantee will not apply to a fault caused by an accident or a similar incident
or damage, liquid ingress, negligence, abnormal usage, non-maintenance or any
other circumstances on the user’s part. Furthermore, this guarantee will not apply to
any fault caused by a thunderstorm or any other voltage fluctuations. As a matter of
precaution, we recommend disconnecting the charger during a thunderstorm.
Batteries are consumables and are not included in any guarantee.
Specifications
Size:
220 mm x 200 mm x 85 mm
Weight:
950 g (including batteries)
Batteries:
4 x 1.5 V (AA, LR6) Alkaline batteries (telephone)
1 x 12 V (A23, LR23) Alkaline (cordless remote)
Declaration of Conformity
Doro hereby declares that Doro Secure 350 conforms to the essential requirements
and other relevant regulations contained in the Directives 1999/5/EC (R&TTE)
and 2002/95/EC (RoHS). A copy of the Declaration of Conformity is available at
www.doro.com/dofc
16
LAST PAGE
English
Version 1.1
© 2012 Doro AB. All rights reserved.
www.doro.com
REV 4516 — STR 2011-07-14