Download Digitus DA-50301 equipment cleansing kit
Transcript
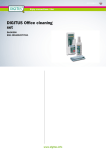
 DIGITUS |
UNIVERSAL OFFICE
CLEANING SET
User Guide
DA-50301
1. STFT/LCD screen
Before application, please refer to the manufacturer's cleaning instructions.
Application: Before cleaning switch the LCD off and wait for it to cool.
* Spray the cleaning solution onto the blue side of the sponge.
* Clean the screen with the moistened sponge.
* Turn the sponge over, and with the leather side,
wipe the scanner glass dry.
2. Scanners, Photocopiers and OHPs
Spray the cleaning solution onto the blue side of the sponge.
Clean the scanner glass with the moistened sponge.
Turn the sponge over and dry the glass with the leather side.
Spray the blue side of the sponge again.
Clean the plastic surface with the moist sponge.
Finally, with the dry cloth, wipe the unit.
3. Mouse units, Faxes and Photo copiers
* Spray some of the cleaning solution onto the blue side of the sponge.
* Clean the surface with the moistened sponge.
* Wipe the unit with the dry cloth.
4. Keyboards
* Spray some of the cleaning solution onto the ‘key cleaning bud’.
* Clean between the keys with the moistened bud from left to right
(or visa-versa).
* Dry the keyboard with the dry cloth.
Stubborn Stains:
* Spray some of the cleaning solution onto the ribbed keyboard sponge.
+ Wipe away the stubborn stains on the keys, between the keys
and on the rest of the keyboard, with the ribbed sponge.
* Wipe the unit with the dry cloth.
« Clean the ribbed keyboard sponge with water
(this sponge can be re-used!).
5. Printers
* Spray some of the cleaning solution onto the blue side of the sponge.
* Clean the surface with the moistened sponge.
* Wipe over the surface with the dry cloth.
Interior Cleaning:
* Spray some of the cleaning solution onto the special ribbed
keyboard sponge.
* Clean the inside surfaces with the ribbed sponge.
* Wipe the surfaces with the dry cloth.
* Clean the sponge with water (the sponge can be re used!).
6. Telephones
Housing:
* Spray some of the cleaning solution onto the dry cloth.
* Clean the plastic surface with the moistened cloth.
Telephone Keys:
* Spray some of the cleaning solution onto the ‘key cleaning bud’.
* Clean between the keys with the bud.
* Wipe over the keys with the dry cloth.
Stubborn Stains:
* Spray some of the cleaning solution onto the ribbed sponge.
* Clean the phone keys, between the keys and the rest of
the key pad with the ribbed sponge.
+ Wipe over the key pad with the dry cloth.
* Clean the ribbed sponge (the sponge can be re used!).
1. TFT/LCD-Bildschirme:
Vor Gebrauch unbedingt die Reinigungshinweise
des Geráteherstellers beachten.
Anwendungshinweis: Bei der Reinigung muss ihr
LCD ausgeschaltet (Netzstecker ziehen) und abgekühlt sein.
° Reiniger aus der Pumpsprayflasche auf die blaue Seite
des Schwamms sprühen.
* Bildschirm mit Schwamm feucht reinigen.
* Schwamm umdrehen und mit der Leder-Rückseite
Bildschirm trocken wischen.
2. Scanner/Fotokopierer/OHP-Projektoren:
Reiniger aus der Pumpsprayflasche auf blaue Seite
des Schwamms sprühen.
Scannerglas mit Schwamm feucht reinigen.
Schwamm umdrehen und mit der Leder-Rückseite
Scannerglas trocken wischen.
Nochmals Reiniger aus der Pumpsprayflasche auf blaue Seite
des Schwamms sprühen.
Kunststoff/Gehäuseteile mit Schwamm feucht reinigen.
Mit Trockentuch trocken wischen.
3. Gehäuse und andere Kunststoffteile
(z.B. Gehäuse von Mouse, Fax, Aktenvernichter, Kopierer u. a.):
* Reiniger aus der Pumpsprayflasche auf blaue Seite des Schwamms sprúhen.
* Kunststoffteile mit Schwamm feucht reinigen.
« Mit Trockentuch trocken wischen.
4. Tastatur:
* Reiniger aus der Pumpsprayflasche auf den Tastatur-Keil spriihen.
* Die Zwischenráume der Tastatur mit dem Keil von links nach rechts
(oder umgekehrt) reinigen.
* Mit Trockentuch nachwischen.
Hartnáckige Verschmutzungen:
Reiniger aus der Pumpsprayflasche auf den Schaum
des Tastaturtupfers spriihen.
Hartnäckige Verschmutzungen auf Tasten, Zwischenräumen und
auf der restlichen Tastatur mit Tastaturtupfer reinigen.
Mit Trockentuch nachwischen.
Tastaturtupfer unter Wasser reinigen (ist mehrfach verwendbar!)
5. Drucker:
* Reiniger aus der Pumpsprayflasche auf die blaue Seite
des Schwamms sprühen.
* Kunststoffteile mit Schwamm feucht reinigen.
* Mit Trockentuch nachwischen.
Innenreinigung:
* Reiniger aus der Pumpsprayflasche auf den Schaum
des Tastaturtupfers sprihen.
* Innenflachen mit Tastaturtupfer reinigen.
* Mit Trockentuch nachwischen.
* Tastaturtupfer unter Wasser reinigen (ist mehrfach verwendbar!).
6. Telefon:
Geháuse:
* Reiniger aus der Pumpsprayflasche auf Trockentuch spriihen.
* Kunststoffteile mit feuchtem Tuch reinigen.
Tasten:
* Reiniger aus der Pumpsprayflasche auf den Tastatur-Keil sprühen.
* Die Zwischenräume der Tastatur mit dem Schaum reinigen.
* Mit Trockentuch nachwischen.
Hartnäckige Verschmutzungen:
Reiniger aus der Pumpsprayflasche auf den Schaum
des Tastaturtupfers sprühen.
Tastatur, Zwischenräume und restliche Tastatur mit
Tastaturtupfer reinigen.
Mit Trockentuch nachwischen.
Tastaturtupfer unter Wasser reinigen (ist mehrfach verwendbar!).
1. TFT/LCD ecrans
Merci de consulter les conseils d'entretien du fabricant
de l'appareil avant toute utilisation.
Conseils d'utilisation: L'écran doit étre mis hors tension puis
attendre son refroidissement.
* Vaporisez le produit nettoyant, la pompe sur la face bleue de l'éponge.
* Nettoyez I'écran avec I'éponge humectée.
* Retournez I'éponge et sécher l’écran avec la face en cuir.
2. Scanners/ photocopieuses/ rétroprojecteurs
Vaporisez le produit sur la face bleue de l'éponge.
Nettoyez le verre du scanner avec l'éponge humectée.
Retournez l'éponge et séchez le verre avec la face en cuir.
Vaporisez de nouveau le produit nettoyant sur la face bleue de l’éponge.
Nettoyez les parties en plastique avec l'éponge.
Séchez avec un des chiffons.
3. Boîtiers/unités centrales et autres parties en plastique
(par exemple: boîtier de souris, fax, destructeurs d'archives,
photocopieuses, etc.):
« Vaporisez le produit sur la face bleue de l’éponge.
« Nettoyez le plastique avec l'éponge humectée.
* Séchez avec un des chiffons.
4. Claviers
* Vaporisez le produit, la pompe sur le coin.
* Nettoyez les interstices entre les touches avec un mouvement
de gauche à droite ou de droite à gauche.
« Séchez avec un des chiffons.
Salissures tenaces:
Vaporisez le produit sur la mousse du tampon pour clavier.
« Nettoyez les salissures tenaces sur les touches,
entre les interstices et sur le clavier
avec le tampon.
Essuyez avec le chiffon.
Lavez le tampon à l’eau, il est réutilisable.
5. Imprimantes
* Vaporisez le produit sur la face bleue de l’éponge.
* Nettoyez les parties en plastique avec l’éponge.
» Essuyez avec un chiffon.
Nettoyage de l’intérieur:
- Vaporisez le produit nettoyant sur la mousse du tampon pour clavier.
e Nettoyez l’intérieur avec le tampon.
* Essuyez avec un chiffon.
« Lavez le tampon sous l’eau, il est réutilisable plusieurs fois.
6. Téléphone
Boîtier:
- Vaporisez le produit nettoyant sur le chiffon.
e Nettoyez les parties en plastique avec le chiffon humecté.
Touches:
* Vaporisez le produit sur le coin de nettoyage du clavier.
* Nettoyez les interstices du clavier avec la mousse.
Essuyez avec un chiffon.
Salissures tenaces:
« Vaporisez la mousse du tampon avec le produit nettoyant.
* Nettoyez les touches, les interstices et le reste du clavier avec le tampon.
» Essuyez avec un chiffon.
o
1. STFT/LCD scherm
Lees a.u.b. de reiniginginstructies van de fabrikant voordat u begint.
Toepassing: Schakel de LCD uit en laat het afkoelen voordat u
begint met schoonmaken.
« Spuit wat schoonmaakmiddel op de blauwe zijde van het sponsje.
* Reinig het scherm met het vochtige sponsje.
« Draai het sponsje om en veeg het scannerglas droog met de lederen zijde.
2. Scanners, Kopieerapparaten en OHP's
Spuit wat schoonmaakmiddel op de blauwe zijde van het sponsje.
Reinig het scherm met het vochtige sponsje.
Draai het sponsje om en veeg het glas droog met de lederen zijde.
Spuit nog wat schoonmaakmiddel op de blauwe zijde van het sponsjie.
Reinig het kunststof opperviak met het vochtige sponsje.
Veeg het apparaat uiteindelijk af met het droogdoekje.
3. Muiseenheden, Faxmachines en Kopieerapparaten
* Spuit wat schoonmaakmiddel op de blauwe zijde van het sponsje.
* Reinig het scherm met het vochtige sponsje.
* Veeg het apparaat af met het droogdoekje.
4. Toetsenborden
* Spuit wat schoonmaakmiddel op het ‘toetskwastje’.
* Gebruik het vochtige kwastje om tussen de toetsen van links naar rechts
(of vice-versa) schoon te maken.
* Droog het toetsenbord met het droogdoekije.
Hardnekkige Viekken:
Spuit wat schoonmaakmiddel op het geribbelde toetsenbordsponsje.
Veeg de hardnekkige vlekken van de toetsen af met het geribbelde
sponsje, tussen de toetsen en op de rest van het toetsenbord.
Veeg het apparaat af met het droogdoekje.
Reinig het geribbelde toetsenbordsponsje met water
(dit sponsje is herbruikbaar!).
5. Printers
* Spuit wat schoonmaakmiddel op de blauwe zijde van het sponsje.
* Reinig het oppervlak met het vochtige sponsije.
* Veeg over het oppervlak met het droogdoekje.
Interieur Reinigen:
» Spuit wat schoonmaakmiddel op het speciale,
geribbelde toetsenbordsponsje.
* Reinig het binnenoppervlak met het geribbelde sponsije.
* Veeg de opperviaktes af met het droogd oekje.
* Reinig het sponsje met water (het sponsje is herbruikbaar!).
6. Telefoons
Behuizing:
* Spuit wat schoonmaakmiddel op het droogdoekje.
* Reinig het kunststof oppervlak met het vochtige doekje.
Telefoontoetsen:
+ Spuit wat schoonmaakmiddel op het “toetskwastje”.
* Veeg tussen de toetsen met het kwastje.
* Veeg over de toetsen met het droogdoekje.
Hardnekkige Vlekken:
Spuit wat schoonmaakmiddel op het geribbelde sponsje.
Veeg de hardnekkige vlekken van de toetsen af met het geribbelde
sponsje, tussen de toetsen en de rest van het toetsenpaneel.
Veeg over het toetsenpaneel met het droogdoekje.
Reinig het geribbelde sponsje (het sponsje is herbruikbaar!).
aD
1. Schermo STFT/LCD
Prima dell‘applicazione, fate riferimento alle istruzioni di
pulizia del produttore.
Applicazione: Prima di pulirlo, spegnete lo schermo e
attendete che si raffreddi.
* Spruzzate la soluzione pulente sul lato blu della spugna.
* Pulite lo schermo con la spugna umida.
* Girate la spugna e con il lato in pelle, asciugate il vetro dello scanner.
2. Scanner, fotocopiatrici e OHP
Spruzzate la soluzione pulente sul lato blu della spugna.
Pulite lo schermo dello scanner con la spugna umida.
Girate la spugna e con il lato in pelle, asciugate il vetro.
Spruzzate di nuovo il lato blu della spugna.
Pulite la superficie di plastica con la spugna umida.
Infine, col panno asciutto, asciugate l‘unità.
3. Mouse, fax e fotocopiatrici
* Spruzzate la soluzione pulente sul lato blu della spugna.
« Pulite la superficie con la spugna umida.
+ Asciugate l‘'unita con il panno asciutto.
4. Tastiere
* Spruzzate la soluzione pulente sullo scovolino per i tasti.
e Pulite tra i tasti con lo scovolino umido da sinistra a destra (o viceversa).
* Asciugate la tastiera con il panno asciutto.
Macchie resistenti:
* Spruzzate la soluzione pulente sulla spugna da tastiere con gli angoli.
* Pulite via le macchie insistenti sui tasti, tra i tasti e sul resto della
tastiera con la spugna con gli angoli.
* Asciugate l‘unità con il panno asciutto.
* Pulite la spugna con gli angoli con l‘acqua
(questa spugna puó essere riutilizzata!).
5. Stampanti
* Spruzzate la soluzione pulente sul lato blu della spugna.
* Pulite la superficie con la spugna umida.
* Passate il panno asciutto sulla superficie.
Pulizia interna:
* Spruzzate la soluzione pulente sulla spugna speciale con
angoli per tastiere.
* Pulite le superfici interne con la spugna.
* Passate il panno asciutto sulla superficie.
+ Pulite la spugna con l'acqua (la spugna puó essere riutilizzata!).
6. Telefoni
Esterno:
* Spruzzate la soluzione pulente sul panno asciutto.
* Pulite la superficie di plastica con il panno umido.
Tasti del telefono:
* Spruzzate la soluzione pulente sullo scovolino per i tasti.
* Pulite tra i tasti con lo scovolino.
» Asciugate sopra i tasti con il panno asciutto.
Macchie resistenti:
* Spruzzate la soluzione pulente sulla spugna con gli angoli.
* Pulite i tasti del telefono, tra i tasti e il resto del tastierino
con la spugna con gli angoli.
» Asciugate sopra il tastierino con il panno asciutto.
* Pulite la spugna con gli angoli (la spugna puó essere riutilizzata!).
1. Pantalla STFT/LCD
Antes de la aplicacién, por favor, consulte las instrucciones de
limpieza del fabricante.
Aplicación: Antes de limpiar la pantalla LCD, apáguela y espere a que se enfríe.
* Pulverice la solución de limpieza sobre la cara azul de la esponja.
* Limpie la pantalla con la esponja humedecida.
* Dé la vuelta a la esponja, y con el lado de piel, seque el cristal.
2. Escáneres, Fotocopiadoras y Proyectores OHP
Pulverice la solución de limpieza sobre la cara azul de la esponja.
Limpie el cristal del escáner con la esponja humedecida.
Dé la vuelta a la esponja, y con el lado de piel, seque el cristal.
Pulverice otra vez la cara azul de la esponja.
Limpie la superficie de plástico con la esponja húmeda.
Por último, con el paño seco, limpie la unidad.
3. Ratones, Faxes y Fotocopiadoras
* Pulverice la solución de limpieza sobre la cara azul de la esponja.
* Limpie la superficie con la esponja humedecida.
* Limpie la unidad con el paño seco.
4. Teclados
* Pulverice un poco de la solución de limpieza sobre
el bastoncillo de limpieza de teclas
* Limpie entre las teclas con el bastoncillo humedecido,
de izquierda a derecha (o visa-versa).
* Seque el teclado con el paño seco.
Manchas Persistentes:
Pulverice un poco de la solución de limpieza sobre
la esponja rugosa para teclados.
Limpie las manchas persistentes de las teclas, de entre las teclas,
y del resto del teclado, con la esponja rugosa.
Limpie la unidad con el paño seco.
Limpie la esponja rugosa para teclados con agua
(¡esta esponja puede volver a utilizarse!).
5. Impresoras
* Pulverice un poco de la solución de limpieza sobre
la cara azul de la esponja.
* Limpie la superficie con la esponja humedecida.
* Limpie la superficie con un paño seco.
Limpieza del Interior:
* Pulverice un poco de la solución de limpieza sobre
la esponja rugosa especial para teclados.
* Limpie las superficies interiores con la esponja rugosa.
* Limpie las superficies con el paño seco.
* Limpie la esponja con agua (¡la esponja puede volver a utilizarse!).
6. Teléfonos
Carcasa:
* Pulverice un poco de la solución de limpieza sobre el paño seco.
* Limpie la superficie de plástico con el paño humedecido.
Teclas del Teléfono:
* Pulverice un poco de la solución de limpieza sobre
el bastoncillo de limpieza de teclas'
* Limpie entre las teclas con el bastoncillo.
* Limpie las teclas con un paño seco.
Manchas Persistentes:
* Pulverice un poco de la solución de limpieza sobre la esponja rugosa.
* Limpie las manchas las teclas del teléfono, de entre las teclas,
y del resto del teclado, con la esponja rugosa.
* Limpie la unidad con el paño seco.
* Limpie la esponja rugosa (¡esta esponja puede volver a utilizarse!).
1.3kpax STFT/LCD
Перед применением обратитесь к инструкции очистки изготовителя.
Применение: перед очисткой выключите ССО и обождите до его
остывания.
® Сбрызните чистящим раствором на синюю поверхность губки.
® Очистите экран увлажненной губкой.
* Переверните губку и жесткой стороной осушите стекло.
2. Сканеры, фотокоперы и проекторы
Сбрызните чистящим раствором на синюю поверхность губки.
Очистите экран увлажненной губкой.
Переверните губку и жесткой стороной осушите стекло.
Еще раз спрысните синюю часть губки.
Очистите пластиковую поверхность увлажненной губкой.
Сухой тряпочкой осушите предмет.
3. Мышки, факсы и фотокоперы
* Сбрызните на синюю поверхность губки.
» Очистите поверхность увлажненной губкой.
* Сухой тряпочкой осушите предмет.
4. Клавиатуры
® Сбрызните очистителем на «щеточку очистителя».
* Очистите между клавишами увлажненной щеточкой
слева-направо (либо справа-налево).
* Сухой тряпочкой осушите предмет.
Остановочные знаки:
Сбрызните очистителем на оребренную губку.
Удалите трудноудаляемые пятна с клавиш, между ними и
на окружности клавиатуры оребренной губкой.
Сухой тряпочкой осушите предмет.
Очистите оребренную губку водой
(эта губка может быть использована еще не раз!).
5. Принтеры
* | Сбрызните на синюю поверхность губки.
* Очистите поверхность увлажненной губкой.
® Сухой тряпочкой осушите предмет.
Внутренняя чистка:
» Сбрызните очистителем на специально оребренную
клавиатурную губку.
Очистите внутреннюю поверхность оребренной губкой.
Сухой тряпочкой осушите предмет.
Очистите оребренную губку водой
(эта губка может быть использована еще не раз!).
6. Телефоны
Корпус:
® Сбрызните очистителем на сухую тряпочку.
* Очистите пластиковую поверхность увлажненной тряпочкой.
Клавиши телефона:
* Сбрызните очистителем на «щеточку очистителя».
* Очистите между клавишами увлажненной щеточкой.
* Очистите клавиши сухой тряпочкой.
Несмываемые пятна:
Сбрызните очистителем на оребренную губку.
Очистить кнопки, между ними, и всю клавиатуру оребренной губкой.
Сухой тряпочкой осушите клавиатуру.
Очистите оребренную губку водой
(эта губка может быть использована еще не раз!).
1. Ekran STFT/LCD
Przed natozeniem, prosze zapoznaé sie z instrukcjami
czyszczenia producenta.
Zastosowania: Przed czyszczeniem wytgczyé
zasilanie LCD ¡ odczekaé na ostygniecie.
* Natrysnaé roztwór czyszczacy na niebieska strone gabki.
* Oczyscié ekran zwilzona gabka.
* Obróció gabke, ¡ skórzana strona, wytrzeé szkto skanera do sucha.
2. Skanery, fotokopiarki i projektory OHP
Natrysnaé roztwór czyszczacy na niebieska strone gabki.
Oczyscié szybe skanera zwilzona gabka.
Obroci¢ gabke, i skorzang strong, wytrze¢ szkto skanera do sucha.
Natrysnaé ponownie roztwór czyszczacy na niebieska strone gabki.
Oczyscié plastikowa powierzchnie zwilzona gabka.
Ostatecznie, wytrzeé urzadzenie sucha éciereczka.
3. Myszy, faksy i fotokopiarki
« Natrysnaé nieco roztworu czyszczacego na niebieska strone gabki.
* Oczysció powierzchnie zwilzona gabka.
* Wytrzeé urzadzenie sucha sciereczka.
> — — — — — — — — — — — — — — — — —
4. Klawiatury
* Natrysnaé nieco roztworu czyszczacego na
,cZubek czyszczenia klawiatury”.
+ Czyscié pomiedzy klawiszami zwilzonym czubkiem od
lewej do prawej (lub odwrotnie).
* Wytrzeé klawiature sucha sciereczka.
Uporczywe plamy:
» Natrysnaé nieco roztworu czyszczacego na ozebrowana gabke klawiatury.
< Scieraé uporczywe plamy na klawiaturach, pomiedzy klawiszami i
reszte klawiatury ozebrowana gabka.
* Wytrzec urzadzenie sucha sciereczka.
* Oczyscié ozebrowana gabke klawiatury woda
(to jest gabka wielokrotnego uzytku!).
5. Drukarki
« Natrysnaé nieco roztworu czyszczacego na niebieska strone gabki.
* Oczyscié powierzchnie zwilzona gabka.
* Wytrzeé powierzchnie sucha sciereczka.
Czyszczenie wnetrza:
* Natrysnaé nieco roztworu czyszczacego na specjalnie ozebrowana
gabke klawiatury.
* Oczyscié powierzchnie wewnetrzne gabka ozZebrowana.
* Wytrzeé powierzchnie sucha sciereczka.
* Oczyscié gabke klawiatury woda (to jest gabka wielokrotnego uzytku!).
6. Telefony
Obudowa:
* Natrysnaé nieco roztworu czyszczacego na sucha sciereczke.
* Oczyscié plastikowa powierzchnie zwilZona éciereczka.
Klawisze telefonu:
* Natrysnaé nieco roztworu czyszczacego na
,cZubek czyszczenia klawiatury”.
. Czyécié pomiedzy klawiszami czubkiem.
Wytrzeé klawisze sucha éciereczka.
Uporczywe plamy:
* Natrysnaé nieco roztworu czyszczacego na ozebrowana gabke klawiatury.
* Czysció klawisze telefonu, pomiedzy klawiszami i
reszte klawiatury ozebrowana, gabka.
* Wytrzec klawisze sucha sciereczka.
* Oczyscié gabke ozebrowana (to jest gabka wielokrotnego uzytku!).
1. Ecrá LCD/STFT
Antes da aplicacáo, consultar as instrucóes de limpeza do fabricante.
Aplicagáo: Antes de limpar desligar o LCD e esperar que arrefega.
* Pulverizar a solugáo de limpeza no lado azul da esponja.
* Limpar o ecrá com a esponja humedecida.
* Voltar a esponja ao contrário, e com o lado em pele, secar o digitalizador.
2. Digitalizadores, Fotocopiadoras e OHPs
Pulverizar a solugáo de limpeza no lado azul da esponja.
Limpar o vidro do digitalizador com a esponja humedecida.
Voltar a esponja ao contrário, e secar o vidro com o lado em pele.
Pulverizar de novo o lado azul da esponja.
Limpar a superfície de plástico com a esponja humedecida.
Finalmente, limpar o aparelho com um pano seco.
3. Equipamentos de rato, Faxes e Fotocopiadoras
* Pulverizar alguma da soluçäo de limpeza no lado azul da esponja.
* Limpar a superfície com a esponja humedecida.
* Secar o aparelho com um pano seco.
4. Teclados
* Pulverizar alguma da soluçäo de limpeza no
,cotonete de limpeza das teclas"
* Limpar entre as teclas com o cotonete humedecido da esquerda
para a direita (ou vice-versa)
* Secar o teclado com um pano seco.
Manchas Dificeis:
Pulverizar alguma da solugáo de limpeza na esponja estriada
para teclado.
Esfregar as manchas difíceis nas teclas, entre as teclas e o
resto do teclado com a esponja estriada.
Secar o aparelho com um pano seco.
Limpar a esponja estriada para teclado com água
(esta esponja pode ser reutilizada).
5. Impressoras
* Pulverizar alguma da solugáo de limpeza no lado azul da esponja.
* Limpar a superfície com a esponja humedecida.
* Secar a superfície com um pano seco.
Limpeza interior:
Pulverizar alguma da solugáo de limpeza na esponja estriada especial
para teclado.
Limpar as superfícies interiores com a esponja estriada.
Secar as superfícies com um pano seco.
Limpar a esponja com água (a esponja pode ser reutilizada!)
6. Telefones
Caixa de protecgáo exterior:
* Pulverizar alguma da solugáo de limpeza num pano seco.
* Limpar a superfície de plástico com o pano humedecido.
Teclas do Telefone:
e Pulverizar alguma da solugáo de limpeza no
,cotonete de limpeza das teclas"
* Limpar entre as teclas com o cotonete.
* Secar as teclas com um pano seco.
Manchas Difíceis:
Pulverizar alguma da solugáo de limpeza na esponja estriada.
Esfregar as teclas do telefone, entre as teclas e o
resto do teclado com a esponja estriada.
Secar o teclado com um pano seco.
Limpar a esponja estriada (a esponja pode ser reutilizada!
1. STFT/LCD ekran
Uygulamaya baslamadan ônce lütfen üreticinin temizleme talimatini okuyun.
Uygulama: Temizlemeden ônce cihazi kapatin ve soÿumasini bekleyin.
* Temizleme sivisini súngerin mavi tarafina sikin.
* Ekrani nemii súngerle temizleyin.
e Süngeri ters çevirin ve deri kapli tarafla ekrani silerek kurulayin.
2. Tarayicilar, Fotokopi ve Tepegoz Projeksiyon Makineleri
Temizleme sivisini sûngerin mavi tarafina sikin.
Tarayici camini nemli sûngerle temizleyin.
Sungeri ters cevirin ve deri kapli tarafla cami kurulayin.
Siingerin mavi tarafina tekrar temizleme sivisi sikin.
Plastik ylizeyi nemli siingerle temizleyin.
Son olarak cihazi kuru bir bezle silin.
3. Fareler, Faks ve Fotokopi Makineleri
* Bir miktar temizleme sivisini siingerin mavi tarafina sikin.
* Yúzeyi nemii súngerle temizleyin.
+ Cihazi kuru bir bezle silin.
4. Klavyeler
Bir miktar temizleme sivisini tus temizleme сибибипа sikin.
* Tuslarin arasini nemli cubukla soldan saga (veya sagdan sola)
dogru temizleyin.
* Klavyeyi kuru bir bezle kurulayin.
Inatçi Lekeler:
Bir miktar temizleme sivisini oluklu klavye siingerine sikin.
Oluklu siingerle tuslarin tizerindeki ve aralarindaki ve
klavyenin diger taraflarindaki inatgi lekeleri silerek temizleyin.
Klavyeyi kuru bir bezle silerek kurulayin.
Oluklu klavye súngerini suyla temizleyin (bu súnger yeniden kullanilabilir!).
| 5. Yazicilar
* Bir miktar temizleme sivisini sûngerin mavi tarafina sikin.
* Yúzeyi nemli súngerle temizleyin.
| * Yúzeyi kuru bir bezle silerek kurulayin.
Ie Kisim Temizligi:
* Bir miktar temizleme sivisini ôzel oluklu Каууе süngerine sikin.
lc yüzeyleri nemli klavye siingeriyle temizleyin.
* Yuzeyleri kuru bir bezle silerek kurulayin.
| + Oluklu siingeri suyla temizleyin (stinger yeniden kullanilabilir!).
6. Telefonlar
Govde:
* Bir miktar temizleme sivisini kuru bir bez úzerine sikin.
| * Plastik yüzeyi nemli bezle temizleyin.
Telefon Tusları:
* Bir miktar temizleme sivisini tug temizleme ¢ubugduna sikin.
* Tuslarin arasini cubukla temizleyin.
* Tuslarin úzerini kuru bir bezle silerek kurulayin.
| Inatçi Lekeler:
* Bir miktar temizleme sivisini oluklu súngere sikin.
* Oluklu siingerle telefon tuglarini, tuslarin arasini ve
tus takiminin geri kalan kisimlarini temizleyin.
* Tus takimint kuru bir bezle silerek kurulayin.
* Oluklu súngeri temizleyin (súnger yeniden kullanilabilir!).


