1
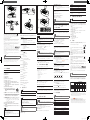
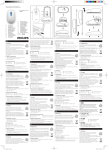
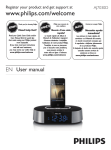
Register your product and get support at AJ7030D A C a b Snooze alarm E When alarm sounds, press SNOOZE. »» The alarm snoozes and repeats ringing five minutes later. To adjust alarm interval (in minutes), press SNOOZE repeatedly. f c d e g h i Set sleep timer j This clock radio can switch to standby mode automatically after a preset period. Press SLEEP repeatedly to select the sleep timer period (in minutes). »» When the sleep timer is activated, appears. To deactivate the sleep timer, press SLEEP repeatedly until [OFF] (off) appears. m k l EN User manual ZH-CN 用户手册 n 15 B D 30 F 60 90 120 off Play audio from an external device You can listen to audio from an external device through this clock radio. 1 G 2 3 Warning •• Never remove the casing of this apparatus. •• Never lubricate any part of this apparatus. •• Never place this apparatus on other electrical equipment. •• Keep this apparatus away from direct sunlight, naked flames or heat. •• Never look into the laser beam inside this apparatus. •• Ensure that you always have easy access to the power cord, plug or adaptor to disconnect this apparatus from the power. 2 Your clock radio Congratulations on your purchase, and welcome to Philips! To fully benefit from the support that Philips offers, register your product at www.philips.com/welcome. Introduction With this clock radio, you can: • listen to FM radio; • enjoy audio from iPod/iPhone or an external device; • know the time; and • wake up by buzzer alarm, radio, or audio in iPod/iPhone. What’s in the box © 2011 Koninklijke Philips Electronics N.V. All rights reserved. AJ7030D_93_UM_V1.0 EN 1 Important Safety Important Safety Instructions a Read these instructions. b Keep these instructions. c Heed all warnings. d Follow all instructions. e Do not use this apparatus near water. f Clean only with dry cloth. g Do not block any ventilation openings. Install in accordance with the manufacturer’s instructions. h Do not install near any heat sources such as radiators, heat registers, stoves, or other apparatus (including amplifiers) that produce heat. i Protect the power cord from being walked on or pinched, particularly at plugs, convenience receptacles, and the point where they exit from the apparatus. Check and identify the contents of your package: • Main unit (with a battery) • AC adapter(plug switchable) • User manual Overview of the main unit A a PRESET • Select a preset radio station. • Adjust hour and minute. b TUNING +/• Tune to a FM radio station. • Adjust hour and minute. c • • Turn on/off the clock radio. Switch the clock radio to standby mode. m Refer all servicing to qualified service personnel. Servicing is required when the apparatus has been damaged in any way, such as power-supply cord or plug is damaged, liquid has been spilled or objects have fallen into the apparatus, the apparatus has been exposed to rain or moisture, does not operate normally, or has been dropped. n Battery usage CAUTION – To prevent battery leakage which may result in bodily injury, property damage, or damage to the unit: • Install all batteries correctly, + and - as marked on the unit. • Do not mix batteries (old and new or carbon and alkaline, etc.). • Remove batteries when the unit is not used for a long time. o Apparatus shall not be exposed to dripping or splashing. p Do not place any sources of danger on the apparatus (e.g. liquid filled objects, lighted candles). q Where the plug of the Direct Plug-in Adapter is used as the disconnect device, the disconnect device shall remain readily operable. AJ7030D_93.indd 3 Note •• You can only use AC power as power supply. The pre-installed lithium CR2032 battery can only back up time and alarm. •• When power is disconnected, the display backlight is off. For first-time use: Remove the protective tab to activate the battery. To replace the battery: B Connect power C f iPod/iPhone • Dock for iPod/iPhone. •• Risk of product damage! Ensure that the power voltage corresponds to the voltage printed on the back or underside of the clock radio. •• Risk of electric shock! When you unplug the AC adapter, always pull the plug from the socket. Never pull the cord. Set clock 1 2 3 In standby mode, press and hold SET for two seconds to activate clock setting mode. »» [12H] or [24H] is displayed. Press TUNING +/- or format. / repeatedly to select 12/24 hour Press SET again to confirm. »» The hour digits begin to blink. Repeat Steps 2 to 3 to set the hour and minute. Note clock radio synchronizes time from the iPod/iPhone automatically. Turn on g VOLUME +/• Adjust volume. Press h SET • • Switch to standby mode Store radio stations automatically/manually. Set clock. k Battery tray l AUX IN • Connect an external audio device. m AL1/2 iPhone·RADIO·BUZZ • Select alarm source. n DC 5V • Power supply socket. 3 Get started Caution •• Use of controls or adjustments or performance of procedures other than herein may result in hazardous radiation exposure or other unsafe operation. Always follow the instructions in this chapter in sequence. 5 Listen to FM radio Tune to FM radio stations Press . »» The clock radio switches to the last selected source. to switch the clock radio to standby mode. »» The clock (if set) appears on the display panel. radiation source. •• For better reception, fully extend and adjust the position of the Specifications 1 2 Amplifier Press SOURCE repeatedly to select FM tuner source. Press and hold TUNING +/- for 2 seconds. »» The clock radio tunes to a station with strong reception automatically. 3 Repeat steps 2 to tune to more stations. To tune to a station manually: 1 Press TUNING +/- repeatedly until you find optimal reception. You can store a maximum of 20 FM radio stations. In tuner mode, press a hold SET for two seconds. »» The clock radio stores all the available FM radio stations and broadcasts the first available station automatically. Store FM radio stations manually 1 2 3 4 5 Press SOURCE repeatedly to select iPod/iPhone mode. Remove the iPod/iPhone E Pull the iPod/iPhone out of the dock. Charge the iPod/iPhone When the clock radio is connected to power, the docked iPod/iPhone starts charging. FM: <28 dBf Total Harmonic Distortion FM: <2% Signal to Noise Ratio FM: >55 dB General information <1 W Press PRESET Dimensions - Main Unit (W x H x D) 198 x 71 x 111 mm Weight - With Packing - Main Unit 0.9 kg 0.5 kg / repeatedly to select a number. Press SET again to confirm. Repeat steps 1 to 4 to store other stations. In tuner mode, press PRESET / to select a preset number. 6 Other features Set alarm timer Set alarm In standby mode, you can set two alarms to ring at different time. Note Press and hold AL1/AL2 for two seconds to activate alarm setting mode. »» The hour digits and alarm icon begin to blink. Press TUNING +/- or / to set the hour. 8 Troubleshooting Warning •• Never remove the casing of this apparatus. To keep the warranty valid, never try to repair the system yourself. If you encounter problems when using this apparatus, check the following points before requesting service. If the problem remains unsolved, go to the Philips web site (www.philips.com/welcome). When you contact Philips, ensure that the apparatus is nearby and the model number and serial number are available. No power •• Ensure that the AC power plug of the clock radio is connected properly. •• Ensure that there is power at the AC outlet. No response from the clock radio •• Disconnect and reconnect the AC power plug, then turn on the clock radio again. Poor radio reception •• Increase the distance between the unit and your TV or VCR. •• Fully extend the FM antenna. Press AL1/AL2 to confirm. »» The minute digits begin to blink. Alarm does not work •• Set the clock/alarm correctly. Repeat steps 2 to 3 to set the minute and alarm volume. G Clock/alarm setting erased •• Power has been interrupted or the power plug has been disconnected. •• Reset the clock/alarm. Select alarm source Adjust AL1/2 iPhone·RADIO·BUZZ control to select alarm source for both alarms. Note •• When alarm time comes, the selected radio, buzzer, or iPod/iPhone turns on. •• You can only select the same alarm source for Alarm 1/ Alarm2. •• If iPhone is selected as alarm source, while no iPod/iPhone is connected, the clock radio switches to buzzer source instead. Activate/deactivate alarm timer 1 2 FM: <22 dBf Search Selectivity 8W Select a preset radio station Place the iPod/iPhone in the dock. D Start to play audio from the iPod/iPhone. FM: 87.5 - 108 MHz Sensitivity - Mono, 26dB S/N Ratio Standby Power Consumption 1 1 2 3 Tuning Range Operation Power Consumption You can enjoy audio from iPod/iPhone through this clock radio. Listen to audio from iPod/iPhone Tuner Press SET. »» The preset number begins to blink. •• To remove a pre-stored station, store another station in its place. 4 2 X 3 W RMS Model: ASSA1I-050200; Output: 5 V; 2 A Note 2 3 Rated Output Power AC Power Tune to an FM radio station. •• Make sure that you have set the clock correctly. The clock radio supports these iPod and iPhone models: Made for. • iPod touch (1st, 2nd, 3rd, and 4th generation) • iPod classic • iPod with video • iPod nano (1st, 2nd, 3rd, 4th, 5th, and 6th generation) • iPod with color display • iPod mini • iPhone 4 • iPhone 3GS • iPhone 3G • iPhone Note •• Position the antenna as far as possible from TV, VCR, or other 4 Play from iPod/iPhone Compatible iPod/iPhone 7 Product information •• Product information is subject to change without prior notice. Tip Store FM radio stations automatically Caution Start to play the external device (see the user manual of this device). Press BRIGHTNESS repeatedly to select different brightness levels. antenna. •• If clock is not manually set, when iPod/iPhone is connected, the j SOURCE • Select source. unused for long periods of time. with the same or equivalent type. •• The battery contains chemical substances, so it should be disposed of properly. •• Keep children away from the battery. •• Perchlorate Material - special handling may apply. See www.dtsc. ca.gov/hazardouswaste/perchlorate. e SNOOZE/BRIGHTNESS • Snooze alarm. • Adjust display brightness. k Use only with the cart, stand, tripod, bracket, l Unplug this apparatus during lightning storms or when Never discard batteries in fire. •• Danger of explosion if battery is incorrectly replaced. Replace only 4 i SLEEP • Set sleep timer. or table specified by the manufacturer or sold with the apparatus. When a cart is used, use caution when moving the cart/apparatus combination to avoid injury from tip-over. •• Risk of explosion! Keep batteries away from heat, sunshine or fire. d AL1/AL2 • Set alarm. • View alarm settings. • Activate/deactivate alarm timer. j Only use attachments/accessories specified by the manufacturer. Caution Press SOURCE repeatedly to select AUX source. »» is displayed. Adjust display brightness Adjust volume F Install battery Connect the audio cable to: • the AUX IN socket. • the AUDIO OUT sockets of an external device. Press AL1/AL2 to view alarm settings. Press AL1/AL2 again to activate or deactivate the alarm timer. »» or appears if alarm timer is on and disappears if it is off. • To stop the ringing alarm, press the corresponding AL1/AL2. • The alarm repeats ringing for the next day. 9 Notice Any changes or modifications made to this device that are not expressly approved by Philips Consumer Lifestyle may void the user’s authority to operate the equipment. This product complies with the radio interference requirements of the European Community. Your product is designed and manufactured with high quality materials and components, which can be recycled and reused. When this crossed-out wheeled bin symbol is attached to a product it means that the product is covered by the European Directive 2002/96/EC. Please inform yourself about the local separate collection system for electrical and electronic products. Please act according to your local rules and do not dispose of your old products with your normal household waste. Correct disposal of your old product helps to prevent potential negative consequences for the environment and human health. 4/13/2011 4:43:08 PM A C a b E f c d e g h i 自动存储 FM 电台 一般信息 您最多可存储 20 个 FM 电台。 在调谐器模式下,按住 SET 2 秒钟。 » 时钟收音机可存储所有可用的 FM 电台,自动广播第 一个可用的电台。 交流电源 型号:ASSA1I-050200; 输出:5 伏;2 安 操作功耗 8瓦 待机功耗 <1 瓦 尺寸 - 主装置(宽 x 高 x 厚) 198 x 71 x 111 毫米 重量 - 含包装 - 主装置 0.9 千克 0.5 千克 j 手动存储 FM 电台 1 2 l n B 按 SET。 » 预设编号将开始闪烁。 3 4 5 m k 调谐至 FM 电台。 D 反复按 PRESET / 选择编号。 再次按 SET 确认。 重复步骤 1-4 存储其它电台。 F 警告 要删除预存储的电台,请将其它电台存储在该位置。 选择预设电台 在调谐器模式下,按 PRESET G 6 / 选择一个预设编号。 Environmental information All unnecessary packaging has been omitted. We have tried to make the packaging easy to separate into three materials: cardboard (box), polystyrene foam (buffer) and polyethylene (bags, protective foam sheet.) Your system consists of materials which can be recycled and reused if disassembled by a specialized company. Please observe the local regulations regarding the disposal of packaging materials, exhausted batteries and old equipment. “Made for iPod” and “Made for iPhone” mean that an electronic accessory has been designed to connect specifically to iPod or iPhone respectively, and has been certified by the developer to meet Apple performance standards. Apple is not responsible for the operation of this device or its compliance with safety and regulatory standards. Please note that the use of this accessory with iPod or iPhone may affect wireless performance. iPod and iPhone are trademarks of Apple Inc., registered in the U.S. and other countries. Note 您的时钟收音机 • 借助本时钟收音机,您可以: • 收听 FM 收音机; • 欣赏 iPod/iPhone 或外部设备中的音频; • 掌握时间;以及 • 通过蜂鸣器闹钟、收音机或 iPod/iPhone 音乐唤醒。 • 包装盒内物品: 检查并识别包装中的物品: • 主装置(带电池) • 交流适配器(可切换插头) • 用户手册 主装置概述 A a PRESET • 选择预设电台。 • 调节小时和分钟。 b TUNING +/• 调到 FM 电台。 • 调节小时和分钟。 ZH-CN 1 注意事项 安全 重要安全说明 a 阅读这些说明。 b 保留这些说明。 c 注意所有警告。 d 遵循所有说明。 c 打开或关闭时钟收音机。 将时钟收音机切换至待机模式。 d AL1/AL2 • 设置闹钟。 • 查看闹钟设置。 • 激活/禁用闹钟定时。 e SNOOZE/BRIGHTNESS • 重复响铃。 • 调节显示屏亮度。 • • 自动/手动存储电台。 设置时钟。 i SLEEP j SOURCE • 选择来源。 • 设置定时关机。 g 不要堵塞任何通风口。按照制造商的说明进行安装。 m AL1/2 iPhone·RADIO·BUZZ • 选择闹钟来源。 n DC 5V • 电源插座。 l 在雷电天气期间或长期不用的情况下,请拔下本装置的电源 插头。 m 所有维修均应由合格的维修人员来执行。本装置有任何损坏时, 如电源线或插头损坏,液体泼溅到或物体跌落到装置上,装置 淋雨或受潮,无法正常运行,或者跌落,均需要进行维修。 n 电池使用注意事项 – 为防止电池泄漏而造成人身伤害、财产 损失或装置损坏,请: • 按照装置上标明的 + 极和 - 极,正确安装所有电池。 • 请勿混合使用电池(旧电池与新电池或碳电池与碱性 电池,等等)。 • 若打算长期不用本装置,应取出电池。 o 切勿将本装置置于漏水或溅水环境下。 p 不要将任何危险源放在本装置上(例如装有液体的物体、点 燃的蜡烛)。 q 如果将直插式适配器的插头用作断开设备,则断开设备应可 以随时使用。 警告 • • • • • • 切勿拆下本产品的外壳。 切勿润滑本装置的任何部件。 切勿将本装置放在其它电器设备上面。 应让本装置远离阳光直射、明火或高温。 切勿直视本装置内部的激光束。 确保始终可轻易地接触到电源线、电源插头或适配器,以便于将本 装置从电源上断开。 AJ7030D_93.indd 4 如果没有手动设置闹钟,当连接 iPod/iPhone 时,时钟收音机将自 动从 iPod/iPhone 同步时间。 3 使用入门 注意 • 不按此处说明的操作流程来使用控件或进行调整可能导致危险的 激光辐射或其它不安全的操作。 始终依照顺序,遵循本章的说明。 安装电池 注意 • • • • • 存在爆炸危险! 请将电池远离高温环境、阳光直射处或明火环 境。切勿将电池丢弃于火中。 电池安装不正确会有爆炸危险。只能用相同或相当的型号更换。 电池含有化学物质,应正确弃置。 请将电池放置在儿童接触不到的地方。 高氯酸盐材料 - 可能需要特殊处理。 请参阅 www.dtsc.ca.gov/hazardouswaste/perchlorate。 注 • • 您只能使用交流电源作为电源。预安装的 CR2032 锂电池只能备 份时间和闹钟。 断开电源时,显示屏背光关闭。 首次使用时: 取下保护片以激活电池。 要更换电池: B 按住 AL1/AL2 2 秒钟,以激活闹钟设置模式。 » 小时位和闹钟图标将开始闪烁。 2 3 反复按 TUNING +/- 或 4 。 » 本时钟收音机将切换到上一个选定的来源。 4 重复步骤 2-3 设置分钟和闹钟音量。G 从 iPod/iPhone 播放 收听 iPhone/iPod 音乐 反复按 SOURCE 选择 iPod/iPhone 模式。 将 iPod/iPhone 放在底座中。 D 开始播放 iPod/iPhone 音乐。 取出 iPod/iPhone E 调整 AL1/2 iPhone·RADIO·BUZZ 控件以选择两个闹钟的闹钟 来源。 注 • • • 到达闹铃时间时,选定的收音机或蜂鸣器或 iPod/iPhone 将开启。 您只能为闹钟 1/闹钟 2 选择相同的闹钟来源。 如果将 iPhone 选为闹钟来源,在没有连接 iPod/iPhone 时,时钟收 音机将切换至蜂鸣器来源。 1 2 按 AL1/AL2 查看闹钟设置。 再次按 AL1/AL2 激活或禁用闹钟定时。 » 如果闹钟定时打开,则 或 出现;如果关闭, 则消失。 • 要停止响铃的闹钟,请按 AL1/AL2。 • 闹钟在第二天重复响铃。 重复响铃 闹钟响起时,按 SNOOZE。 » 五分钟以后,闹钟再响并重复响铃。 要调整闹钟间隔(分钟),反复按 SNOOZE。 设置定时关机 本时钟收音机在预设时段后可切换至待机模式。 反复按 SLEEP 选择定时关机(分钟)。 » 激活定时关机时, 出现。 要禁用定时关机,请反复按 SLEEP,直到 [OFF](关闭)出现。 15 30 60 90 120 1 2 将音频线缆连接至: • AUX IN 插孔。 • 外部设备的 AUDIO OUT 插孔。 反复按 SOURCE(信号源) 选择 AUX 来源。 » 将显示 。 调节显示屏亮度 反复按 BRIGHTNESS 可选择不同的亮度级别。 开始播放外部设备(请参阅此设备的用户手册)。 1 2 3 尽量将天线放在距离电视、录像机或其它辐射源较远的地方。 要获得更好的接收效果,请完全展开天线并调整天线位置。 反复按 SOURCE,选择 FM 调谐器来源。 按住 TUNING +/- 保持 2 秒钟。 » 时钟收音机将自动调谐至接收信号较强的电台。 重复步骤 2 调谐至更多电台。 要手动调谐至电台: 1 反复按 TUNING +/- 直至获得最佳接收效果。 如果产品上贴有带叉的轮式垃圾桶符号,则表示此 产品符合欧盟指令 2002/96/EC。 请熟悉当地针对电子和电器产品制订的分门别类的 收集机制。 请遵循当地的规章制度,不要将旧产品与一般的生活垃圾一同 弃置。正确弃置旧产品有助于避免对环境和人类健康造成潜在 的负面影响。 该产品含有符合欧洲指令 2006/66/EC 的电池,不能 与一般的生活垃圾一同弃置。请熟悉当地有关单独 收集电池的规章制度,因为正确弃置将有助于避免 对环境和人类健康造成负面影响。 环境信息 已省去所有不必要的包装。我们努力使包装易于分为三种材 料:纸板(盒)、泡沫塑料(缓冲物)和聚乙烯(袋、保护性 泡沫片)。 您的系统包含可回收利用的材料(如果由专业公司拆卸)。请 遵守当地有关包装材料、废电池和旧设备的处理的规定。 “Made for iPod”和“Made for iPhone”表 示电子附件专为连接 iPod 或 iPhone 而设 计,并经开发人员认证,符合 Apple 性能标 准。Apple 对该设备的操作及其是否符合安全和法规标准不负 任何责任。请注意,通过 iPod 或 iPhone 使用该附件可能影响无 线性能。 iPod 和 iPhone 是 Apple Inc. 在美国 和其它国家/地区注册的商 标。 注 • 型号铭牌位于本设备的底部。 7 产品信息 ఙർఙࠂྠ᠂ਾϾዼ +D]DUGRXVWR[LF6XEVWDQFH ధ3E /HDG ܌+J 0HUFXU\ ᬄ&G FDGPLXP ࡒ۴&KURPLXP أᜌ৷Ъ 3%% أᜌفЪ 3%'( +RXVLQJ ທक़ 2 2 2 2 2 2 /RXGVSHDNHUV ঝϗ֊ჱ 2 2 2 2 2 2 3:%V ϴቊࡵ ; 2 2 2 2 2 $FFHVVRULHV 5HPRWHFRQWURO FDEOHV ࡵڼIJီ३చĶ჻ ཐĶ৹ࢨཐij ; 2 2 2 2 2 ńњ൙ۂႹႹݡ༂ᇍᇄഖᄡۂҊࡵ֩ଚ၆बᇍҏਜᇓ֩ݧӕԟ6-7ķїም݃֩ཏ ဵ ;,QGLFDWHVWKDWWKLVWR[LFRUKD]DUGRXVVXEVWDQFHFRQWDLQHGLQDWOHDVWRQHRIWKHKRPRJHQHRXVPDWHULDOV XVHGIRUWKLVSDUWLVDERYHWKHOLPLWUHTXLUHPHQWLQ6-7 注 • ̻Ճሙ 1DPHRIWKH3DUWV ¾ńњ൙ۂႹႹݡ༂ᇍᄡۂҊࡵෲႹबᇍҏਜᇓ֩ݧबᄡ6-7їም݃֩ཏဵၟ༳ 2,QGLFDWHVWKDWWKLVWR[LFRUKD]DUGRXVVXEVWDQFHFRQWDLQHGLQDOORIWKHKRPRJHQHRXVPDWHULDOVIRUWKLV SDUWLVEHORZWKHOLPLWUHTXLUHPHQWLQ6-7ķ 产品信息如有更改,恕不另行通知。 调谐至 FM 电台 • • 本产品采用可回收利用的高性能材料和组件制造 而成。 您可通过本时钟收音机收听外部设备的音频。 当时钟收音机连接至电源时,插接在底座上的 iPod/iPhone 将开 始充电。 提示 注意 如果用户未经 Philips 优质生活部门的明确许可而擅自对此设备 进行更改或修改,则可能导致其无权操作此设备。 从外部设备播放音频 为 iPod/iPhone 充电 收听 FM 广播 9 2011 © Koninklijke Philips Electronics N.V. 保留所有权利。 规格如有更改,恕不另行通知。所有商标均是 Koninklijke Philips Electronics N.V. 或它们各自所有者的财产。Philips 保留随时更改产 品的权利,而且没有义务对较早前提供的产品进行相应的调整。 off 3 5 时钟/闹钟设置已被清除 • 电源中断或电源插头已断开。 • 重置时钟/闹钟。 选择闹钟来源 将 iPod/iPhone 从底座中拔出。 调节音量 F 无线电接收质量差 • 拉开本装置与电视或录像机之间的距离。 • 完全展开 FM 天线。 本产品符合欧盟的无线电干扰要求。 可将时钟收音机切换至待机模式。 » 显示面板上将显示时钟(如果已设置)。 您可通过本时钟收音机欣赏 iPhone/iPod 音乐。 1 2 3 设置小时。 按 AL1/AL2 确认。 » 分钟数位将开始闪烁。 切换到待机模式 按 / 激活/禁用闹钟定时 开机 SET AUX IN • 连接外部音频设备。 仅使用制造商指定或随设备销售的手推车、 支座、三脚架、支架或桌台。使用手推车时, 请小心移动载有产品的手推车,以避免翻倒 造成伤害。 注 • 1 为保持保修的有效性,切勿尝试自行维修本装置。 如果在使用本设备时遇到问题,请在申请服务之前检查以下事 项。如果仍然无法解决问题,请访问 Philips 网站 (www.philips. com/welcome)。联系 Philips 时,请确保将本装置放在身边并准备 好型号和序列号。 闹钟无法工作 • 正确设置时钟/闹钟。 确保您已正确设置 iPod。 重复步骤 2 至 3 以设置小时和分钟。 h 电池托架 k 选择 12/24 小时制。 本时钟收音机支持以下 iPod 和 iPhone 型号: 度身定制。 • iPod touch(第 1、2、3 和 4 代) • iPod classic • iPod with video • iPod nano(第 1、2、3、4、5 和 6 代) • 带彩色显示屏的 iPod • iPod mini • iPhone 4 • iPhone 3GS • iPhone 3G • iPhone k 仅使用制造商指定的附件/配件。 / 兼容的 iPod/iPhone l j 4 反复按 TUNING +/- 或 再次按 SET 确认。 » 小时位将开始闪烁。 VOLUME +/• 调节音量。 不要在靠近水的地方使用本装置。 防止电源线被踩踏或挤夹,特别是在插头、电源插座和设备 电源线出口位置。 2 3 在待机模式下,按住 SET 2 秒钟以启用时钟设置模式。 » 将显示 [12H] 或 [24H]。 g 只能使用干布进行清洁。 i 1 iPod/iPhone • iPod/iPhone 底座。 f 不要在任何热源附近安装,如散热器、蓄热器、炉具或其它 发热设备(包括功放器)。 存在损坏产品的风险! 请确保实际电源电压与印在时钟收音机背 面或底部的电压相符。 存在触电危险! 拔下交流适配器时,务必先将插头从电源插座中 拔出。切勿拉扯电源线。 f e h • 设置时钟 按 • • 注 注意 产品简介 •• The type plate is located on the bottom of the apparatus. 2011 © Koninklijke Philips Electronics N.V. All rights reserved. Specifications are subject to change without notice. Trademarks are the property of Koninklijke Philips Electronics N.V. or their respective owners. Philips reserves the right to change products at any time without being obliged to adjust earlier supplies accordingly. 在待机模式中,您可以设置两个闹钟,使其在不同时间响铃。 连接电源 C 切勿拆下本产品的外壳。 时钟收音机没有响应 • 断开然后重新插接交流电插头,然后重新启动本时钟收音机。 设置闹钟 感谢您的惠顾,欢迎光临 Philips!为了您能充分享受 Philips 提供 的支持,请在 www.philips.com/welcome 上注册您的产品。 • 不能通电 • 确保正确连接本时钟收音机的交流电源插头。 • 确保交流电插座正常供电。 其它功能 设置闹钟定时 2 故障种类和处理方法 注 • Your product contains batteries covered by the European Directive 2006/66/EC, which cannot be disposed with normal household waste.Please inform yourself about the local rules on separate collection of batteries because correct disposal helps to prevent negative consequences for the environmental and human health. 8 ညΧၬణᬀ(QYLURQPHQWDO3URWHFWLRQ8VH3HULRG 7KLVORJRUHIHUVWRWKHSHULRG\HDUV ሴྔ༓ӅᇓݧႹ֩ႹႹݡ༂ᇍࠋჱෑᄡᆢӌൔႬ֩์ࡵ༳҆ߺكഷທྈࠋёĶሴྔ༓ӅႬ߀ൔ Ⴌۂሴྔ༓Ӆ҆ߺࣦߐؗᄳӲᇛಝࠋؗఇಪപґӅᄳӲᇛ෩֩ݡཏ 规格 7KLVORJRUHIHUVWRWKHSHULRG\HDUVGXULQJZKLFKWKHWR[LFRUKD]DUGRXVVXEVWDQFHVRUHOHPHQWV FRQWDLQHGLQHOHFWURQLFLQIRUPDWLRQSURGXFWVZLOOQRWOHDNRUPXWDWHVRWKDWWKHXVHRIWKHVH>VXEVWDQFHVRU HOHPHQWV@ZLOOQRWUHVXOWLQDQ\VHYHUHHQYLURQPHQWDOSROOXWLRQDQ\ERGLO\LQMXU\RUGDPDJHWRDQ\DVVHWV 功放器 额定输出功率 2 X 3 瓦 RMS 调谐器 调谐范围 FM:87.5 - 108 兆赫 灵敏度 - 单声道,26dB 信噪比 FM:<22 dBf 搜索选择 FM:<28 dBf 总谐波失真 FM:<2% 信噪比 FM:>55 dB 4/13/2011 4:43:11 PM