1
KIT FEATURES
ALL VEHICLES
2
ISO-DIN unit
provisions
3
CD pocket holds
(2) jewel cases
"L"
"R"
KIT COMPONENTS
Radio Housing
Slide Mounting Brackets ("L" and "R")
into the slots on the sides of the Radio
Housing as indicated.
4
A
Slide the ISO-DIN head unit into the kit. Align
the holes in the Mounting Brackets with the
holes in the head unit and mount the Brackets
to the head unit with the screws included with
the unit.
5
Mounting
Brackets
B
C
D
A) Strip wire ends back ½"
B) Twist ends together
C) Solder
D) Tape
Locate the factory wiring harness in the
dash. Metra recommends using the
proper mating adaptor and making
connections as shown. (Isolate and
individually tape off the ends of any
unused wires to prevent electrical short
circuit).
TOOLS REQUIRED
Re-connect the battery terminal and test the unit
for proper operation. Mount the head unit/kit
assembly to the sub-dash with those screws
previously removed in step #1.
REV. 07-29-09
Phillips screwdriver
Socket wrench
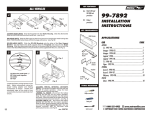
99-3301
INSTALLA TION INSTRUCTIONS
APPLICATIONS
CAR
PAGE
BUICK
Century 1997-2005........................................................ 1
LeSabre 1995-2005...................................................... 1
Park Avenue 1995-2005................................................ 1
Regal 1995-2004.............................................................. 6
Rendezvous 2002-2007................................................ 6
CHEVROLET
Avalanche 2003-2006 ................................................. 6
Cavalier 2000-2005....................................................... 6
Express Van 2001-2007............................................... 5
Impala 2000-2005......................................................... 5
Malibu 2001-2003........................................................... 5
Monte Carlo 2000-2005 ............................................. 5
Trailblazer 2002-2007.................................................... 2
Venture 2000-2005....................................................... 2
GMC
Envoy 2002-2007............................................................ 2
OLDMOBILE
Bravada 1998-2001......................................................... 2
Silhouette 2000-2004................................................... 5
PONTIAC
Aztec 2001-2005.............................................................. 3
Bonneville 2000-2005.................................................. 3
Grand Am 2001-2005 ................................................... 4
Montana 2000-2005..................................................... 4
Sunfire 2000-2005........................................................ 4
WIRING AND ANTENNA CONNECTIONS (Sold Separately)
Harness:
Please visit www.metraonline for specific interface
applications
Antenna adapter: • 40-GM10 - GM antenna adapter 88-up
KNOWLEDGE IS POWER
Enhance your installation and fabrication skills
by enrolling in the most recognized and respected
mobile electronics school in our industry.
Log onto www.installerinstitute.com
or call 800-354-6782 for more information
and take steps toward a better tomorrow.
1-800-221-0932
www.metraonline.com
© COPYRIGHT 2001-2009 METRA ELECTRONICS CORP.
BUICK Century 1997-2005
1
Disconnect the negative battery terminal to prevent an
accidental short circuit. Remove the plastic trim piece to
the left of the glove box and (1) phillips screw exposed.
Unsnap the top edge of the knee bolster panel. Remove
(1) phillips screw from the panel. Remove the ashtray
cluster and (2) phillips screws from each side. Unclip the
entire dash trim bezel and remove. Open doors and
unsnap end caps from each side of dash. Unsnap and
remove radio/instrument cluster panel. Remove (3)
screws in order to remove radio.
BUICK Regal 1995-2000
1
BUICK LeSabre 1995-2005
1
Disconnect the negative battery terminal to prevent an
accidental short circuit. Open drivers door and unsnap
and remove dash end cap. Remove (2) phillips screws
from underneath steering column cover. Unsnap and
remove steering column cover. Unsnap and remove
instrument panel. Remove (2) 9/32" screws and remove
radio.
BUICK Rendevous 2002-2007
1
BUICK Park Avenue 1995-1999
1
Disconnect the negative battery terminal to prevent an
accidental short circuit. Unsnap the climate control trim
panel (from door to door) and remove (4) phillips screws
exposed. Pop out the a/c vents and remove (1) phillips
screw exposed in each vent cavity. Unclip the radio trim
bezel and remove. Remove the screws securing the factory
head unit and disconnect the wiring.
1
Disconnect the negative battery terminal to prevent an
accidental short circuit. Open drivers door and unsnap
and remove dash end cap. Remove (2) phillips screws
from underneath steering column cover. Unsnap and
remove steering column cover. Unsnap and remove
instrument panel. Remove (2) 9/32" screws and remove
radio.
Disconnect the negative battery terminal to prevent an
accidental short circuit. Remove screws in cup holder
Unsnap and remove shifter. Remove (2) screws from
bottom of radio/climate control bezel, unclip and remove.
Remove (3) 7mm hex head screws to remove radio.
CHEVROLET Avalanche 2003-2006
1
BUICK Park Avenue 2000-2005
1
Disconnect the negative battery terminal to prevent an
accidental short circuit. Remove the plastic trim piece to
the left of the glove box and (1) phillips screw exposed.
Unsnap the top edge of the knee bolster panel. Remove
(1) phillips screw from the panel. Remove the ashtray
cluster and (2) phillips screws from each side. Unclip the
entire dash trim bezel and remove.Open doors and
unsnap end caps from each side of dash. Unsnap and
remove radio/instrument cluster panel. Remove (3)
screws in order to remove radio.
Disconnect the negative battery terminal to prevent an
accidental short circuit. Unsnap and remove dash bezel.
Remove (3) 9/32" screws and remove radio.
CHEVROLET Cavalier 2000-2005
1
Disconnect the negative battery terminal to prevent an
accidental short circuit. Open driver door and remove fuse
panel on the end of dash. Open passenger door and
remove panel on end of dash. Remove (1) phillips screw
from each side exposed. Remove (3) screws from top of
glove box liner. Remove (2) screws from the top-left corner
of the glove box cavity. Remove (1) phillips screw from the
defroster duct Remove the duct work and (1) phillips screw
exposed. Remove the dash pad and (3) phillips screws
exposed at the top of the radio trim bezel.
6
CHEVROLET Express Van 2001-2007
1
Disconnect the negative battery terminal to prevent an
accidental short circuit. Remove (2) 10mm bolts from
below knee bolster under steering column and remove
panel. Remove (2) 10mm bolts from panel below
passenger dash airbag and remove panel. Remove (2)
10mm nuts from inside center pocket between power
outlets. Unsnap and remove radio and instrument cluster
panel. (May not be necessary to completely remove radio
and instrument cluster panel to access radio.) Remove (3)
9/32" bolts to remove radio.
CHEVROLET Trailblazer 2002-2007
1
CHEVROLET Impala 2000-2005
1
Disconnect the negative battery terminal to prevent an
accidental short circuit. Open drivers door and remove
fuse panel on end of dash. Open passenger door and
remove panel on end of dash. Remove (1) Phillips screw
from each side exposed. Remove (3) screws from top of
glove box liner. Remove (2) screws from the top-left corner
of the glove box cavity. Remove (1) Phillips screw from the
defroster duct. Remove the duct work and (1) Phillips
screw exposed. Remove the dash pad and (3) Phillips
screws exposed at the top of the radio trim bezel. Skip to
the Installation Instructions for ALL VEHICLES on Page
#3.
CHEVROLET Venture 2000-2005
1
1
CHEVROLET Monte Carlo 2000-2005
1
5
Disconnect the negative battery terminal to prevent an
accidental short circuit. Unclip the trim panel above the
pedals. (It is not necessary to remove the panel, it can
remain hanging.) Remove (2) 9/32" screws from the knee
panel and unclip the panel. Unsnap the driver's side fuse
panel cover and remove (1) 9/32" screw. Open the glove
box and remove (1) 9/32" screw from the upper left corner.
Remove (3) 9/32" screws securing the factory radio and
disconnect the wiring.
Disconnect the negative battery terminal to prevent
anaccidental short circuit. Open cup holders and
remove (2) phillips / 7mm screws. Unsnap and
remove dual power outlet assembly from lower
storage. Open lower storage door and remove (2)
7 mm screws inside. Remove (2) 7mm screws
(facing up) from under cup holder. Remove (3)
7mm hex head screws and remove radio.
GMC Envoy 2002-2007
CHEVROLET Malibu 2001-2003
Disconnect the negative battery terminal to prevent an
accidental short circuit. Unsnap and remove radio
bezel. Remove (3) bolts and remove radio.
Disconnect the negative battery terminal to prevent
an accidental short circuit. Remove (2) phillips
screws inside climate cluster. Remove (1) phillips
screw under climate controls to the left of the power
outlet. Remove (2) 9/32" screws from under
steering column, lower the panel to access (3)
phillips screws from around steering wheel and
remove. Unsnap and remove bezel. (Use caution
pulling over hazard switch.)
Disconnect the negative battery terminal to prevent
an accidental short circuit. Remove the climate
control knobs. Remove (1) phillips screw above
and (2) phillips screws below the climate controls.
Unclip the radio trim bezel. Remove (4) screws
from the factory head unit, slide the unit out and
disconnect the wiring.
OLDSMOBILE Bravada 1998-2001
1
Disconnect the negative battery terminal to prevent an
accidental short circuit. Unsnap top trim of floor console
and slide back. Remove (4) phillips screws: (2) left and (2)
right lower from the carpeted panel. Slide carpeted panel
down and backwards to reveal (2) phillips screws and
remove. Unsnap radio bezel and unplug cigarette lighter
and accessories. Remove (3) 7mm screws and remove
radio.
2
OLDSMOBILE Silhouette 2000-2004
1
Disconnect the negative battery terminal to prevent
an accidental short circuit.Open cup holders and
remove (2) phillips 7mm screws. Unsnap and
remove dual power outlet assembly from lower
storage. Open lower storage door and remove (2)
7mm screws inside. Remove (2) 7mm screws
(facing up) from under cup holder. Remove (3)
7mm hex head screws and remove radio.
PONTIAC Grand Am 2001-2005
1
PONTIAC Aztec 2001-2005
1
Disconnect the negative battery terminal to prevent
an accidental short circuit. Pull out cup holder
inserts. Remove (1) phillips screw exposed inside
bottom cup holder. Unsnap and remove shifter trim
with cup holders. Remove (2) #15 torx at bottom
of radio / climate bezel.
PONTIAC Montana 2000-2005
1
3
Disconnect the negative battery terminal to
prevent an accidental short circuit.Remove (2)
phillips screws from the instrument cluster.Unclip
the ignition trim and remove.Unclip the climate
control / radio trim bezel and remove. Depress the
spring clips on each side of the factory head
unit and remove.
Disconnect the negative battery terminal to prevent
anaccidental short circuit. Open cup holders and
remove (2) phillips 7mm screws. Unsnap and
remove dual power outlet assembly from lower
storage. Open lower storage door and remove (2)
7mm screws inside.Remove (2) 7mm screws
(facing up) from under cup holder. Remove (3)
7mm hex-head screws and remove radio.
PONTIAC Sunfire 2000-2005
PONTIAC Bonneville 2000-2005
1
Disconnect the negative battery terminal to prevent
anaccidental short circuit. Unsnap and remove
radio trim bezel. Remove (3) 9/32" screws from
radio brackets and remove radio.
1
Disconnect the negative battery terminal to prevent
an accidental short circuit. Open the glove box and
remove (2) Phillips screws exposed on the right
edge of the radio trim bezel. Unclip the bezel and
remove. Remove (2) 7mm hex-head screws
securing the factory head unit and disconnect the
wiring. Skip to the Installation Instructions for ALL
VEHICLES on Page #3.
4