1
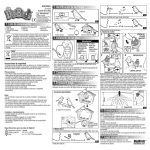
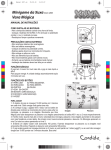
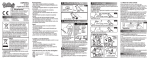
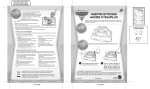
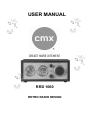
USER MANUAL RRD 1060 RETRO RADIO DESIGN Dear customer! First of all thank you very much, that you have decided for the cmx® RRD 1060! Please read all information’s carefully before you start running the cmx® RRD 1060. Our company reserves the right to improve the product. That includes changes to specifications and design, also without notice. If you have problems, please visit our website at www.cmx-electronics.com and select your device. Under the point "Support" you find the most frequently asked questions about your device - if not, please use the contact form. If you provide variations of your product, please visit our website. Version 1 cmx® RRD 1060 Side 2 from 5 1. Safety Informations CAUTION RISK OF ELECTRIC SHOCK DO NOT OPEN The lightning flash is a warning sign alerting you of „dangerous voltage“ inside the product. The exclamation point is a warning sign alerting you of important instructions accompanying the product. WARNING To reduce the risk of electric shock, do not remove cover (or back). No user-serviceable parts inside. Refer servicing to qualified service personnel. To reduce the risk of fire or electric shock, do not expose this appliance to dripping or splashing liquids. NOTE Caution symbols are printed on lower side of unit. Please refer to instruction manual. CAUTION Grounding or polarization. The precautions should be taken so that the wider blade of the AC plug must match the slot in receptacle “wall socket”. Invisible laser radiation when open and interlocks defeated. Avoid exposure to beam. CLASS 1 LASER PRODUCT Version 1 cmx® RRD 1060 Side 3 from 5 2. Quick Start Open the battery door and insert 1 button cells (AG13) and 3 AAA batteries. The shelf-life of the AAA batteries is around 1 month. If you want to operate the device with a plug, you have to buy one with DC 4,5 V ( ) at a specialized trade. Switch the button on the backside of the device to “ON”. Is the function switch on “OFF/AL” the radio is off, but the alarm is on. Is the function switch on “AUTO”, the radio will turn on and off automatically. 3. Radio Rotate tuning knob to tune in the desired station. Adjust the antenna to obtain the best reception. NOTE: The power indicator will light up, when opening radio set. To turn off the radio, slide the function switch to “OFF”. 4. Settings By the settings from time, alarm, reminder and timer you have to press between every step “SET” again. 4.1. Time Switch the function to “ON”. Press “T” to select 12 / 24 hours. The display appears the selected hour. Press “SET” to adjust hour, minute, year, month and day (to adjust the settings, press “UP/SN” and “DOWN”). 4.2. Alarm / snooze Switch the function to “ON”. Press “MODE” to enter alarm mode. Press “T” or “S” to choose the different settings: o – alarm is not active o “” – alarm is active o “” Zz – alarm and snooze is active Version 1 cmx® RRD 1060 Side 4 from 5 Press “SET” to adjust hour, minute and music (to adjust the settings, press “UP/SN” and “DOWN”). NOTE: You can choose between 6 different ringtones. The alarm will ring one minute each time. You can press any key to stop. 4.3. Sleep timer Switch the function to “OFF/AUTO”. Press twice “MODE” to enter alarm mode and than press “SET”. Press “T” or “S” to choose the different settings between 10 to 60 minutes and than press “SET”. Press “T” to activate sleep timer. The display shows “SLEEP”. Switch the function to “AUTO”. The radio will turn off according to the settings. 4.4. Temperature Show current ambient temperature. Press “°C/°F” to perform the conversion of centigrade or Fahrenheit temperature. 5. Specifications Display temperature Celsius / Fahrenheit Speakers max. 25 Watt PMPO Batteries (included) 3 batteries (AAA) 1 button cell (AG13) Version 1 cmx® RRD 1060 Side 5 from 5