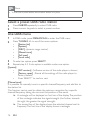
1
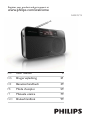
Register your product and get support at www.philips.com/welcome AE5230/12 EN User manual 3 DA Brugervejledning 21 DE Benutzerhandbuch 39 FR Mode d’emploi 59 IT Manuale utente 79 NO Brukerhåndbok 99 1 Important Safety Notice 4 4 5 2 Your FM/DAB radio Introduction What’s in the box Overview of the main unit 7 7 7 8 3 Get started Place the radio Prepare FM/DAB antenna Connect power Turn on Adjust the volume level 10 10 10 10 12 12 4 Listen to FM radio Tune to FM radio Store FM stations manually Select a preset FM radio station 13 13 13 13 5 Listen to DAB radio Tune to DAB radio Change DAB station Scan DAB radio stations Display station information Store DAB stations manually Select a preset DAB radio station Use DAB menu 14 14 14 15 15 15 16 16 6 Product information Tuner (FM) Tuner (DAB) General information 18 18 18 18 7 Troubleshooting 19 8 About DAB 20 EN 3 E n g l i sh Contents 1 Important Safety Hearing safety Listen at a moderate volume. Using headphones at a high volume can impair your hearing. This product can produce sounds in decibel ranges that may cause hearing loss for a normal person, even for exposure less than a minute. The higher decibel ranges are offered for those that may have already experienced some hearing loss. Sound can be deceiving. Over time your hearing ‘comfort level’ adapts to higher volumes of sound. So after prolonged listening, what sounds ‘normal’ can actually be loud and harmful to your hearing. To guard against this, set your volume to a safe level before your hearing adapts and leave it there. To establish a safe volume level: Set your volume control at a low setting. Slowly increase the sound until you can hear it comfortably and clearly, without distortion. Listen for reasonable periods of time: Prolonged exposure to sound, even at normally ‘safe’ levels, can also cause hearing loss. Be sure to use your equipment reasonably and take appropriate breaks. Be sure to observe the following guidelines when using your headphones. Listen at reasonable volumes for reasonable periods of time. Be careful not to adjust the volume as your hearing adapts. Do not turn up the volume so high that you can’t hear what’s around you. You should use caution or temporarily discontinue use in potentially hazardous situations. Do not use headphones while operating a PRWRUL]HGYHKLFOHF\FOLQJVNDWHERDUGLQJHWFLWPD\FUHDWHDWUDIÀF hazard and is illegal in many areas. Where the mains plug or an appliance coupler is used as the disconnect device, the disconnect device shall remain readily operable. 4 EN Never remove the casing of this unit. Never lubricate any part of this unit. 3ODFHWKLVXQLWRQDÁDWKDUGDQGVWDEOHVXUIDFH Never place this unit on other electrical equipment. 2QO\ XVH WKLV XQLW LQGRRUV .HHS WKLV XQLW DZD\ IURP ZDWHU PRLVWXUH DQG OLTXLGÀOOHG objects. .HHSWKLVXQLWDZD\IURPGLUHFWVXQOLJKWQDNHGÁDPHVRUKHDW Notice $Q\FKDQJHVRUPRGLÀFDWLRQVPDGHWRWKLVGHYLFHWKDWDUHQRWH[SUHVVO\ approved by Philips Consumer Lifestyle may void the user’s authority to operate the equipment. This product complies with the radio interference requirements of the European Community. This product complies with the requirements of the following directives and guidelines: 2004/108/EC + 2006/95/EC Your product is designed and manufactured with high quality materials and components, which can be recycled and reused. When this crossed-out wheeled bin symbol is attached to a product it means that the product is covered by the European Directive 2002/96/EC. Please inform yourself about the local separate collection system for electrical and electronic products. EN 5 E n g l i sh Warning Please act according to your local rules and do not dispose of your old products with your normal household waste. Correct disposal of your old product helps to prevent potential negative consequences for the environment and human health. Your product contains batteries covered by the European Directive 2006/66/ EC, which cannot be disposed with normal household waste.Please inform yourself about the local rules on separate collection of batteries because correct disposal helps to prevent negative consequences for the environmental and human health. Environmental information All unnecessary packaging has been omitted. We have tried to make the packaging easy to separate into three materials: cardboard (box), polystyrene foam (buffer) and polyethylene (bags, protective foam sheet.) Your system consists of materials which can be recycled and reused if disassembled by a specialized company. Please observe the local regulations regarding the disposal of packaging materials, exhausted batteries and old equipment. 6 EN E n g l i sh 2 Your FM/DAB radio &RQJUDWXODWLRQVRQ\RXUSXUFKDVHDQGZHOFRPHWR3KLOLSV7RIXOO\EHQHÀW from the support that Philips offers, register your product at www.philips. com/welcome. Introduction With this unit, you can enjoy both FM radio and Digital Audio Broadcasting (DAB) radio. Digital Audio Broadcasting (DAB), is a way of broadcasting radio digitally through a network of transmitters. It provides you with more choice, better sound quality and more information. What’s in the box Check and identify the contents of your package: Main unit AC adaptor User manual EN 7 Overview of the main unit 8 EN a Jack for the headphone. Turn on or off the unit. E n g l i sh b c 1 - 5+ Numeric keypads: Set/select a preset radio station. d DAB/FM Select DAB or FM radio. e VOL+/ Adjust volume. f MENU/SCAN Select DAB menu option. Scan DAB radio stations. g Display panel Display current status. h TUNING +/ FM mode: Tune to a radio station. DAB mode: Navigate DAB station list/menu. i SELECT Display DAB station information. &RQÀUP'$%VWDWLRQPHQXVHOHFWLRQ j FM/DAB antenna Improve FM/DAB reception. k Battery compartment door l Retractable stand Provide stand support. m DC Jack for the AC adaptor(supplied). EN 9 3 Get started Caution Use of controls or adjustments or performance of procedures other than herein may result in hazardous radiation exposure or other unsafe operation. Always follow the instructions in this chapter in sequence. If you contact Philips, you will be asked for the model and serial number of this apparatus. The model number and serial number are on the back of the apparatus. Write the numbers here: Model No. __________________________ Serial No. ___________________________ Place the radio 7RSODFHWKHXQLWRQDÁDWVWDEOHVXUIDFHSXOORXWWKHUHWUDFWDEOHVWDQGIURP bottom of the unit at back-side. Prepare FM/DAB antenna For optimal reception, fully extend and adjust the position of the FM/DAB antenna. Tip Position the antenna as far away as possible from your TV, VCR or other radiation source to prevent interference. Connect power You can use this radio player on AC power or battery power. Battery Life (Approx. hours) When using FM DAB alkaline R6 (size AA) 9 9 10 EN E n g l i sh Option 1: AC power Caution Risk of product damage! Ensure that the power supply voltage corresponds to the voltage printed on the back or the underside of the product. Risk of electric shock! When you unplug the AC adaptor, always pull the plug from the socket. Never pull the cord. 8VHRQO\WKH$&DGDSWRUVSHFLÀHGE\WKHPDQXIDFWXUHURUVROGZLWKWKLVXQLW Note The type plate is located on the back of the apparatus. 1 Connect one end of the AC adaptor to the DC socket on the main unit. 2 Connect the other end of the AC adaptor to the wall outlet. Option 2: Battery power Caution 5LVNRIH[SORVLRQ.HHSEDWWHULHVDZD\IURPKHDWVXQVKLQHRUÀUH1HYHUGLVFDUG EDWWHULHVLQÀUH Do not mix batteries (old and new or carbon and alkaline, etc.). Remove batteries if they are exhausted or if the unit is not to be used for a long time. 1 2 Open the battery compartment at the back of the unit. Insert 6 R6/UM-3/AA size batteries (not supplied) with correct polarity (+/-) as indicated, then close the battery compartment. EN 11 3 The unit is ready to operate. Tip “Battery low” message is shown when the battery power is low. Change batteries to ensure normal operation. Note Batteries contain chemical substances, so they should be disposed of properly. Turn on 1 Press . » The unit switches to the last selected source. To turn off the unit: 1 Press again. Adjust the volume level 1 During play, press VOL+/-to increase/decrease the volume level. 12 EN E n g l i sh 4 Listen to FM radio Tune to FM radio 1 2 Press DAB/FMrepeatedly to select FM radio. Press TUNING +/- to tune to a radio station. Search FM radio stations 1 Tune to FM radio. 2 Press and hold TUNING +/- for more than two seconds to start searching stations. » The FM tuner tunes to a station with strong reception automatically. 3 5HSHDWVWHSLIQHFHVVDU\XQWLO\RXÀQGWKHGHVLUHGVWDWLRQ Store FM stations manually You can program a maximum of 10 preset FM radio stations. 1 Tune to your desired FM station. 2 To preset number 1 - 5, press and hold the numeric keypad 1 - 5 for two seconds; To select the preset number 6 - 10, press and hold the numeric keypads 5+ simultaneously with other keypad (e.g. 5+ with 1 for 6; 5+ with 5 for 10) for two seconds. » The preset number of the saved station appears. Note To overwrite a preset station, store another station in its place. Select a preset FM radio station 1 2 Press DAB/FMrepeatedly to select FM radio. Press numeric keypads to select a preset number. EN 13 5 Listen to DAB radio Tune to DAB radio :KHQ\RXHQWHUWKH'$%PRGHIRUWKHÀUVWWLPHWKHUDGLRSOD\HU automatically scans DAB radio stations. Then station list is retained in memory so the next time the radio player is switched on, the station scan does not take place. 1 Press DAB/FMrepeatedly to select DAB radio. » A bar graph indicates the progress of the search and the number of stations found increase as the scan progresses. Progress bar Number of Stations found A When scan is completed, the stations are listed in numerical then alphabetic order. » First available station is played. B If there is no DAB coverage currently available » “Station list” is displayed. a Change the location or adjust antenna. b Press SELECT to scan again. Change DAB station 1 2 3 Tune to a DAB station. Use TUNING +/- to navigate through available stations. Press SELECT to choose a station. 14 EN 1 When playing a DAB station, or the current station is not available, press and hold MENU/SCAN for more than two seconds. » The radio player scans all available DAB radio stations and broadcasts the current station. Tip New stations and services will be added in the DAB broadcast. To make new DAB stations and services available on your radio player, do scan on a regular base. Display station information 1 2 Tune to a DAB radio station. Press SELECT repeatedly to scroll through the following information (if available): Dynamic label segment (DLS) Program type (PTY) Ensemble Name Channel and frequency Signal error rate Bit rate and audio status Time Date Store DAB stations manually You can store a maximum of 10 preset DAB radio stations. 1 Tune to your desired DAB station. 2 To preset number 1 - 5, press and hold the numeric keypad 1 - 5 for two seconds; To select the preset number 6 - 10, press and hold the numeric keypads 5+ simultaneously with other keypad (e.g. 5+ with 1 for 6; 5+ with 5 for 10) for two seconds. » The preset number of the saved station appears. EN 15 E n g l i sh Scan DAB radio stations Note To overwrite a preset station, store another station in its place. Select a preset DAB radio station 1 2 Press DAB/FMrepeatedly to select DAB radio. Press numeric keypads to select a preset number. Use DAB menu 1 2 In DAB mode, press MENU/SCAN to enter the DAB menu. Press TUNING +/- to scroll the menu options: [Station list] [System] [DRC] (dynamic range control) [Manual tune] [Full scan] [Local scan] 3 To select an option, press SELECT. 4 Repeat step 2-3 if sub-option is available under one option. [System] [SW version] (Software version of the radio player is shown.) [Factory reset] (Resets all the settings of this radio player to factory default.) 3UHVV¶6(/(&7µWRFRQÀUPUHVW [Manual tune] ,WLVSRVVLEOHWRPDQXDOO\WXQHWRDVSHFLÀFFKDQQHOIUHTXHQF\DQGDGGWKLVWR the station list. 7KLVIXQFWLRQFDQEHXVHGWRREWDLQWKHRSWLPXPUHFHSWLRQIRUDVSHFLÀF channel/frequency, taking into account the position of the aerial. » $UHFWDQJOHZLOOEHGLVSOD\HGRQÀUVWOLQHRIWKHGLVSOD\7KHSRVLWLRQ of this rectangle indicates the signal strength (the further towards the right, the greater the signal strength). » The second line of the display shows the selected channel and its IUHTXHQF\7KHÀUVWOLQHRIWKHGLVSOD\VKRZVDUHFWDQJOH 16 EN Adjust the position of the antenna to obtain the optimum signal strength. [DRC] Dynamic range control (DRC) adds or removes a degree of compensation for the differences in the dynamic range between radio stations. [DRC high] (DRC is switched on; the default setting recommended for noisy environment.) [DRC low] (DRC is set to half normal level.) [DRC off] (DRC is switched off.) [Full scan] and [Local scan] Local scan is used to perform a small range of DAB radio search (in UK). Full scan is used to perform a wide range of DAB radio search (outside UK). Note If no button is pressed within seven seconds, the menu exits. EN 17 E n g l i sh Tip 6 Product information Note Product information is subject to change without prior notice. Tuner (FM) Tuning Range 87.5 - 108MHz Tuning grid 50KHz Tuner (DAB) Tuning Range 174.928MHz - 239.200MHz (Band III) General information AC/DC adaptor - Brand name - Model - Input - Output PHILIPS OH-075V0500T-VDE 220-230V~50Hz 35mA 7.5V 500mA Operation Power Consumption 5W Standby Power Consumption <1W Power output 0.3W (10% THD) Battery power input 1.5V x 6 Headphone output power 12mW x 2 (32 ohm) Dimensions - Main Unit (W x H x D) 317 x 133 x 90 mm Weight - Main Unit 0.884kg 18 EN E n g l i sh 7 Troubleshooting Warning Never remove the casing of this apparatus. To keep the warranty valid, never try to repair the system yourself. If you encounter problems when using this apparatus, check the following points before requesting service. If the problem remains unsolved, go to the Philips web site www.philips.com/welcome. When you contact Philips, ensure that the apparatus is nearby and the model number and serial number are available. No power Ensure that the AC power plug of the unit is connected properly. Ensure that there is power at the AC outlet. Insert the batteries with their polarities (+/– signs) aligned as indicated. Replace the battery. No sound Adjust the volume. Poor radio reception Increase the distance between the unit and your TV or VCR. Fully extend the antenna. EN 19 8 About DAB About Digital Audio Broadcasting (DAB) DAB digital radio is a new way of broadcasting radio via a network of terrestrial transmitters. It provides listeners with more choice and information delivered in crystal clear, crackle-free sound quality. – The technology allows the receiver to lock on to the strongest signal it FDQÀQG – With DAB digital stations there are no frequencies to remember, and sets are tuned by station name, so there’s no returning on the move. What is a multiplex? Digital radio operation is made up of a single block of frequencies called a multiplex. Each multiplex works within a frequency spectrum, such as Band III for DAB broadcasts. DAB BROADCASTERS AND DLS Each DAB broadcaster (or multiplex operator) also provides text and audio data services. Some programmes are supported by Dynamic Label Segments (DLS).This is data which you can read as scrolling text on your DAB radio display. Some stations transmit the latest news, travel, and weather, what’s on now and next, website addresses and phone numbers. For more information on digital radio coverage and services, please visit: www.drdb.org. 20 EN © 2009 Koninklijke Philips Electronics N.V. All rights reserved. AE5230_12_UM_V1.2