1
DLPTM Projector
XD435U / XD430U / SD430U / XD420U / SD420U
Controlling the projector using a personal computer
This projector can be controlled by connecting a personal computer with RS-232C terminal.
PC-controllable functions :
• Turning the power ON or OFF
• Changing input signals
• Inputting commands by pressing the buttons on the control panel and remote control
• Menu setting
Connection
Important:
• Make sure that your computer and projector are turned off before connection.
• Boot up the computer first, and then plug the power cord of the projector.
(If you do not follow this instruction, the Comport may not function.)
• Adapters may be necessary depending on the PC connected to this projector. Contact your dealer for details.
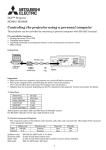
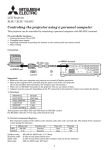
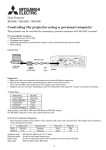
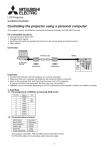
1) Interface
PROTOCOL
RS-232C
BAUD RATE
9600 [bps]
DATA LENGTH
8 [bits]
PARITY BIT
STOP BIT
NONE
1 [bit]
FLOW CONTROL
NONE
This projector uses RXD, TXD and GND lines for RS-232C control.
For RS-232C cable,the reverse type cable should be used.
2) Control command diagram
The command consists of the address code, function code, data code, and end code. The length of the command
varies among the functions.
HEX
Address code
30h 30h
Function code
Function
Data code
Data
ASCII
'0' '0'
Function
Data
[Address code]
[Function code]
[Data code]
[End code]
End code
0Dh
30h 30h (In ASCII code, '0' '0') fixed.
A code of each fixed control move.
A code of each fixed control data (number) and not always indicated.
0Dh (In ASCII code, ' ') fixed.
1
3) Control sequence
•
(1) Send the command from the personal computer to the projector.
(2) The projector will send a return command after it receives an end code. If the command is not received correctly, the projector will not send the return command.
(3) The personal computer checks the command and confirms if the sent command has been executed or not.
(4) This projector sends various codes other than the return code. When having a control sequence by RS-232C,
reject other codes from the personal computer.
During signal switching, the command may not take effect even when the projector sends the return command.
After signal switching completes, wait for the mode indication to disappear before sending the next command.
When sending commands successively, wait to receive the return command of the current command before
sending a next command.
Keep intervals of at least 400 ms between receipt of a return command and sending of a next command.
•
[Example] When turning the power ON (Figures and symbols enclosed in quotation marks are ASCII codes.):
Any commands will not be executed for 10 seconds after the power is turned on.
•
•
Sending commands
Status code from
from the PC, etc.
30 30 21 0D
'0' '0' '!' '
Description
the projector
Command for POWER ON
'
30 30 21 0D
Command receipt confirmation
'0' '0' '!' '
(Command echo back)
'
4) Operation commands (Not executable in stand-by mode. When the commands for input select are sent while
the splash screen is being displayed, the splash screen is only canceled.)
The operation commands are used for the basic operation setting of this projector. They may not be executed
while the signals are changed. The operation commands have no data codes.
Operation
POWER ON
POWER OFF
INPUT COMPUTER 1
INPUT COMPUTER 2
INPUT VIDEO
INPUT S-VIDEO
INPUT USB*
ASCII
!
"
_r1
_r2
_v1
_v2
_s1
HEX
21h
22h
5Fh
5Fh
5Fh
5Fh
5Fh
Note
72h
72h
76h
76h
73h
31h
32h
31h
32h
31h
This command is invalid for 1 minute after the power is turned off.
This command is invalid for 1 minute after the power is turned on.
This command will not be executed in Stand-by mode or the MUTE is executed.
This command will not be executed in Stand-by mode or the MUTE is executed.
This command will not be executed in Stand-by mode or the MUTE is executed.
This command will not be executed in Stand-by mode or the MUTE is executed.
This command will not be executed in Stand-by mode or the MUTE is executed.
* XD435U only
[Example]
When setting the input signal to COMPUTER 1 (Figures and symbols enclosed in quotation marks are
ASCII codes.):
Sending commands
Status code from
from the PC, etc.
30 30 5F 72 31 0D
'0' '0' '_' 'r' '1' '
Description
the projector
Command for setting the input
'
30 30 5F 72 31 0D
signal to COMPUTER 1
Command receipt confirmation
'0' '0' '_' 'r' '1' '
(Command echo back)
'
5) Volume commands (Not executable in stand-by mode. Possible only to read during muting.)
The volume commands are used for the volume setting of this projector with the value.
ITEM
VOLUME
ASCII
VL
HEX
56h
VALUE
00 - 21
4Ch
How to set the grade
Use the ASCII codes to set the grade for setting data. Please refer to the table below for the HEX code.
ASCII
'0'
'1'
'2'
'3'
'4'
'5'
'6'
'7'
'8'
'9'
HEX
30h 31h 32h 33h 34h 35h 36h 37h 38h 39h
[Example]
When setting the volume to 15 (Figures and symbols enclosed in quotation marks are ASCII codes.):
Sending commands
from the PC, etc.
Status code from
the projector
30 30 56 4C 31 35 0D
'0' '0' 'V' 'L' '1' '5' ' '
Description
Command for setting the volume
30 30 56 4C 31 35 0D
'0' '0' 'V' 'L' '1' '5' ' '
2
Command receipt confirmation
(Command echo back)
6) Keystone commands (Not executable in stand-by mode. Possible only to read during muting.)
The keystone commands are used for the keystone setting of this projector with the value. The value will vary
depending on the installation conditions, etc.)
ITEM
KEYSTONE(vertical)
ASCII
KS
HEX
4Bh
VALUE
±20
53h
How to set the grade
Use the ASCII codes to set the grade for setting data. Please refer to the table below for the HEX code.
ASCII
HEX
'+'
2Bh
'–'
2Dh
'0'
30h
'1'
31h
'2'
32h
'3'
33h
'4'
34h
'5'
35h
'6'
36h
'7'
37h
'8'
38h
'9'
39h
7) Mute commands (Not executable in stand-by mode. When the mute commands are sent while the splash
screen is being displayed, the splash screen is not muted but only canceled.)
The mute commands are used for the mute setting of this projector with the 0(30h) and 1(31h).
ITEM
MUTE
ASCII
MUTE
HEX
4Dh
55h
54h
VALUE
0 (OFF), 1 (ON)
45h
8) Remote commands (Not executable in stand-by mode. When the remote commands are sent while the splash
screen is being displayed, the splash screen is only canceled.)
Some remote control operations can be achieved by the remote command codes. The remote commands have no data codes.
Button's name on remote
+ VOLUME
– VOLUME
KEYSTONE
MUTE
▲
▼
t
s
MENU
ENTER
AUTO POSITION
STILL
16:9
USB DEVICE UNPLUG*
ASCII
r06
r07
r43
ra6
r53
r2b
r4f
r59
r54
r10
r09
ra4
re2
rb5
HEX
72h
72h
72h
72h
72h
72h
72h
72h
72h
72h
72h
72h
72h
72h
30h
30h
34h
61h
35h
32h
34h
35h
35h
31h
30h
61h
65h
62h
36h
37h
33h
36h
33h
62h
66h
39h
34h
30h
39h
34h
32h
35h
* XD435U only
[Example]
When displaying the MENU selection bar (Figures and symbols enclosed in quotation marks are ASCII
codes.):
Sending commands
Status code from
from the PC, etc.
30 30 72 35 34 0D
'0' '0' 'r' '5' '4' '
Description
the projector
Command operating the same
'
30 30 72 35 34 0D
as the MENU button
Command receipt confirmation
'0' '0' 'r' '5' '4' '
(Command echo back)
'
9) Password lock commands
The password lock commands control the password lock. The password lock enabling or disabling command is
sent with a 4-digit figure (password) added to the end of the data code. When the password lock is enabled or
disabled successfully, the projector sends a return command comprising the data code, password, and “1” at the
end. When enabling or disabling the password lock fails, it sends a return command with “0” at the end. There is
no reconfirmation of the password.
ITEM
Password lock
enabling/ disabling
ASCII
PSLOCK
HEX
50h
53h
4Ch
4Fh
43h
**** is a 4-digit figure (password).
3
4Bh
VALUE
0****(Disabling),
2****(MENU ACCESS)
10) Reading command diagram
The projectors operating status, such as POWER-ON / OFF, the currently selected input terminal and lamp
operating time, etc. can be monitored.
POWER ON
POWER OFF
INPUT COMPUTER 1
INPUT COMPUTER 2
INPUT VIDEO
INPUT S-VIDEO
INPUT USB*
POWER ON/OFF IMPOSSIBLE
POWER ON/OFF POSSIBLE
NO SIGNAL SUPPLIED
SIGNAL SUPPLIED
LAMP OPERATING TIME
(on a LOW mode basis)
ASCII
Function
Data (Receive)
vP
1
vP
0
vI
r1
vI
r2
vI
v1
vI
v2
vl
s1
vPK
0
vPK
1
vSM
0
vSM
1
vLE
hhhhmm
76h
76h
76h
76h
76h
76h
76h
76h
76h
76h
76h
76h
HEX
Function
Data (Receive)
50h
31h
50h
30h
49h
72h 31h
49h
72h 32h
49h
76h 31h
49h
76h 32h
49h
73h 31h
50h 4Bh
30h
50h 4Bh
31h
53h 4Dh
30h
53h 4Dh
31h
4Ch 45h
hhhhmm
* XD435U only
The PC sends the command without attaching the data code to it. On the other hand, the projector attaches to the
received command it’s current operating status as the data code and send it back to the PC. (LAMP OPERATING
TIME: “h” and “m” represent hour and minute respectively. )
[Example ] When checking the currently selected input terminal (when the INPUT VIDEO is being selected) :
Sending commands
from the PC, etc.
30 30 76 49 0D
'0' '0' 'v' 'I' ' '
Status code from
the projector
Description
Command for checking the input terminal
30 30 76 49 76 31 0D
'0' '0' 'v' 'I' 'v' '1' ' '
Check result ( VIDEO)
11) Menu setting commands (Not executable in stand-by mode. Possible only to read during muting.)
The menu setting commands are used for the menu setting of this projector. If the personal computer sends the
command without attaching the data code, the projector attaches to the received command it’s current setting value
as the data code and send it back to the PC.
ITEM
CONTRAST
BRIGHTNESS
WHITE ENHANCE
COLOR TEMP.
COLOR
TINT
SHARPNESS
GAMMA MODE
ASCII
P
Q
WEH
A
T
S
R
GS
HEX
50h
51h
57h
41h
54h
53h
52h
47h
53h
AUTO POWER ON
AUTO POWER OFF
SPLASH SCREEN
BACK COLOR
LAMP MODE
IMAGE REVERSE
MENU POSITION
CINEMA MODE
VIDEO SIGNAL
APON
APOF
SS
BB
LM
IR
MP
CINE
VS
41h
41h
53h
42h
4Ch
49h
4Dh
43h
56h
50h
50h
53h
42h
4Dh
52h
50h
49h
53h
ANAMORPHIC
PASSWORD FUNCTION
SC
PSLOCK
LANGUAGE
LG
53h
50h
43h
4Ch
43h
53h
4Bh
47h
45h
48h
4Fh
4Fh
4Eh
46h
4Eh
45h
4Ch
4Fh
4
VALUE
±30±30±30 (R from G + Main data + B from G)
±30±30±30 (R from G + Main data + B from G)
0~10, 11 (AUTO)
1(STANDARD), 2(HIGH), 3(LOW), 4(USER)
±10
±10
±05
0 (DYNAMIC), 1 (STANDARD),
2 (THEATER), 3 (AUTO)
0 (OFF), 1 (ON)
00 (OFF), 05, 10, 15, 30, 60
0 (OFF), 1 (ON)
0 (BLACK), 1 (BLUE)
0 (STANDARD), 1 (LOW)
0 (OFF), 1 (MIRROR), 2 (INVERT), 3 (MIRROR INVERT)
0 (Upper left), 1 (Lower right)
0 (OFF), 1 (AUTO)
0 (AUTO), 1 (NTSC), 2 (PAL), 3 (SECAM) ,
4 (4.43NTSC), 5 (PAL-M), 6 (PAL-N), 7 (PAL-60)
0 (OFF), 1 (ON)
0****(UNLOCK),
2****(MENU ACCESS) **** is a 4-digit figure (password)
), 1 (English), 2 (Español), 3 (Deutsch) ,
0(
4 (Français), 5 (Italiano), 6 (
), 7 (
),
8(
), 9 (
)
ITEM
RESET ALL
HORIZ.POSITION
VERT. POSITION
FINE SYNC.
TRACKING
COMPUTER INPUT
SET UP
HOLD
HOLD BEGIN
HOLD END
CLAMP POSITION
CLAMP WIDTH
UNPLUG DEVICE*
AUTO START*
REPEAT SETTING*
INTERVAL TIME*
ASCII
RSTALL
HP
VP
FN
TRK
CIN
STU
HLD
HLB
HLE
CLP
CLW
UUD
UAS
URS
UIT
HEX
52h 53h 54h
48h 50h
56h 50h
46h 4Eh
54h 52h
43h 49h
53h 54h
48h 4Ch
48h 4Ch
48h 4Ch
43h 4Ch
43h 4Ch
55h 55h
55h 41h
55h 52h
55h 49h
4Bh
4Eh
55h
44h
42h
45h
50h
57h
44h
53h
53h
54h
TRANSITION EFFECT*
UTE
55h
49h
45h
THUMBNAIL DISPLAY*
UTD
55h
49h
44h
VALUE
4Ch 4Ch + (increment), - (decrement)
+ (increment), - (decrement)
00 - 31
+ (increment), - (decrement)
0 (RGB), 1 (YCBCR/YPBPR), 2(AUTO)
1 (OFF), 2 (3.75%), 3 (7.5%)
0 (OFF), 1 (ON)
00 - 99
00 - 99
00 - 63
01 - 63
0(OFF),1(ON)
0(OFF),1(ON)
0(5 sec.), 1(10 sec.),
2(30 sec.), 3(1 min.),4(3 min.)
00=NONE, 01=SLIDE IN ←, 02=SLIDE IN →
03=WIPE ↓, 04=WIPE ↑, 05=WIPE →, 06=WIPE ←
07=SPLIT WIPE IN , 08=SPLIT WIPE OUT ,
09=SPLIT WIPE IN , 10=SPLIT WIPE OUT ↔
11=BLIND ↓, 12=BLIND →, 13=BOX WIPE IN
14=BOX WIPE OUT, 15=DISSOLVE1, 16=DISSOLVE2
0(OFF),1(ON)
↔
41h
* XD435U only
• Some commands are not executed depending on the input signal. The operational restrictions same as those on
the menu setting are applied. Refer to “Menu operation” in the User Manual for more details.
How to set the grade
Use the ASCII codes to set the grade for setting data. Please refer to the table below for the HEX code.
ASCII
HEX
'+'
2Bh
[Example 1]
'–'
2Dh
'0'
30h
'1'
31h
'2'
32h
'3'
33h
'4'
34h
'5'
35h
'6'
36h
'7'
37h
'8'
38h
When setting the AUTO POWER ON to ON. (Figures and symbols enclosed in quotation marks are
ASCII codes.):
Sending commands
from the PC, etc.
30 30 41 50 4F 4E 31 0D
'0' '0' 'A' 'P' 'O' 'N' '1' '
[Example 2]
Status code from
Description
the projector
Command for setting the
'
30 30 41 50 4F 4E 31 0D
AUTO POWER ON to ON
Command receipt confirmation
'0' '0' 'A' 'P' 'O' 'N' '1' '
(Command echo back)
'
When setting the CONTRAST R of the COLOR TEMP.-USER to +10, the CONTRAST G to 0, and
the CONTRAST B to -5. (Figures and symbols enclosed in quotation marks are ASCII codes.):
Sending commands
from the PC, etc.
Status code from
the projector
30 30 50 2B 31 30 2B 30 30 2D 30 35 0D
'0' '0' 'P' '+' '1' '0' '+' '0' '0' '-' '0' '5' ' '
[Example 3]
Description
Command for setting the
picture control
30 30 50 2B 31 30 2B 30 30 2D 30 35 0D
'0' '0' 'P' '+' '1' '0' '+' '0' '0' '-' '0' '5' ' '
Command receipt confirmation
(Command echo back)
When checking the TINT setting (when the TINT is set to +10). (Figures and symbols enclosed in
quotation marks are ASCII codes.):
Sending commands
from the PC, etc.
30 30 53 0D
'0' '0' 'S' '
'9'
39h
Status code from
Description
the projector
Command for checking
'
30 30 53 2B 31 30 0D
'0' '0' 'S' '+' '1' '0' '
5
'
the TINT setting
Check result (+10)