1
IMPORTANT SAFETY INFORMATION
Read and follow all instructions and warnings prior to using the
product.
TELEPHONE
HEADSET SYSTEM
When using your telephone equipment, these instructions and
warnings should be followed to reduce the risk of fire, electric
shock, injury to persons, and damage to property.
WELCOME
WARNINGS
S12
For your comfort, health, and safety, do not exceed moderate
listening levels.
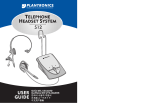
The S12 Telephone Headset System is designed to add a
headset to an existing telephone.
Use only the Listed AC power adapter supplied by Plantronics.
Unplug this product from the wall outlet before cleaning. Do not
use liquid cleaners or aerosol cleaners.
The S12 System provides precise levels of listening and talking
comfort and crystal clear voice quality.
Avoid contact with liquids. Do not locate this product near water,
for example, near a bath-tub or sink, in a wet basement, or near a
swimming pool.
This product should never be placed near or over a radiator or
heat register. This product should not be placed in a built-in
installation unless proper ventilation is provided.
Do not allow anything to rest on the power cord. Do not locate
this product near operating machinery or in areas where the
power cord is likely to be damaged by furniture or foot traffic.
Discontinue use of product and contact Plantronics if the product
overheats, has a damaged cord or plug, has been dropped or
damaged, or if the product has been dropped in water.
The S12 System is not designed to work on telephones that
have the dial pad in the handset or on cordless telephones.
This user guide provides the following steps to quickly set up
and use your headset system.
1. Identify the Components
2. Attach to Telephone
3. Set Amplifier Compatibility Switch
4. Make a Test Call
The other side has more details:
Examine other features
■ Troubleshooting
■ Technical Support Center Information
■ FCC Information
■ Parts and Accessories
■ Warranty and Service
Do not overload outlets and extension cords as this can result in
the risk of fire or electric shock.
■
Never disassemble or push objects of any kind into this product as
this may short out parts that could result in a fire or electric shock.
Use caution when installing or modifying telephone lines.
Do not use the telephone equipment to report a gas leak in the
vicinity of the leak.
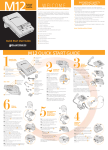
QUICK START USER GUIDE
S12 QUICK START GUIDE
Left Side View
1
Identify the
Components
1
2
11
Headset Holder
Compatibility Slide
Switch
12
S12 Amplifier
13
Headset Indicator
(Green)
14
Power Indicator
(Green)
15
Mute Indicator (Red)
16
Listen Volume Control
17
Mute Button
18
Headset/Handset
Button
10
Over-the-Head
Adjustable
Headband
Headset
Assembly
Over-the-Ear
Right Side View
3
Clothing Clip
4
Headset Plug
19
Speak Volume Control
5
Microphone
Boom
20
Speak Volume Master
(Hi, Low) Switch
6
Ear Cushion
Assembly
21
Cord (Phone to
Amplifier)
7
Earloop
22
AC Power Adapter
8
Pivot Ball Ring
9
Firefly® In-Use
Indicator
2
Attach
Amplifier to
Telephone
2.1 Unplug your telephone
handset cord from the
telephone base.
2.1
2.2 Plug your telephone
handset cord into the S12
amplifier handset jack.
2.3 Connect the cord 21
between the telephone base
jack on the S12 amplifier and
your telephone base.
2.4
2.3
2.4 Plug the headset plug into
the headset jack.
Back View
2.5 Route the headset cord through the cable management
channel on the bottom of the amplifier (not shown).
2.6 Snap in the headset holder
23
AC Power
Adapter Jack
24
Headset Jack
25
Handset Jack
26
Telephone Base Jack
10
(not shown).
2.7 Plug the AC power adapter into the AC power adapter jack
and plug into a standard
AC wall output.
2.7
Over-the-Head............converts to............Over-the-Ear
3
4
Set Amplifier
Compatibility
Slide Switch
3.1 Put on headset and press the
headset button.
The headset indicator 13 should be
on (green).
3.2 Lift the telephone’s handset off
the cradle and place it on your
desk.
3.1
The mute indicator should not be illuminated
4.2 Remove the phone handset from the
cradle and place on your desk.
4.1
If you do not hear a dial tone in the
headset, press the headset button.
1.
3.2
The headset indicator is on.
4.3 Use your telephone keypad to call a
friend or colleague.
3.4 If you don’t hear a dial tone,
adjust the compatibility slide switch
following this process:
4.4 Adjust the listen volume using the listen
volume control.
Slide the compatibility slide
switch until you hear a clear dial
tone.
1.
Experimenting with various switch
settings will not harm the amplifier
or your telephone.
Make a
Test Call
4.1 Verify that the mute button is off.
3.3 If you hear a clear dial tone,
you can proceed to Step 4.
There may be multiple settings
with a dial tone. Select the one
that sounds most like the handset
of your phone.
2.2
3.4
4.5 If your friend cannot hear you, or you
hear a buzz or hum, try changing the
compatibility slide switch.
4.21
4.4
4.5
4.6 Adjust how loud you sound to the other
party by adjusting the speak volume control.
4.7 If you sound too loud, move the speak
volume master switch to its lower setting and
adjust the speak volume control.
4.8 After completing the call, return the
handset to its cradle.
4.6
4.7
EXAMINE OTHER FEATURES
1 To receive calls with your
headset
1.1
1.1 Put on your headset.
1.2 When your telephone
rings, push the headset
button. The headset
indicator 13 should be
on (green).
1.3 Remove the handset
from the cradle and
place it on your desk.
1.4 Begin talking to
your calling party.
1.5 When you are
finished, hang up
the handset.
13
1.2
1.2
Your working system should look like this:
3
4
TIP: The handset must remain
off the cradle during phone calls.
1.3
1.3
2 To use your telephone
handset
2.1 Push the headset button.
The headset indicator should
not be illuminated.
3 To switch from your telephone
handset to your headset
3.1 Alert your caller that there
will be a short delay, and put on
your headset.
3.2 Push the headset button. The
headset indicator should be on (green).
3.3 Resume talking through
your headset.
4 To switch from your headset to
your telephone handset
4.1 Alert your caller that there will be a short delay,
and then release the headset button. The headset
indicator should not be illuminated.
4.2 Remove your headset and pick up your handset.
4.3 Resume talking through your telephone handset.
It provides the following benefits:
■
2.2
2.2 Use the telephone
handset as normal.
TROUBLESHOOTING
I cannot hear a dial tone.
■ Make sure all cable connections are correct and firmly
in place.
■ Pay special attention that handset cord 21 is properly
connected.
■ Ensure AC power adapter is connected and power is on.
■ Make sure you have pressed the headset button and the
headset indicator is on.
■ Make sure the telephone handset is off-hook.
■ Adjust listen volume control.
■ Adjust the compatibility slide switch.
■ Ensure that the headset is centered on your ear.
Caller cannot hear my voice.
■ Make sure the mute button is turned off (indicator off).
■ Increase the outgoing volume by adjusting the speak
volume control
■ Adjust headset so the microphone is closer to your mouth.
I hear a hum in the headset.
■ Adjust the compatibility slide switch until the sound is
clear. Trying other settings will not harm the amplifier or
your telephone.
Plantronics Help Desk
The Plantronics Help Desk is ready to assist you!
Dial 1-800-544-4660 or visit our website at
www.plantronics.com.
5 To use the mute function.
5.1 Press the mute button. The mute indicator
should be on (red). You will be able to hear
them but they can not hear you.
5.2 Release the mute button to
deactivate the mute function. The
mute indicator should not be illuminated.
5
FCC REQUIREMENTS
Part 68
This equipment complies with Part 68 of the FCC rules and the
requirements adopted by ACTA. On the exterior of this equipment
is a label that contains a product identifier in the format
US:AAAEQ##TXXXX. If requested, this information must
be provided to your telephone company.
A plug and jack used to connect this equipment to the premises
wiring and telephone network must comply with the applicable
FCC Part 68 rules and requirements adopted by ACTA. A compliant
telephone cord and modular plug is provided with this product. It is
designed to be connected to a compatible jack that is also compliant.
See installation instructions for details.
The REN is useful to determine the quantity of devices you may
connect to your telephone line. Excessive RENs on a telephone line
may result in the devices not ringing in response to an incoming call.
In most, but not all areas, the sum of the RENs should not exceed
five (5.0). To be certain of the number of devices you may connect
to your line, as determined by the REN, contact your local telephone
company. For product approved after July 23, 2001, the REN for
this product is part of the product identifier that has the format
US:AAAEQ##TXXXX. The digits represented by ### are the REN
without the decimal point. (For example, 03 represents a REN of 0.3.)
For earlier producers, the REN is separately shown on the label.
If this telephone equipment causes harm to the telephone network,
the telephone company will notify you in advance that temporary
discontinuance of service may be required. But if advance notice
isn’t practical, the telephone company will notify the customer as
soon as possible. Also, you will be advised of your right to file a
complaint with the FCC if you believe it is necessary.
The telephone company may make changes in its facilities,
equipment, operations, or procedures that could affect the proper
functioning of your equipment. If they do, you will be notified in
advance in order for you to make necessary modifications to
maintain uninterrupted service.
PARTS
SoundGuard® Plus™ technology quickly reduces the
level of harsh noises, such as fax tones
■
Call Clarity™ improves incoming and outgoing sound
■
Switch easily with one button selection between
headset and handset
■
Incoming and outgoing volume control
■
Mute control
If trouble is experienced with this unit, for repair or
warranty information, please contact customer service at
(800) 544-4660. If the equipment is causing harm to the
network, the telephone company may request that you
disconnect the equipment until the problem is resolved.
DO NOT DISASSEMBLE THIS EQUIPMENT: it does not
contain any user serviceable components.
We recommend the installation of an AC surge arrester in
the AC outlet to which this equipment is connected. Telephone
companies report that electrical surges, typically lighting
transients, are very destructive to customer terminal equipment
connected to AC power sources.
INDUSTRY C ANADA NOTICE
Terminal Equipment
Notice: This equipment meets the applicable Industry Canada
Terminal Equipment Technical Specifications. This is confirmed
by the registration number. The abbreviation, IC, before the
registration number signifies that registration was performed
based on a Declaration of Conformity indicating that Industry
Canada technical specifications were met. It does not imply
that Industry Canada approved the equipment.
Notice: The Ringer Equivalence Number (REN) for this terminal
equipment is marked on the equipment itself. The REN assigned
to each terminal equipment provides an indication of the
maximum number of terminals allowed to be connected to
a telephone interface. The termination on an interface may
consist of any combination of devices subject only to the
requirement that the sum of the Ringer Equivalence Numbers
of all the devices does not exceed five.
LIMITED WARRANTY
for Plantronics Commercial Products
Purchased in the US and Canada
Headset Holder
65217-01
Cord (phone to amplifier)
65218-01
AC Power Adapter
73079-01
Adjustable Headband
43298-01
Headset Assembly
65219-01
345 Encinal Street
Santa Cruz, California 95060
(800) 544-4660
www.plantronics.com
Pivot Ball Ring
45650-03
Ear Cushion Assembly
(Leatherette Assembly)
© 2002-2006 Plantronics, Inc. All rights reserved. Plantronics, the logo
design, Plantronics and logo design combined, Call Clarity, Firefly and
SoundGuard Plus are trademarks or registered trademarks of Plantronics, Inc.
All other trademarks are the property of the respective owners.
46186-01
Patents U.S. 5,210,791, D394,437 & D403,327; Finland 20183 & 20184;
GB Regd.Des.No. 2073246 & 2073247; Sweden 64 176 & 64 177
65220-01
Printed in USA. 65168-01 (08-06)
Amplifier Assembly
• This warranty covers defects in materials and
workmanship of Commercial Products manufactured,
sold or certified by Plantronics which were purchased
and used in the United States and Canada.
• This warranty lasts for one year from the date of
purchase of the Products.
• This warranty extends to you only if you are the end user
with the original purchase receipt.
• We will, at our option, repair or replace the Products that
do not conform to the warranty. We may use functionally
equivalent reconditioned/refurbished/remanufactured/
pre-owned or new Products or parts.
• To obtain service in the U.S. contact Plantronics at
(800) 544-4660 and in Canada call (800) 540-8363.
If you need additional information, please contact our
service centers at the numbers provided.
• THIS IS PLANTRONICS’ COMPLETE WARRANTY FOR
THE PRODUCTS.
• This warranty gives you specific legal rights, and you may
also have other rights which vary from state to state or
province to province. Please contact your dealer or our
service center for the full details of our limited warranty,
including items not covered by this limited warranty.