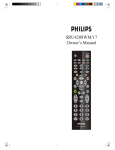
1
WIRELESS AUDIO/VIDEO SENDER
with IR Extender Feature
Transmisor inalámbrico de Audio
y Video con extendedor IR
RECEIVER
Receptor
SENDER
Transmisor
MODEL NO. PRT215
(includes T215 Sender and R215 Receiver)
PRT215_h13957b-050906
PRT215-OM_H13957B.pmd
1
(incluye el transmisor T215 y el receptor R215)
9/5/2006, 12:05 PM
OWNER’S MANUAL
Manual del Usuario
INTRODUCTION
CONTENTS
Your Wireless Audio/Video Sender system consists of a Sender unit which
you connect to your satellite receiver, DVD player, etc., and a Receiver
unit that you connect to a TV anywhere in your home. The Audio/Video
Sender converts the A/V signal from your A/V product into a 2.4 GHz
wireless Radio Frequency (RF) signal and transmits it (even through walls)
to the Audio/Video Receiver unit. The Audio/Video Receiver converts the
signal back to an A/V signal and passes it through a cable to your TV’s
COAX input, or A/V input jacks.
INTRODUCTION ........................................................................ 3
The Audio/Video Sender system also includes an IR Extender feature. This
lets you remotely control the A/V product that the Sender is connected to,
from the location where the Receiver is located. For example, you can
control a DVD Player in your living room, while watching it on a TV in
your bedroom.
There are just a few simple steps to follow to hook up your Audio/Video
Sender system to a satellite receiver, VCR, DVD Player, or Cable Box.
CONTROLS AND CONNECTIONS .................................................. 4
SENDER ............................................................................ 4
RECEIVER .......................................................................... 5
CONNECTING UP ..................................................................... 6
HOOKING UP THE SENDER .................................................... 6
HOOKING UP THE RECEIVER ................................................. 8
FINE TUNING YOUR SYSTEM .................................................... 10
IR EXTENDER FEATURE ......................................................... 11
FCC CAUTION
This equipment generates and uses radio frequency energy, and if not
installed and used properly, that is, in strict accordance with the
manufacturer’s instructions, it may cause interference to radio and
television reception. It has been type tested and found to comply with the
limits for remote control devices in accordance with the specifications in
Sub-Parts B and C of Part 15 of FCC Rules, which are designed to provide
reasonable protection against such interference in a residential installation.
However, there is no guarantee that interference will not occur in a
particular installation. If this equipment does cause interference to radio or
television reception, which can be determined by unplugging the equipment,
try to correct the interference by one or more of the following measures.
• Reorient the antenna of the radio/TV experiencing the interference.
• Relocate the equipment with respect to the radio/TV.
• Move the equipment away from the radio/TV.
• Plug the equipment into an outlet on a different electrical circuit from the
radio/TV experiencing the interference.
• If necessary, consult your local dealer for additional suggestions.
TV Channel
Switch
2.4 GHz Channel
Switch
2
PRT215-OM_H13957B.pmd
2-3
RECEIVER
(BOTTOM VIEW)
SENDER (TOP VIEW)
3
9/5/2006, 12:05 PM
CONTROLS
AND
CONNECTIONS
Audio/Video Sender
Audio/Video Receiver
Antenna for
IR Extender
Feature
2.4 GHz Video
Antenna
2.4 GHz Video
Antenna
TV Output
Connector
DC6V
2.4 GHz Channel
Switch
DC6V
IR Extender
Jack
A/V Input
Jacks
ON-OFF
Switch
(on side)
TV Channel
Switch
(on bottom)
4-5
2.4 GHz Channel
Switch
(on bottom)
Power Supply
Jack
4
PRT215-OM_H13957B.pmd
A/V Input
Jacks
5
9/5/2006, 12:05 PM
ON-OFF
Switch
(on side)
Power Supply
Jack
CONNECTING UP
Hooking up the Audio/Video Sender
1. Connect one set of Audio/Video cables to the VIDEO and AUDIO
jacks of your Audio/Video Sender. Take care to match the colors of the
plugs on the cable with the jacks on the Audio/Video Sender.
2. Connect the other end of the cable to the Audio/Video OUT jacks on
your TV. Take care to match the colors of the plugs on the cable with
the jacks on the TV. If the jacks on the TV are colored differently,
connect the yellow plug to the jack labelled VIDEO, the red plug to the
jack labelled AUDIO RIGHT and the white plug to the jack labeled
AUDIO LEFT. See diagram A below.
Note: If your TV does not include Audio/Video OUT jacks, you will
need to remake the connections as shown in diagram B) using the
TV antenna (coaxial) connections to link up a Satellite Receiver
(DBS), or Cable Box, or VCR, or DVD Player to your TV.
A/V Cables
Coaxial
Cable
SAT Receiver
SAT Receiver
A) Connections for a TV
with A/V OUT jacks.
3. Plug the Audio/Video Sender’s Power Supply into a convenient 120 volt
wall outlet and plug its jack into the Audio/Video Sender.
4. Position the Audio/Video Sender in a convenient location such as on top
of your TV and orient the antenna so that the flat side points in the
direction of the room where you will be installing the Receiver.
If you have several A/V
components:
If you have two or more A/V
components (e.g. Satellite Receiver
(DBS), VCR, Cable Box, DVD Player,
etc.) that you want to watch in another
room, they will probably already be
hooked up to the local TV in series (see
the diagram to the right). To connect the
Audio/Video Sender you just need to
identify the last component in the chain
and connect its LINE OUT jacks to the
Audio/Video Sender’s A/V IN jacks.
If the last component in the chain does
not have spare LINE OUT jacks,
reconnect the local TV to the last
component in the chain using a coaxial
cable to connect to the VHF/UHF jack,
then use the A/V connections for the
Audio/Video Sender.
B) Connections for a TV
without A/V OUT jacks.
6
PRT215-OM_H13957B.pmd
6-7
7
9/5/2006, 12:05 PM
SAT Receiver
Cable Box
DVD Player
Hooking up the Audio/Video Receiver
If your TV does not have A/V connectors:
1. Connect a set of Audio/Video cables to the A/V OUT jacks of your
Audio/Video Receiver. Connect the other end to your TV.
You can use the supplied coaxial cable to connect the TV OUT COAX
socket on the Audio/Video Receiver to the Antenna input on your TV. If
you already have an antenna connected to your TV, you will need to use a
TV antenna splitter as shown below.
2. Plug the Audio/Video Receiver’s Power Supply into a 120 volt wall
outlet and plug its jack into the Audio/Video Receiver.
Set your TV and the TV Channel switch on the Audio/Video Receiver (on
the bottom of the unit) to the same channel (3 or 4).
3. Position the Audio/Video Receiver in a convenient location such as on
top of your TV and orient the antenna so that the flat side points in the
direction of the room where you set up the Audio/Video Sender.
If you want to use your Video Sender to transmit from your Stereo
System only:
Just hook up the Video Sender using only the red and white jacks for the
right and left channels of the audio signal. Leave the yellow (video) jacks
unconnected.
If your second TV is already hooked
up to a Satellite Receiver or other
A/V device:
If your Satellite Receiver or other A/V
component is connected to the TV using
A/V cables, you can connect the Audio/
Video Receiver to the free LINE IN
jacks on the component. If there are no
LINE IN jacks, you will need to use a
TV antenna splitter as described on the
next page.
A/V component
8
PRT215-OM_H13957B.pmd
8-9
9
9/5/2006, 12:05 PM
FINE TUNING YOUR SYSTEM
The Wireless Audio/Video Sender usually works best with the flat faces of
the antennas on the Sender and Receiver units facing each other, see
diagram below. Sometimes, however, reflections and other effects in your
home may affect the signal so that some adjustment of either the Sender or
Receiver antenna might be necessary to get the best signal.
USING
THE
IR EXTENDER
FEATURE
The IR extender feature lets you use your PM725T remote control to control
the A/V product that the Audio/Video Sender is connected to. E.G., if the
Audio/Video Sender is connected to a DVD Player, or VCR in your living
room, and the Audio/Video Receiver is connected to a TV in your bedroom;
you can control the DVD Player or VCR while watching the picture from it
on the TV in your bedroom. The remote sends Radio Frequency (RF)
commands to the Audio/Video Sender (the unit with the thin antenna on it).
It receives the RF commands from your remote and converts them to
Infrared (IR) commands. You plug the IR extender cable into the jack on
the back of the Audio/Video Sender and attach the IR emitters to the front
of the DVD Player, or VCR, etc. that you want to control.
1. Plug the IR extender jack on the IR emitter cord into the IR EXT.
socket located on the back of the Audio/Video Sender.
Audio/Video
Sender.
DVD
VCR
If you are not getting any sound or picture at all from the Receiver:
• Check that the CHANNEL slide switch (labeled A, B, C, D) on both
units is set to the same letter. The switch is on the bottom of the Sender
unit and it’s under the flip-up antenna on the Receiver unit.
• Check that both the Sender’s and Receiver’s power supplies are
plugged in.
• Check that the ON/OFF switch on the Sender and Receiver are ON.
If the video or sound is poor, or there is interference:
Try changing the channel on both units. Do this by adjusting the
CHANNEL slide switch on each unit to any position from A to D. Make
sure both units are set to the same letter.
LEFT
IR EXT.
IR emitter
10-11
RIGHT
DC 12V
AUDIO IN
IR extender jack
2. Place the emitter cord in front of the two devices you want to control
(e.g., DVD and VCR).
3. Make sure that the two IR emitters are attached close to the IR sensors
on the devices you want to control.
The IR emitter cord lets you control up to two IR devices.
10
PRT215-OM_H13957B.pmd
IR emitter
VIDEO IN
11
9/5/2006, 12:05 PM
INTRODUCCIÓN
CONTENIDO
Su sistema de Transmisor inalámbrico de Audio y Video consiste en una
unidad de transmisor que se conecta a un sistema de satélite, reproductor
de DVD, etc., y una unidad de receptor que se conecta a un Televisor
dondequiera en su hogar. El remitente de Audio/Video convierte la señal de
A/V de su producto de A/V en una señal inalámbrica de radiofrecuencia
(RF) de 2.4 Gigahertz y la transmite (incluso a través de las paredes) a la
unidad del receptor de Audio/Video. El receptor de Audio/Video convierte
la señal de nuevo a una señal de A/V y la pasa a través de un cable a la
entrada COAXIAL de su TV, o a una entrada A/V. El sistema del
remitente de Audio/Video también incluye una característica IR. Esto le
deja controlar remotamente el producto de A/V con el que el remitente está
conectado, del lugar en donde se localiza el receptor. Por ejemplo, usted
puede controlar a un reproductor de DVD en la sala, mientras que lo mira
en un Televisor en su dormitorio. Hay justo algunos pasos simples a seguir
para conectar el sistema de remitente de Audio/Video a un receptor de
satélite, reproductor de VCR, de DVD, o caja de cable.
INTRODUCCIÓN .................................................................................... 12
CONTROLES Y CONEXIONES
............................................... 14
TRANSMISOR ................................................................................... 14
RECEPTOR ........................................................................................ 15
CONECTADO .......................................................................................... 16
CONECTANDO EL TRANSMISOR
..................................... 16
CONECTANDO EL RECEPTOR ..................................................... 18
AJUSTE DEL SISTEMA
......................................................... 20
CARACTERÍSTICA DEL EXTENDEDOR IR ...................................... 21
ADVERTENCIA DE LA FCC:
Este equipo genera y utiliza energía de radiofrecuencia, y si no se instala y
utiliza correctamente, es decir, estrictamente de acuerdo con las
instrucciones del fabricante, puede provocar interferencia con la recepción
de radio y televisión. Ha sido probado y se ha determinado que cumple con
los límites para dispositivos de control remoto de acuerdo con las
especificaciones contenidas en las Sub-Partes B y C de la Parte 15 de las
Normas de la FCC, que están diseñadas para ofrecer una protección
razonable contra dicha interferencia en una instalación residencial. Sin
embargo, no se puede garantizar que no ocurra interferencia en alguna
instalación en particular. Si el equipo ocasiona interferencia en la recepción
de radio o televisión, lo cual puede ser determinado desenchufando el
equipo, intente corregir la interferencia mediante una o más de las
siguientes medidas:
• Reoriente la antena de la radio/TV que experimenta la interferencia.
• Ubique el receptor en otro lugar con respecto a la radio/TV.
• Mueva el receptor más lejos de la radio/TV.
• Conecte el receptor en una toma de un circuito eléctrico diferente al de
la radio/TV que está experimentando la interferencia.
• De ser necesario, consulte a su proveedor local por más sugerencias.
Interruptor de
canal de TV
Interruptor De
Canal de 2.4
Gigahertz
12
PRT215-OM_H13957B.pmd
12-13
RECEPTOR
(VISTA DE ABAJO )
TRANSMISOR
(VISTA DE ARRIBA )
13
9/5/2006, 12:05 PM
CONTROLES Y CONEXIONES
Remitente de Audio/Video
Receptor de Audio/Video
Antena para la
función del
extendedor IR
Antena de
Vídeo de 2.4
Gigahertz
Antena de
Vídeo de 2.4
Gigahertz
Enchufe de
Salida del TV
Interruptor De
Canal de 2.4
Gigahertz
DC6V
DC6V
Entrada para
el Extendedor
IR
Entrada para
Audio/Video
Interruptor de
encendido/
apagado (al
lado)
Interruptor de
canal de TV
(debajo)
Entrada para
la Fuente de
Alimentación
14
PRT215-OM_H13957B.pmd
14-15
Entrada para
Audio/Video
15
9/5/2006, 12:05 PM
Interruptor de
canal de 2.4
Gigahertz (debajo)
Interruptor de
encendido/
apagado (al
lado)
Entrada para
la Fuente de
Alimentación
CONECTADO
Conectando el transmisor de Audio y Video
1. Conecte su sistema de cables de Audio/Video en las entradas de
VIDEO y AUDIO de su remitente. Tenga cuidado al emparejar los
colores de los enchufes en los cables con las entradas del remitente de
Audio/Video.
2. Conecte el otro extremo del cable a la salidas de Audio/Video del TV.
Tenga cuidado al emparejar los colores de los enchufes del cable con las
salidas en la TV. Si las salidas en el TV son de un color diferente,
conecte el enchufe amarillo en la entrada rotulada VÍDEO, el enchufe
rojo en la entrada rotulada AUDIO DERECHO y el enchufe blanco en
la entrada rotulada AUDIO IZQUIERDO. Vea el diagrama de abajo.
Nota: Si su Televisor no incluye salidas de Audio/Video, usted
necesitará rehacer las conexiones según lo demostrado en el
diagrama B) usando las conexiones (coaxiales) de antena de la TV
para acoplar un receptor de satélite (DBS), una caja de cable, un
reproductor de VCR, o de DVD a su TV.
Cable
Coaxial
Cables de A/V
SAT Receiver
SAT Receiver
3. Conecte la fuente de alimentación del remitente de Audio/Video en un
enchufe de pared conveniente de 120 voltios y conecte el otro extremo
en la entrada del remitente de Audio/Video.
4. Coloque el remitente de Audio/Video en una lugar conveniente por
ejemplo sobre el TV y oriente la antena de modo que los puntos
laterales planos estén en dirección del cuarto en donde usted instalará el
receptor.
Si usted tiene varios componentes
de A/V:
Si usted tiene dos o más componentes de
A/V (ej. receptor de satélite (DBS),
VCR, caja de cable, reproductor de
DVD, etc.) que usted desea mirar en
otro cuarto, estos probablemente ya
están conectados a un TV local en serie
(véase el diagrama a la derecha). Para
conectar el remitente de Audio/Video
usted necesita identificar el ultimo
componente conectado en la cadena y
debe conectar la LÍNEA de SALIDA de
enchufe en la entrada del remitente de
Audio/Video. Si este componente en la
cadena no tiene LÍNEA de salida para
un enchufe A/V, vuelva a conectar la
TV local al ultimo componente en la
cadena usando un cable coaxial para
conectar con el enchufe de antena VHF/
UHF, después utilice las conexiones de
A/V para el remitente de Audio/Video.
SAT Receiver
Cable Box
DVD Player
Recibidor de Satélite
Caja de Cable
A) Conexiones para un TV
con salidas de Audio/Video.
B) Conexiones para un TV sin
salidas de Audio/Video.
Reproductor de DVD
16
PRT215-OM_H13957B.pmd
16-17
17
9/5/2006, 12:05 PM
Conectando el receptor de audio y video
Si el Televisor no tiene entradas de conexión de A/V:
1. Conecte un sistema de cables de Audio/Video en las salidas de Audio/
Video de su receptor. Conecte el otro extremo en su TV.
Usted puede utilizar el cable coaxial provisto para conectar el enchufe
COAXIAL de TV en el receptor de Audio/Video con entrada de antena de
su TV. Si usted ya tiene una antena conectada en su TV, usted necesita
utilizar un divisor de TV y antena según lo demostrado en el diagrama de
abajo.
2. Conecte la fuente de alimentación del receptor de Audio/Video en un
enchufe de pared de 120 voltios y el otro extremo en el receptor de
Audio/Video.
3. Coloque el receptor de Audio/Video en una lugar conveniente, por
ejemplo sobre el Televisor y oriente la antena de modo que los puntos
laterales planos estén en la dirección del cuarto en donde usted instalara
el remitente de Audio/Video.
Fije su TV y el interruptor de canal de TV en el receptor de Audio/Video
(debajo de la unidad) al mismo canal (3 o 4).
Si usted desea utilizar su remitente de video para transmitir de su
sistema estéreo solamente:
Simplemente conecte el remitente de video usando solamente los conectores
rojos y blancos para los canales derechos e izquierdos de la señal de audio.
Deje el enchufe (de video) amarillo desconectado.
Si el segundo Televisor esta
conectado al receptor de satélites u
otro dispositivo de A/V:
Si el receptor de satélite u otro
componente de A/V está conectado en
el TV usando los cables de A/V, usted
puede conectar el receptor de video/
audio en la Línea de entrada libre del
componente. Si no hay LÍNEA de
entrada disponible, usted necesitará
utilizar un divisor de TV y antena según
lo descrito en la página siguiente.
A/V component
Reproductor de CD
Componente A/V
18
PRT215-OM_H13957B.pmd
18-19
19
9/5/2006, 12:05 PM
AJUSTANDO SU SISTEMA
El remitente inalámbrico de Audio/Video generalmente trabaja mejor
cuando las caras planas de las antenas del remitente y la unidad del
receptor están en la misma dirección (frente a frente), mire el diagrama de
abajo. A veces, sin embargo, las reflexiones y otros efectos en su hogar
pueden afectar la señal de modo que un ajuste de la antena del remitente o
del receptor puede ser necesario para conseguir una mejor señal.
USANDO LA CARACTERISTICA DEL
EXTENDEDOR IR
La característica IR del extendedor le deja utilizar el control remoto PM725T
para controlar el producto de Audio/Video de donde el remitente de Audio/
Video está conectado. E.G., si el remitente de Audio/Video está conectado
en un reproductor de DVD, o VCR en su sala, y el receptor de Audio/
Video está conectado en un Televisor en su dormitorio; usted puede
controlar el reproductor de DVD o VCR mientras que mira la imagen en el
TV en su dormitorio. El telecontrol envía comandos de radiofrecuencia
(RF) al remitente de Audio/Video (la unidad con la antena delgada). Este
recibe los comandos de RF de su telecontrol y los convierte a comandos
(IR) infrarrojos. Conecte el enchufe del cable del extendedor IR en la
parte posterior del remitente de Audio/Video y luego adhiera los emisores
IR al frente del reproductor de DVD, VCR, etc. al que usted desea
controlar.
Transmisor
A/V
DVD
VCR
Si usted no consigue ningún sonido o imagen del receptor:
· Compruebe que el interruptor de CANAL (etiquetado A, B, C, D) en
ambas unidades este fijo en la misma letra. El interruptor está en la
parte de abajo de la unidad del remitente y está debajo de la antena en
la unidad del receptor.
LEFT
IR EXT.
Emisor IR
VIDEO IN
RIGHT
DC 12V
AUDIO IN
Emisor IR Enchufe del extendedor IR
· Compruebe que las fuentes de alimentación del remitente y del receptor
estén enchufadas.
1. Conecte el enchufe del cable del extendedor IR en la entrada del emisor
situada en la parte posterior del remitente de Audio/Video.
· Compruebe que el interruptor ON/OFF (encendido/apagado) en el
remitente y el receptor estén ENCENDIDOS.
2. Coloque el cable emisor enfrente de los dos dispositivos que usted desea
controlar (Ej., DVD y VCR).
Si la imagen del video o el sonido es malo, o hay interferencia:
Intente cambia el canal en ambas unidades. Haga esto ajustando el
interruptor de CANAL en cada unidad a cualquier posición de A a D.
Cerciórese de que ambas unidades estén fijadas en la misma letra.
3. Cerciórese de que los dos emisores IR estén adheridos cerca de los
censores IR en los dispositivos que usted desea controlar.
El cable IR del emisor le deja controlar hasta dos dispositivos IR.
20
PRT215-OM_H13957B.pmd
20-21
21
9/5/2006, 12:05 PM
LIMITED ONE YEAR WARRANTY
GARANTÍA LIMITADA POR UN AÑO
Philips warrants that this product shall be free from defects in material,
workmanship and assembly, under normal use, in accordance with the
specifications and warnings, for one year from the date of your purchase of
this product. This warranty extends only to the original purchaser of the
product, and is not transferable. To exercise your rights under this warranty,
you must provide proof of purchase in the form of an original sales receipt
that shows the product name and the date of purchase. For customer
support or to obtain warranty service, please call 919-573-7854. THERE
ARE NO OTHER EXPRESS OR IMPLIED WARRANTIES. Philips’
liability is limited to repair or, at its sole option, replacement of the product.
Incidental, special and consequential damages are disclaimed where
permitted by law. This warranty gives you specific legal rights. You may
also have other rights that vary from state to state.
Philips garantiza que este producto carece de defectos de material,
manufactura o armado, bajo uso normal y de acuerdo con las
especificaciones y advertencias, por el plazo de un año a partir de la fecha
de compra de este producto. Esta garantía cubre únicamente al comprador
original del producto y no es transferible. Para ejercer sus derechos bajo
esta garantía, debe proporcionar una prueba de compra mediante una
factura original que muestre el nombre del producto y la fecha de compra.
Por atención al cliente o para obtener servicio de garantía, sírvase llamar al
919-573-7854. NO EXISTEN OTRAS GARANTÍAS IMPLÍCITAS O
EXPLÍCITAS. Las obligaciones de Philips se limitan a la reparación o, a su
sola opción, al reemplazo del producto. No se aceptan reclamos por daños
incidentales, especiales e indirectos, de acuerdo a lo permitido por la ley.
Esta garantía le otorga a usted derechos legales específicos. Usted también
tener otros derechos que pueden variar de estado a estado.
Made in China. Quality Assured in USA.
Ledgewood, NJ 07852
Hecho en China-TC,
Aseguración de calidad en Estados Unidos
Ledgewood, New Jersey 07852
22
PRT215-OM_H13957B.pmd
22-23
23
9/5/2006, 12:05 PM
Universal
Remote
Model
PM725T
Table of Contents
Introduction
Introduction ...................................................... 3
Button Functions ............................................... 4
SAT/DVD Functions .................................... 6
Setup ............................................................... 7
Battery Installation ....................................... 7
Battery Saver ............................................... 7
Code Saver ................................................. 7
Power-On default ........................................ 7
Code Setup ................................................. 7
Code Entry ....................................................... 8
Direct Code Entry ........................................ 8
Code Search ............................................... 8
Brand Search ............................................... 9
Code Identification Feature ............................. 10
Sleep Timer .................................................... 10
Programming Combo Device Codes ............... 11
Controlling Combo Devices ............................ 11
Controlling Devices with Power On and Off .... 11
VCR/DVD/DVR Punch-Through Feature ....... 12
Volume/Mute Control Feature ......................... 12
Setting Volume/Mute Control, Punch-Through . 13
Setting any Mode to use its own Volume/Mute 13
Code Learning ................................................ 14
Tips on Learning ........................................ 14
IR Transmitter Finder Feature ..................... 16
Learning Commands ....................................... 17
Clearing Commands ....................................... 18
Clearing Learned commands for a mode ..... 18
Master Clear ............................................. 18
TV/VCR/INPUT ............................................ 18
IR Extender Feature ....................................... 19
Troubleshooting .............................................. 20
Instrucciones en Español ................................. 22
Congratulations on your purchase of a Philips
Universal Remote Control. Philips Universal
Remotes let you replace a broken or lost remote or
combine more than one remote into one. In
addition, this remote is equipped with a command
learning feature which lets the remote learn
commands from your original equipment remote
control!
2
3
This remote control operates the common features
of most but not all models and brands of IR
Infrared Controlled Video Equipment. This remote
may provide functions that are not available on
your equipment. Some functions of your particular
equipment (e.g. menu functions) may not be
controlled by this remote. In such cases, use the
original remote control for your equipment. Please
use this manual to become familiar with your
Philips Universal Remote. After you are familiar
with your remote the first thing you need to do is to
install batteries and setup your remote for your
particular product and brand.
The remote also transmits wireless Radio Frequency (RF) commands to the video sender. The
video sender receives these commands and
converts them to regular Infrared (IR) commands.
These IR commands are then emitted from an IR
Extender cable to control your A/V components.
This lets you control your A/V components from
ANY room in your home - you don’t need to aim
the remote at your component!
Thank you for buying a Philips remote and we hope
it will give you many years of service.
Button Functions, cont.
Button Functions
1.
23.
2.
22.
3.
21.
4.
20.
5.
19.
6.
18.
7.
17.
8.
16.
9.
15.
10.
14.
11.
13.
12.
Note: The REC button must be pressed TWICE to
record from your VCR. For some brands of VCRs, you
might need to press the REC button once, then press it
again for three seconds.
Some buttons on the remote might have functions that
are referred to by different names on the device you are
controlling. E.G. PREV.CHAN may be called RECALL, or
ENTER may be called DISPLAY. These differences
depend on the brand and model of your product. Also,
this remote can only operate features that exist on your
product. E.G., your product must have PREV.CHAN
ability for the PREV.CHAN button to operate this
feature.
4
1. TV, VCR, DVD,CBL, AUX, CD, SAT Selects
product to be operated.
2. NUMBERS Enter numbers for direct channel
selection. Some products require Enter to be
pressed after channel selection.
3. ENTER Used after direct channel number entry to
immediately change to the selected channel.
4. MENU brings up the DVD disc Menu screen - use
with the UP, DOWN, LEFT & RIGHT navigation
buttons.
5. GUIDE brings up the DVD Title Menu screen.
Displays on-screen program guide.
6. VOLUME UP/DOWN Changes the volume level of
the product, normally the TV.
7. UP, DOWN, LEFT & RIGHT navigation buttons.
8. OK Selects menu items for the device you are
controlling.
9. PREV. CHAN Returns to the previously selected
channel, or DVD repeat toggle. REPEAT A-B
performs DVD players “A-B Repeat” (or RPT A.B)
function for repeat play of current Chapter or Track.
10. PIP TV Picture-in- Picture control.
11. CC (SUBTITLE) TV Closed Caption (if your TV has
this feature) or DVD Subtitle toggle.
12. LEARN Used to setup learning functions.
13. RECORD, PLAY, STOP, REW, FF, PAUSE
VCR control buttons operate your VCR even when
the remote is set to operate the TV. Also operates
DVD Scan -/+.
14. CODE SEARCH Used for setup.
15. SLEEP Turns off the TV after a period of 1 to 99
minutes.
16. MUTE Turns off the TV sound while the picture
remains.
17. TOGGLE Swaps TV PIP screens.
18. CHANNEL UP/DOWN Changes the channels.
CHAPTER +/- controls DVD/CD track selection i.e.
DVD/CD Track Skip Up/Down (in DVD and SAT
modes). Note the VCR buttons also control DVD
when in DVD Mode.
19. QUIT Used to exit menu functions.
20. INFO/SELECT Displays/selects on-screen channel
information, etc.
21. TV/VCR/INPUT For some TVs, press repeatedly to
select from available viewing sources (antenna,
cable box, VCR, etc.).
22. POWER Turns product On or Off.
23. Red Indicator Lights when any button is pressed.
5
Button Functions, cont.
DVD Functions (labeled in Blue)
SCAN+ and SCAN- buttons control the speed of Fast
Forward and Reverse Playback respectively.
CHAPTER+ and CHAPTER- buttons respectively
locate the succeeding or preceding Chapters or Tracks
on a disc.
REPEAT A-B button performs DVD players “A-B
Repeat” (or RPT A.B) function for repeat play of current
Chapter or Track.
INFO/SELECT button brings up DVD Display or
Control Menu for Chapter/Track/Title number, Time
remaining/elapsed indication, system information, etc.
MENU brings up the DVD disc Menu screen - use with
the UP, DOWN, LEFT & RIGHT navigation buttons.
OK button is used for on-screen Menu selection. Note
some DVD players require the Play button to be used.
SUBTITLE ON-OFF (CC) Turns the subtitles on or off.
QUIT Exit On-Screen Menus and/or Return to previous
On-Screen selection.
Note, not all DVD Players support all the functions
described above.
SAT Functions
GUIDE button displays on-screen Satellite Channel
Guide.
CHAPTER+ and CHAPTER- buttons perform the
“Page+” and “Page-” function for on-screen Guide
Menus used by some Satellite systems.
INFO/SELECT button brings up Satellite Display screen
for current Channel and system information.
MENU brings up the Satellite Menu screen - use with the
UP, DOWN, LEFT & RIGHT navigation buttons.
OK button is used for on-screen Menu selection.
QUIT button is used to Exit or Clear on-screen Menu
displays.
Setup
Battery Installation
1. On the back of the remote,
push down on the tab and
lift the cover off.
2. Match the batteries to the
+ and - marks inside the
battery case, then insert 2
AAA Alkaline batteries.
3. Press the battery cover
back into place.
Battery Saver
Your remote automatically turns off if the buttons are
depressed more than 30 seconds. This will save your
batteries should your remote get stuck in a place where
the buttons remain depressed (e.g., between the sofa
cushions).
Code Saver
Codes are stored in permanent memory while you are
changing batteries so you will not lose any codes
stored in the remote while you are changing batteries.
Power-On Default
The remote powers on in TV mode.
Code Setup
The CODE SEARCH button is used to setup the
remote. You can either setup the remote using the code
for your brand of product, from the code tables (on
separate sheet), or you can search through the library
of codes until you find a code that works for your
product.
Please refer to “Programming with Code Search” on page
8 for more information on using the code search feature
to learn how to search through the library of codes for
your products.
NOTE: You can store any kind of code under any mode
(except TV). I.E. you can store a VCR code under the
CBL button, or a DVD code under the VCR button, etc.
However, you can only store TV codes under the TV
button.
6
7
Code Search, cont.
Direct Code Entry
1. Press and hold the CODE SEARCH button until the
red indicator stays on, then release the CODE
SEARCH button.
2. Press and release the desired mode button (TV,
VCR, etc.). The red indicator blinks, then stays lit.
3. Enter the 4 digit code from the code tables (on
separate sheet). Note: after a valid code entry, the
red indicator turns off. For an invalid code, the red
indicator flashes.
4. With your device on, press CHANNEL UP. If the
device responds, no further programming is required.
Note: If some buttons do not operate your equipment,
try one of the other codes for your brand.
Write your codes down here for easy reference later.
Type
Type stored
TV
Code
TV
CBL
DVD
VCR
SAT
Code Search
If your product does not respond after you have tried all
the codes for your brand, or if your brand is not listed,
try searching for your code by following these steps.
1. Manually turn on the device (TV, VCR, etc.) to be
controlled.
2. Press and hold the CODE SEARCH button until the
red indicator stays on, then release the CODE
SEARCH button.
3. Press and quickly release the desired mode button
(TV, VCR, etc.). The red indicator blinks off once.
4. Press the CHANNEL UP button repeatedly (up to
300 times) until the device to be controlled changes
channel. The red indicator blinks off with each
button press. If you accidentally overshoot the
code required, press the CHANNEL DOWN button
to backtrack through the library until the device
changes channel. Pressing CHANNEL UP changes
direction to forward again.
5. Press and release MUTE to install the code.
8
Most users will store VCR codes under the VCR button,
Cable codes under CABLE, etc. If (for example) you
want to store a VCR code under CABLE, first follow the
procedure for Direct Code Entry (previous page) and
press CABLE in step 2 of Direct Code Entry, then enter
ANY VCR code in step 3 of Direct Code Entry. Then
follow the steps above for Code Search (or Brand
Search, below). Note: If the device does not have a
CHANNEL UP button, use PLAY (VCR only) or
POWER instead. Code Search starts from the currently
stored 4 digit number under that mode.
Code Search by Brand
Lets you search for a code for a specific Brand within
the Code Library for a particular manufacturer.
1. Turn on the device (TV, VCR, etc.) to be controlled.
2. Press and hold the CODE SEARCH button until the
red indicator remains on, then release CODE
SEARCH button.
3. Press and quickly release the desired mode button
(TV, VCR, etc.). The red indicator blinks off once.
4. Press and release the numeric button (0-9)
corresponding to desired Manufacturer (see table on
code list sheet). The red indicator blinks off once.
Note, pressing “0” performs a full library search same
as normal Code Search Method on previous page.
5. Press the CHANNEL UP button ((or POWER or
PLAY (VCR only)) repeatedly until the device to be
controlled changes channel. The red indicator blinks
off with each button press. If you accidentally
overshoot the code required, press the CHANNEL
DOWN button to backtrack through the library until
the device changes channel. Pressing CHANNEL
UP changes direction to forward again.
6. Press and release MUTE to install the code.
Brand Search Method entry is now complete.
Note: When all codes under a Brand have been searched
the red indicator flashes rapidly for 3 seconds.
9
Code Identification Feature
The Code Identification Feature allows you to identify
the 4 digit library code stored under your device key. For
example, if you want to find out what 4 digit code is
stored under your TV device key, follow the six steps
below:
1. Press and hold the CODE SEARCH button until the
red indicator stays on. Release the CODE SEARCH
button.
2. Press and release the desired mode button (TV,
VCR, etc.). The red indicator blinks, then stays lit.
3. Press and release the CODE SEARCH button. The
red indicator blinks off.
4. To find the first digit for the code stored under the
mode key pressed in step 2, press each numeric key
from 0-9 in turn. When the red indicator blinks off
the number you pressed is the first digit for the code
you are searching for.
5. To find the second digit, repeat step 4, this time
when the red indicator blinks off this is the second
digit.
6. Repeat step 4 to find the third and fourth digits.
Sleep Timer
The SLEEP button operates the Sleep function of your
device providing it supports the Sleep function.
Alternatively, you can enable the remote to turn off
your TV after a period of 1 to 99 minutes as shown
below. This feature is only available for the TV Mode
and the remote must be in TV Mode to set a Sleep
Timer. This feature works even if your TV does not
have its own Sleep function.
1. Press and release the TV Mode button.
2. Press and hold the CODE SEARCH button until the
red indicator stays on. Release the CODE SEARCH
button.
3. Press and release the SLEEP button (Note any
previously set Sleep timer is cancelled at this point
and the remote returns to normal operation).
4. Press and release the numeric buttons (01-99) for
the time required. The red indicator blinks off to
indicate button press acceptance and remains off
after the second button press.
5. TV Sleep Timer now set.
6. Leave the Remote pointing towards the TV with an
unobstructed path.
To cancel the Sleep Timer, press and release the
POWER button in TV Mode or repeat Steps 1, 2 and 3
above.
10
Setup, cont.
Programming Combo Device Codes
Some Combo devices (e.g. TV/VCR, TV/DVD, DVD/
VCR, etc.) will require you to set up two different Mode
buttons to control both parts of the Combo device. For
example, if you have a TV/DVD Combo, you might need
to set up one code under the TV button to control the
TV part AND a separate code (under any other Mode
button) to control the DVD part.
Controlling Combo Devices
Some Combo devices (e.g. TV/VCR, TV/DVD, DVD/
VCR, etc.) have separate buttons on the original remote
to select the part of the Combo device to be controlled.
For example, if your Combo device is a DVD/VCR then
its original remote might have separate DVD and VCR
buttons for selection of the Combo part you would
control. The equivalent button functions can be found
on your Philips remote by using the device Mode and
CODE SEARCH buttons.
Referring to “Programming with Code Search” on page
8, setup a device Mode (e.g. DVD) with the correct code
for your Combo device. Assuming the DVD/VCR
Combo device is the example and its code is
programmed under DVD Mode, press and hold the
DVD Mode button for more than one second to send
the DVD button command. To send the VCR button
command, quickly press and release the CODE
SEARCH button followed by pressing and releasing the
DVD Mode button. This method can be applied
similarly to all Combo devices (e.g. TV/VCR, TV/DVD,
DVD/VCR, etc.) and is available for all Modes. Note this
feature is not supported by all codes.
Controlling Devices Requiring Separate Power On and
Off Buttons
Some devices (e.g. certain RCA TVs) require separate
Power On and Power Off buttons to turn the device on
and off. The equivalent button functions can be found
on your Philips remote by using the device Mode and
POWER buttons. Referring to “Programming with Code
Search” on page 8, setup a device Mode (e.g. TV) with
the correct code for your device.
Assuming a TV device is the example and its code is
programmed under TV Mode, to turn your TV on, press
and hold the TV Mode button for more than one
second to transmit the Power On button command.
11
Setup, cont.
Setup, cont.
Controlling Devices Requiring Separate Power On and
Off Buttons, cont.
To turn the TV off, press and release the POWER
button to transmit the Power Off button command. This
method can be applied similarly to any device and is
available for all Modes. Note this feature is not
supported by all codes.
Any Mode chosen for Volume/Mute control MUST have
its own Volume/Mute function or the Volume/Mute
buttons will do nothing.
Setting ALL Volume/Mute Control to any one Mode
This routine can set all Modes to “punch-through” to
any one chosen Mode for Volume/Mute button control
without the needing to change to that Mode.
VCR/DVD/DVR Punch-Through Feature
This remote allows the 6 VCR transport buttons (i.e.
PLAY, PAUSE, STOP, FF, REWIND, and REC) to
Punch-Through control from any Mode programmed
with TV, SAT or Cable codes to the last VCR, DVD or
DVR programmed Mode you used. Normally other
types of remotes only punch-through (from another
Mode) on the 6 VCR buttons to the device programmed
under the VCR Mode button. This is not much use if
you are using a DVD programmed under a Mode other
than VCR. For example, if you have 2 DVD, VCR or DVR
devices programmed into this remote, the last one you
accessed on the remote will be the one that has control
of the 6 VCR transport buttons when in any other
Mode. This feature will not operate if the programmed
TV, SAT or Cable code has its own VCR transport
button control e.g. a TV Combo, SAT/PVR, etc.
1. Press and hold the CODE SEARCH button until the
red indicator turns on, then release the button.
2. Press and hold the MUTE button until the red
indicator blinks off, then release the button.
3. Press and release the desired Mode button (TV,
VCR, etc.) for Volume/Mute control, the red
indicator blinks then stays on.
4. Press and release the MUTE button and the red
indicator turns off. The red indicator will blink
rapidly for three seconds if the Mode you have
selected has no Volume/Mute control.
5. All other Modes will now punch-through to your
chosen Mode for Volume/Mute control.
6. All “Visual” and “Audio” programmed Modes will
now punch-through to the respective Modes you
have chosen for Volume/Mute control.
Setting any Mode to use its own Volume/Mute Control
Volume/Mute Control and Punch-Through Feature
This remote lets you select which device Mode controls
your Volume/Mute buttons. The remote is initially set
(factory default) for all device Modes programmed with
“Visual” codes (e.g. TV, VCR, DVD, DVR, SAT &
CABLE) and “Audio” codes (e.g. CD & AUDIO) to use
their own Volume/Mute control if present. If the
programmed “Visual” code has no Volume/Mute
operation of its own then those buttons will punchthrough control to the TV Mode device without
needing to change to TV Mode. Please refer to the next
page for more information.
12
This routine can set any Mode to use only its own
Volume/Mute control. Note - If your chosen Mode has
no Volume/Mute functions of its own then the Volume/
Mute buttons will do nothing.
1. Press and hold the CODE SEARCH button until the
red indicator turns on, then release the button.
2. Press and hold the MUTE button until the red
indicator blinks off, then release the button.
3. Press and release the desired Mode button (TV,
VCR, etc.), the red indicator blinks then stays on.
4. Press and release the VOLUME- (Down) button, the
red indicator blinks then stays on.
5. Press and release the MUTE button and the red
indicator turns off.
6. All “Visual” and “Audio” programmed Modes will
now punch-through to the respective Modes you
have chosen for Volume/Mute control.
13
Code Learning
Tips On Learning, cont.
The learning feature lets you “learn” functions from
your original remote control. For example - you may
want to use your remote to operate the RANDOM
PLAY feature from your original CD remote control.
This remote is equipped with an “easy learning” feature
that lets you “learn” features (such as RANDOM PLAY
from your original CD remote).
Tips On Learning
You can only learn one device type under any one
Mode button e.g. only learn TV codes under the TV
Mode, VCR codes under the VCR Mode, etc. If you are
trying to learn from a “Universal” remote, it might have
more than one code type stored under a Mode. Try
learning from another remote to see if there’s a problem
with the type or brand of remote you are trying to learn
from.
a. Some functions from some types of remotes might
not be able to be learned.
b. No functions may be stored under LEARN, or
CODE SEARCH buttons.
c. Only one original device type can be learned per
individual Mode.
d. Use fresh batteries for both the Learning Remote
and the Original Remote.
e. Keep at least three feet away from incandescent or
low-energy lights when learning.
f. Perform a Master Clear (see page 18) before learning
and try learning 2 or 3 commands initially. Then
carry out a Master Clear before completely learning
your original remote’s commands.
g. Place the original remote end-to-end with the
Learning Remote so the IR transmitters on both
remotes are directly in line with each other. You may
need to adjust the height of either remote to achieve
this. Use the IR Transmitter Finder feature to assist
you.
h. Keep the distance between the two remotes to
approximately 1 inch and do not move or change the
distance between the two remotes until you have
learned all the required buttons for that Mode.
i. When Learning, do not release the button being
Learned until the red indicator has blinked off for
half a second.
j. Avoid learning your original remote Volume/Mute
buttons unless you are sure these operate the same
device e.g. some original DVD remotes include TV
Volume/Mute button control and can be two
different types of code.
14
k. Avoid learning your original remote VCR transport
buttons unless you are sure these operate the same
device e.g. some original TV remotes include VCR
button control and can be two different types of
code.
l. If learning the first or second buttons for a Mode
results in continuous errors then try the following:
i. End the Learn session by pressing the CODE
SEARCH key.
ii. Clear out the learned commands for that Mode.
iii. Check the IR transmitters are correctly aligned
between the two remotes (use the IR Transmitter
Finder facility).
iv. Adjust the distance between the two remotes to be
closer (e.g. half an inch) or a further away (e.g. 2
inches) from each other.
v. Try learning the original remote for that Mode again.
If problems reoccur with the same button check the
original remote button being learned – does it transmit?
Does it operate the target device? Try learning that
button under a different clear Mode. If it learns okay
then it is likely to be a different code type from the
others and cannot be learned under the same Mode.
15
Learning Commands
IR Transmitter Finder Feature
This feature assists you in identifying where your
original remotes IR transmitter is located and is
particularly useful if your original remote’s IR
transmitter is hidden behind a lens.
1. Point both remotes facing each other by
approximately 1 inch apart (see Tips on Learning on
previous pages)
2. Press and hold the CODE SEARCH button until the
red indicator turns on, then release the button.
3. Press and release the desired Mode button (TV,
VCR, etc.), the red indicator blinks then stays on.
4. Press and release the LEARN button, the red
indicator blinks then stays on.
5. Press and hold any Original Remote button and
move the Original Remote to the left and right, and/
or, up and down in front of the Learning remote IR
transmitter. The red indicator will remain on if no IR
from the Original remote is found and the red
indicator will blink on and off more rapidly when the
IR transmitters are lining up. The point where the
red indicator blinks most rapidly is where the two IR
transmitters are aligned. Note some original remotes
will only transmit IR on the initial button press then
stop. In these cases, quickly press and release the
original remote button repeatedly during this
procedure.
6. You can now learn a button from your original
remote by continuing from “Step 4” in the
“Learning Commands” section on the next page, or,
to exit at this point, press and release the CODE
SEARCH button
The learning feature allows you to “learn” functions
from your original remote control. For example - you may
want to use your remote to operate the RANDOM PLAY
feature from your original CD remote control. This
remote is equipped with an “easy learning” feature that
allows you to “learn” features (such as RANDOM PLAY
from your original CD remote) by following the steps
below, and on the next page:
1. Press and hold the CODE SEARCH button until the
red indicator turns on, then release the button.
2. Press and release the desired mode button (TV,
VCR, etc.), the red indicator blinks then stays on.
3. Press and release the LEARN button, the red
indicator blinks then stays on.
4. Press and release the Learning Remote button that
you want to teach (e.g. POWER).
5. Point both remotes facing each other by approximately 1 inch apart (see tips on page 14).
6. Press and hold the Original Remote button (e.g.
Power) until the red indicator blinks once and stays
on. If there is a learning problem, the indicator blinks
for three seconds and stays on. If this happens,
repeat Steps 4 to 6.
7. Repeat Steps 4-6 for other buttons you want to
learn.
8. Press and release the CODE SEARCH button when
all desired remote commands are learned. Code
Learning is now complete.
6.
Line up your remotes (that you’re learning from) in front of
the Learning remote, on a hard surface approx. 1 inch apart.
16
2.
4.
3.
1.
17
Clearing Commands
To Clear all Learned Commands under a mode
Clearing learned commands is helpful if, for example, you
replace your CD player with another brand or model. If
you had learned a feature from your old CD player’s
original remote on to this remote (such as RANDOM
PLAY), that feature would no longer work for your new
CD player. Should you wish to remove or clear one or
more “learned” commands, follow the steps below:
1. Press and hold the CODE SEARCH button until the
red indicator turns on. Release the CODE SEARCH
button.
2. Press and release the button for the mode you want
to clear (TV, VCR, etc.). The red indicator blinks off.
3. Press and release the LEARN button TWICE. The
red indicator blinks off.
4. Press and release the CODE SEARCH button. The
red indicator turns off. All learned Commands under
that mode are now cleared.
Master Clear - To Clear all Learned
Commands under all modes
1. Press and hold the CODE SEARCH button until the
red indicator turns on. Release the CODE SEARCH
button.
2. Press and release the LEARN button TWICE. The
red indicator blinks off.
3. Press and release the CODE SEARCH button. The
red indicator turns off. All Learned commands in the
remote are now cleared.
IR Extender Feature
The IR extender feature lets you use your remote
control to control the A/V product that the Audio/
Video Sender is connected to. E.G., if the Audio/
Video Sender is connected to a DVD Player, or
VCR in your living room, and the Audio/Video
Receiver is connected to a TV in your bedroom;
you can control the DVD Player or VCR while
watching the picture from it on the TV in your
bedroom. The remote sends Radio Frequency (RF)
commands to the Audio/Video Sender (the unit
with the thin antenna on it). It receives the RF
commands from your remote and converts them to
Infrared (IR) commands. You plug the IR extender
cable into the jack on the back of the Audio/Video
Sender and attach the IR emitters to the front of
the DVD Player, or VCR, etc. that you want to
control.
1. Plug the IR extender jack on the IR emitter
cord into the IR EXT. socket located on the
back of the Audio/Video Sender.
2. Place the emitter cord in front of the two
devices you want to control (e.g., DVD and
VCR).
3. Make sure that the two IR emitters are
attached close to the IR sensors on the devices
you want to control.
Audio/Video
Sender.
DVD
TV/VCR/INPUT
VCR
LEFT
IR EXT.
When in TV mode the TV/VCR/INPUT button performs
the INPUT source switch function.
When in a mode that has been programmed for VCR the
TV/VCR/INPUT button performs the TV/VCR antenna
switch function.
When in a mode that has been programmed for Cable the
TV/VCR/INPUT button performs the A.B switch
function.
When in a mode that has been programmed for SAT the
TV/VCR/INPUT button performs the TV/SAT switch
function.
When in a mode that has been programmed for DVD the
TV/VCR/INPUT button performs the DVD Setup
function.
18
IR emitter
IR emitter
VIDEO IN
RIGHT
DC 12V
AUDIO I N
IR extender jack
The IR emitter cord lets you control up to two IR
devices.
19
Troubleshooting
Remote does not operate your product.
•
•
•
•
Press the mode button of the product you want to
control.
Program the remote with a new code.
Install new batteries. (You might have to reprogram
your remote after installing new batteries.)
Remote may not be compatible with your product.
Remote does not operate some features of your product.
•
•
Program remote with a new code.
Remote may not be able to operate all features of
your product or button names might be different
than your product.
Red Indicator blinks after you program a product code.
•
•
Remote did not accept the code.
Try to program the code again or try a different
code.
For help with setup, please call: 919-573-7854.
Limited One Year Warranty
Philips warrants that this product shall be free from
defects in material, workmanship and assembly, under
normal use, in accordance with the specifications and
warnings, for one year from the date of your purchase
of this product. This warranty extends only to the
original purchaser of the product, and is not transferable. To exercise your rights under this warranty, you
must provide proof of purchase in the form of an
original sales receipt that shows the product name and
the date of purchase. For customer support or to obtain
warranty service, please call 919-573-7854. THERE ARE
NO OTHER EXPRESS OR IMPLIED WARRANTIES.
Philips’ liability is limited to repair or, at its sole option,
replacement of the product. Incidental, special and
consequential damages are disclaimed where permitted
by law. This warranty gives you specific legal rights.
You may also have other rights that vary from state to
state.
FCC Caution
THIS DEVICE COMPLIES WITH PART 15 OF THE FCC
RULES. OPERATION IS SUBJECT TO THE FOLLOWING TWO CONDITIONS: (1) THIS DEVICE MAY NOT
CAUSE HARMFUL INTERFERENCE, AND (2) THIS
DEVICE MUST ACCEPTANY INTERFERENCE RECEIVED, INCLUDING INTERFERENCE THAT MAY
CAUSE UNDESIRED OPERATION.
This equipment generates and uses radio frequency
energy, and if not installed and used properly, that is, in
strict accordance with the manufacturers instructions, it
may cause interference to radio and television reception.
It has been type tested and found to comply with the
limits for remote control devices in accordance with the
specifications in Sub-Parts B and C of Part 15 of FCC
Rules, which are designed to provide reasonable
protection against such interference in a residential
installation. However, there is no guarantee that interference will not occur in a particular installation. If this
equipment does cause interference to radio or television
reception, which can be determined by unplugging the
equipment, try to correct the interference by one or more
of the following measures.
• Reorient the antenna of the radio/TV experiencing the
interference.
• Relocate the receiver with respect to the radio/TV.
• Move the receiver away from the radio/TV.
• Plug the receiver into an outlet on a different electrical
circuit from the radio/TV experiencing the interference.
• If necessary, consult your local Dealer for additional
suggestions.
NOTE: Modifications to any of the components in this
kit will void the user’s authority to operate this
equipment.
Made in China. Quality Assured in USA.
Ledgewood, NJ 07852
20
21
Índice
Introducción
Introducción ......................................................... 23
Funciones de botones ..................................... 24
Funciones de DVD y Satélite ......................... 26
TV/Videocasetera/Entrada .................................. 26
Preparación .......................................................... 27
Instalación de baterías .................................... 27
Ahorrador de baterías ..................................... 27
Almacén de códigos ....................................... 27
Encendido por omisión .................................... 27
Fijación de códigos ......................................... 27
Ingreso de códigos ............................................... 28
Ingreso directo de códigos .............................. 28
Búsqueda de códigos ...................................... 28
Búsqueda de códigos por marca .................... 29
Identificación de códigos ..................................... 30
Cronometro de apagado automático .................... 30
Códigos de programación de
equipos combinados ............................................. 31
Control de equipos combinados ........................... 31
Control de equipos con Encendido y Apagado .... 31
Control de VCR/DVD/DVR ............................... 32
Control de volumen/silencio ................................. 32
Ajuste de control volumen/silencio ...................... 33
Ajuste de cualquier modo para utilizar su
propio control de volumen/silencio ....................... 33
Transferencia de códigos ..................................... 34
Consejos para la transferencia de códigos ..... 34
Función de búsqueda de transmisor IR
(infrarrojo)....................................................... 36
Aprendizaje de comandos .................................... 37
Despejando comandos ......................................... 38
Despejar comandos transferidos para una
modalidad ........................................................ 38
Despejado maestro ......................................... 38
Extendedor IR ................................................ 39
Localización y reparación de averías .................. 40
Felicitaciones por su compra del Control remoto
universal Philips. Los controles Philips le permiten
sustituir un control remoto descompuesto o perdido,
o combinar más de un control remoto en una sola
unidad. Además, ¡este control remoto está
equipado con una función de transferencia de
comandos que le permite transferir los comandos
de su equipo de control remoto original!
22
23
Este control remoto opera las funciones comunes
de la mayoría de los modelos y marcas de equipo
de video de control por rayos infrarrojos (pero no
de todos). Este control remoto puede ofrecer
funciones que no estén disponibles en su equipo.
Es posible que algunas funciones de su equipo en
particular (por ej., menú de funciones) no se
puedan controlar con este control remoto. En tal
caso, utilice el control remoto original de su equipo.
Por favor, use este manual para familiarizarse con
su control remoto universal Philips. Después de
familiarizarse con él, la primera cosa que tiene que
hacer es colocar las baterías y preparar su control
remoto para su aparato y marca en particular.
El control remoto también transmite comandos de
radiofrecuencia (RF) inalámbrica al transmisor de
video. El transmisor de video recibe estos
comandos y los convierte en comandos infrarrojos
(IR) comunes. Después estos comandos IR se
emiten desde un cable extendedor IR para
controlar sus componentes A/V. Esto le permite
controlar sus componentes A/V desde
CUALQUIER habitación de su hogar. ¡No es
necesario apuntar con el control remoto hacia el
componente!
Gracias por comprar un control remoto Philips y
esperamos que le brinde muchos años de servicio.
Funciones de botones
Funciones de botones
1.
1.
23.
2.
2.
22.
3.
3.
21.
4.
20.
5.
19.
4.
5.
6.
7.
8.
6.
18.
7.
17.
10.
8.
16.
11.
9.
15.
10.
14.
11.
13.
9.
12.
13.
14.
12.
15.
16.
17.
18.
Nota: el botón REC debe oprimirse DOS VECES para grabar
en su videocasetera. Para algunas marcas de
videocaseteras será necesario que oprima el botón REC una
sola vez y enseguida oprimirlo nuevamente durante tres
segundos.
Algunos botones del control remoto pueden tener funciones
con diferentes nombres en el aparato que está controlando.
Por ej, el canal anterior (PREV.CHAN) puede llamarse
RECALL, o ENTER puede llamarse DISPLAY. Estas
diferencias dependen de la marca y del modelo de su aparato.
Además, este control remoto puede operar únicamente las
funciones que existen en su producto. Por ejemplo, su
producto debe estar equipado con canal anterior
(PREV.CHAN) para que el botón de PREV.CHAN funcione.
24
19.
20.
21.
22.
23.
TV, VCR, DVD, CBL, AUX, CD, SAT Selecciona el equipo
que se va a usar.
NUMEROS oprima los números para la selección directa
de canales. Algunos aparatos requieren que se oprima Enter
después de la selección del canal.
ENTER (Ingresar) Se utiliza después del acceso directo de
canales para cambiar inmediatamente al canal seleccionado.
MENU Trae la pantalla del Menú de discos del DVD: Úselo
con los botones de navegación hacia arriba, abajo, izquierda
y derecha.
GUIDE (Guía) Presenta en pantalla la guía de programación.
VOLUME UP/DOWN (Subir/bajar volumen) Cambia el
nivel de volumen del equipo, normalmente el del televisor.
UP, DOWN, LEFT & RIGHT Botones de navegación
(arriba, abajo, izquierda y derecha).
OK (Aceptar) Se utiliza para la selección del Menú en
pantalla.
PREV. CHAN (Canal anterior) Regresa al canal
seleccionado previamente, o botón para repetir el DVD.
PIP TV (Picture-in-picture, Imagen en imagen) Controla
la presentación en la pantalla del televisor de una imagen
secundaria, en una ventana dentro de la imagen principal.
CC (SUBTITLE) [Trascripción del audio en pantalla
(subtítulos)] Activa y desactiva la función de trascripción
del audio en pantalla del televisor (si el televisor tiene esta
característica) o los subtítulos de DVD.
LEARN (Aprendizaje) Se emplea para configurar funciones
de aprendizaje.
RECORD, PLAY, STOP, REW, FF, PAUSE (Grabar, reproducir,
parar, devolver, adelantar, pausa) los botones de control de la
videocasetera hacen funcionar este aparato incluso cuando el
control remoto esta en la modalidad de TV. También ejecuta la
función DVD Scan +/- (exploración +/- de DVD).
CODE SEARCH (Búsqueda de código) Función emplea da
para la configuración del control remoto.
SLEEP (Apagado automático) Apaga el televisor después
de un período de 1 a 99 minutos.
MUTE (Silencio) apaga el sonido de la TV mientras que
permanece la imagen.
TOGGLE (Alternar) permite alternar entre una pantalla y
otra al utilizar la función de imagen en imagen en el televisor.
CHANNEL UP/DOWN (Canal siguiente/anterior) Cambia de
canal. CHAPTER +/- (Capitulo +/-) Controla la selección de
pistas de DVD/CD, es decir, la pista de DVD/CD para subir/
bajar (en modalidades de DVD y SAT). Observe que los
botones de movimiento de la videocasetera también
controlan el DVD cuando está en la modalidad de DVD.
QUIT (Salir) Se utiliza para salir de las funciones del menú.
INFO/SELECT Trae la pantalla o el Menú de control del
TV, DVD o Satélite para indicar el numero de Capitulo/
Pista/Titulo, el tiempo restante/transcurrido, información
del sistema, etc.
Botón de TV/VCR/INPUT (televisión, videocassetera,
entrada) Para algunos televisores, oprima este botón
repetidamente para seleccionar una de las fuentes disponibles
para recibir la imagen (antena, videocasetera, etc.).
POWER (Encendido) Enciende o apaga el equipo.
Indicador luminoso rojo se enciende cuando se presiona
cualquier botón.
25
Funciones de botones
Funciones de DVD (con leyendas en azul)
Los botones SCAN+ y SCAN- controlan la velocidad para
adelantar o retroceder la reproducción respectivamente.
Los botones CHAPTER+ y CHAPTER- localizan
respectivamente los capítulos o pistas siguientes o
precedentes de un disco.
El botón REPEAT hace las funciones “A-B REPEAT” (o
RPT A.B) de los reproductores de DVD para repetir la
reproducción del capítulo o pista actual.
El botón INFO/SELECT trae la pantalla o el Menú de
control del DVD para indicar el número de Capítulo/Pista/
Título, el tiempo restante/transcurrido, información del
sistema, etc.
MENU Trae la pantalla del Menú de discos del DVD: Úselo
con los botones de navegación hacia arriba, abajo, izquierda y
derecha.
OK (Aceptar) Se utiliza para la selección del Menú en
pantalla.
SUBTITLE (CC) [Transcripición en pantalla, subtítulos]
Activa y desactiva la función de transcripción del audio en
pantalla o los subtítulos de DVD.
Funciones de Satélite
El botón “Guide” presenta en pantalla la guía del canal de
satélite.
Los botones “Chapter+” y “Chapter-” realizan la función
de “Page+” y “Page-” para los menús de guía en pantalla
utilizados en algunos sistemas de satélite.
El botón “Info/Select” trae la pantalla de satélite que indica
la información actual del canal y del sistema.
Menu trae la pantalla del menú de satélite. Úselo con los
botones de navegación hacia arriba, abajo, izquierda y
derecha.
El botón OK se utiliza para la selección del Menú en
pantalla.
El botón Quit se utiliza para salir o despejar las pantallas del
menú.
TV/Videocasetera/Entrada
Cuando está en la modalidad de TV, el botón TV/VCR/
INPUT realiza la función de cambio de fuente de
ENTRADA.
Cuando está en una modalidad que se ha programado para la
videocasetera (VCR), el botón TV/VCR/INPUT realiza la
función de cambio de antena de TV/VCR.
Cuando está en una modalidad que se ha programado para
Cable, el botón TV/VCR/INPUT realiza la función de cambio
A.B.
Cuando está en una modalidad que se ha programado para
SAT, el botón TV/VCR/INPUT realiza la función de cambio
de TV / SAT.
Cuando está en una modalidad que se ha programado para
DVD, el botón TV/VCR/INPUT realiza la función de ajuste
inicial de DVD.
26
Preparación
Instalación de baterías
1. En la parte posterior de su control
remoto empuje hacia abajo la
lengüeta y levante la tapa.
2. Acomode dos baterías alcalinas AAA
de manera que coincidan los polos
positivo y negativo dentro del
compartimiento de las baterías.
3. Acomode la tapa de las baterías en
su lugar.
Ahorrador de baterías
Su control remoto se desactiva automáticamente si los
botones se oprimen más de 30 segundos continuos. Esto
permite que las baterías conserven su carga en caso de que el
control remoto se atore en un lugar donde los botones se
puedan oprimir solos (por ejemplo, entre los cojines del
sofá).
Almacén de códigos
Los códigos están almacenados en la memoria permanente, así
que no se perderá ningún código almacenado en el control
remoto mientras usted cambia las baterías.
Encendido por omisión
El control remoto se enciende en la modalidad de TV
Fijación de códigos
El botón de búsqueda de códigos (CODE SEARCH) se
utiliza para fijar el control remoto. Puede fijar el control
utilizando el código de su marca de aparato, de las tablas de
códigos (vea la hoja separada), o puede buscar en la biblioteca
de códigos hasta que encuentre un código que funcione para
su aparato. Por favor consulte la sección de “Programación
con búsqueda de códigos” en la página 28 para obtener más
información sobre el uso de la función de búsqueda de códigos
y aprender a hacer una búsqueda en la biblioteca de códigos
para sus productos.
NOTA: También puede almacenar cualquier tipo de código
bajo cualquier modalidad (salvo TV). Es decir, puede
almacenar un código de videocasetera en el botón CBL, o un
código de cable en el botón de VCR, etc. Sin embargo,
únicamente puede almacenar códigos de TV en el botón de
TV.
27
Preparación, cont.
Preparación, cont.
Ingreso Directo de Códigos
Programacíon con Búsqueda de codigos (Code Search)
1. Oprima, sin soltar, el botón CODE SEARCH hasta que el
indicador rojo permanezca encendido. Suelte el botón
CODE SEARCH.
2. Oprima y suelte el botón de la modalidad deseada (TV,
VCR, etc.). El indicador rojo parpadea y enseguida se
queda encendido.
3. Ingrese el código de 4 cifras de las tablas de códigos (en la
hoja separada). Nota: después de ingresar un código
válido, el indicador rojo se apaga. Cuando se ingresa un
código inválido, el indicador rojo parpadea.
4. Con su aparato encendido, oprima CHANNEL UP. Si el
aparato responde, ya no se requiere ninguna programación
adicional. Nota: si algunos botones no hacen funcionar su
equipo, trate uno de los demás códigos para su marca.
Escriba aquí los códigos para futura referencia.
La mayoría de los usuarios almacenan los códigos de
videocasetera en el botón de VCR, los códigos del Cable en el
botón de CABLE, etc. Por ejemplo, si desea almacenar un
código de videocasetera en cable, siga primero el
procedimiento para la Entrada directa de códigos (página
previa) y oprima CBL en el paso 2 de la Entrada directa de
códigos. A continuación ingrese CUALQUIER código de VCR
en el paso 3 de la Entrada directa de códigos. Luego siga los
pasos anteriores para la Búsqueda de códigos (o Búsqueda
de códigos por marca, vea abajo). Nota: Si el aparato no tiene
un botón de CHANNEL UP (subir de canal), utilice PLAY (en
VCR solamente) o POWER. La búsqueda de códigos inicia a
partir del número de 4 cifras almacenado actualmente bajo esa
modalidad.
Búsqueda de Códigos por Marcas
Tipo
TV
Tipo Almacenado
Código
TV
CBL
DVD
VCR
SAT
Programacíon con Búsqueda de codigos (Code Search)
Si su aparato no responde después de haber intentado todos
los códigos de la marca de su aparato, o si la marca no aparece
en la lista, trate de buscar su código siguiendo los pasos a
continuación.
1. Encienda manualmente el aparato (TV, VCR, etc.) que se
habrá de controlar.
2. Oprima, sin soltar, el botón CODE SEARCH hasta que el
indicador rojo permanezca encendido. Suelte el botón
CODE SEARCH.
3. Oprima y suelte el botón de la modalidad deseada (TV,
VCR, etc.). El indicador rojo parpadea una vez.
4. Oprima el botón CHANNEL UP (hacia arriba)
repetidamente (hasta 300 veces) hasta que el aparato
que se ha de controlar cambie de canal. El indicador rojo
parpadea con cada opresión de botón. Si accidentalmente
se pasa del código deseado, oprima el botón CHANNEL
DOWN (hacia abajo) para retroceder hacia la biblioteca
hasta que el aparato cambie de canal. Oprimir el botón
CHANNEL UP cambia la dirección hacia delante
nuevamente.
5. Oprima y suelte el botón MUTE para fijar el código.
28
Le permite buscar un código de una marca específica en la
biblioteca de códigos para un fabricante en particular.
1. Encienda el aparato (TV, VCR, etc.) que se ha de controlar.
2. Oprima sin soltar el botón CODE SEARCH (búsqueda de
códigos) hasta que el indicador rojo permanezca encendido,
y enseguida suelte el botón.
3. Oprima y suelte rápidamente el botón de la modalidad
deseada (TV, VCR, etc.). El indicador rojo parpadea una
vez.
4. Oprima y suelte el botón numérico (0-9) correspondiente
al Fabricante deseado (vea la tabla en la hoja de la lista de
códigos). El indicador rojo parpadea una vez y se apaga.
Observe que al oprimir el “0” se efectúa una búsqueda
completa de la biblioteca igual al Método de búsqueda de
códigos de la página anterior.
5. Oprima el botón CHANNEL UP (subir de canal) ((o
POWER o PLAY (en la videocasetera solamente))
repetidamente hasta que el aparato que se ha de controlar
cambie de canal. El indicador rojo parpadea con cada
opresión de botón. Si accidentalmente se pasa del código
requerido, oprima el botón CHANNEL DOWN (bajar de
canal) para retroceder en la biblioteca hasta que el aparato
cambie de canal. Al oprimir el botón CHANNEL UP se
cambia la dirección para seguir hacia adelante nuevamente.
6. Oprima y suelte MUTE para instalar el código.
La entrada del Método de búsqueda de marca está completo.
Nota: Cuando se han buscado todos los códigos bajo una
Marca, el indicador rojo parpadea rápidamente durante 3
segundos.
29
Preparación, cont.
Preparación, cont.
Función de Identificación de Códigos
Códigos de programación de equipos combinados
La función de identificación de código permite identificar el
código de librería de 4 dígitos almacenado en la tecla del
dispositivo. Por ejemplo, si desea descubrir qué código de 4
dígitos está almacenado en su tecla de TV, siga los seis pasos
siguientes:
1. Oprima, sin soltar, el botón CODE SEARCH hasta que el
indicador rojo permanezca encendido. Suelte el botón
CODE SEARCH.
2. Oprima y suelte el botón de la modalidad deseada (TV,
VCR, etc.). El indicador rojo parpadea y luego permanece
encendido.
3. Oprima y suelte el botón CODE SEARCH. La luz
indicadora parpadea y se apaga.
4. Para encontrar la primera cifra para el código almacenado
bajo el botón de modalidad oprimido en el paso 2, oprima
cada botón numérico del 0 al 9. Cuando la luz indicadora
parpadea y se apaga, el número que oprimió es la primera
cifra para el código que está buscando.
5. Para encontrar la segunda cifra, repita el paso 4, esta vez
cuando la luz indicadora parpadee y se apague, esta es la
segunda cifra.
6. Repita el paso 4 para encontrar los terceros y cuartos
dígitos.
Algunos equipos combinados (combos) (por Ej. TV/VCR,
TV/DVD, DVD/VCR, etc.) requerirán que ajuste dos tipos
diferentes de botones de Modo para controlar ambas partes
del equipo combinado. Por ejemplo, si cuenta con un Combo
TV/DVD, es posible que deba ajustar un código en el botón
TV para controlar la parte de la television y otro código
adicional (en cualquier otro botón de Modo) para controlar la
parte de DVD.
Cronometro de apagado automático
El botón SLEEP (apagado automático) habilita la función de
apagado automático de su dispositivo, proporcionado que su
aparato tenga esta función. Alternativamente, usted pude
programar el control remoto para apagar su TV después de un
periodo de 1 a 99 minutos. Esta característica esta solamente
disponible en el modo TV y el control remoto debe estar en el
modo de TV para fijar el cronometro de apagado automático.
Esta función puede ejecutarse aun si su televisor no tiene esta
característica.
1. Presione y suelte la tecla de modo TV.
2. Presione y mantenga presionado el botón CODE
SEARCH (búsqueda de código) hasta que el indicador rojo
permanezca encendido. Suelte el botón CODE SEARCH.
3. Oprima y suelte el botón SLEEP (observe, el apagado
automático previamente fijado es cancelado a este punto y
el control remoto vuelve a la operación normal).
4. Oprima y suelte los botones numéricos (01-99) para
seleccionar el tiempo que desee que transcurra. El
indicador rojo se apagara brevemente para indicar la
aceptación de la presión del botón y quedara apagado
después de la segunda presión de botón.
5. El cronometro de apagado automático del televisor quedara
configurado.
6. Deje el control remoto apuntando hacia el televisor
sin que haya obstrucción alguna entre ambos
Para cancelar le Cronometro de apagado automático, oprima y
suelte el botón POWER (encendido) en el modo TV, o repita
los pasos 1, 2 y 3 mencionados arriba.
30
Control de equipos combinados
Algunos equipos combinados (por Ej. TV/VCR, TV/DVD,
DVD/VCR, etc.) tienen botones diferentes en el control
remoto original para seleccionar la parte del equipo
combinado a ser controlado. Por ejemplo, si su equipo
combinado es un DVD/VCR entonces es posible que su
control remoto original tenga botones diferentes para DVD y
VCR para seleccionar la parte del combo que quiera controlar.
Puede encontrar las funciones equivalents a los botones en su
control remoto Philips, utilizando los botones de Modo y
CODE SEARCH del mismo.
Vea “Programación con búsqueda de código” en la Pág. 28
para ajustar un Modo de equipo (por Ej. DVD) con el código
correcto para su equipo combinado. Tomando como ejemplo
el equipo combinado DVD/VCR y asumiendo que su código
está programado bajo el Modo DVD, presione y mantenga
presionado el botón de Modo DVD durante más de un
segundo para enviar el comando del botón DVD. Para enviar
el comando del botón VCR, presione y suelte rápidamente el
botón CODE SEARCH (búsqueda de código) y a
continuación presione y suelte el botón de Modo DVD. Este
método puede ser aplicado en forma similar para todos los
equipos combinados (por Ej. TV/VCR, TV/DVD, DVD/VCR,
etc.) y está disponible para todos los Modos. Nota: Tenga en
cuenta que esta característica no acepta todos los códigos.
Control de equipos que requieren botones de encendido
y apagado diferentes
Algunos equipos (por ej. algunos televisores RCA) requieren
botones diferentes para encender y para apagar el equipo.
Puede encontrar las funciones equivalentes a los botones en
su control remoto Philips, utilizando los botones de Modo y
POWER del mismo. Vea “Programación con búsqueda de
código” en la Pág. 28 para ajustar un Modo de equipo (por ej.
TV) con el código correcto para su equipo. Asumiendo que el
televisor es el ejemplo y que el código a ser programado es el
Modo TV, para encender su TV presione y sostenga el botón
de Modo TV durante más de un segundo para transmitir el
comando del botón de encendido. Paga apagar el televisor,
presione y suelte el botón POWER para transmitir el
comando del botón de apagado.
31
Preparación, cont.
Preparación, cont.
Este método puede ser aplicado en forma similar para
cualquier equipo y está disponible para todos los Modos.
Nota: Tenga en cuenta que esta característica no admite todos
los códigos.
Cualquier modo seleccionado para el control de
volumen/silencio DEBE contar con su propia función de
volumen/silencio o los botones de volumen/silencio no
funcionaran.
Función de traspaso de VCR/DVD/DVR
Ajuste de TODOS los controles de Volumen/
Silencio a cualquier modo.
Este control remoto permite la traslación de los 6 botones de
transporte de cinta VCR (PLAY (reproducción), PAUSE
(pausa), STOP (detener), FF (avance), REWIND (rebobinar),
y REC (grabar) desde cualquier Modo programado con
códigos de TV, SAT o CABLE al último Modo de VCR, DVD
o DVR utilizado. Normalmente otros tipos de controles
remotos únicamente permiten traspasar (desde otro Modo)
los 6 botones de VCR al equipo programado en el botón de
Modo VCR. Esto no es de mucha utilidad si está utilizando
un DVD programado en un Modo que no sea VCR. Por
ejemplo, si tiene tres equipos DVD, VCR o DVR
programados en este control remoto, el último que utilizó en
el control remoto será el que tenga el control de los 6 botones
de VCR transportados mientras esté en cualquier otro Modo.
Esta prestación no funcionará si el código de TV, SAT o
CABLE programado tiene su propio control de botones de
transporte de VCR, como por ejemplo un TV Combo, SAT/
PVR, etc.
Control de volumen/silencio y traspaso
Este control remoto le permite seleccionar que Modo de
equipo controla los botones de volumen/silencio.
Inicialmente este control está ajustado (de fábrica) para que
todos los Modos de equipos programados con códigos
“Visual” (por ej. TV, VCR, DVD, DVR, SAT & CABLE) y
códigos de “Audio” (por ej. CD & AUDIO) utilicen su
propia función de control de volumen/silencio cuando la
tengan. Si el código “Visual” programado no tiene operación
propia de volumen/silencio, entonces esos botones
traspasarán el control al equipo del Modo de TV sin
necesidad de cambiar al Modo TV. Por información más
detallada, vea “Ajuste del control de volumen/silencio y
traspaso”. Por favor refiérase a la pagina siguiente.
32
Esta rutina puede ajustar todos los modos para priorizar a
cualquier modo seleccionado para el botón de control de
volumen/silencio sin necesidad de cambiar a ese modo.
1. Presione y mantenga presionado el botón CODE
SEARCH hasta que el indicador rojo se encienda, luego
suéltelo.
2. Presione y mantenga presionado el botón MUTE hasta
que el indicador rojo destelle, luego suéltelo.
3. Presione y suelte el botón de modo deseado (TV, VCR,
etc.) para el control de volumen/silencio, el indicador rojo
destella y luego permanece encendido.
4. Presione y suelte el botón MUTE y el indicador rojo se
apaga. El indicador rojo destellará rápidamente durante
tres segundos si el modo que ha seleccionado no tiene
control de volumen/silencio.
5. Todos los demás modos priorizarán al modo que usted ha
elegido para el control de volumen/silencio.
6. Todos los modos programados “visual” y “audio” ahora
fun- cionaran con los modos respectivos que usted ha
elegido para el control de volumen / silencio.
Configuración de Control de Volumen/
Silencio para Cualquier Modo
Esta rutina puede fijar cualquier modo para el uso solamente
de su propio control de Volumen/Silencio. Nota - si su modo
elegido no tiene ninguna función de volumen/silencio propio
entonces los botones de volumen/silencio no harán nada.
1. Presione y mantenga presionado el botón CODE
SEARCH hasta que el indicador rojo se encienda, luego
suéltelo.
2. Presione y mantenga presionado el botón MUTE hasta
que el indicador rojo deje de destellar, luego suéltelo.
3. Presione y suelte el botón de modo deseado (TV, VCR,
etc.), el indicador rojo destella y luego queda encendido.
4. Presione y suelte el botón de VOLUMEN- (abajo), el
indicador rojo destella y luego queda encendido.
5. Presione y suelte el botón MUTE y el indicador rojo se
apaga.
5. Todos los modos programados “visual” y “audio” ahora
funcionaran con los modos respectivos que usted ha
elegido para el control de volumen/silencio.
33
Transferencia de códigos
La función de aprendizaje (transferencia) le permite a
este control remoto “aprender” funciones de su control
remoto original. Por ejemplo, es posible que usted desee
usar su control remoto la función RANDOM PLAY
(reproducción al azar) del control remoto original de su
reproductor de discos compactos. Este control remoto
esta equipado con una función de “aprendizaje fácil”
que le permite aprender funciones (tales como RANDOM PLAY del control remoto original de su
reproductor de discos compactos).
Consejos Para el Aprendizaje
Solamente puede aprender un tipo de equipo bajo un
botón de modo, o sea, sólo puede aprender códigos de
TV en el modo TV, códigos de VCR en el modo VCR,
etc. Si usted está intentando aprender las funciones de
un control remoto “universal”, podría tener más de un
tipo de código guardado bajo un modo determinado.
Intente aprender funciones de otro control remoto para
verificar si existe un problema con el tipo o marca del
control remoto del cual está intentando adquirirlas.
a. Algunas funciones de algunos tipos de controles
remotos no pueden ser aprendidas.
b. No podrán almacenar funciones bajo los botones
LEARN (aprender) o CODE SEARCH (búsqueda de
código).
c. Únicamente puede transferir las funciones de un
tipo de equipo original por modo individual.
d. Utilice baterías nuevas tanto en el control remoto de
aprendizaje como en el original.
e. Durante el proceso de aprendizaje, mantenga una
distancia mínima de tres pies de luces
incandescentes o de baja energía.
f. Antes del aprendizaje ejecute un Despejado
Maestro (ver Pág. 38) e intente adquirir inicialmente
2 o 3 comandos. Luego realice una Despejado
maestro antes de realizar el aprendizaje completo de
los comandos de su control remoto original.
g. Coloque el control original extremo con extremo con
el control de aprendizaje, de modo que los
transmisores infrarrojos de ambos estén
directamente alineados entre sí. Es posible que
tenga que ajustar la altura de alguno de los
controles para lograr esto. Utilice la función de
búsqueda de transmisor IR como ayuda.
34
Consejos Para el Aprendizaje, cont.
h. Mantenga una distancia de aproximadamente una
pulgada entre los dos remotos y no los mueva ni
cambie la distancia entre ellos, hasta que haya
adquirido todas las funciones de botones para ese
modo.
i. Durante el proceso de aprendizaje, mantenga
presiona do el botón que está siendo adquirido
hasta que el indicador rojo haya destellado durante
medio segundo.
j. Evite transferir las funciones del botón Volume/Mute
de su control remoto original salvo que esté seguro
de que opera el mismo equipo. Tenga en cuenta que
algunos controles remoto de DVD originales
incluyen un botón de control volumen/silencio para
TV y pueden tener dos tipos distintos de código.
k. Evite transferir las funciones de los botones de
transporte de VCR de su control remoto original
salvo que esté seguro de que operan el mismo
equipo. Tenga en cuenta que algunos controles
remotos de TV originales incluyen botones de
control de VCR y pueden tener dos tipos distintos
de código.
l. Si el aprendizaje del primer o segundo botón para un
modo causa sucesivos errores, entonces intente lo
siguiente:
i. Finalice la sesión de aprendizaje presionando la tecla
CODE SEARCH.
ii. Elimine los comandos adquiridos para ese modo.
iii. Verifique que los transmisores IR estén
correctamente alineados entre los dos controles
remoto (utilice la función de búsqueda de transmisor
IR).
iv. Disminuya (media pulgada) o aumente (2 pulgadas)
la distancia entre los dos controles.
v. Intente transferir nuevamente las funciones del
control remoto original para ese modo.
Si surgen problemas nuevamente con el mismo botón,
revise el botón del control remoto original a ser
transferido. ¿Transmite? ¿Opera el equipo destinatario?
Intente adquirir las funciones de ese botón bajo un
modo diferente. Si lo adquiere correctamente
probablemente se trate de un código de tipo diferente a
los otros y no puede ser adquirido bajo el mismo modo.
35
Aprendizaje de Comandos
Búsqueda de transmisor IR (infrarrojo)
Esta función le ayuda a identificar donde está ubicado
el transmisor IR de su control remoto original y es
especialmente útil si el mismo está escondido detrás de
un lente.
1. Enfrente ambos controles remotos a una distancia
de aproximadamente 1 pulgada entre ellos (vea
“Consejos para el aprendizaje de códigos” en las
páginas anteriores.)
2. Presione y mantenga presionado el botón de CODE
SEARCH hasta que el indicador rojo se encienda,
luego suéltelo.
3. Presione y suelte el botón del modo deseado (TV,
VCR, etc.), el indicador rojo parpadea y luego
permanece encendido.
4. Presione y suelte el botón LEARN (aprender), el
indicador rojo parpadea y luego permanece
encendido.
5. Presione y mantenga cualquier botón del control
remoto original y mueva el control remoto original a
la izquierda y a la derecha, y/o arriba y abajo frente
al transmisor infrarrojo del control de adquisición. El
indicador rojo permanecerá encendido si no
encuentra la señal infrarroja del remoto original y
destellará más rápido cuando los transmisores
infrarrojos estén alineados. El punto en el cual el
indicador rojo destella con mayor rapidez es donde
los dos transmisores infrarrojos están alineados.
Nota: Algunos controles remotos originales
únicamente transmitirán IR la primera vez que oprima
el botón y luego se detendrán. En estos casos,
rápidamente presione y libere el botón del control
remoto original repetidamente durante este
procedimiento.
6. Ahora podrá aprender las funciones de un botón de
su control remoto original, continuando a partir del
“paso 4” de la sección “Aprendizaje de comandos”
de la página siguiente, o, para salir a esta altura,
presione y libere el botón CODE SEARCH.
La función de aprendizaje le permite a este control
remoto “aprender” funciones de su control remoto
original. Por ejemplo, es posible que usted desee usar
su control remoto para ejecutar la función RANDOM
PLAY (reproducción al azar) del control remoto original
de su reproductor de discos compactos. Este control
remoto está equipado con una función de “aprendizaje
fácil” que le permite aprender funciones (tales como
RANDOM PLAY del control remoto original de su
reproductor de discos compactos) siguiendo los pasos
que se indican a continuación:
1.
2.
3.
4.
5.
6.
7.
8.
Presione y mantenga presionado el botón CODE
SEARCH (búsqueda de código) hasta que el indicador
rojo se encienda; luego, suelte el botón.
Presione y suelte el botón del modo deseado (TV, VCR,
etc.); el indicador rojo parpadeará y luego quedará
encendido.
Presione y suelte el botón LEARN (aprender); el
indicador rojo parpadeará y luego quedará encendido.
Presione y suelte el botón del control remoto donde
quiera que quede memorizada la función a aprender [por
ejemplo POWER (encendido)].
Apunte ambos controles remotos uno frente al otro, a
una distancia de alrededor de una pulgada (aprox. 2,5 cm)
uno del otro (ver Consejos en la página 34).
Presione y mantenga presionado el botón del control
remoto original [por ejemplo PLAY (reproducción)]
hasta que el indicador rojo parpadee una vez y quede
encendido. Si hay algún problema de aprendizaje, el
indicador parpadeará durante tres segundos y quedará
encendido. Si esto ocurre, repita los pasos 4 a 6.
Repita los pasos 4 a 6 para los otros botones que quiera
aprender.
Presione y suelte el botón CODE SEARCH cuando se
haya concluido el aprendizaje de todos los comandos
deseados del control remoto. El aprendizaje de códigos
está ahora completo.
6.
Alinee el control remoto (del cual está aprendiendo) frente a
frente con el control remoto que realiza el aprendizaje, sobre
una superficie firme, alejados aproximadamente una pulgada
(2,5 cm).
36
2.
4.
3.
1.
37
Despejando Comandos
Para Despejar Todos los Comandos
Transferidos bajo una modalidad
Borrar los comandos que se han aprendido puede serle
útil si, por ejemplo, reemplaza su reproductor de discos
compactos por uno de otra marca o modelo. Si este
control remoto ha aprendido, por ejemplo, la función
RANDOM PLAY (reproducción al azar) del control
remoto original de su viejo reproductor de discos
compactos, esa función podría no poder ejecutarse en
un reproductor nuevo. En caso de que quiera quitar o
borrar uno o más comandos “aprendidos”, siga los
pasos siguientes:
1. Oprima, sin soltar, el botón CODE SEARCH hasta
que se encienda la luz indicadora. Suelte el botón
CODE SEARCH.
2. Oprima y suelte el botón de la modalidad que desee
despejar (TV, VCR, etc.). El indicador parpadea y se
apaga.
3. Oprima y suelte el botón LEARN DOS VECES. El
indicador parpadea y se apaga.
4. Oprima y suelte el CODE SEARCH. El indicador
parpadea y se apaga. Todos los comandos
transferidos bajo esa modalidad se han despejado.
Despejado Maestro: Para Despejar Todos los
Comandos Transferidos, es Decir, Regresar a
las Funciones por Omisión de Fabrica
1. Oprima, sin soltar, el botón CODE SEARCH hasta
que la luz indicadora se encienda. Suelte el botón
CODE SEARCH.
2. Oprima y suelte el botón LEARN DOS VECES. El
indicador parpadea y se apaga.
3. Oprima y suelte el CODE SEARCH. El indicador
parpadea y se apaga. Todos los comandos
transferidos en el control remoto se han despejado.
Extendedor IR
El extendedor IR le permite utilizar su control
remoto para controlar el producto A/V al cual
está conectado el emisor de audio/video. Por
ejemplo, si el emisor de audio/video está
conectado a un reproductor de DVD o VCR en
su sala, y el receptor de audio/video está
conectado a un televisor en su dormitorio, puede
controlar el reproductor de DVD o VCR mientras
ve la imagen en el televisor de su dormitorio. El
control remoto envía comandos de
radiofrecuencia (RF) al emisor de audio/video (la
unidad que tiene la antena delgada). Este recibe
los comandos de RF desde el control remoto y
los convierte en comandos infrarrojos (IR). Debe
conectar el cable extensor IR en el conector de la
parte trasera del emisor de audio/video y los
emisores IR en la parte frontal del reproductor de
DVD o VCR, etc., que desea controlar.
1. Conecte el conector del extensor IR en el
cable emisor IR en el enchufe IR EXT ubicado
en la parte trasera del emisor de audio/video.
2. Coloque el cable emisor en la parte frontal de
los dos dispositivos que desea controlar (por
ejemplo, DVD y VCR).
DVD
VCR
LEFT
IR EXT.
Emisor IR
Emisor IR
VIDEO IN
RIGHT
DC 12V
AUDIO I N
Enchufe
del extendedor IR
3. Asegúrese de que los dos emisores IR están
conectados cerca de los sensores IR en los
dispositivos que desea controlar.
El cable del emisor IR le permite controlar hasta dos
dispositivos IR.
38
39
Localización y reparación de averías
El Control Remoto no Opera su Producto
• Oprima el botón de modalidad del aparato que desea
controlar.
• Programe el control remoto con un nuevo código.
• Instale baterías nuevas (quizá tenga que reprogramar su
control remoto después de instalar baterías nuevas).
• Puede ser que el control remoto no sea compatible con su
aparato.
El Control Remoto no Opera Algunas
Funciones de su Aparato
• Programe el control remoto con un código nuevo.
• Puede ser que el control remoto no sea capaz de operar
todas las funciones de su aparato o los nombres de los
botones pueden ser diferentes a los de su aparato.
La Luz Indicadora Parpadea Después de que
Programa un Código de Producto
• El control remoto no aceptó el código.
• Intente programar el código otra vez o trate un código
diferente.
Para solicitar ayuda con la configuración, por favor llame al
teléfono (919) 573-7854.
Garantía limitada por un año
Philips garantiza que este producto carece de defectos de
material, manufactura o armado, bajo uso normal y de acuerdo
con las especificaciones y advertencias, por el plazo de un
año a partir de la fecha de compra de este producto. Esta
garantía cubre únicamente al comprador original del producto
y no es transferible. Para ejercer sus derechos bajo esta
garantía, debe proporcionar una prueba de compra mediante
una factura original que muestre el nombre del producto y la
fecha de compra. Por atención al cliente o para obtener
servicio de garantía, sírvase llamar al 919-573-7854. NO
EXISTEN OTRAS GARANTÍAS IMPLÍCITAS O
EXPLÍCITAS. Las obligaciones de Philips se limitan a la
reparación o, a su sola opción, al reemplazo del producto. No
se aceptan reclamos por daños incidentales, especiales e
indirectos, de acuerdo a lo permitido por la ley. Esta garantía
le otorga a usted derechos legales específicos. Usted también
tener otros derechos que pueden variar de estado a estado.
Hecho en China-TC,
Aseguración de calidad en Estados Unidos
Ledgewood, New Jersey 07852
40
Advertencia de la FCC
ESTE DISPOSITIVO CUMPLE CON LA
PARTE 15 DE LAS NORMAS DE LA FCC.
SU OPERACIÓN ESTÁ SUJETA A LAS
SIGUIENTES DOS CONDICIONES: (1)
ESTE DISPOSITIVO PUEDE NO
PROVOCAR INTERFERENCIA NOCIVA, Y
(2) ESTE DISPOSITIVO DEBE ACEPTAR
CUALQUIER INTERFERENCIA RECIBIDA,
INCLUYENDO CUALQUIER
INTERFERENCIA QUE PUEDA PROVOCAR
UNA OPERACIÓN NO DESEADA.
Este equipo genera y utiliza energía de la
radiofrecuencia, y si no se instala y utiliza
correctamente, es decir, estrictamente de acuerdo
con las instrucciones del fabricante, puede
provocar interferencia con la recepción de radio y
televisión. Ha sido probado y se ha determinado
que cumple con los límites para dispositivos de
control remoto de acuerdo con las
especificaciones contenidas en las Sub-Partes B y
C de la Parte 15 de las Normas de la FCC, que
están diseñadas para ofrecer una protección
razonable contra dicha interferencia en una
instalación residencial. Sin embargo, no se puede
garantizar que no ocurra interferencia en alguna
instalación en particular. Si el equipo ocasiona
interferencia en la recepción de radio o televisión,
lo cual puede ser determinado desenchufando el
equipo, intente corregir la interferencia mediante
una o más de las siguientes medidas:
• Reoriente la antena de la radio/TV que
experimenta la interferencia.
• Ubique el receptor en otro lugar con respecto
a la radio/TV.
• Mueva el receptor más lejos de la radio/TV.
• Conecte el receptor en una toma de un circuito
eléctrico diferente al de la radio/TV que está
experimentando la interferencia.
• De ser necesario, consulte a su proveedor
local por más sugerencias.
NOTA: Toda modificación a cualquiera de los
componentes de este equipo anulará la autoridad del
usuario para operarlo.
41
Notes
Notes
42
43
Made in China. Quality Assured in USA.
Ledgewood, NJ 07852
PM725T