1
Supermicro Switch Web GUI Quick Configuration Guide
Switch Web GUI Quick
Configuration
Guide for
SSE-G48-TG4
SSE-G24-TG4
SSE-X24S
SBM-GEM-X2C
SBM-GEM-X2C+
SBM-GEM-X3S+
SBM-XEM-X10SM
Release: 1.0a
1 / 24
Supermicro Switch Web GUI Quick Configuration Guide
Release: 1.0a
2 / 24
Supermicro Switch Web GUI Quick Configuration Guide
The information in this User’s Manual has been carefully reviewed and is believed to be accurate. The vendor assumes no responsibility
for any inaccuracies that may be contained in this document, makes no commitment to update or to keep current the information in this
manual, or to notify any person or organization of the updates. Please Note: For the most up-to-date version of this manual, please
see our web site at www.supermicro.com.
Super Micro Computer, Inc. ("Supermicro") reserves the right to make changes to the product described in this manual at any time and
without notice. This product, including software and documentation, is the property of Supermicro and/or its licensors, and is supplied only
under a license. Any use or reproduction of this product is not allowed, except as expressly permitted by the terms of said license.
IN NO EVENT WILL SUPERMICRO BE LIABLE FOR DIRECT, INDIRECT, SPECIAL, INCIDENTAL, SPECULATIVE OR
CONSEQUENTIAL DAMAGES ARISING FROM THE USE OR INABILITY TO USE THIS PRODUCT OR DOCUMENTATION, EVEN IF
ADVISED OF THE POSSIBILITY OF SUCH DAMAGES. IN PARTICULAR, SUPERMICRO SHALL NOT HAVE LIABILITY FOR ANY
HARDWARE, SOFTWARE, OR DATA STORED OR USED WITH THE PRODUCT, INCLUDING THE COSTS OF REPAIRING,
REPLACING, INTEGRATING, INSTALLING OR RECOVERING SUCH HARDWARE, SOFTWARE, OR DATA.
Any disputes arising between manufacturer and customer shall be governed by the laws of Santa Clara County in the State of California,
USA. The State of California, County of Santa Clara shall be the exclusive venue for the resolution of any such disputes. Super Micro's total
liability for all claims will not exceed the price paid for the hardware product.
Manual Revision 1.0a
Release Date: June 28, 2012
Unless you request and receive written permission from SUPER MICRO COMPUTER, you may not copy any part of this document.
Copyright © 2012 by SUPER MICRO COMPUTER INC.
All rights reserved.
Printed in the United States of America
Release: 1.0a
3 / 24
Supermicro Switch Web GUI Quick Configuration Guide
Contents
1
2
Introduction ................................................................................................................. 5
Basic Configurations ................................................................................................... 6
2.1
Login Page .......................................................................................................... 6
2.2
Home page .......................................................................................................... 6
2.2.1
Page Top Links ........................................................................................... 7
2.2.2
Page Top LED Display ............................................................................... 8
2.2.3
Left Side Tree ............................................................................................. 8
2.2.4
Middle Configuration Link Table ............................................................... 9
2.3
Management IP Address ..................................................................................... 9
2.3.1
Changing the Management IP Address & Gateway ................................. 10
2.4
User Accounts ................................................................................................... 11
2.5
Interface MTU and Jumbo Frames ................................................................... 12
2.6
Interface Description ......................................................................................... 13
2.7
Stacking............................................................................................................. 13
2.8
Tracking Uplink Failure .................................................................................... 15
2.9
Saving Configurations ...................................................................................... 16
2.10 Upgrading Firmware ......................................................................................... 17
2.11 Resetting to Factory Defaults............................................................................ 18
3
VLAN Configurations .............................................................................................. 20
4
Link Aggregation ...................................................................................................... 22
4.1
Enabling LA Status ........................................................................................... 22
4.2
Creating a Port Channel .................................................................................... 23
4.3
Associating a Port Channel with Ports.............................................................. 23
4.4
Configuring Port Channel Parameters .............................................................. 24
Release: 1.0a
4 / 24
Supermicro Switch Web GUI Quick Configuration Guide
1 Introduction
This document is designed to provide Supermicro switch users with the information required to
configure the basic functionalities on the switch through its Web graphical user interface (GUI).
Supermicro Switch products can be configured through Web browsers like Internet Explorer or
Mozilla Firefox. To manage a switch through a web browser, type in the management IP address
in the web browser address bar. This will allow you to start accessing the switch. For example, if
the management IP address of the switch is 192.168.100.102, the switch can be accessed
through the Web browser by typing http://192.168.100.102 in the address bar of the web
browser.
Note:
Most of the contents of this manual apply to these six switch products:
SSE-G48-TG4
SSE-G24-TG4
SSE-X24S
SBM-GEM-X2C
SBM-GEM-X2C+
SBM-GEM-X3S+
SBM-XEM-X10SM
In a few sections the contents differ for these products. In those specific places, the applicable
product is clearly identified. So if any particular product is not mentioned, you can assume that
the contents are valid for all six switch products.
Release: 1.0a
5 / 24
Supermicro Switch Web GUI Quick Configuration Guide
2 Basic Configurations
2.1 Login Page
When you type the switch IP address into the browser, the following Login page appears.
Fig 1: Login page
Enter the User Name and Password and click on the Login button. This User Name and
Password are both used for accessing the switch through the web for switch configuration. The
user name and password entered are validated by the switch. The default user name is ADMIN
and the default password is ADMIN.
2.2 Home page
The Home page is displayed upon successful validation of the user name and password. This
page presents links to configurations of all the features of the switch. It has the following main
components.
Page Top Links
Page Top LED Display
Left Side Tree
Release: 1.0a
6 / 24
Supermicro Switch Web GUI Quick Configuration Guide
Middle Configuration Links Table
Except for the Page Top LED Display section, the Home page is same for all the switch products
SSE-G48-TG4, SSE-G24-TG4, SSE-X24S, SBM-GEM-X2C, SBM-GEM-X2C+, SBM-GEM-X3S+
and SBM-XEM-X10SM.
Fig 2: Home Page
2.2.1 Page Top Links
This section provides the following links:
Refresh
Help
Support
About
Logout
The Refresh link refreshes the contents of the page. Unlike the browser provided refresh button,
this link refreshes only the contents of the section in the middle of the page which has active data.
The Support link provides a link to the customer support group at Supermicro.
The Help link provides context specific help text. This link opens a new help text page relevant to
the configuration page currently being displayed.
The About link provides information about the switch itself and the firmware versions supported.
Release: 1.0a
7 / 24
Supermicro Switch Web GUI Quick Configuration Guide
The Logout link provides a means of signing out of the management web application. It returns to
the login screen requesting a user name and password for login.
2.2.2 Page Top LED Display
This part of the screen displays the port status of the switch. It displays Speed and Link status for
every port. Since the number of ports is different between each of the switches, this displays a
different number of ports for each type of switch.
For SSE-G48-TG4, it displays 48 Gigabit Ethernet ports and four 10-Gigabit Extreme Ethernet
ports.
For SSE-G24-TG4, it displays 24 Gigabit Ethernet ports and four 10-Gb Extreme Ethernet ports.
For SSE-X24S, it displays 24 10-Gb Extreme Ethernet ports.
For SBM-GEM-X2C, it displays 16 Gigabit Ethernet ports and three 10-Gb Extreme Ethernet
ports.
For SBM-GEM-X2C+, it displays 22 Gigabit Ethernet ports and three 10-Gb Extreme Ethernet
ports.
For SBM-GEM-X3S+, it displays 24 Gigabit Ethernet ports and three 10-Gb Extreme Ethernet
ports.
For SBM-XEM-X10SM, it displays 24 10-Gb Extreme Ethernet ports and one Gigabit Ethernet
port.
Note:
Ex ports configured as stacking ports will not be displayed in this LED display. The link status of
stacking ports is displayed on the stacking pages.
In stacking, a switch identifier will be displayed on top of this LED display. You can select the
stack member switch of interest in order to view the LED display for that corresponding switch.
2.2.3 Left Side Tree
The Left Side Tree display on the left side of the page provides quick access to configuration
pages. This tree is organized based on the features supported in the switch. The main features
are categorized as follows:
System Management – System based configurations
Layer 2 Management – Layer 2 Protocols including VLAN, RSTP, MSTP …
Layer 3 Management – Layer 3 Protocols including – IP, RIP, OSPF ….
Release: 1.0a
8 / 24
Supermicro Switch Web GUI Quick Configuration Guide
Multicast Management – Multicast Protocols including IGMP, PIM …
Statistics – Statistics and Counters for all the features.
This tree is displayed on the left panel on all configuration pages. This allows you to choose any
configuration page directly without requiring a return to the home page.
2.2.4 Middle Configuration Link Table
This section of the page displays a table of links to all major configurations. This table provides
links similar to those of the Left Side Tree. The configuration links are categorized based on
features of switch.
2.3 Management IP Address
Note: The default management IP address for all Supermicro switch products is:
192.168.100.102.
Switch
Management IP Interface
SSE-G24-TG4
The management IP address is configured for VLAN 1. All front
1-Gb ports and back 10Gb ports are configured as untagged
member ports of VLAN 1 by default.
SSE-G48-TG4
You can connect to any of the front panel 1Gb ports or back
panel 10-Gb ports to manage the switch using the management
IP address.
SSE-X24S
The management IP address is configured for a 1Gb
management Ethernet port. You can connect to this
management IP address through the 1-Gb Ethernet port.
If you prefer to manage through the 10-Gb ports, then you can
assign the desired management IP address to VLAN 1.
Alternatively, you can create any layer 3 VLAN to manage the
switch through its 10-Gb ports.
SBM-GEM-X2C
SBM-GEM-X2C+
SBM-GEM-X3S+
SBM-XEM-X10SM
Blade switches can be managed with the default IP address
through the CMM Ethernet connection. The internal
management Ethernet ports of the blade switches are
connected with the CMM Ethernet ports internally.
If you prefer to manage through the front panel Ethernet ports,
then you can assign the desired management IP address to
VLAN 1.
Alternatively, you can create any layer 3 VLAN and manage the
switch through its front Ethernet ports.
Release: 1.0a
9 / 24
Supermicro Switch Web GUI Quick Configuration Guide
2.3.1 Changing the Management IP Address & Gateway
The management IP address and default gateway can be configured in the System Mgmt
Management IP page.
Fig 3: Management IP Page
IP Address Mode – For a static IP addresses use the Manual mode. To get an IP address
through DHCP, use the Dynamic mode.
IP Address – Use this setting to configure the IP address for static manual mode.
Subnet Mask – Use this setting to configure the subnet mask for the static manual mode.
Default Mgmt Gateway – The default gateway can be configured only for the SBM-GEMX2C, SBM-GEM-X2C+, SBM-GEM-X3S+, SBM-XEM-X10SM and SSE-X24S switches.
Note:
For the blade switches SBM-GEM-X2C, SBM-GEM-X2C+, SBM-GEM-X3S+ and SBM-XEMX10SM the management IP address and default gateway can also be configured from the CMM
management interface.
The management IP address and gateway of the switch are saved automatically into switch
NVRAM. Hence it is not required to save configuration in order to save the management IP and
gateway address.
Release: 1.0a
10 / 24
Supermicro Switch Web GUI Quick Configuration Guide
2.4 User Accounts
The default administrative user name for all Supermicro switches is ADMIN and the password for
all these switches is also ADMIN. The password for this ADMIN user can be changed in the page
System Mgmt Management Security Local Users.
New users can be created with different privilege levels. Fifteen is the highest privilege – it equals
the ADMIN user. One is the lowest privilege – it only allows the user to view the configurations;
the user may not modify them. The default privilege is at least one.
Fig 4: User Accounts Page
To change the password for the ADMIN user, choose ADMIN for the User Name and type the
new password in the Password text box. Then make sure to set the Privilege as LEVEL_15 for
an ADMIN user.
Release: 1.0a
11 / 24
Supermicro Switch Web GUI Quick Configuration Guide
2.5 Interface MTU and Jumbo Frames
The interface MTU can be changed in Layer2 Mgmt Port Manager Basic Settings page.
The default MTU is 1500 bytes. The maximum supported MTU for 1-Gigabit ports is 9202. The
maximum supported MTU for 10-Gigabit ports is 16338.
The Supermicro switch MTU refers only to the layer 2 payload size. Hence the MTU of 9202
means a total “in-wire” MTU of 9220 (14 bytes Ethernet Header plus 4 bytes FCS are added).
To configure the MTU for any interface, the interface must be administratively brought down first
by changing the Admin State to Down.
Fig 5: Interface MTU Page
Configure jumbo frame support by setting the MTU as 9200 bytes (or any other preferred jumbo
frame size up to 9202 bytes).
Note:
The check box on the first column needs to be checked for all of the interfaces that need to be
configured. Multiple check boxes can be checked to configure more than one interface at a time.
Use the Apply button at the end of the page to apply the changed configurations.
Release: 1.0a
12 / 24
Supermicro Switch Web GUI Quick Configuration Guide
2.6 Interface Description
Interfaces can be given a description or name in text. This helps users to identify or remember
the interface connections with other components on the network. The interface description can be
configured in Layer2 Mgmt Port Manager Basic Settings page.
Fig 6: Interface Description Page
2.7 Stacking
The SSE-G24-TG4 and SSE-G48-TG4 switches support stacking of up to 16 switches. SBMGEM-X2C, SBM-GEM-X2C+ support stacking of up to 8 switches.
Stacking can be configured from the System Mgmt Stack Stack Settings page.
Release: 1.0a
13 / 24
Supermicro Switch Web GUI Quick Configuration Guide
Fig 7: Stacking Page
In the Ports field, list the stacking ports as comma separated without space characters. Stacking
ports are named as xg1, xg2, xg3 and xg4. So if you choose ports xg1 and xg2 as stacking
ports, configure the ports field as either “xg1,xg2” or as “xg1-2”.
To connect switches in stacking mode follow the steps below:
Configure the stacking Switch ID, Ports, and Priority. Then Enable for Stacking in all
switches. Make sure to configure the priority as PM (preferred master) for the switch you
intend to be master.
Connect the stacking ports through CX4 cables (stacking cable lengths must not exceed
3 meters).
Restart all switches
Manage the stack through the master switch IP address.
Note:
1. Do not use the same switch ID for multiple switches on the stack.
2. All switches in the stack can only be configured through the master switch.
3. Make sure all stacked switches run the same version of firmware!
Release: 1.0a
14 / 24
Supermicro Switch Web GUI Quick Configuration Guide
4. Only the same switch models can be stacked together. For example, the SSE-G24-TG4 switch
can only be stacked with other SSE-G24-TG4 switches.
5. Use the same stacking ports configuration across all the switches in stack. For example, if xg1
and xg2 is used for stacking, all switches in the stack should have the same port numbers as
stacking ports.
2.8 Tracking Uplink Failure
The Uplink Failure Tracking Feature (ULFT) is useful for blade switches (SBM-GEM-X2C, SBMGEM-X2C+, SBM-GEM-X3S+ and SBM-XEM-X10SM). This helps blade servers to move to
redundant Ethernet ports in case any blade switch uplink fails.
The user can configure one or more groups for ULFT. Each group can have one or more uplinks
and one or more downstream ports.
Link tracking can be configured from the Layer2 Mgmt Link Tracking page.
Fig 8: Link Tracking Page
In the Upstream Interfaces field and Downstream Interfaces fields, list the ports as comma
separated without space characters. For example to choose ports gi0/1 to gi0/5 and gi0/10 as
downstream ports, configure the Downstream Interfaces field as “gi0/1-5,gi0/10”.
For example if it is desired to bring down all fourteen ports from gi 0/1 to gi 0/14 when uplink
interface gi 0/15 goes down, configure the following:
Release: 1.0a
15 / 24
Supermicro Switch Web GUI Quick Configuration Guide
Enable Link Status Tracking – Choose Enable and click on the Apply button on the left
panel.
Configure the Group ID as 1
Configure the Upstream Interfaces as gi0/15
Configure the Downstream Interfaces as gi0/1-14
Click on the Add Group button.
Note:
If more than one uplink port is configured, all downstream ports will be brought down only when
all upstream ports are down.
2.9 Saving Configurations
Switch configurations can be saved on the System Mgmt File Management page.
You can save a currently running switch configuration in one of three ways.
•
Save Startup Config – This option saves the current running configuration in local flash
with the file name configured as “startup configuration” file. This configuration will be
loaded automatically every time the switch reboots.
•
Save Flash File – This option saves the current running configuration in local flash with a
user-specified file name.
•
Save Remotely – This option saves the current running configuration in a remote TFTP
server. For this option you will need to provide the IP address and file name of the TFTP
server.
Release: 1.0a
16 / 24
Supermicro Switch Web GUI Quick Configuration Guide
Fig 9: File Management Page
2.10 Upgrading Firmware
Switch firmware can be upgraded in the System Mgmt Firmware Upgrade page.
Flash Area – The default selection is Normal to upgrade firmware in normal flash area. To
upgrade firmware in the fallback flash area, choose Flash Area as the Fallback.
File Name – Use the Browse button to select the switch firmware from local computer.
When switches are in the stacking mode, it is only necessary to upgrade the firmware of one
switch – firmware will be upgraded in all other stack members automatically.
Release: 1.0a
17 / 24
Supermicro Switch Web GUI Quick Configuration Guide
Fig 10: Firmware Upgrade Page
2.11 Resetting to Factory Defaults
Supermicro switches can be reset to factory defaults in the System Mgmt System Settings
page.
This page has a button that you can press to allow a “Reset To Factory Defaults”. This will clear
all information about switch configurations and local user accounts. Make sure to have all
necessary configurations backed up before doing “Reset To Factory Defaults” in external
computers. This reset requires a reboot of the switch.
Release: 1.0a
18 / 24
Supermicro Switch Web GUI Quick Configuration Guide
Fig 11: System Settings Page
Release: 1.0a
19 / 24
Supermicro Switch Web GUI Quick Configuration Guide
3 VLAN Configurations
The SSE-G24-TG4, SSE-G48-TG4, SBM-GEM-X2C, SBM-GEM-X2C+ and SBM-GEM-X3S+
switches support 1024 static VLANs. The SSE-X24S and SBM-XEM-X10SM switches support 4K
static VLANs.
VLANs can be configured in Layer2 Mgmt VLAN Static VLANs page.
Fig 12: VLAN Page
In the Member Ports, Untagged Ports, and Forbidden Ports fields, list the ports as comma
separated without space characters. While configuring continuous ports use “-“ for port ranges.
For example to configure ports gi 0/1 to gi0/10 and gi0/15 and gi0/20 as member ports, enter the
Member Ports field as “gi0/1-10,gi0/15,gi0/20”.
The following parameters can be configured in this page.
VLAN ID - This is a VLAN identifier number. It is mandatory to set this parameter in order
to create a VLAN.
VLAN Name – Optional name or description to associate with this VLAN.
Member Ports – Provide all the member ports of this VLAN including tagged and
untagged member ports.
Release: 1.0a
20 / 24
Supermicro Switch Web GUI Quick Configuration Guide
Untagged Ports – These are the member ports that need to be configured as untagged
ports. If all the ports of this VLAN are untagged, member ports and untagged ports will be
same.
Forbidden Ports – This is a list of any ports that need to forbidden from this VLAN.
Note: PVID
Supermicro switches associate all received untagged packets as destined for VLAN 1. This
happens irrespective of the VLANs which are associated with the received ports. Therefore if you
need untagged packets to be associated with a particular VLAN, it is necessary to configure a
pvid for those ports. The PVID can be configured in the Layer2 Mgmt VLAN Port Settings
page.
Release: 1.0a
21 / 24
Supermicro Switch Web GUI Quick Configuration Guide
4 Link Aggregation
Supermicro switches support both static port channel link aggregation and dynamic LACP link
aggregation.
Configure port channel or link aggregation as follows:
Enable LA Status
Create a port channel
Associate the port channel you have created with the required ports
Configure any port-channel-specific parameters
4.1 Enabling LA Status
LA status can be enabled in Layer2 Mgmt LA Basic Settings page.
Fig 13: LA Status Page
Release: 1.0a
22 / 24
Supermicro Switch Web GUI Quick Configuration Guide
4.2 Creating a Port Channel
A port channel can be created in the Layer2 Mgmt LA Interface Settings page.
Fig 14: Port Channel Page
To create any port channel, enter the Port Channel ID in the page-top dialog box and click Add.
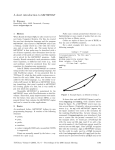
4.3 Associating a Port Channel with Ports
Once a port channel is created in the port channel page, it can be associated with the required
physical ports. This can be done in the Layer2 Mgmt LA Port Settings page.
Configure Port Channel and Mode for the required physical ports.
Use the mode “ON” for static port channels. Use the mode as “ACTIVE” or “PASSIVE” for LACP
port channels.
Release: 1.0a
23 / 24
Supermicro Switch Web GUI Quick Configuration Guide
Fig 15: Port Channel Ports Page
For example to configure the ports gi 0/15 and gi 0/16 with static port channel 10, do the following
steps.
Check the check box for the port gi 0/15 and gi 0/16.
Choose the port channel as po10 for both port gi 0/15 and gi 0/16.
Choose the mode as “On” for both ports gi 0/15 and gi 0/16.
Click on Apply button.
4.4 Configuring Port Channel Parameters
Once a port channel is created and associated with the required ports, you can configure the port
channel parameters.
If necessary configure the MTU of the port channel in the Port Channel page (Fig 14). The default
value is 1500.
If necessary configure the name or description of the port channel in the Port Channel page (Fig
14).
Make the port channel Admin Status as “UP” in the Port Channel page (Fig 14).
Add the port channel to any required vlans in the VLAN page (Fig 12).
Release: 1.0a
24 / 24