1
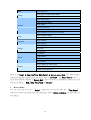
Contents
1.
PRODUCT CHARACTERISTICS...............................................................................................................1
1-1 PRODUCT CHARACTERISTICS ...........................................................................................................................1
1-2 MAIN FEATURES FOR SV1000..........................................................................................................................3
2.
LANGUAGE SELECTION .........................................................................................................................5
3.
MAIN SCREEN..............................................................................................................................................6
3-1 DISPLAY MODE ................................................................................................................................................8
3-2 MOTION/ALARM TO ZOOM ..............................................................................................................................9
3-3 STORAGE SPACE.............................................................................................................................................13
3-4 RECORDING & DI/DO STATUS .......................................................................................................................14
4.
PLAYBACK ..................................................................................................................................................15
4-1 PLAYBACK PASSWORD SETTING.....................................................................................................................17
4-2 SEARCH FOR RECORDED DATA.......................................................................................................................18
4-2-1 Search by Time .....................................................................................................................................18
4-2-2 Search by Event ....................................................................................................................................19
4-3 AUDIO/VIDEO PLAYBACK CONFIGURATION ...................................................................................................27
4-3-1 Video Playback Configuration ..............................................................................................................27
4-3-2 Audio Playback Configuration..............................................................................................................28
4-4 SNAPSHOT/BACKUP .......................................................................................................................................30
4-4-1 Snapshot and save to floppy..................................................................................................................30
4-4-2 Backing up Video Files .........................................................................................................................31
5.
SYSTEM SETTINGS...................................................................................................................................34
5-1 CAMERA SETUP ..............................................................................................................................................35
5-2 PTZ ...............................................................................................................................................................39
5-3 VIEW SETUP ...................................................................................................................................................41
5-4 USER ACCOUNT MANAGEMENT .....................................................................................................................42
5-5 DI/DO ...........................................................................................................................................................45
5-6 ALARM NOTICE ..............................................................................................................................................47
5-7 SYSTEM..........................................................................................................................................................51
5-7-1 Time Synchronization ...........................................................................................................................52
5-7-2 Other Functions.....................................................................................................................................54
5-8 NETWORK SETUP ...........................................................................................................................................55
5-8-1 Remote Monitor ....................................................................................................................................56
iii
5-8-2、Remote Monitor via Internet by a modem .........................................................................................56
5-8-3、Remote Monitor when SV-1000 is connected to the Internet by a modem ........................................62
5-8-4 Remote Setup ........................................................................................................................................68
5-8-5 Network Share ......................................................................................................................................68
5-9 DISK ..............................................................................................................................................................69
5-10 AUDIO ..........................................................................................................................................................70
5-11 VOICE DIALER .............................................................................................................................................71
6.
REMOTE OPERATION..............................................................................................................................72
6-1 DOWNLOAD PLAYER ......................................................................................................................................73
6-2 REMOTE MONITOR VIA MPEG4.....................................................................................................................73
6-3 REMOTE MONITOR VIA JPEG.........................................................................................................................76
6-4 REMOTE PLAYBACK .......................................................................................................................................77
6-5 DVR PLAYER.................................................................................................................................................79
6-6 DVR REMOTE SETUP.....................................................................................................................................82
6-6-1 Remote Setup Record............................................................................................................................82
6-7 DVR REMOTE BACKUP .................................................................................................................................84
7.
APPENDIX ...................................................................................................................................................85
A.
COMPATIBLE PC HARDWARE ......................................................................................................................85
B.
MAIN MENU ...............................................................................................................................................88
C.
FAQ............................................................................................................................................................90
D.
INTERNET CONNECTION..............................................................................................................................92
E.
MAINTENANCE ...........................................................................................................................................94
iv
1. Product Characteristics
1-1 Product Characteristics
Optimum Replacement for Time-lapse Recorder
Traditional Time-lapse Recorder is a mechanical device. It is very easy to break down after
long-term operation and it causes many problems such as: the overly used magnetic heads
which cause blurred image; tapes need to be changed often and manually; the recording time is
not long enough; the management of recorded tapes is complicated; inefficient when trying to
locate the needed data; recording a huge amount of useless images, etc.
SuperVision adopts digital recording technology. The quality of images will not deteriorate
with time. With its high compression rate, the storage time can last for months under normal
applications. The overwrite operation mode will overwrite the earliest data, and no more tape
change is required. Motion detection function will enable the recording only when there is
motion of the objective, and makes the system and data retrieval more efficient.
High Reliability
Normal PC digital surveillance system adopts the MS-Windows OS (Operating Systems). Such
kind of system is so often to crash. It usually makes a negative impression which digital
surveillance system is unreliable.
SuperVision adopts Embedded-Linux OS. Our advanced embedded technology condenses the
entire system into a tiny flash module, which makes the system more reliable. Even when the
power fails, the system will re-boot and return to normal operation in less than one minute.
Longer Recording Days
SuperVision adopts the advanced MPEG-4 compression to store the video images. It allows
you to record more data on the same capacity of hard disks.
Ease of Operation
1
Mouse clicking on the Graphical User Interface controls all the operations. No keyboard is
needed so that it is most suitable for the security guards and normal non-IT based users to use.
Multi-Function
Function of one set of SuperVision = Time-lapse Video Cassette Recorder + Multiplexer
processor + Motion Detection Processor
You can backup the data to CD-R/RW, remotely monitor the images and still recording the
current video data at the same time.
2
1-2 Main Features for SV1000
Items
System
Display
Description
OS
Embedded Linux
Video Inputs
4/8/12/16 channels in BNC jack
Video Outputs
D type 15 Pins VGA and TV-Out
Video Format
NTSC/PAL
Audio Input/Output
1 Channel input and 1 Channel Output
PC Interface
PCI Slot
Multi-Tasking
Yes
User Interface
800*600, very user friendly
Frame rate
Realtime display
Resolution
640*480
HDD Usage Display
Yes
Hidden Camera
Yes
Video Loss Detection
Yes
Image Parameter Adjustment Brightness/Contrast/Hue/Saturation for each camera
Compression
MPEG 4 like Compression
Resolution
640*480,640*240,320*240
Frame rate
NTSC:120/240/240/240, PAL:100/200/240/240 @320*240
Pre-Schedule Recording
Recording
Motion detection area
recording by motion, continuously recording, non-recording
Define any 8x8 cell for motion detection. Free combinations of
detected areas. No limitation on the number of detection areas.
Motion detection sensitivity
10 ranges per camera
Pre-Recording
0~10 sec
Post-Recording
0~20 sec
Watermark
Yes
Date Code
Playback
By 7days x 24hours, set each hour as:
Recording includes time/date information.
To prevent date code from being modified
Playback channels
4 channels playback at the same time
Playback mode
Play, Pause, frame by frame play, fast forward, fast backward
Video Enhancement
De-interlace, Sharpen
Search
Search by time, date and event.
Image Adjustment
Brightness/Contrast
3
Remote
Functions
Alarm
Storage &
Network Access
LAN/ WAN/ Internet, by Ethernet/ Modem
Network Interface
10/100/1000 Ethernet
Remote Monitoring
JPEG mode or MPEG 4 streaming.
Remote Playback
Yes. with MPEG 4 Streaming Technology.
Remote Setup
Yes
Download and Local Play
Yes
Central Management
Yes
Remote Backup
by Windows Network Neighborhood
DHCP Support
Yes
DDNS Support
Yes
i-Mode
Yes
Inputs
4/8/12/16 NC/NO dry contact inputs
Outputs
4/8/12/16 NC/NO relay
IO & Camera Relations
1-1, 1-many, many-1, many-many
Motion/Alarm to Zoom
Yes
Alarm to notice
by Email / FTP / SMS (Short Message requires GSM modem)
Max IDE HDD
Support up to 6 IDE HDDs
RAID support
Support IDE/SCSI RAID
Backup
Backup
Other
USB/ IDE burning device(CD-R/RW, DVD±R/RW) ; USB
storage (Pen Drive, HDD)
HDD SMART Diagnostics
Yes
Password protection
100 user accounts, each one can see different cameras
PTZ camera support
Yes
Power Down Management
Yes. Auto-recovery when power back
Watchdog
Yes Hardware Watchdog.
Time Zone/Daylight Saving
Yes
AVI Format Export
Yes
Time Sync
Support Time Server, FM and RTC Time Sync
UI Language
8 languages in single software: English, French, German,
Japanese, Polish, Portuguese, Spanish, Traditional Chinese
* Specifications subject to change without notice
4
2.
Language Selection
You can select your preferred display language at “Main Menu” before starting DVR system.
There are seven languages that are supported in this version- Traditional Chinese, English,
Japanese, French, German, Portuguese, and Spanish.
5
3. Main Screen
After turning on the DVR, launch the DVR program and it will show the following main
screen,
1
2
9
8
7
6
5
6
4
3
The controls in the main screen including:
Function
Description
1
Storage Space
Indicate the HD free space status
2
Recording/ DI/DO Status Camera recording status and alarm/sensor input
and output status
3
System Setting
Quick access to system configuration
4
Playback
Quick access to playback mode
5
Full Screen Monitoring
Monitor in full Screen
6
Date/Time
Display current date and time
7
Display Mode
Select display divisions
8
Motion/Alarm to Zoom
Activate zooming function when motion or alarm
occurs
9
Sequencer
Display in sequence
Not
e:
Whenever you click this button
, the system will return to the main screen.
7
3-1 Display Mode
There are 7 kinds of Display mode, 4 splits, 6 splits, 8 splits, 9 splits, 10 splits, 13 splits, and 16
splits.
The default display mode is 16 splits. The cameras displayed on each split mode can be
configured in the system setting menu.
Besides the different kinds of split modes, you can click in a camera image on any split screen
to show the full screen of that specific camera as shown in the example below.
In the full screen mode the “Screen Adjustment Parameters” will locate at the bottom of the
screen. These parameters are “contrast”, “brightness”, “chroma”, and “saturation”.
When a Speed Dome is connected and the system is in full screen mode, PTZ control buttons
will pop up in the lower right of the screen. These controls include “Zoom in”, “Zoom out”,
“Auto Focus”, “Focus Near”, “Focus Far”, and “PTZ Speed”.
Zoom In
Zoom Out
Auto Focus
Focus Far
Focus Near
PTZ Speed
Preset Point
Contrast
Brightness Chroma Saturation Auto Pan
8
3-2 Motion/Alarm to Zoom
The function of “ Motion/Alarm to Zoom” is zooming in the screen when there is any motion
or alarm occurring. After clicking
icon, it will activate the “Motion/Alarm to Zoom
“mode.
Motion/Alarm Zooming Area
Motion/Alarm Picture
1. At first, you must go to “ Alarm Notice” in “System Setting” menu to set up the channels
that you want to enable the “ Motion/Alarm to Zoom” function. For the “Alarm to Zoom”
function, you need to have further set up in “DI/DO” under “System Setting.” Click “ DI/DO”
in “ System setting and then select “DI->Zoom”. Next, click channels which you want to
enable “Alarm to Zoom” function and then return to the “Main Menu” to click the
“ Motion/Alarm to Zoom” icon. To note that only “DI/DO” and “Motion to Zoom” be set can
the “Alarm to Zoom” function work
9
Select the channels you want to
enable “ Motion/Alarm to Zoom”
Select the channels you want to
enable “Alarm to Zoom” function
10
2. When the channel which is enabled the “ Motion/Alarm to Zoom” function occurs motion or
alarm, its’ screen will be zoomed in the “ Motion/Alarm Zooming” area and the original screen
of this channel will be replaced by a “Motion/Alarm Picture”. If the channel is not enabled
the “ Motion/Alarm to Zoom” function, the screen of this channel will not be zoomed and will
not be marked in red frame even there is a motion or alarm in this channel.
3. If there is no other motion or alarm occurring, the current zoomed screen will be continually
kept in “ Motion/Alarm Zooming Area”. If yes, the zoomed screen will be kept in
“ Motion/Alarm Zooming Area” just for three seconds and will be replaced by the one from
any channel waiting for zoomed after three seconds. If there is more than one motion or alarm
occurring at the same time, the zooming rule will be as follows,
a. The previous zooming channel will be the first priority for zooming again and others will
be marked in red frame to wait for zooming in after three seconds. However, the number of
continually zooming the same channel will be limited to three times. After three times,
even this channel occurs motion or alarm again, the motion/alarm zooming area will show
the screen of other channel. If the motion or alarm in one of the channels waiting for
zooming and marked in red frame disappears within three seconds waiting time, this
channel will not be zoomed in and the red frame will disappear.
b. If the previous zoomed channel does not have motion or alarm again, the first priority
being zoomed is the channel of which number is the smallest. For example, if channel #3
and channel #7 occur motions or alarms at the same time, channel #3 will be zoomed firstly
for three seconds and the screen of channel #7 will be marked in red frame to wait for
zoomed after three seconds.
4. Zooming in a specific channel: You can decide just to zoom in a specific channel. When
clicking any channel you want to zoom in, the screen of this channel will be zoomed in to the
“Motion/Alarm Zooming” area marked in yellow color frame and the original screen of this
channel will be replaced by a “locked picture”. Then, the screen of other channels, even
occurring motion or alarm, will not be zoomed in “Motion/Alarm Zooming Area” and it will be
just marked in red color frame. You can click the “ Motion/Alarm Zooming Area” to cancel the
“ Zooming in a specific channel”.
11
Motion/Alarm Zooming Area
marked in yellow color
Locked Picture
12
3-3 Storage Space
On the right side of the main screen, you can find the free space of hard disks. If there are
more than one hard disk is connected, it will display the status of each HD every 5 seconds.
When you start using a new hard disk (for example, a hard disk with capacity 80GB), the
percentage of free space will be very close to 100% (e.g. 99%), and the color will be BLUE.
However, as recording continues, the available space will diminish. When the remaining
available space is less than 4GB, the display color will change to ORANGE. This serves as a
warning message that the system will soon enter the Recycle Mode; which means, the earliest
recorded data will be replaced by the newest recording data. If you would like to keep all the
data, this is the time to swap a new hard disk.
If the disk has not been changed and the recording continues, the system will go into Recycle
Mode when the hard disk free space is less than 1GB. The color of “Hard Disk Free Space”
will turn RED.
13
3-4 Recording & DI/DO Status
The first column indicates the recording status of each camera:
Color
Recording Mode
Status
Orange (
) Full recording
Green (
) Motion-sensor
Motion not detected
) Motion-sensor
Motion detected & recording
Red
(
Gray (
) No recording
The second and third column shows the status of each DI and DO
device.
Color
Green (
Red
(
Status
) Device not activated
) Device activated
14
4. Playback
Click the playback icon
on the main screen to enter playback mode. If “Playback
Password Protection” function is enabled (See 4-1 Playback Password Setting), the system will
prompt you to enter User name and Password to enter playback mode as following,
15
The controls of Playback function are as following,
Browse
Calendar
Status
Search by hour
Search by minute
Search Result
Time Map
Exit
Camera
Selection
Play
Snapshot/Backup
Event
Search
16
Setup
Full
Screen
4-1 Playback Password Setting
If you want to activate “Playback Password Protection” function, click
in the main
menu to go the “System Setting” as follows. Change the “Security” from “ Disable” to
“Enable” mode and then click “Playback Password”.
Set up User authority
Enable Playback
Password
Then, set up the “User” authority of playback as follows,
17
4-2 Search for Recorded Data
This software system provides two modes of “ Search for Recorded Data”. One is “ Search by
time” and the other one is “Search by Event”.
4-2-1 Search by Time
Time Map
When you click the icon of “ Time Map” on the lower right corner of Playback screen, it will
show three kinds of time parameters for users to search and jump to the recorded data by time
directly including “ Calendar, Hour and Minute”.
First, click on the date of the calendar on the upper right corner of the
screen and then select the “hour” and “minute” using the two bars on
the lower right corner.
Hour bar
Minute bar
Next, select the cameras for playback using the buttons at the
bottom of the screen. You can playback up to 4 cameras at the
same time. When you click the camera button, camera numbers
1 to 16 will appear. Select the desired camera to playback.
Choose “ - ” if no camera is to be played back on this screen.
The color of the selected cameras on the right side of the screen
will be in “light blue” background.
Click the Play button to start playback.
18
Time
Status
Forward
Rewind
Next Frame
Play
Pause
Note:
You can 2×, 4×, 6× forward by clicking Forward button one more time.
You can 2×, 6× rewind by clicking Rewind button one more time.
Next Frame allows you to play picture by picture.
4-2-2 Search by Event
Event Search
Click the “ Event Search” icon
, it will show the “Search Window”. There are three
kinds of event search modes, “ Time, System and Device”.
Search Mode
Description
Time
Search all of the events within the time range you set up.
System
*Search all of the System events within time range
which you set up by marking the “ Time Search” at the
same time or
*Search all of the System events without time boundary
by disable the “ Time Search”.
19
Device
* Search all of the Device events within time range
which you set up by marking the “ Time Search” at the
same time or
*Search all of the Device events without time boundary
by disable the “ Time Search”.
Time Mode:
Step 1: Select “ Time” mode from the Search type.
Step 2: Set up the time of starting point and end point including, Year, Month, Day, Hour,
Minute and Second.
Step 3: Click “ Search” button
“ button
to execute the “ Event Search”. Click “ Reset
to go back to Default time range. Click “Cancel” button
to stop the event search.
20
Step 4: Then, the system will open the Search Result Window and show the “Search Result".
In the Search Result Window of Time Mode, there will be 9 information columns for each event log
including“ Date, Time, Event, Type, Camera Motion, Camera Video Loss, Camera Enable,
Camera Disable and Content. The columns of Date and Time list the event time information. Event
21
column list “ System", “Camera" or “Device" event. Type includes “Information ( )",
“Warning( )", or “Error( )". Camera Motion, Camera Video Loss, Camera Enable or
Camera Disable represents the camera with event. The Content column makes the description of
System event.
It will show 24 event logs in one page each time and you can click one of the “ Jump button
to go to the event page you want to see.
: Jump to the first page of event search result.
: Jump to the preview page of event search result.
: Jump to the next page of event search result.
: Jump to the last page of event search result.
Step 5: Click
button. The system will jump to “Playback Window"as the
following picture. The search result will be shown on the right side of “Playback Window". Or
click “ Re-search"
button and the system will go back to Search Window.
Search
Result
22
Step 6: Select one of the search logs. It will pop up a window on the left side of Search result to
show the detail information of this log including Event, Type and detail Content. Click “GoTo"
button and it will start to play the event video. This software version can provide four channels
playback at the same time. If this event just happens in four channels ( ex. 2nd, 3rd, 5th, 7th ch) at
the same time, the four channel split will just playback these four channel videos. If this event
happens in over four channels ( ex. 2nd, 3rd, 5th, 7th 9th, 11th ch), you can decide which channel
video will be played in the split window by manually setting up the playback channel
Otherwise, the system will decide the event playback channel priority according to the following
rule:
The first priority of playback channel will be the channel of which number is already in the
preset playback channel. For example, Preset playback channel is 1st, 2nd, 3rd, 4th Ch. The
event happens in 2nd, 3rd, 5th, 7th 9th, 11th Ch at the same time. Then, 2nd and 3rd channel
will be the first priority to be played on the split window. The rest of two split windows will
play the channel with small number. In this case 5th, and 7th channel will be played in the split
channel too. However, 11th Channel will not be played in the split window except you can
manually change the playback channel.
Note:
It will show 10 event logs in one page each time and you can click one of the “ Jump button
to go to the event page you want to see.
23
.
System Mode:
You can search the event by “System" mode and you can also add the “Time Search"
condition to narrow the search range. By marking the various System conditions, you can decide the
search range.
The following table lists all of the “System Events".
Event Group
Rule
Recording Start
Record
Recording Stop
Recording running
Recording exception
Capture setup error
Capture sync error
Capture
Capture card error
Watchdog Fail
DIO mapping Fail
Update time to RF clock
Timer
Update time to RTC clock
Timer update error
No RF clock device
24
Other
Startup
Event log error
Enter play recorded video Mode
Enter disk tool menu
Enter setup mode
Enter playback mode
Monitor
DVR online
Current Timezone
Detect camera count error
System Shutdown: Disk error detected
Setup
Playback
System Setup change
Max user count limit is 128
Enter monitor
Enter backup
No disk found
Storage
Disk error
Recycle disk
FTP alarm
Alarm
E-mail alarm
SMS alarm
Voice Dialer
Setup change by remote user
Remote
Remote Setup Fail
Remote Setup get Fail
Refer to the Step 1 to Step 6 of Time Mode Search to play the event video. The main different
between System Search mode and Time Search mode is the Step 4 “the Search Result window".
In the Search Result Window of System Mode, there will be just 5 information columns for each
event log including“ Date, Time, Event, Type and Content".
Device Mode:
You can search the event by “Device" mode and you can also add the “Time Search"
condition to narrow the search range. By marking the various Device conditions, you can decide the
search range
25
The following table lists all of the “Device Type"
Device Event
Event Type
Camera
Camera Motion
Camera Video Loss
Camera Enable
Camera Disable
DI
DI is activated or not.
DO
DO is activated or not.
Refer to the Step 1 to Step 6 of Time Mode Search to play the event video.
26
4-3 Audio/Video Playback Configuration
Audio/Video
Configuration
When you click audio/video configuration icon
, it will show up the following dialog box.
It provides you with the audio and video playback configuration.
4-3-1 Video Playback Configuration
In the Video configuration, we have two kinds of “Playback Video Enhancement” modes“De-interlace” and “Sharpen” to provide you with the better playback video quality. You can
enable these two modes at the same time. In De-interlace mode, you can select “ Even only” or
“Weave.” Each one has different enhancement on playback video quality. You can select the
one you prefer to fit your quality requirement.
27
4-3-2 Audio Playback Configuration
In the Audio Configuration, it allows you to set up the channels you want to playback with
audio in full screen.
28
Choose the audio channel ( No.: 1~4 ) and volume ( No.: 0~9 ) you would like to playback.
Then click “OK”, the selected single channel with audio will display in full screen.
Note:
It just supports one audio channel.
29
4-4 Snapshot/Backup
Snapshot/Backup
4-4-1 Snapshot and save to floppy
It is possible to save the selected single image to a floppy or a USB storage device (this
selection shown after plugging in USB storage device). Click the
button and select
Snapshot. The following dialog will appear:
Choose the screens you would like to save to the floppy or USB. If you would like to save
single images of all the 4 screens as JPEGs, select all numbers and click “OK”.
30
4-4-2 Backing up Video Files
You can copy the video files from hard disk to burning device such as CD-R/W or DVD-R/W
or USB external storage media, such as USB pen drive or USB Hard Disk. Click the
button and select Export to see the following screen:
Reset time range
Rescan device
Backup Device
Selected files info
Add files
Remove files
Burn Disc
Exit
USB Export Files
Config.
Erase Disc/storage
31
4-4-2-1 Backing Up Procedures
1. Before you start to back up the video files, make sure that the back up program has detected
the IDE/USB burning devices or USB storages. If not, please check if the device is
installed properly and click
to rescan the device. After that, the device still can not be
detected, please verify if the device is ok.
2. When you put the disc to burning device or plug the USB storage device to the DVR, click
the “Backup Device” or “Rescan Device” to get the device information. The row of
“Selected File Info” in the upper left screen will show the device space for backing up.
3. Select the files to back up:
Expand the hard drive directories in the left of the screen. Drag the mouse to select the
recording files for backup (by Year, Month, Date).
4. Erase (Blank) the Disk:
If you use the burning device such as CD-R/W, DVD+R/RW or DVD-R/W to back up the
files, you need to check whether the disc is used. If yes, the icon
will lighten after you
insert the disk to the recorder.
a. Click on
to start the erasing process.
b. After it is done, the Message area will display “Done”.
Note:
If CD-R is used, you do not need to execute this process.
If the Backup device is USB storage and there are already files in it, the icon
lighten. You can decide if you want to click
will also
to delete these files.
5. Click
to add these files to the right side of the screen for burning or copy to the
burning device or USB storage. The total size of the selected files should not exceed
600MB.
6. You can browse the other directories (dates) to continue the file selection.
7. If the backup device is burning device and the blank disc in the burning device can be
detected, the Burn Disc icon
will lighten when you Add the “Selected files” to the
right column of the screen for backup. Click this Burn Disc icon
32
and the system will
start to convert the selected files into standard ISO 9660 format files (Make ISO), and burn
the files to the disc.
8. If the backup device is USB storage and the device space is enough to back up the selected
files, the Export Files icon
will lighten when you Add the “Selected files” to the right
column of the screen for backup. Click this icon
and the system will start to copy the
files to the storage.
9. If problems arise while backing up the files, it might be due to the reasons indicated below:
The blank CD or DVD disk is in bad quality: Replace with a better quality disk.
The CD-RW or DVD+R/RW or DVD-R/RW has been used too many times: Replace
with a new disk.
The burning device cannot process high-speed burning: Reduce the burning speed.
The blank disc does not support high-speed burning: Reduce the speed, or replace with
high-speed compatible disk.
10. You can click Configure icon
to set up the “ Burn Disc, “ Export File” and “ Erase
Disc/ Storage”.
Note:
Not support Pioneer DVD+R
Not support Transcend USB Pen drive.
USB storage devices only support FAT16/FAT32 format.
There may be compatible issue between USB external hard drive and motherboard.
33
5. System Settings
Click the icon
on the main screen to go to the system settings page.
Click on the keyboard icon to enter the user name and password.
To exit the System Settings, click
on the upper right corner in the “System Settings”
screen.
Note
Preset user name: admin
Preset password:
1111
34
5-1 Camera Setup
1. Select the desired camera for setup.
2. Camera Name: Use the “keyboard figure” on the right of “Camera Name” field to enter
the description for the camera.
3. Camera Status (Disable/Enable/Hide): If the channel is not connected to a camera, set
“Disable”. If it is connected, set “Enable”. If you do not want the camera image to be
showed on the main screen, set “Hide”.
Note:
If a camera is “hidden”, the video is still recorded in the hard disk.
4. B/W Camera: If “black&white” camera is used, please click the “B/W Camera” icon.
5. Video Format (NTSC/PAL/SECAM): The video format of 16 cameras must be the same.
Therefore, if you change the video format of any camera, all the rest cameras will be
changed to the same format automatically.
6. Quality (Poor/ Low/ Middle/ High/ Best): You can adjust the recording quality. The higher
35
7.
8.
9.
10.
the quality setting, the more hard disk space will be consumed.
Save Disk Space (Enable/Disable): The setting allows you to save disk space.
Sensitivity (10/20/30/40/50/60/70/80/90/100): You can set the sensitivity of motion
detection during recording. It is recommended to adjust the setting to 100 in order to
prevent any data loss. However, in some special conditions, the system continues to record
even when no motion has occurred. This will result in a considerable amount of useless
data being recorded. In such a case, it is recommended to lower the sensitivity setting to
avoid wasting hard disk
Digital Signature (Enable/Disable): The setting allows you to encrypt digital signature
(watermark) to the video content.
Resolution (320×240/640*240/640×480): You can adjust the recording resolution. The
higher the number, the better the quality. However, the higher quality setting will consume
more hard disk space.
11. Frame Rate (0.2/0.5/1/2/3/4/5/6/7/8/10/12/15/20/25/max): You can adjust the recording
frame rate for fully recording mode and event recording mode. The higher the number is,
the higher frame rate it will be recorded. However, with higher frame rate, the hard disk
space will be consumed faster.
10-1 Fully Recording
You can set frame rate for fully recording mode.
10-2 Event Recording
(1) Events (Motion/DI): allow you to choose events that you would like to record.
(2) Event Occur: allows you to set recording frame rate when event occurs.
(3) Event Not Occur: allows you to set recording frame rate when event does not
occur. There are two options to select. One is “pre/pos Recording and the other
one is “Low frame Rate recording. For the pre-Record setting
(0/1/2/3/4/5/6/7/8/9/10) is to record a certain seconds before an alarm happens.
And post-Record setting (0/1/2/3/4/5/8/10/15/20) is to record a certain seconds
after an alarm happens.
36
12. Recording Schedule: Refer to the Recording Schedule Table below. There are 7 rows and
24 columns in the schedule table, which represents 7 days and 24 hours.
There are three recording modes:
Full recording.
Motion sensor recording
No recording
13. Copy Camera Setting: After finishing the camera setup for one camera, you can click the
“Copy Camera Setting” button, located on the upper right of the “Camera Setup” screen, to
copy the setting of this camera to other cameras. This saves time and effort. The following
dialog will appear. Click the setting area you would like to copy (Refer to the three “areas”
below), and then click the cameras located on the right of the screen and click “OK”.
14. Motion Sensor Setup: This is used to set the motion sensor area.
14-1 Method One
(1) Click
37
(2) Select “Set Detection Area” and use the mouse to drag an area to be detected.
(3) You can set many detection areas by dragging mouse again.
14-2 Method Two
(1) Click
(2) Select “Clear Detection Area” and use the mouse to drag a non-detection area.
(3) Drag the mouse again to set more non-detection areas.
15. Color Adjustment: Here you can adjust Contrast/ Brightness/ Hue/ Saturation. The “Hide
Sensor Area” setting is to help you examine the adjustment.
Color Adjustment function is also provided in the one channel monitor mode. That means
user also can adjust color in single monitor mode except that “ Administrator “ enables
“Hide Color adjust” in “ System” page under “System configuration” for security
concern. (Please refer to the Chapter 5-7 for “System” setting).
16. OSD (On Screen Display) Position: you can select where the “time” and “camera name”
will be displayed in the image in live view. There are four positions to choose from: Top
Left, Top Right, Bottom Left and Bottom Right.
38
5-2 PTZ
To make the PTZ camera function correctly, please follow the instructions below:
1. Connect the PTZ to RS232 port (via RS485-RS232 converter).
2. Refer to Chapter 5-7-2 to assign “PTZ” to the RS232 port you connected.
3. Refer to the user manual of PTZ to setup the protocol, baud rate and ID.
4. Select Camera: please select the correct camera number which has PTZ function.
5. Status: set to ”Enable”
6. Model, ID, and Baud Rate: set the ID the same as the PTZ camera.
You can control the PTZ camera using the control panel in this page.
: Focus near
: Focus far
: auto focus
Preset function:
1. Select p1reset point 1.
2. Move the PTZ camera to the position 1 using the panel.
3. Click “save”.
39
4. Select other preset points and follow the same procedure to set up.
5. Totally we support 128 preset points.
Auto-Pan function:
1. Click “Set Pan Start”
2. Move the PTZ camera, the PTZ will remember the path.
3. Click “Set Pan End”
Note:
Preset and Auto-pan function is different from protocol to protocol. The above
example is given using Pelco-D protocol for example.
40
5-3 View Setup
Clicking the “Split” tab will display the view setup screen as following.
1. There are 7 kinds of Display mode, 4 splits, 6 splits, 8 splits, 9 splits, 10 splits, 13 splits,
and 16 splits.
Click the “small block” on the split screen, then you can modify the camera shown on each
split screen. An example for the description of the all cameras when doing the view setup is
located on the right side of the table.
2. Sequencer Setting
There are 1 channel and 4 channel sequencer modes. For the one channel sequencer mode,
you can set up the desired sequencer order and duration (up to 300 seconds). For the four
channel sequencer mode, the display format is 4 spilt and you can set up its sequencer
duration.
41
5-4 User Account Management
The User Account Management function allows different user to login the system using
different user name. To start using this function, click on the User icon.
There are 2 system preset accounts. The user names and passwords for these two accounts are
as follows.
Username: “admin”; Password: “1111” is for the system management account. This
account cannot be deleted.
Username: “net”; Password: “1111” is for the normal user account. This account can be
deleted.
To see more details of the account information, click View on the bottom left of this screen.
42
[Add User Account]:
Click “Add” icon to add new user accounts as screen below.
Enter the name and password for the new user.
Administrator Account/Normal User Account: Only administrator account can enter the
system setup menu to change the settings. Normal User accounts are used for remote login
only.
Dial-In Access: This option is to enable/disable the user to dial into the DVR, i.e., to
access the system through modem.
Playback: Authorize user the function of playback.
Password Expire Setup: This is the notification of password expiration. The time setup
range can be 1~365 days. When the password expires, the following dialogue will appear:
Remote Monitor/Playback/PTZ Control: You can define the authorization of each user to
use remote functions.
43
[Modify User Account]
Click “Modify” icon to modify the existing user account.
The operation is similar to that of the “Add User Account” above.
[Delete User Account]
Click “Delete” icon to delete the user account. A screen will display as follows.
Click “OK” if you would like to delete this user account.
Note:
The preset user “admin” cannot be deleted.
44
5-5 DI/DO
Click on the DI/DO icon and select the total number of DI/DO installed on your system to see
the following figure:
[DI Status]
Choose Disable, NC, or NO according to your DI device (e.g., photo sensor).
Disable: Disable the DI function.
NC (normal closed): The signal loop is closed under normal conditions. When the loop
becomes open, DI will be triggered until the loop becomes closed again. In other words, if
the loop keeps on open for a period of time, DI will keep on triggering in that time
interval.
NO (normal open): The signal loop is open under normal conditions. When the loop
becomes closed, DI will be triggered until the loop becomes open again. In other words, if
the loop keeps on closed for a period of time, DI will keep on triggering in that time
interval.
[DO Status]
Disable: Disable the DO function.
Enable: Enable the output signal when DO is triggered.
Set the duration of DO signal. The available durations are 5, 10, 30, 60, 120, 300, 600,
45
1800 and 3600 seconds. If DO is triggered, in this time interval, DO will keep on
triggering.
[Action]
There are 6 actions that are related to the DI/DO functions.
DI →Camera Recording
When DI is triggered, DVR can start to record the video of selected cameras. You can
select the cameras to be recorded when DI is triggered by using the “DI/Camera array”
shown below the setting. Each DI signal can trigger more than one camera recording.
Cam Motion →DO
When selected camera detects motion, selected DO can be triggered and start to send
control signal to the external device (e.g., alarm) within the DO duration. The
“Camera/DO array” below the setting allows you to relate the DO devices corresponding
to each camera.
Cam V-Loss →DO
When selected camera video is lost, selected DO can be triggered and start to send control
signal to the external device (e.g., alarm) within the DO duration. The “Camera/DO array”
below the setting allows you to relate the DO devices corresponding to each camera.
DI →DO
When selected DI is triggered, selected DO can be triggered and start to send control
signal to the external device (e.g., alarm) within the DO duration. The “DI/DO array”
below the setting allows you to relate the DO devices corresponding to each DI.
System Event →DO
There are two types of system event. One is “ System Warning” and the other one is
“System Error”. When system event occurs, selected DO will be triggered and start to
send control signal to the external device (e.g., alarm) within the DO duration. The
“Event/DO array” below the setting allows you to relate the DO devices corresponding to
each system event.
DI →Zoom
When selected DI is triggered, selected camera will be triggered and its image will be
zoomed in the “Motion/Alarm Zooming area” (refer to Chapter 3-2).
The following figure may help to understand the concept described above.
Input Event:
Output Action:
DI Triggered
to Start Recording
Motion Detected
Video Loss
Image to be Zoomed
46
System Event
to Trigger DO
5-6 Alarm Notice
SuperVision Series can send four types of alarm to your pre-defined email addresses, FTP site,
mobile phone number (via SMS) or Voice dialer. This section gives step-by-step instructions
to send different alarms to each destination. We define four types of alarm sources as below.
dvr
Alarm Source
Definition
Motion Alarm
Motion is detected in selected cameras (despite the recording
mode is full recording, motion sensor recording or no recording).
DI Alarm
Selected DI is triggered.
System Error Alarm
(1) Hard disk error, or
(2) Camera lost signal.
System Warning Alarm
1. Hard disk is going to enter recycle mode (free space less than
4GB), or
2. Hard disk has being in recycle mode.
First, please click on the icon “Alarm Notice” to see the following figure:
[Alarm to Email]
(1) Make sure the DVR system connects to Internet.
(2) Key in the IP address or the hostname of the mail server. If the mail server requires
47
user name and password to send emails, please click the icon “Authorization SMTP”
to enter the user name and password.
Note:
If you don’t know the IP address of your mail server, you can ping the mail server to
get the IP address as following figure.
(3) Key in sender’s full email address. It must be a valid email address.
(4) Add Alarm Notice: Click the icon Add to see the follow figure.
(5) Alarm Duration: The duration time can be from 1 minute to 1440 minutes (1 day).
When the “Alarm” happens, the DVR system will send the alarm notice one time
during the duration and do it again in next duration until the “Alarm Source”
disappears.
(6) Select alarm Source. Please refer to the definition of each alarm source.
(7) Action: Click the icon “E-Mail” and key in the email addresses which will receive the
alarm notice. You can enter three email addresses to be notified for a single alarm.
(8) Click “OK” when you have done the setting.
(9) You can add another alarm notice by repeating the step (4) to (8).
48
[Alarm to FTP Site]
(1) Make sure the DVR system connects to Internet.
(2) Key in the IP address of the FTP site.
(3) Enter the directory you would like to store the alarm notice (logs and pictures).
(4) Add Alarm Notice: Click the icon Add to see the above figure.
(5) Alarm Duration: The duration time can be from 1 minute to 1440 minutes (1 day).
When the “Alarm” happens, the DVR system will send the alarm notice one time
during the duration and do it again in next duration until the “Alarm Source”
disappears.
(6) Select alarm Source. Please refer to the definition of each alarm source.
(7) Action: Click the icon “FTP”.
(8) You can add another alarm notice by repeating the step (4) to (7).
[Alarm to SMS]
This function requires an external GSM modem to send messages to mobile phones via SMS
(Short Message Service).
(1) Please refer to your GSM modem user manual for the physical connections.
(2) Go to Serial Port setting in the System sub-menu. Choose GSM Modem on the
49
COM port that connects to the GSM modem.
(3) Back to this Alarm Notice sub-menu, and
set the Baud Rate to be 9600 baud per
second. (Note: If you fail to send SMS
successfully, you may reduce the baud rate
to 4800 or 2400 bps and try again.)
(4) Key in the Subject of the alarm message
(for example, DVR Alarm).
(5) Add Alarm Notice: Click the icon Add.
(6) Alarm Duration: The duration time can be from 1 minute to 1440 minutes (1 day).
When the “Alarm” happens, the DVR system will send the alarm notice one time
during the duration and do it again in next duration until the “Alarm Source”
disappears.
(7) Select alarm Source. Please refer to the definition of each alarm source.
(8) Action: Click the icon “SMS” to enter the mobile phone number. You can enter three
mobile phone numbers to be notified for a single alarm.
(9) Click “OK” when you have done the setting.
(10) You can add another alarm notice by repeating the step (5) to (9).
[Alarm to Voice Dialer]
This function requires an external Voice Dialer to send alarm messages to phones. SuperVision
Series Ver 4.0 only supports Voyager Voice Dialer.
(1) Please refer to Voyager Voice Dialer user manual for the physical connections.
(2) Go to the “Voice Dialer” setting in the System sub-menu to set the phone number
which you want to let the DVR auto dial out. You can enter three phone numbers to be
notified for a single alarm.
(3) Go to Serial Port setting in the System sub-menu. Choose Voice Dialer on the COM
port that connects to the Voice Dialer.
Note:
You can send the same alarm notice via email, FTP, SMS and Voice Dialer at the
same time. You can also modify or delete your previous alarm notice setting. It is
very similar to add a new alarm notice.
50
5-7 System
Click “System” tab for the settings: “Date/Time”, “RS-232”, “TV-Out”, “Watch Dog”,
“Language”, and “Security”.
51
5-7-1 Time Synchronization
There are four kinds of methods to synchronize DVR’s time.
Type
Description
1. Manual
Set up time manually
2. Time Server
Synchronize DVR time with Time Server
3. RF Clock
Synchronize DVR time with RF Clock
4. RTC
Synchronize DVR time with Real Time Clock(RTC)
When you select “ Time Server” Synchronization, enter the IP address or hostname of the Time
Server.
52
You can test the Time Server function by clicking “Time Server test”.
When you select “ RF Clock” Synchronization, you can click “ Test” button to do the “RF
clock test”. Then, the DVR will issue a command to RF clock to get Time information and
display it on the screen. RF Clock can be connected to the DVR through RS232 port.
Note:
1. Configuring Time Synchronization will reboot DVR.
2. When you synchronize DVR time by RF Clock, the selection of RS232 COM port( COM 1
or COM 2) in System configuration must be the same as the physical connection.
53
5-7-2 Other Functions
[RS 232]
This setting is for you to configure the RS232 port. Select the correct device that connects to
your system to make its function work.
[TV Out]
CyberVision SuperVision supports the VGA card with TV-out function. With this function, you
can export DVR screen to TV Wall. You can click the icon and choose “Disable”, “NTSC-J”,
“NTSC-M”, “PAL-B”, “PAL-D”, “PAL-G”, “PAL-H”, “PAL-I”, “PAL-M”, PAL-N” based on
the TV-out function requirement.
[Watch Dog]
Watch Dog is a hardware device to monitor the system status. If the system fails to response,
Watch Dog will send a reset signal to the motherboard to reboot the system. To enable Watch
Dog function, please select available durations 15,20, 25… or 60 seconds. It requires the first
capture card to have a physical connection to the reset pin of the motherboard.
[Language]
CyberVision SuperVision supports 8 display languages, i.e., English, French, Germany,
Japanese, Polish, Portuguese, Spanish, and Traditional Chinese.
[Security]
You can “Enable” or “Disable (preset)” the security control setting.
Playback Password: if enabling this setting, then it requires password to enter Playback
mode.
Hide Color Adjust: if enabling this setting, then color adjustment functions cannot be
executed while zooming-in single channel.
54
5-8 Network Setup
Click “Network Setup” tab to set up the network configurations as follows. Enable the “Static
IP ” and enter the IP address, NetMask, and Gateway in the fields.
Note: If you use another network port (like port 81) instead of default port 80, when you start
the remote viewing, please remember to add the port number followed by the IP address and
the “http://” in front of the IP address. For example: http://142.173.62.171:81. If you use port
80, you could just click the IP address directly.
[ DNS ]
An internet service that translates domain name into IP address . For example , the domain
name www.example.com can translate into 198.105.232.4.
[ DDNS ]
The Dynamic DNS service allows you to alias a dynamic IP address to a static hostname,
allowing your computer to be more easily accessed from various location on the Internet.
We support free DDNS account and customer pay account. To use this service, for free account,
you must apply an account from several free Web servers such as http://DynDNS.org
[ DHCP ]
A protocol for assigning dynamic IP address to devices on a network. With dynamic
55
addressing, a device can have a different IP address every time it connects to the network .
5-8-1 Remote Monitor
[JPEG]
If you set this function to be JPEG, DVR will encode one JPEG picture per channel per second
for remote access. The remote PC needs to install Java Virtual Machine.
[MPEG-4]
If you set this function to be MPEG-4, DVR will encode about 30 pictures per system per
second for remote access. The remote PC needs to install “MPEG4 player”, which can be
download from the DVR.
5-8-2、Remote Monitor via Internet by a modem
ISP A
RAS
ISP B
Router
Internet
Modem
Ethernet
Modem
PC
SuperVision
[DVR site]
Before starting the remote monitoring function, users need to apply for a fixed line (leased line
or ADSL), and get the fixed IP address from the ISP (Internet Service Provider). The
framework to perform this feature is depicted in the above figure. Moreover, please follow the
procedure described in section 4-8 “Network Setup” to setup the network configuration.
Remember to check that the fixed line(usually RJ45 cable) has connected to the DVR system
correctly.
[Remote user site]
Please refer the following procedure (which is extracted from documents provided by
MicroSoftM Inc. to finish the setting of user site where a window 2000 system is installed.
Windows 2000 Dial-Up Guide
Step 1
56
Click Start on your Windows taskbar, select Run. Type ncpa.cpl in the Open field then
click OK to begin.
Step 2
In the Network and Dial-Up Connections window, open Make New Connection to start the
Network Connection Wizard.
57
Step 3
In the Welcome to the Network Connection Wizard window, click Next.
58
Step 4
The New Connection Type window will have several selections. Choose Dial-Up to private
network, then click Next.
Step 5
For the Phone Number to Dial window, first choose a local service number from the
following Web sites...
Please type in the number you have chosen and click Next to continue.
59
Step 6
In the Completing the Network Connection Wizard window, check the box labeled Add a
shortcut to my desktop, then click Finish to close the wizard, and therefore, start the
Connect window.
SV-1000
60
Step 7
Before dialing, the Connect window has several text fields to fill. Your User name will be
your entire official USF e-mail address and the Password will be the password to that e-mail
address, respectively. In addition, you may check the Save password box and/or customize
the phone number (to disable call-waiting or other features) if you prefer.
Step 8
Your connection setup is now complete! If you have not payed for USFBasic Dial-up yet,
please do so at the iConnect Marketplace. Qualified faculty must register through the
Faculty Modem Pool Eligibility page. Both Web addresses are respectively listed below
for your convenience.
After successful connect, the user's PC will be assigned an IP Address from the RAS (Remote
Access Server) of ISP.
Users can open the Web Browser now, enter SV-1000 IP Address (Refer to 4-8), and wait for
several seconds (time for loading program) to start remote monitoring function.
61
5-8-3、Remote Monitor when SV-1000 is connected to
the Internet by a modem
Modem
Modem
SuperVision
PC
Similar to dialing up to ISP (Internet Service Provider) for connecting to internet described in
the previous section, direct dial-in access is another way to let users remotely connecting to
SuperVision series products which is equipped with a modem device. The above figure depicts
the framework of this feature.
Additionally, the only slightly difference between these two methods is that direct dial-in
access uses SuperVision series products to replace the function provided by ISP RAS (Remote
Access Server) to perform the procedure of connection.
[DVR site]
From the DVR site, please follow the steps below to finish the setting.
1. Login the setup page of the DVR system as an administrator, and then setup the
network functions you required on “Network Setup” page, for example, enable
remote monitoring, enable remote setup, ..etc.
2. Prepare a user account which has the permission of dial-in access. Or the default user
“admin” has the permission already. Later on, from the remote site, you need this
account to login the DVR system once the dial-in access is finished.
3. Check the BIOS setting of motherboard to make sure that the setting of onboard
Serial Port 1” (Port A) is enabled (or Auto or 3F8).
4. Connect the modem to the COM1 interface of the DVR system.
5. Prepare a regular telephone line (PSTN), and then correctly connect the modem to the
telephone line.
6. Remember to power on the modem and check if the status of modem is correct before
power on the DVR system.
[Remote user site]
Please refer the following procedure (, which is extracted from documents provided by
62
MicroSoftM Inc. to finish the setting of user site where a window 2000 system is installed.
Windows 2000 Dial-Up Guide
Step 1
Click Start on your Windows taskbar, select Run. Type ncpa.cpl in the Open field then
click OK to begin.
Step 2
In the Network and Dial-Up Connections window, open Make New Connection to start the
Network Connection Wizard.
63
Step 3
In the Welcome to the Network Connection Wizard window, click Next.
64
Step 4
The New Connection Type window will have several selections. Choose Dial-Up to private
network, then click Next.
Step 5
For the Phone Number to Dial window, first choose a local service number from the
following Web sites...
Please type in the number you have chosen and click Next to continue.
65
Step 6
In the Completing the Network Connection Wizard window, check the box labeled Add a
shortcut to my desktop, then click Finish to close the wizard, and therefore, start the
Connect window.
SV-1000
66
Step 7
Before dialing, the Connect window has several text fields to fill. Your User name will be
your entire official USF e-mail address and the Password will be the password to that e-mail
address, respectively. In addition, you may check the Save password box and/or customize
the phone number (to disable call-waiting or other features) if you prefer.
Step 8
Your connection setup is now complete! If you have not payed for USFBasic Dial-up yet, please
do so at the iConnect Marketplace. Qualified faculty must register through the Faculty
Modem Pool Eligibility page. Both Web addresses are respectively listed below for your
convenience.
Users can open the Web Browser now, enter SuperVision IP address(see Note), and wait for
several seconds (time for loading program) to start remote monitoring function.
67
Note
After successful connecting to the modem, the PC will be assigned an IP Address, which is the
successor number of SuperVision’s IP Address. For example, if the IP address of SuperVision
is 140.113.17.154, then 140.113.17.155 will be assigned to the PC. Therefore, you need to use
this IP address in IE browser in order to connect to the DVR system.
5-8-4 Remote Setup
Remote Setup allows you to configure most functions of the DVR via another PC remotely.
Please refer to chapter 6 for remote operation.
5-8-5 Network Share
This function allows you to find the DVR in the network and copy the recorded files to your
PC remotely.
1 Enable ”Network Share Status”.
2 Give a name for this DVR for identification in the network.
3 Enter the Workgroup.
4 Give a password for remote access of the files.
5 Click on the camera numbers to be shared in the network.
Please refer to chapter 6 for remote operation.
68
5-9 Disk
This function allows you to check disk status easily and precisely through pressing the
S.M.A.R.T
69
5-10 Audio
Click on the icon “Audio” to set up the audio channel settings as following.
[ Select Camera]
You can select camera number from the monitor screen which you want to add audio function.
It means that if it connects a capture card of 4 channels, the No. you can select is from 1 to 4.
Likewise, if you connects a capture card of 16 channels, the No. you can select is from 1 to 16.
Be sure to note that it only can select one channel to add audio function for each time at DVR
ver 4.0. For DVR version 4.02, it will support four channel audio.
70
5-11 Voice Dialer
Click on the icon “Voice Dialer” to set up the dial out phone number of “Voice Dialer” to let
the Voice Dialer send alarm message when Alarm occurs. You can enter three phone numbers
to be notified for a single alarm at the same time. Please refer Chapter 5-6 about the setting of
Alarm Notice.
Note
SuperVision ver 4.0 only support Voyager Voice Dialer facility
71
6. Remote Operation
CyberVision SuperVision allows you to monitor and control the system via network. Open an
IE browser on the remote PC and enter the IP address of the DVR to see the screens below:
72
6-1 Download Player
The remote PC needs to install the MPEG-4 player in order to monitor, playback, and control
the DVR. The player can be downloaded from the DVR directly.
Click the “Download” icon and follow the instructions to install the player.
6-2 Remote Monitor via MPEG4
Click the MPEG4 icon to see the following figure.
Select cameras
Delete cameras
Network
Preferences
Snapshot
Full Screen
Select the cameras to be displayed on the right of the screen.
Click on the corresponding icons on the bottom of the screen to view difference display
mode.
Click the
icon (Network Preferences) on the lower right of the screen to select the
suitable network setting based on the actual environment. It will pop up a screen as
follows.
73
You can click the icon
(Full Screen) to enlarge the monitoring screen display. If
you click it again, it will be back to the normal monitoring screen.
You can select one of the pictures and click the icon
(Snapshot) to save as a JPEG
file.
If you want to operate the PTZ function, click on the camera screen directly. The screen
will enlarge and a PTZ control panel will appear on the right as below.
74
Zoom In
Zoom Out
PTZ Speed
Auto Focus
Focus Near
Focus Far
75
6-3 Remote Monitor via JPEG
(1) Click Single View, 4 Split or 16 Split.
(2) Select camera(s).
(3) Start to monitor.
Note
Administrator must enable the JPEG remote monitor function first.
The remote PC must have Java VM installed to see the pictures.
76
6-4 Remote Playback
Click the Playback icon to see the following figure.
(1)
(2)
(3)
(4)
(5)
Select a date on the calendar.
Select a Camera.
Select a recording duration.
Click on the Playback icon to start playback.
You can select various playback speeds or drag the time bar directly.
77
Speed (-): To reduce the playback speed.
Speed (+): To increase the playback speed.
Playback
Previous 1 min: To rewind 1 minute.
Next 1 min: To forward 1 minute.
Pause
Stop
Save video clips
Save JPEG files
Enlarge to full screen
Adjust video size
78
6-5 DVR Player
The DVR Player is used in three applications:
1.
To watch the video clip downloaded from the DVR;
2.
To watch the video clip burned on the CD-R/RW;
3.
To verify the Digital Signature of the video clip.
You can find the DVR Player application in the program files.
Click on the icon
on bottom right to select a video clip.
You can check the digital signature in File -> Check Signature.
79
AVI Format Export:
This function provides you to transform the download files from CX3 format to AVI
format.
a. Open a download file.
b. In the “Tools’ bar, select “ Convert to AVI” and then select the path you want to save
the AVI file and key in the AVI file name.
80
c. Select the transforming format. Here we choose Microsoft MPEG 4 Video Codec.
d. Select transforming parameters and it will influence the file’s quality and size.
e. Enter “ OK” and then it will show the transforming status.
Note:
The codec you choose are not all workable but it will prompt a warming message if it
is not workable.
The time of transforming format will depend on the file size and the codec you
choose.
81
6-6 DVR Remote Setup
Click on the Remote Setup to see the screen below.
The operation is very similar to the “System Settings” in Chapter 4.
Adjust the settings and click “Save To DVR” icon on the upper right to take effect.
6-6-1 Remote Setup Record
Each DVR remote setup change will be saved in the log system (refer to 3-2-2 Search by
Event). The record will show any configuration that is changed by remote users.
82
Record shown in “Event Search
Besides, once any remote setup change is done, it will immediately send a message to you.
83
6-7 DVR Remote Backup
If the Network Share function is enabled, you can copy the video data of the DVR to any
Windows PC in the same network.
(1) Search computer in the network by the DVR name or IP address.
(2) Enter the username: dvrbackup and password you set in chapter 4-8-3.
(3) Copy the files to hard disk or storage for backup.
84
7. Appendix
A. Compatible PC Hardware
Approval Motherboard List
BrandName Model
Chipset
on-board LAN
Intel865G
# of PCI slot
3
ASUS
P4P800-VM-TAY
ASUS
P4P800S
Intel848P
5
Support
ASUS
P4P800-SE
Intel865PE
5
Support
ASUS
P4P800-X
Intel865PE
4
Support
ASUS
P5P800-SE
Intel865PE
4
Support
GIGABYTE GA-8I845GE-RZ
Intel845GE
5
Support
GIGABYTE GA-8I84E
Intel848P
Support
GIGABYTE GA-8I848P-L
Intel848P
5
5
GIGABYTE GA-8I848P-G
Intel848P
5
Support
GIGABYTE GA-8I848E
Intel848P
5
Support
GIGABYTE GA-8IG1000 MK
Intel865G
5
Support
GIGABYTE GA-8IG1000 Pro-G
Intel865G
3
Support
GIGABYTE GA-8IPE1000-L
Intel865PE
5
Support
GIGABYTE GA-8IPE1000-L GT
Intel865PE
5
Support
GIGABYTE GA-8IPE1000 Pro
Intel865PE
5
Support
GIGABYTE GA-8IPE1000 Pro2
Intel865PE
5
Support
GIGABYTE GA-8IPE1000-G
Intel865PE
5
Support
GIGABYTE GA-8IPE1000
Intel865PE
5
Support
SuperMicro
P4SPE
Intel865PE
5
Support
SuperMicro
P4SPE
Intel865PE
5
Support
SuperMicro
P4SPA+
Intel865G
5
Support
ECS
ESC 865PE
Intel865PE
5
Support
85
Support
Support
Minimum Hardware Requirements:
SV/SV+
Channels
Chipset
4
8
SV1000
12
16
4
8
SV-2000
12
16
16
Intel 848P, 865PE, 865G, Intel 848P, 865PE, 865G, Intel 848P, 865PE,
925X, 945P, 915G, 945G, 925X, 945P, 915G, 945G, 865G, 925X, 945P,
915P, 865GV
915P, 865GV
915G, 945G, 915P,
865GV
SiS 645DX, 650GX, 648FX, SiS 645DX, 650GX, 648FX, SiS 645DX, 650GX,
661FX, 648
661FX, 648
648FX, 661FX, 648
VGA Card NVIDIA MX4000,
GeoForce 4 MX440,
GeoForce 2 MX400,
NVIDIA MX4000,
GeoForce 4 MX440,
GeoForce 2 MX400,
NVIDIA MX4000,
GeoForce 4 MX440,
GeoForce 2 MX400,
GeForce FX5500,
GeForce FX5500, MX4000, GeForce
MX4000, FX5200, FX6200, FX5200, FX6200, FX6500, MX4000,
FX6500, FX6600, 6201TC, FX6600, 6201TC, 6200TC FX6200,
6200TC
FX6600,
6200TC
RAM
256M
512M
CPU
Celeron 2.0G
P4 2.4G
256M
Celeron
2.0G
512M
P4 2.4G
P4
2.8G
Network Interface Chip
Realtek 8139C, 8100B
Kinnerreth-R
Intel 82562EZ
Marvell 8001
Intel 82547EI
ATA Extension Card
Promise Ultra 100 TX2
Promise Ultra 133 TX2
HighPoint Rocket 133
SCSI Card
Adaptec 29160, 39160, 2940UW
Tekram: DC-390U, DC-390U2D, DC-390U2B, DC-390U2WE, DC390
86
FX5500,
FX5200,
FX6500,
6201TC,
512M
P4 2.8G
ACARD
RAID0/1 support
ACS 7500
RAID0/5 support
ACS 7630
DVD Burner
DVR Burner
Disk Type Support
Remarks
Pioneer
*DVD+RW
*DVD-R
*DVD-RW
Not support Pioneer
DVD+R/RW
Asus
*DVD+R
*DVD+RW
*DVD-R
*DVD-RW
PTZ Model
Model
Lilin
Pelco-D
Pelco-P
Panasonic
Sensormatic
DongHwa
TOA
Kalatel
SANYO
Hi Sharp
Samsung
GTICO(Small)
GTICO(big)
YoKo
Dynacolor
87
B. Main Menu
Every time you start the DVR, you shall see the Main Menu for advanced system functions.
Start DVR: To start the DVR normally.
Play Recorded Video: Playback only. Be sure to enter admin user password first when
you want to enter the Play Recorded Video icon. This option is used to playback a hard
disk without rewriting it with new recording contents.
Disk Tools: Be sure to enter admin user password first when you want to enter the Disk
Tools icon.
S.M.A.R.T Diagnostic: To examine the internal record of the hard disk.
Disk Scan: To check the hard disk status using Linux tools.
Disk Manager: To assign cameras to hard disks or to format hard disk. Furthermore,
this function also can collect recorded data of a camera in different hard disks to one
hard disk when reallocating the camera to hard disks.
88
When you plug in or replace new hard disks/ DOM, or execute “Disk Tools” in
“Main Menu”, Diskmanager will help you collect data of a camera that is recorded in
different hard disks to one specific hard disk. The following dialogue will appear:
Click “Finish” to start re-allocation.
System Tools:
Reset Configuration: To reset all the settings to factory default.
Select Language: To select your preferred language (Traditional Chinese, English,
Japanese, French, German, Portuguese, and Spanish).
89
C. FAQ
1. Q.
I have set the recording mode as motion sensor recording. But why the DVR still
records a lot of video that has no motion at all?
A:
(1) The digital recording system is very sensitive. It can detect the tiniest motion that
human eyes cannot perceive. You can lower the sensitivity setting in camera setup
menu.
(2) Flickering fluorescent lights (when traditional 120 Hz ballast are used) or TV (or
computer) screen can be the motion source. In this case, adjust the motion detection
area so that these flicking sources will not be detected. It is recommended not to
align the camera directly at fluorescent lights, TV, or computer screens. The use of
better-quality fluorescent lights (with electronic ballast), monitors, and the cameras
can be considered.
(3) When cameras are installed, please make sure the quality of cables, connections,
and workmanship. Sometimes interference could cause the image unstable. Avoid
placing the system close to a compressor (fridge), or to a motor (washing machine)
that might cause magnetic interference.
2. Q:
A:
3. Q:
What will happen if there is a power outage (cut)? Do I have to do anything?
If a power outage occurs, the last file will not be closed properly. Therefore, up to 10
minutes of data might be lost. It is recommend connecting the system to an
Uninterruptible Power Supply (UPS). This will help to avoid shortening the system life
span and partial data loss caused by the instability of power supply.
When the power returns, the system will automatically re-boot, restore data and go back
to the normal operation in approx. 1 minute.
Why the remote monitor not working?
A:
(1)
(2)
(3)
Using the windows command PING to check if the network connection is ok.
Turn of proxy setting off.
Make sure you have Java VM installed (in JPEG mode) or Player installed (in
MPEG4 mode).
90
(4)
Check security setting in IE browser is not too restricted. The active X option
must be enabled.
4. Q: How to check the log file of the DVR?
A: The log file can be seen from remote PC using IE browser. Suppose the DVR IP address
is 192.168.123.12, type http://192.168.123.12/log/dvrlog.php on a remote PC to see the log.
5. Q: How to capture the snapshot of the whole screen?
A: It can be done from remote PC using IE browser. Suppose the DVR IP address is
192.168.123.12, type http://192.168.123.12/rmapi/misc/screen-snapshot on a remote PC to see
the picture.
91
D. Internet Connection
D-1: IP address is used by one DVR only
Assume the static IP address you get from ISP is 211.23.87.163.
When
(1) The IP address is not used by any other devices, and
(2) ISP does not require user name and password to connect,
You can connect like the following figure:
Ethernet (RJ45)
DVR
ADSL Modem
In this case, just follow the instructions in section 3-6-7 and section 4-2 to make the DVR on
Internet.
User from Internet can use http://211.23.87.163 to connect to the DVR.
D-2: IP address is shared by more than one devices
Assume the static IP address you get from ISP is 211.23.87.163.
When
(1) The IP address is shared by more than one devices, or
(2) ISP requires user name and password to connect,
You can connect like the following figure:
Ethernet (RJ45)
192.168.123.51
DVR 1
211.23.87.163
192.168.123.52
DVR2
192.168.123.xx
ADSL Modem
NAT Router
Windows PC
92
In this case, you will need an NAT router to connect to the high-speed modem. Please refer to
the user manual of your NAT router to translate DVR1 (192.168.123.51 port 80) to a port of
211.23.87.163, for example, port 8001. Similarly, translate DVR2 (192.168.123.52 port 80) to
another port of 211.23.87.163, say, port 8002. You also need to set the user name and password
on this router in order to successfully connect to ISP. Follow the instructions in section 3-6-7 to
set the IP address of DVR1 as 192.168.123.51.
Users from Internet can now use http://211.23.87.163:8001 to connect to DVR1 and use
http://211.23.87.163:8002 to connect to DVR2.
93
E.
Maintenance
Avoid placing the system in a high temperature or a high humidity environment and also keep
away from the place with frequent vibrations. Operate the system under stable voltage. If
possible, operate the system with a UPS (Uninterruptible Power Supply)
94