1
GGP
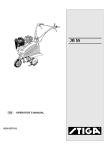
S i l e x 3 60 - G
BRUKSANVISNING SV .... 4
KÄYTTÖOHJEET FI ... 10
BRUGSANVISNING DA ..16
BRUKSANVISNING NO .22
GEBRAUCHSANWEISUNG DE...27
INSTRUCTIONS FOR USE EN...33
MODE D’EMPLOI FR....39
GEBRUIKSAANWIJZING NL...45
ISTRUZIONI PER L’USO IT.....51
INSTRUCCIONES DE USO ES ....57
INSTRUÇõES DE UTILIZAÇÃO PT ...63
INSTRUKCJA OBS£UGI PL ....69
»HC“P”K÷»fl œOÀ‹«Œ¬¿“EÀfl RU...75
NÁVOD K POU®ITÍ CZ ..82
HASZNÁLATI UTASÍTÁS HU ..88
NAVODILA ZA UPORABO SL ..94x
8214-2209-80
1
A
B
C
D
J
K
E
F
G
H
L
M
N
3
2
B
O
S
P
H
Q
R
2
5
4
F
T
L
6
3
ENGLISH
1 SYMBOLS
The following symbols can be found on the rotary
cultivator/in these instructions. These will provide
a reminder of the care and attention that is required
during operation. If any symbol is missing, has
been damaged or is illegible, it must immediately
be replaced with a new one.
This is what the symbols mean:
Warning! Read the owner’s manual before
operating the machine.
Warning! Rotating blade.
wed.
Warning! This symbol highlights important text in these instructions. Risk of serious personal injury or damage to the
machine if the instructions are not follo-
2 SAFETY INSTRUCTIONS
2.1 GENERAL
• Read through this instruction book carefully
and make sure you understand the contents before using the tiller.
• The tiller must only be used for gardening purposes.
• Keep children away from the tiller.
• Do not allow children or persons who have not
read the instructions to handle the tiller.
• The tiller is manufactured in accordance with
current standards, and must not be modified or
rebuilt.
• All the symbols on the tiller should be kept intact.
• The user is liable for damages incurred by a
third party.
WARNING for petrol. Petrol is highly inflammable: Petrol must be stored in the requisite
containers.
• Always fill-up outdoors and with the engine
switched off.
• Do not smoke when filling-up.
• There must be no naked flames or other sources
of heat in the vicinity of the petrol.
• Do not start the engine if petrol has spilled out.
Move the machine and allow the petrol to evaporate before starting the machine.
GB
• Screw on the filler cap correctly after filling up.
• Set the throttle control in the "Stop" position,
and close the petrol cock when the machine has
been stopped.
• Switch off the engine before transporting the
machine. Never lift the machine by yourself.
The machine is lifted by two persons, one on
each side holding the steering and the rotor axle. Wear protective gloves and hold the machine
upright when lifting.
• When the machine is loaded on a trailer or tailboard it should be run up on a ramp by using its
wheel.
2.2 PREPARATIONS
• Before starting work, remove all foreign objects
such as stones, glass, cables, metal objects and
other loose objects.
• Toys, hoses and other objects can be damaged.
• Check that the tiller is in good condition before
using it.
• Check that all nuts and bolts are tightened.
2.3 OPERATING
• Always operate the machine at low speed when
working on stony ground.
• Do not change the engine's speed setting. The
engine must not be overspeeded.
• The work area should be well illuminated during the work.
• The tiller must not be used when other persons,
especially children, are in the vicinity.
• The tiller must not be used without the splashguards or protective cover.
• The tiller must not be used if the operator is ill,
has taken medicine, or is under the influence of
other substances which reduce one's reactions.
• The tiller must not be used on terrain which slopes more than 20°.
• The user is responsible to ensure that all risks in
the terrain are taken into consideration, and that
procedures are taken to prevent accidents. This
particularly applies to sloping, slippery or loose
terrain.
• Start the engine carefully, according to the instructions in this manual. No parts of the body
must come in contact with the rotors.
• The engine must never be started in an enclosed
area.
33
GB
ENGLISH
• The carbon monoxide in the engine's exhaust
fumes is poisonous and can cause death.
• Wear tightly fitting clothes and heavy-duty
shoes which completely cover the feet.
• The tank should only be half full when operating on slopes. Petrol can leak out.
• The engine must be stopped in the following
circumstances:
• When the machine is left unattended
• Before the machine is filled up with petrol
• Always make sure you have a good footing,
especially on slopes.
• Check that no one is in front of you or beside
you when starting the blades. Keep a steady
grip on the steering. The machine will lift when
the rotors are started. Use extra caution when
backing.
• Always keep at a safe distance to the rotors
when working.
• Holding the steering correctly ensures a safe distance.
• No person must come closer than 20 m to the
machine when working on slopes. The user
must hold the steering firmly with both hands
all the time.
• Working on stony or hard ground demands extra attention from the operator. The machine becomes more unstable.
• Never touch the engine when operating the machine, or just afterwards. Risk for burn injuries.
2.4 AFTER OPERATING
• Allow the engine to cool before putting the machine in a storeroom. Fire risk!
• Remove dirt and foreign material before putting
the machine in a storeroom. The area round the
petrol tank and muffler must be kept clean from
leaves, oil, petrol or other foreign materials.
Fire risk!
• If the petrol tank is to be emptied, do this outdoors and when the engine is cold. Fire risk!
• The machine should be stored in a dry place.
The machine must not stored with fuel in the
tank in rooms where there are naked flames,
sparks or other strong sources of heat.
2.5 MAINTENANCE
• Carry out maintenance regularly. All nuts and
bolts should always be tight.
34
• Only use genuine spare parts which are in good
condition. Spare parts must not be repaired.
They must be replaced if they are defective.
Poor quality spare parts can lead to personal injury. If the muffler is damaged it must be replaced.
• The engine must be stopped and the spark plug
lead disconnected in the following circumstances:
When adjusting the rotors.
When the machine is to be cleaned or repaired.
When checking after a collision with a solid
hard object. Carry out the necessary repairs before continuing to work.
If the machine begins to vibrate abnormally.
Carry out the necessary repairs before continuing to work.
• Wear protective gloves when working with the
rotors.
3 ASSEMBLY
3.1 Handle
Install the handle as follows:
1. Insert both halves (2:B) of the handle through
the holder (2:P).
2. Install the screws (2:R) with washers through
the halves of the handle and screw into the
member (2:Q).
3. Tighten the screws (2:O and 2:R)
3.2 Auxiliary wheel
Install the auxiliary wheel (3:H) and mount with
the wing nut (3:S).
3.3 Depth skid
Install the depth skid (4:L) and secure with the
locking pin (4:T) in the central hole.
GB
ENGLISH
4 DESCRIPTION
The rotary cultivator is driven by a four-stroke engine and is intended for soil cultivation in private
gardens. The most important parts and controls of
the rotary cultivator are described below.
4.1 Drive control (1:C)
The control is used to start the rotor for forward
motion when the engine is running.
Control in idle mode (down) – No drive.
Control pulled in – Forward operation.
4.7 Auxiliary wheel (1:H)
The auxiliary wheel is designed to facilitate transportation of the machine. The auxiliary wheel must
be removed before the machine is used for rotary
cultivation.
Remove the auxiliary wheel as follows:
1. Remove the wing nut (3:S).
2. Remove the auxiliary wheel with strut.
3. Reassemble in the reverse order.
4.8 Gearbox (1:M)
The gearbox becomes extremely hot
during operation. Risk of burn injuries.
4.9 Rotors (1:N)
4.2 Throttle and stop (1:A)
The control determines the engine’s rpm and has
start and stop positions.
The throttle control determines the speed and is
used to stop the engine.
Stop: Control in the rear position.
Idle: Control 1 cm in front of rear position.
Full throttle and start: Control in the front position.
4.3 Handle (1:B)
The handle has two handgrips that are used to operate the machine over the area to be cultivated.
4.4 Fuel cap (1:K)
Unscrew the fuel cap to fill with petrol. The fuel
cap must always be closed during operation.
4.5 Protective grille (1:F)
The protective grille must always be installed during operation. There are surfaces that become extremely hot under the protective grille that risk
causing personal injury if touched.
Nobody must be close to the dangerous
rotors during operation.
The rotors are made of special steel and work
the soil at the same time as the machine is propelled forwards.
4.10Starter handle (1:E)
Handle for starting the engine.
4.11Depth skid (1:L).
The task of the depth skid is to keep the machine
stable so that the soil can be cultivated.
The depth skid has three positions. Shifting takes
place as follows:
1. Pull out the locking pin (4:T).
2. Pull out the depth skid and reinstall in the desired position.
3. Reinstall the locking pin.
4.6 Oil filler/drain (1:J)
Always check the oil level before starting the engine.
Plug for oil filler and checking the oil level.
To drain the oil, the machine must be tilted so that
the oil runs out from the same hole.
35
GB
ENGLISH
5 OPERATION
5.1 Fuel
Read and understand all safety instructions.
No fires or smoking near to petrol.
Use 92-95 octane lead free petrol.
Oil-mixed petrol designed for 2-stroke engines
must never be used.
Filling
Read and understand all safety instructions.
If the engine has been running, wait a
few minutes until it has cooled before
filling up.
Fill carefully to prevent the spillage of
fuel.
Move the rotary cultivator at least 3 metres from the filling site before starting.
Fill as follows:
1. Clean around the fuel cap.
2. Unscrew the filler cap.
3. Fill using a funnel or use a filler can with spout
to prevent spillage.
4. Tighten the filler cap.
5. Move the rotary cultivator at least 3 metres
from the place of filling before starting.
Move the rotary cultivator at least 3 metres from the filling site before starting.
5.2 Engine Oil
Always check the oil level before starting. Otherwise there is a risk of serious
engine damage.
Also see “4.6” and “4.10”. Check the oil level as
follows:
1. Position the machine so that the engine is horizontal.
2. Unscrew the oil filler with dipstick and check
that the oil level is at the full mark. See 5:F.
3. Top up the oil if necessary. Use normal engine
oil SAE 10W-30.
4. Reassemble the oil filler cap.
5.2.1 Starting the engine
1. Set the throttle (1:A) in the “START” position.
36
2. Hold the handle with one hand and slowly pull
the starter handle with the other hand. See
“4.10”. When the starter mechanism engages,
quickly and forcefully pull the starter handle
until the engine starts.
NOTE! Do not pull the cord hard to its stop position and do not release it in the pulled out position. This damages the starter mechanism.
5.3 Operating
1. Tip the rotary cultivator back slightly so that the
rotor is above ground.
2. Activate the dive control (1:C).
3. Tilt the cultivator forward so that it works its
way into the soil.
5.4 Stop
Stop the rotary cultivator by setting the throttle and
stop control (1:A) to “STOP”.
5.5 Operating tips
The rotors propel the machine forward. The speed
of the rotors is controlled by the throttle (1:A).
Keep hands and feet away from rotating
parts (1:N).
The optimum working depth varies with soil conditions. The working depth is determined by how
hard the depth skid is pushed down during propulsion. Operate and test.
Drive 2-3 times in different directions for best results.
Never operate the machine in wet soil. Clumps of
earth are created that are then difficult to break-up.
Hard and dry soil requires an extra run, at right angles to the first.
WARNING! Never overload a new machine. Drive carefully for the first 5
hours.
ENGLISH
6 STORAGE
Store the rotary cultivator in a dry place. Also see
section “Safety instructions”.
After draining the petrol, start the engine and allow
it to run until it runs out of petrol.
7 MAINTENANCE
WARNING!Repairs must be carried out
by the dealer. Otherwise the guarantee
becomes invalid.
WARNING!Before carrying out repairs
and maintenance, the spark plug connection must be disconnected.
7.1 Periodic maintenance
Before each operation
• Check for fuel leaks.
• Check that all screws are tightened.
After each operation
• Clean the rotary cultivator.
• Check for fuel leaks.
Every 25 operating hours and every 3 months
• Check, clean or replace the air filter.
• Check that all screws and nuts are tightened.
7.2 Air filter (1:D)
Do not use flammable liquids when
cleaning.
Serious engine damage can be caused if
the machine is operated with a defective
or blocked filter.
The paper filter must never be cleaning
with liquid.
The machine is equipped with a pre-filter (foam
rubber) and a main filter (paper).
Clean/replace the air filter every 3 months or every
25 operating hours. During operation in dry and
dusty conditions, the air filter must be cleaned/replaced every day.
Clean/replace the air filter as follows:
1. Undo the screws or locking tabs and the filter
housing.
2. Grasp the main filter (paper) and shake it a few
times against a hard surface or blow clean with
compressed air from the inside out.
GB
3. Wash the pre-filter (foam rubber) in liquid detergent and water. Then carefully twist the filter
out and allow to dry.
4. When the pre-filter is dry, reinstall the filter in
reverse order.
The filters must be replaced if very dirty or defective.
7.3 Spark plug (1:G)
The sparkplug must be replaced in the following
cases.
• When the electrodes are burnt.
• If the porcelain insulator indicates damage.
• If the rotary cultivator is difficult to start.
The electrode gap should be 0.7-0.8 mm.
Use sparkplug Champion QC12YC or similar.
7.4 Changing the oil
Change the oil the first time after 2 hours of operation, and subsequently every 25 hours of operation or at least once a season. Change oil when the
engine is warm.
The engine oil may be very hot if it is
drained off directly after the engine is
shut off. So allow the engine to cool a few
minutes before draining the oil.
1. Unscrew the cap for oil filling/oil draining. See
“4.6”.
2. Place a container on the floor.
3. Tilt the machine so that the hole is above the
container. See fig. 6.
3. Let the oil run out into the container.
5. Fill with new oil: See “5.2”.
7.5 Cleaning
Never use high-pressure washing equipment when cleaning. This can cause water to penetrate between the seals and
cause machine damage.
First brush off all dirt. Then wipe down the rotary
cultivator using a damp cloth. The underside can
be washed with water.
7.6 Fault-tracing
Fault: Difficult to start
37
GB
ENGLISH
Cause: The fuel is too old.
Action: Drain the tank and fill with fresh petrol.
Cause: Sparkplug fault.
Action: Replace spark plug.
Fault: Engine runs unevenly
Cause: Contaminated fuel.
Action: Clean the petrol tank and carburettor.
Cause: Sparkplug fault.
Action: Replace spark plug.
Fault: Weak engine, does not run at full throttle
Cause: Blocked air filter
Corrective action: Clean or replace the air filter.
Fault: Stops during operation
Cause: No fuel.
Action: Fill with petrol
8 SERVICE
Authorised service stations carry out repairs and
servicing. They always use genuine spare parts.
Under no circumstances may parts other than genuine spare parts be used.
This is a requirement stipulated by the
Testing Authority. The machine is approved and tested with these parts.
If the machine requires servicing, repair
or maintenance that entails dismantling
of the cover, this must be performed by
an authorised service station.
The manufacturer reserves the right to make alterations to the product without prior notification.
9 PURCHASE TERMS
A full warranty is issued against manufacturing
and material defects. The user must carefully follow the instructions given in the enclosed documentation.
Warranty period
According to relevant laws.
Exceptions
The warranty does not cover damage due to:
- Neglect by users to acquaint themselves with
accompanying documentation
- Carelessness
- Incorrect and non-permitted use or assembly
- The use of non-genuine spare parts
- The use of accessories not supplied or approved
Neither does the warranty cover:
- Wear parts
- Normal wear
The purchaser is covered the national laws of each
country. The rights to which the purchaser is entitled with the support of these laws are not restricted by this warranty.
GGP reserves the right to make alterations to the
product without prior notification.
38