1
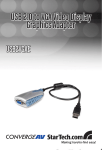
USB to VGA Adapter
USB 2.0 to VGA Dual Display Adapter
USB2VGA2
Instruction Manual
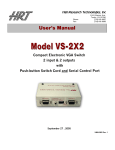
Actual product may vary from photo
FCC Compliance Statement
This equipment has been tested and found to comply with the limits for a Class B digital device,
pursuant to part 15 of the FCC Rules. These limits are designed to provide reasonable protection
against harmful interference in a residential installation. This equipment generates, uses and can
radiate radio frequency energy and, if not installed and used in accordance with the instructions,
may cause harmful interference to radio communications. However, there is no guarantee that
interference will not occur in a particular installation. If this equipment does cause harmful
interference to radio or television reception, which can be determined by turning the equipment off
and on, the user is encouraged to try to correct the interference by one or more of the following
measures:
• Reorient or relocate the receiving antenna.
• Increase the separation between the equipment and receiver.
• Connect the equipment into an outlet on a circuit different from that to which the
receiver is connected.
• Consult the dealer or an experienced radio/TV technician for help.
Use of Trademarks, Registered Trademarks, and other Protected Names and Symbols
This manual may make reference to trademarks, registered trademarks, and other protected names
and/or symbols of third-party companies not related in any way to StarTech.com. Where they occur
these references are for illustrative purposes only and do not represent an endorsement of a
product or service by StarTech.com, or an endorsement of the product(s) to which this manual
applies by the third-party company in question. Regardless of any direct acknowledgement
elsewhere in the body of this document, StarTech.com hereby acknowledges that all trademarks,
registered trademarks, service marks, and other protected names and/or symbols contained in this
manual and related documents are the property of their respective holders.
Patent No.: US: US 7.203.788 / TW: I 229808 / JP: 3100747 / DE: 203 15 724.9 / CN:
ZL 02 2 92566.X / KR: 0405501
Instruction Manual
Table of Contents
Introduction . . . . . . . . . . . . . . . . . . . . . . . . . . . . . . . . . . . . . . . . . . . . . . . . . . . . .1
Features . . . . . . . . . . . . . . . . . . . . . . . . . . . . . . . . . . . . . . . . . . . . . . . .1
System Requirements . . . . . . . . . . . . . . . . . . . . . . . . . . . . . . . . . . . . .1
Package Contents . . . . . . . . . . . . . . . . . . . . . . . . . . . . . . . . . . . . . . . .1
Installation . . . . . . . . . . . . . . . . . . . . . . . . . . . . . . . . . . . . . . . . . . . . . . . . . . . . . .2
Windows XP . . . . . . . . . . . . . . . . . . . . . . . . . . . . . . . . . . . . . . . . . . . . .2
Windows Vista . . . . . . . . . . . . . . . . . . . . . . . . . . . . . . . . . . . . . . . . . . .3
Configuring the Adapter . . . . . . . . . . . . . . . . . . . . . . . . . . . . . . . . . . . . . . . . . .5
Primary Mode . . . . . . . . . . . . . . . . . . . . . . . . . . . . . . . . . . . . . . . . . . . .5
Extended Mode . . . . . . . . . . . . . . . . . . . . . . . . . . . . . . . . . . . . . . . . . .5
Mirror Mode . . . . . . . . . . . . . . . . . . . . . . . . . . . . . . . . . . . . . . . . . . . . .5
USB 2.0 to VGA Adapter Properties . . . . . . . . . . . . . . . . . . . . . . . . . .6
Virtually Repositioning Your Displays . . . . . . . . . . . . . . . . . . . . . . . . . .6
Troubleshooting . . . . . . . . . . . . . . . . . . . . . . . . . . . . . . . . . . . . . . . . . . . . . . . . .7
Specifications . . . . . . . . . . . . . . . . . . . . . . . . . . . . . . . . . . . . . . . . . . . . . . . . . . .9
Technical Support . . . . . . . . . . . . . . . . . . . . . . . . . . . . . . . . . . . . . . . . . . . . . . . .9
Warranty Information . . . . . . . . . . . . . . . . . . . . . . . . . . . . . . . . . . . . . . . . . . . . .9
i
Instruction Manual
Introduction
Thank you for purchasing a USB 2.0 to VGA Dual Display Adapter. This adapter allows
you to connect any CRT monitor, LCD monitor, or projector to your PC or notebook,
making it the perfect solution for extending your desktop, or adding an extra display.
Features
• Supports resolutions up to 1600 x 1200 (32-bit), 1920 x 1200 (16-bit)
• Lightweight, portable design
• Simple, plug and play installation
Before you begin
System requirements:
•
Pentium 4 / Celeron family or AMD K6 / Athlon / Duron family with 1.5GHz or more
CPU Clock Speed
• An available USB 2.0 port
• Two VGA compatible monitors/displays
• 256MB RAM or higher (1GB or higher recommended for playing DVDs)
• Windows 2000 SP4, Windows XP SP2 (32bit) and Windows Vista (32bit)
Package contents:
This package should contain:
• USB 2.0 to VGA Dual Display Adapter (1)
• Drivers CD (1)
• Instruction Manual (1)
1
Instruction Manual
Installation
Note: Please ensure that driver installation is complete prior to the physical
installation of the USB 2.0 to VGA adapter.
Windows XP
1. Insert the Driver CD into your CD/DVD-ROM drive.
2. If the installation program does not begin automatically, locate the Setup.exe
application. This file will be located in the root directory of the Driver CD.
3. Executing the Setup.exe application
will launch the following screen.
Please click on Next:
4. At the screen that follows, you will be
instructed to ensure the USB2VGA
adapter is not connected to the
host computer. Once you have
read this information, please click on
Next.
5. Once driver installation is complete,
you will reach the following screen.
Select Yes, I want to restart my
computer now, and click on
Finish.
2
Instruction Manual
Installation - Windows XP - Cont’d
6. Once your computer has completely restarted, you should notice the USB 2.0 to VGA
utility in the system tray as illustrated below. Software installation is now complete.
7. Plug the power cord from the secondary monitor into a nearby power socket. Turn on
the secondary monitor.
8. Connect the VGA cord running from the secondary monitor to the adapter.
9. Plug the USB connection from the adapter into an available USB 2.0 port.
10. The secondary monitor should now be ready for use.
Windows Vista
1. Insert the Driver CD into your CD/DVD-ROM drive.
2. If the installation program does not begin automatically,
locate the Setup.exe application. This file will be located in
the root directory of the Drivers CD.
3. When the InstallShield Wizard
launches, click Next.
4. At the screen that follows, you will be
instructed to ensure the USB2VGA
adapter is not connected to the
host computer. Once you have
read this information, please click on
Next.
3
Instruction Manual
5. Please wait while Setup searches
for installed components.
6. Select Yes, I want to restart my
computer now and click Finish.
7. Once your computer has completely restarted, you should notice the USB 2.0 to VGA
utility in the system tray as illustrated below. Software installation is now complete.
8. Plug the power cord from the secondary monitor into a nearby power socket. Turn on
the secondary monitor.
9. Connect the VGA cord running from the secondary monitor to the adapter.
10.Plug the USB connection from the adapter into an available USB 2.0 port. Once the
adapter has been connected to the host computer, you will notice several message
balloons indicating driver installation status:
11. The secondary monitor should now be ready to use.
4
Instruction Manual
Configuring the adapter
Once the driver and adapter have been installed, an icon will appear in the system tray
as shown below. This utility allows you to quickly change the settings and resolution for
your USB 2.0 VGA Adapter. The configuration menu can be accessed by right-clicking
on the icon:
Primary Mode
Selecting USB-VGA (Primary), will set the
secondary display adapter as the main display
adapter in the system. The system’s primary
adapter (and monitor) will automatically switch to
act as the extended desktop.
Please Note: Some display utilities and drivers that
ship with AGP and built-in display adapters will
prevent this option from working on some systems.
For the USB-VGA (Primary) setting to take effect,
you must first disable the original display utility
(typically located in the system tray).
Extended Mode
By default, your USB 2.0 VGA Adapter will extend
your Windows desktop functioning in USBVGA(Extended) .
You can change the relative position of this
extension under the Display Properties (Go to
Control Panel -> double click on Display and
select the Settings tab).
Mirror Mode
This setting will mirror the image from
your original desktop onto the secondary
desktop.
5
Instruction Manual
USB 2.0 to VGA Adapter Properties
1. To access the Display Properties for the USB 2.0 VGA Adapter, open the Control
Panel, and double-click on the Display icon.
2. Select the Settings tab.
3. Click on the Display drop-down menu, and select the USB 2.0 VGA DEVICE
(DISPLAY) as illustrated below:
4. From here, you can change the resolution and color depth as desired. Once the
desired changes have been made, click on OK to apply the settings.
Virtually Repositioning Your Displays
Click and drag the appropriate monitor icon (labelled 1 or 2) to the desired position. For
example, the secondary display can be dragged to the left of the primary display,
allowing it to be positioned virtually on the left. Click OK or Apply to save the changes.
6
Instruction Manual
Troubleshooting
The USB 2.0 to VGA Adapter can’t be set as the primary display
Some video card manufacturers ship their product with a utility that prevents other video
cards from being set as the primary card. Please check the system tray for an icon
representing this utility, and if possible, please disable the utility prior to switching to the
USB 2.0 to VGA adapter as the primary display.
My DVD player will not work when I move the image to the extended display
Some DVD playback software does not support playing video on a second adapter of any
kind. Please refer to the documentation that was included with your DVD playback
software for further information.
Video will not display using Windows Media Player on the extended desktop
Please ensure that you have moved the Media Player window completely over to the
second screen.
There are horizontal lines covering the displayed image
This is due to a low refresh rate setting. You can change this in: Display Properties,
Settings, Advanced, Monitor. Make sure that you have selected the USB 2.0 VGA
Device first, and do not exceed the refresh rate limitations of the monitor. Resetting, or
resynchronizing the monitor may also help. For further details on how to reset or
resynchronize your monitor, please refer to the documentation that was included with
your monitor purchase.
I am unable to use applications that require Direct3D on the USB 2.0 VGA adapter
Currently, the drivers that support the USB 2.0 VGA adapter do not support Direct3D.
Please check for driver updates in the future, for added support. If your application
requires Direct3D, please use the main display adapter.
The following troubleshooting tips may help if you are experiencing any issues.
Check to make sure that all connectors are plugged in correctly.
- Make sure that the USB port that you are using is USB 2.0.
- Check to see that the monitor is connected correctly and the power is ON.
- Try connecting the adapter directly to the computer instead of through a hub.
- Make sure you restart your computer after the driver installation.
- Unplug the adapter and re-insert it.
- Check the website to make sure you have the latest drivers.
- Reset/refresh/resynchronize your monitor.
- If you have problems during the boot up process, start your computer in Safe Mode
7
Instruction Manual
Troubleshooting - Cont’d
and uninstall the driver. Hold the CTRL key until the Windows startup menu appears
and select Safe Mode.
- As there is a limitation, the USB 2.0 VGA Adapter cannot be used for the viewing of
DVD video movie except for the Media Player Classic software on Windows Vista.
- It may disable the main display when you access the Primary function on part of
graphic cards of Intel solution.
8
Instruction Manual
Specifications
General Specifications
Operating systems supported
Certifications (Regulatory and other)
Bus Type
Windows 2000/XP/Vista
FCC, CE, ROHS
USB 2.0
USB Type ‘A’ x 1
HD15 Female x 1
Connectors
Supported Resolutions
Aspect Ratio
Resolution
Color Bits
16 : 10
1920 x 1200
16
16 : 9
1920 x 1080
16
16 : 10
1680 x 1050
16 , 32
16 : 10
1440 x 900
16 , 32
16 : 10
1280 x 800
16 , 32
15 : 9
1280 x 768
16 , 32
5:4
1280 x 1024
16 , 32
4:3
1600 x 1200
16 , 32
4:3
1280 x 960
16 , 32
4:3
1152 x 864
16 , 32
4:3
1024 x 768
16 , 32
4:3
800 x 600
16 , 32
Technical Support
StarTech.com’s lifetime technical support is an integral part of our commitment to provide industry-leading
solutions. If you ever need help with your product, visit www.startech.com/support and access our
comprehensive selection of online tools, documentation, and downloads.
Warranty Information
This product is backed by a one-year warranty. In addition, StarTech.com warrants its products against defects in
materials and workmanship for the periods noted, following the initial date of purchase. During this period, the
products may be returned for repair, or replacement with equivalent products at our discretion. The warranty covers
parts and labor costs only. StarTech.com does not warrant its products from defects or damages arising from
misuse, abuse, alteration, or normal wear and tear.
Limitation of Liability
In no event shall the liability of StarTech.com Ltd. and StarTech.com USA LLP (or their officers, directors,
employees or agents) for any damages (whether direct or indirect, special, punitive, incidental, consequential, or
otherwise), loss of profits, loss of business, or any pecuniary loss, arising out of or related to the use of the product
exceed the actual price paid for the product. Some states do not allow the exclusion or limitation of incidental or
consequential damages. If such laws apply, the limitations or exclusions contained in this statement may not apply
to you.
9
About StarTech.com
StarTech.com is “The Professionals’ Source for Hard-to-Find Computer Parts”.
Since 1985, we have been providing IT professionals with the quality products
they need to complete their solutions. We offer an unmatched selection of
computer parts, cables, server management solutions and A/V products and
serve a worldwide market through our locations in the United States, Canada, the
United Kingdom and Taiwan.
Visit www.startech.com for complete information about all our products and to
access exclusive interactive tools such as the Parts Finder and the KVM
Reference Guide. StarTech.com makes it easy to complete almost any IT
solution. Find out for yourself why our products lead the industry in performance,
support, and value.
17 August 2007 (Rev. A)