1
About the software on your Sony notebook
Using the product recovery CD-ROMs
n N
38
2
On the next screen, press Y to confirm the deletion of the current partitions.
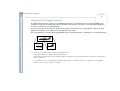
The next screen displays a selection of sizes for your new C: drive. According to the option you select, the
recovery process will create 1 or 2 partitions on the hard disk.
3
Confirm your selection on the next screen.
4
Wait until the new partitions are created and the notebook reboots.
5
Press G to proceed with the system recovery.
6
Follow the instructions on the screen.
7
When the recovery process is finished, remove the system recovery CD-ROM from the drive.
8
Press any key to restart your notebook.
! Please note that this option will delete all existing data both on the C: and D: drives before starting the recovery.
Aborting the recovery process
The recovery process always warns you when the decision you are asked to take, cannot be undone.
Whenever possible, the recovery screens allow you either to go back to the previous screen, or to abort the
recovery process.