1
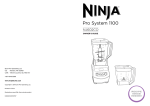
Ninja Pro System 1100
™
NJ602W 30
OWNER’S GUIDE
U.S.:
EURO-PRO Operating LLC
Newton, MA 02459
CANADA:
EURO-PRO Operating LLC
4400 Bois Franc
Ville St. Laurent, Québec H4S 1A7
1-800-798-7398
www.ninjakitchen.com
COPYRIGHT © EURO-PRO OPERATING LLC 2010
PRINTED IN CHINA
REV. 100426
Illustrations may differ from actual product.
NJ602W_30_IB_ENG_100426.indd 1-1
10-05-03 11:38 AM
English
IMPORTANT SAFETY INSTRUCTIONS
For Household Use Only
WHEN USING ELECTRICAL
APPLIANCES, BASIC SAFETY
PRECAUTIONS SHOULD ALWAYS
BE FOLLOWED, INCLUDING THE
FOLLOWING:
READ ALL INSTRUCTIONS
BEFORE USING YOUR NINJA™ PRO
SYSTEM 1100.
POLARIZED PLUG
WARNING: To reduce the risk of
electric shock, this appliance has a
polarized plug (one blade is wider
than the other). This plug will fit
into a polarized outlet only one
way. If the plug does not fit fully
into the outlet, reverse the plug. If it
still does not fit, contact a qualified
electrician to install the proper
outlet. DO NOT modify the plug in
any way.
2
TOLL FREE: 1-800-798-7398
NJ602W_30_IB_ENG_100426.indd 2-3
1. To protect against electrical shock,
do not submerge the appliance or
allow the power cord to come into
contact with water or any other
liquid.
2. Close supervision is necessary when
any appliance is used by or near
children.
3. Never leave an appliance
unattended when in use.
4. Turn the appliance ‘Off’ and remove
the power cord from the electrical
outlet when not in use, before
assembling or disassembling parts
and before cleaning. To unplug,
grasp the plug and pull from the
electrical outlet. Never pull from the
power cord.
5. DO NOT abuse the power cord.
Never carry the appliance by the
power cord or yank it to disconnect
from electrical outlet; instead grasp
the plug and pull to disconnect.
6. DO NOT operate any appliance with
a damaged cord or plug, or after the
appliance malfunctions, has been
dropped or damaged in any manner.
Return the appliance to EURO-PRO
Operating LLC for examination,
repair or adjustment.
7. DO NOT let the power cord hang
over the edge of table or counter or
touch hot surfaces such as the stove.
8. Always use appliance on a dry, level
surface.
9. Keep hands, hair, clothing, as well
as utensils out of container while
processing to reduce the risk of
severe injury to persons or damage
to the appliance. A scraper may be
used but only when the appliance is
not running.
10.CAUTION: Blade assembly is sharp,
handle with care. When handling
the blade assembly, always hold by
the shaft.
11. Avoid contact with moving parts.
12. DO NOT attempt to sharpen
blades.
13. DO NOT use the appliance if blade
assembly is bent or damaged.
14.To reduce risk of injury, never place
the blade assembly on base without
pitcher or bowl properly attached.
15.DO NOT operate this appliance on
or near any hot surfaces (such as
gas or electric burner or in a heated
oven).
16.The use of attachments or
accessories including canning
jars, not recommended by the
manufacturer may result in fire,
electric shock or personal injury.
17. DO NOT remove the container from
the motor base while the appliance
is in operation.
18.To reduce the risk of injury, NEVER
operate the appliance without the lid
in place; DO NOT try to defeat the
interlock mechanism; make sure that
the attachment is properly installed
before operating the appliance.
19.DO NOT expose containers to
extreme temperature changes.
20.Exercise extreme caution when
blending hot liquids.
21. CAUTION: Do not process food or
liquid that is hotter than 180°F/82°C.
Allow very hot ingredients to cool
before processing.
22.DO NOT overfill.
23.Extreme caution must be used when
moving an appliance containing hot
food, water or other liquids.
24.When processing hot foods or
liquids, always open the pouring
spout cap to vent the steam. Keep
hands and other exposed skin
away from the opening to prevent
possible burns or scalding.
25.DO NOT operate the appliance
empty.
26.Always allow the appliance to cool
after blending hot liquids before
taking off parts and before cleaning.
27.If the appliance overheats, a thermal
switch will become activated and
shut off the motor. To reset, unplug
the appliance and let it cool down
for approximately 10 minutes before
using again.
28.THIS PRODUCT IS INTENDED FOR
HOUSEHOLD USE ONLY. Do not
use this appliance for anything other
than its intended use. Do not use
outdoors.
NOTE: This unit has a short power
supply cord to reduce the risk resulting
from becoming entangled in or tripping
over a long cord. An extension cord
may be used if you are careful in its use:
1. The electrical rating of the extension
cord should be at least as great as
the electrical rating of the appliance.
2. An extension cord with the power
cord must be arranged so that it will
not drape over the countertop or
tabletop where they can be pulled
on by children or tripped over
accidentally.
SAVE THESE
INSTRUCTIONS
www.ninjakitchen.com
3
10-05-03 11:38 AM
English
Contents
Thank you for
purchasing
the Ninja™ Pro
System 1100.
Getting Started..................................................................................... 6
Using the Ninja™ Pro System 1100.................................................. 8
Using the Pitcher.................................................................................. 11
Using the Bowl...................................................................................... 12
Care & Maintenance............................................................................ 13
Speed Setting & Uses......................................................................... 14
Troubleshooting Guide...................................................................... 15
Replacement Parts.............................................................................. 15
Recipes..................................................................................................... 16
Warranty.................................................................................................. 22
Registration............................................................................................ 23
TECHNICAL SPECIFICATIONS
Voltage: 120V., 60Hz.
Power: 1100 Watts
Pitcher Capacity: 2.15 L (72 ounces) (9 cups)
Bowl Capacity: 1.18 L (40 ounces) (5 cups)
4
TOLL FREE: 1-800-798-7398
NJ602W_30_IB_ENG_100426.indd 4-5
www.ninjakitchen.com
5
10-05-03 11:38 AM
English
Getting Started
a
The Ninja Pro System 1100 is a professional, high powered innovative tool with a sleek
design and outstanding performance, a true asset to any kitchen. It is perfect for ice
crushing, blending, pureeing, and controlled processing. The Ninja Pro System 1100 also
features a unique capability to knead dough for pizzas, breads, pretzels and cookies!
Create all of your favorite recipes fast and easy with just one touch of a button. For best
results, be sure to carefully read all the instructions contained in the manual before using
this appliance.
b
c
d
e
f
g
h
i
j
k
l
m
n
o
a 6-Blade Assembly (pitcher)
j Grated Fill Spout with Cap
b Whipping Attachment (pitcher)
k 72 oz. Pitcher
c 4-Blade Assembly (bowl)
l 40 oz. Bowl
• Patented Ninja™ Blade Technology
d Dough Blade (bowl)
mGear Shaft
• Extra Large, 72 oz. Pitcher - BPA Free
e Dough Paddle (bowl)
n Motor Base
• 40 oz. Bowl - BPA Free
f Pitcher Lid with Locking Handle
o Control Panel
• Lock–In Lid, Featuring Pour Spout
g Bowl Lid with Locking Handle
p Power Cord (not shown)
• Easy to Clean Electronic Control Panel
h Locking Handle Release Button
q Cord Storage (in back) (not shown)
• Sturdy, Non-Slip Base
i Pouring Spout with Cap
NOTE: Accessories are not interchangeable.
6
TOLL FREE: 1-800-798-7398
NJ602W_30_IB_ENG_100426.indd 6-7
FEATURES:
• Cord Storage Box
• Hidden Drain Holes - prevent water build up from dishwasher
www.ninjakitchen.com
7
10-05-03 11:38 AM
English
Using the Ninja™ Pro System 1100
Shaft
Fig. 1
Fig. 3b
Fig. 2
BEFORE FIRST USE
1 Remove all packaging material and labels
from the appliance.
2 Wash the lids, pitcher, bowl and
attachments in warm, soapy water with
a soft cloth. Use caution when washing
the blade assemblies as the blades are
very sharp.
1 Place the motor base on a clean, dry,
level surface.
3 Rinse and dry thoroughly.
4 The pitcher, bowl, lids and
attachments are all dishwasher safe.
It is recommended that the lids and
attachments go on the top rack. Ensure
that the attachments are removed from
the containers before placing in the
dishwasher.
5 The motor base can be wiped clean with
a damp cloth.
Fig. 4a
HOW TO ASSEMBLE
CAUTION: Make sure that the motor base
is unplugged from the power source.
2 Lower the pitcher or the bowl onto the
motor base. (Fig. 1)
3 Rotate the container to the left as far as
it will go. As the container rotates, it will
lower and the safety tabs on the bottom
of the container will slide under the
safety tabs on the top of the motor base.
(Fig. 2)
4 The pitcher or bowl can be placed on the
motor base two ways; the handle can be
on the front right corner or the front left
corner. (Fig. 3a, Fig. 3b)
5 Place either the 6-Blade assembly or the
whipping attachment into the pitcher.
(Fig. 4a) Place either the 4-Blade
assembly, dough blade or dough paddle
into the bowl. (Fig. 4b) Holding the
attachment by the shaft, place it onto the
gear shaft inside the container. Ensure
that the attachment fits snuggly around
the gear shaft and that it is standing
straight.
Locking
Handle
Shaft
Fig. 3a
Fig. 4b
CAUTION: Blades are sharp! Use extreme
caution when handling the blade
assemblies. Always hold them by the
shaft.
HOW TO USE
IMPORTANT: DO NOT attempt to
operate the appliance without the lid on.
1 Place the pitcher or bowl onto the motor
base and insert the desired attachment.
(See 'HOW TO ASSEMBLE'.)
2 Add the ingredients to the container.
Make sure your total of ingredients
don't go higher than the highest
measured marking line on the side of the
containers.
IMPORTANT: Never add ingredients
into the container before placing the
attachment in first.
Fig. 5
3 Place the corresponding lid onto the
container with the locking handle in the
upright position and the pouring spout
on the corner opposite the container’s
handle. Align the arrows ( ) located on
the lid and container’s handle. Ensure
that the lid is completely seated and
press the lid down into the container.
Press the locking handle down so that
the latches on the lid fit under the tabs
on the container. (Fig. 5)
4 Plug the power cord into the electrical
outlet and press on the power button ( ).
TOLL FREE: 1-800-798-7398
NJ602W_30_IB_ENG_100426.indd 8-9
NOTE: As a safety feature, the power
button ( ) will flash and the motor will
not work if the container and lid are not
installed correctly. When the container
and lid are installed properly, the power
button ( ) will be solid, indicating that
the appliance is ready for use.
5 Select the button that best suites your
needs.
8
NOTE: If you need to add additional
ingredients while the appliance is
processing, open the pouring spout cap
and pour the ingredients in through the
opening.
* See ‘Speed Settings & Uses’ chart.
www.ninjakitchen.com
9
10-05-03 11:38 AM
English
Using the Pitcher
Using the Ninja™ Pro System 1100 - cont'd
6 Press power button ( ) or the selected
button a second time to stop the
attachment from turning or press a
different button to change the speed.
7 If the ingredients stick to the side of
the container, stop the appliance by
pressing the power button ( ) and wait
for the attachment to stop turning. Then
remove the lid by pressing the release
button, lifting the handle up and pulling
straight up. (Fig. 6) Use a spatula to
dislodge the pieces, replace the lid and
continue processing.
8 To remove the container, press the power
button ( ) to turn the appliance 'Off'.
Wait for the attachment to stop moving
before removing. (Fig. 7)
CAUTION: Never remove the container
while the appliance is still running.
9 Depending on the consistency of the
contents in the container, open the
pouring spout cap and use the spout
to empty liquid contents. For thicker
consistencies, or for removing dough
from the bowl, remove the lid and
attachment carefully (by its shaft), then
empty contents from the container.
10
Fig. 8
Fig. 7
Fig. 6
TOLL FREE: 1-800-798-7398
NJ602W_30_IB_ENG_100426.indd 10-11
10 Unplug the appliance after use.
IMPORTANT: Never run the appliance
empty.
CAUTION: Blades are sharp! Use extreme
caution when handling the blade
assemblies. Always hold them by the
shaft.
CAUTION: Use extreme caution when
processing hot foods or liquids to avoid
accidental scalding or burns. Do not
process food or liquid that is hotter than
180°F/82°C. Allow very hot ingredients
to cool before processing.
When processing hot foods or liquids,
always open the spout cap to vent the
steam. Keep hands and other exposed
skin away from the opening to prevent
possible burns or scalding.
WARNING: Secure the appliance while in
use by pressing down on the lid with one
hand.
WARNING: Never leave the appliance
unattended while in use.
USING THE 6-BLADE ASSEMBLY
IMPORTANT: Accessories are not
interchangeable.
IMPORTANT: DO NOT attempt to
operate the appliance without the lid on.
1 Holding the 6-Blade assembly by
the shaft, place it onto the gear shaft
inside the container. Ensure that the
attachment fits snuggly around the gear
shaft and that it is standing straight.
2 Add the ingredients and secure the
pitcher lid onto the pitcher. (Fig. 8)
3 Plug the power cord into the electrical
outlet and press on the power button ( ).
Fig. 9
USING THE WHIPPING ATTACHMENT
IMPORTANT: Accessories are not
interchangeable.
IMPORTANT: DO NOT attempt to
operate the appliance without the lid on.
1 Holding the whipping attachment by
the shaft, place it onto the gear shaft
inside the container. Ensure that the
attachment fits snuggly around the gear
shaft and that it is standing straight.
2 Add the ingredients and secure the
pitcher lid onto the pitcher. (Fig. 9)
3 Plug the power cord into the electrical
outlet and press on the power button ( ).
NOTE: Please refer to ‘Speed Settings
& Uses’ chart for suggested uses and
speeds.
NOTE: Please refer to ‘Speed Settings
& Uses’ chart for suggested uses and
speeds.
www.ninjakitchen.com
11
10-05-03 11:38 AM
English
Using the Bowl
Care & Maintenance
HOW TO CLEAN
CAUTION: Make sure that the motor
base is unplugged from the power
source before inserting or removing any
attachment and before cleaning.
CAUTION: DO NOT immerse the motor
base into water or any other liquid. Clean
with a damp sponge or cloth and wipe
dry.
Fig. 10
Fig. 11
USING THE 4-BLADE ASSEMBLY
IMPORTANT: Accessories are not
interchangeable.
CAUTION: Blades are sharp! Use extreme
caution when handling the blade
assemblies. Always hold them by the
shaft.
IMPORTANT: DO NOT attempt to
operate the appliance without the lid on.
1 Holding the 4-Blade assembly by
the shaft, place it onto the gear shaft
inside the container. Ensure that the
attachment fits snuggly around the gear
shaft and that it is standing straight.
2 Add the ingredients and secure the bowl
lid onto the bowl. (Fig. 10)
3 Plug the power cord into the electrical
outlet and press on the power button ( ).
NOTE: Please refer to ‘Speed Settings
& Uses’ chart for suggested uses and
speeds.
USING THE DOUGH BLADE
IMPORTANT: Use only ‘DOUGH’ button
when using this attachment.
Fig. 12
USING THE DOUGH PADDLE
IMPORTANT: Use only ‘DOUGH’ button
when using this attachment.
IMPORTANT: Accessories are not
interchangeable.
IMPORTANT: Accessories are not
interchangeable.
IMPORTANT: DO NOT attempt to
operate the appliance without the lid on.
IMPORTANT: DO NOT attempt to
operate the appliance without the lid on.
1 Holding the dough blade by the shaft,
place it onto the gear shaft inside the
container. Ensure that the attachment
fits snuggly around the gear shaft and
that it is standing straight.
1 Holding the dough paddle by the shaft,
place it onto the gear shaft inside the
container. Ensure that the attachment
fits snuggly around the gear shaft and
that it is standing straight.
2 Add the ingredients and secure the bowl
lid onto the bowl. (Fig. 11)
2 Add the ingredients and secure the bowl
lid onto the bowl. (Fig. 12)
3 Plug the power cord into the electrical
outlet and press on the power button ( ).
3 Plug the power cord into the electrical
outlet and press on the power button ( ).
NOTE: Please refer to ‘Speed Settings &
Uses’ chart for suggested uses.
NOTE: Please refer to ‘Speed Settings &
Uses’ chart for suggested uses.
1 The pitcher, bowl, lids and
attachments are all dishwasher safe.
It is recommended that the lids and
attachments be placed on the top rack.
2 You may also wash the containers by
filling ¾ of the container with warm water
and a drop of dish washing detergent,
placing the corresponding lid on the
container and pressing the pulse button
a few times. Once clean, remove the
container from the motor base. Rinse
the container, attachment and lid under
running water. Allow all the parts to dry
before storing.
Use extreme caution when handling the
blade assemblies as blades are very
sharp.
Please call customer service if any
servicing needs to be performed on the
appliance at 1-800-798-7398.
HOW TO STORE
1 Store the Ninja™ Pro System 1100 upright
with the pitcher on the motor base,
6-Blade assembly inside the pitcher and
lid on the pitcher. Do not place anything
on top. Store the bowl with the 4-Blade
assembly inside and the lid on top along
with the appliance and the rest of the
attachments.
2 Tuck power cord in cord storage
compartment in the back of the motor
base.
12
TOLL FREE: 1-800-798-7398
NJ602W_30_IB_ENG_100426.indd 12-13
www.ninjakitchen.com
13
10-05-03 11:38 AM
English
Troubleshooting Guide
Speed Setting & Uses
FUNCTION
Whipping
Mincing
CONTAINER ATTACHMENT
Pitcher
Bowl
Whipping
Attachment
Blade Assembly
SPEED
BUTTON
TYPE OF FOOD
3
Whipped cream
Thin pancake batter
Scrambled eggs
Mousse
Pulse
Onion
Garlic
Herbs
Bread dough
Pie dough
Pizza dough
Pretzel dough
Kneading
Bowl
Dough Blade
1
(DOUGH)
Dough Mixing
Bowl
Dough Paddle
1
(DOUGH)
Cookie dough
2
(BLEND)
Pâtés
Stewed fruits
Dips
Apple sauce
Spreads
Soups
Baby food
Blending
Grinding
Bowl
Bowl
Blade Assembly
Blade Assembly
2
Meat
Grating
Bowl
Blade Assembly
3 or Pulse
Grated cheese
Bread crumbs
Chopping
Pitcher or
Bowl
Blade Assembly
Pulse
Salsa
Vegetables
Nuts
Mixing
Pitcher or
Bowl
Blade Assembly
2
(BLEND)
Light cake mixes
Batters
Ice Crushing
Pitcher or
Bowl
Blade Assembly
3
(ICE CRUSH)
Ice
Pureeing
Pitcher or
Bowl
3
Smoothies
Smooth soups
Milkshakes
14
Blade Assembly
TOLL FREE: 1-800-798-7398
NJ602W_30_IB_ENG_100426.indd 14-15
PROBLEMS
POSSIBLE REASONS & SOLUTIONS
Make sure the container is securely placed on motor
base.
Make sure the lid is securely on container in the correct
position (align arrows).
Motor Doesn’t Start or
Attachment Doesn’t
Rotate.
The appliance is turned 'Off'. Press the power button ( ) to
turn 'On'.
Check that the plug is securely inserted into the electrical
outlet.
Check the fuse or circuit breaker.
The unit has overheated. Unplug and wait approximately 10
minutes before using again.
Food is Unevenly
Chopped.
Either you are chopping too much food at one time, or
the pieces are not of even size and processing smaller
amounts per batch.
Food is Chopped Too
Fine or is Too Watery.
The food has been over processed. Use pulse button for
controlled processing.
Food Collects On
Lid or On the Sides of the
Container.
The mixture is to thick. Add more liquid.
You Cannot Achieve
Snow From Solid Ice.
Do not use ice that has been sitting out or has started to
melt. Use ice straight from the freezer.
Replacement Parts
ORDERING REPLACEMENT PARTS
To order additional parts and attachments, please visit our website:
www.ninjakitchen.com or feel free to contact customer service: 1-800-798-7398.
www.ninjakitchen.com
15
10-05-03 11:38 AM
English
Recipes
Orange Double-Up
Ingredients:
4 Cups
1
/2 Cup 2 Medium
16 oz.
Directions:
Pour 2 cups of orange juice into the pitcher. Add the juice concentrate and the
fresh oranges. Blend on 2 until uniformly smooth. Pour the mixture into a large
serving pitcher and add the remaining orange juice and carbonated water. Stir
well to blend. Pour over ice and serve. Serves 4 to 6.
Middle Eastern Tabouli
Ingredients:
1 Cup
1 Cup
1 Bunch
6 Sprigs
1
/2 Small
2 Cloves
1
/3 Cup
2
1
/2 tsp.
1
/2 tsp.
2 Ripe
3
Plain Bulgur (cracked wheat), uncooked
Water
Fresh Parsley, stemmed
Fresh Mint, stemmed
White Onion, peeled
Garlic, peeled
Extra Virgin Olive Oil
Lemons, juiced (about 1 /4 cup)
Salt
Freshly Ground Black Pepper
Tomatoes, cored and diced
Green Onions, cleaned and chopped
Directions:
In a large bowl, mix the bulgur with the water. Cover and let stand for 20 minutes,
until the water is absorbed and the wheat is tender.
Place the parsley, mint, onion and garlic into the bowl and pulse on 1 to make a
small, rough chop, cleaning the sides of the bowl with a spatula as necessary.
Transfer the mixture to the bowl of softened bulgur.
Place the olive oil, lemon juice, salt and pepper in the bowl and blend on 2 until
incorporated. Add the dressing to the bulgur mixture and lightly toss to mix. Add
the chopped tomatoes and green onion, again tossing gently to mix. Taste and
adjust the seasonings. Serve well-chilled or at room temperature. Serve 6.
Bowl
4-Blade Assembly
Bowl Lid
16
TOLL FREE: 1-800-798-7398
NJ602W_30_IB_ENG_100426.indd 16-17
Caramel Crème Parfait
Ingredients:
1 Cup 1 tsp.
4 Cups
1
/2 Cup 1
/2 Cup
Directions:
Pour the cream into the pitcher and whip on 3 until stiff peaks form, about 25
seconds. Gently fold in the sugar and set aside. Clean the pitcher and dry.
Place the ice cream and 1 /4 cup of caramel sauce into the pitcher. Add the milk
and blend on 3 until very smooth. Remove and assemble the parfaits. Drizzle a
small amount of the remaining caramel sauce down the sides of 4 glasses. Layer
the ice cream and whipped cream into each glass. Top each parfait with a drizzle
of the remaining caramel sauce and serve at once. Serves 4.
Pitcher
Whipping Attachment
6-Blade Assembly
Pitcher Lid
Pitcher
6-Blade Assembly
Pitcher Lid
Orange Juice, divided
Frozen Orange Juice Concentrate
Fresh Oranges, peeled, seeded and cut into pieces
Carbonated Water
Heavy Whipping Cream
Sugar
Premium Vanilla Ice Cream
Premium Caramel Sauce, divided
Lowfat Milk
Roasted Tomato & Olive Bruschetta
Ingredients:
4 Medium
2 Tbsp.
1 Clove
1
/4 Cup
1 tsp.
Directions:
Place the tomatoes on a baking sheet and toss with the oil. Sprinkle with salt
and pepper. Bake at 350°F for 30 to 40 minutes, or until very soft and tender.
Remove and cool slightly.
Place the cooled tomatoes in the bowl and add the garlic, olives and basil. Add a
few drops of oil if the mixture looks dry. Pulse on 1 for just a few seconds, or long
enough to roughly chop the vegetables together. Don’t over-blend.
Spoon the bruschetta on the bread rounds and serve. Makes about 12 servings.
Bowl
4-Blade Assembly
Bowl Lid
Tomatoes, cored and quartered
Extra-Virgin Olive Oil
Garlic, peeled
Black Olives, pitted
Fresh Basil
Fresh Bread Rounds, lightly toasted
www.ninjakitchen.com
17
10-05-03 11:38 AM
English
Recipes - cont’d
Sweet Strawberry Smoothie
Ingredients:
1
/2 Cup
1
/2 Cup
1 Cup
1
/2 Cup
2 Cups
Directions:
Pour the milk and cream into the pitcher and add the strawberries, yogurt and
ice cubes. Blend on 3 until the mixture is very smooth and no fruit pieces remain.
Pour into glasses and serve right away. Serves 2 to 3.
Pitcher
6-Blade Assembly
Pitcher Lid
Crisp & Rich Butter Cookies
Half-and-Half Cream
Whole Milk
Ripe, Sweet Strawberries, stemmed and washed
Lowfat Vanilla-Flavored Yogurt
Ice Cubes
Ingredients:
1 Cup
1
/2 Cup
Pinch
1 Large
1 tsp.
1
/2 tsp.
2 1 /2 Cups
Butter
Sugar
Salt
Egg
Vanilla Extract (substitute lemon extract)
Almond Extract
All-Purpose Flour
Easy Pizza Dough
Ingredients:
1
/4 oz. Pkg.
1 tsp.
1 Tbsp.
2
/3 Cup
1
/4 Cup
2 Cups
Directions:
Place the yeast, salt, sugar and water in the bowl. Pulse on 1 for 10 seconds. Add
the oil and flour and blend on 1 until the dough is smooth and no lumps remain.
Transfer the dough to a lightly-oiled bowl and cover. Let rise for about 1 hour.
If you are making high-rise pizza dough, punch down the dough and let rise again
for 45 minutes. If not, eliminate the second rising and spread the dough onto a
pizza pan or baking sheet that has been lightly coated with cooking spray.
Add sauce and toppings as preferred and bake at 425°F for 25-30 minutes, or
until the crust is lightly browned and the toppings and cheese are hot.
Makes 1 pizza crust.
Bowl
Dough Blade
Bowl Lid
Dry Active Yeast
Salt
Sugar
Water, warmed to 110-115°F
Canola Oil (substitute olive oil)
All-Purpose Flour
Golden Mashed Potato Puffs
Ingredients:
4 Medium
1
/2 Cup
1
1
/2 tsp.
2 tsp.
1
/2 Cup
1
/2 tsp.
Makes about 6 dozen cookies.
Bowl
Dough Paddle
Bowl Lid
Directions:
In a large saucepan filled with water, bring the potatoes to a boil, and then reduce
the heat to medium-low and simmer until tender. Drain the potatoes and place
into the pitcher. Add the remaining ingredients, Reserving 2 tablespoons of
Parmesan cheese, and pulse on 1 until blended.
Preheat the oven to 350°F. Drop the potato mixture by teaspoons onto a nonstick baking sheet. Sprinkle the potato puffs with the remaining Parmesan cheese
and bake for 20 minutes. Allow the puffs to cool slightly and serve warm.
Pitcher
6-Blade Assembly
Pitcher Lid
Directions:
Place the butter, sugar, salt, egg and extracts in the bowl. Blend on 1 until very
light and fluffy. Add the flour and pulse on 1 until combined. Remove the dough
paddle and clean the sides of the bowl with a spatula, mixing in any unblended
dough. Cover with the lid and chill the dough for about 20 minutes.
Fill a cookie press and press shapes onto ungreased cookie sheets. Bake at
400°F for 8 to 10 minutes. Cookies should be set, but not browned, when done.
Cool on wire racks before serving.
18
TOLL FREE: 1-800-798-7398
NJ602W_30_IB_ENG_100426.indd 18-19
Russet Potatoes, peeled and diced
Milk, warmed
Egg, beaten
Baking Powder
White Flour
Parmesan Cheese, grated
Salt
www.ninjakitchen.com
19
10-05-03 11:38 AM
English
Recipes - cont’d
Pineapple Nut Crumb Cake
Ingredients:
/2 Cup 3
/4 Cup 2 1 1 /2 tsp. 1 1 /4 Cups 1 tsp.
1 Fresh 1
Butter
Sugar
Eggs
Vanilla Extract
All-Purpose Flour
Baking Powder
Pineapple, peeled, cored, quartered lengthwise and sliced
Crumb Topping:
1 1 /4 Cups All Purpose Flour
1
/2 Cup Sugar
1
/4 tsp. Ground Cinnamon
1
/2 Cup Butter
1
/2 Cup Walnuts
Directions:
Preheat the oven to 350°F. Butter the bottom and sides of a 10-inch springform
pan. Place the butter in the bowl and blend on 1 until very fluffy. Add the sugar
and blend again on 1 for 10 seconds. Use a spatula to clean the sides of the bowl.
Add the eggs and vanilla and blend on 1 until uniformly smooth.
Add the flour and baking powder and blend on 1 just until all the ingredients are
moistened. Pour the batter into the prepared pan.
In the bowl, combine the flour, sugar and cinnamon for the crumb topping. Add
the butter and walnuts and pulse on 1 for 20 seconds. Remove and set aside.
Place the pineapple slices on top of the batter, leaving a 1 /2 -inch margin around
the outside edge. Scatter the crumb mixture over the top. Bake for 50 to 60
minutes, or until the cake is firm.
Remove the cake and cool. Remove the pan rim and place on a serving platter.
Serves 8 to 10.
Bowl
Dough Blade
Bowl Lid
20
TOLL FREE: 1-800-798-7398
NJ602W_30_IB_ENG_100426.indd 20-21
English Toffee Cookies
Ingredients:
1 Cup 1
/2 Cup 1
/2 Cup
1 tsp. 1
2 Cups Pinch
10 oz.
1
/2 Cup Directions:
Place the butter, sugars, extract and egg yolk in the bowl and blend on 1 until
smooth and creamy. Use a spatula to clean the sides of the bowl. Add the flour
and salt. Blend again until smooth. Spoon the cookie dough onto a baking sheet
that has been coated with cooking spray. Allow a 2-inch margin, as the dough will
spread.
Lightly spread the chocolate over the dough and sprinkle the nuts over all. Bake
at 350° for 15 to 20 minutes. Cool slightly and cut into small squares. Cool on a
wire rack.
Makes about 24 cookies.
Bowl
Dough Paddle
Bowl Lid
Butter, softened
Dark Brown Sugar, packed
Sugar
Vanilla Extract
Egg Yolk
Cake Flour
Salt
Milk Chocolate Candy Bar, melted
Almonds, chopped
Banana Pineapple Smoothie
Ingredients:
2 Cups 1 Cup 1 Small
1
/4 Cup 1 Tbsp. 3 Cups Directions:
Pour the juice into the pitcher and add the pineapple, banana, coconut milk,
honey and ice. Blend on 3 until very smooth. Pour into glasses and serve at once.
Serves 3 to 4.
Pitcher
6-Blade Assembly
Pitcher Lid
Pineapple Juice
Pineapple Chunks, fresh or canned
Ripe Banana, cut into chunks
Unsweetened Coconut Milk
Honey
Ice Cubes
www.ninjakitchen.com
21
10-05-03 11:38 AM
Model
NJ602W 30
OWNERSHIP REGISTRATION CARD
FOR CANADIAN CONSUMERS ONLY
English
WARRANTY
Please go to our website www.ninjakitchen.com for further details.
Please fill out and mail the product registration card within ten (10)
days of purchase. The registration will enable us to contact you in
the unlikely event of a product safety notification. By returning this
card you acknowledge to have read and understood the instructions
for use, and warnings set forth in the accompanying instructions.
Mail to the following address:
• EURO-PRO Operating LLC
4400 Bois Franc, Ville St.Laurent, Québec, Canada H4S 1A7
Owner’s Name:
Address:
City:
Province:
|
Postal Code:
|
Date Purchased:
Name of Store:
Appliance Model:
NJ602W 30
22
TOLL FREE: 1-800-798-7398
NJ602W_30_IB_ENG_100426.indd 22-23
www.ninjakitchen.com
23
10-05-03 11:38 AM