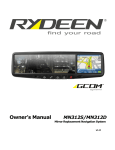
Download Owner`s Manual
Transcript
DVA6
Guide de l’Utilisateur
DVA6
Android Powered - 2 Din Multimedia Receiver with Built-in Bluetooth
Android Powered - 2 Din Multimedia Receiver with Built-in Bluetooth
Moteur Android– Multimédia 2 Din Récepteur avec Bluetooth Intégré
English
Manual de Instrucciones
Español
DVA6
Français
Owner’s Manual
English
Welcome Statement & Warnings
Thank you for purchasing the RYDEEN DVA6, that it will make your driving experience easier &
hassle-free.
The DVA6 provides an easy-to-use touch screen user interface and innovative functionality in a
stylish design that replaces the factory radio.
Please read this Owner’s Manual carefully. If you have any further questions about your DVA6
operation, feel free to call RYDEEN, Toll Free at 1-877-777-8811 (within USA only) for product
support, or visit our website: www.rydeenmobile.com.
PRECAUTIONS & WARNINGS
IMPORTANT INFORMATION
PLEASE READ CAREFULLY BEFORE USING THIS PRODUCT
We recommend that you read and follow all information and instructions in this Owner’s Manual for the
best performance and satisfaction of your DVA6.
Ŗ ;QWT &8# PCXKICVKQP UQHVYCTG IS NOT a substitute for personal judgment. The route suggestions
UJQWNFPGXGTUWRGTUGFGCP[NQECNVTCHſETGIWNCVKQPRGTUQPCNLWFIOGPVQTMPQYNGFIGQHUCHGFTKXKPI
practices. Before making any maneuvers (for example, a U-turn or a left turn) suggested by the DVA6
system, please be sure that such a maneuver can be completed legally and safely. Do not follow route
suggestions that could put you or your vehicle in a potentially unsafe or illegal circumstance.
Ŗ ;QWUJQWNFPQVFGRGPFQP&8#VQNQECVGGOGTIGPE[UGTXKEGU
UWEJCURQNKEGſTGUVCVKQPUJQURKVCNU
and clinics). The database may not include all emergency service providers. It is the best to call your
local police department and ask for directions in these situations.
Ŗ 5GVVJGWPKVXQNWOGCVCNGXGNVJCVYKNNCNNQY[QWVQJGCTQWVUKFGVTCHſECPFGOGTIGPE[XGJKENGU
Ŗ #XQKFRNCEKPIEGNNRJQPGUQTYKTGNGUUVTCPUEGKXGTFGXKEGUPGCTVJG)25CPVGPPCCUVJGKTUKIPCNUOC[
YGCMGPQTKPVGTHGTGYKVJVJG)25UCVGNNKVGUKIPCNDGKPITGEGKXGFD[[QWT&8#ECWUKPIKVVQRGTHQTO
poorly.
Ŗ 6JG&8#UJQWNFPQVDGRTQITCOOGFYJKNGFTKXKPI6JGFTKXGTECPQPN[RTQITCOVJGWPKVYJKNG
VJGXGJKENGKURCTMGFKPCUCHGNQECVKQP
Ŗ /QXKPI RKEVWTGU FKURNC[ QP VJG &8# UETGGP UJQWNF PQV DG YCVEJGF QT VQWEJGF YJKNG VJG
XGJKENGKUKPOQVKQP
Ŗ 2CTMKPIDTCMGUCHGV[U[UVGOUJQWNFDGKPUVCNNGFEQTTGEVN[CEEQTFKPIVQVJGKPUVTWEVKQPQPVJG
QYPGTŏU OCPWCN 1VJGTYKUG 4;&''0 CPF KVU TGVCKNGTU CTG PQV TGURQPUKDNG HQT CP[ CEEKFGPV
ECWUGFD[KORTQRGTKPUVCNNCVKQPQTOKUWUGQHVJG&8#WPKV
Ŗ 5'8'4'+0,74;4+5-&1016OQWPV[QWT&8#QPVJGUWTHCEGQHQTKPVJGFGRNQ[OGPVſGNFQH
your vehicle’s driver and passenger airbag units.
Ŗ 2QUKVKQP VJG WPKV KP C NQECVKQP VJCV FQGU PQV QDUVTWEV VJG FTKXGTŏU XKGY QH VJG TQCF KPUVTWOGPVU QT
vehicle controls.
Ŗ 2QUKVKQPVJGWPKVUQVJGUETGGPECPDGXKGYGFYKVJLWUVCSWKEMINCPEG)NCPEGCVVJGWPKVUETGGPQT
manipulate the in-route touch screen controls ONLY WHEN VEHICLE IS COMPLETELY STOPPED
AND IT IS SAFE to do so.
Ŗ $GUWTGVJG&8#WPKVKUUGEWTGN[CVVCEJGFVQVJGXGJKENGŏUFCUJUVTWEVWTGYKVJVJGUWRRNKGFDTCEMGV
and screws.
Ŗ &1016CVVGORVVQOQFKH[QTFKUCUUGODNGVJG&8#WPKVRGTUQPCNKPLWT[QTFCOCIGEQWNFTGUWNV+HC
RTQDNGOQEEWTUUVQRWUKPIVJGU[UVGOKOOGFKCVGN[CPFEQPVCEV4;&''0%JCPIGUQTOQFKſECVKQPU
to the DVA6 will void the warranty and its compliance with FCC rules thus making it illegal to use.
Ŗ +H[QWPQVKEGCP[QHVJGHQNNQYKPI
WPKFGPVKſGFNKSWKFQPVJGWPKVUOQMGTKUKPIQWVQHVJGWPKVWPWUWCN
odor emanating from the unit) – STOP USING THE UNIT IMMEDIATELY. Contact the nearest
RYDEEN retailer or call RYDEEN Customer Service for assistance Toll Free @ 1-877-777-8811 (within
USA only).
Ŗ &1016OQWPV[QWT&8#QPCP[PQPCWVQOQVKXGHQTOQHVTCPURQTVCVKQP
OQVQTE[ENGUDKMGU#68ŏU
watercraft).
2
Ŗ #
XQKFFTQRRKPI[QWT&8#WPKVQTUWDLGEVKPIKVVQGZEGUUKXGUJQEMCPFXKDTCVKQPUCUVJKUOC[
cause it to malfunction.
Ŗ &
1 016 WUG CP[ UJCTR QDLGEV VQ QRGTCVG [QWT WPKVŏU VQWEJUETGGP FKURNC[ 'ZEGUUKXG HQTEG
could damage the LCD display.
Ŗ GGRVJG&8#WPKVQWVQHTGCEJQHUOCNNEJKNFTGP4GOQXCDNGRCTVU
OKETQ5&OGOQT[ECTF
can be a choking hazard.
Ŗ 6
JG&8#WPKV+50169#6'42411(#XQKFGZRQUKPIKVVQTCKPQTQVJGTHQTOUQHGZEGUUKXG
moisture. Water damage is not covered under the warranty.
WARNINGS
Ŗ 6*'(1..19+0)+05647%6+105#4'+06'0&'&(14#76*14+<'&
RYDEEN MOBILE INSTALLERS ONLY
Ŗ 241('55+10#.+056#..#6+10$;#76*14+<'&4;&''04'6#+.'4
REQUIRED TO BE COVERED UNDER WARRANTY
Technical Support Contact Info
If you have other questions about the RYDEEN DVA6, please contact your retailer or Technical
Support:
Ŗ 6GNGRJQPG
YKVJKP75#QPN[
Ŗ VGEJFGRV"T[FGGPOQDKNGEQO
Ŗ 9GD#FFTGUUYYYT[FGGPOQDKNGEQO
3
English
WARNINGS
English
Precautions
Thank you for purchasing this product.
Please read through the Owner’s Manual to
learn how to properly operate the DVA6 unit.
#HVGT[QWJCXGſPKUJGFTGCFKPIVJGOCPWCN
please keep it in a safe place for future
reference.
0GXGTGZRQUGVJKUWPKVCORNKſGTQTURGCMGTU
to moisture or water to prevent electronic
URCTMUQTſTGU
Only connect the unit to a 12-volt power
supply with proper negative grounding.
Please don’t change the fuse on the power
cord without professional guidance, using
an improper fuse may cause damage to this
WPKVQTGXGPECWUGſTG
Never install this unit where the operation
and condition for driving safely is
compromised.
Please power off this unit at once and send it
back to the after-sales service center or the
dealer /distributor you purchased from if one
of the following symptoms is found:
Never use the video display while the car
is in motion. The use of video playback
YJKNGFTKXKPIKUCXKQNCVKQPQHVTCHſENCYUCPF
KPETGCUGUVJGTKUMQHVTCHſECEEKFGPVU
To ensure safe driving, please adjust the
volume to a safe & comfortable level in case
of emergency situations.
4
C0QCWFKQQWVRWV
D0QKOCIGQWVRWV
E9CVGTQTQVJGTQDUVCENGGPVGTUVJGWPKV
F5OQMKPI
(e). Peculiar smell.
To provide a clear demonstration and an
alternative for easy understanding of the
operation of this unit, graphic illustration
was used. However, this illustration is not
necessary printed as the actual image found
on the unit.
Precautions
Contents
Warning
9GNEQOG5VCVGOGPV9CTPKPIU2
Operate the unit correctly according to the
instruction manual to prevent unnecessary
problems.
6GEJPKECN5WRRQTV%QPVCEV+PHQ3
%QPVTQN2CPGN
4GOQVG%QPVTQN7
This product is a CLASS 1 LASER PRODUCT.
Use of controls or adjustments or performance
of procedures other than those specified
herein may result in hazardous radiation
exposure. Do not open covers and do not
repair yourself. Refer servicing to qualified
personnel.
$CUKE1RGTCVKQPU9
Turn On/Off the Power............................9
Mute ........................................................9
Adjust the Volume...................................9
Playing Source Selection ........................9
When Vehicle is Put in Reverse .............9
When Parking Brake Applied ..................9
Wallpaper................................................9
6YQNCUGTRTQFWEVU
/CKPOGPW10
Main Menu ............................................10
Applications Menu ................................10
Wave length: CD: 780nm DVD: 650nm
Laser power: No hazardous radiation is
emitted with safety protection.
To reduce the risk of fire electric shock, and
annoying interference, use only the included
components.
&KUE1RGTCVKQP10
4CFKQ1RGTCVKQPU13
5&75$1RGTCVKQPU14
$NWGVQQVJ1RGTCVKQPU17
1. &1016WUGKTTGIWNCTUJCRGFFKUE
+PVGTPGV19
)#205GVVKPIU...................................19
Wi-Fi Settings .......................................20
Create Wi-Fi Hotspot ............................20
Visit Website .........................................21
E-mail....................................................21
2. &KUE %NGCPKPI Use a dry, soft cloth to
wipe the disc from center to edge, only neutral
detergent can be used.
1VJGT/QFG21
Navigation Operations ..........................21
AUX Operations ....................................21
Steering Wheel Control.........................21
i-Mode (Siri) Function ...........................22
)QQING%CNGPFCT%QPſIWTCVKQP ............22
&GNGVG)OCKN#EEQWPV ...........................23
Caution of disc using
5[UVGOUGVVKPIU24
5QWPFUGVVKPI25
3. 9JGPRNC[KPICPGYFKUE New disc may
have some rough spots around the inner and
outer edges. If such a disc is used, remove
these rough spots with a pencil or ball-point
pen, etc.
&GXKEG%QPPGEVKQPU
Wiring Diagram .....................................28
6TQWDNGUJQQVKPI29
5RGEKſECVKQPU30
1PG;GCT.KOKVGF9CTTCPV[31
(%%%QORNKCPEG5VCVGOGPV32
&KUENCKOGT32
5
English
CAUTIONS ON HANDLING
2TGECWVKQPU4
Control Panel
English
2TGUU= ?MPQD
VQVWTPQPVJGWPKV
4GOQVG5GPUQT
/KETQ5&%CTF5NQV
*1/'$WVVQP
&KUE5NQV
Insert the disc with label side facing up.
Show main menu
/'07$WVVQP
/KETQRJQPG $WKNVKPCPF'ZVGTPCN/KETQRJQPG
We recommend to use External
Microphone for better Quality. Internal
Mic. is just for urgent use, in case of
External Mic. broken.
Show MENU options
$#%-$WVVQP
Back to previous MENU.
81.-PQD
>
>
>
>
Power “ON” / “Standby Mode” (Press)
Adjust Volume (rotate)
Mute the Volume (press when on)
Power “OFF” (long press)
4GUGV
Load factory settings
#7:KP,CEM
/KPK75$%QPPGEVQT
5&%CTF5NQV
6
'LGEV
Eject disc (when disc inserted)
*
&GHCWNV2CVJ
1. Path of SD Card(): /sdcard/sd_media
2. Path of USB(): /sdcard/external_usb
3. Path of Micro SD Card(): /sdcard/
external_sd
To install a new map, please install the
CRMſNGſTUVVJGPUVCTVVJGCRRNKECVKQPCPF
set the path.
Remote Control
English
1. Change playing source in sequence
2. Eject the disc
3. Select audio language
Show music catalog
4. Display playback information
<QQO
6. Select radio band
7. Call out - Outgoing call
)QVQUGCTEJ
9. DVD title
10. Repeat playback
11. Setup menu
12. Play / Pause
13. Move the cursor up/down/left/right.
Up/down: Manual tuning
14. Numeric keys
15. Mute the volume
16. Unit power
17. Select DVD subtitle language
18. Select DVD angle
19. Show / exit home menu
20. Return to previous display
21. Clear information
22. Hang up
23. Previous/Next
Auto tuning (long press)
Fast backward/forward (long press)
24. Display settings
25. Adjust volume
26. Stop playback
Rear zone (not used)
27. Change next rear source
28. Play/Pause
29. Previous/Next track
Fast backward/forward (long press)
7
Remote Control
English
0QVGUQHTGOQVGEQPVTQNWUKPI
1) Aim the remote control at the remote sensor on the unit.
2) Remove the battery from the remote control or insert a battery insulator if the battery has not
been used for a month or longer.
3) DO NOT store the remote control under direct sunlight or in high temperature environment, or it
may not function properly.
4) The battery can work for 6 months under normal conditions. If the remote control doesn’t work,
change the battery.
5) Use“button shaped” lithium battery “CR2025”(3V) only.
&1016TGEJCTIGFKUCUUGODNGJGCVQTGZRQUGVJGDCVVGT[VQſTG
7) Insert the battery in proper direction according to the ( + ) and ( - ).
8) Store the battery out of children reach it can be hazardous if swallowed to avoid the risk of
accident.
7PKPUVCNN$CVVGT[
+PUVCNN$CVVGT[
Slide out the battery compartment tray
at the bottom on the back of the remote
control.
Use button-shaped lithium battery
CR2025 (3V)” only. Insert the battery
to the battery tray with proper direction
according to the (+) and (-) poles.
PULL OUT
8
PUSH IN
6WTP1P1HHVJG2QYGT
9JGP2CTMKPI$TCMG#RRNKGF
1. Press the [ VOL ] knob to turn on the unit.
The unit will go back to the last source
used prior to the radio being powered off.
2. When on, press the [ VOL ] knob to
“Standby Mode” the unit.
3. When on, long press the [ VOL ] knob to
turn off the unit.
+ H 24- 59 ECDNG KU EQPPGEVGF VQ JCPF
brake switch, the video display of the TFT
monitor will be controlled by driving status,
system setup and input video sources.
2. When the car is moving forward, and a
video source is being played, the screen
will display a warning disclaimer and a
blank screen. The warning screen will
prevent the driver from watching images.
/WVG
Pressthe [ VOL ] knob to mute the sound.
Note:
Ć 3
U H V V L Q J W K H > 92 / @ N Q R E D J D L Q R U
DGMXVWLQJYROXPHZLOOXQPXWH
9CNNRCRGT
1. Long press the blank area of the main
menu.
#FLWUVVJG8QNWOG
Rotate the [ VOL ] knob to increase or
decrease the volume level.
The adjustable range of volume is 0 to 50.
2NC[KPI5QWTEG5GNGEVKQP
1. Press the =
] button on the panel to
show main source menu.
2. Touch desired icon on the bottom of the
screen to enter corresponding working
mode, such as Disc, Navi, Radio, etc.
Drag left/right to scroll.
9JGP8GJKENGKU2WVKP
4GXGTUG
2. Select a source from:
= )CNNGT[? VQ XKUKV VJG ICNNGT[ QH OQDKNG
storage.
[Live wallpapers]: to show the wallpapers
with animation stored in the unit. Drag up/
down to scroll.
[Wallpapers]: to show the wallpapers
stored in the unit. Drag left/right to scroll.
3. Select desired picture to view, touch [Set
YCNNRCRGT?QT=1-?VQEQPſTOUGNGEVKQP
If the rear view video camera is connected,
the unit automatically switches to CAMERA
source during reverse driving. The unit returns
to the previous source after the vehicle has
been taken out of reverse.
9
English
Basic Operations
Disc Operation
/CKP/GPW
+PUGTVC&KUE
Press the =
] button on the panel to enter
main source menu.
Insert a disc into the slot, and the unit will
change to disc mode automatically.
English
Main menu
1
2
3
4
6
5
7
Notes:
Ŗ 2NGCUG EQPHKTO YJGVJGT VJGTG KU C FKUE KP
the unit before you insert another one.
Ŗ 6JGWPKVYKNNGZKVEWTTGPVRNC[KPIUQWTEGCPF
enter DVD mode when one disc is inserted.
Ŗ 6JG HQNNQYKPI FKUE HQTOCVU CTG UWRRQTVGF
CD-R, CD-RW, DVD-R, DVD+R, DVD-RW,
DVD + RW .
'LGEVVJG&KUE
8
1. Indicator of mobile storages.
2. Hold and drag down to show the
PQVKſECVKQPU
3. Wireless signal and time indicator.
4. Enter settings menu
5. Show applications list.
6. Access web browser.
7. AV Off
8. Car AV system source bar:
Touch and hold the center of the bar and
drag left/right to show more icons.
Touch desired icon to enter corresponding
mode.
#RRNKECVKQPU/GPW
Touch [
] to enter applications menu.
Press [
] on the panel to eject the disc.
Notes:
Ŗ #HVGT GLGEVKPI VJG FKUE VJG WPKV TGXGTVU VQ
another source automatically.
Ŗ + H VJG FKUE KU PQV TGOQXGF HTQO VJG WPKV
within 10 seconds, the disc will be reloaded
to prevent accidental damage.
&KUE2NC[DCEM
When a disc is inserted, the display will
show “Loading...”. For MP3/WMA or a disc
with mixed files, reading time may exceed 1
minute.
&8&2NC[DCEM/GPW
During playback, touch the screen (except top
left corner) to show control buttons.
1
1. IN-CAR
Show the Car AV applications.
2. APPS
Show the Android applications installed.
9+&)'65
Show the widget applications.
In the list menu, drag left/right to scroll.
Touch and hold an icon for more than 2
seconds to add shortcut to the desktop. To
delete the shortcut, hold it and drag to the
[
] on the bottom, and release after it
turns red.
Touch the [
] button on the panel to exit.
10
2
1.
2.
3.
4.
3
4
5
6
Return to home menu
Show more control buttons
Stop playback
Previous chapter
Fast backward (long press)
5. Play/Pause
7
Disc Operation
1. Return to home menu
2. Show more control buttons
3. Previous track
Fast backward (long press)
4. Play/Pause
5. Next track
Fast forward (long press)
6. Repeat play
English
6. Next chapter
Fast forward (long press)
7. To enter search menu
7
8
9
10
11
12
13
8. Previous page of control buttons
9. Random play
10. Repeat play
11. Select audio channel
12. Select subtitle language
13. Next page of control buttons
8
9
10
5JQYſNGNKUV
8. Hide the second line of control buttons
5JWHƀGRNC[
10. Enter EQ menu
/KZGF&KUE2NC[DCEM
8
14.
15.
16.
17.
18.
19.
14
15
16
17 18
19
Show DVD informations
Show DVD title
Select viewing angle
Show DVD menu
Progress bar
Enter EQ menu
When inserting a mixed disc, the unit will read
the disc and show the files list. For some
discs, you need to choose Music/Video/Photo
to play back.
1
2
3
4
%&2NC[DCEM
Insert a CD in the disc slot, and the unit will
read the disc. For some discs, you will need to
choose Music/Video/Photo for playback.
1
5
6
1.
2.
3.
4.
5.
Return to home menu
Show music list
Show video list
Show photo list
File/Folder list
Drag the list up/down to scroll.
6QWEJCſNGPCOGVQXKUKVKV
6. Enter search menu
2
3
4
5
6
11
Disc Operation
When viewing a picture, touch the screen
(except top left corner) to show control
buttons.
English
1
0QVG
If you do not select Repeat on, when the
entire disc or TITLE playback has finished,
the system will stop. If no other control, after 5
minutes the unit will turn into standby mode.
4CPFQO6TCEM2NC[DCEM
HQT
%&8%&/29/#1PN[
2
3
4
5
6
1. Return to home menu
2. Play/Pause
<QQOQWV
<QQOKP
5. Rotate counterclockwise
6. Rotate clockwise
* Video/Audio playback reference DVD/CD
playback.
5VQR2NC[DCEM6GORQTCTKN[
1. D u r i n g p l a y b a c k , p r e s s
to pause
playback. The sound will be muted.
2. Press to continue playback.
5GNGEV&GUKTGF6TCEM%JCRVGT
Press
or
to skip to the previous or next
track/chapter.
(CUV(QTYCTF$CEMYCTF
&WTKPI2NC[DCEM
Press and hold
or
button to fast
backward or forward during playback.
During the fast forward or backward operation,
the volume will be muted.
4GRGCV
During playback, press
select repeat playback.
Ŗ &GHCWNVUGVVKPIKUQHH
12
button on screen to
You can play all the tracks in random order.
1. During playback, press [
] button on the
screen to select random playback.
2. Press again to select normal playback.
5GCTEJ
For DVD/VCD:
6QWEJ=)QVQ?QPVJGEQPVTQNDCT
2. Input the chapter number.
6QWEJ=1-?VQEQPſTO
For Mixed disc:
] icon.
1. Touch [
+PRWVVJGſNGPCOG
6QWEJ=&QPG?VQEQPſTO
&8&#WFKQ5GNGEV
Press [
] button to select audio language to
listen if the DVD has multiple audio languages.
8%&#WFKQ5GNGEV
Press [
] button to select audio channel to
listen (L, R, Stereo).
&8&5WDVKVNG5GNGEV
Press [
] button to select the subtitle
language to show if the DVD has multiple
language subtitles.
&8&6KVNG5GNGEV
Touch [ T ] button to display title or chapter
list, touch desired title to play.
Radio Operations
Select [Radio] on the main menu to enter
radio mode.
2
3
Touch the [ ] button to select one radio
band among FM1, FM2, FM3, AM1 and AM2.
English
1
5GNGEV1PG4CFKQ$CPF
/CPWCN6WPKPI
During manual tuning, the frequency will be
changed in steps.
] or [
] button on the
Touch the [
operation bar to tune in a lower/higher station.
4
1.
2.
3.
4.
5.
6.
7.
8.
9.
5
6
7
8
9
Return to home menu
Preset stations list
Current frequency
Preset stations of current band
Touch 1~6 to listen to preset station.
Show more control buttons
Tune backward
Auto tune backward. (long press)
Search and store preset stations
automatically
Tune forward
Auto tune forward. (long press)
Band switch
#WVQ6WPKPI
Hold the [
] or [
] button on the operation
bar for more than 2 seconds to seek a lower/
higher station.
To stop searching, repeat the operation above
or press other buttons having radio functions.
Note:
:KHQ D VWDWLRQ LV UHFHLYHG VHDUFKLQJ VWRSV
DQGWKHVWDWLRQLVSOD\HG
#WVQ5VQTG
1PN[UVCVKQPUYKVJUWHſEKGPVUKIPCNUVTGPIVJYKNN
be detected and stored in the memory.
To start automatic station search, touch the
] button on the operation bar.
[
To stop auto store, press other buttons having
radio functions.
Note:
$IWHU DXWR VWRUH WKH SUHYLRXV VWRUHG VWDWLRQV
ZLOOEHRYHUZULWWHQ
10
11
12
13
14
15
10. Hide the second line of control buttons
11. Show RDS options
12. Save stations manually
13. To receive local / distant radio stations
)QVQUVCVKQPD[KPRWVVKPIHTGSWGPE[
15. Enter EQ menu
/CPWCN5VQTG
1. When one expected radio station has
] button on the
been detected, touch [
operation bar to show the preset station
store list.
2. Touch to select an item on the list to store
the current station in the memory.
3. Touch top left of the screen to exit.
13
English
Radio Operations
SD/USB Operations
4GECNNVJG5VQTGF5VCVKQPU
7UKPICP5&%CTF
Method 1:
Touch the 1~6 on the left of screen to listen to
the preset station of current band.
1. Open the card slot cap, insert an SD card
into the corresponding slot, the unit will load
VJGſNGUCWVQOCVKECNN[
6QTGOQXGVJGECTF[QWUJQWNFſTUVUGNGEV
another source, in order to avoid damaging
the card, press the card slightly, and take
off the card after it pops out.
Method 2:
1. Touch [ ] button on the screen to show
the preset stations list.
2. Select a band
3. Touch a station on the list to listen to.
4. Touch top left of the screen to exit.
.QECN5GGMKPI
When LOCAL seeking is on, only radio
stations with strong radio signal will be be
received.
To open LOCAL function, touch [
] button
on the operation bar, then touch the [
]
button to select “Loc” or “DX”.
Note
7KH QXPEHU RI UDGLR VWDWLRQV WKDW FDQ EH
UHFHLYHG ZLOO GHFUHDVH DIWHU WKH /RF VHHNLQJ
PRGHLVRQ
7UKPI75$&GXKEG
1. Connect your USB device to the USB
cable.
When connecting a USB device, the unit
YKNNTGCFVJGſNGUCWVQOCVKECNN[
2. To remove the USB device, you should
ſTUVUGNGEVCPQVJGTUQWTEGKPQTFGTVQCXQKF
damaging the USB device.
/WUKE2NC[DCEM
Select [Music] on the applications menu, the
unit will display all the music on the mobile
storages.
1
2
-G[5GCTEJ
Touch [
] button on the operation bar to
show key search menu.
Touch the keypad to input the frequency,
VQWEJ=1-?VQIQVQVJGUVCVKQPFKTGEVN[
3
4
5
6
Touch [
14
] to clear all the digits.
7
1. Return to home menu
5GNGEVſNGUQWTEG
.KUVVJGſNGUD[UQPIPCOG
Touch a song to start play.
.KUVVJGſNGUD[CTVKUV
.KUVVJGſNGUD[CNDWO
6. Show the folders
7. List window
Drag up/down to scroll.
Touch an item to select.
8. Enter search menu.
8
SD/USB Operations
5GNGEV/WUKED[#TVKUV
10
1. Touch [Artists] on the left of the screen.
2. Touch an artist shown on the list.
3. Select a song to play.
5GNGEV/WUKED[#NDWO
11
12
13
14
15
9. Return to home menu
10. Show list menu
11. Show more control buttons
12. Previous track
Fast backward (long press)
13. Play/Pause
14. Next track
Fast forward (long press)
15. Repeat play
1. Touch [Albums] on the left of the screen.
2. Touch an album shown on the list.
3. Select a song to play.
5GNGEV/WUKED[5QPI0COG
1. Touch [Songs] on the left of the screen.
2. Select a song to play.
8KFGQ2NC[DCEM
Select [Video] on the applications menu,
the unit will display all the video files on the
storages.
During playback, touch the screen(except top
left corner) to show control buttons.
1
16
17
2
18
16. Hide the second line of control buttons.
5JWHƀGRNC[
18. Enter EQ menu.
2NC[2CWUG
3
When playing, press [ ] button to pause, and
the sound will be mute.
Press [ ] button to play.
1. Return to home menu
2. Back
3. Folder/File list
Drag up/down to scroll, touch to access.
2TGXKQWU0GZV6TCEM
Press
track.
or
button to go to previous or next
(CUV(QTYCTFKPIQT4GXGTUKPI
Press and hold
/ forward.
or
button to fast backward
4
5
6
7
8
9
15
English
9
English
SD/USB Operations
4. Show more control buttons
5. Stop playback
6. Previous chapter
Fast backward (long press)
7. Play/Pause
8. Next chapter
Fast forward (long press)
9. Enter EQ menu
)CNNGT[1RGTCVKQPU
5GNGEV=)CNNGT[?QPVJG#225OGPW
2. Select one gallery to show the picture list.
3. Touch to view it.
10
10.
11.
12.
13.
11
12
13
Show previous page of control buttons
Enter search menu
Repeat play
Random play
Notes
Ć '
LVFRQQHFW 86% VWRUDJH GHYLFHV IURP WKH
XQLWZKHQQRWLQXVH
Ć 8VHDQRSWLRQDOFDEOHWRFRQQHFWWKH86%
DXGLR SOD\HU86% PHPRU\ DV DQ\ GHYLFH
FRQQHFWHG GLUHFWO\ WRWKHXQLWZLOOSURWUXGH
RXWIURPWKHXQLWDQGPD\EHGDQJHURXV
Ć 'RQRWXVHXQDXWKRUL]HGSURGXFWV
UUKPICP#PFTQKFOQDKNG
RJQPGCUC75$UVQTCIG
FGXKEG
If you want to use your Android mobile phone
as a USB storage device.
1. Connect your Android mobile phone to the
unit with a USB cable.
2. Set USB connection type of your mobile
phone to “Mount SD card”.
* If you select “Charge only”, it won’t be
recognized by the unit.
3. In the setting menu of the unit, select
“Storage”, then “Mount USB disk”.
16
Drag left/right to scroll.
Touch the top right corner to delete the
photo.
Touch top left corner to back.
The Bluetooth allows you to utilize your car’s
built-in audio system for handsfree wireless
mobile phone or music communication. Some
Bluetooth mobile phones have the audio
features, and some portable audio players
support Bluetooth feature. This system can
play audio data stored in a Bluetooth audio
device. The car stereo with Bluetooth will be
able to retrieve phonebook contacts, received
calls, dialed calls, missed calls, incoming calls,
outgoing call and listen to music.
Notes:
Ć 7KLVV\VWHPZLOOQRWRSHUDWHRUPD\RSHUDWH
LPSURSHUO\ ZLWK VRPH %OXHWRRWK DXGLR
SOD\HUV
Ć 7KHXQLWFDQQRWJXDUDQWHHWKHFRPSDWLELOLW\
RIDOOPRELOHSKRQHVWRJHWKHUZLWKWKHXQLW
Ć $XGLR SOD\EDFN ZLOO EH VHW WR WKH VDPH
YROXPH OHYHO DV VHW GXULQJ WHOHSKRQH FDOO
7KLVFDQFDXVHSUREOHPVLIH[WUHPHYROXPH
OHYHOLVVHWGXULQJWKHWHOHSKRQHFDOO
Touch [BT Phone] on the main menu to enter
Bluetooth Phone mode.
1. If the Bluetooth function of the unit is off,
the unit will ask you to turn it on.
(Default setting is on)
2. Turn on Bluetooth function of your mobile
phone.
3. Search for new Bluetooth devices on your
phone. Select the model name from the
pairing list on the mobile phone, and enter
password (Default password: 0000)
Or touch [
] button on the screen to
search mobile Bluetooth devices.
After connect successfully, the unit show
following menu.
English
Bluetooth Operations
/CMKPIC%CNN
Ŗ &KCN0WODGT
1. Input numbers by digit-keys on the screen.
Touch [
] to clear the digits.
2. Touch [
] button to dial out.
3. Touch [
] button to terminate call.
Ŗ #PUYGTKPICECNN
You can answer an incoming call by pressing
] button.
the [
Touch [
] button to reject an incoming call.
Ŗ &KUEQPPGEV
To disconnect a paired device, touch
[Disconnect] button.
%CNNHTQO2JQPGDQQM
1. Touch [
] button to show your phone
book.
]
2. Select a number to select and touch [
button to dial out.
] to search a contact name.
3. Touch [
17
English
Bluetooth Operations
: Previous track
: Play/Pause
%CNN*KUVQT[
: Next track
Access Call History by touching [
] button.
$NWGVQQVJ5GVVKPIU
Touch [
menu.
Then select a number from Dialled/Missed/
Received calls.
$NWGVQQVJ#WFKQ5VTGCOKPI
9JCVKUCWFKQUVTGCOKPI!
Audio streaming is a technique for transferring
audio data such that it can be processed
as a steady and continuous stream. Users
can stream music from their external audio
player to their car stereo wirelessly and listen
to the tracks through the car’s speakers.
Please consult your nearest dealer for more
information on the product of wireless audio
streaming transmitter offered.
CAUTION
2NGCUG CXQKF QRGTCVKPI [QWT EQPPGEVGF
OQDKNG RJQPG YJKNG CWFKQ UVTGCOKPI CU
VJKUOC[ECWUGPQKUGQTVJGUQWPFVQEWVKP
CPFQWVQPRNC[DCEM
#WFKQ UVTGCOKPI OC[ QT OC[ PQV TGUWOG
C H V G T V G N G R J Q P G K P V G T T W R V C U V J K U K U
FGRGPFGPVQP[QWTOQDKNGRJQPG
Touch [BT Music] button to play music on your
mobile phone.
18
] button to show Bluetooth setting
)#205GVVKPIU
0QVG
Contact the manufacturer for latest compatible
)FGXKEGU
7. Must setup following options: Name, APN,
MCC, MNC.
Touch the dialogue box to show keypad,
and input your desired name.
APN according to the operator to
determine.
User set the APN to access the internet.
+PUGTVVJG)FQPING
2. Select [
] on the main menu to enter
the setting interface.
3. Click the [Wireless & networks] to enter
the Wireless & network settings and click
[more...].
6JGWPKVYKNNFGVGEV[QWT)OQFWNGVQ
determine the MCC and MNC.
8. Then press the [
] button and click the
“Save” button.
4. Click [Mobile network] to enter the Mobile
network settings.
5GNGEVVJG#20)KEQPCRRGCTUQPVJG
top right corner of the taskbar.
5. Click the [Access Point Names].
6. Press the [
] button on the front panel,
then click the [New APN].
19
English
Internet
English
Internet
9K(K5GVVKPIU
%TGCVG9K(K*QVURQV
This unit generally supports the following:
realtek 8188cu, 8188eu.
User can use the unit to create a personal
Wi-Fi hotspot. All your other Wi-Fi enabled
devices will then be able to connect to this
hotspot and share the primary internet
connection.
1. Connect the WiFi dongle to the unit.
Touch the [
] icon on the main menu
to enter setting menu, and turn on Wi-Fi (if
necessary).
%QPPGEVVJG9KſCPF)FQPINGVQVJG75$
slots on the rear of the unit.
Refer to “Device Connections”.
2. Touch the [
] icon on the main
menu, and drag down to “WIRELESS &
0'6914-5Œ
2. Touch [
WiFi setting menu.
] to enter
3. Select “More...”.
3. Touch an available WiFi hotspot.
4. Touch “Tethering & portable hotspot”.
4. Touch [
] and input the
RCUUYQTFVQWEJ=%QPPGEV?VQEQPſTO
5. Touch “Portable Wi-Fi hotspot”.
5. After successfully connected, the [
]
icon appears on the top right corner of the
screen. Now you can access internet.
20
After setting done, you can touch “Set up WiFi hotspot” to modify the settings.
Other Mode
If your device can’t connect to the Wi-Fi
hotspot:
1. Check the Wi-Fi network.
The
icon will appear on the top left of
the screen after setting successfully. If not,
check your Wi-Fi dongle connection and
the Hotspot settings.
%JGEMVJG)PGVYQTM
If the signal indicator
on the top taskbar
turns grey, the network is unavailable,
EJGEM[QWT)FQPINGEQPPGEVKQPCPF)
settings.
3. Be sure to input the correct password.
4. There may be too many devices connected
to the hotspot.
0CXKICVKQP1RGTCVKQPU
To navigate by the unit, simply select the
desired navigation application on the main
menu. Then navigate by the touch screen.
#7:1RGTCVKQPU
Select [Aux In 1] on the main menu to visit
front auxiliary device, and select [AUX IN 2] to
enter rear auxiliary device.
5VGGTKPI9JGGN%QPVTQN
Select [SWC] on the main menu to enter SWC
setting menu.
8KUKV9GDUKVG
1. Touch number button to select a SWC
button.
To access the internet, you must setup
“wireless & network” in system settings menu.
] on the main menu to view a
Select [
website.
Touch the dialog box on the upper side of
the screen to show keypad. Input the website
CFFTGUU CPF VQWEJ =)Q? VQ XKUKV KV &TCI VJG
web page to scroll.
'OCKN
Select [Email] or other mail software on the
applications menu.
2. Select a function.
3. Press each individual steering wheel control
button for each corresponding function.
4. Touch [Study] to program.
1PEGVJGſPCNUVGGTKPIYJGGNEQPVTQNDWVVQP
is programmed, the functions are saved
and the programming will end.
6. Touch [ Reset ] to reset the programming.
First you must setup an account, or sign into
an existing account. Enter your Email address
and password. Then you can send/receive
E-mails through the unit.
21
English
Internet
Other Mode
English
K/QFG
5KTK(WPEVKQP
1. Turn on the bluetooth function of both the
unit and smartphone.
Make sure the smartphone has internet
access (iPhone 4S, iPhone 5, iPhone 5S,
K2CF5COUWPI)CNCZ[GVE
2. Turn on the ‘Siri’ application of iPhone/iPad
or ‘Talk Assistant’ application of Android
phones.
3. Pair your phone to the unit through the
Bluetooth module.
4. Touch [ ] to select i-Mode on.
5. When speaking through the external
microphone of the unit, voice signals will be
transferred to the phone.
The phone will process the data and search
the relative information on local memory or
the internet, then transfer the result back to
the unit.
)QQING%CNGPFCT
%QPſIWTCVKQP
1. Ensure the network is available, refer to the
<Internet>.
2. Touch [
] icon on the main menu, select
[Date & time] in the settings menu, then set
the correct local time.
3. Touch [
] icon on the main menu to
enter applications menu and select “APPS”.
Select the Calendar icon to show the
following menu.
Touch the
icon on the top right corner,
the unit will pop up the following menu when
[QWWUGVJG%CNGPFCTHQTVJGſTUVVKOG
Touch "Add account".
5GNGEVő)QQINGŒ
22
Other Mode
6QWEJ=1-?DWVVQPVQEQPſTO
&GNGVG)OCKN#EEQWPV
1. Touch [
] icon on the main menu to
enter settings menu, slide down the screen
VQſPF)QQING
6QWEJ=)QQING?KH[QWNQIIGFQPCIQQING
account before, the address appears.
Select the mail address to show the details.
Press the [
] button on the front panel
to pop up the sub-menu.
Touch [
?VQſPKUJUGVVKPI
Select "Remove account" to delete this
account.
4. Select Calendar in APPS menu to show the
calendar and the arrangements. You can
select a date to view the details.
To add a new event, touch the
icon
on the top right corner, or touch [ + ] icon on
the blank area.
23
English
If you want to establish a new account,
please touch [New].
If you want to use an existing account,
please touch [Existing].
After select “Existing”, input your mail
account and password. Then touch [ ].
System settings
Select [
] on the main menu to enter
English
settings mode.
Drag up/down to scroll the options.
W+4'.'550'6914-5
To setup the wireless configuration, such as
9K(K820)PGVYQTM
(QT)#20UGVVKPIUTGHGTVQő+PVGTPGVŒ
&'8+%'
To setup the Sound, Display, and Storage,
Applications management.
CAR
8KFGQ
Video input option: Choose video input
mode
Rear camera option: Choose rear camera
display mode.
PERSONAL
To Setup Location services, Security and
Language & keyboard, etc.
ACCOUNTS
Accounts management.
)GPGTCN
Lighting: Choose button backlight.
Radio region: Choose radio region.
Radio range: Choose radio Frequency:
local or distance.
Blackout: Choose screen blackout off, 10s
or 20s.
Beep:Turn on or off button beep sound.
Calibration: To calibrate the screen.
&8&TCVKPI
DVD audio: Choose DVD audio language.
DVD subtitle: Choose DVD subtitle
language.
Disc menu: Choose DVD menu language.
Set password: To set password for rating.
+PRWVFKIKVRCUUYQTFVQWEJ=Ũ?VQEQPſTO
touch [DEL] to delete a number inputted.
Touch [X] to exit.
Rating level:To setup the rating level.
-KFUCHG)2)2)2)440%
Adult.
+PRWV)CKP
Choose input volume gain of each source.
24
SYSTEM
To setup Date, time and Accessibility, etc.
Sound setting
English
Select [EQ] on the menu to enter sound
setting mode.
Touch to select a preset EQ on upper side
of the screen from Flat, Pop, User, Techno,
4QEM%NCUUKECPF,C\\
Touch [ ] or [ ] to adjust the level, Center
Frequency and Q for Bass/Mid/Treb.
Touch [
] to enter Fader/Balance/
Subwoofer setting menu.
Touch [ ] or [ ] to setup Balance, touch
[ ] or [ ] to setup Fader.
5WD9QQHGT
Sub woofer: Turn on/off the sub woofer
playback.
5WDYQQHGTſNVGT6QWEJ [ ] or [ ] to select
subwoofer Filter.
Sub woofer Level: Touch [ ] or [ ] to adjust
subwoofer Level.
25
Device Connections
English
Notes of connection
Ŗ This unit is designed to be used in a vehicle with a 12-volt battery and negative grounding.
Before installing this unit to a recreational vehicle, a bus, or a truck, make sure the battery
voltage is appropriate for this unit to be used, otherwise, have a professionally installed
transformer to convert the output voltage to 12V.
Ŗ 6 Q CXQKF UJQTV EKTEWKV KP VJG GNGEVTKECN U[UVGO GPUWTG VJCV VJG PGICVKXG DCVVGT[ ECDNG KU
disconnected before installation.
Ŗ To prevent short circuit in the wiring and damaging to this unit, secure all wirings with cable
clamp or adhesive tape. Route the wirings in a secured, out of heating place without touching
any moving parts such as gear shift, handbrake, and seat rails to prevent the wiring insulation
being melted / worn off.
Ŗ Never pass the yellow power cord through the installation hole into the engine compartment and
connect to the car battery. Otherwise, a high possibility of serious short circuit to the electrical
system may occur.
Ŗ If you need to replace the fuse, please replace with a 15A fuse. Using no fuse or a fuse with an
KORTQRGTTCVKPIOC[ECWUGFCOCIGVQVJGWPKVQTCRQVGPVKCNſTG+HCRTQRGTHWUGKUKPUVCNNGFCPF
problems continue to occur, please contact your local retailer or installer.
Ŗ DO NOT connect other equipments with the car battery to avoid battery overheating.
Ŗ Please make sure all the wiring connections & the cables of the speakers are well-insulated.
Otherwise, this unit may be damaged by short circuit.
Ŗ If there is no ACC available, please connect ACC lead to the power supply with a switch.
Ŗ +HCPGZVGTPCNRQYGTCORNKſGTKUEQPPGEVGF RNGCUG FQPVEQPPGEV 2%106NGCF VQVJGRQYGT
NGCFQHVJGGZVGTPCNRQYGTCORNKſGTQVJGTYKUGGNGEVTKEURCTMQTQVJGTFCOCIGOC[TGUWNV
Ŗ 0GXGTITQWPFVJGURGCMGTQWVRWVVQRTGXGPVVJGFCOCIGVQVJGDWKNVKPRQYGTCORNKſGT
26
Device Connections
English
Parking Brake Cable Connections
Green/White Wire
Back Up Camera Connections
27
English
MICROPHONE
Black
3G/WIFI
3G/WIFI
White
Black
RADIO ANT
Red(R)
FRONT OUT
White(L)
Black
Red(R)
REAR OUT
White(L)
Grey
Yellow
Green
Black
GPS ANTENNA
PARKING
Orange
REVERSE
Pink
Black
Key A
Key B
SWC
GND
VIDEO OUT
Black
Blue
Red(R)
White(L)
SUBWOOFER
PIN
PIN
PART B
Black
1
NC
1
Rear R+
2
NC
2
Rear R-
3
NC
3
Front R+
4
Battery +12V
4
Front R-
5
P.ANT
5
Front L+
6
Illumination
6
Front L-
7
ACC
7
Rear L+
8
GND
8
Rear L-
AUX IN
Red
VIDEO IN
Yellow
Black
Yellow
CAMERA VIDEO
Black
PART A
Device Connections
9KTKPI&KCITCO
28
Black
Microphone
Troubleshooting
The following checklist can help you solve the problems which you may encounter when using the
unit. Before consulting it, check the connections and follow the instructions in the user manual.
2QUUKDNGECWUG
Car ignition is not on.
Cable is not properly
The unit will not switch on.
connected.
Fuse is burnt.
Volume is set at minimum or
No sound
the mute function is on.
The unit or screen does
The unit system is unstable.
not function normally.
&8&OQFG
5QNWVKQP
Turn your car key in the ignition.
Check cable connection.
Replace fuse with a new fuse of the
same capacity.
Check the volume or switch the mute
function off.
Press the RESET button.
Disc must be inserted with the label
The appliance will not play The disc is inserted incorrectly.
side facing up. Clean the disc and
discs.
The disc is dirty or damaged.
check for damage. Try another disc.
Adjust mounting angle to less than
Sound skips due to
/QWPVKPICPINGKUQXGTŇ
Ň
vibration.
Mounting is unstable.
Mount the unit securely with the
supplied parts.
670'4OQFG
The antenna is not connected
Connect the antenna properly.
Unable to receive stations.
properly.
Poor quality reception of The antenna is not fully
Fully extend the antenna and if
radio station.
extended or it is broken.
broken, replace it with a new one.
The battery cable is not
Connect the permanent live on the unit
Preset stations are lost.
properly connected.
to the permanent live on the vehicle.
75$5&OQFG
The memory card or USB
Insert SD card / USB the other way
Unable to insert USB
device has been inserted the
around.
device or SD card.
wrong way round.
%JGEMVJCVVJG75$FKUMſNGU[UVGO
is in FAT or FAT32 format. Due to
The USB device or SD
NTFS format is not supported. different formats, some models of USB
card cannot be read.
storage devices or MP3 players may
not be read.
4GOQVGEQPVTQN
The remote control is not
working or does not work The battery is low or empty.
Change the batteries.
properly
29
English
2TQDNGO
)GPGTCN
English
6SHFL¿FDWLRQV
)GPGTCN
Reference Supply Voltage .................................................................... 12V(DC)
Operating Voltage Range ........................................................10.5 - 15.8V(DC)
Max Operating Current .................................................................................15A
)TQWPFKPI5[UVGO .................................................... Car Battery Negative Pole
Dimensions(WXHXD) ......................................................... 178X101.5X159mm
Weight(main unit) ...................................................................................... 1.9kg
FM
Signal Noise Ratio ................................................................................ ŮF$
Usable Sensitivity(S/N=30dB) ..........................................................ŭF$z8
Frequency Response(-3dB) ..........................................................*\`-*\
Station Seeking Level .................................................................... `F$z8
Distortion .............................................................................................. ŭ
5VGTGQ5GRCTCVKQP
-*\ ..................................................................... ŮF$
Antenna Impedance ...................................................................................š
AM
Usable Sensitivity(S/N=20dB) ..........................................................ŭF$z8
Frequency Response(-3dB) ..........................................................*\`-*\
LCD
Screen size ............................................................................. 6.2 inches(16:9)
Display resolution ........................................................................800X480dots
Contrast radio ............................................................................................. 400
Brightness.......................................................................................... 400cd/m2
&8&2NC[GT
Signal / Noise Ratio .............................................................................. ŮF$
Dynamic Range .................................................................................... ŮF$
Distortion(line out) ................................................................................ ŭ
Frequency Response(±3dB) .......................................................*\`-*\
Maximum Output Power ........................................................................4×45W
Load Impedance ...........................................................................................š
#7:+0
Distortion .............................................................................................. ŭ
Frequency Response(±3dB) .......................................................*\`-*\
Audio Input Level ...................................................................................500mV
#WFKQ
Audio Output Impedance ......................................................................... -š
Audio Output Level ....................................................................... 2Vrms(Max)
8KFGQ
Normal Video Input Level(CVBS) .......................................................1.0±0.2V
Video Input Impedance...............................................................................š
Video Output Impedance ............................................................................š
Video Output Level .............................................................................1.0±0.2V
'PXKTQPOGPV
Operating Temperature .............................................................-10°C ~ +60°C
Storing Temperature..................................................................-20°C ~ +70°C
Operating Humidity ..................................................................... `4*
Storing Humidity ......................................................................... `4*
0QVKEG
When the unit is operated in extreme conditions, such as operated with maximum power output
for a long time, or the temperature is over 70°C, it will enter heat protection mode, the volume will
automatically be lowered. This is normal.
30
One Year Limited Warranty
9CTTCPV[2GTKQF
Rydeen warrants this product for a period of one (1) year from the original purchase date with
proof of purchase.
9CTTCPV[%QXGTCIG
6JKUYCTTCPV[EQXGTUCNNFGHGEVUKPOCVGTKCNCPFYQTMOCPUJKRGZEGRVCUURGEKſGFDGNQY
1. Installation by anyone other than an authorized Rydeen Mobile Retailer voids the warranty.
2. Any products distributed outside of the USA by Rydeen North America Inc. (Rydeen) or which is
not purchased in the USA or Canada unless the product is purchased through the USA Military
Exchange Service.
3. Any product(s) which are purchased from an unauthorized retailer (in store or online).
4. Any products in which the serial number label or the model number label are removed, torn,
OQFKſGFQTTGRNKECVGF
5. Any damage defects or malfunctions resulting from any of following:
a) When defect occurs during shipment of product (freight carrier’s responsibility).
b) Installation or removal of product.
c) Accidents, act of nature, misuse, abuse, neglect, unauthorized product modification or
failure to follow product owner’s manual instructions.
d) Any repair or attempt to repair without RYDEEN authorization.
e) Any other cause which is not related to product defect.
f) Any cosmetic damages due to normal wear and tear.
g) Any consumable items (such as fuse or batteries).
If any problems develop with your Rydeen products during or after the Limited Warranty Period, or
if you have any questions regarding the operation or installation of the product, you should contact
your Rydeen retailer. If the problem or your question is not handled to your satisfaction, please
contact Rydeen Customer Service Department at 1-877-777-8811 (within the USA only) Monday (TKFC[DGVYGGP#/VQ2/2CEKſE5VCPFCTF6KOGQTXKUKVYYYT[FGGPOQDKNGEQO
If warranty service is required for your Rydeen product:
1. Please call Rydeen Customer Service Department and obtain a Return Authorization Number
(“RA”) Number.
2. Please pay for any shipping charge to Rydeen Customer Service Department. Rydeen will
pay the return shipping charge, if the repair or service was performed during the warranty
period. Rydeen will ship freight collect (recipient is responsible for shipping charge) if Rydeen
FGVGTOKPGVJGUGTXKEGYCURGTHQTOGFQWVUKFGQHYCTTCPV[RGTKQFQTGZENWUKQPUFGUETKDGFCDQXG
warranty coverage. Rydeen will not accept warranty service requests from outside of the U.S.A.
even if product was purchased in the USA.
3. Please include a copy of your original purchase receipt including Rydeen product model
number, purchase date, retailer name/address and a RA Number whenever your product is sent
for warranty service.
4. Rydeen will pay for all labor and material expenses for covered product during warranty period.
5. Shipping address for Rydeen Customer Service Department is following:
Rydeen North America Inc. (a manufacturer of Rydeen products), 2701 Plaza Del Amo, Unit 705,
Torrance, California 90503, USA
31
English
Rydeen North America Inc. (a manufacturer of “Rydeen” products) warrants this product (DVA6)
only to the original purchaser as described following:
English
FCC Compliance Statement
This device complies with Part 15 of the FCC interference limits for Class B digital devices
for home or office use. These limits are designed to provide more reasonable protection
against harmful interference in a residential installation and are more stringent than “outdoor”
requirements.
Operation of this device is subject to the following conditions:
1. This device may not cause harmful interference, and
2. This device must accept any interference received, including interference that may cause
undesired operation.
Disclaimer
The information in this user manual is for general guidance. Images in the manual may not
represent the exact images that are displayed in the operating system software. Some features
described in the manual may not be available or the features described may be limited, depending
on the updated software or any other reasons.
32
U\GHHQPRELOHFRP
Rydeen North America Inc.
dba Rydeen Mobile Electronics
2701 Plaza Del Amo, Unit 705, Torrance, California 90503 USA
Phone: 1-877-777-8811 Fax: 1-310-943-3778
Copyright © 2013 Rydeen North America Inc. All Rights Reserved.
RYDEEN ® is a registered trademark of Rydeen North America Inc.
These materials are protected by copyright law and international treaties. Any unauthorized use, reproduction or distribution
QHVJGUGOCVGTKCNUQTCP[RQTVKQPJGTGKPYKNNTGUWNVKPUGXGTGEKXKNCPFETKOKPCNRGPCNVKGUCPFſPGU8KQNCVQTUYKNNDG
prosecuted to the fullest extent of the law.
P/N: 127075006163


