1
•_
n'
41
'
=
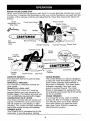
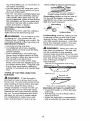
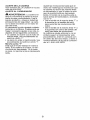
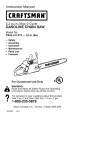
I (RaFTSMSN°I
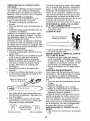
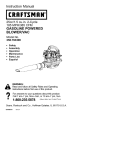
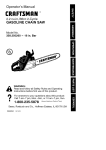
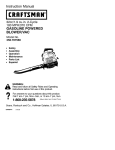
2:3 cu: in.i38cc 2-Cycle
GASO UN E C HAl N SAW
Model No.
358.381700
o
o
°
-
- 16 in. Bar
Safety
Assembly
Operation
Maintenance
Parts List
• Espaftol, p 29
Read and follow all Safety Rules and Operating
WARNING:
Instructions before first use of this product.
a
For answers to your questions about this product:
Call 7 am-7 pm, Mon-Sat; Sun, 10 am-7 pm
1.800.235.5878
(Hou,s,_sted
oreCentra,
T,mo}
:Sears Brands Management
Corporation,
:115673227
_ _
Hoffman Estates, IL 60179 U.S.A.
_
Rev. 1 2/10/14 KAP .....................................
_
SASN42OP
Warranty
Safety Rules
Assembly
Operation
Maintenance
Service and Adjustments
....... : 2
3
:7
:
:8
15
19
Storage ......
Troubleshooting Table
:Emissions Statement
Parts List
Spanish
Parts & Ordering
22
23
25
27
29
Back Cover
CRAFTSMAN TWO YEAR FULL WARRANTY
FOR TWO YEARS from the date of purchase, this product is warranted against any
defects in material or workmanship. A defective product will receive free repair or
replacement if repair is unavailable.
ADDITIONAL LIMITED WARRANTY ON ENGINE CRANKSHAFT
FOR THE THIRDTHROUGHTENTH YEARfrom date of purchase, the engine crankshaft
in this product is warranted against any defects in material or workmanship. With
proof of purchase, a defective engine crankshaft wil! be replaced. This additional
warranty covers only the engine crankshaft, and does not apply to any other engine
component. You must pay the labor cost of crankshaft installation.
For warranty coverage details to obtain free repair or replacement, visit the
website: www.craftsman.com
This warranty covers ONLYdefects in material and workmanship.
Warranty coverage does NOT include:
• Expendable items that can wear out from normal use within the warranty period,
including but not limited to chain bar, chain, filters or spark plug.
° Product damage resulting from user attempts at product modification or repair
or caused by product accessories.
• Repairs necessary because of accident or failure to operate or maintain the
product according to all supplied instructions.
• Preventive maintenance, or repairs necessary due to improper fuel type, fuel
mixture, contaminated or stale fuel.
This warranty is void if this product is ever used while providing commercial services or if rented to another person.
This warranty gives you specific legal rights, and you may also have other rights
which vary from state to state.
Sears Brands Management Corporation, Hoffman Estates, IL 60179
i,illlllllnlllnlll,ll
••
i iiiiii iiiiiJJlnlU[UJ,llll,
illllllllllllll
The engine exhaust from this product contains
chemicals known to the State of California to cause
cancer, birth defects or other reproductive harm.
HII]IIIIIIIII
IIIII I]1[I
III
I
2
IIIIIIIIIII
Congratulations on making a smart purchase. Your new Craftsman product is
designed and manufactured for years of dependable operation. But like all products,
it may require repair from time to time. That's when having a Repair Protection
Agreement can save you money and aggravation.
Here's what the Repair Protection Agreement* includes;
_J Expert service by our 10,000 professional repair specialists
Unlimited service and no charge for parts and labor on all covered repairs
:_-_ Product replacement up to $1500 if your covered product can't be fixed
v' Discount of 16% from regular price of service and related installed parts not
covered by the agreement; also, 10% off regular price of preventive
maintenance check
_' Fast help by phone - we call it Rapid Resolution - phone support from a
Sears representative, Think of us as a "talking operator's manual",
Once you purchase the Repair Protection Agreement, a simple phone call is all
that it takes for you to schedule service. "You can call anytime day or night, or
schedule a service appointment online.
The Repair Protection Agreement is a risk-free purchase, tf you cancel for any
reason during the product warranty period, we wil! provide a full refund. Or, a prorated refund anytime after the product warranty period expires. Purchase your
Repair Protection Agreement today!
Some limitations and exclusions apply. For prices and additional information in the U.S,A, call 1-800-627-6655.
*Coverage in Canada varies on some items, For full details call Sears
Canada at 1-800-361-6665.
Sears Installation Service
For Sears professional installation of home appliances, garage door openers,
water heaters, and other major home items, in the U.S.A. or Canada call
1-888-331-4569.
Hearing
Protection
WARNING:
Always disconnect
spark plug wire when making repairs except for carburetor adjustments. Because a chain saw is a high-speed
wood-cutting tool, special precautions
must be observed to reduce the risk of
accidents. Careless or improperuse of
this tool can cause serious injurY.
PLAN AHEAD
• Restrict the use of your saw to adult
users who understand and can follow
safety rules, precautions, and operating instructions found in this manual.
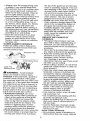
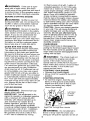
Snug
Fitting
Clothing
•3
_
! _1_
. Safety Hat
_-^
Protection
Heavy Duty
not completely and securely
° Wear protective gear. Always use '
assemb ed A ways replace bar
steel-toed safety footwear with nonchain, hand guard, or chain brake
slipsoles; snug-fitting clothing; safety
immediately if it becomes damaged,
chaps; heavy-duty, non-slip gloves;
broken or is otherwise removed.
:eye protection such as non-fogging,
MAINTAIN YOUR SAW IN GOOD
vented goggles or face screen; an
WORKING ORDER
approved safety hard hat; and sound
barriers (ear plugs or mufflers) to pro_,WARNING:
Disconnect the
tect your hearing. Regular users
spark plug before performing mainteshould have hearing checked regunance except carburetor adjustments.
larly as chain saw noise can damage
• Have all chain saw service performed
hearing.
by a qualified service dealer with the
• Secure hair above shoulder length. Do
exception of the items listed in the
not wear loose clothing or jewelry; they
MAINTENANCEsection of this manual.
can get caught in moving parts.
• Make certain the saw chain stops
° Keep all parts of your body away from
moving when the throttle trigger is
the chain when the engine is running.
released. For correction, refer to
° Keep children, bystanders, and aniCARBU RETQR ADJUSTMEi',.IT.
mals a minimum of 30 feet (t0 me° Keep the handles dry, clean, and
ters) away from the work area when
free from oil or fuel mixture.
starting and using the saw.
° Keep caps and fasteners securely
° Do not handle or operate a chain saw
tightened,
when you are fatigued, ill, or upset, or
• Nonconforming replacement compoif you have taken alcohol, drugs, or
nents or the removal of safety devices
medication. You must be in good
may cause damage to the unit and
physical condition and mentally alert. If
possible injury to the operator or byyou have any condition that might be
standers. Use only Craftsman acces _
aggravated by strenuous work, check
sories and replacement parts as recwith doctor before operating.
ommended. Never modify your saw.
° Do not start cutting until you have a
° Maintain chain saw with care.
clear work area, secure footing, and,
• Keep unit sharp and clean for better
if you are felling trees, a planned retreat path.,,:
:: ...........
: ...... ; and sater performance.
: : :
OPER_,TE :YOUR SAW SAFELY
:'
E01fow instructions for lubricating and
D0:n0teperate acha n saw with one
: : Chang ng accessories.:::
i:,
....hand. Serious injury to the operator,
° Check for damaged parts. Before further use of the chain saw, a guard or
helpers, bystanders or any combinaother part that is damaged should be
tion of these persons may result from
carefully checked to determine that it
one-handed operation. A chain saw
will operate properly and perform its
s ntended for tw0-handed use.
intended function. Check for alignment
° Operate the chain saw only in a wellof moving parts, binding of moving
ventilated outdoor area.
parts, breakage of parts, mounting and
* Do not operate saw from a ladder or
any other conditions that may affect its
in a tree.
:
operation. A guard or other part that is
° Make sure the chain will not make
damaged should be properly repaired
contact with any object while starting
or replaced by a Sears Service Center
the engine. Never try to start the saw
unless otherwise indicated elsewhere
when the guide bar is in a cut.
in the operator's manual.
o Do not put pressure on the saw at
o When not in use, chain saws should
the end of the cut. Applying pressure
be stored in a dry, high or locked-up
can cause you to lose control when
place out of the reach of children.
the cut is completed.
° When storing saw, use a scabbard or
, Stop engine before setting saw down.
carrying case.
° Hand carry saw only when engine is
HANDLE FUEL WITH CAUTION
stopped. Carry with muffler away
• Do not smoke while handling fuel or
from body; guide bar & chain projectwhile operating the saw.
ing behind you; guide bar preferably
• Eliminate all sources of sparks or
covered with a scabbard.
flame in the areas where fuel is
° Do not operate a chain saw that is
mixed or poured.
damaged, improperly adjusted, or
4
• Always have fire extinguishing tools
available if you should need them.
• Mix and pour fuel in an outdoor area
and use an approved, marked container for all fuel purposes. Wipe up
all fuel spills before starting saw.
• Move at least 10 feet (3 meters) from
fueling site before starting engine.
• Turn the engine off and let saw coot
in a non-combustible area, not on
dry leaves, straw, paper, etc. Slowly
remove fuel cap and refuel unit.
• Empty the fuel tank before storing or
transporting the unit. Use up fuel left in
the carburetor by starting the engine
and letting it run until it stops.
• Store the unit and fuel in an area
where fuel vapors cannot reach
sparks or open flames from water
heaters, electric motors or switches,
furnaces, etc.
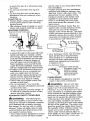
GUARD AGAINST KICKBACK
Follow all safety rules to help avoid
kickback and other forces which can
result in serious injury.
,,_/_
_;_
the top of the guide bar and the saw
chain is suddenly stopped. This sudden stopping of the chain results in a
reversal of the chain force used to
cut wood and causes the saw to
move in the opposite direction of the
chain rotation. The saw is driven
straight back toward the operator.
• Putl-ln can occur when the moving
chain contacts a foreign object in the
wood in the cut along the bottom of
the guide bar and the saw chain is
suddenly stopped. This sudden
stopping pulls the saw forward and
away from the operator and could
easily cause the operator to lose
control of the saw.
REDUCE THE CHANCE OF
KICKBACK
.....
• Recognize that kickback can happen. With a basic understanding of
kickback, you can reduce the element of surprise which contributes to
accidents.
• Never let the moving chain contact
any object at the tip of the guide bar.
• Keep the working area free from ob_
structions such as other trees,
branches, rocks, fences, stumps,
etc. Eliminate or avoid any
obstruction that your saw chain could
hit while you are cutting.
• When cutting a branch, do not let the
guide bar contact branch or other objects around it.
• Keep saw chain sharp and properly
tensioned. A loose or dull chain can
increase the chance of kickback. Fol_
low manufacturer's chain sharpening
and maintenance instructions. Check
tension at regular intervals, but never
with the engine running. Make sure
the bar nuts are securely tightened.
• Begin and continue cutting at full
speed. If the chain is moving at a
slower speed, there is greater
chance of kickback occurring.
° Use extreme caution when re-entering a previous cut.
• Do not attempt cuts starting with the
tip of the bar (plunge cuts).
• Watch for shifting logs or other forces
that could close a cut and pinch o[
fall into chain.
• Use the Reduced-Kickback
Guide
Bar and Low-Kickback Chain specified for your saw.
Avoid Pinch-Kickback:
, Be extremely aware of situations or
obstructions that can cause material
Kickback Path
Avoid Obstructions
Clear The
Working Area
_IbWARNING:
Avoid kickback
which can result in serious injury.
Kickback is the backward, upward or
sudden forward motion of the guide
bar occurring when the saw chain near
the upper tip of the guide bar contacts
any object such as a log or branch, or
when the wood closes in and pinches
the saw chain in the cut. Contacting a
foreign object in the wood can also resuit in toss of chain saw control.
• Rotational Kickback can occur
when the moving chain contacts an
object at the upper tip of the guide
bar. This contact can cause the
chain to dig into the object, which
stops the chain for an instant. The
result is a lightning fast, reverse
reaction which kicks the guide bar
Up and back toward the operator.
• Pinch-Kickback
can occur when the
the wood c_oses in and pinches the
moving saw chain in the Cut along
5
topinchthetopoforotherwise
stop
:thechain.
oDonotcutmore
thanonelogata
time.
• Donottwistthesawasthebaris
withdrawn
fromanundercut
when
bucking.
AvoidPull-In:
ing the chain if your hand slips off the
front handlebar,
- Position of front and rear handlebars,
designed with distance between handles and "in-line" with each other. The
spread and "in-line" position of the
hands provided by this design ,work
together to give balance and resistance in controlling the pivot of the
saw back toward the operator if kickback occurs.
o Reduced-Kickback
Guide Bar, designed with a small radius tip which
reduces the size of the kickback
danger zone on the bar tip, This type
of bar has been demonstrated to significantly reduce the number and seriousness of kickbacks when tested
in accordance with ANSl Bt75,1.
• Always begin cutting with the engine
at ful! speed and the saw housing
against wood.
• Use wedges made of plastic or wood.
Never use metal to hold the cut open.
MAINTAIN CONTROL
Stand tothe left of the saw
Thumb on
underside
;&
of h_,
S
_&
Elbow
locked
Tip
Guide
Ba_
Small
Radius
Large Radius I
Tip Guide Bar I
° Low-Kickback Chain, has met kickback performance requirements
when tested on a representative
sample of chain saws below 3.8
cubic inch displacement specified
in ANSI B175,t,
Low-KickbackChain
Contoured Depth Gauge
,_,,J;_,_
=.___
EtengatedGuard Link
_'_--deflects kickback
"__
_
force And allows
_-._
_
wood to gradually
"--,,j--"
ride intoCutter
CHAIN BRAKE
• Chain Brake, designed to stop the
chain in the event of kickback.
Never reverse hand positions
- A good, firm grip on the saw with both
hands wilt help you maintain control,
Don't let go. Grip the rear handle with
your right hand whether you are right
or left handed. Wrap the fingers of
your left hand over and around the
front handlebar, and your left thumb
under the front handlebar. Keep your
left arm straight with the elbow locked.
° Position your left hand on the front
handlebar so it is in a straight line
with your right hand on the rear
handle when making bucking cuts.
Never reverse right and left hand
positions for any type of cutting.
• Stand with your weight evenly balanced on both feet.
° Do not overreach. You could be
drawn or thrown off balance and lose
control of the saw.
- Do not cut above shoulder height. It
is difficult to maintain contro! of saw
above shoulder height.
KICKBACK SAFETY FEATURES
_WARNING:
WE DO NOT REPRESENTAND "YOUSHOULDNOT AS_
SUME THATTHE CHAIN BRAKEWiLL
PROTECTYOU IN THE EVENTOF A KICKBACK. Kickback is a lightning fast action
which throws the bar and rotating chain
back and up toward the operator. Kickback can be caused by allowing contact
of the bar tip in the danger zone with
any hard object. Kickback can also be
caused by pinching the saw chain along
the top of the guide bar, This action may
push the guide bar rapidly back toward
the operator. Either of these events may
cause you to lose control of the saw
which could result in serious injury or
even death. DO NOT RELY UPON ANY QF
THE DEVICES BUILTINTO YOUR SAW.
WARNING:
The following features are included on your saw to help
reduce the hazard of kickback; however,
such features will not totally eliminate
this danger. Do not rely only on safety
devices, Follow all safety rules to help
avoid kickback and other forces which
can result in serious injury.
*_Front Hand Guard, designed to reduce
the chance of your left hand contact-
6
YOU SHOULDUSE THE SAWPROPERLY
AND CAREFULLYTO AVOID KICKBACK.
Reduced-kickback guide bars and lowkickback saw chains reduce the chance
and magnitude of kickback and are recommended. Your saw has a low kickback chain and bar as original equip°
ment. Repairs on a chain brake should
be made by an authorized Sears Service Center. Take your unff to the place
of purchase if purchased from a servicing dealer, or to your nearest Sears
Service Center.
- Tip contact in some cases may cause
a lightning fast reverse REACT ON,
kicking guide bar up and back toward
operator.
° Pinching the saw chain along the top
of the guide bar may push the guide
bar rapidly back toward the operator.
. Either of these reactions may cause
you to tose control of the saw which
could result in serious injury. Do not
rely exclusively upon devices built into
your saw.
This unit is not equipped with an antivibration system and is intended for
occasional use only.
SAFETY NOTICE: Exposure to vibrations through prolonged use of gasoline
powered hand tools could cause blood
vessel or nerve damage in the fingers,
hands, and joints of people prone to
circulation disorders or abnormal swellings. Prolonged use in cold weather has
been linked to blood vessel damage in
otherwise healthy people. If symptoms
occur such as numbness, pain, loss of
strength, change in skin color or texture,
or loss of feeling in the fingers, hands, or
joints d scont nue the use :of this tool
and seek medical attention. An anti-vibration system does not guarantee the
avoidance of these problems, Users
who operate power tools on a continual
and regular basis must monitor closely
their physical condition and the condition
of this tool
CHAIN BRAKE: To comply with
Federal OSHA Regulations for Commercial Logging, a chain brake is
required and shall not be removed
or otherwise disabled.
SPARK ARRESTING SCREEN: "Your
saw is equipped with a temperature
limiting muffler and spark arresting
screen which meets the requirements
of California Codes 4442 and 4443.
All U.S. forest land and the states of
California, idaho, Maine, Minnesota,
New Jersey, Oregon, and Washington
require by law that many internal combustion engines to be equipped with a
spark arresting screen, tf you operate
a chain saw in a state or locale where
such regulations exist, you are legally
responsible for maintaining the operating condition of these parts Failure to
do SO is a violation 0fth e law. Refer to
the Customer Respons b t eschart n
the MAINTENANCEsection,
STANDARDS: This chain saw is listed
by Underwriters Laboratories, tnc. in
accordance with American National
Standards for Gasoline-Powered Chain
Saws Safety Requirements (ANSI
B175,1-20t 2).
If you need assistance or find that parts
are missing or damaged, please call
1-800-235-5878.
NOTE: It is normal to hear the fuel filter
rattle in an empty fuel tank.
Your unit has been factory tested and
the carburetor precisely adjusted. As a
result you may smell gasoline or find a
drop of oil/fuel residue on the muffler
when you unpack the unit.
ASSEMBLY
Your saw is fully assembled; no
assembly is necessary.
&WARNING:
Before using chain
saw, ensure all fasteners are secure.
CARTON CONTENTS
Check carton contents against the following list,
Model 358.381700
o Chain saw (fully assembled)
- Chain adjustment tool (bar to0f)
= 2-cycle engine oil
° Carrying case
o Extra 16 in. bar
• Extra t 6 in. chain
Examine parts for damage. Do not use
damaged parts.
7
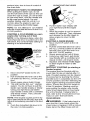
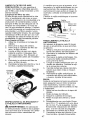
KNOW YOUR CHAIN SAW
READ THIS OPERATOR'S MANUALAND SAFETY RULES BEFORE OPERATING YOUR
CHAIN SAW, Compare the ifiustrations with your unit to familiarize yourself with the
location of the various controls and adjustments. Save this manual for future reference.
Chain
Adjustment TooI
(Bar Tool)
,;
Front Hand Guard
--._
Chain
Bar
Sprocket
Hole
Front Handle
Starter Rope
ON/STOP
Switch
Choke/
Fast Idle
Lever
Muffler
Bar Oii Fill Cap
Starter Hous{_ng
Fuel Mix FillCap Primer Bulb
Cylinder Cover
t
_J
Chain
Brake
Throttle
Lock-out
Chain
Direction
of Travel
Rear
Handle
CRA
Throttte
Trigger
Clutch Cover
/
Bar Nuts
_--- Chain
Catcher
ON/STOP:SWITCH
='
.... : ......
The ON/STOPSW TCHis used to stop
the engine.'
: :_
; :
THROTTLE TRIGGER
The THROTTLETRIGGERcontrols engine speed,
THROTTLE LOCK-OUT
The THROTTLELOCK-OUT must be
pressed before you can squeeze the
throttle trigger. This feature prevents you
from accidentally squeezing the trigger.
CHOKE/FAST IDLE LEVER
The choke and fast idle are set by pulling the CHOKE/FASTIDLE LEVERout to
the futt extent for cold starting or after
refueling, The choke provides additional
fuel to the engine during cold starting.
PRIMER BULB
The PRIMER BULB circulates fuel to the
Carburetor to provide quicker starting,
CHAIN BRAKE
_
:
The CHAIN BRAKEis a device designed
to stop the chain if kickback occurs. The
chain brake activates automatically in
the event of kickback. The chain brake
activates manually if the front hand
guard is pushed forward. The chain
brake is disengaged by pulling the front
hand guard back toward the front handle
as far as possible.
CHAIN TENSION
tt is normal for a new chain to stretch
during the first t5 minutes of operation.
"You should check your chain tension
each time before you start the chain
saw, See CHAIN TENSIONunder the
MAINTENANCEsection.
•8
3,2 fluid ounces of oil with 1 gallon of
unleaded gasoline. DO NOT USE automotive oil or marine oil. These oils will
cause engine damage. When mixing
fuel, follow instructions printed on container, Once oil is added to gasoline,
shake container momentarily to assure
that the fuel is thoroughly mixed. Always
read and follow the safety rules relating
to fuel before fueling your unit. Purchase
fuel in quantities that can be used within
30 days to assure fuel freshness.
CAUTION: Never use straight gasoline
in your unit, This will cause permanent
engine damage and void the limited
warranty. Do not use alternate fuels
such as ethanol blends above 10% by
volume (E-15, E-85) or any methanol
blended fuel. Use of these fuels can
cause major engine performance and
durability problems.
CHAIN BRAKE
Ensure chain brake is disengaged by
pulling the front hand guard back toward
the front handle as far as possible. The
chain brake :must be disengaged before
cutting with the saw.
:i
'_ WARNING:
If the saw is operated with a loose chain, the chain
could jump off the guide bar and result
in serious injury to the operator and/or
damage the chain making it unusable.
BEFORE STARTING ENGINE
3t_WARNING:
Muffler is Very hot
during and after use. Do not touch the
muffler or aIIow combustible material
such as dry grass or fuel to do so.
d_I, WARNING:
Be sure to read the
fuel handling information in the safety
rules section of this manual before you
begin. If you do not understand the
fuel handling information do not attempt to fuel your unit. Seek help from
someone that does understand the information or call the customer assistance help line at 1-800-235-5878.
GUIDE BAR AND CHAIN OIL
The bar and chain require lubrication.
The chain oiler provides continuous
lubrication to the chain and guide bar.
Be sure to fill the bar oil tank when you
fill the fuel tank (Capacity = 6.8 fl. oz.),
Lack of oil will quickly ruin the bar and
chain. Too little oil wilt cause overheating shown by smoke coming from the
chain and/or discoloration of the bar.
For maximum guide bar and chain life,
we recommend you use Craftsman
chain saw bar oil. If Craftsman bar oil
is not available, you may use a good
grade SAE 30 oil until you are abte to
obtain Craftsman brand. The oil output
is automatically metered during operation. Your saw will use approximately
one tank of bar oil for every tank of fuel
mix, Always fill the bar oil tank when
you fill the fuel tank.
.......
At_ WARNING:
The chain must not
move when the engine runs at: d e
speed, If the chain moves at idle
speed refer to CARBURETOR ADJUSTMENT within this manual. Avoid contact
with the muffler, A hot muffler can
cause serious burns,
STOPPING YOUR ENGINE
• Release the throttle trigger.
• Move ON/STOP switch to the STOP
position.
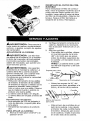
STARTING POSITION
• To start the engine, hold the saw
firmly on the ground as illustrated.
Make sure the chain is free to turn
without contacting any object,
Starter Rope Handle
FUELING ENGINE
_t_i_WARNING:
Remove fuel cap
slowly when refueling.
IMPORTANT: This equipment is designed to operate on unleaded gasoline
with a minimum 87 octane (R+M/2 '
method), with ethanol blended up to
I0% maximum by volume (E-10).
Before operation, gasotine must be
mixed with a good quality synthetic
2-cycle air-cooled engine oil designed to
be mixed at a ratio of 40:1. Craftsman
brand synthetic oil is recommended.
Mix gasoline and oit at a ratio of 40:1.
A 40:1 ratio is obtained by mixing
Left Hand
on Front
Handle
Right Foot Through Rear Handle
•_ WARNING:
Do not attempt to
throw or drop-start the chain saw.
Doing so wilt put the operator at risk of
9
serious injury due to loss of control of
the chain saw.
IMPORTANT POINTS TO REMEMBER
When pulling the starter rope, do not
use the full extent of the rope as this can
cause the rope to break. Do not let starter rope snap back. Hold the handle and
let the rope rewind slowly. For coId
weather starting, start the unit at FULL
CHOKE; allow the engine to warm up
before squeezing the throttle trigger.
NOTE: Do not attempt to cut material
with the choke/fast idle lever in the FULL
CHOKE position.
STARTING A COLD ENGINE (or warm
engine after running out of fuel)
NOTE: In the following steps, when the
choke/fast idle lever is pulled out to the
full extent, the correct throttle setting for
starting is set automatically.
IGNITION
i SWITCH
ON
Lever
t.
Move ON/STOP switch to the ON
position.
2. Pull choke/fast idle lever out to the
full extent (to the FULL CHOKE position).
3. Slowly press primer bulb 6 times.
4. This unit has the Sim-pul
starting
system, "YOUdo not have to pull the
starter rope handle sharply or briskly.
Using your right hand, pull starter
rope handle 5 times with a controlled
and steady motion. Then, proceed
to the next step.
NOTE: Ifthe engine sounds as if it is trying to start before the 5th putl, stop pulting and immediately proceed to the next
step.
5. Push the choke/fast idle lever in to
the HALF CHOKE position.
TM
CHOKE/FAST
IDLE
LEVER
OFF
HALF
/
FULL
,J
¢
6. Pull the starter rope sharply with
your right hand until the engine
starts,
7. Allow the engine to run for approximately 30 seconds. Then, squeeze
and release the throttle trigger to
allow engine to return to idle
speed,
STARTING A WARM ENGINE
1, Move ON/STOP switch to the ON
position.
2, Pull the chokeitast idle lever out to
the FULL CHOKE position to set the
fast idle, then push the lever in to
the HALF CHOKE position.
3, Slowly press primer bulb 6 times.
4, Using your right hand, pull starter
rope handle with a controlled and
steady motion until engine starts.
5. Squeeze and release throttle trigger
to allow engine to return to idle
speed.
DIFFICULT STARTING (or starting a
flooded engine)
The engine may be flooded with too
much fuel if it has not started after t0
pulls. Flooded engines can be cleared
of excess fuel by pushing the choke/
fast idle lever in completely (to the OFF
CHOKE position) and then following the
warm engine starting procedure listed
above. Ensure the ON/STOP switch is
in the ON position. Starting could require pulling the starter rope handle
many times depending on how badly
the unit is flooded. If engine fails to
start, refer to the TROUBLESHOOTING
TABLE or call t-800-235-5878.
CHAIN BRAKE
,_WARNiNG:
If the brake band is
worn too thin it may break when the
chain brake is triggered. With a broken
brake band, the chain brake will not
10
stopthechain.
Thechainbrakemust
bereplaced
ifanypartisworntotess
than0.020"(0.5ram)thick.Repairs
on
a chainbrakeshould
bemadebyyour
SearsService
Center.
Takeyourunit
totheplaceofpurchase
ortothenearestSears
Service
Center.
• Thissawisequipped
witha chain
brake.
Thebrake
isdesigned
tostop
thechainifkickback
occurs.
• Theinertia-activated
chainbrakeis
activated
ifthefronthandguardis
pushed
forward,
either
manually
(by
hand)orautomatically
(bysudden
movement).
• Ifthebrakeisalready
activated,
itis
disengaged
bypulling
thefronthand
guardbacktoward
thefronthandle
asfaraspossible.
- Whencutting
withthesaw,thechain
brakemustbedisengaged.
Disengaged
Engaged
Braking function control
CAUTION: The chain brake must be
checked several times daily. The engine
must be running when performing this
procedure. This is the only instance
when the saw should be placed on the
ground with the engine running.
Place the saw on firm ground. Grip the
rear handle with your right hand and
the front handle with your left hand.
Apply full throttle by fully depressing
the throttle trigger. Activate the chain
brake by turning your left wrist against
the hand guard without releasing your
grip around the front handle. The chain
should stop immediately.
:.
Inertia activating
function
control
_IbWARN|NG:
When performing
the following procedure, the engine
must be turned off.
Grip the rear handle with your right hand
and the front handle with your left hand.
Hold the chain saw approximately 14
inches (35 cm) above a stump or other
wooden surface. Release your grip on
the front handle and use the weight of
the saw to let the tip of the guide bar fall
forward and contact the stump. When
the tip of the bar hits the stump, the
brake should activate.
OPERATING TIPS
o Check chain tension before first use,
after I minute of operation, and each
time before you start the chain saw.
See CHAIN TENSION in the MAtNTE*
NANCE section.
o Cut wood only. Do not cut metal, plastics, masonry, non-wood building materials, etc,
• Stop the saw if the chain strikes a
foreign object. Inspect the saw and
repair or replace parts as necessary.
tf the chain jumps off the guide bar,
inspect the chain for damaged drive
links before reinstalling. Burrs on
drive links, which prevent them from
entering the groove of the guide bar,
can be removed with a flat file.
• Keep the chain out of dirt and sand.
Even a small amount of dirt will dull a
chain, increase the possibility of kickback, and require chain sharpening or
replacement.
• Practice cutting a few small logs using the following techniques to get
the "feel" of using your saw before
you begin a major sawing operation.
o Squeeze the throttle trigger and a!*
low the engine to reach full speed
before cutting.
• Begin cutting with the saw frame
against the log.
o Keep the engine at full speed the
entire time you are cutting.
• Allow the chain to cut for you. Exert only light downward pressure.
If you force the cut, damage to the
bar, chain, or engine can result.
• Release the throttle trigger as
soon as the cut is completed, aF
lowing the engine to idle. If you
run the saw at full throttle without
a cutting toad, unnecessary wear
can occur to the chain, bar, and
engine. To maximize operating
efficiency, donot run the engine
for longer than 30 seconds at a
time at full throttle.
° To avoid losing control when cut is
complete, do not put pressure on
saw at end of cut.
• Stop the engine before setting the
saw down after cutting,
TREE FELLING TECHNIQUES
,_WARNING:
Check for broken or
dead branches which can fall while cutting causing serious injury. Do not cut
near buildings or electrical wires if you
1t
.....
donotknow
thedirection
oftreefall,nor
cutatnightsince
youwillnotbeateto
seewell,norduring
badweather
such
asrain,snow,
orstrong
winds,
etc.
Ifthetreemakes
contact
withanyutility
line,theutility
company
should
benotifiedimmediately.
• Carefully
planyoursawing
operation
inadvance.
• Clear
theworkarea.
Youneeda clear
areaallaround
thetreesoyoucan
havesecure
footing.
• Thechainsawoperator
should
keep
ontheuphillsideoftheterrain
asthe
treeislikelytorollorslidedownhill
afteritisfelled.
• Study
thenatural
conditions
thatcan
cause
thetreetofallinaparticular
direction.
Natural
conditions
thatcancause
atree
tofallina particular
direction
include:
• Thewinddirection
andspeed.
• Theleanofthetree.Theleanof a
tree might not be apparent due to uneven or sloping terrain. Use a plumb
or level to determine the direction of
tree lean.
• Weight and branches on one side.
• Surrounding trees and obstacles.
Look for decay and rot. tf the trunk is
rotted, it can snap and fall toward the
operator. Make sure there is enough
room for the tree to fall. Maintain a distance of 2-1/2tree lengths from the nearest person or other objects. Engine
noise can drown out a warning call.
Remove dirt, stones, loose bark, nails,
staples, and wire from the tree where
cuts are to be made.
Plan a clear retreat path to the rear
and diagonal to the line of fall.
NOTE: if the tree has large buttress
roots, remove them before making the
notch. If using saw to remove buttress
roots, keep saw chain from contacting
ground to prevent dulling of the chain,
NOTCH CUT AND FELLING THE
TREE
* Make notch cut by cutting the top of
the notch first. Cut through t/3 of the
diameter of the tree. Next complete
the notch by cutting the bottom of the
notch. See illustration. Once the
notch is cut remove the notch of
wood from the tree.
After removing the wood from the
notch, make the felling cut on the opposite side of the notch. This is done
by making a cut about two inches (5
cm) higher than the center of the
notch. This will leave enough uncut
wood between the felling cut and the
notch to form a hinge. This hinge will
help prevent the tree from falling in the
wrong direction.
: ....
Hinge holds tree on stump and helps
control fall
Opening
of felling
7
4J_°°
_,/_e_"
•
FELLING LARGE TREES
(6 inches (15 cm) in diameter or larger)
The notch method is used to fell large
trees. A notch is cut on the side of the
tree in the desired direction of fall. After
a felling cut is made on the opposite
side of tree, the tree will tend to fall into
the notch ....
....
'
Closing of
notch
NOTE: Before felling cut is complete,
use wedges to open the cut if necessary
to control the direction of fall. To avoid
kickback and chain damage, use wood
or plastic wedges, but never steel or iron
wedges.
° Be alert to signs that the tree is
ready to fall: cracking sounds, widen12
ingofthefellingcut,ormovement
in
theupperbranches.
* Astreestartstofall,stopsaw,putit
down,
andgetawayquickly
onyour
planned
retreat
path.
o DO NOT cut down a partially fallen tree
with your saw. Be extremely cautious
with partially fallen trees that may be
poorly supported. When a tree doesn't
fall completely, set the saw aside and
pull down the tree with a cable winch,
block and tackle, or tractor.
CUTTING A FALLEN TREE
(BUCKING)
Bucking is the term used for cutting a
fallen tree to the desired tog size.
_WARNING:
Do not stand on the
tog being cut. Any portion can roll
causing loss of footing and control. Do
not stand downhill of the log being cut.
IMPORTANT POINTS
. Cut only one log at a time.
- Cut shattered wood very carefully;
sharp pieces of wood could be flung
toward operator.
o Use a sawhorse to cut small togs.
Never allow another person to hold
the log while cutting and never hold
the log with your leg or foot.
* Do not cut in an area where logs,
:limbs, and roots are tangled such as
in a blown down area. Drag the logs
into a clear area before cutting by
pulling out exposed and cleared !ogs
first,
Use a wedge to remove pinched saw
Turn saw OFF and use a plastic or
wooden wedge to force cut open.
Overcutting begins on the top side of
the log with the bottom of the saw
against the log. When overcutting use
light downward pressure.
x_ Overcutting
Undercutting
"_.':
Undercutting involves cutting on the
underside of the log with top of saw
against the tog. When undercutting
use light upward pressure. Hold saw
firmly and maintain control. The saw
will tend to push back toward you.
_WARNING:
Neverturn saw upside down to undercut. The saw cannot be controlled in this position.
Always make your first cut on the compression side of the log. The compression side of the log is where the pressure of the log's weight is
concentrated.
Firstcut on compression side of log
TYPES OF CUTTING USED FOR
BUCKING
WARNING:
If saw becomes
pinched or hung in a log, don't try to
force it out. You can lose control of the
saw resulting in injury and/or damage
to the saw. Stop the saw, drive a
wedge of plastic or wood into the cut
until the saw can be removed easily.
Restart the saw and carefully reenter
the cut. To avoid kickback and chain
damage, do not use a metal wedge.
Do not attempt to restart your saw
when it is pinched or hung in a log.
_.j
Second cut
Second cut
Firstcut on compression side of log
BUCKING WITHOUT A SUPPORT
o Overcut through 1/_of the diameter
of the log.
, Rotl the log over and finish with a
second overcut.
• Watch for logs with a compression
side to prevent the saw from pinch-
13
ing, See illustrations for cutting logs
with a compression side,
BUCKING USING A LOG OR
SUPPORT STAND
= Remember your first cut is always on
the compression side of the log.
(Refer to the illustrations below for
your first and second cut)
o Your first cut should extend !/3 of the
diameter of the log.
o Finish with your second cut.
Using a log for support
i st Cut
Usinga support stand
2nd Cut 'X,
A[_ WARNING:
Never climb into a
tree to limb or prune. Do not stand on
ladders, platforms, a tog, or in any position which can cause you to lose your
balance or control of the saw.
IMPORTANT POINTS
• Work slowly, keeping both hands firmly
gripped on the saw. Maintain secure
footing and balance.
• Watch out for springpoles. Springpotes
are small size limbs which can catch
the saw chain and whip toward you or
pull you off balance. Use extreme caution when cutting small size limbs or
slender material.
• Be alert for springback. Watch out for
branches that are bent or under
pressure. Avoid being struck by the
branch or the saw when the tension
in the wood fibers is released.
° Keep a clear work area, Frequently
clear branches out of the way to avoid
tripping over them.
LIMBING
° Always limb a tree after it is cut
down. Only then can limbing be done
safely and properly.
• Leave the larger limbs underneath the
felled tree to support the tree as you
work.
• Start at the base of the felled tree and
work toward the top, cutting branches
and limbs. Remove small limbs with
one cut.
° Keep the tree between you and the
chain. Cut from the side of the tree
opposite the branch you are cutting.
• Remove larger, supporting branches
with the cutting techniques described
in BUCKINGWITHOUTA SUPPORT,
• Always use an overcut to cut small
and freely hanging limbs. Undercutting
could cause limbs to fall and pinch the
saw,
PRUNING
LIMBING AND PRUNING
WARNING:
Be alert for and
guard against kickback. Do not allow the
moving chain to contact any other
branches or objects at the nose of the
guide bar when limbing or pruning. Atlowing such contact can result in serious
injury.
_1_WARNING:
Limit pruning to limbs
shoulder height or below. Do not cut if
branches are higher than your shoulder.
Get a professional to do the job.
• Make your first cut 1/3of the way
through the bottom of the limb.
• Next make a 2nd cut all the way
through the limb. Then cut a third
t4
overcut leaving a t to 2 inch (2.5 to 5
cm) collar from the truck of the tree.
Seoondoot
J
Third CUt
i_,_y/
irJ
i
:
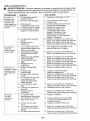
CUSTOMER
i ::
Pruningtechnique
RESPONSIBILITIES
A_ILWARNING:
Disconnect the spark plug before performing maintenance
except for carburetor adjustments.
Fill in dates as you complete
regular service
Service
Every I Every '
5 hrs. 125 hrs. "Yea!y Dates
Before After'
Use , Us e
' Check for damaged/worn parts
E
' Check for loose fasteners/parts
Check chain tension
Check chain sharpness
_r
i
i
_'
_"
!
i
_.-
i
i
i
i
I
Check guide bar
........................................................................................
Check fuel mixture level
I...............................
Ch.eck..guid# .bar..and cha!n 0.il
i
!
!
'
Inspect and clean unit & decals
i
i
1
_ _
1
i
I :'
,Clea,n,c,0o,!!ngsystem ..........
Check chain brake
i
i '
! _'
_
I ....
_'
i
Clean guide bar groove
i
i
............ -...................
..................................
_
i
Clean
...............................
air filter
-*
t
:
i
i t
!
i
!
.....................
_"
'*_- ........ _.................................................................
_" i_
..............
:.........................
ii.................
Clean/inspect muffler and spark
arresting screen
i apiece spark plug and fuel filter
!
i
!
GENERAL RECOMMENDATIONS
The warranty on this unit does not cover items that have been subjected to
operator abuse or negligence. To receive fufivalue from the warranty, the
operator must maintain unit as
instructed in this manual, Various adjustments will need to be made periodical]y to properly maintain your unit.
- Once a year, replace the spark plug,
air filter, and check guide bar and
chain for wear. A new spark plug and
air filter assures proper air, fuel mixture
i
v"
v"
i
and helps your engine run better and
last longer,
CHECK FOR DAMAGED 0R _i, _:
WORN PARTS
Contact your Sears Service Center for
replacement of damaged or worn parts.
NOTE: It is normal for a small amount of
oil to appear under the saw after engine
stops, Do not confuse this with a leaking
oii tank,
• ON/STOPSwitch - Ensure ON/STOP
sw_tchfunctions properly by moving
the switch to the STOP position, Make
15
sureengine
stops;
thenrestart
engine
andcontinue.
° FuelTank- DonotusesawffNet
tankshows
signs
ofdamage
orleaks.
° OilTank- Donotusesawifoiltank
shows
signsofdamage
orleaks.
CHECK
FORLOOSE
FASTENERS
ANDPARTS
° BarKnob
° Chain
° Muffler
° Cylinder Shield
° Air Filter
° Handle Screws
. Vibration Mounts
' Starter Housing
* Front Hand Guard
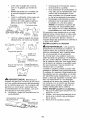
CHECK CHAIN TENSION
Guide
Bar
Chain Adjustment
Adjusting
Tool
Screw
(Bar Too{)
2.
Loosen bar nuts until they are
finger tight against the clutch cover.
3. Turn adjusting screw clockwise until
chain solidly contacts bottom of
guide bar rail,
!Adjusting
Screw
/
4.
I
6, While lifting tip of guide bar, tighten
bar nuts securely with the bar tool.
Bar Nuts
WARNING:
Wear protective
gloves when handling chain. The chain
is sharp and can cut you even when it is
not moving.
Chain tension is very important. Chains
stretch during use. This is especially true
during the first few times you use your
saw. Always check chain tension each
time before you start the chain saw.
1. Use a screwdriver to move chain
around guide bar to ensure kinks
do not exist. The chain should rotate freely.
Bar Nuts
turn adjusting screw t/4 turn clockwise, Repeat until sag does not
exist.
Adjusting Screw - I/' 4 Turn
Using bar toot, roll chain around
guide bar to ensure all links are in
bar groove.
5. Lift up tip of guide bar to check for
.sag. Release tip of guide bar, then
7. Use the screwdriver end of the bar
tool to move chain around guide
bar.
8. If chain does not rotate, it istoo
tight. Slightly loosen bar nuts and
loosen chain by turning the adjusting screw 1/4 turn counterclockwise. Retighten bar nuts.
9. If chain is too loose, it will sag below the guide bar. DO NOT operate
the saw if the chain is loose.
NOTE: The chain is tensioned correctly
when the weight of the chain does not
cause it to sag below the guide bar
(with the chain saw sitting in an upright
position), but the chain still moves freely
around the guide bar.
_WARNING:
If the saw is operated
with a loose chain, the chain could jump
off the guide bar and result in serious
injury to the operator and/or damage the
chain making it unusable, tf the chain
jumps off the guide bar, inspect each
drive link for damage. Damaged chain
must be repaired or replaced.
CHECK CHAIN SHARPNESS
A sharp chain makes wood chips.
A du!l chain makes a sawdust powder
and cuts slowly. See CHAIN SHARPENING. ....
CHECK GUIDE BAR
Conditions which require guide bar
maintenance:
• Saw cuts to one side or at an angle.
• Saw has to be forced through the cut.
• Inadequate supply of oil to bar/chain.
Check the condition of guide bar each
time chain is sharpened. A worn guide
bar will damage the chain and make
cutting difficult.
After each use, ensure ON/STOP
switch is in the STOP position, then
16
cleanallsawdust
fromtheguidebar
andsprocket
hole,
Tomaintain
guidebar:
• MoveON/STOP
switch
toSTOP.
° Loosen
andremove
barknobcompletelybylifting
leverandturning
counterclockwise.
° Loosen
chaintension
byturning
adjusting
wheef(upward
direction).
Remove
clutchcover.
° Remove
barandchainfromsaw.
, Clean the oil holes and bar groove
after each 5 hours of operation.
• Burring of guide bar rails is a normal
process of rail wear. Remove these
burrs with a flat file.
° When rail top is uneven, use a flat file
to restore square edges and sides.
i_-_-- File Rail Edges-a- N N
and Sides
IU I
Square
I
I
Worn Groove
Correct Groove
Replace guide bar when the groove is
worn, the guide bar is bent or cracked,
or when excess heating or burring of the
rails occurs. Ifreplacement is necessary,
use only the guide bar:SPeCified for your
saw in the repair parts list or onthe decal located on the chain saw_
i
CHECK FUEL MIXTURE LEVEL
• See FUEUNG ENGINEunder the OPERATIONsection.
LUBRICATION
:
:
Bar Oil
_j_
F"' caP
:::_(_1_
. see GUIDE BAR AND CHAIN OIL under the OPERAT ON section.
t7
INSPECT AND CLEAN UNIT AND
DECALS
° After each use, inspect complete unit
for loose or damaged parts. Clean the
unit and decals using a damp cloth
with a mild detergent.
, Wipe off unit with a clean dry cloth.
COOLING SYSTEM
To keep the working temperature as
low as possible the machine is
equipped with a cooling system.
The cooling system cons sts of:
• Air intake on the starter
° Air guide plate
• Fins on the flywheel
• Cooling fins on the cylinder
• Cylinder cover (directs cold air over
the cylinder)
Clean the cooling system with a brush
after each use, more often in demanding conditions. A dirty or blocked cooling system results in the machine
overheating which causes damage to
the piston and cylinder.
CHECK CHAIN BRAKE
See CHAIN BRAKE in the OPERATION
section.
CLEAN AIR FILTER
CAUTION: Do not clean filter in gasoline or other flammable solvent to
avoid creating a fire hazard or produc_
ing harmful evaporative emiss ons.
Cleaning the air fitter:
A dirty air filter decreases the life and
performance of the engine and increases fuel consumption and harmfut
emissions. Always clean your air filter
after 10 tanks of fuel or 5 hours of operation, whichever comes first. Clean
more frequently in dusty conditions.
A used air filter can never be completely cleaned, It is advisable to replace your air filter with a new one after every 50 hours of operation, or
annually, whichever comes first.
t. Loosen 3 screws on cylinder cover.
2. Remove cylinder cover.
3. Remove air filter cover and air filter.
4, Ctean the air filter using hot soapy
water. Rinse with clean coot water.
Air dry completely before reinstalling.
5. Reinstall air filter and air filter cover,
6.
Reinstall
screws.
cylinder cover and 3
Tighten securely.
:
Air Filter
Cover
Cylinder
Cover
INSPECT MUFFLER AND SPARK
ARRESTING SCREEN
_iL WARNING:
The muffler on this
product contains chemicals known to
the State of California to cause cancer.
As the unit is used, carbon deposits
build up on the muffler and spark arresting screen, and must be removed
to avoid creating a fire hazard or affecting engine performance.
Replace the spark arresting screen if
breaks occur.
Spark
Exhaust
Arresting Outlet
Screen Cover
Nut
Muffler
1. Loosen and remove the nut from
the exhaust outlet cover.
2. Remove the exhaust oulet cover.
3. Remove spark arresting screen.
Handle screen carefully to prevent
damage.
4. Clean the spark arresting screen
gently with a wire brush. Replace
screen if breaks are found.
5. Replace any broken or cracked
muffler parts.
6. Reinstall spark arresting screen, exhaust outlet cover, and nut. Tighten
nut securely.
REPLACE SPARK PLUG
The spark plug should be replaced
each year to ensure the engine starts
easier and runs better. Ignition timing
is fixed and nonadjustable.
1. Loosen 3 screws on cylinder cover.
2. Remove the cylinder cover.
3. Pull off the spark plug boot.
4. Remove spark plug from cylinder
and discard.
5. Replace with Champion RCJ-7Y
spark plug and tighten securely
with a 3/4 inch (19 ram) socket
wrench. Spark plug gap should be
0.025 inch (0,6 ram).
6. Reinstalfthe spark plug boot.
7. Reinstall the cylinder cover and 3
screws. Tighten securely.
Cylinder
Cover
Spark
Plug Boot
CLEANING THE SPARK ARRESTING SCREEN
Cleaning is required every 25 hours of
operation or annually, whichever
comes first.
,Spark
Plug
REPLACE FUEL FILTER
To replace fuel filter, drain your unit by
running it dry of fuel. Remove fuel cap
and its connected retainer from tank.
Pull filter from tank and remove from
line. Replace and reassemble.
18
x ,
_IbWARNINGI
D:isconnect the
spark plug before performing maintenance, service, or adjustments except
for carburetor adjustments.
CHAIN SHARPENING
Cutter
File Holder Line
o Sharpen cutters on one side of
the chain first. File from the inside
of each cutter to the outside.
Then, turn the chain saw around
and repeat the process for the
other side of the chain,
• File on the forward stroke only.
Use 2 or 3 strokes per cutting
edge,
• Keep alt cutters the same length
when filing.
° File enough to remove any damage to cutting edges (side plate
and top plate of cutter).
All Cutters
Remove Damage
Same Length
/
\_,
WARNING:
Improper chain
sharpening techniques and/or depth
gauge maintenance will increase the
chance of kickback which can result in
serious injury.
WARNING:
Wear protective
gloves when handling chain. The chain
is sharp and can cut you even when it is
not moving.
Conditions which indicate the need for
chain sharpening:
o Reduction in size of wood chips.
The size of the wood chip will decrease as the chain gets duller until it
becomes more like a powder than a
chip. Note that dead or rotted wood
will not produce a good chip.
° Saw cuts to one side or at an angle.
• Saw has to be forced through the cut.
_ _ _ v
,-_ ,,4
v v__lTopPiate
"J
_ _
_'
Side Plate
o File chain to meet the specifications as shown,
Tools required:
° 5/32 inch (4 mm) diameter round file
and file holder
° Fiat file
° Depth gauge tool
TO SHARPEN CHAIN:
1, Move ON/STOP switch to the STOP
position.
2. Check chain for proper tension.
Adjust chain tension if necessary.
See CHAINTENSION section.
3, Sharpen cutters, :i : i:: :I
• To sharpen :thecutters; position
the file :holder level (90_) so that
it rests On the top edges of the
cutter and :depthgauge,
NOTE: The chain has both left
and right hand cutters.
b_ 80°
/'_'-.\60o
30o,
Hook Angle
\I
0.025 inch
(o.65
ram/
Rounded
Right
Too Much Hook Angle
',
Fite Holder
L
Corner
SquaredOff
Corner
Wrong
_WARNING:
Cutter
Depth Gauge
:-
Align the 30 ° file holder marks
parallel with the bar and to the
center of the chain ..........
Maintain the proper
hook angle according to the manufacturer's specifications for the chain you
are using. Improper hook angle wilt
increase the chance of kickback which
can result in serious injury,
19
4
Check and lower depth gauges,
•
•
Place gauge tool on cutter.
If the depth gauge is higher than
the depth gauge tool, file it level
to the top of the depth gauge tool.
° Maintain rounded front comer of
depth gauge with a flat file,
NOTE: The very top of the depth
gauge should be flat with the front
half rounded off with a flat file.
If you require further assistance or are
unsure about performing this procedure,
contact your Sears Service Center or
call our customer assistance help line at
1-800-235-5878,
CHAIN REPLACEMENT
,I_ WARNING:
Wear protective
gloves when handling chain, The
chain is sharp and can cut you even
when it is not moving,
It is normal for a new chain to stretch
during the first 15 minutes of operation,
You should recheck your chain tension
each time before you start the chain
saw and adjust the chain tension as
required, See CHAIN TENSION section.
Replace the old chain when it becomes worn or damaged. Use only the
Low-Kickback replacement chain specified in the repair parts list.
The correct replacement bar and chain
is also specified on a decal located on
the chain saw,
See your Sears Service Center to replace and sharpen individual cutters
on your chain,
TO REPLACE CHAIN:
1, Move ON/STOP switch to the STOP
position,
2. Loosen and remove the bar nuts
and the clutch cover from the saw.
3. Remove the old chain,
Chain adjustment tool f___,_
(BarTool)
@'
4. An adjusting pin and screw is used
to adjust the tension of the chain, It
is very important when assembling
the bar, that the pin located on the
adjusting screw aligns into a hole in
the bar. "Fuming the screw will move
the adjustment pin up and down the
screw, Locate this adjustment before
you begin mounting the bar onto the
saw, See following illustration.
lnside
view of
dutch
cover
Adjustment located on clutch cover
5. Turn the adjusting screw by hand
counterclockwise until the adjusting pin just touches the stop. This
should allow the pin to be near the
correct position.
6, Slide guide bar on bar bolts until
guide bar stops against clutch
drum sprocket,
7,
20
Carefully remove the chain from the
package. Hold chain with the ddve
links as shown.
CHAIN ADJUSTMENT
See CHAIN TENSION in MAINTENANCE
section.
CARBURETOR ADJUSTMENT
DIIRECTION OF ROTATION
_
Cutters
Gauge
Drive Links
8. Place chain over and behind clutch
retainer, fitting the drive links in the
clutch drum sprocket.
9. Fit bottom of drive links between
the teeth in the sprocket in the
nose of the guide bar.
10. Fit chain drive links into bar groove.
11. Pull guide bar forward until chain is
snug in guide bar groove. Ensure
all drive links are in the bar groove.
12. Now, install clutch cover making
Sure the adjusting pin is positioned
in the lower hole in the guide bar,
Remember this pin moves the bar
forward and backward as the
screw is turned.
Adjusting Pin
AgikWARNING:
The chain will be
moving during most of this procedure.
Wear your protective equipment and
observe all safety precautions. The
chain must not move at idle speed.
The carburetor has been carefully set
at the factory. Adjustments may be
necessary if you notice any of the following conditions:
• Chain moves at idle. See IDLE
SPEED-T adjusting procedure.
* Saw will not idle. See IDLE SPEED-T
adjusting procedure,
Idle Speed-T
Allow engine to idle. if the chain moves,
idle is too fast. If the engine stalls, idle is
too stow. Adjust speed until engine runs
without chain movement (idle too fast) or
stalling (idle too slow). The idle speed
screw is located in the area above the
primer bulb and is labeled T.
° Turn idle screw (T) clockwise to increase engine speed.
- Turn idle screw (T) counterclockwise
to decrease engine speed.
If you require further assistance or are
unsure about performing this procedure,
contact your Sears Service Center or
call our customer assistance help line at
1-800-235-58"78.
i
Lower
Hole
/
Guide Bar
13. Install bar nuts and finger tighten
only. Do not tighten any further
at this point. Proceed to CHAIN
ADJUSTMENT.
21
,_WARNING:
Perform the following steps after each use:
° Allow the engine to cool, and secure
the unit before storing or transporting.
• Store chain saw and fuel in a well
ventilated area where fue_vapors
cannot reach sparks or open flames
from water heaters, electric motors or
switches, furnaces, etc.
• Store chain saw with atl guards in
place and position chain saw so that
any sharp object cannot accidentally
cause injury.
• Store chain saw well out of the reach
of children.
SEASONAL STORAGE
Prepare your unit for storage at the
end of the season or if it will not be
used for30 days or more.
If your chain saw is to be stored for a
period of time:
• Clean saw thoroughly before storage.
o Store in a clean dry area.
• Lightly oil external metal surfaces
and guide bar.
• Oil the chain and wrap it in heavy paper or cloth.
FU EL SYSTEM
Empty the fuel system before storage
for 30 days or longer. Drain the gas
tank, start the engine and let it run until
the fuel lines and carburetor are empty,
Use fresh fuel next season.
Under FUELING ENGINE in the OPERATiON section of this manual, see message labeled IMPORTANT regarding
the use of gasohot in your chain saw.
Fuel stabilizer is an acceptable alternative in minimizing the formation of
fuel gum deposits during storage. Add
stabilizer tothe gasoline in the fuel
tank or fuel storage container.
Follow the mix instructions found on
stabilizer containers, Run engine at
least 3 minutes after adding stabilizer.
Craftsman 40:1, 2-cycle engine oil (air
cooled) is blended with fuel stabilizer, tf
you do not use this oil, you can add a
fuel stabilizer to your fuel tank.
ENGINE
* Remove spark plug and pour t tea*
spoon of 40:t, 2-cycle engine oil (air
cooled) through the spark plug opening. Slowly pull the starter rope 8 to
10 times to distribute oil.
, Replace spark plug with new one of
recommended type and heat range.
* Clean air filter.
° Check entire unit for loose screws.
nuts, and bolts, Replace any damaged, broken, or worn parts.
, At the beginning of the next season,
use only fresh fue! having the proper
gasotine to oil ratio,
OTHER
o Do not store gasoline from one season to another.
o Replace your gasoline can if it starts
to rust
22
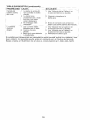
TROUBLESHOOTING
TABLE
WARNING:
Always stop unit and disconnect spark plug before performing all of the recommended remedies below except remedies that require
operation
TROUBLE
Engine wilI not
start or will run
only a few
seconds after
starting,
of the unit.
CAUSE
13. Fuel tank empty,
i 4, Spark plug not firing.
'5, Fuel not reaching
carburetor.
6. Carburetor requires
adjustment.
7, None of the above.
Engine will
not idle
properly.
Engine wiI1not
accelerate.
lacks power,
or dies under
a load.
i Engine
i smokes
'excessively.
Engine runs
hot,
for bar and
chain
lubrication.
Chain moves at
idle speed,
'
i REMEDY
1, ON/STOP switch in
STOP position.
! 2. Engine flooded,
1. Move ON/STOP switch to ON.
2. See "Difficult Starting" in the
Operation Section.
3. Fill tank with correct fuel mixture.
4. Install new spark plug.
15.
i
i
i 6.
]
Check for dirty fuel fiIter; replace.
Check for kinked or split fuel line;
repair or replace,
Contact Sears Service (see back cover),
7. Contact Sears Service (see back cover).
I. Idle speed set too high
or too low.
2. Low Speed Mixture
1. See "Carburetor Adiustment" in the
Service and Adjustments Section,
2, Contact Sears Service (see back cover),
3. requires
Crankshaftadjustment.
seals worn.
14, Compression tow,
! 5. None of the above.
3. Contact Sears Service (see back cover).
4. Contact Sears Service (see back cover),
5. Contact Sears Service (see back cover).
i 1. Air filter dirty.
! 2, Spark plug fouled.
' 3. Carburetor requires
adjustment.
4. Exhaust ports or muffler outlets plugged.
5, Compression iow,
6, Chain brake engaged.
7. None of the above.
2. Fuel mixture incorrect.
3. Air fiter d rty.
!4. High Speed Mixture
requires adjustment.
i5. Crankcase leak.
11 • Fuel mixture incorrect.
i
i2. Spark plug incorrect,
i3- High Speed Mixture
i set too lean,
14•Exhaust ports or muf] fler outlets plugged.
Carbon build-up on
5. spark arresting screen.
Starter housing dirty
None of the above.
] . OiI tank empty,
12. Oil pump or oil filter
I
clogged,
13. Guide bar oil hole
blocked.
i 1• Idle speed requires
adjustment.
!2. Ctutch requires repair,
I !. Ctean or replace air fiiter.
i 2, Clean or replace plug and regap.
3. Contact Sears Service (see back cover).
[
i 4. Contact Sears Service (see back cover).
5. Contact Sears Service (see back cover)•
6. Disengage chain brake,
7. Contact Sears Service.(see b_a:ct_,.€over),.:
....
• Adjust choke.
Empty fue_ tank and refilt with
2. correct fuel mixture.
3. Clean or replace air filter.
4. Contact Sears Service (see back cover).
5. Contact Sears Service (see back cover).
t. See
"Fueling Engine" in the Operation
section.
i 2, Replace with correct plug.
3, Contact Sears Service (see back cover),
i 4. Contact Sears Service (see back cover).
5. Clean spark arresting screen,
6. Clean starter housing area.
7. Contact Sears Service (see back cover),
1, Fill oil tank,
2. Contact Sears Service (see back cover),
3. Remove bar and clean•
1. See "Carburetor Adjustment" in the
Service and Adjustments Section.
i 2. Contact Sears Service (see back cover).
23
TROUBLESHOOTING
I TROUBLE
[ o;s
TABLE - Continued
CAUSE
not
I move when engine is accelerated.
Chain clatters
or cuts roughly.
Chain stops
within the cut.
Chain cuts at
an angle,
REMEDY
t. Chain tension too
tight.
2. Carburetor requires
t
adjustment,
E
F3. Guide bar rails
i
pinched.
i 4, Clutch slipping.
i 5, Chain brake engaged,
t. See "Check Chain Tension" in the
Maintenance Section,
2. Contact Sears Service (see back cover).
i 1. Chain tension incorrect.
1. See "Check Chain Tension" in the
Maintenance Section.
2. Contact Sears Service (see back cover).
3. Resharpen or replace chain.
! 4. See "Chain Sharpening" in the
i
Service and Adjustments Section.
3. Repair or replace.
4. Contact Sears Service (see back cover).
5. Disengage chain brake.
2. Cutters damaged,
3. Chain worn.
4. Cutters dull, improperly
sharpened, or depth
gauges too high,
5. Sprocket worn.
15. Contact Sears Service {see back cover).
6. Chain installed
16. install chain in right direction,
backwards.
!, See "Chain Sharpening" in the
1. Chain cutter tops not
filed fiat.
Service and Adjustments Section,
2. Repair or replace guide bar.
i 2. Guide bar burred or
bent; rails uneven.
13. Clutch slipping. ................ 3. Contact Sears Service .(see back cover).
1. See "Chain Sharpening" in the
1, Cutters damaged on
one side.
Service and Adjustments Section.
Chain dull on one side,
2. See "Chain Sharpening" in the
Service and Adiustments Section.
Gu idel_ar be.nt or- wor n. 3. Replace guide bar.
If situations occur which are not covered in this manual, use care and good
judgement. If you need assistance, contact Sears Service or the CUSTOMER
ASSISTANCE HELPLINE at 1-800-235-5878.
24
IMPORTANT:
This product
is compliant
with U.S, EPA Phase
3 regulations
for exhaust
and evaporative
emissions.
To ensure
EPA Phase 3 compfiance,
we recommend
using only genuine
replacement
parts. Use of
non-compliant
replacement
parts is a violation of federal taw.
YOUR WARRANTY
RIGHTS
AND OBLIGATIONS:
The U.S. Environmental
Protection
Agency, California
Air
Resources
Board, Environment
Canada and Sears Brands
Management
Corporation,
U,S.A.
(Sears)
are
pleased
to explain
the emissions
control
system
warranty
on your year 2014 and later off-road
engine,
In
CaIifornia,
alt small off-road engines
must be designed,
buiIl, and equipped
to meet the State's
stringent
antismog standards.
Sears must warrant the emission control system on your sma[J off-road engine for the periods of
time listed below provided
there has been no abuse, neglect, or improper
maintenance
of your small off-road
engine. 'four emission control system includes parts such as the carburetor,
the ignition system and the fuel tank,
line, and cap. Where a warrantable
condition exists, Sears will repair your small off-road engine at no cost to you,
Expenses
covered under" warranty
inctude diagnosis,
parts and labor.
MANUFACTURER'S
WARRANTY
COVERAGE;
If any emissions
related
part on your engine (as tisted under
Emissions
Control Warranty
Parts List) is defective
or a defect in the materials
or workmanship
of the engine
causes the failure of such an emission
related part, the part wilt be repaired or replaced by Sears.
OWNER'S
WARRANTY
RESPONSIBILITIES:
As the smai_ off-road
engine owner, you are responsible
for the
performance
of the required
maintenance
listed in your instruction
manual. Sears recommends
that you retain aI_
receipts covering
maintenance
on your small off-road engine, but Sears cannot deny warranty
soteIy for the _ack
of receipts or for your failure to ensure
the performance
of all scheduled
maintenance,
As the small off-road
engine owner, you should be aware that Sears may deny you warranty coverage if your small off-road engine or a
part of it has faited due to abuse, neglect, improper maintenance,
unapproved
modifications,
or the use of parts
not made or approved by the original equipment
manufacturer.
You are responsible
for presenting
your smal_ offroad engine to a Sears
authorized
repair center as soon as a problem
exists. Warranty
repairs
should be
completed
in a reasonable
amount of time, not to exceed 30 days. If you have any questions
regarding
your
warranty
rights and responsibilities,
you should contact your nearest authorized
service center.
Please
call Sears at 1-800,469-4663
or send e-maif correspondence
to emission.warranty@us,hvwan.net.
WARRANTY
COMf,/IENCEMENT
DATE: The warranty
period begins on the date the small off-road
engine is
purchased,
LENGTH
OF COVERAGE:
This warranty
shall be for a period of two years from the initial date of purchase,
or
untit the end of the product warranty
(whichever
is longer).
WHAT IS COVERED:
REPAIR OR REPLACEMENT
OF PARTS. Repair or replacement
of any warranted
part
wiII be performed
at no charge to the owner at an approved
Sears servicing
center. If you have any questions
regarding
your warranty rights and respensibilities,
you should contact your nearest authorized
service center,
Please cat] Sears at 1-8004694663
or send e-mai_ correspondence
to emission.warranty@us,hvwan.net.
WARRANTY
PERIOD: Any warranted
part which is not scheduled
for replacement
as required
maintenance,
or
which is scheduled
only for regular inspection
to the effect of "repair or replace as necessary"
shall be warranted
for 2 years. Any warranted
part which is scheduled
for replacement
as required maintenance
sha[I be warranted
for the period of time up to the first scheduled
replacement
point for that part.
DIAGNOSIS:
The owner shatF not be charged
for diagnostic
labor which [eads to the determination
that a
warranted
part is defective
if the diagnoslic
work is performed
at an approved
Sears servicing
center.
CONSEQUENTIAL
DAMAGES:
Sears may toe liable for damages
to other engine components
caused by the
failure of a warranted
part still under warran%_
WHAT IS NOT COVERED:
At] faifures caused by abuse, neglect, or improper maintenance
are not covered.
ADD-ON
OR MODIFIED
PARTS:
The use of add-on or modified parts can be grounds for disaflowing
a warranty
claim. Sears is not fiable to cover failures of warranted
parts caused by the use of add-on or modified parts,
NOW TO FILE A CLAIM:
If you have any questions
regarding
your warranty
rights and responsibilities,
you
shoutd contact your nearest authorized
Sears service center,
Please ca[_ Sears at I`8004694663
or send e-maiJ correspondence
to [email protected].
WHERE
TO GET WARRANTY
SERVICE:
Warranty
services
or repairs shall be provided
at all Sears service
centers.
Please catt Sears at 1-800469-4663
or send e-maiI correspondence
to [email protected].
MAINTENANCE,
REPLACEMENT
AND REPAIR
OF EMISSION
RELATED
PARTS: Any Sears approved
replacement
pad used in the performance
of any warranty
maintenance
or repair on emission refuted parts wilt be
provided without charge to the owner if the part is under warranty.
EMISSION
CONTROL
WARRANTY
PARTS LIST', Carburetor,
air filter (covered
up to maintenance
schedu;e),
ignition system; spark pIug (covered
up to maintenance
schedule),
ignition module, muffler including
catalyst (if
equipped),
fuel tank, line, and cap.
MAINTENANCE
STATEMENT:
The owner is responsible
for the performance
of all required
maintenance
as
defined }n the instruction
manual.
•
25
: The information
on the product tabe{ indicates
Example:
(Year) ERA and/or CAUFORN
IA,
,r
which standard
your
engine is certified.
EmSSiON
CONiROLI.mRMAnO_"
THISENGINE
MEETS
EXHANDP/P EMISSION
REGULATIONS
FOR20XXUS EPA/CALIFORNIA
SHALLOFFROAD ENGINES
MANUFACTURER
FAMILYiDISP
PLT#XXXXXXXX×X
SKU#XXXXXXXXX
EMISSIONCOMPLIANCE
PERIODXX)<HOURS
ItlltI!11111
i 11
IIMI I1111111111
III
SN: XXXXXXXXXXXX-X
THE
AIRINDEX
OF
TH_S
ENGINE
iSX
t0
("'2'I"'"""'T
41
t
61
I
BI
I
1el
THE LOWER.THE AIR INDEX, THE LESSPOLLU_ON
REFERTO OWNER'SMANUALFOR
MAINTENANCESPECINCAIIONS AND AD)USTM_NTS
This engine is certified to be emissions compliant for the following use:
[]
Moderate (50 hours)
[]
Intermediate (125 hours)
[]
Extended (300 hours)
• 26
REPAIR PARTS
not described in the Operator's
must be performed by quaEified
personnel,
Part
No. ',
530057893
530057908
530057891
530016080
530071888
580727101
7,
8,
9.
10.
11.
12,
13.
14.
15.
16,
577167201
530023877
530071945
530057905
530071945
530057907
530016419
580940901
530015922
530071905
17.
18.
19
20.
530015127
536016134
530021179
581594701
!
Description
Ref,
Part
No.
Kf_ob_Ohoke
Sprin#-]gn.
Switch
Lever-_gn Switch
Screw
Kit= Trigger/Lockout
21.
586710801
22
57937t802
23.
545006106
Kit-_uel Line
(hCL 8)
Assy-Fuef
Pick Up
Fitting-Fuel
Une
Kit-Cfutch Washer
Assy-ciutch
drum 3/_
Kit-CSuleh Washer
Asey-Clutch
Washer=LargeCIutcr
Assy-Fuel
Cap wret.
Nut-"U"type
speed
Kit-tgn,
(rack module}
Washer_Fiywheel
Nut - Flywheel
Screw=Shoulder
Starter Hub
24.
25,
26.
27.
28,
28.
30.
31.
32.
33.
34,
530069232
530016432
578152201
545227101
576657801
530016080
530058786
530057286
585600501
530016416
586583305
35,
86.
37.
38,
530071893
530016482
530018133
530057910
Manual
service
Description
Ref,
Kit-Starierputiey
(tncl 19,20,29)
Kit-Fan Housing
(Incl. 26,27)
Haadle-Starier
39.
40.
5300159i7
586531401
41.
530069611
Kit-Rope
Screw
Guide-rope
Screw
Spring-Starter
Screw
Assy_OiIVent
Assy-OitCapw/ret.
Handguard
Spring_Handguard
Assy-Chassis
(Inct.
5,6,8,t4,15,
30,31,33,37}
Kit_Cha[r',brake
Screw
Be}t_Ber
Plate-Bar
42,
43_
44.
45.
46.
5800_5826
530038593
530051539
566514501
530071845
47.
48.
49.
50.
530016432
530057888
530057924
530071891
51,
52.:
53.:
545227101
581071401
530037820
27
Part
NO,
i
1
i
Description
Nub.Ba#
Aesy*C_utch Cover
(_nel.41)
Kit_ Bar Adjust
(IncI, 42,43)
Pin*Bar Adjust
Retainer
Chain 16"
Bar 16"
Kit_Ctutch Washer
(tacl. 9Jr)
Screw
Hendfe-Front
Assy-Oit pick up
Kit-G[I pump
(lneL 51,52,53)
Screw
Assy-Oil Pump
Gear-Worm
REPAIR PARTS
SEARS
CHAINSAW
MODEL358.381700
19
34
33
23
WARNING
All repairs, adjustments
and
maintenance
net described in
the Operator's Manual
performed by qualified
personnel
Ref.
Part
1,
2,
3,
4,
5,
6.
7,
8.
9.
lO.
11.
12,
13,
14.
590058837
590016153
590071908
530016432
590047442
530057943
530058687
530057925
530016425
530057892
545070601
==_
580727101
530047721
530071889
15,
16.
17,
18,
19,
530071894
Champion
530071884
530016136
545006007
2&
21.
22.
23,
NO,
530057942
536071894
545008056
530016338
must be
service
Description
Refo
Shield=Oyt. (Incl. 2)
Screw
Kil- Ig0. (incL flywheel)
Screw
Strap_Ground
Assy-Wire
Harness
Cover-Air Filter
Filter-Air
Screw
Housing-Air
Fitter
Carburetor
=Zama W26B (Incl. t3}
Kit-Fuet Line
Bulb-Purge
"strap-in"
Ki_- Oath. Adapter
(Incl, 15,33,36)
Gasket-Cyl.
(kit)
Acsy-Spark
Plug (RCJ- 7Y)
Kit-Cy{inder
(Inel. 24,32)
Clip-High Tension Lead
Kit-Muffler
(Incl. 20,21,22,23)
Backplate-Muffter
Gasket=Muffler
(kit}
Kil_Spark Arrestor
Bolt_Muff]er
24.
25.
26.
27.
28,
29.
30.
31.
82,
33.
34.
35.
36.
37.
88.
39.
Part
No,
545015301
545112901
530016417
530057941
530056363
530071883
5300t5697
530038729
546015401
530071894
530016426
530071884
530057926
530057909
530016101
530071894
Description
Insert-Left (black) CyL
Assy-OrankshaftiRod
Belt
Cap-Crankcase
Assyl Bearing/Seal
Kit-Hieton _ncl. 30,31}
Retainer-P_ston
pin
Ring-Pistoe
Insert-Right
(gray} CyL
Seaf-Adaptar
(kit)
Screw
Gasket_ CarbiAdapler
(kit)
Tube=Intake
Wire-ThrotiJe
Nut-Cad3.
Kit=GaskeI ({ncL 15,21,33,35)
I N0ts_ow_
l
11567 t 227
586039401
545160901
530049847
28
Manuaf
DecaFWarning
Assy-Carryir_g
Case
Scabbard - Carrying Case
Dectaraci6n
deGarantia
Reglas
deSeguridid
Montaje
Uso
Mantenimiento
Servicio
yAjustes
29
30
35
36
44
48
Almacenamiento
52
Tabla
Diagn6stica
53
Declaracion
deEmision
56
ListadePiezas
27
Repuestos
y EncargosContratapa
GARANT{A COMPLETA DE DOS AfrOS DE CRAFTSMAN
POR DOS AltOS a partir de la fecha de la compra, este producto est& garantizado
contra cualquier defecto de material o mano de obra. El producto defectuoso se
reparar& o sustituir_ de forma gratuita si la reparaci6n no es posible.
GARANTJA LtMITADA ADIClONAL EN EL CiGOEI;4AL DEL MOTOR
A PARTIRDEL TERCER A_,IOHASTAEL DI_CtMOdesde la fecha de compra, el cigGe_al
del motor de este producto est& garantizado contra cualquier defecto de material o
mano de obra. Tras presentar el comprobante de la compra, un cigSefial del motor
defectuoso se sust_Jira. Esta garantia adicional cubre s6lo el cigQeSal del motor, y
no se aplica a cuatquier otro componente del motor. Usted debe pagar el costo de la
mano de obra de instalaci6n del cigiJeSal.
Para mas informaci6n sobre la cobertura de la garantia para obtener una
reparaci6n o sustituci6n gratuita, visite la p_gina web: www.craftsman,com
Esta garantia SOLO cubre defectos de material y mano de obra, La cobertura
de la garantia NO incluye:
• Piezas desechabtes que pueden sufrir desgaste debido al uso normal dentro
del periodo de garant[a, incluidas, entre otras, la barra guia, la cadena, los
filtros o ta bujla.
° Dados provocados por los intentos de] usuario de modificar o reparar el producto o
debido a los accesorios det producto.
• Reparaciones debidas a un accidente o a no utilizar o mantener et producto de
acuerdo a todas las instrucciones proporcionadas.
• Mantenimiento preventivo o reparaoiones debidas a! uso de un tipo incorrecto
de combustible, una mezcta incorrecta de combustible o combustible contaminado o con impurezas.
Esta garant{a se anutarb, siet producto se uti iza para ofrecer servicios comerCiales 0 si se atquila a otra persona_
;
:,/
:
Esta garantia ot0rgaderechos legales especificos y puede que a gunos varfen
de un estado a otro.
Sears Brands Management Corporation, Hoffman Estates, IL 60179
lul,u,u,u,l[mui
,
u]]l
,uluuuul ulll
,
ADVERTENCIA
ilUll
iii
iiiilUllllllllUllllll
ii
iiiiiiiii
Los gases de escape del motor de este producto
contienen sustancias quimicas conocidas en el
Estado de California come causantes de cancer,
defectos cong_nitos y otros daSos reproductivos.
lUlllll
iiiilUll,
29
iii
iiiii
i'
U ll
i
iFelicitaciones! ilia realizado una compra intetigente! Su nuevo producto Craftsman est,_ diseSado y fabricado para brindar muchos aSos de funcionamiento
confiable. Pero como todos Ios productos, puede requerir reparaciones peri6db
cas. En ese momento, tener un Acuerdo de protecci6n para reparaciones puede
ahorrade dinero y trastornos.
El Acuerdo de Proteccion para Reparaciones*
incluye Io siguiente"
F" Servicio experto por pare de nuestros t0 000 especialistas en repara:clones profesionales
i
...........
:
: :
/
Servicio ilimitado y ningun costo per las piezas y la mano de obra en
todas las reparaciones cubiertas
_- Reemplazo del producto hasta $t500 si el producto cubierto no puede ser
reparado
It
Descuento del 10% sobre el precio normal det servicio y las piezas
instaladas asociadas no cubiertas por el acuerdo; ademAs, 10% de des
cuento sobre el precio normal de la verificaci6n de mantenimiento preventivo
Ayuda telef6nica r&pida - la Ilamamos Resoluci6n r&pida; asistencia
telefSnica por parte de un representante de Sears. Piense en nosotros como
un "manual del propietario parlante".
Una vez que compre el Acuerdo de protecci6n para reparaciones, bastarA con que
realice una simple llamada telef6nica para programar servicios. Puede Ilamar a cualquier hora, de dia o de noche0 o programar una visita de servicios en tnternet.
Ef Acuerdo de Protecci6n para Reparaciones es una compra libre de riesgos. Si
cancela por cualquier motivo durante el periodo de garantia del producto, le proporcionaremos un reembolso completo. O un reembolso prorrateado en cualquier
momento posterior al vencimiento del periodo de garantia del producto.iCompre
su Acuerdo de protecci6n para reparaciones ya mismo!
Aptican atgunas limitaciones y exclusiones. Para conocer los precios e informacion adicional en EE.UU, Ilame al 1-800-827-6655.*La
cobertura en
Canada varia en algunos articulos. Para obtener los detalles completos,
flame a Sears Canada al 1-800-36t-666&
Servicio de instalaci6n de Sears
Para la instalaci6n profesionat de Sears de electrodom6sticos, abrepuertas de
garajes, calentadores de agua y otros articulos domesticos importantes, en
EE.UU. o Canad& llame a 1-888-331-4569.
,_ ADVERTENCIA:
Desconecte
siempre el cable de la bujia al reparar
el aparato, excepto en el caso de
ajustes al carburador. Debido a que
las sierras de cadena son instrumentos para cortar madera a alta velocidad, deben observarse precauciones
de seguridad especiales para reducir
el riesgo de accidentes. El uso descuidado o indebido de esta herramienta puede causar graves heridas.
PIENSE ANTES DE PROCEDER
Limite el uso de la sierra a aquellos
usuarios adultos que comprendad y
puedan imptementar todas las precauciones, regtas de seguridad e instrucciones de uso que se encuentran en
este manual.
Ropa Ajustada
aI Cuer
Zapatos de
Seguridad
Guantes de
Pantorriileras
de Seguridad
• Use equipo protector, Siempre use
calzado de seguridad con puntas de
acero y suetas anti-deslizantes; ropa
ajustada aI cuerpo; pantorrilleras de
seguridad; guantes gruesos de uso
industrial anti-deslizantes; protecci6n
de ojos tales como gafas de seguri30
•
dadguenoselacara;casco
duro
aprobado;
ybarrera
desonido
(tapones
deo_do
uorejeras
anti-sonido)•
paraproteger
laaudiciSn.
Losque
usansierras
defuerza
habitualmente
deber&n
hacerse
revisar
laaudici6n
frecuentemente
yaqueelruidodelas
sierras
decadena
puede
dar_ar
los
o[dos.
•
- Mantenga el cabello pot encima del
nivel de los hombros. No desgaste la
ropa suelta o joyer[a; pueden enredarse en las piezas m6viles.
* Mantenga todas las partes de cuerpo
alejadas de ta cadena siempre que el
motor est6 en funcionamiento,
- Mantenga a los niSos, espectadores
y animales a una distancia minima
de 10 metros (30 pies) def #.rea de
trabajo o cuando est& haciendo arrancar el motor.
° No tevante ni opere tas sierras de cadena cuando est& fatigado, enfermo,
ansioso o si ha tornado alcohol, drogas o remedios. Es inprescindible que
ud. est& en buenas condiciones fisicasy alerta mentalmente. Si ud. sufre
de cualquier condici6n que pueda em_peorar con el trabajo arduo, ases6rese
con su m6dico.
. No ponga en marcha la sierra sin tener un &tea de trabajo despejada, una
superficie estable para parase y, si
estA derrubando &rboles, un carnino
predeterminado de retroceso.
USE LA SIERRA OBSERVANDO TODOS LOS PROCEDIMIENTOS DE
SEGURtDAD
J Mantenga fas dos manos en las manijas siempre que el aparato est6 en
march& El uso del aparato con una
' sola mano puede causar graves her!alas al usuario, a los asistentes o a los
especadores. Las sierras de cadena
est&n diser_adas para que se las use
con las dos manes en todo momento,
° Haga uso de ta sierra de cadena Qni: camente en tugares exteriores bien
ventilados.
° No haga uso de ta sierra desde las
escaleras port&tiles ni los &rboles.
. Asegt3rese de que ta cadena no vaya
a hacer contacto con ningOn objeto
antes de porter en marcha el motor.
:Nunca intente hacer arrancar la sierra
con ta barra gu_a dentro de un corte.
, No aplique presi6n a la sierra al final
de los cortes. Aplicar presiSn puede
hacer uue pierda el control al compfetarse el corte.
Pare el motor antes de apoyar ta
sierra en ningen tado.
Cuando trasJade ta sierra en la mano,
h&galo _nicamente con el motor parado. Ll_vela con et silenciador apartado
del cuerpo y la barra y cadena hacia
atr&s, con la barra de preferencia cubierta por una fund&
No ponga en funcionamiento la sierra
de cadena si est_ daSada, incorrectamente ajustada, o si no est& armada
completa y seguramente. Siempre
cambie el barre, cadena, protector de
mano, freno de cadena, o el otras piezas immediatamente si dafiado, roto,
o se sate por cuatquier motivo.
MANTENGA LA SIERRA EN BUENAS CONDICIONES DE FUNCTIONAMIENTO
_,ADVERTENCIA:
Desconecte la
buj_a antes de hacer cualquier mantenimiento menos los ajustes al carburador.
• Ueve la sierra de cadena a un proveedor de servicio autorizado para
que haga todo servicio menos aquel_
los procedimientos listados en la secciSn de MANTEN1MIENTO
de este
manual.
° Asegt_rese de que la cadena se detenga pot compfeto cuando se suelta
el gatiflo. Para hacer correcciones,
vea los AJUSTE AL CARBURADOR.
° Mantenga las manijas secas, lirnpias
y tibres de aceite o de mezcta de
combustible.
° Mantenga las tapas y los fijadores
bien fijos.
• Componentes de repuesto que no
concuerden con fas piezas originaies
o la remoci6n de dispositivos de seguridad podda causar daflos at aparato y
accidentes al usuario o a espectadores. Use exclusivamente fos accesorios y repuestos Craftsman recomendados. Nunca modifique la sierra.
° Mantenga su sierra de cadena con
cuidado.
° Mantenga la herramienta afitada y
limpia para mejor funcionamiento y
mayor seguddad.
° Siga todas las instrucciones para lubricaci6n y cambio de accesorios.
° Inspeccione todas las piezas por si
hubiera darios. Antes de continuar con
el uso deI aparato; el protector u otra
pieza que se encuentre daSada debera ser inspeccionada cuidadosa*
mente para determinar si pueden
usarse de forma apropiada y para
31
vierificar si puede efectuar el funcionamiento para el cueal fue disefiada, lnspeccione et atineamiento de las piezas movibles, piezas movibles que se
encuentren atascadas, la ruptura de
piezas, montura y cualquier otra condici6n que pueda afectar el uso del
aparato. El protector o cualquier otra
pieza que se encuentre da6ada debera ser reparada apropiadamente o
deber&, set reemplazada pot un Centro de Servicio Sears, a no ser que se
indique de otra forma en este manual
det usuario.
- AI no encontrarse en uso, tas sierras
de cadena deber&n atmacenarse en
un lugar seco, en un tugar alto o bajo
Ilave, fuera del atcance de los nifios.
• AI almacenar la sierra, use una funda o un estuche de carga.
MANEJE EL COMBUSTIBLE CON
EXTREMO CUIDADO
• No fume mientras trabaja con et
combustible ni cuando est& haciendo uso de la sierra.
• Elimine todas tas posibtes fuentes de
chispas o llamas en tas &reas donde
se mezcla o vierte el combustible,
• Tenga siempre a mano herramientas
para extinguir incendios, por si fueran
: necesarias.
• Mezcle y vierta el combustible afuera
y use siempre recipiente aprobado
:para combustibles y marcado come
tal. Limpie todos los derrames de
combustible antes de poner el aparato en marcha.
• Al_jese a per 1o menos 3 metros (10
pies) deI lugar de abastecimiento
antes de poner el rotor en march&
-Apaque el motor y deje que la sierra
se enfrie en un lugar libre de substancias combustibes y no sobre hojas secas, paja, patel, etc. Retire ta tapa tentamente y reabastezca el aparato.
o Antes de guarder el aparato, vacie el
deposito de combustible. Arranque
el motor y d_jelo en marcha hasta
que se detenga con el fin de agotar
el combustible que pueda quedar en
et carburador.
o Guarde el aparato y el combustible
en un espacio fresco, seco y bier]
ventilado donde los vapores del
: combustible no puedan entrar en
contacto con dchispas ni llamas
abiertas provenientes de termotangues, motores o interruptores el6ctricos, calefactores centrales, etc.
PROTEJASE CONTRA LAS
RECULADAS
Ud. debe seguir todas las precauclones e instrucciones de seguridad
para ayudar e evitar las reculadas y
las dem&s fuerzas que pueden causar
graves heridas.
Trayectoria de Ia
.. _..i
._._::' Reculada
Evite Ias obstrucciones
Despeje el
Area de
Trabajo
_,ADVERTENCIA:
Evite reculada
le pueden causar graves heridas. Recutada es et movimiento hacia el
frente, hacia atr_.s o rApidamente hacia adelante, esto puede ocurrir cuando la punta de ta barra guia de la sierra de cadena entra en contacto con
cualquier objeto eomo puede ser otra
rama o tronco, o cuando Ia madera se
cierra y atasca mientras se hace el
core. Et entrar en contacto con alg0n
objeto extrafio a ta madera le puede
causar at usuario ta p_rdida del control
de la sierra de cadena.
• La Reculada Rotacionat puede
acontecer cuando ta cadena en movimiento entra en contacto con atgOn
objeto en Ia parte superior de la punta de la barra guia puede causar que
ta cadena entre al material y se detenga por un instante. El resuttado
es una reacci6n inversa, a velocidad
de relb.mpago, que hace recular la
barra guia hacia arriba y hacia atr_.s
hacia et usuario.
° La Reculada por Atasco acontecen
cuando la madera se cierra y atasca
la cadena en movimiento en el corte a
lo largo de ta parte superior de la barra guia y ta cadena se detiene repentinamente. Esta detenci6n repentina de
ta cadena tiene como resultado una
inversi6n de la fuerza de la cadena
usada para cortar madera y causa
que ta sierra se mueva en sentido opuesto al de la rotaci6n de fa cadena.
La sierra directamente hacia atr&s en
direcci6n al usuario.
- La Reculada por lmputsi6n puede
acontecer cuando _acadena en movimiento entra en contacto con atg0n
32
objeto extraSo a ta madera en el
corte a Io largo de la parte inferior de
la barra guia y la cadena se detiene
repentinamente.
Esta detenci6n repentina de la cadena tira de la sierra
adelante y tejos del usuario y podria
:hacer f&cilmente al usuario perder el
control de la sierra.
REDUZQA LAS PROBABILIDADES
DE RECULADA
• Est_ consciente de la posibilidad de
reculada. Teniendo una buena comprensiSn b&sica de la recutada, ud.
podr#, reducir el elernento de sorpresa
que contribuye a los accidentes.
• Nunca permita que la cadena en movimiento toque ning_n objeto en la
punta de la barra guia.
• Mantenga el &rea de trabajo libre de
obstrucciones como por ejempto otros
&rbofes, ramas, piedras, cercas, tocones, etc. Elimine o evite toda obstrucci6nes comp pot ejemplo otros
&rboles ramas, piedras, cercas, to W
cones, etc. Elimine o evite toda ob:strucciSn que la cadena pueda tocar
mientras est& cortando.
° AI cortar una rama, no deje la barra
guia entrar en contacto con otra
rama o otros objetos alrededor.
• Mantenga ta sierra afilada y con la
tensiSn correcta. Las cadenas con
poco file o flojasincrementan la probabitidad de reculada. Siga las instrucciones del fabricante para afilar
y efectuar mantenimiento de la cadeha. Verifique la tensi6n a intervalos
regulares con el motor parado, nunca en marcha. Aseg[3rese de que las
tuercas de la freno de cadena est6m
parado, nunca en marcha.
AsegQrese de que las tuercas de ta
freno de cadena est6n ejustadas firmemente.
° Empiece y efectt3e la totalidad de
cada corte con et aceterador a rondo. Si la cadena se est& moviendo a
una velocidad menor que la m&xima,
hay m&s probabilidad de que la sierra recule.
° Use cuidado extremo al entrar de
nuevo en un corte ya empezado.
• No intente hacer cortes empezando
con la punta de la barra (cortes de taladro).
• Tenga cuidado con troncos que se
desptazan y con las dem&s fuerzas
que podrian cerrar un corte y apretar
Ia cadena o bien caer sobre ella.
° Use la barra Guia Reducidora de
Recuiadas y la Cadena Minimizadora de Reculadas recomendadas
para su sierra.
Para Evitar la Reculada por Atasco:
• Mant6ngase completamente conciente
de toda s_uaciSn u obstrucciSn que
pueda hacer que el material presione
la cadena en la parte superior o que
pueda parar ta cadena de cuatquier
otro modo.
• No corte rnas de un tronco a la vez.
° No retuerza la sierra al retirar ta barra
de un corte ascendiente cuando est&
seccionando troncos.
Para Evitar la Reculada por Impulsion:
° Empiece todo corte con el motor acel_
erado a fondo y con la caja de la sierra apoyada contra la madera.
° Use cu_as de pl&stico o de madera
(nunca de metal) para mantener abierto el corte.
MANTENGA EL CONTROL
Parese hacia la izquierda de Ia sierra.
posicibn
las manos
Codo rigido
El pulgar pot debajo de la maniia
° Sostener firmemente con las dos
manso fe ayudarA a mantener et control de la sierra. No afloje. Mantenga ta
mano derecha envolviendo totatmente
la manija trsera, sea ud. derecho o
zurdo. Sostenga ta manija delantera
con la mano izquierda, colocando el
pulgar debajo de la manija y rodeando
ta manija con los dedos. Mantenga el
brazo izquierdo totatrnente extendido
con el codo fijo.
- Coloque le mano izquierda el la manija delantera, de modo que quede en
linea recta con ta mano derecha en la
manija trasera, cuando est6 haciendo
cortes de seccionamiento. P&rese tevemente hacia la izquierda de la sierra
para evitar que el cuerpo est_ el tinea
directa con la cadena.
• P&rese con el peso distr_buido igualmente entre los dos pies.
° No se extienda excesivamente. La
sierra puede impulsario o empujarlo y
_ 33
ud. puede perder el equitibrio y el control de la sierra.
• No corte arriba del nival de los hombros. Es dificil mantener el control de
la sierra si est& pot encima del nivet
: de los hombros.
DISPOSlTIVOS DE SEGURIDAD
CONTRA LAS REGULADAS
ADVERTENOtA:
Los siguientes
dispositivos han sido incluidos en la
sierra para ayudar a reducir el riesgo de
reculadas; sin embargo, tales implementos no pueden eliminar totaImente esta
reacci6n peligrosa. Como usuario de
sierra de cadena, ud. no debe confiarse
sotamente en los dispositivos de seguridad. Ud. debe seguir todas las precauciones de seguridad, instrucciones y
mantenimiento que se encuentran en
este manual para ayudar a evitar las reculadas y otras fuerzas que pueden
causar graves heridas.
Protector de Mano Delantera, diseSado para reducir la probabilidad que su
mano izquierda entre en contacto con
la cadena, si la mano se desprende
de ]a manija delantera.
° La posiciSn de las manijas delantera y
trasera, dise_adas con distancia entre
Ias manijas y "en linea" la una con la
otra, La separaci6n y la colacaci6n en
tinea que este dise[io provee se combinan para dar equitibrio y resistencia
para controtar ta propulsi6n de la sierra hacia el usuario si acontece una
reculada.
• Barra Guia Reducidora de Recu]adas,
diseSada con punta de radio pequeSo
que reduce el tamaSo de ta zona de
petigro en la punta de Ia barra. Las
barras guias reducidoras de reculadas
son aquellas que han demostrado que
reducen significativamente la cantidad
y la seriedad de las reculadas cuando
hart sido examinadas de acuerdo con
los requisitos de seguridad para las
sierras de cadena a gasotina establecidos pot el Patr6n ANSI (American
National Standards Institute, Inc.)
B175.t.
Punta de Radio
Zona de Peligro
Pequer_o
Barra
Guia
Grande
Punta deBarra
Radio {ZonadePeligro_.
Guia
, Las Cadenas Minimizadoras de Reculadas han satisfecho los requisitos
de rendimiento del ANSI B175.1 (Requisitos de Seguridad para las Sierras de Cadena a Gasolina) en pruebas con una muestra representativa
de Sierras de cadena con despfazamiento de menos de 3,8 putgadas,
como se especifica en ANSl Bt75.1.
Cadena Minimizadora de Recuiadas
Marcador de Profundidad Perfilado
_-...... Eslab6n Protector
__
fuerza de reacci6n
y permite que Ia
largado desvia la
madera entre gradualmente a la Cuchilla
FRENO DE CADENA
• Freno de Cadena, dise_ado para detener la cadena en el caso de recula_
da,
_ADVERTENCIA:
NUESTRACOM_
PAllIA NO REPRESENTAY USTED NO
DEBERAASUMIR QUE EL FRENODE CADENA LO PROTEGERAEN CASO DE RECULADAS. Una reculada es una acci6n
r&pida la cual lanza la barra y la cadena
rotativa hacia atr&s y hacia arriba en direcci6n al usuario. Una reculada podria
ser causada cuando se permite que la
punta de la barra en la zona de peligro
entre en contacto con cualquier objeto
en la zona superior de la barra guia.
Esta acci6n puede empujar la barra
guia r&pidamente hacia atr&s en direcci6n donde se encuentra el usuario, Cualquiera de 6stos dos acontecimientos
puede causar que el usuario pierda el
control de la sierra Io que podria resultar
en lesiones de alta gravedad o hasta ta
muerte. NO DEPENDACIEGAMENTEEN
CUALQUIERADE LOS DISPOSITIVOSINCLUIDOSEN SU CUIDADOSAMENTE
PARAEVITARLAS RECULADAS. Las barras guia reducidoras de reculadas y Ias
cadenas de sierra de baja.acci6n de reculadas reducen la ocasion y magnitud
de las reculadas y son recomendadas.
Con su sierra vienen incluidas una cadena de baja acci6n de reculadas y una
barra de equipo original. Reparaciones
al freno de cadena deben ser hechos
por un Centro de Servicio Sears que
este autorizado. Lleve ta unidad af sitio
de compra a el Centro de Servicio
Sears mas cercano.
- El contacto con fa punta de Ia sierra
puede causar una REACCtONcontraria
que a una velocidad vertiginosa expu!sa la espada hacia arriba y hacia
atr&s, en direcci6n al operador.
34
o Si la cadena queda atrapada per la
parle supenor de la espada, 6sta
puede rebotar bruscamente hac_a et
operador.
o CuaIquiera de estas dos reacciones
puede provocar la p_rd{da del control de la motosierra y causar una
grave lesi6n No confie exclusivamente en ios dispositivos de seguridad que incorpora su sierra.
Este aparato no esta equipado con un
sistema de anti-vibrac{6n y se diser_a
si es usado ocasionaimente.
AVISO SEGURIDAD: El estar expuesto
afas vibraciones traves del use prolongado de herramlentas de fuerza a gasolina puede causar dahos a los vases
sangu[neos o a los nervios de los dedos, tas manes y las coyunturas en
aquellas personas que tienen propenstdad a los trastornos de la circulac_6n o
alas hinchazonees anormales. E{ use
prolongado en tiempo file ha side asociado con dar_os a los vases sangufneos de personas que per otra parte
se encuentran en ped_ectoestado de
safud. Si ocurren sfntomas tales come
el entumecimiento, el dolor, la falta de
fuerza, las cambios en el color o la textura de la ptel o falta de sentido en los
dedos, las manes o las coyunturas,
pare de suar esta maquina immediatamente y procure atensi6n medica. Los
sistemas de anti-vtbraci6n no garantizan que se eviten tales problemas. Los
usuarios que hacen use continue y proIongando de tas herramientas de fuerza
deben fiscalizar atentamente su estado
fisice y el estado del aparato.
FRENO DE CADENA: Para con- formarse con las Regufac_ones Federales del OSNA para el tumbado comercial de arbotes, un freno de cadena
se requiere y no ser& quitado ni serA
fisiado de otra manera.
REJILLA ANTICHISPA: Su sierra
vlene equipada con silenctador limitador
de temperatura y con rejilta antichispa
que cumpie los requisites de los
C6digos de California 4442 y 4443
Todas las tierras forestadas federales,
m&s los estados de California, Idaho,
Maine, Minnesota, Nueva Jersey,
Washington y Oreg6n, requieren per ley
que touches motores de combusti6n
interna est_n equipados con rejilla
antlchispa. Si usted usa una sierra de
cadena en un estado y otra Iocalidad
donde existen tales reglamentos, usted
ttene ta responsabllidad jur{dica de
mantener estas piezas en correcto
estado de funcionameinto. De Io
contrario, estara, en infracci6n de la ley.
Refiera a la carta de RESPONSABILIDADESDEL USUARIOen la seccion del
MANTENIMIENTO.
PADRONES: Este sierra de cadena
consta en la lista de Underwriters Laboratories, Inc. de acuerdo a los Requisites Nacionales de Segundad Estadounidenses para S_erras de Cadena
a Gasotina (ANSI B175.1-20t2),
A
Si necesita ayuda, faftan ptezas o encuentra piezas dafiadas, favor Ilamar
al 1-800-23545878.
AVISO" Es normal oir el golpeteo del
filtro de combustible en el tanque
vacion_
Su aparato ha side puesto a prueba en
ta f_brica y se le ha ajustado con precision el carburador. Come resuttado, es
posible que se sienta un olor a gasolina
o gue se encuentre una gota de residue
de aceite o combustible en el silenciador
a! desempacar el aparato.
MONTAJE
EI aparato viene completamente armado y no hay necesidad de montaje.
_IL ADVERTENClA:
Antes de usar
la sierra de cadena, asegure redes los
fijadores se encuentren bien ajustados.
CONTENIDO DE LA CAJA
Use fa siguiente lista para verificar el
contenido:
Modelo 358.381700
• Sierra de cadena (completamente armada)
o Herramienta de Ajuste de ta Cadena
(Herramienta de ta Barra)
- Aceite de motor de 2-ciclos
° Estuche transportador
° Barra adicional de 16 puigadas
• Cadena adicional de 16 pulgadas
Verifique las piezas en case de averia.
No use piezas que se encuentren
daSadas.
35
CONOZCA EL APARATO
LEA ESTE MANUAL DEL USUARIO Y [_ASREGLAS DE SEGURIDAD ANTES DE USAR
LA SIERRA DE CADENA. Compare las ilustraciones con su aparato para famitiarizarse con la ubicaci6n de los varios controles y ajutes. Guarde este manual para
uso futuro.
Herramienta de
Ajuste de la Cadena
(Herramienta de ia Barra)
Protector
de Mano
Delantera ''_
Cadena
Silenciador
Orificio del
Engranaje
:
/
-_/
Manija Delantera
Cuerda de Arranque
Interruptor
ON/STOP
z/
TapadeI Tanq
Lubricantede Barra
/
Caja de_Arranque
Paianca del
cebadori
marcha
lenta
&pida
Bombeador
Tapa del Tanque de Combustible
Tapa deI Cilindro
/
Traba deI
Manija
Trasera
\
El INTERRUPTORON/STOPest_ acostumbrado a detener lamb, quina,
GATILLO DE ACELERADOR
El GATtLLODE ACELERADORcontrola
vetocidad de m&quina,
TRABA DEE ACELERADOR
Es necesario apretar primero la TRABA
DEL ACELERADOR para poder accionar
et acelerador, Este dispositivo previene el acionamiento accidental del
acelerador.
PALANCA DEL CEBADORi
'
MARCHA LENTA RAPIDA
El cebador y la marcha lenta rapida son
fijadas tirando ta PALANCADEL CEBA*
DORiMARCHALENTARAPIDAcompletamente para arrancar el aparato en frio o
despu_s reaprovisionado de combustible. La palanca del cebador provee
combustible adicionaI al motor at arrancar frio.
E] BOMBEADORcircula combustible al
carburador.
FRENO DE CADENA
El FRENO DE CADENA esta dise_ado
para detener ta cadena en caso de reculada, El freno de cadena se activa
autom&ticamente en caso de reculadas, El freno de cadena se activa
manualmente si empujan al protector
de mano delantero adelante, Para desactivar el freno de cadena, tire Io mas
posible del protector de mano delan*
tero hacia la manija delantera.
TENSION DE LA CADENA
Es norma! que las cadenas nuevas se
estiren durante los primeros t5 minutos
de uso. Deberb,verificarse la tensi6n de
la cadena cada vez que haga arrancar
la sierra de cadena, Vea TENSIONDE LA
CADENAen la secci6n de MANTENIMtENTO.
36
A ADVERTENOIA:
Si la sierra se
usa con la cadena floja, _sta podrfa
sattar de la barra guia y producir lesiones graves al operador y/o daSos a
la cadena, inutiliz_ndola.
ANTES DE PONER EL MOTOR EN
MARCHA
ADVERTENCIA:
El silenciador
es extremadamente caliente durante el
use y despu6s de usar el aparato. No
toque e] silenciador ni permita que el
material combustible tal come gasolina o
hierba seca hagan contacto.
ADVERTENCIA:
Lea toda ta informaci6n sobre el manejo det combustible en la secciSn de reglas de seguridad de este manual antes de
empezar. Si no comprende la informaci6n sobre el manejo del combustible,
no intente abastecer su aparato. Procure ayuda de alguien que comprenda
ta informaci6n o Ilame al tet#fono de
ayuda af consumidor al
1-800-235-5878.
ACEITE PARA BARRA Y LA CADENA
La barra y la cadena requieren lubricaciSn. E1libricador de la cadena provee
lubricaciSn continua a la cadena y a la
barra guia No se olvide de Ilenar el tanque de aceite para barra siempre que
Ilene el tanque de combustible (Capacidad = 6,8 ft. oz.). La falta de aceite arruinar_ la barra y {a cadena r_,pidamente.
Et use de demasiado poeo aceite causat& exceso de caientamiento qua ser&
detectable per el humo proveniente de
la cadena y/o per la desco[oraciSn de la
barra. Para obtener la m,_xima prelongaci6n de la vida de la baray ta cadena,
recomendamos que use el aceite para
barras de sierra de cadena Craftsman.
Si el aceite Craftsman no est& dispondible, puede usarse un aceite SAE 30 de
buena calidad hasta obtenerel aceite
marcha Craftsman. La cantidad de tubricaciSn es medida autom#,ticamente
durante ei funcionamiento de la sierra.
La sierra usar& m&s o menos un tanque
de aceite para la barra per cada tanque
de combustible. Siempre tfene e! tanque
de aceite de la barra cuando Ifene el
tanque de combustib{e.
ABASTEClMIENTO
DEL MOTOR
ADVERTENCIA:
Remueva la
tapa det tanque de combustible fentamente al reabastecer combust{ble.
IMPORTANTE: Este equipo esta
diseSado para operar con gasotina sin
plomo con un minima de octane 87
(m_todo R+Mi2), con etanol mezclado
hasta un 10% m&ximo per volumen
(E-10). Antes de la operaciSn, la
gasolina se debe mezclar con un
aceite para motor enfriado per aire de
2 ciclos sint_ticos de buena calidad
diseSado para mezctarse a una
proporciSn de 40:1. Se recomienda el
aceite sint_tico de la marca Craftsman.
Mezcte la gasolina y el aceite a una
proporc{Sn de 40:t. Se obtiene una
proporciSn de 40:1 al mezclar 3.2
onzas liquidas (95 mt) de aceite con
1 ga!6n (4 {itros) de gas0lina sin
plomo. NO USE aceite automotriz ni
aceite maritime. Estos aceites
causar&n daSos al motor. At mezclar
combustible, siga tas instrucciones
impresas en el recip{ente. Una vez
queet aceite se agregue a la gasolina,
agite el recipiente moment&neamente
para asegurar que et combustible se
mezcle bien. Siempre lea y siga tas
regias de seguddad relacionadas con
el combustible antes de Ilenar su
unidad con combustible. Compre
combustible en cantidades qua se
puedan usar en 30 alias para asegurar
la frescura del combustible.
PRECAUCtON: Nunca use gasofina
sola en su unidad. Esto causar& un
da_o permanente en el motor y
anular& la garant_a limitada. No use
combustibles alternatives come
mezcJas de etanof per arriba del 10%
per volumen (E-t5, E-85) o cualquier
combustible mezclado con metanof.
El use de estos combustibles puede
causar un mayor desempeho del
motor y problemas de durabilidad.
FRENO DE CADENA
AsegSrese el freno de cadena se disactiva tirando el protector de mane delantero hacia atr&s, acerc&ndoto a la
manija delantera todo fo que sea posibte, Es necesado desactivar el freno
de cadena para cortar con _asierra.
,_ ADVERTENOIA:
La cadena no
debe moverse cuando el motor se encuentre en marcha inactiva. Si la cadenase mueve en marcha inactiva, vea ta
secciSn de AJUSTEAL CARBURADORen
este manual. Evite contacto con el silenciador. Un silenciador caliente podr[a
causar quemaduras muy graves.
37
PARA PARAR EL MOTOR
° SueRe el gati]lo acelerador.
• Mueva el interruptor ON/OFF a la posici6n OFF.
POSICION DE ARRANQUE
• Para poner en marcha el motor, sujete
la sierra firmamente en el suelo como
se ilustra Asegdrese de que la cadena pueda moverse libremente sin tocar ningdn objeto
Mango de la cuerda de arranque
La mano
izquierda en
la mango
deiantera
El pie derecho en el interiorde la
mango trasera.
-_ADVERTENCIA:
t'4o intente
hacer arrancar la sierra de cadena
arrojb,ndota o dejandola caer, Esto
pondra at operador en riesgo de sufrir
lesiones graves debidas a la p6rdida
de control de la sierra de cadena.
PUNTOS IMPORTANTES PARA
REOORDAR
At tirar de la cuerda de arranque, no use
la extensi6n completa de la cuerda ya
que esto puede causar que la cuerda
se parta. No permita que ta cuerda de
arranque regrese a su tugar bruscamente. Sujete el mango y permita que ta
cuerda rebobine lentamente.
Para arranques bajo condiciones de clima frio, ponga en marcha el motor con
el cebador en Ia posici6n FULL CHOKE;
permita que el motor caliente antes de
apretar el gati!lo acelerador.
AViSO: No intente a cortar ning_n tipo
de material si fa palanca del cebadori
marcha tenta rapida se encuentran en
la posici6n FULLCHOKE.
PARA ARRANCAR EL MOTOR FRIO
(o motor caliente despu6s de quedar sin combustibZe)
AVISO: En Ios pasos siguientes, cuando la palanca def cebadorimarcha tenta
rapida se activa en su maxima extensi6n, autom&ticamente fijar& la aceleraci6n para la puesta en marcha.
tNTERRUPTOR
STOP
1. Mueva el interruptor ON/STOP a la
posici6n ON.
2. Tire de la palanca def cebadori
marcha lenta rapida su maxima extensi6n (a ta posioi6n FULL
CHOKE).
3 Lentamente, oprima el bombeador 6
veces
4. Este aparato cuenta con un sistema de arranque Sim-pul _". No
tiene que tirar brusca ni energicamente del mango de ta cuerda de
arranque. Usando su mano derecha, tire del mango de la cuerda de
arranque 5 veces con un movimiento controlado y constante; luego, proceda al siguiente paso.
AVISO: Si el motor parece que est@
intentando arrancar antes det quinto
tir6n, pare de tirar y proceda inmediatamente al siguiente paso.
5. Empuje la palanca del cebador/
rnarcha lenta rapida a ta posici6n
HALF CHOKE.
PALANCADEL CEBADORi
MARCHA LENTA RAPIDA
OFF
/'
HALF
/
FULL
j¢
//
6. Tire del mango de la cuerda de arranque con su mano derecha hasta
que et motor se ponga en march&
7. Permita que el motor continue en
marcha por approximadamente 30
segundos. Luego, apriete y suelte el
gati!lo acelerador para permitir que
et motor regrese a marcha lenta.
PARAARRANCAR CON EL " :
MOTOR CALIENTE
t. Mueva el interruptor ON/STOP a la
posici6n ON,
38
• El freno de cadena inercia-activado
2. Tiredetapatanca
delcebadori
se activa si el protector delantero de
marcha
lentar_pida
sum_xima
mano es empujado hacia adelante ya
extension
(alaposici6n
FULL
sea manualmente (a mano) o auCHOKE)
parafljarlamarcha
tenta
r&pida;
luego,
regrese
lapalanca
det tom&ticamente (por et movimiento repentino).
cebadorimarcha
lentar&pida
a ta
o Si el freno ya esta activado, se Io deposici6n
HALF
CHOKE).
tirando et protector de mano
3. Lentamente,
oprima
elbombeador sactiva
delantero hacia &no&, acerc_ndolo a
6 veces.
4. Usando
sumanoderecha,
tiredel
la manija delantera todo to que sea
mango
detacuerda
dearranque o posible.
Para cortar con ta sierra, es necesario
conunmovimiento
controtado
y
desactivar el freno de cadena.
constante
hasta
queelmotor
se
Desactivado
ponga
enmarch&
Activado
5. Apriete
ysuelteelgatilloaceleradorparaparapermitir
queelmotor
regrese
amarcha
lenta.
ARRANClUE
IDIFICIL
(oarranque
de
motorahogado)
Elmotorpuede
encontrarse
ahogado
condemas!ado
combustible
sinoseha Control del freno
puesto
enmarcha
despu6s
de110
tir6n. PRECAUClON: El freno de cadena
Unmotor
queseencuentre
ahogado debe ser inspeccionado varias veces al
puede
setaclarado
delexceso
decom- alia. At hacer esta inspecci6n, el motor
bustible
empujando
lapatanca
delceba- siempre debe estar prendido. Esta es la
dor/marcha
lentarapida
en totalmente (a
t3nica ocasi6n cuando la sierra se debe
la posiciSn OFF CHOKE) y luego siguiendo el procedimiento de puesta en marcha para motores calientes que se has
indicado anteriormente. Aseg_rese de
que el interruptor ON/STOPse encuentre
en la posici6n ON. Que el motor se
ponga en marcha puede requerir que
se tire de la cuerda de arranque muchas veces, dependiendo cub.n ahogado se encuentre el motor.
Si el motor no arranca, refi6rase a la
TABLA DtAGN6STICA Ollame a
1-800-235-5878.
FRENO DE CADENA
cotocar en la suelo con et motor aun
prendido.
Coloque la sierra en suelo firme. Sostenga ta manija trasera con la mano
derecha y la manija delantera con la
mano izquierda. Aplique a la velocidad m&xima presionando el gatillo del
acelerador. Active el freno de cadena
dando vuetta a su muSeca izquierda
contra el protector de mano delantera
sin sottar la manija detantera. La cadena debe parar inmediatamente,
Control del funcionamiento
activado por inertia
_ADVERTENClA:
La banda del
freno podr& romperse al activar el freno
si 6sta se encuentra demasiado usada
y fin& Si la banda del freno se encuentra rota, el freno de cadena no detendra
ta cadena. El freno de cadena debe ser
substituido si Cualquier parte se desgasta menos de 0,5 mm (0,020 de pulgada) densamente, Reparaciones al freno
de cadena deben set hechos por un
Centro de Servicio Sears que este autorizado. Lleve ta unidad al sitio de compra a et Centro de Sewicio Sears mas
cercano.
• Esta s erra viene equipada con un freno de cadena diseSada para detener
la cadena en el caso de recutada,
_IbADVERTENCIA:
Cuando tleve a
cabo el procedimiento siguiente, el
motor deber& estar apagado.
Sostenga la manija trasera con fa mano
derecha y la manija delantera con la
mano izquierda. Sujete la sierra unos
35 cm (14 pulgadas) por encima de un
toc6n u otro superfice de madera. Libere
la empu_adura del mango delantero y
que la punta de Ia barra guia caiga hacia adelanta y pueda entrar en contacto
con el tocon. Cuando la punta de la barra golpee et tocon, el freno debe activarse.
SUGERENCtAS PARA EL USO
CORRECTO DEL APARATO
• Verifique fa tension de la cadena
antes del primer USo, desPu6S de un
39
minuto de funcionamiento y cada vez
que haga arrancar la sierra de cadena. Yea TENSIONDE LA CADENAen la
secci6n de MANTENtMIENTO.
° Corte madera Qnicamente. No corte
metal, pl&stico, tadrillos, cemento,
otros materiates de construcci6n que
no sean de madera, etc.
• Pare la sierra si la cadena toca cuaIquier objeto ajeno. Inspeccione ta sierra y repare o instale repuestos seg5n
la necesidad. Si la cadena satta y se
sale de la barra guia, inspeccione la
cadena en busca de eslabones de
funcionamiento daSados antes de
instalarla nuevamente. Las rebabas
en los esiabones de funcionamiento
que puedan impedides entrar en la
muesca de la barra gula, se pueden
eliminar con una lima plana.
• Mantenga la cadena fuera de la arena y la tierra. La menor cantidad de
tierra desafila r&pidamente fas cadehas, asi incrementa la posibilidad de
reculadas y bar& necesario volver a
afilar o sustituir la cadena.
• Corte varios troncos pequeSos como
pr&ctica, usando la siguiente t6cnica,
para acostumbrarse al manejo de la
sierra, antes de empezar un proyecto de grandes dimensiones.
• Acelere et motor a rondo antes de
empezar a cortar apretando el gatillo acelerador.
• Empiece el corte con el bastidor de
la sierra apoyada contra el tronco.
° Mantenga et motor con aceterador
a fondo constantemente mientras
corta.
° Deje que la sierra haga todo el trabajo de cortar; no use m&s que una
muy ligera presi6n hacia abajo.
° Suelte el gatilto acelerador inmediatamente al terminar de cortar, dejando que el motor funcione a marcha lenta. Si mantiene la sierra en
marcha con acelerador a rondo sin
estar cortando, puede oausar desgaste innecesario. Para maximizar
la eficacia operativa, no haga
funcionar et motor durante mas
de 30 segundos en el momento
a la velocidad m_xima,
• Para no perder el control cuando
se haya completado el corte, no le
ponga presi6n a la sierra al final
del corte.
° Pare el motor antes de apoyer la sierra al finalizar un corte.
TECNICAS PARA TUMBAR ARBOLES
ADVERTENCIA:
Vea que no
haya ramas rotas o muertas que
podrian caerte encima mientras corta,
causando heridas graves. No corte
cerca de edificios ni cables el_ctricos
si no sabe la direcci6n de tumbado del
&rbot, ni de noche ya que no podr& ver
bien, ni durante mal tiempo como !luvia, nieve, o vientos fuertes, etc. Si el
arbol hace contacto con algSn cable
de tinea de servicio p_btico, la compaSa de servicio p[iblico deber& ser
notificada de inmediato.
• Planifique la operaci6n de corte cuidadosamente pot adelantado.
° Despeje al &rea de trabajo. Ud. precisa un &rea despejada en todo el contorno de &rbo] donde pueda pisar con
firmeza entodo momento.
• El usuario de la sierra de cadena deber& permanecer del lado cuesta arriba
det terreno ya que es probable que el
&rbol rodillo o se deslice cuesta abajo
despu_s de caer,
• Estudie las condiciones naturales que
puedan causar que el &rbol caiga en
una direcci6n determinada.
Entre las condiciones naturates que
pueden causar que el &rbol caiga en
una direcci6n determinada, se encuentran:
• La direcci6n y la velocidad del viento.
° El &ngulo de inclinaci6n del &rbol. El
Angulo de los &rboles a veces no se
nota debido al dective det terreno o a
terreno desparejo. Use plana o cordel
de sonda para determinar I direcci6n
de la inclinaci6n del &rbol.
• El _.rbotes m&s pesado o tieno mucho
m&s ramas de un lado. _
° Arboles y obst&cutos en derredor.
Ver_que si hay porciones descompuestas o podridas. Si el tronco est,,
podrido, puede pa_rse repentinamente
sin aviso y caer sobre el usuario.
Aseg_rese de que haya suficiente espacio para la caida det &rbof. Mantenga una distancia equivalente a dos
veces y medio del larbo del &rboI que
est_ cortando entre et &rbol y la persona m&s cercana u otros objetos. El ruido del motor puede impedir que se escuchen tas advertencias gritadas.
Retire ta tierra, las piedras, la corteza
suelta, los clavos, las grampas y et
alambre que pueda haber en el arbol
en el lugar det corte.
4O
tumbado y ta muesca para format una
bisagra. Esta bisagra ayudar& a evitar
que el arbot ciaga en la direcci6n equivocada,
P|anifique una ruta predeterminada
Rey
despejada de retroceso
Retroceso
/
La bisagra sostiene el arbol en el
tocbn y ayuda a controtar ta caida
Abertura del
corte de
tumbada
Retroceso
PARA TUMBAR ARBOLES
GRANDES (con dia.metrode 15 cm
(6 pulgadas) o m&s)
Se usa et m_todo de corte de muesca
para los arbofes grandes. La muesca
es un corte en el lado del _trbot hacia
el cual se desea que caiga. Despu6s
de hacer et corte de tumbado det lado
opuesto, el arbot tendra la tendencia
de caer hacia el lado en que se ha hecho el corte de muesca.
AVlSO" Si el &rbol tiene raices de
apoyo grandes, retirelas antes de hacer el corte de muesca. Si us6 la sierra
para quitar raices grandes de apoyo,
prevenir la cadena de entrar en contacto con ta tierra esto te previene de
perder del filo.
CORTE DE MUESCA Y TUMBADO
DEL ARBOL
• Haga el corte de muesca cortando
primero la base de la muesca. Haga
que el corte atraviese un tercio del ancho det tronco. Luego complete el
corte de muesca cortando en &ngulo
como se muestra en la ilustraci6n
"M6todo muesca", abajo. Una vez
completo el corte de muesca, retire la
curia de madera del &rbol.
Corte final (corte de tumbada)
aqui, a 5 cm (2 pulgadas) arriba
deI centro de la muesca.
Primer corte
/]_
Muesca _
......
5 cm
/
Cierre de
ta muesca
AVISO: Antes de completar el
tumbado, use cutlas para abrir el
corte, cuando sea necesario, para
controlar la direcci6n de la caida, Use
cutlas de madera o de pl&stico, pete
nunca de acero o de hierro, para evitar
que ta sierra recule y para evitar dafios
a la cadena.
° Este alerta a los indicios de que el
&rbol est& por caer: los crujidos, et
ensanchamiento del corte de tumbado y los movimientos de las ramas
superiores.
• En el instante en que el &rbot comienza a caer, pare la sierra, ap6yela en el
suelo y retroceda rApidamente, por la
trayectoria de retroceso prevista.
• Para evitar heridas, NO corte un ,_rbol
parciatmente caido con ta sierra, Tome
extremo cuidado con los &rbofes parcialmente tumbados que tienen apoyo
precario. Cuando el arbol no cae totalmente, ponga la sierra de lado y use
un montacargas a cable, un aparejo
de po eas o un tractor para bajarl O,
CORTANDO UN ARBOL TUMBADO
(SECCIONAMIENTO)
El t_rmino seccionamiento significa
co[tar un &rbol tumbad 0 en secciones
del largo deseado.
_t_ ADVERTENCIA:
No se pare
sobre et tronco que esta siendo cortado. Cualquier parte del tronco puede
rodar haciendo que el usuario pierda
el equilibrio y et control, No se posi*
clone cuesta abajo del tronco que est,.
siendo cortado.
PUNTOS IMPORTANTES
• Corte _nicamente un tronco a la vez,
• Corte con sumo cuidado la madera
astillada. La sierra puede arrojar pedazos punteagudos y filosos hacia el
usuario.
• Despues de retirada la curia de madera det muesca, det lado opuesto al
corte de muesca haga el corte de
tumbado. El corte de tumbado debe
quedar a 5 cm (2 pulgadas) m&s arriba que la base del corte de muesca.
Este procedimiento dejar& suficiente
madera sin cortar entre el corte de
:
41
* Use un caballete para cortar troncos
pequeSos. Nunca permita a otra persona que sostenga el tronco mientras
ud. corta ni sostenga el tronco con Ia
piema o el pie.
° No cor[e en lugares donde haya troncos, ramas y raices entrefazadas
como puede acontecer despu_s de
un vendaval. Arrastre los troncos hasta un tugar despejado antes de cortarlos, empezando por los troncos expuenstos y ya retirados.
TIPOS DE CORTE QUE SE USAN
PARA EL SECCIONAM|ENTO
,_ADVERTENCIA:
Si la sierra queda apretada o atascada dentro del tronco, no intente sacada a la fuerza.
Puede perder et control de la sierra,
causando heridas o daSos al aparato.
Pare la sierra, martille una cuSa de
pl&sticoo de madera en el corte hasta
que la sierra salga f&citmente. Ponga la
sierra de nuevo en marcha y colSquela
cuidadosamente de nuevo en el cor[e.
No intente poner en marcha ta sierra de
nuevo cuando esterapretada o atascada
en un tronco.
Use una cuba para sacar la sierra
Apague la sierra y use una cuba de
madera o de plb,stico para abrir eltajo.
Corte Descendiente: empieza desde
el lado superior del tronco con la parte
de abajo de la sierra contra el tronco;
haga una teve presi6n hacia abajo,
Corte descendiente
.;%:_.
Haga siempre ei primer corte del lado
del tronco que est& bajo compresi6n.
El lado de compresi6n del tronco es
donde ta presi6n del peso det tronco
se concentra.
Primercorte det lado del tronco
bajo compresi6n._,
Segundo co_e
Primer corte de lade deI tronco
bajo compresi6n
SECCIONAMIENTO SIN APOYO
• Haga el corte descendiente de un tercio del di&metro.
° Haga rodar el tronco y termine con
otto corte descendiente.
• Tenga cuidado con los troncos presionados de un tado. Vea la ilustraciones
anterior para seccionar un tronco
presionado.
SECCIONAMIENTO USANDO TRONCO O CABALLETE DE APOYO
° Recuerde que el primer corte siempre
es de Iado deI tronco bajo compresi6n. (Vea en Ia ilustraciones que sigue
el primer corte y el segundo corte.)
° El primer corte debera extenderse por
1/3 del di&metro del tronco,
• Termine por el segundo corte.
Uso de tronco como apoyo
4!
ascendiente" "_:,:,_
Corte Ascendiente:
empieza desde
el lado inferior del tronco con la parte
de arriba de ta sierra contra el tronco;
haga una leve fuerza hacia arriba, Sujete la sierra firmemente para mantener el control. La sierra tendr#, la tendencia de empujar af usuario hacia
atras.
ADVERTENCIA:
Nunca invierta
la sierra para hacer cortes ascendientes. No se puede controlar ta sierra de esa form&
• • 42
Con caballete como apoyo
i, : ' • Empiece por la base del #,rbo!tumbado y vaya trabajando :hacia el tope,
cortando tas ramas_ Corte tas ramas
pequeSas de un solo corte.
• Mantenga et tronco del &rbol entre ud,
y la cadena tanto como fuere posible.
o Retire las ramas mrs grandes y las
ramas de apoyo con ta t6cnica de un
tercio y dos tercios descirta en ta secci6n SECCIONAMIENTOSINAPOYO.
/
_ 1er torte
° Use siempre un corte descendiente
para cortar ramas pequeSas y ramas
que cuelgan libremente. Los cortes
ascendientes podrian hacer que tas
ramas caigan y apreten la sierra.
PARA PODAR
PARA CORTAR RAMAS Y PODAR
ADVERTENCIA:
Pode _nicaADVERTENCIA:
Este alerta y
mente last fa altura del hombro. No
tenga cuidado con los reculada, Cuancorte las ramas que queden m&s altas
do cortar ramas y podar, nunca permique los hombros. Consiga a un profeta que ta cadena en movimiento toque
sional para efectuar ese trabajo.
ning[_n objeto en ta punta de la barra
• Haga el primer corte en forma ascenguia. Permitir tal contacto puede cau_
diente de 1/3 del di_,mentro de la
sar graves heridas.
rama.
ADVERTENCIA:
Nunce trepe a
• Despu6s haga un segundo corte atravesando completamente ta ram& Filos _rboles para cortar ramas o para
nalmente haga un tercer corte, despodar. No se pare sobre escaleras,
cendiente, dejando un toco de 2,5 a 5
plataformas, troncos ni en ninguna pocm (1 a 2 pulgada) sobresatiendo del
sici6n que podria causarle que pierda
tronco del _rboL
et equilibrio o et control de ta sierra.
PUNTOS tMPORTANTES
= Trabaje lentamente, con las dos manos sujetando firmemente la sierra.
Mantenga el equilibrio, con los pies en
una superficie estable,
• Tome cuidado con las ramas chicas.
E1material de poco di&metro puede
l
f_ t_'l Segundo corte f'ff_
entredarse en la cadena, dando un
latigazo al usuario o haciendo que
pierda el equilibrio. Use extremo cuidado at cortar ramas pequeSas.
• Este alerta contra los rebotes. Tenga
cuidado al cortar ramas dobladas o
bajo presi6n para evitar ser golpeado pot la rama o la sierra cuando se
suefte la tensi6n en las fibras de
madera.
Despeje frecuentemente las rams
acumuladas para no le hagan tropezaR
PARA CORTAR RAMAS
• Siempre corte fas ramas del &rbot
despu_s de que se lo haya tumbado.
Unicamente asi se puede cortar las
ramas de forma adecuada y segura,
o Deje tas ramas m&s gruesas debajo
del &rbol tumbado para que apoyen el
&rbol mientras ud. trabaja.
i
ercoco
Te oorooJf,Y
43
RESPONSABtLIDADES
DEL USUARIO
ADVERTENCIA:
Desoonecte la bujia antes de hacer cualquier
mantenimiento, con la excepci6n de los ajustes at carburador.
Anote las fechas a! completar
el servicio de rutina
Verifiique que no haya piezas
da_adasigastadas
! Antes
Despues
I de
t
de
Usar
Cada
5
Usar
horas
Verifique que no hay fijadorre
piezas sueltas
Verifique Ia tensi6n de la cadena
25
..horas
Cadaj
AnuaF ,
mente il
de
Servicio
Feohas
i
'
i
i
i
i..........................
i
j,.-
i
Verifique e! fiIo de la cadena
Inspeccione la barra guia
Verifique e! niveI de la mezcta del
combustible
Inspeccione ta barra y verifique
deI aceite de la cadena
i
P"
t.."
[
Inspeccione y limpie et aparato
i y las ptacas
t Limpie ef sistema refrigerante
_eccione
el freno de cadena
Ii"
Umpie el ranura de la barra
Limpie el fi[tro de aire
Limpie e inspeccione la rejilla antichispas e inspeccione el sitenciador,
I
Cambie la bujia y la fittro de
combustible
RECOMENDACIONES GENERALES
La garantia de este aparato no cubre
los articulos que hart sido sometidos al
abuso o a la negligencia de parte del
usuario. Para poder recibir el valor total de la garantia, el usuario deber&
hacer el mantenimiento tal como se
indica en este manual. Hara falta
hacer varios ajustes peri6dicos para
mantener el aparato adecuadamente.
• Una vez pot at_o, cambie la bujia y el
elemento del filtro de aire e inspeccione la barra guia y fa cadena para
ver que no est_n gastadas. El reemplazo de la bujia y del elemento del
filtro de aire asegura una mezcla coF
recta de aire y combustible y ayuda
a que el motor marche mejor y que
dure m_ts.
VERIFIQUE QUE NO HAYA
PIEZAS DAf_IADAS O GASTADAS
Entre en contacto con el Centro de
Servicio Sears para el reemplazo de
piezas daSadas o desgastadas.
AVlSO: Es normal que aparezca una
pequeSa cantidad de aceite debajo de
la sierra despu_s de parar el motor. No
confunda esto con perdidas del tanque de aceite.
° fnterruptor ONiSTOP-Aseg_rese que el
interruptor este funcionando correctamente cotoc&ndolo en fa posici6n
STORAseg[3rese de que el motor se
haya detenido por completo, fuego
ponga el motor en marcha nuevamente y contint_e.
° Tanque de Combustible-No use sierra
si hay sefiafes de dahos o fugas del
tanque de combustible.
• Tanque de Aceite-No use sierra si el
tanque de aceite da se_ales de daho
o fugas.
44
VERIFIQUE QUE NO HAYA FIJADORES O PIEZAS SUELTAS
• Tuercas de la barra
° Cadena
° Silenciador
° Protector det Cilindro
• Fiitro de Aire
• Tornilios de las Manijas
° Fijadores An_-Vibraci6n
• Caja det Arranque
• Protector de Mano Delantera
VERIFIQUE LA TENSION DE LA
CADENA
5,
barra gula para asegurarse de que
todos los eslabones se encuentren
dentro de las ranura de la barra.
Levante la punta de la barra gufa
para asegurarse que ninguna parte
de ta cadena se encuentre floja e
cuelgue+ Suette la punta de la barra, entonces gire el tomillo de
ajuste 1/4de vueita a la derecha (en
el sentido del reloj) hasta que la
cadena quede tirante.
Tomitlode ajuste - +/4de vuelta
I
_ADVERTENCIA:
Use guantes
protectores al manejar la cadena. La
cadena tiene fiLo y podria causade
graves cortaduras, aun cuando _sta
no se encuentre en movimiento.
La tensiSn de la cadena es muy importante, Estiramientos de la cadena durante uso. Esto es especialmente vetdad durante los tiempos primeros que
usted utiliza la sierra. Controle siempre
la tensi6n de la cadena antes de cada
arranque de la sierra de cadena.
t+ Use un destornillador para mover
la cadena airededor de la barra
gula para asegurarse de que la ca+
dena no se haya enroscado+ La
cadena deber#, moyerse tibremente
Herramienta
Tuercas de TomilIode de Ajuste de
ta barra
Ajuste la Cadena
(Herramieata
de ta Barra)
2+ Afloje tas tuercas de la barra hasta
que est_n tan ajustadas contra la
cubierta del embrague con los dedes t_nicamente.
3. Gire el tornitlo de ajuste a la derecha (en el sentido del reloj) hasta
entra en contacto con sSlidamente
el rondo del riel de la barra guia.
4+ Usando ta herramienta de la barra,
haga girar la cadena atrededor de ta
6.
Manteniendo la punta de la barra
tevantada, ajuste firmemente las
tuercas de la barra con la herram enta de ajuste de la barra.
Tuercas de
Ia barra
7.
Use la punta en forma de destornillador de la herramienta de la barra
para hacer rotar fa cadena por ta
barra.
8. Si no puede hacer rotar la cadena,
estA demasiado ajustada+ Afloje
levemente las tuercas de la barra y
afioje cadena dar vuetta el tornillo
de ajuste hacia la izquierda (en
contra del sentido de] reloj). Vuelva
a ajustar las tuercas de la barra.
9. Si la cadena se encuentra demasiado f!oja, colgar& por debajo de
ta barra guia+ NO USE ta sierra si la
cadena se encuentra floja.
AVISO: La tensi6n de la cadena es
correcta cuando el peso de ]a cadena
no causa una comba pot debajo de !a
barra guia (con la sierra de cadena
apoyada en posici6n vertical), pero ia
cadena se mueve igualmente con libertad alrededor de ta barra guia,
ADVERTENCIA:
Si ia sierra se
funciona con un cadena flojo, la cadena podria sattar de ta barra y resuitado
en accidentes muy graves yio dafios a
ta cadena, inutiliz&ndola+Si la cadena
saita fuera de la barra guia, inspec+
clone cada eslab6n de funcionamiento
en busca de daSos. La cadena debe
repararse o sustituirse si est& da_ada.
• 45
VERIFtQUE Si LA CADENA ESTA
AFILADA
Las cadenas afitadas producen trocitos
de madera. Las cadenas desafiladas
producen potvo de aserr[n y cortan lentamente. Vea AFILACfONDE LA CADENA.
INSPECClONE LA BARRA
Condiciones que requieren que se
haga mantenimiento a la barra:
* La sierra corta para un lado o en
&ngulo.
• Hay que forzarla para que atraviese et
corte.
- Cantidad inadecuada de lubricante en
la barra y la cadena.
Verifique la condici6n de ta barra cada
vez que haga afilar ta cadena. Las barras gastadas dar3an la cadena y tornan
dificil el trabajo de cortar.
Despu_s de usar, aseg0rese el interruptor ON/STOPestA en posici6n STOP,fuego lirnpie todo et aserrfn y cualquier otro
escombro de la ranura de la barra y det
orificio del engranaje.
Para mantener la barra guia:
° Coloque el interruptor ON/STOPen posici6n STOP.
° Afloje y remueva por complete la perilla de la barra; para ello levante la
patanca y girela hacia la izquierda.
° Afloje fa tension de la cadena; para
elfo gire la rueda de ajuste (hacia
arriba). Remueva ta cubierta del
embrague.
* Remueva ta barra y la cadena del
aparato.
- Limpie los orfficios del aceite y el ranura de la barra despu_s de cada 5 horas de la operaci6n.
Retire el Aserr[n de la
Ranurade la Barra
\
• Los deles de Ia barra desarroltan protuberancias al gastarse. S&quelas con
una lima plan&
° Si la superficie superior del rie] est&
desnivelada, use una lima plana para
restaurar la forma cuadrada.
4--
Encuadre los ---_
BordesdeI Riels
con una Lima
Ranura correcta
Ranuragastada
Cambie la barra si la ranura est,. gasta*
da, si la barra est& torcida o resquebrajada o si hay calentamiento excesivo o
formaci6n de protuberancias en los
deles. Si es necesario cambiar fa barra,
use exclusivamente ta barra guia especificada para su sierra en la lista de repuestos, especificada tambi_n en la calcomania de repuesto de barra y
cadena que se encuentra en la sierra.
VERIFIQUE EL NIVEL DE LA MEZCLA DEL COMBUSTIBLE
° Vea ABASTECIMIENTODEL MOTORen
ta secci6n uso.
LUBRICAClON
Tapa del Tanquede
Aceite de la Barra
,\
-
.
• Vea ACEITE PARABARRAY LA CADENA en la secci6n uso.
INSPECClONE Y MMPIE EL APARATO Y I_AS PLACAS
• Despues de que cada uso, inspecclone la aparato compteta para saber
si hay piezas flojas o daSadas, Limpie
el aparato y las placas usando un trapo hQmedo con detergente suave.
° Seque el aparato con un trapo limpio
y seco.
: : :
SiSTEMA REFRIGERANTE
Para lograr una temperatura de funcionamiento Io m&s baja posible, la m&quina incorpora un sistema refdgerante.
Et sistema refrigerante esta compuesto
per:
° Toma de aire en el mecanismo de arranque
° Deflector de aire
° Palas de ventilador en el volante
• Aletas de enfriamiento en el cilindro
° Cubierta del cilindro (dirige el aire refdgerante hacia et cilindro)
Limpie el sistema refrigerante con un
cepilto despues de cada uso (en condiciones dificiles, con mayor frecuencia). Un sistema refrigerante Sucio u
obturado produce sobreca!entemiento
de ta m&quina, con tas consiguientes
averias del citindro y el pist6n.
INSPEOOIONE EL FRENO DE CADENA
° Vea FRENO DE CADENAen la secci6n
USO.
46
LIMPIE EL F1LTRO DE AIRE
PRECAUCION: No use gasolina ni
ningt_n otro liquido inflamable para limpiar el filtro, para evitar incendios y emisiones nocivas.
Limpieza del filtro de aire:
El filtro de aire sucio disminuir& la vida
Otity el rendimiento det motor e incrementar& el consumo de combustible y la
producci6n de contaminantes. Limpie
siempre el filtro de aire despu_s de 10
tanques de combustible o 5 horas de
uso, el que acontezca primero, Limpielo
con m&s frecuencia en condiciones muy
polvorientas. Los filtros usados nunca
quedan totalmente timpios. Se aconseja
reemplazar al fittro de aire por uno nueVOdespues du cada 50 horas de uso o
anualmente, 1oque acontezca pr mero.
Para limpiar el filtro:
!. Afloje los 3 torniltos en la tapa del
ci]indro.
2. Remueva la tapa del cilindro.
3. Remueva la cubierta del filtro de
aire yet fittro de aire,
4. Limpie el filtro de aire con agua
caliente y jab6n, Enjuague bien
con agua clara y fria. Sequelo at
aire totafmente antes de reinstalarIo,
5. Reinstale la cubierta det filtro de
aire y el filtro de aire,
6. Reinstale la tapa def cilindro y los 3
tornillos. Apriete firmemente,
Tapa de_
Cilindro
Cubierta
deI Filtro
: de Aire
\
INSPECClONE EL SlLENCIADOR
LA REJILLA ANTICHISPAS
Y
ADVERTENCIA:
Et silenciador
en este producto contiene las substancias quimicas queet estado de California reconoce como causantes de
c&ncer. :
A medida que se use el aparato, el sitenciador y la rejilla antichispas se van
carbonizando. Es necesario sacar la
carbonizaci6n para evitar e r esgo de
incendio o afectar el rendimiento del
motor,
Cambie la rejilla antichispas si ocurren
las roturas.
Rejil_a
Antichispas
: _
Difusordel
silenciador
...... i
!
i
PARA
MMPIAR
Tuerca
LAREJ1LLA
ANTICHISPAS
Se requiere ta timpieza cada 25 horas
de uso o anualmente, e! que accontezca primero.
1. Afloje y remueva ta tuerca de ta cubierta del difusor del silenciador.
2. Remueva la cubierta def difusor del
sifenciador.
3. Remueva la rejilla antichispas. Remueva la rejiUa cuidadosamente
para prevenir daSo.
4. Limpie la rejilla antichispas con un
cepillo de alambre. Cambie la rejiP
la si encuentra roturas.
5. Cambie todas las piezas det silenciador que esten rotas o resquebrajadas.
6. Reinstale la rejilla antichispas, ta
cubierta del difusor det silenciador,
y tuerca. Apriete firmemente.
BUJIA
Deber& cambiarse la bujla anualmente
para asegurar que el motor arranque
m_s f&cilmente y marche mejor. La
cronometrizaciSn del encendido es fija
e inalterable.
1. Afloje los tres tornit!os en la tapa de!
cilindro.
2, Retire la tapa del cilindro.
3. Saque la cubierta de la bujia.
4. Retire la bujia det cilindro y deskchela.
5. Reempl&cela con una buj[a Champion RCJ-7Y aj_stela con una Ilave
de 19 mm (3/4 de pulgada). Apriete
firmemente. Separaci6n de electrodos: 0,6 turn (0,025 de pulgada).
6. Reinstale la cubierta de la bujia,
7. Reinstale fa tapa del cilindro y tos
tres tomiltos. Apriete firmemente.
47
Tapa del
cilindro
Cubiel
de ia
buji_
REEMPLAZO EL FILTRO DE COMBUSTIBLE
Para reemplazar el filtro de combustible, vacie el aparato haciendo que el
motor marche hasta quedar sin combustible, luego retire el juego de tapa
def filtor de combustible y retentor del
tanque. Saque el filtor det tanque y
sep&relo de la line& Reemptazo.
Bujia
_ADVERTENCIA:
Desconecte la
buj[a antes de realizar mantenimiento,
servicio, o ajustes, excepto de ajustes
del carburador.
AFILAC1ON DE LA CADENA
2.
3.
_I_ ADVERTENCIA:
Las t_cnicas
de afilado de la cadena yio el mantenimiento del marcador de profundidad
incorrectos aumentan las probabitidades de reculadas, que pueden producir lesiones graves.
,_ ADVERTENCIA:
Use guantes
protectores al manejar la cadena. La
cadena tiene filo y podria causarle
graves cortaduras, aun cuando 6sta
no se encuentre en movimiento.
Condiciones que indican ta necesidad
de afilar Ia cadena:
• Reducci6n del tama_o de las astillas
de madera. El tamaSo de las astillas
de madera se reduce a medida que ta
cadena se desafila, hasta volverse
m&s un polvo que una astilla. Observe
que la madera muerta o podrida no
produce una buena asti]ta,
° La sierra corta de fado o en &ngu!o.
• La sierra debe ser forzada a trav#s del
corte.
Herramientas necesarias:
• Lima redonda de 5/32 de pulgada (4
ram) de di&metro y soporte para lima
o Lima plana
• Herramienta marcadora de profundidad
PARA AFILAR LA CADENA:
1. Mueva et interruptor ON/STOP a la
posici6n STOP.
....
Verifique la tensi6n correcta de la
cadena. AjOstela si es necesario.
Vea la secci6n TENSION DE LA CADENA.
Afile las cuchillas.
• Para afilar las cuchillas, ubique
el nivel dei soporte de la lima
(90°) de modo que se apoye
sobre los bordes superiores de
la cuchitla y el marcador de profundidad.
AVlSO: La cadena tiene cuchillas del lado izquierdo y deI lado
derecho.
SoporteparaLima
Cuchilta
:
,
Marcador de Profundidad
° Alinee las marcas de 30 ° del
soporte para lima, paralelas a la
barra y al centro de !a cadena.
_
A
t
:
Cuchi_la
4
Marcadet Soporte
para Lima
Afile primero tas cuchilfas de un
tado de la cadena. Lime desde
el interior de cada cuchiUa hacia
el exterior. Despues, gire la sierra de cadena y repita el proceso
en et otro lado de la cadena.
48
* Lime s6to el golpe de avance;
use 2 o 3 gotpes por borde de
corte.
* Mantenga todas las cuchlilas de
la misma Iongltud cuando tas
lima.
* Lime Io suficiente como para eliminar cualquier da¢_oen los
bordes de corte (placa lateral y
piaca superior de la cuchilfa)
Cuchdtas
Remueva daflo
iguai Iongitud
Placa
Superior
Piaca
Lateral
° Lime la cadena segun tas especificaciones, tal como se ilustra.
L._
/
80°
.
%
60_
i
30 _'
,g.ngulode gancho
0 025 _nch
_i_(0
65 mm)
'_
ESeqdU'nn_ead
a
Correcto
_,ngulodel Gancho Fuera Elevada el
Incorrecto
Cuadrado Esquina
Incorrecto
ADVERTENCIA:
Mantenga ef
#,ngufo de gancho correcto de acuerdo
con las especificaciones del fabricante
de la cadena que usa. Si el &ngulo del
gancho es =ncorrecto, aumentan las
probabifidades de reculadas, que pueden producer lesiones graves.
4. Verifique y baje los marcadores de
profundidad.
Herramienta marcadora
de profundldad
_-__-_J/__
__oo'
_
Lima
* Coloque la herramienta marcadora sobre la cuchilla.
o Si el marcador de profundidad es
m&s alto que la herramienta marcadora de profundldad, I{melo
para nivelarlo con la parte superior de ta herramienta marcadora.
* Mantenga redondeada la esqu_na
delantera del marcador de profundidad con una lima plan&
AVlSO: Et extremo superior del
marcador de profundldad debe
ser parejo con la mitad delantera,
redondeada con una tima plan&
Si necesita m&s asistencia o no esta
seguro sobre como llevar a cabo este
procedimiento, comuniquese con el
Centro de Servicio Sears o Ilame a
nuestra finea de asistencia al cliente al
1-800_235-5878.
REEMPLAZAR LA CADENA
_LADVERTENCIA:
Use guantes
protectores al manejar la cadena. La
cadena tiene filo y podria causarle
graves cortaduras, aun cuando esta
no se encuentre en movimiento.
Es normal que una cadena nueva se
est=redurante los primeros 15 minutos
de uso. Usted deber& veriflcar la tension
de la cadena cada vez que haga arrancar la sierra de cadena y ajustarla cuando sea necesario. Vea la secci6n de
TENSION
DE LA CADENA
Camb_e la cadena usada cuando est_
gastada o da_ada.Use exclusivamente
la cadena de repuesto Minim=zadora de
Reculadas que se especifica en la lista
de repuestos para reparaciones. La cadena y barra de repuesto correctas tambi_n se especifican en una et_queta
ubicada en la sierra de cadena. Entre
en contacto con et Centro de Servicio
de Sears para cambiar y afilar las cuchitlas _ndividuales de la cadena.
PARA REEMPLAZAR rLACADENA:
1. Mueva el interruptor ONISTOP a la
posici0n STOP.
2. Afloje y remueva las tuercas de la
barra y ]a cubierta de! embrague
de la sierra.
3. Remueva la cadena usada.
Marcadorde
49
cadena con los eslabones de impulsion orientados como se ve en
_a i_ustraci6n.
Embrague
Tuercas de
la barra
Herramienta
DEBERAN
DIRECCION
de
Ajuste de ta Cadena
(Herramienta de la Barra)
4.
APUNTAR EN
A LA ROTACtON
Cuchillas Marcador de Profundidad
El aparato tiene clavija y tornillo de
ajuste para ajustar ta tensi6n de la
cadena. Es muy importante que al
instalar la barra, ia ctavija que se
encuentra en el tornii}o de ajuste
este alineada con un orificio en la
barra. Girar el tornillo hace que la
clavija de ajuste se deslice hacia
arriba y hacia abajo por e! tornillo.
Ubique este ajuste antes de empezar a instalar la barra en ta sierra.
Vea {a itustracidn siguiente.
embragul
Ajuste situado en la cubieita
5.
Gire el tornitlo de ajuste a mane
hacia ta izquierda (en contra del
sentido del reloj) hasta que la clavija de ajuste toque el retentor. Esto
debe colocar el davija cerca de ta
posici6n correcta.
6. Haga deslizar la barra en los pernos de la barra hasta que la barra
se detenga al tocar el engranaJe
:del cilindro def embrague.
Eslabones de Funcionamiento
8.
Coloque ia cadena por encima y
detr&s del seguider del embrague,
ponga las eslabones de funcionamiento en el citindro del embrague.
9. Coloque los estabones de propulsi6n entre los dientes del engranaje en ta punta de la barra.
10. Coloque los eslabones de propulsi6n en ta ranura de la barra.
tt. Tire la barra hacia adelante hasta
que la cadena quede tirante en la
ranura de la barra. Asegure que
todas los eslabones de propulsi6n
se encuentren en el ranura de }a
barra.
12. Ahora instale la cubierta del embrague asegur&ndose que Ia clavija de ajuste este posicionada en el
orificio inferior en ta barra guia.
Cubierta
dei
embrague
Clavija
Orificio
inferior
Barra guia
Barra guia
/
7"
Pemos de Ia barra
7. Retire rnuy cuidadosamente la
cadena del paquete. Sostenga ta
13. Instale tas tuercas de la barra y
ajQstetas a mano 5nicamente.
Ajuste tas tuercas de la barra
despu#s de que ta cadena este
tensionada.
5O
AJUSTE DE LA CADENA
Vea TENSION DE LA CADENA en la secci6n de MONTAJE.
AJUSTE AL CARBURADOR
_lt ADVERTENCIA:
La cadena estar#, en movimiento durante la mayor
parte de este prodecimiento. Use el
equipo protector y observe todad tas
precauciones de seguridad. La cadena no debe moverse con el motor en
marcha lent&
El carburador ha sido ajustado cuidadosamente en la f&brica. Posiblemente se
hagan necesarios ajustes si se nota cu_
alquiera de tas siguientes condiciones:
. La cadena se mueve con el motor en
marcha lent& Vea procedimiento de
MARCHALENTA"T'.
o La sierra no anda a marcha lenta. Yea
procedimiento de MARCHA LENTA "T'
Marcha Lenta "T"
Deje que el motor trabaje en marcha
lenta. Si la cadena se mueve, la marcha fenta es demasiado. Si el motor
se para, la marcha lenta es demasiado
tenta.
Ajuste las revoluciones hasta que el
motor se mantenga en marcha sin que
ta cadena se mueva (la marcha lenta
es demasiado) o que e! motor se ahogue (ta marcha lenta es demasiado
ienta). El tornillo de la marcha est& situado arriba del bombeador y marcado
con la "T",
. Gire el tornilto de la marcha lenta "F" a
la derecha (en el sentido det reloj)
para aumentar las revoluciones del
motor.
• Gire el tomillo de la marcha tenta 'T" a
la izquierda (en contra del sentido dei
reloj) para bajar las revoluciones.
Si requiriera ayuda adicional o no se
sintiera seguro al desempe_ar este
procedimiento, entre en contacto con
et Centro de Servicio Sears, o Ilame a
nuestro telefono de ayuda al consumidor al 1-800-235-5878,
51
'_ ADVERTENCiA:
Realice los siguientes pasos despu_s de cads uso:
, Deje que el motor se enfrie y fije bien
el aparato antes de guardarlo o de
transportarlo.
° Guarde la sierra y el combustible en
unloca! bien ventitado donde los vapores de combustible no puedan entrar en contacto con shispas ni llamas
abiertas provenientes de los termotanques, los motores o interruptores et6ctdcos, catefactores centrales, etc.
° Guarde el aparato con todos los protectores en su lugar y coloque el aparato de modo que las piezas filosas no
puedan causar heddas por accidente.
° Guarde el aparato bien fiJera del alcance de los nir_os.
ESTAClONAL ALMACENAJE
Prepare el aparato pars guardado at
final de la temporada o si no se Io va a
usar por m&s de 30 dfas o mas.
Siva a guardar e! aparato durante un
periodo largo:
• Limpie ta sierra a conciencia antes det
aimacenaje.
o Almac6ne en un lugar limpio y seco.
• Aplique una pequeSa cantidad de
aceite a las superficies extemas
metalicas y a ta barra guia.
• Lubrique la cadena y envu_Ivala en
papel grueso o en tel&
SlSTEMA DE COMBUSTIBLE
Vacie el sistema de combustible antes
de almacenar el aparato por 30 dias o
m&s. Vacie el tanque de combustible,
ponga el motor en marcha y d6jeto en
marcha hasta que las lineas de combustible y et carburador est_n vacios.
Use combustible fresco para la pr6xima temporada. Vea el mensaje marcado tMPORTANTE, que se refiere al uso
de combustibles con mezcla de alcohol en su aparato, en la secciSn de
USO, bajo ABASTECIMtENTO DEL MOTOR.
Los estabilizadores de combustible
son una alternativa aceptable para
minimizar ta formaci6n de dep6sitos
de goma durante el almacenamiento.
ASada estabilizador a ta gasotina en el
tanque de combustible o en el recipiente de afmacenado de combustible.
Siga las instrucciones de mezcla que
se encuentran en los envases de estabilizador. Ponga et motor en marcha y
dejelo en marcha unos 3 minutos despu6s de ponerte estabilizador.
El aceite Craftsman 40:1 para motores
de 2 tiempos (enfriados a aire) viene
mezctado con estabitizador de com_
bustibfe. Si no usa este aceite, em
tonces puede aSadir un estabilizador
al tanque de conmbustible.
INTERIOR DEL MOTOR
• Retire la bujia y vierta una cucharada
de las de t_ de adceite 40:t para motores de 2 tiempos (enfriados a aire)
por la abertura para Is bujia. Tironee
lentamente de la soga de arranque 8
a 10 veces para distribuir et aceite.
° Reemplace la bujia con otra de! tipo y
de la gama de calor recomendados.
• Umpie el filtro de aire.
• Examine todo el aparato para verificar
que no haya tornillos, tuercas ni pernos sueltos. Cambie dotas las piezas
daSadas, quebradas o gastadas.
• At principio de la pr6xima temporada,
use exclusivamente combustible nuevo con la proporci6n correcta de gasolina a adeite.
OTRO
• No guarde gasolina de una temporada
a ta pr6xima.
° Cambie el recipiente de gasolina si se
empieza a oxidar.
52
TABLA
,_
DIAGNOSTICA
ADVERTENCIA:
de haeer cualquiera
cepto reparaciones
Siempre apague el aparato y desconecte
la bujia antes
de las reparaciones
recomendadas
a continuaci6n
exque requieran que el aparato est@ en operaci6n.
[PROBLEMA
-" CAUSA
i EI motor no
1. El interrupter est& en
arranca o se
/
posici6n STOP.
mantiene en
2. El motor est& ahogade.
marcha s61o
unos segundos
3. Ei tanque de
I despues de arcombust{ble est& vacio,
I' rancar.
4. La bujia no hace chispa.
flegando al carburador,
5. El combustible no est&
6.
7.
m
E1motor no
anda en
marcha lenta
come debe.
E_! motor no
I acelera, le falta
I potencia o se
El caburador requiere
ajuste.
Ninguno de los
anteriores.
i SOLUCION
1, Celoque el interrupter en ON.
2. Vea "Arranque
DificiI" en Ia
secci6n Use.
3 Llene el tanque con la mezcta
i
correcta de combustible.
i4. Instale una bujia nueva.
combustible est& sucio;
iimpieio. Verifique si hay
Iineadede
5, dobleces
Verifique sienelfafiltro
combustible o si est& partida:
reparla o c&mbieia,
i6, Entre en contacto con el Servicio
Sears (vea parte trasera del manuat).
Entre en contacto con ei Servicio
7, Sears (yea pare trasera del manual),
it • Las revoluciones
de Ja
marcha tenta est_,n muy
altos e muy bajas,
La Mezcla para Bajas
2. Revoluciones requier
ajuste.
!3, Las juntas del cigQeSal
estb,n gastadas.
La compresi6n est#,
baja,
Ninguno de los
anteriores.
11.El fi!tro
t.
i
12. Entre en contacto con el Servicio
Entre
3, Sears
Sears
Entre
!i4" Sears
en centacto con ei
(yea parte trasera
(yea parte trasera
en contacto con el
(vea partetrasera
Servicio
deI manuai).
del manual).
Servicio
dei manual),
i5, Entre en contacto con el Servicio
Sears (yea parte trasera del manuat).
Limpie e cambie el filtre de aire.
de aire est&
SUCIO,
i2.
La buj_a est,,
carbenizada
El carburador requiere
ajuste.
Los pueRos de escape
o las aberturas de
salida de_ silenciador
est&n tapados.
La cempresi6n est&
baja.
La freno de cadena es
activado.
i7. Ninguno de los
anteriores.
Et cebador est,.
parcia_mente accionado.
La mezcla de combustible se ha hecho
2. Umpie o cambie la bujia y
catibre Ia separaci6n,
3. Entre en centacto con et Servicio
Sears (yea pare trasera deI manual).
4, Entre en contacto con el Servicio
Sears (yea parte trasera de! manual).
i 2 aba °car
El motor
humea
exoesivamente.
Vea "Ajuste at Carburado¢' en la
secci6n Servicio y Ajustes.
5. Entre en contacto con e! Servicio
i
Sears (vea pare trasera del manual). }
6. Desactive el freno de cadena.
7. Entre en contacto con el Servicio
Sear s_rte
trasera dei manualjk J
11. Ajuste el cebador.
! 2. Vacie el tanque de combustible
mezcla correcta.
cambie
el ill[re aire,
' 3. Limpie
y il6neloo de
combustible
con ta
}3. El filtro de aire est&
_ sucio.
i 4. Entre en contacto con el Servicio
i
Sears (vea parte trasera del manual),
4, La
mezcla pararequiere
Altas
Revotucienes
I ajuste.
15, El cb,rter est& perdiendo,
5. Sears
Entre en
contacto
con el deI
Servicio
(yea
pare trasera
manual),
• 53
TABLA
DIAGNOSTICA
I PROBLEMA
--Eimotor ........
marcha con
(continuado)
i CAUSA
J1, La mezcla de combus-
iSOLUCION
1. Vea "Abastecimiento
tible se ha hecho
del
Aparato" en la secci6n Uso,
temperatura el- 2. Se ha instaiado la bujia
vada.
I 3. La Mezcta para Altas
Revoluciones esta.
demasiado pobre,
4. Los puertos de escape
_
C&mbiela por la bujia correct&
i Entre en contacto con el Servicio
Sears (yea parle trasera del manual).
I
] 4. Entre en contacto con el Servicio
o tas aberturas de
salida silenciador est_n
tapados.
5. Acumulaci6n deI carbon,
en et rejilta antichispas,
6. Caia del arranque sucio.
7. Ninguno deI antedicho.
i
Sears (yea parte trasera del manual).
15,
i
i
! 6.
i 7.
Vea "Para Limpiar la Rejilla
Antichispas" en la secci6n
Mantenimiento.
Limpie et _.rea.
Entre en contacto con el Servicio
i
I
Insuficiencia
de aceite
para lubricar
la barra y cadena.
La cadena se
mueve en
marchaIent&
i La cadena no
se mueve
i cuando se
i acelera e!
[motor.
La cadena
golpetea o
corta desparejo.
1. El tanque de aceite
est#,
2. E} bombeador de aceite
o el filtor de aceite esta
tapado.
3. Et orificio para aceite en
la barra esta tapado.
Entre en contacto con et Servicio
Sears (yea parte trasera del manual).
Saque
1. La marcha Ienta
requiere ajuste,
i2. El embrague reauiere
reparaciones.
La cadena est&
il.
demasiado tensionada.
,
12, Et carburador requiere
ajuste.
I
13.
Los deles de Ia barra
guia est&n apretados.
El desIizarse de embrague.
5. La freno de cadena es
activado.
1. La Oadena est&
incorrectamente
tensionada.
]
12. Las cuchillas est&n
daSadas,
3. La cadena est& gastada,
i4. Las cuchillas est&n
desafiladas o real
afiladas o los medidores
de profundidad est,_n muy
altos,
Engranaje desgastada.
6. La cadena instalado hacia
atr&s.
54
la barra y limpiela.
i 1. Yea "Aluste al Carburade¢
en
i
Ia secei6n Sewicio y Nustes.
! 2. Entre en contaete con et Servieio
Sears (vea_pa_e trase[a d2[_manua!) :_..
1. Vea "Verifique la TensiSn de la
Cadena" en Ia secci6n ManteniI
miento.
!
2, Entre en contacto con el Servicio
Sears (vea parte trasera del manual),
3. Repara o reemplace.
4. Entre en contacto con et Servicio
Sears (vea parte trasera del manual).
5. Desactive el freno de cadena.
1. Vea "Verifique la Tensi6n de la
Cadena" en }a secci6n Mantenimiento,
2, Entre en contacto con el Servicio
Sears (yea parte trasera deI manual).
3. Afile o cambie la cadena.
4. Vea "AfilaciSn de Ia Cadena" en
la secci6n Servicio y Ajustes.
5. Entre en contacto con el Servicio
Sears (yea parte trasera deI manual),
6. lnstale el cadena en la direcci6n
derecha.
F
TABLA DIAGNOSTICA
(continuado)
[ PROMBLEMrA ' CAUSA_
Parada del
I cadena dentro
,t
del corte
i
_La cadena
I oor[a en
. angulo.
] SOLUCION
rl Yea "Afilac!6n de la Cadena" en
La parte de arnba de
las cuch_llas no estan
la secc_6n Servlclo y A_ustes.
planas.
2 La barratlene
protuberanc_as o est&
torcida o !os neles
est&n desparejos
3 El embrague est_
,2
Repara o reemplace [a
!
barra guia
3
Entre en contacte con el Sep,qclo
Sears (yea parte trasera del manual).
L Las
_1
patlnando_
cuch_llas estfn
12.
=
3
i
dafiadas per un lado
Cadena no esta
afilada
Barra gula esta doblada
o desgastada.
ia secci6n
Servic!o
Ajustes. en
2" Vea
"Afllac_6n
de la yCadena"
Vea "Afitaci6n de la Cadena" en
la secci6n Servlcio y A]ustes
13 Reemplace ta barra gu[a
!
Si acontencen situaciones no previstas en este manual, actue con cautela y use
buen criterio. Si necesita ayuda, entre en contacto con el Centro de Servicio
Sears o Ilame al TELEFQNQ DE AYUDA AL CONSUMtDQR al 1-800-235-5878.
55
IMPORTANTE:
Este producto
es conforme
con la normativa
los Estados
Unidos (ERA) referente
a emisiones
de escape
EPA Fase 3, se recomiende
utilizar s6Io repuestos
odgiaales.
federaies,
Fase 3 de ta Agencia
de Prolecci6n
Ambientat
de
y evaporacidm
Para asegurar
_a conformidad
con
El use de afro ripe de repuestos
incumple Ias leyes
SUS DERECHOS
Y OBMGAClONES
DE GARANTIA:
La Agencia
de Protecci6n
Ambientat
de Ios Estados
Unidos, Ia Junta de Recursos
Ambientetes
de California,
la Agencia
Ambiental
Canadiense
y Sears Brands
Management
Corporation,
U.S.A, (Sears)
se comptacen
en explicar Ia garantia con la qua cuenta el sistema de
control de emisi6n en su motor 9equedo,
modelo 28t 4 y mas adelantepara
use fuera de carretera.
En California,
redes los motores
pequeTios
para use fuera de carretera
deben ser disedados
construidos
y equipados
pare
satisface[
tas r;gurosas hermes antihumo
que posee el estado. Sears deberA garantizar
el sisteme de control de
emisi6n en su m_quina de motor pequedo
pare use fuera de carretera
per los periodas de t[empo qua expI[camos
a continuaci6n
y con la condicidn
de que su maqu[na
de motor pequefio
pare use faera de carretera
no haya
suffido ninggn tipo de abuse, neglJgeneia o mantenimfento
[napropiado.
Su sistema de central de emisi6n inctuye
pJexas tales come el carburador,
el sistema de [gnici6n y e[ tanque de combustible,
Iinea de combustible
y tape.
Dande exista una condici6n
que requiera
reparaci6n
bale garantia,
Sears reparar_ gratis su motor pequedo
pare
use fuera de carretera,
Los gates cubiedos
bale ta garantia indayen
el diagn6sfico,
las plazas y tabor.
CUBIERTA
DE GAPJkNTIA
DEL FABRICANTE:
SI cuatquier plaza relacionada
con eJ sJstema de emisf6n de su
motor (come
homes enumerado
en Ia tista de piezas
de control
de amisi6n
bale garantia)
se encontrara
defectuosa
o defectos en e! material
o en fa labor del motor causaran que tar plaza comenzara
a fatlar, Is #ieza
sere reparada
o reemp_azada
per Sears.
GARANTIA
DE RESPONSABILIDAD
DE BEL DUENO:
Come duefio de una maquina
de motor pequedo para
use fuera de carretere,
usted ser_, responsabfa
per e! mantenim[ento
adeeuado
en ;as periodos
previamente
programados
y eaumeredos
en su manual de instrucciones.
Sears recomienda
que guarde redes los recibos
que indiquen
que se ha desempedado
mantenJmiento
en su maquina
de motor pequefio
para use fuera de
carretera,
pero Sears no podra negar el servicio bale garantia
Onicamente
a cause de la falta de recibos o per el
incumplimiento
de su pad.e en esegurarse
qua et mantenimiento
programado
haya side desempe_ado.
Come
duefio de una m_quina de motor pequefio para use fuera de carretera,
usled debera center con e[ conocimiento
de qua Sears puede negar la cub_eda bale garant[a
si su m,Cquina de motor peque_o para use fuera de carretera
o a[guna pieza de ia misma ha de)ado de funcionar
debido al abuse, negligencia
mantenimiento
inapropiado,
modificaciones
no aprobadas
oei use de pJezas qua no hayan side fabrJcadas
o aprobadas
per ef fabricante
original del equipo. Es responsabil[dad
suya el Ilevar su m_qu[na
de motor pequedo papa use fuera de carretera a
un centre de reparaci6n
autorizado
Sears tan pronto coma se presente
el problema.
Los reparaciones
bale
garantia
deber_n
ser compfetadas
en un per[odo de tiempo razonable,
que no exceda los 30 dias. S_ cuenta
usted con alguna
pregunte
en relaci6n
a sos derechos
y responsabilidades
de garantia,
usted deber_
comunicatse
con su centre de servicio autorizado
m&s eercano,
Per favor
comuniquese
Sears
aJ 1-800-469-4663
o eerie
ta correspondencfa
per carreo
etectronico
a
[email protected].
FECHA
DEL COMIENZA
DE LA GARANTIA:
El periodo de garantia
comienza
en ta fecha de compra de Ia
m_quina
de motor pequefio
pare use fuera de carretera,
DURACtON
DE LAGARANT[A:
Esta garantia cuenta con on periodo de duraci6n
de dos a_os eomenzando
en
la fecha inicia! de compra,
o hasta el final de{ garantia
de producto
(cualquiera
qua sea m&s largo).
QUE CUBRE
LA GARANTIA:
REPARACION
O REIEMPLAZO
DE PIEZAS.
La reparaci6n
o el reemplazo
de
cualquier
pieza garantizada
seran desempe6ados
y ofreeidos at duedo sin costa aIguno en un centre de servicio
Sears. Si cuenta usted con aIguna pregunta en retaci6n a sue derechos
y responsab[fidades
de garantia,
usted
deberA comunicarse
con su centre de servicio autorizado
mas cercano.
Per favor
comunJquese
Sears
at 1-860-469-4663
o eerie
Ia correspondencia
per correo
electronico
a
emission.warranty@us,hvwan.net.
PERIODO
DE GARANTIA:
Cualquier
pieza ,garantizada
que no este programada
para set reemp_azada
come
,pado del mantenimiento
requendo
o que este programada
enicamente
para inspecci6n
regular para efectos de
'reparacidn
o reemptazo
si fuera necesario"
debera garaatJzarse
per un periodo de dos aries.
Cua_quier plaza
garantizada
que est6 programada
para set reemp[azada
coma porte gel mantenimiento
requerido
debera estar
garantizada
per el periodo
de tiempo que comienza
en la fecha de compra
iniciat haste la fecha deI palmer
reemplazo
programado
pare dicha pieza.
DtAGNOST!CO:
No se debera
cobrar
at due,do ningdn tipo de cargos
per la labor de diagn6stico
la cual
determfne
que una pieza garantizada
se encuentra
defectuosa
siet trabaja de diagn_stico
ha side desempet_ado
or un centre de servicio autorizado
Sear_
ANOS
PeR CONSECUECIA:
Sears podr4 ser responsabte
de defies
ocurridos
a etras piezas
deI motor
causados
per Ia faJJa de una pieza garant_zada qua se encuentre
baio e[ pedodo de garant[a.
QUE NO CUBRE
LA GARANTtA:
Todas los falfas eausadas
per eJ abuse,
negJigencia
o mantenimiento
inapropiado
no asian cubiertas.
PtEZAS
AI_IADIDAS
O MODIFIGADAS:
El oso de piezas ar3adidas o _a modificaci_n
de piezas podran servir
come base para que se anule ta rectamaci6n
de garantia.
La garantia
de Sears no se responsabiliza
per e_ mat
funcionamiento
debido al use de piezes adadidas
o de pJezas modificadas.
COMe
ENTABLAR
UNA RECLAMACION:
Si cuenta usted con alguna pregunta
relacionada
can sue derechos
y responsabJJidades
de garantia,
usted debera entrar en contacto con so centre de serv;eio autorizado
Sears mas
cercano.
Per favor eomuniquese
Sears
at 1-800-469-4663
o envie
[a correspondencia
per correo
electron[co
a
emission.warranty@us,hvwae,net.
DONDE OBTENER
SERVICIO
DE GARANTtA:
Servicio o repa{aciones
bajo garant[a deber_n
ser provistas en
todos los centros de servicio Sears.
Por favor
comuniquese
Sears
at 1-800-469-4663
o eerie
la correspondeneia
pot correo
electronico
a
emission.warranty@_s.hvwa
n,net.
MANTENtMIENTO,
R_EMPLAZO
Y REPARAClON
DIE PIEZAS
RELACIONADAS
CON LA EMISION:
Cualquier
pieza de repuesto
Sears aprobada y util]zada en e[ desempefio
de cue[qatar servicio de mantenimiento
o servicio de reparaci6n
bale garant[a
de piezas
relaeianadas
con ta emisibn
ser_ provisto
sin caste aiguno aI
duetdo sila pieza se encuentra
ba_o garant_a.
_LISTA SE PtEZAS
D15 CONTROL
DE E_ISION
GARANTIZADAS:
Carburador,
f_ftro de aide (cubierta
haste ta
fecha de mantef_imiento
programada),
sistema
de ignicidn:
bu ia (cubieda
hasta [a fecha de mantenimiento
£rogramada),
mbdulo de ignici6n,
sftenciador
[ncluido ai catalizador
(si esta equipage),
tanque de combustible,
tinea de combustible
y tapa,
DECLARACION
DE MANTENtM!ENTO:
E] duefio es i'esponsab]e
de adquirir rode e[ mantenimiento
requerida
come to define en el manual de instrucciones.
56
La informaci6n en _aetiqueta del producto indica las normas de certificaci6n de su motor.
Ejemplo: (A6o) EPA y/o CALIFORNIA,
Informacion lmportante en relaci6n
aI motor. Este motor satisface Ias --4.
regulaciones de emision para tooEMissiON
¢ON?ROI.
INt=ORMATION
"
totes pequeGos operados fuera de
I _I$ ENGINE
ME_SEXHAND
EVP
EMISSION
REG[1LAIION$
I FOR
20_ USEPA/CALIFORNIA
SMALL
OFP
ROAD
ENGINES
ia oarretera.
Famiiia ........ i MANUFACTURER
# De Serie .......---_.AMILY/DtSP
.... _'-%T#XXXXXXXXXX
SKU#XXXXXXXXX
....... , _MISSIONCOMPLIANCE
PERIOD
XXXHOURS
_or__o,_
_,,,_ _,mo,
o_
IIIlItt!IUl
I1!
i IIIIIiiIt1111t!1!
I!tl
SN:XXXXXXXXXXXX-X
TH_AIRINDEX
OFTHIS
_GINE_SX
Vea el manual de instrucciones I0 j ' 2.
I 4
_jG_ I "8"_ 1'""to!
para especificaciones de ............THELOWER
THEAIRINDEX,THELESSPOLLUtiON
mantenimiento y ajustes,
-_
REFER
TOOWNER'S
MANUAL
FOR
MAINTENANCE
SPECIFICATIONS
ANDAD]USTMENT5
Se certifica este motor para satisfacer los requisitos de emisi6n para los uso
siguientes:
[]
Moderado (50 horas)
_[ lntermedio (125 horas)
[]
Extendido (300 horas)
57
58
59
Product questions
1-8
or problems?
-331-4569
Customer Care Hot Line
Get answers to questions, troubleshoot problems,
order parts, or schedule repair service.
Para respuestas a preguntas o problemas, y ordenar
piezas o pedir servicio para la reparaci6n de su equipo.
To help us help you, register
your product at www.craftsman,com/registration
Para poderte ayudar mejor, registra tu producto
en www.craftsman.com/registration
Join the Craftsman Club today!
www,craftsma
n.com/sign
up
Receive exclusive member benefits including special pricing and offers,
project sharing, expert advice, and SHOP YOUR WAY REWARDSt
Como miembro exclusivo, recibe diversos beneficios como ofertas, precios especiales, proyectos
nuevos, consejos de expertos y nuestro programa de puntos SHOP YOUR WAY REWARDS!
® Regis_e_'ed T_ademark
® MarCa
Re_}istr_da
/
TM
T_ademark
of KCD
IP, LLC in he UI_ ed S a es, or Sears
/ T_ Marca de Fabrica de KCD
fP, LLC e_ Estad_s
Unidos,
o Seats
Bfar_ds,
LLC {tt r_[_er countries
B_a_lds, LLC in o_o_ paist_s