1
AXIS StorPoint CD+ User’s Manual
StorPoint CD+
Network CD-ROM Server
User’s Manual version 1.1
Notices
Safety Notices
Liability
Please observe all safety markings and instructions when using
this product.
Every care has been taken in the preparation of this manual; if
you detect any inaccuracies or omissions, please inform us at
an address which can be found in the last appendix of the
manual. Axis Communications cannot be held responsible for
any technical or typographical errors and reserves the right to
make changes to the product and manuals without prior notice.
Axis Communications makes no warranty of any kind with
regard to the material contained within this document,
including, but not limited to, the implied warranties of
merchantability and fitness for a particular purpose. Axis
Communications shall not be liable nor responsible for
incidental or consequential damages in connection with the
furnishing, performance or use of this material.
Important! -
potential hazard that can seriously impair
operation.
Do not proceed any of the above notices until you have fully
understood the implications.
Electromagnetic Compatibility (EMC)
USA - This equipment has been tested and fount to comply
with the limits for a class B digital device, pursuant to Part 15
of the FCC rules. These limits are designed to provide
reasonable protection against harmful interference in a
residential installation. This equipment generates, uses and can
radiate radio frequency energy, and if not installed and used in
accordance with the instructions, may cause harmful
interference to radio communications. However, there is no
guarantee that interference will not occur in a particular
installation. If this equipment does cause harmful interference
to radio or television reception, which can be determined by
turning the equipment off and on, the user is encouraged to try
to correct the interference by one or more of the following
measures:
•
•
Reorient or relocate the receiving antenna
Increase the separation between the equipment and the
receiver
• Connect the equipment into an outlet on a circuit different
from that to which the receiver is connected
• Consult the dealer or an experienced radio/TV technician
for help
Shielded (STP) network cables must be used with this unit to
ensure compliance with the class B limits.
Axis’ Trademarks
StorPoint, ThinServer
Trademark Acknowledgments
AIX, AppleShare, AppleTalk, DOS, Ethernet, IBM, Internet
Explorer, Macintosh, Microsoft, Netscape, Netscape Navigator,
NetWare, OS/2, UNIX, Windows, Windows for Workgroups,
Windows 95, Windows 98, Windows Me, Windows NT,
Windows 2000 and Windows XP are registered trademarks of
the respective holders.
AXIS StorPoint CD+
Rev 1.1
User’s Manual
Date: June 2002
Copyright ©
Axis Communications AB, 2002
Europe - This digital equipment fulfils the requirements for
radiated emission according to limit B of:
•
SCSI: EN55022/1998, and the requirements for immunity
according to EN55024/1998 residential, commercial, and
light industry
• IDE: EN55022/1998, and the requirements for immunity
according to EN55024/1998 residential, commercial, and
light industry
Compliance is not valid for unshielded network cables.
2
AXIS StorPoint CD+ User’s Manual
Preface
Thank you for purchasing the AXIS StorPoint CD+ CD/DVD Server. This product is developed to
make the information stored on CD/DVD-ROMs available to all users on an Ethernet network.
About This Manual
The manual provides introductory information as well as detailed instructions on how to set up
and manage the StorPoint CD+ in various network environments. It is intended for everyone
involved in installing and managing the StorPoint CD+. To fully benefit from the manual, you
should be familiar with basic networking principles.
This manual applies to the AXIS StorPoint CD+ with firmware release 6.00 and subsequent
releases until otherwise notified.
About Axis
Axis Communications is dedicated to providing innovative solutions for network-connected
computer peripherals. Since the start in 1984, it has been one of the fastest growing companies in
the market and is now a leader in its field.
ThinServer™ Technology
enables Axis’ products to act as intelligent file server independent ThinServer devices. A
ThinServer device is a network server which includes “thin” embedded server software capable of
simultaneous multiprotocol communication, scalable RISC hardware and a built-in Web server
which allows easy access and management via any standard Web browser. The ThinServer
technology makes it possible to connect any electronic device to the network, thus providing
“Access to everything”.
Mobile Access by Axis
The Bluetooth Access Point from Axis is part of a family of network access solutions that create
local "hot spots" of high-speed wireless connectivity areas. These areas provide a wireless
communications link to local networks and the Internet for mobile devices equipped with
Bluetooth wireless technology, an industry supported technology that provides a low-cost means
for supporting short-range wireless communications between portable devices. Axis provides
solutions that scale from network access devices to larger, more advanced systems to meet the
range of needs for creating new mobile networks and services.
Network Print Servers
offer a powerful and cost-efficient method for sharing printer resources in your network. They
connect to any standard printer, featuring high performance, simple management and easy
upgrading across the network. The print servers are available in Ethernet, Fast Ethernet and Token
Ring versions.
IBM Mainframe and S/3x - AS/400 Print Servers and Protocol Converters
include a wide range of LAN, coax and twinax attached print servers for the IBM host
environment. By emulating IBM devices, these servers provide conversion of the IPDS, SCS and
3270DS data streams to the major ASCII printer languages.
Network Attached CD/DVD Servers
provide a flexible and cost-efficient solution for sharing CD-ROMs, DVD-ROMs and other optical
media across the network. They are available in Ethernet, Fast Ethernet and Token Ring versions.
AXIS StorPoint CD+ User’s Manual
3
Network Camera Servers
provide live images using standard Internet technology, thus enabling access to live cameras via
any standard Web browser. They offer a perfect solution for remote surveillance over the Internet;
their sharp images can bring life into any web site. These servers support Ethernet as well as PSTN
and GSM phone lines.
Network Document Servers
enable easy distribution of paper-based information across workgroups and the enterprise. By
sending scanned documents to your destination via the Internet/intranet, you will reduce your
faxing/mailing costs, as well as save time, thus improving your organization’s efficiency.
Support Services
Should you require any technical assistance, please contact your Axis reseller. If your questions
cannot be answered immediately, your reseller will forward your queries through the appropriate
channels to ensure a rapid response. If you are connected to the Internet, you can:
•Download user documentation and firmware updates
•Find answers to previously resolved problems in the FAQ database. Search by product, category
or phrase
•Report problems to Axis support staff by logging in to your private support area
Visit the Axis Support Web at http://www.axis.com/techsup/
4
AXIS StorPoint CD+ User’s Manual
Table of Contents
Section 1
Introduction . . . . . . . . . . . . . . . . . . . . . . . . . . . . . . . . . . . . . . . . . . . . . . . . . . 7
AXIS StorPoint CD+ . . . . . . . . . . . . . . . . . . . . . . . . . . . . . . . . . . . . . . . . . 7
Features and Benefits . . . . . . . . . . . . . . . . . . . . . . . . . . . . . . . . . . . . . . . . . . 8
Section 2
Installing the StorPoint CD+ . . . . . . . . . . . . . . . . . . . . . . . . . . . . . . . . . . . . .
Connecting the StorPoint CD+ to the Network . . . . . . . . . . . . . . . . . . . . .
Assigning an IP Address . . . . . . . . . . . . . . . . . . . . . . . . . . . . . . . . . . . . . . . .
System Settings . . . . . . . . . . . . . . . . . . . . . . . . . . . . . . . . . . . . . . . . . .
10
11
12
21
Section 3
Microsoft & IBM Networks (SMB) . . . . . . . . . . . . . . . . . . . . . . . . . . . . . . . . .
Network Settings . . . . . . . . . . . . . . . . . . . . . . . . . . . . . . . . . . . . . . . . .
Access Control . . . . . . . . . . . . . . . . . . . . . . . . . . . . . . . . . . . . . . . . . . .
Accessing the Discs . . . . . . . . . . . . . . . . . . . . . . . . . . . . . . . . . . . . . . . . . . .
27
27
29
35
Section 4
NetWare (NCP) . . . . . . . . . . . . . . . . . . . . . . . . . . . . . . . . . . . . . . . . . . . . . . .
Network Settings . . . . . . . . . . . . . . . . . . . . . . . . . . . . . . . . . . . . . . . . .
Access Control . . . . . . . . . . . . . . . . . . . . . . . . . . . . . . . . . . . . . . . . . . . . . . .
Accessing the Discs . . . . . . . . . . . . . . . . . . . . . . . . . . . . . . . . . . . . . . . . . . .
43
43
50
54
Section 5
UNIX (NFS) . . . . . . . . . . . . . . . . . . . . . . . . . . . . . . . . . . . . . . . . . . . . . . . . . .
Network Settings . . . . . . . . . . . . . . . . . . . . . . . . . . . . . . . . . . . . . . . . .
Access Control . . . . . . . . . . . . . . . . . . . . . . . . . . . . . . . . . . . . . . . . . . . . . . .
Accessing the Discs . . . . . . . . . . . . . . . . . . . . . . . . . . . . . . . . . . . . . . . .
66
66
67
68
Section 6
Macintosh (AFP) . . . . . . . . . . . . . . . . . . . . . . . . . . . . . . . . . . . . . . . . . . . . . .
Network Settings . . . . . . . . . . . . . . . . . . . . . . . . . . . . . . . . . . . . . . . . .
Access Control . . . . . . . . . . . . . . . . . . . . . . . . . . . . . . . . . . . . . . . . . . .
Accessing the Discs . . . . . . . . . . . . . . . . . . . . . . . . . . . . . . . . . . . . . . . . . . .
71
71
73
76
Section 7
FTP (File Transfer Protocol) . . . . . . . . . . . . . . . . . . . . . . . . . . . . . . . . . . . . . . 78
Network Settings . . . . . . . . . . . . . . . . . . . . . . . . . . . . . . . . . . . . . . . . . 78
Access Control . . . . . . . . . . . . . . . . . . . . . . . . . . . . . . . . . . . . . . . . . . . . . . . 80
Section 8
Web Browser (HTTP) . . . . . . . . . . . . . . . . . . . . . . . . . . . . . . . . . . . . . . . . . . .
Network Settings . . . . . . . . . . . . . . . . . . . . . . . . . . . . . . . . . . . . . . . . .
Access Control . . . . . . . . . . . . . . . . . . . . . . . . . . . . . . . . . . . . . . . . . . .
Accessing the Discs . . . . . . . . . . . . . . . . . . . . . . . . . . . . . . . . . . . . . . . . . . .
Section 9
Recordable Discs . . . . . . . . . . . . . . . . . . . . . . . . . . . . . . . . . . . . . . . . . . . . . . 85
Copying Files to Recordable Discs . . . . . . . . . . . . . . . . . . . . . . . . . . . . . 85
Setting a Password . . . . . . . . . . . . . . . . . . . . . . . . . . . . . . . . . . . . . . . . . . . 88
Section 10
CD Grouping . . . . . . . . . . . . . . . . . . . . . . . . . . . . . . . . . . . . . . . . . . . . . . . . . 89
Windows Explorer . . . . . . . . . . . . . . . . . . . . . . . . . . . . . . . . . . . . . . . . . 89
AXIS StorPoint DISCO . . . . . . . . . . . . . . . . . . . . . . . . . . . . . . . . . . . . . . . . . 91
Section 11
Hard Disk Caching . . . . . . . . . . . . . . . . . . . . . . . . . . . . . . . . . . . . . . . . . . . . 100
Verifying the Hard Disk . . . . . . . . . . . . . . . . . . . . . . . . . . . . . . . . . . . . . . . 102
Using Hard Disk Caching for Increased Performance . . . . . . . . . . . . . . . 103
AXIS StorPoint CD+ User’s Manual
81
81
82
84
5
Using Hard Disk Caching for Archiving Discs . . . . . . . . . . . . . . . . . . . . . 104
Section 12
Monitoring the StorPoint CD+ . . . . . . . . . . . . . . . . . . . . . . . . . . . . . . . . . .
Event Log . . . . . . . . . . . . . . . . . . . . . . . . . . . . . . . . . . . . . . . . . . . . . .
Statistics . . . . . . . . . . . . . . . . . . . . . . . . . . . . . . . . . . . . . . . . . . . . . . .
E-mail (SMTP) . . . . . . . . . . . . . . . . . . . . . . . . . . . . . . . . . . . . . . . . . . . . . .
SNMP . . . . . . . . . . . . . . . . . . . . . . . . . . . . . . . . . . . . . . . . . . . . . . . . .
AXIS ThinWizard . . . . . . . . . . . . . . . . . . . . . . . . . . . . . . . . . . . . . . . . . . . .
109
109
110
111
111
113
Appendix A
Parameter List . . . . . . . . . . . . . . . . . . . . . . . . . . . . . . . . . . . . . . . . . . . . . . .
The Configuration File . . . . . . . . . . . . . . . . . . . . . . . . . . . . . . . . . . . . .
Directory Structure . . . . . . . . . . . . . . . . . . . . . . . . . . . . . . . . . . . . . . .
Editing the Configuration Parameters . . . . . . . . . . . . . . . . . . . . . . . . .
115
115
121
123
Appendix B
Troubleshooting . . . . . . . . . . . . . . . . . . . . . . . . . . . . . . . . . . . . . . . . . . . . .
The Front Panel Indicators . . . . . . . . . . . . . . . . . . . . . . . . . . . . . . . . . . . .
Restoring Factory Default Settings . . . . . . . . . . . . . . . . . . . . . . . . . . . . . .
Running a Diagnostic Test . . . . . . . . . . . . . . . . . . . . . . . . . . . . . . . . . . . . .
Errors when Accessing the StorPoint CD+ or an Inserted Disc . . . . . . .
Problems Finding a Wide-SCSI Hard Disk . . . . . . . . . . . . . . . . . . . . . . . .
Low Transfer Rates when Using Disc Changers . . . . . . . . . . . . . . . . . .
Errors when Writing Data to a Disc . . . . . . . . . . . . . . . . . . . . . . . . . . . . .
Problems Running CD-ROM Software . . . . . . . . . . . . . . . . . . . . . . . . . . .
Difficulties Locating the StorPoint CD+ in NetWare . . . . . . . . . . . . . .
Problems Connecting to the StorPoint CD+ in a PureIP Environment .
Insufficient Access Rights in NetWare NDS . . . . . . . . . . . . . . . . . . . .
Name Resolution Problems in Windows (SMB) . . . . . . . . . . . . . . . . . . . .
Problems Locating the Domain Controller in Windows (SMB) . . . . . . . .
127
128
130
132
133
134
134
135
136
136
137
137
139
140
Appendix C
Upgrading the StorPoint CD+ . . . . . . . . . . . . . . . . . . . . . . . . . . . . . . . . . . .
Obtaining New Software . . . . . . . . . . . . . . . . . . . . . . . . . . . . . . . . . . .
Upgrading the Firmware . . . . . . . . . . . . . . . . . . . . . . . . . . . . . . . . . . . . . .
Extending the RAM Memory . . . . . . . . . . . . . . . . . . . . . . . . . . . . . . . . . . .
141
141
142
145
Appendix D
Tower and Drive Installation . . . . . . . . . . . . . . . . . . . . . . . . . . . . . . . . . . . .
Hardware Inventory . . . . . . . . . . . . . . . . . . . . . . . . . . . . . . . . . . . . . .
Physical Description . . . . . . . . . . . . . . . . . . . . . . . . . . . . . . . . . . . . . . . . . .
Installing the StorPoint CD+ in a Tower . . . . . . . . . . . . . . . . . . . . . . .
Connecting the Drives to the StorPoint CD+ . . . . . . . . . . . . . . . . . . . .
146
146
147
149
151
Appendix E
Technical Specifications . . . . . . . . . . . . . . . . . . . . . . . . . . . . . . . . . . . . . . . 153
Appendix F
Glossary . . . . . . . . . . . . . . . . . . . . . . . . . . . . . . . . . . . . . . . . . . . . . . . . . . . 155
Index . . . . . . . . . . . . . . . . . . . . . . . . . . . . . . . . . . . . . . . . . . . . . . . . . . . . . . 159
6
AXIS StorPoint CD+ User’s Manual
Introduction
Section 1
Introduction
AXIS StorPoint CD+
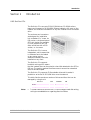
The StorPoint CD+ connects CD/DVD-ROM drives, CD-R/RW writers,
towers and changers to 10/100 MBit Ethernet networks. All users on the
network can share the information on any disc inserted into a connected
drive.
The enclosure and connectors
are designed for installation
into a standard 51/4” tower. An
IDE version, a single and a dual
SCSI port version are available.
It is not possible to mix IDE
disks and drives with a SCSI
version, or vice versa.
The StorPoint CD+ is server
independent, which means that
no software has to be loaded
on any server, and no
additional software has to be
installed on any client.
The StorPoint CD+ supports
hard disk caching which means
that the inserted discs can be copied to a hard disk attached to the SCSI or
IDE bus. The caching mechanism allows users to access the networked
discs at hard disk speed.
The StorPoint CD+ supports CD-Recordable drives which makes it
possible to write files to CD-R/RW discs over the network.
This table lists the maximum number of drives and discs that can be
managed by a single unit:
Max no. of
Disc drives
Hard disks
Discs using hard disk caching
Notes:
o
SCSI
7
6
255
Dual SCSI
14
13
255
IDE
8
7
255
The Basic versions of the StorPoint CD+ do not support hard disk caching,
writing to recordable discs or organizing discs into folders.
AXIS StorPoint CD+ User’s Manual
7
Introduction
Features and Benefits
File Server
Independence
The StorPoint CD+ is connected as a node in an Ethernet network. The
StorPoint CD+ acts as a file server to the network. This means that it is
independent of other file servers, i.e. the communication takes place
directly between the network client and the StorPoint CD+. This results in
high performance, reliability and independence of other equipment.
Plug and Play
The file server independent approach makes the installation quick and
convenient. In most environments the physical connection to the network
is the only installation required prior to starting work with the StorPoint
CD+. No software needs to be installed on clients or file servers. Your
computer will see the StorPoint CD+ as another network file server, and
you access it using the standard commands used in your network
operating system.
Environments
The StorPoint CD+ can be used simultaneously from NetWare, Windows,
OS/2, DOS, UNIX, Macintosh and Internet/intranet clients. It supports
basic messaging and network protocols:
•
•
•
•
•
•
•
•
•
•
8
NCP over IPX
NCP over IPX/UDP (NetWare IP)
NCP over TCP/IP (PureIP)
SMB over NetBIOS/NetBEUI
SMB over NetBIOS/TCP/IP
NFS over UDP/IP
HTTP over TCP/IP
AFP over AppleTalk
AFP over TCP/IP
FTP over TCP/IP
AXIS StorPoint CD+ User’s Manual
Introduction
Internet/Intranet
Web Server
The built-in Web server makes it possible to access data via any standard
Web browser, such as Netscape Navigator or Microsoft Internet Explorer.
The support includes configuration, management and disc access.
Speed
By using a 32-bit RISC processor and cache memory expandable up to
256 MB, data throughput of up to 3200 kB/sec on a single client, or 4000
kB totally for multiple clients, is obtained – ample speed for demanding
CD-ROM applications.
Security
Maintenance
Network Management
Hard Disk Caching
CD Grouping
Easy Network Backup
Disc access can be restricted by setting up native access control in all
network environments. It is also possible to limit the number of
simultaneous users of any disc in order to comply with license
agreements.
New software can easily be downloaded to the StorPoint CD+ Flash
memory by using Windows Explorer drag-and-drop, or over the network
using FTP. All updates are free of charge.
The StorPoint CD+ supports the Simple Network Management Protocol,
SNMP.
The StorPoint CD+ includes a hard disk caching facility that can copy the
inserted discs to attached hard disks. This mechanism will allow faster
user access, especially if you are using changers. Furthermore, a cached
copy can be accessed even though the original disc has been ejected from
the drive.
In the Microsoft and IBM (SMB) and the Novell NetWare network
environments it is possible to use your Windows Explorer to create new
group folders under the Volumes folder. This makes it possible to group
discs, and thus easier to locate and access.
With the support of writing to recordable discs using simple drag-anddrop, the StorPoint CD+ makes an excellent backup solution over the
network.
Scalable Solutions
If you have more than one StorPoint CD+ on your network, the AXIS
StorPoint DISCO is a convenient tool for locating and accessing the
networked CD/DVDs. The AXIS StorPoint DISCO utility can be
downloaded free of charge from the Axis Web Site.
Asian Languages
The StorPoint CD+ supports double-byte character encoded discs. The
supported languages are: Simplified Chinese, Traditional Chinese,
Japanese and Korean.
AXIS StorPoint CD+ User’s Manual
9
Installing the StorPoint CD+
Section 2
Installing the StorPoint CD+
This section includes the setup procedures for getting your StorPoint CD+
up and running:
Stage 1 - Connecting the StorPoint CD+ to the network
Stage 2 - Assigning an IP address
Stage 3 - Setting system parameters
You should then proceed to the relevant sections of the manual
depending on your network environment:
Note:
•
•
•
•
•
“Microsoft & IBM Networks (SMB)” on page 27
“NetWare (NCP)” on page 43
“UNIX (NFS)” on page 66
“Macintosh (AFP)” on page 71
“Web Browser (HTTP)” on page 81
o
Typically, your StorPoint CD+ will already be installed in a CD-ROM tower
when delivered. However, if required:
• Refer to “Installing the StorPoint CD+ in a Tower” on page 149 on
how to install the StorPoint CD+ in a CD-ROM tower.
• Refer to “Connecting the Drives to the StorPoint CD+” on page 151 on
how to connect CD-ROM drives to the StorPoint CD+.
10
AXIS StorPoint CD+ User’s Manual
Installing the StorPoint CD+
Connecting the StorPoint CD+ to the Network
Before You Begin
Procedure
Always consult the Network Administrator before making changes to the
network configuration.
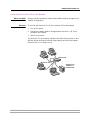
To connect the StorPoint CD+ to your network, follow these steps:
1. Turn off the power.
2. Connect the network cable to the appropriate connector, i.e. RJ-45 for
100baseTX and 10baseT.
3. Switch on the tower.
The StorPoint CD+ front panel indicators will flash during power-on and
self-test. When the Status indicator stops flashing and turns solid green,
the StorPoint CD+ is ready for use.
Network hub
Network cables
StorPoint CD+
installed in a
CD-ROM tower
AXIS StorPoint CD+ User’s Manual
11
Installing the StorPoint CD+
Assigning an IP Address
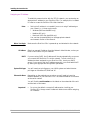
To establish communication with the TCP/IP network, you must assign an
appropriate IP address to your StorPoint CD+. For example, this is needed
in order to access the StorPoint CD+ Web interface.
Note:
o
Setting the IP address is not needed if you are not using IP addressing on
your network, i.e. in these environments:
• Windows (SMB over NetBEUI only)
• NetWare (IPX only)
• Macintosh (AFP over AppleTalk only)
You can then proceed directly to the appropriate network
environment section of the manual.
Before You Begin
Make sure the StorPoint CD+ is powered up and attached to the network.
IP Address
Obtain an unused IP address from the Network Administrator, unless you
have a DHCP server on your network.
DHCP
If you are using DHCP, the IP address will be set automatically as soon as
you connect the StorPoint CD+ to the network. To find out which IP
address has been assigned to your StorPoint CD+, check your DHCP
server. If you want to set the IP address manually, you can disable DHCP
by setting the appropriate configuration parameter.
System Privileges
You will need root privileges on your UNIX system and administrator
privileges on Windows NT/2000 and XP.
Ethernet Address
Depending on the method you are using, you will need to know the
Ethernet address of your StorPoint CD+. The Ethernet address is the same
as the serial number.
You will find the serial number on the labels on the underside of the unit
and the back of the tower.
Important!
12
o
Do not use the default or example IP address when installing your
StorPoint CD+. Always consult the Network Administrator before assigning
an IP address.
AXIS StorPoint CD+ User’s Manual
Installing the StorPoint CD+
Methods for Setting
the IP Address
You can set the IP address using one of these methods, depending on your
network operating environment:
Method
Network environments
See ...
Web browser *
Windows 95/98/NT/Me/2000/XP
page 13
Windows 95/98/NT/Me/2000/XP, NetWare
page 14
UNIX, OS/2
page 16
DHCP
Windows NT/2000, NetWare, UNIX,
Macintosh
page 17
BOOTP
UNIX
page 17
RARP *
UNIX
page 18
Text editor
Macintosh
page 20
AXIS IP Installer *
Windows 95/98/NT, NetWare
page 18
ARP *
*) These methods operate on single network segments only, i.e. they
cannot be used over routers.
Note:
Web Browser
o
When the IP address has been successfully assigned to your StorPoint CD+,
you can set the ProtectIP parameter to on in order to avoid accidental or
malicious changing of the IP address. With this configuration, the
StorPoint CD+ will no longer accept a new IP address using the Web
browser or ARP method. You will find the ProtectIP parameter under the
[IP] section in the config.ini file located in the
System/ServerProperties folder. Use a text editor to edit the file.
In most Windows environments, you can use a standard Web browser,
e.g. Internet Explorer or Netscape Navigator, to set the IP address. Follow
these steps:
1. Start your Web browser.
2. In the location/address field, enter the following:
<nnnnnn> are the last six digits
of the serial number, e.g. 3E5207
for the serial number
Note:
o
<ip3_ ip4> the last two groups of
the desired IP address, e.g.
253_80 for the IP address
On a Class C network, you can enter simply
<xxxxxx>_<ip4>
where <xxxxxx> are the last six digits of the StorPoint CD+ serial
number and <ip4> is the last group of the desired IP address.
Example
The serial number of your StorPoint CD+ is 00408C3E5207 and you
want to assign it the IP address 192.16.253.80. Your Windows client
AXIS StorPoint CD+ User’s Manual
13
Installing the StorPoint CD+
has the IP address 192.16.6.40. You enter 3E5207_253_80 in the
location/address field.
The StorPoint CD+ will retrieve the first two groups of the new IP
address from the subnet where the client issues the broadcast.
When the IP address has been successfully set, the StorPoint CD+ File
View page will appear in your Web browser.
Important!
ARP in Windows
o
You must have the NetBEUI protocol enabled. In Windows 2000, this is not
the default setting.
o
The new IP address must be set within 30 minutes after restart.
o
This method will work for most Windows configurations. However, if you
experience problems when using this method, we recommend that you use
the AXIS IP Installer for setting the IP address. See “AXIS IP Installer” on
page 18.
Perform the following commands to download the IP address and verify
correct Internet communication in Windows 95/98/Me and Windows
NT/2000/XP.
Start a DOS window and type the following command:
Syntax Windows 95
arp -s <IP address> <Ethernet address> <my PC IP address>
ping <IP address>
where <my PC IP address> is the IP address of your Windows 95 PC.
Example Windows 95
arp -s 192.16.253.80 00-40-8c-10-00-86 171.16.6.40
ping 192.16.253.80
Syntax Windows 98/Me and Windows NT/2000/XP
arp -s <IP address> <Ethernet address>
ping <IP address>
Example Windows 98/Me and Windows NT/2000/XP
arp -s 192.16.253.80 00-40-8c-10-00-86
ping 192.16.253.80
The host will return ‘Reply from 192.16.253.80 ...’ or some similar
message. This indicates that the address has been set and the
communication is established.
14
AXIS StorPoint CD+ User’s Manual
Installing the StorPoint CD+
Notes:
o
Once the StorPoint CD+ has established communication using an
appropriate IP address, the arp command cannot be used to change the
address. This is to avoid accidental or unauthorized changes. However, if
you restart the StorPoint CD+, you can change the IP address within 30
minutes.
o
Please note that when you execute the ping command for the first time,
you will experience a significantly longer response time than usual.
o
If you are using host names, you can map a unique host name to the
acquired IP address. Refer to your system manuals or to the Network
Administrator for instructions on how to perform the name mapping on
your particular system.
AXIS StorPoint CD+ User’s Manual
15
Installing the StorPoint CD+
ARP in UNIX
and OS/2
Follow these steps to download the IP address and verify the
communication in UNIX and OS/2:
1. Type the following command:
arp -s <IP address> <Ethernet address> temp
2. Ping the unit as follows:
ping <IP address>
Example:
arp -s 192.16.253.80 00:40:8c:10:00:86 temp
ping 192.16.253.80
The host will return ‘192.16.253.80 is alive’, or some similar
message to indicate that the address has been set and the communication
is established.
Notes:
o
Once the StorPoint CD+ has established communication using an
appropriate IP address, the arp command cannot be used to change the
address. This is to avoid accidental or unauthorized changes. However, if
you restart the StorPoint CD+, you can change the IP address within 30
minutes.
o
Please note that when you execute the ping command for the first time,
you may experience a significantly longer response time than is usual.
o
If you are using host names, you can map a unique host name to the
acquired IP address. Refer to your system manuals or to the Network
Administrator for instructions on how to perform the name mapping on
your particular system.
o
The arp -s command may vary from system to system. Some BSD-type
systems expect the IP address and Ethernet address in reverse order,
whereas IBM AIX systems require the additional argument ether. For
example:
arp -s ether <IP address> 00:40:8c:10:00:86 temp
16
AXIS StorPoint CD+ User’s Manual
Installing the StorPoint CD+
DHCP in Windows,
NetWare and UNIX
Follow these steps to use the DHCP method:
1. Edit or create a scope in the DHCP manager of the DHCP daemon. For
Windows NT/2000 servers, refer to the “Windows NT Resource Kit” on
how to do this.
The entries made in this scope typically include the following
parameters:
• Range of IP addresses
• Subnet mask
• Default router IP address
• Lease duration
• Mail server IP address
• DNS server IP address
• WINS server IP address(es)
• Domain name
• NTP server IP address
• NDS tree name
• NDS server IP address(es)
2. Activate the scope.
DHCP is enabled by default. The IP address and all the other settings will
be set automatically.
Notes:
BOOTP in UNIX
o
To fully benefit from DHCP, it is recommended that you use the WINS
name resolution protocol available in Windows NT/2000. If you intend to
use WINS, at least one WINS server IP address must be included in the
scope. Once the IP address is received, the StorPoint CD+ will register its
host name and IP address on the WINS server.
o
You might want to include an SLP scope list and some SLP directory agents
in the DHCP scope. However, we recommend that you specify the SLP
settings in the StorPoint CD+ parameter list instead. You can do this via
the StorPoint CD+ Web interface or by editing the config.ini file.
Follow these steps to use BOOTP in UNIX:
1. Append the following entry to your boot table (typically
/etc/bootptab):
<host name>:ht=<hardware type>:vm=<vendor magic>:\
:ha=<hardware address>:ip=<IP address>:\
:sm=<subnet mask>:gw=<gateway field>
where:
ht =
ether for Ethernet
vm =
rfc1048
ha =
The Ethernet or node address, i.e. the StorPoint CD+
serial number
The IP address of the StorPoint CD+
ip =
AXIS StorPoint CD+ User’s Manual
17
Installing the StorPoint CD+
sm =
gw =
The subnet mask
The default router address
Example:
cdserv:ht=ether:vm=rfc1048:ha=00408c110086:ip=192.36.253.8
0:\
:sm=255.255.255.0:gw=192.36.253.254
2. Make sure a unique host name is mapped to the acquired IP address. Refer
to your system manuals or to the Network Administrator for instructions on
how to perform the name mapping on your particular system.
3. Start the BOOTP daemon (if not already running), typically by the command:
bootpd -a
4. Restart the StorPoint CD+ to download the IP address, default router
address and subnet mask.
RARP in UNIX
Follow these steps to use the RARP method in UNIX:
1. Append the following line to your Ethernet address table. This is typically
performed using the command /etc/ethers:
<Ethernet address> <IP address>
Example:
00:40:8c:10:00:86 192.16.253.80
2. If you are using host names, you can map a unique host name to the acquired
IP address. Refer to your system manuals or to the Network Administrator
for instructions on how to perform the name mapping on your particular
system.
3. If it is not already running, start the RARP daemon. This is typically done
using the command rarpd -a.
4. Restart the StorPoint CD+ to download the IP address.
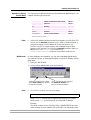
AXIS IP Installer
AXIS IP Installer is an application that allows you to assign IP addresses
to your StorPoint CD+, find IP addresses of already installed StorPoint
CD+s and access the StorPoint CD+ internal Web pages for easy
configuration.
The required utility software is available on the AXIS Online CD. It can
also be downloaded from the Axis Web Site at http://www.axis.com
Follow these steps to install the AXIS IP Installer:
1. Locate the setup file, Setup.exe, and choose the Run option from the
Windows Start menu.
2. Follow the instructions as they appear on the screen.
18
AXIS StorPoint CD+ User’s Manual
Installing the StorPoint CD+
When finished, the AXIS IP Installer will be available from your Start
menu. To run the program, select Programs | Axis Communications |
AXIS IP Installer.
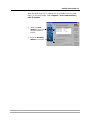
1. Select the serial
number of your AXIS
StorPoint server in
this list.
2. Enter the desired IP
address in this field.
AXIS StorPoint CD+ User’s Manual
19
Installing the StorPoint CD+
Text Editor in
Macintosh
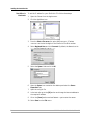
To set the IP address for your StorPoint CD+ follow these steps:
1. Open the Chooser from the Apple menu.
2. Click the AppleShare icon.
3. From the Select a file server list, select AXIS<nnnnnn>_AT where
<nnnnnn> are the last six digits of the StorPoint CD+ serial number.
4. Select Registered User and click Connect. By default, the Name is set to
root and the Password is set to pass.
5. Select the System folder and click OK.
6. Open the System icon created on the desktop and select the Server
Properties folder.
7. Open the config.ini file.
8. In the text editor go to the [IP] section and change the Internet address to
the required IP address.
9. Go to the [Server] section and set Restart = yes to restart the server.
10. Select Save from the File menu.
20
AXIS StorPoint CD+ User’s Manual
Installing the StorPoint CD+
System Settings
The StorPoint CD+ can be configured using one of these tools:
•
•
Accessing the
StorPoint CD+
Web Pages
Web browser - The StorPoint CD+ Web interface, which is the preferred
administration tool. Requires the IP address to be set. See description
below.
Text editor - The StorPoint CD+ text files. Refer to “Text Editor” on
page 125. However, hard disk caching cannot be performed from this
interface.
The StorPoint CD+ web interface is divided into two parts:
The File View page for browsing and accessing files and folders on the
networked discs. This page is available to all users.
• The Administration pages for specifying configuration parameters and
access rights. These pages are intended for the Administrator only.
You access the web pages using a standard web browser:
•
• Netscape Navigator version 4.08 or higher
• Internet Explorer version 4.0 or higher
Follow these steps:
1. Start the Web browser.
2. Enter the name or IP address of the StorPoint CD+ in the location/address
field:
http://<IP address>
The File View page is displayed.
From this page, users can display and access the discs inserted in the
connected drives according to the access permissions set up by the
Administrator.
3. Click admin to access the Administration pages. You will be prompted to
supply the Server password the first time during a session. Any user id can
be used. The default password is pass.
AXIS StorPoint CD+ User’s Manual
21
Installing the StorPoint CD+
4. The Server Settings page is displayed. From this page you can edit the system
settings and display information about the connected drives. You can also
view the current configuration settings, shutdown the server, restart the
server and restore the factory default settings.
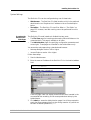
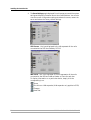
SCSI Server - the icons displayed to the left represent all the units
connected to the SCSI bus listed by SCSI ID.
IDE Server - the icons displayed to the left represents all the units
connected to the IDE bus listed as Master or Slave for each bus
To display information on a particular device, simply click the
corresponding icon:
Server
Disc drive or LUN expander (LUN expander only applies to SCSI)
Changer
Hard disk
22
AXIS StorPoint CD+ User’s Manual
Installing the StorPoint CD+
Main Menu
Notes:
Shutting Down the
StorPoint CD+
From the main menu, you can access the Administration pages:
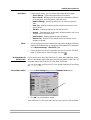
• Server Settings - System settings and drive information.
• Discs & Drives - Managing the drives and the inserted discs. Setting
up access rights. Archiving discs to hard disk cache.
• Network Settings - Specifying settings for the network protocols
used.
• Event Log - Viewing the event log that contains occurrences in the
StorPoint CD+.
• Statistics - Displaying statistics on the StorPoint CD+.
• Support - Troubleshooting, server report, software version, Axis online
services, contact information, etc.
• Help Contents - Displaying general help information.
• External Link - Optional link to a Web site on the Internet or your
company’s intranet.
o
You can prevent users from accessing the volumes via the Web interface by
disabling the Enable access to volumes via Web browser (HTTP) parameter
on the Network Settings - Web (HTTP) page.
o
Context sensitive online help is available from all the StorPoint CD+ Web
pages. To access help for a specific page, click Help
.
If you need to shut down the StorPoint CD+ after the installation, make
sure it is shut down safely otherwise you risk losing data. Do NOT turn off
the power before the StorPoint CD+ has been shut down.
You can shut down the StorPoint CD+ via its Web interface or by editing
the config.ini file.
Via the Web Interface
1. On the Server Settings page, click the Shutdown Server button.
2. Click OK in the confirmation dialog.
Your StorPoint CD+ will shut down and you can now turn off the power.
AXIS StorPoint CD+ User’s Manual
23
Installing the StorPoint CD+
Via the config.ini File
1. Locate the config.ini file using your standard file manager tool. You
will find it in the Root/System/ServerProperties folder.
2. Use your preferred text editor and change the Shut Down parameter to yes.
You will find the Shut Down parameter under the [Server] section.
3. Save the config.ini file.
Your StorPoint CD+ will now shut down and you can then turn off the
power.
Server Password
To protect the system files, it is important that you set the Server
password. The Server password is used in basically all protocols, i.e.
HTTP, NetWare (NCP), Windows (SMB), Macintosh (AFP), SNMP and FTP.
For example, a user will be prompted for the Server password when trying
to access the Administration Web pages for the first time during a session.
By default, the Server password is set to pass.
To set the Server password, follow these steps:
1. On the Server Settings page, click Change... to open the Server Settings
dialog box.
2. Open the General page.
3. Specify and confirm the Server password.
4. Click Close.
Note:
24
o
If you lose the Server password, you must restore the factory default
settings. See “Restoring Factory Default Settings” on page 130.
AXIS StorPoint CD+ User’s Manual
Installing the StorPoint CD+
Date & Time
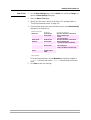
1. On the Server Settings page, click the Server icon and then Change... to
open the Server Settings dialog box.
2. Open the Date & Time page.
3. Specify the time zone in which the StorPoint CD+ operates. Refer to
“Time Zone Parameter Values” on page 120.
4. To set the time using a time synchronization source, choose Automatically
and specify the time source:
Network environment
Time Source:
You must also specify the ...
NetWare IPX
Novell Directory
Services (NDS)
Time Source parameter on the Network
Settings | NetWare page:
- SAP or
- List of server names.
NetWare PureIP
NetWare/IP
Novell Directory
Services (NDS)
Time Source parameter on the Network
Settings | NetWare page:
- List of server names or IP addresses.
TCP/IP
Network Time
Protocol (NTP) *
NTP Server parameter on the Server Settings
| Date & Time page:
- Name or IP address of the time server.
Windows NT/2000
domains
Microsoft Windows
NT/2000 Network
(SMB)
* Note: NTP is not natively supported by Windows NT servers. You will need third
party software.
To set the time manually, choose Manually and specify the date in
yyyy-mm-dd format, and time in hh:mm:ss format using the 24 hour
clock.
5. Click Save to save your settings.
AXIS StorPoint CD+ User’s Manual
25
Installing the StorPoint CD+
TCP/IP
The installation wizard is a convenient way to specify the Internet-related
settings for your StorPoint CD+.
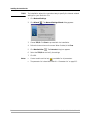
1. Click Network Settings.
2. Click Wizard
. The Network Settings Wizard dialog appears.
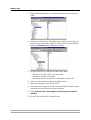
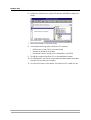
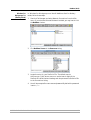
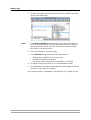
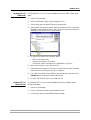
3. Choose TCP/IP. Click Start to proceed with the installation.
4. Follow the instructions on the screen. When finished, click Close.
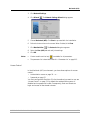
5. Click Detailed View
. The Protocols dialog box appears.
6. Select the TCP/IP tab and verify the settings.
7. Click OK.
Notes:
26
o
Context sensitive online help
is available for all parameters.
o
The parameter list is described in detail in “Parameter List” on page 115.
AXIS StorPoint CD+ User’s Manual
Microsoft & IBM Networks (SMB)
Section 3
Microsoft & IBM Networks (SMB)
This section outlines the required configuration settings for running the
StorPoint CD+ in the Microsoft and IBM (SMB) network environment, i.e.
Windows 95/98/NT4/Me, Windows 2000/XP or OS/2. It also describes
how to set up access restrictions.
If you are using the StorPoint CD+ in a multiprotocol environment,
proceed to the other relevant sections of the manual, namely:
•
•
•
•
•
“NetWare (NCP)” on page 43
“UNIX (NFS)” on page 66
“Macintosh (AFP)” on page 71
“FTP (File Transfer Protocol)” on page 78
“Web Browser (HTTP)” on page 81
Network Settings
You do not have to specify any specific settings before you can use the
StorPoint CD+ in the Windows (SMB) environment. However, we
recommend that you change some of the default settings, e.g. the SMB
server name. You can use the Administration web pages to configure the
StorPoint CD+.
SMB Server Name
Recommendation!
The default SMB server name is AXIS<nnnnnn>, where <nnnnnn> are
the last six digits of the StorPoint CD+ serial number. This is the name
that will be presented to the Windows clients on the network. You can
change that name by editing the SMB Server Name parameter.
Choose a more descriptive name for your server, e.g. CD_Server.
AXIS StorPoint CD+ User’s Manual
27
Microsoft & IBM Networks (SMB)
SMB Protocols
SMB is a protocol that make use of NetBIOS. NetBIOS can be used over
several different network protocols. The StorPoint CD+ supports the
following transport methods:
• SMB over NetBIOS/TCP/IP (NBT) - max 1000 users
• SMB over NetBIOS/NetBEUI - max 300 users
Both protocols are enabled by default. However, you can disable the
protocols by setting the appropriate configuration parameters.
Access Control
Access control is used for restricting access to the shared discs in the
StorPoint CD+. In the Windows (SMB) environment you can select
whether you want to use user-level or share-level access control.
User-level
Access Control
User-level access control allows you to define rights for discs/volumes for
each individual logged in user. The StorPoint CD+ will act as an
“NT4/2000 member server” in the domain and verify the user’s identity
and group memberships against a domain controller on the network. The
advantages with this method are:
•
•
•
Share-level
Access Control
Recommendation!
Wizard
The user is not required to answer to password prompts every time
he/she needs to access a protected disc or a volume.
The network administrator can administer the access rights for discs and
volumes using the standard administration tools in Windows NT/2000.
The network administrator can use the native user groups in the domain
to set basic security.
Share-level access control is based on different passwords for different
shared discs/folders. No verification with domain controllers will take
place. This is a good method to use in smaller “workgroup based”
networks when there is no domain controller.
User-level access control is the preferred method to use in Windows
NT/2000 server based networks.
The installation wizard is a convenient way to set up your StorPoint CD+
for your Windows (SMB) environment and it will guide you through the
following:
•
Defining your server name and the workgroup/domain you want your
StorPoint CD+ to appear in.
• Defining how you want to control access to shared resources.
To run the Wizard follow the steps outlined below:
1. Start your web browser, and enter the name or IP address of the
StorPoint CD+ in the location/address field.
2. Click admin. You will be prompted for the Server password. By default, this
is set to pass. To change the Server password, see “Server Password” on page
24.
3. Click Network Settings.
28
AXIS StorPoint CD+ User’s Manual
Microsoft & IBM Networks (SMB)
4. Click Wizard
. The Network Settings Wizard dialog appears.
5. Choose Windows (SMB). Click Start to proceed with the installation.
6. Follow the instructions on the screen. When finished, click Close.
7. Click Detailed View
. The Protocols dialog box appears.
8. Select the Windows (SMB) tab and verify the settings.
9. Click OK.
Notes:
o
Context sensitive online help
is available for all parameters.
o
The parameter list is described in detail in “Parameter List” on page 115
o
When creating a computer account in the domain, the administrator’s user
name and password will be saved by the StorPoint CD+ to enable the
StorPoint CD+ to authenticate the users who log on. After the account has
been created, these parameters can be changed in the configuration file
(config.ini). When viewing the configuration file, the password will not be
visible in clear text.
Access Control
The procedures for managing shares depends on the security mode you
are using:
•
•
•
Verifying the
Security Mode
User-level access control in Windows NT/2000 networks
User-level access control in OS/2 networks
Share-level access control
To verify the security mode setting, follow these steps:
1. Start your web browser, and enter the name or IP address of the
StorPoint CD+ in the location/address field.
2. Click admin. You will be prompted for the Server password. By default,
this is set to pass. To change the Server password, see “Server Password”
on page 24.
3. Click Network Settings.
AXIS StorPoint CD+ User’s Manual
29
Microsoft & IBM Networks (SMB)
4. Click Detailed View
. The Protocols dialog box appears.
5. Select the Windows (SMB) tab. If you want to change the Security Mode
parameter, click Change...
6. Click OK.
30
AXIS StorPoint CD+ User’s Manual
Microsoft & IBM Networks (SMB)
Managing Shares
in User-level
Access Control
Important!
Defining Shares
The system files are protected by default. All users that belong to the
administrator groups in the domain have administrator rights on the
StorPoint CD+. All members of the domain have permissions to read and
execute files on all the discs.
o
You cannot use Server Manager in Windows NT to manage the shares on
the StorPoint CD+.
By default, all new discs are shared automatically. If you want to change
a share, i.e. remove it or change the name, follow these steps:
1. Start your web browser, and enter the name or IP address of the
StorPoint CD+ in the location/address field.
2. Click admin. You will be prompted for the Server password. By default, this
is set to pass. To change the Server password, see “Server Password” on page
24.
3. Click Disc & Drives.
4. Locate the resource you want to share, and click Properties
Properties dialog box appears.
. The
5. Open the Windows Sharing page.
6. You can select whether you want to use the access rights of the disc or the
drive by checking the appropriate radio button. Note that this is a global
setting for all network protocols.
7. Select the Share as radio button, and enter a name in the Share Name field.
8. Enter a comment in the Comment field.
9. Click OK.
AXIS StorPoint CD+ User’s Manual
31
Microsoft & IBM Networks (SMB)
Managing
Access Rights in
Windows NT/2000/XP
Environments
Notes:
In Windows NT/2000/XP environments, access rights are managed from
the Windows NT/2000/XP Explorer. It is not possible to manage access
rights from the Windows 95/98 Explorer or from the StorPoint CD+ web
interface.
o
The access rights are additive which means that the user’s access rights are
the summary of the rights granted from individual assignments and group
memberships.
o
Files and subfolders on the disc will automatically inherit the same access
rights as the root folder.
Follow these steps:
1. In the Windows NT/2000 Explorer, select the disc or volume for which you
want to change the access rights.
2. Select Properties from the File menu.
3. Select the Security tab, and (Windows NT only) click the Permissions button.
4. Specify the permissions.
5. Click OK.
Note:
32
o
Access rights work as in any other Windows NT4/2000 Server. The built-in
help in Windows NT4/2000/XP is a good place to start learning more about
NT/2000/XP security. See access permissions in the Windows help system.
AXIS StorPoint CD+ User’s Manual
Microsoft & IBM Networks (SMB)
Managing
Access Rights in
OS/2 Environments
To manage access rights in OS/2 environments, follow these steps:
1. Start your web browser, and enter the name or IP address of the
StorPoint CD+ in the location/address field.
2. Click admin. You will be prompted for the Server password. By default, this
is set to pass. To change the Server password, see “Server Password” on page
24.
3. Click Discs & Drives.
4. Locate the resource you want to share or protect in the file tree, and click
Properties
. The Properties dialog box appears.
5. Open the Windows Security page.
6. You can select whether you want to use the access rights of the disc or the
drive by checking the appropriate radio button. Note that this is a global
setting for all network protocols.
7. Add permissions for the users and groups you want to grant access.
Notes:
o
Files and subfolders on the disc will automatically inherit the same access
rights as the root folder.
o
The access rights are additive which means that the user’s access rights are
the summary of the rights granted from individual assignments and group
memberships.
8. Click OK.
AXIS StorPoint CD+ User’s Manual
33
Microsoft & IBM Networks (SMB)
Managing Shares
in Share-level
Access Control
Note:
By default, all new discs are shared automatically. If you want to change
a share, i.e. remove it or change the name, follow the procedure outlined
below:
o
Macintosh HFS CD-ROM:s are not shared automatically. This can be
defined via the web interface.
1. Start your web browser, and enter the name or IP address of the
StorPoint CD+ in the location/address field.
2. Click admin. You will be prompted for the Server password. By default, this
is set to pass. To change the Server password, see “Server Password” on page
24.
3. Click Disc & Drives.
4. Locate the resource you want to share or protect in the file tree, and click
Properties
. The Properties dialog box appears.
5. Open the Windows Sharing page.
6. You can select whether you want to use the access rights of the disc or the
drive by checking the appropriate radio button. Note that this is a global
setting for all network protocols.
7. Select the Share as radio button, and enter a share name in the Share Name
field.
8. Specify the type of access you want the user to have:
• Read-Only to enable users to open and copy documents.
• Full to enable users to change, add and remove files.
• Depends on Password to allow different types of access. Note that
you must specify both password fields, otherwise the users will not be
prompted for any password.
9. Click OK.
34
AXIS StorPoint CD+ User’s Manual
Microsoft & IBM Networks (SMB)
Accessing the Discs
The StorPoint CD+ makes your networked CD/DVD-ROMs available to
anyone who has the appropriate privileges on the network. Users will
access the StorPoint CD+ just as any other workstation or file server.
The way you access the StorPoint CD+ resources depends on your
network environment:
Notes:
General Disc Settings
Network environments
See ...
Windows 95/98/ME & Windows NT/2000/XP
page 36
OS/2 Warp 4
page 38
IBM Peer for OS/2
page 38
DOS
page 40
o
The examples will assume that you have not changed the default server
name. The default server name is AXIS<nnnnnn> where <nnnnnn> are the
six last digits of the StorPoint CD+ serial number. If you have changed the
server name, use the new name where the examples refer to the default
name.
o
Depending on the access rights set up by the Administrator, you might be
prompted to supply a password or receive a message similar to ‘Access is
denied’ when trying to access a shared resource on the StorPoint CD+. The
default Server password is pass.
o
In the Windows 95/98/ME and Windows NT 4/2000/XP environments, you
can install the AXIS StorPoint Disco utility, which is a powerful Windows
application for locating and using CD/DVD-ROMs located on AXIS storage
servers, wherever they are on your network. Refer to “AXIS StorPoint
DISCO” on page 91.
To specify the general settings for an inserted disc, follow these steps:
1. Start your web browser, and enter the name or IP address of the
StorPoint CD+ in the location/address field.
2. Click admin. You will be prompted for the Server password. By default, this
is set to pass.
3. Click Discs & Drives.
4. Locate the desired disc.
AXIS StorPoint CD+ User’s Manual
35
Microsoft & IBM Networks (SMB)
5. Click Properties
. The Properties dialog box appears:
6. Select the General tab. You can specify the following settings:
• Name - The volume name that will be presented to the clients. If left
blank, the volume label will be used.
• Description - The description that will be displayed in Windows
Explorer.
• User Limit - The number of users that will have access to the disc. To
disable this function, enter the value 0 into this field.
7. Click OK.
Windows 95/98
Windows NT 4
Windows 2000/XP
Follow these steps:
1. Start the Windows Explorer.
2. Expand the Network Neighborhood/My Network Places icon.
3. Expand the Entire Network icon. By default, the StorPoint CD+ appears in
the folder that comes first when sorted by name. If the Domain Name is
already set, the StorPoint CD+ will appear in the specified folder.
Notes:
36
o
Depending on your version of Windows Explorer, your screen may differ
from the screen shown in this example.
AXIS StorPoint CD+ User’s Manual
Microsoft & IBM Networks (SMB)
o
If you cannot find the StorPoint CD+ under Entire Network, refer to
“Alternative Method” on page 37.
4. Double click the entry for your StorPoint CD+. The default name is
Axis<nnnnnn>, where <nnnnnn> are the six last digits of the StorPoint CD+
serial number.
5. To map one of the StorPoint CD+ resources, locate:
• Root for root level access
• Volumes for access to all the discs
• the volume name for access to an individual disc, e.g. office97
6. Right click the resource and select Map Network Drive...
7. Select a drive letter for your StorPoint CD+.
8. Check Reconnect at logon if you wish to use the resource under the same
drive letter the next time you start your computer.
9. Click OK. The StorPoint CD+ is ready for use.
Alternative Method
If you cannot find the StorPoint CD+, follow these steps:
1. Start the Windows Explorer from the Start menu.
2. From the Tools menu, select Map Network Drive...
Notes:
o
Depending on your version of Windows Explorer, your screen may differ
from the screen shown in this example.
3. Select a drive letter.
4. In the path box, type \\AXIS<nnnnnn>\root, where <nnnnnn> are the six
last digits of your StorPoint CD+ serial number.
AXIS StorPoint CD+ User’s Manual
37
Microsoft & IBM Networks (SMB)
5. Check Reconnect at logon if you wish to use the resource under the same
drive letter the next time you start your computer.
6. Click OK. The StorPoint CD+ is ready for use.
OS/2 Warp 4
1. Double click the Connection icon.
2. Open Network, File and Print Client Resource Browser.
3. Double click your StorPoint CD+.
4. Select the resource you want to map to a drive letter.
5. From the Selected menu, select Assign drive.
IBM Peer for OS/2
Make sure you have IBM Peer for OS/2 installed. If not, see the
instructions in “Alternative Method” on page 40.
1. Double click the OS/2 Peer icon. The Peer window is displayed:
38
AXIS StorPoint CD+ User’s Manual
Microsoft & IBM Networks (SMB)
2. Double click the Sharing and Connecting icon to open this window:
Any active connections you have will be listed in the window.
3. From the Connection menu, select Create. This dialog is displayed:
4. In the Workstation field, type AXIS<nnnnnn>, where <nnnnnn> are the last
six digits of your StorPoint CD+ serial number.
5. In the Share/alias field enter the StorPoint CD+ resource:
• Root for root level access
• Volumes for access to all the discs
• the volume name for access to an individual disc, e.g. acrobat
6. In the Local device name field, select a drive letter for your StorPoint CD+.
7. Click Create. The StorPoint CD+ is ready for use.
Note:
o
The StorPoint CD+ folders will not be visible on the Desktop in OS/2
versions prior to OS/2 WARP Connect. If you wish to use an earlier version
of OS/2, we recommend using third party NFS software to connect to the
StorPoint CD+.
AXIS StorPoint CD+ User’s Manual
39
Microsoft & IBM Networks (SMB)
Alternative Method
If you do not have Peer for OS/2, you can map the StorPoint CD+ to a
drive letter using the net use command. Follow these steps:
1. Open an OS/2 window.
2. Use the net use command to mount the StorPoint CD+. At the OS/2 prompt,
type:
net use <drive letter>: \\AXIS<nnnnnn>\<folder>
where <nnnnnn> are the six last digits of your StorPoint CD+ serial number
and <folder> is any shared StorPoint CD+ folder.
3. To make the connections permanent, create or edit your startup.cmd file
to include your net use commands.
DOS
Follow these steps:
1. At the DOS prompt, type:
net use <drive letter>: \\AXIS<nnnnnn>\<folder>
or:
net use <drive letter>: \\<IP address>\<folder>
where <nnnnnn> are the six last digits of your StorPoint CD+ serial
number and <folder> is the StorPoint CD+ folder you want to map.
2. To make the connections permanent, edit your autoexec.bat file to include
your net use commands.
Example 1 (Root level access):
To access the root level of your StorPoint CD+ with serial number
00408C18025C under the drive letter E, type:
net use E: \\AXIS18025C\root
Example 2 (Volumes folder access):
If your StorPoint CD+ serial number is 00408C18025C, and you want
to be able to access all the discs under the drive letter F, type:
net use F: \\AXIS18025C\volumes
Example 3 (Disc access):
If your StorPoint CD+ serial number is 00408C18025C, and you want
to map a disc named 44018881 to drive G, type:
net use G: \\AXIS18025C\44018881
40
AXIS StorPoint CD+ User’s Manual
Microsoft & IBM Networks (SMB)
Notes:
o
If you are using DOS within Windows 95 or Windows NT 4, and you wish to
access files or directory names longer than 8 characters, you will need to
precede these long names with a quote mark (“). For example, to change to
the directory called Product Information:
G:\AXIS18025C\VOLUMES\>CD “PRODUCT INFORMATION
o
Windows NT gives the additional facility of using the * wildcard. For
example, a quick way of changing to the Product Information directory
would be:
G:\AXIS18025C\VOLUMES\>CD “PRODUCT*
Asian Languages
Global Setting
The StorPoint CD+ supports double-byte character encoded discs. The
supported languages are: Simplified Chinese, Traditional Chinese,
Japanese and Korean.
If you want all discs to be displayed in a certain Asian language, you can
define this from the Server Settings page.
1. Click the Server icon.
2. Click Change..., and select the Asian Languages tab.
3. Select the required language from the DBCS Encoding drop-down list, and
click OK.
Note:
Local Setting
o
DBCS stands for Double Byte Character Set, and is by default set to None.
If you only want to display some discs in an Asian language, or if you
have discs in more than one Asian language, you can define this
individually per disc/drive from the Discs & Drive page.
AXIS StorPoint CD+ User’s Manual
41
Microsoft & IBM Networks (SMB)
1. Select the required disc from the Discs and File System view, and click
Properties
.
2. Select the required Asian language from the DBCS Encoding drop-down list,
and click OK.
Note:
42
o
It is also possible to specify an Asian language for the root folder in order
to display virtual folders in a certain Asian language in Windows SMB.
AXIS StorPoint CD+ User’s Manual
NetWare (NCP)
Section 4
NetWare (NCP)
This section outlines the required configuration settings for running the
StorPoint CD+ in the Novell NetWare environment, how to set up access
restrictions and accessing the discs.
The StorPoint CD+ supports a maximum of 1000 users in NetWare.
If you intend to use StorPoint CD+ in a multiprotocol environment,
proceed to the other relevant sections in this manual, namely:
•
•
•
•
•
“Microsoft & IBM Networks (SMB)” on page 27
“UNIX (NFS)” on page 66
“Macintosh (AFP)” on page 71
“FTP (File Transfer Protocol)” on page 78
“Web Browser (HTTP)” on page 81
Network Settings
The StorPoint CD+ emulates both a 4.x and a 5.x NDS server and a
NetWare 3.x bindery server. It also supports NetWare/IP and PureIP. In
NetWare 5 and NetWare 6 environments, the StorPoint CD+ can be
integrated as any other 5.x server simultaneously accessed via IPX,
NetWare/IP and PureIP.
If your network supports TCP/IP, you can use the Administration Web
pages to configure the StorPoint CD+.
NetWare Server Name
Recommendation!
Time Synchronization
The default NetWare server name is AXIS<nnnnnn>_NW, where
<nnnnnn> are the last six digits of the StorPoint CD+ serial number. This
is the name that will be presented to the NetWare clients on the network.
You can change that name by editing the NetWare Server Name
parameter.
Choose a more descriptive name for your server, e.g. CDServer.
Make sure you specify the time synchronization source properly. Refer to
“Date & Time” on page 25.
AXIS StorPoint CD+ User’s Manual
43
NetWare (NCP)
Installation as an
NDS Server
If used as an NDS server, the StorPoint CD+ must first be installed in the
NDS tree. The most convenient way to do this is using the installation
wizard available from the StorPoint CD+ Web interface, see “Wizard” on
page 44.
However, if you do not have a TCP/IP environment, you must use a text
editor and edit the configuration file manually. Refer to “Text Editor” on
page 45.
Important!
o
If you change any of the following parameters after installing the StorPoint
CD+ in the NDS tree, you might need to repeat the installation:
•
•
•
•
•
Requirements
IP address
Internal Net Address
IPX Enable
PureIP Enable
NetWare/IP
When installing the first StorPoint CD+ into the NDS tree, you must use
an account with Supervisor rights for the [Root] of the tree.
The StorPoint CD+ will extend the NDS schema with a new attribute
called AXIS:SPcd:rights which will be added to the NCP Server class.
The extension is needed for storing file system access rights.
The new attribute will not affect the operation of your NetWare servers.
The schema extension has been approved by Novell as part of the YES
certification of this product.
Notes:
o
Adding the schema extension requires Supervisor rights to the [Root]
object of the NDS tree.
o
If you do not have Supervisor rights to [Root] or if schema extensions are
not allowed in your NDS tree, you can store the access rights in a file on a
NetWare file server. However, you must specify the NDS Rights Storage
and NDS Rights File parameters properly. You will need Supervisor rights to
the Organizational Unit (OU). After the NDS installation, you must create
and assign access rights to the directory on the NetWare file server where
the file is stored.
For subsequent installations, Create rights to the context where you want
to install the StorPoint CD+ will be sufficient.
Wizard
The installation wizard is a convenient way to install your StorPoint CD+
in the NetWare environment.
1. Verify that the NDS tree is synchronized. To do that, you load
DSREPAIR.NLM on a NetWare server console in the NDS tree and select
Unattended full repair.
Important!
44
o
If the NDS tree is not synchronized, do not continue the installation until
you have solved the problem.
AXIS StorPoint CD+ User’s Manual
NetWare (NCP)
2. Start your Web browser, and enter the name or IP address of the StorPoint
CD+ in the location/address field.
3. Click admin. You will be prompted for the Server password. By default, this
is set to pass. To change the Server password, see “Server Password” on page
24.
4. Click Network Settings.
5. Click Wizard
. The Network Settings Wizard dialog appears.
6. Choose NetWare (NCP) to set up the StorPoint CD+ for your NetWare
clients. Click Start to proceed with the installation.
7. Follow the instructions on the screen. When finished, click Close.
8. Click Detailed View
. The Protocols dialog box appears.
9. Select the NetWare (NCP) tab and verify the settings.
10. Click OK.
11. Restart your StorPoint CD+.
Notes:
Text Editor
o
Online help
is available for all parameters.
o
The parameter list is described in detail in “Parameter List” on page 115.
If you do not have TCP/IP on your network, follow these steps to install
the StorPoint CD+ as an NDS server:
1. Login as Supervisor in bindery mode.
2. Verify that the NDS tree is synchronized. To do that, you load DSREPAIR.NLM
on a NetWare server console in the NDS tree and select Unattended full
repair.
Important!
o
If the NDS tree is not synchronized, do not continue the installation until
you have solved the problem.
AXIS StorPoint CD+ User’s Manual
45
NetWare (NCP)
3. Use a standard text editor such as Notepad to edit the configuration
parameters. From Windows Explorer or File Manager, locate the StorPoint
CD+ configuration file, config.ini which is located in the
System/ServerProperties folder.
4. Enter the appropriate settings for these parameters:
Parameter name
Value
Description
TimeZone
=
Must be set to the correct time zone that the StorPoint CD+ is
operating in. See “Time Zone Parameter Values” on page 120.
TimeSyncSource
= NDS
Set to NDS to enable the StorPoint CD+ to get its time from
the NetWare network.
NWEnable
= yes
Enables NetWare support.
IPXEnable
= yes
Set to yes to enable the IPX protocol.
NetWareIP_Enable
= no
Enables NCP over IPX/UDP (NetWare/IP).
PureIPEnable
= yes
Set to yes to enable PureIP for non-TCP/IP networks.
ServerName
=
NetWare server name to be presented to the NetWare clients.
Default is AXIS<nnnnnn>_NW where nnnnnn are the last six
digits of the serial number.
NDSEnable
= yes
Must be set to yes to enable the NDS login.
NDSTreeName
=
The name of the tree where you want to install the StorPoint
CD+, e.g. MEDCORP
NDSServerContext
=
The distinguished name of the context in the NDS tree where
you want to install the StorPoint CD+, e.g.
Manufacturing.Medtec
NDSAdminName
=
The distinguished name of a user or administrator with
Supervisor or Create rights to the context where you want to
install the StorPoint CD+, e.g. Admin.Medtec
Note: Do not enter a dot in front of the distinguished name
even if prompted for one.
NDSAdminPassword
=
The password of the administrator entered in NDSAdminName
shown above.
NDSInstall
= install
Change this to install when you are ready to install the
StorPoint CD+. The setting forced will overwrite the existing
server object without warning.
NDSRightsStorage
= NDS
Set to NDS to store the access rights in the NDS tree. Set to
File to store the file system access rights in a file on a Netware
server. This is necessary if you do not allow schema extensions
in your NDS tree, or if you do not have Supervisor access
rights. Set to Local to store the access rights locally on the
StorPoint.
[Server]
[NetWare]
46
AXIS StorPoint CD+ User’s Manual
NetWare (NCP)
NDSRightsFile
=
If storing the access rights in a file on the Novell file server,
specify the whole path to the file, e.g.
CORPSERVER/SYS:CDSERVER/CDSRV.DAT
The specified directory must exist and the StorPoint CD+ must
have Read, Write, Create, Erase, Modify and File Scan rights.
The StorPoint CD+ will create the file once you start adding
trustees.
TimeSyncSources
= SAP
Default is SAP for the network agreed time. Use SAP with IPX
and IP address or DNS name for PureIP. Alternatively, enter a
list of server names to be contacted for time synchronization.
AXIS StorPoint CD+ User’s Manual
47
NetWare (NCP)
Example (NDS settings):
The StorPoint CD+ is placed in Eastern United States. The name of your
NDS tree is ACMECORP, the name of the context where you wish to
install the StorPoint CD+ is Corp.Acme, and the administrator's name is
Admin.Acme. Specify these parameters:
[Server]
TimeZone
TimeSyncSource
...
[NetWare]
NWEnable
IPXEnable
NetWareIP_Enable
PureIPEnable
ServerName
NDSEnable
NDSTreeName
NDSServerContext
NDSAdminName
NDSAdminPassword
NDSInstall
NDSRightsStorage
TimeSyncSources
= US_CAN_Eastern
= NDS
=
=
=
=
=
=
=
=
=
=
=
=
=
yes
yes
yes
no
AXIS<nnnnnn>_NW
yes
ACMECORP
Corp.Acme
Admin.Acme
secret
install
NDS
SAP
5. Save the config.ini file to start the NDS server installation. The
installation takes about 15 seconds, after which users will be able to access
the StorPoint CD+ in NDS mode.
6. Check the logfile.txt file to verify that the StorPoint CD+ was
successfully installed. See “Installation Errors in NetWare NDS” on page 49.
7. Restart your StorPoint CD+ after the installation.
8. After the installation you must logout and then login again to have all the
necessary rights on the StorPoint CD+ server object and the associated
volume.
Using the NWAdmin, you will find a new server object and
corresponding volume object in the context you chose above.
The StorPoint CD+ installed in the NDS Tree
Note:
48
o
You can display Details in NWAdmin to verify the syntax of the
NDSServerContext and NDSAdminName parameters.
AXIS StorPoint CD+ User’s Manual
NetWare (NCP)
Installation Errors in
NetWare NDS
If you experience problems when installing your StorPoint CD+ in a
NetWare NDS network, errors that occur will be written to a file named
logfile.txt located in the System/ServerProperties folder. You can
display the log file on the Event Log page within the StorPoint CD+ Web
interface.
This table comprises a summary of error messages:
Error
Installation failed: NDS tree not found
Installation failed: Administrator object
missing
Installation failed: Administrator
password is incorrect
Installation failed: Server context not
found
Installation failed: Insufficient rights to
create server object
Installation failed: NDS Server object
already exists
Installation warning: Could not extend
NDS Schema. User xxxxx doesn't have
SUPERVISOR rights to the [Root] object.
Installation warning: Could not extend
NDS Schema (class 1)
Installation warning: Could not extend
NDS Schema (class 2)
Description
The server could not find the NDS tree. Verify the spelling.
The server could not find the user object specified in the
NDSAdminName parameter. Verify that you use the
correct format, e.g. admin.acme. Verify the spelling.
The password supplied in the NDSAdminPassword
password could not be used to login as the user in the
NDSAdminName parameter. Verify the spelling.
The context specified in the NDSServerContext
parameter was not found. Verify the spelling.
The specified user in the NDSAdminName parameter
does not have sufficient rights to create the server object in
the specified context.
You have tried to install the server on top of an existing
server object. Set the NDSInstall parameter to forced
to overwrite the existing object.
The administrator who is trying to install the server has
insufficient rights for adding the schema extension. Specify
a NDSAdminName with Supervisor rights to the [Root]
object.
These errors are the result of insufficient rights of the
administrator trying to install the server. Specify a
NDSAdminName with Supervisor rights to the [Root]
object.
Installation warning: Could not extend
NDS Schema (attribute)
Installation as a
Bindery Server
If used as a bindery server, no specific installation is required prior to
using and accessing the StorPoint CD+. However, it is recommended that
you specify the authentication server.
AXIS StorPoint CD+ User’s Manual
49
NetWare (NCP)
Access Control
The way you manage security in NetWare depends on the mode you are
using:
• NDS mode
• Bindery mode without user authentication
• Bindery mode with user authentication
The StorPoint CD+ acts as a normal NetWare file server, which means that
you use standard tools such as ConsoleOne, NWAdmin, SYSCON and Filer
for handling security.
Note:
Access Restrictions in
NetWare NDS
Note:
Default Access Rights
o
In NetWare, access rights for users in bindery mode is separate from users
accessing the StorPoint CD+ in NDS mode. For this reason, we
recommend that you disable bindery mode after you have successfully
installed the StorPoint CD+ in NDS and thus allow users to log on in NDS
mode only.
o
•
•
50
If NDS mode is not functioning, you can always access the StorPoint CD+
in bindery mode by logging in as Supervisor. This is true even if you have
disabled bindery mode.
The default access rights protect all the system files, which means that
only users with Supervisor privileges on the StorPoint CD+ have access to
those files. However, all users logged into NDS can access the discs. These
access rights are set up by the following trustee assignments:
•
Notes:
You cannot set up access restrictions for the NetWare environment via the
StorPoint CD+ Web interface.
All users who have NDS Supervisor privileges to the StorPoint CD+
server object, will have supervisor rights to the StorPoint CD+
filesystem.
The root of the SYS volume has [Public] as trustee, with File Scan, Read,
Write, Create, Modify and Erase rights.
The System folder has all rights, except Supervisor, filtered. Thus all
system files are effectively protected from normal users.
o
If the default security is satisfactory to your system, simply do not change
anything.
o
You can change the default trustee assignments using NWAdmin.
AXIS StorPoint CD+ User’s Manual
NetWare (NCP)
Setting Security
Rights in NetWare
NDS
Because the StorPoint CD+ acts as a normal NDS file server, its NDS
security rights can be set using standard procedures, e.g. ConsoleOne or
NWAdmin.
To make all the discs available to some users only, follow these steps:
1. Login using an account with Supervisor rights.
2. Start the NWAdmin.
3. Remove the [Public] trustee from the root of the SYS volume.
4. Add the new trustee assignments to the root of the SYS volume.
To restrict access to a particular disc, follow these steps:
1. Login using an account with Supervisor rights.
2. Start the NWAdmin.
3. On the resource you want to protect, set an inherited rights filter and filter
ALL rights.
4. Add the new trustee assignments to the resource. This makes it available only
to the users in the trustee list.
Note:
NetWare Bindery
Without
Authentication
o
The NetWare NDS access rights for the StorPoint CD+ can be set using
Security Equivalence, Group, Container, Organization role, and User Objects
as with any other NDS file server. There is no difference between how you
use NWAdmin to set these access rights for a StorPoint CD+, and how you
would set the access rights on an NDS file server.
If user authentication is not required, you do not have to specify an
authentication server. The Supervisor can login using the Server
password. Other users can login without password and will be considered
to belong to the EVERYONE group.
No NetWare server licenses are required since the StorPoint CD+ does not
log on to the file server.
If needed, you can use your standard NetWare administration tool, e.g.
Filer, to limit access to the StorPoint CD+ system files to the Supervisor.
Unauthorized users will still have guest access to the volumes. This is
normally sufficient security for a StorPoint CD+.
NetWare Bindery
With Authentication
Important!
If user access control is required, you must specify an authentication
server in the Bind Authentication parameter. The StorPoint CD+ will need
to log on to the authentication server in order to authenticate the user
and read which groups the user belongs to. In this case, the
authentication server must have a standby license for the StorPoint CD+.
However, several StorPoint CD+servers can share this license.
o
If “Station Restrictions” are used on the Novell server used for
authentication, each user who wants to access the StorPoint CD+ need at
least two concurrent connections to the authentication server.
AXIS StorPoint CD+ User’s Manual
51
NetWare (NCP)
If a license is not available, the user will still be authenticated but group
information cannot be read.
The authenticated users can access the discs according to the access rights
set up by the Administrator.
The authentication procedure will not introduce any extra administrator
overhead as there is no need for maintaining a separate user database for
the StorPoint CD+. If the user is defined in the file server that the
StorPoint CD+ uses for authentication, the user will automatically have
access to the StorPoint CD+.
Authentication to a
NetWare 3.x Server
For access to a StorPoint CD+ connected to a NetWare 3.x server,
authentication is done against the user list in the bindery of the NetWare
server:
•
If a user is on the list, the password will be verified. If the password is
correct, the user will be granted access.
• If the password is incorrect, login will fail.
If a user is not on the list, he will not be granted access to the StorPoint
CD+. However, he could login as ‘guest’ and get access to volumes that
are not protected.
Default Access Rights
The default access rights in NetWare bindery mode are set up by the
following trustee assignments:
•
•
Note:
Setting Security
Rights in NetWare
Bindery
o
The root of the SYS volume has [EVERYONE] as trustee, with File Scan,
Read, Write, Create, Modify and Erase rights.
The System folder has all rights, except Supervisor, filtered. Thus all
system files are effectively protected from normal users.
You can use Filer to change the default access rights.
The security rights can be set using standard procedures, e.g. Filer.
To make all the discs available to some users only, follow these steps:
1. Login as Supervisor on the StorPoint CD+. In order for Filer to access the
StorPoint CD+, the client must have an active connection.
2. Login as Supervisor on your NetWare Bindery file server and start Filer.
3. Change the current directory to AXIS<nnnnnn>_NW/SYS:.
4. Remove the [EVERYONE] trustee from the root.
5. Add a new trustee assignment to the root.
To restrict access to a particular disc, follow these steps:
1. Login as Supervisor on the StorPoint CD+. In order for Filer to access the
StorPoint CD+, the client must have an active connection.
2. Login as Supervisor on your NetWare Bindery file server and start Filer.
3. Change the current directory to AXIS<nnnnnn>_NW/SYS:.
52
AXIS StorPoint CD+ User’s Manual
NetWare (NCP)
4. On the resource you want to protect, set an inherited rights filter and filter
ALL rights.
5. Add the new trustee assignment to the resource. This makes it available only
to the users in the trustee list.
Note:
o
The NetWare bindery access rights for the StorPoint CD+ can be set using
Group and User Objects as with any other file server.
o
You can always access the StorPoint CD+ using the user name Supervisor
and the password specified by the Server Password parameter. By default
the password is pass.
AXIS StorPoint CD+ User’s Manual
53
NetWare (NCP)
Accessing the Discs
The StorPoint CD+ makes your networked CD/DVDs available to anyone
who has the appropriate privileges on the network. Users will access the
StorPoint CD+ just as any other file server.
You use your standard NetWare client to access the networked discs:
Notes:
General Disc Settings
Network environments
See ...
Windows 95/98/ME and Windows NT 4/2000/XP (NDS)
page 55
Windows 95/98/ME and Windows NT 42000/XP (Bindery)
page 57
Windows for Workgroups 3.x (NDS)
page 59
Windows for Workgroups 3.x (Bindery)
page 61
Windows NT 3.51 (NDS)
page 63
Windows NT 3.51 (Bindery)
page 63
DOS
page 65
o
The examples will assume that you have not changed the default server
name. The default server name is AXIS<nnnnnn>_NW, where <nnnnnn>
are the six last digits of the StorPoint CD+ serial number. If you have
changed the server name, use the new name where the examples refer to
the default name.
o
Depending on the access rights set up by the Administrator, you might be
prompted to supply a password or receive a message similar to ‘Access is
denied’ when trying to access a shared resource on the StorPoint CD+. The
default Server password is pass.
o
In the Windows 95/98/ME and Windows NT 4/2000/XP environments, you
can install the AXIS StorPoint Disco utility, which is a powerful Windows
application for locating and using CD/DVDs located on AXIS storage
servers, wherever they are on your network. Refer to “AXIS StorPoint
DISCO” on page 91.
To specify the general settings for an inserted disc, follow these steps:
1. Start your Web browser, and enter the name or IP address of the
StorPoint CD+ in the location/address field.
2. Click admin. You will be prompted for the Server password. By default, this
is set to pass.
3. Click Discs & Drives.
4. Locate the desired disc in the file Volumes folder.
54
AXIS StorPoint CD+ User’s Manual
NetWare (NCP)
5. Click Properties
. The Properties dialog box appears:
6. Select the General tab. You can specify the following settings:
• Name - The volume name that will be presented to the clients. If left
blank, the volume label will be used.
• Description - The description that will be displayed in Windows
Explorer.
• DBSC Encoding - Select the required Asian language from the dropdown list.
• User Limit - The number of users that will have access to the disc. To
disable this function, enter the value 0 into this field.
7. Click OK.
Windows 95/98 and
Windows NT 4
(NDS Mode)
In Windows 95/98/Me and Windows NT/2000/XP on a Novell NetWare
client for NDS, follow these steps to map the StorPoint CD+:
1. Start the Windows Explorer.
2. Expand the Network Neighborhood icon. The available resources are
displayed:
Note:
o
Depending on your version of Windows Explorer, your screen may differ
from the screen shown in this example.
AXIS StorPoint CD+ User’s Manual
55
NetWare (NCP)
3. Expand the Entire Network icon and open the Novell Directory Services
folder.
4. Locate your StorPoint CD+. The default name is AXIS<nnnnnn>_NW_SYS,
where nnnnnn are the last six digits of the StorPoint CD+ serial number.
Expand the Volumes folders to display all the discs
5. To map a StorPoint CD+ resource to a drive letter, select:
• AXIS<nnnnnn>_NW_SYS for root level access
• Volumes for access to all the discs
• the volume name for access to an individual disc, e.g. office97
6. Right click the resource and select Map Network Drive...
7. Select a drive letter for your StorPoint CD+.
8. Check Reconnect at logon if you wish to use the resource under the same
drive letter the next time you start your computer.
9. Check Check to make a folder appear as the top most level option if
available.
10. Click OK. The StorPoint CD+ is ready for use.
56
AXIS StorPoint CD+ User’s Manual
NetWare (NCP)
Windows 95/98/Me
and
Windows NT/2000/XP
(Bindery Mode)
In Windows 95/98/Me and Windows NT/2000/XP on a Novell NetWare
client for bindery mode, follow these steps to map the StorPoint CD+:
1. Start the Windows Explorer.
2. Expand the Network Neighborhood icon. The available resources are
displayed:
Note:
o
Depending on your version of Windows Explorer, your screen may differ
from the screen shown in this example.
3. Expand the Entire Network icon and then open the NetWare Servers folder.
4. Double click the entry for your StorPoint CD+. The default name is
Axis<nnnnnn>_nw, where <nnnnnn> are the six last digits of the StorPoint
CD+ serial number.
5. In bindery mode, you will be prompted to enter user name and password,
unless you are already logged on.
AXIS StorPoint CD+ User’s Manual
57
NetWare (NCP)
6. Once you are logged on to the StorPoint CD+, expand the SYS and Volumes
folders to display all the discs:
Note:
o
If the Show All Volumes parameter is set to yes, the individual discs will be
shown at the same level as SYS. Some applications will not run properly
unless the data is stored at root level. To avoid such problems, assign a
drive letter to that particular volume.
7. To map a StorPoint CD+ resource to a drive letter, locate:
• SYS for root level access
• Volumes for access to all the discs
• the volume name for access to an individual disc, e.g. office97
8. Right click the resource and select Map Network Drive...
9. Select a drive letter for your StorPoint CD+.
10. Check Reconnect at logon if you wish to use the resource under the same
drive letter the next time you start your computer.
Click OK. The StorPoint CD+ is ready for use.
58
AXIS StorPoint CD+ User’s Manual
NetWare (NCP)
Windows for
Workgroups 3.x (NDS
Mode)
In Windows for Workgroups on a Novell NetWare client for NDS, follow
these steps:
1. Start the File Manager and select Network Connections from the Disk
menu. If you also have Microsoft Network installed, you may have to click
the NetWare... button.
2. Click the NetWare Connections button on the toolbar. A screen similar to
this is displayed:
3. Select the entry for your StorPoint CD+. The default name is
AXIS<nnnnnn>_NW, where <nnnnnn> are the last six digits of the
StorPoint CD+ serial number.
4. Click the Login button.
5. Once you are logged in to the StorPoint CD+, click the Drive Connections
button on the tool bar. This screen is displayed:
Note:
o
If the Show All Volumes parameter is set to yes, the individual discs are
shown at the same level as SYS. Some applications will not run properly
unless the data is stored at root level. To avoid such problems, assign a
drive letter to that particular disc.
AXIS StorPoint CD+ User’s Manual
59
NetWare (NCP)
6. Double click AXIS<nnnnnn>_NW_SYS and then VOLUMES to display this
screen:
7. Select a drive letter in the Drives listing.
8. In the Resources listing, select a StorPoint CD+ resource:
• AXIS<nnnnnn>_NW_SYS for root level access
• Volumes for access to all the discs
• the volume name for access to an individual disc, e.g. OFFICE
9. Click Map to map the StorPoint CD+ to the selected drive letter.
10. Click Permanent if you wish to use the resource under the same drive letter
the next time you start you computer.
11. Click the Exit button on the tabular. The StorPoint CD+ is ready for use.
60
AXIS StorPoint CD+ User’s Manual
NetWare (NCP)
Windows for
Workgroups 3.x
(Bindery Mode)
In Windows for Workgroups on a Novell NetWare client for bindery
mode, follow these steps:
1. Start the File Manager and select Network Connections from the Disk
menu. If you also have Microsoft Network installed, you may have to click
the NetWare... button.
2. Click NetWare Servers in the Resources listing.
3. Locate the entry for your StorPoint CD+. The default name is
AXIS<nnnnnn>_NW, where <nnnnnn> are the last six digits of the
StorPoint CD+ serial number. Use drag-and-drop to move the StorPoint CD+
to the Connections listing.
4. You will be prompted for user name and password. By default the password
is set to pass.
AXIS StorPoint CD+ User’s Manual
61
NetWare (NCP)
5. Click Drive Connections. Double click AXIS<nnnnnn>_NW\SYS and then
open the VOLUMES folder.
Note:
o
If the Show All Volumes parameter is set to yes, the individual discs are
shown at the same level as SYS. Some applications will not run properly
unless the data is stored at root level. To avoid such problems, assign a
drive letter to that particular disc.
6. Select a drive letter in the Drives listing.
7. In the Resources listing, select a StorPoint CD+ resource:
• AXIS<nnnnnn>_NW\SYS for root level access
• VOLUMES for access to all the discs
• the volume name for access to an individual disc, e.g. OFFICE
8. Click Map to map the StorPoint CD+ to the selected drive letter.
9. Click Permanent if you wish to use the resource under the same drive letter
the next time you start you computer.
Click the Exit button on the tabular. The StorPoint CD+ is ready for use.
62
AXIS StorPoint CD+ User’s Manual
NetWare (NCP)
Windows NT 3.51
(NDS Mode)
On Windows NT 3.51 on an Novell NetWare client for NDS, follow these
steps:
1. Start the File Manager.
2. From the Disk menu, select Connect Network Drive…
3. In the listing, open the Novell Directory Servers folder.
4. Open the NDS tree and the context in which the StorPoint CD+ is installed.
The default name is AXIS<nnnnnn>_NW_SYS, where <nnnnnn> are the six
last digits of the StorPoint CD+ serial number.
5. To connect a StorPoint CD+ resource, select:
• SYS for root level access
• Volumes for access to all the discs
• the volume name for access to an individual disc, e.g. office
6. Select a drive letter for your StorPoint CD+.
7. Check Reconnect at Logon if you wish to use the resource under the same
drive letter the next time you start your computer.
8. If you wish to connect using a different user name, enter the name in the
Connect As box. Otherwise, leave the box empty.
9. Click OK. The StorPoint CD+ is now ready for use.
Windows NT 3.51
(Bindery Mode)
On Windows NT 3.51 on an Novell NetWare client for bindery mode,
follow these steps:
1. Start the File Manager.
2. From the Disk menu, select Connect Network Drive…
3. In the listing, open the IntranetWare Servers folder.
AXIS StorPoint CD+ User’s Manual
63
NetWare (NCP)
4. Double click the entry for your new StorPoint CD+. The default name is
AXIS<nnnnnn>_NW, where <nnnnnn> are the six last digits of the
StorPoint CD+ serial number.
5. In bindery mode, you will be prompted to enter your user name and
password, unless you are already logged in.
6. To connect a StorPoint CD+ resource, select:
• SYS for root level access
• Volumes for access to all the discs
• the volume name for access to an individual disc, e.g. office
7. Select a drive letter for your StorPoint CD+.
8. Check Reconnect at Logon if you wish to use the resource under the same
drive letter the next time you start your computer.
9. If you wish to connect using a different user name, enter the name in the
Connect As box. Otherwise, leave the box empty.
Click OK. The StorPoint CD+ is now ready for use.
64
AXIS StorPoint CD+ User’s Manual
NetWare (NCP)
DOS
When you are using DOS in NetWare, you use the map command to mount
the StorPoint CD+. Follow these steps:
1. At the DOS prompt of a NetWare file server, type:
map root <drive letter>:=AXIS <nnnnnn>
/<volume name>:<folder>
where <nnnnnn> are the six last digits of your StorPoint CD+ serial
number and <folder> is the StorPoint CD+ folder you want to map.
2. To make the connections permanent, edit your autoexec.bat file to include
your map commands.
Example 1 (Root level access):
To access the root level of your StorPoint CD+ with serial number
00408CCD000B under the drive letter E, type:
map root E:=AXISCD000B_NW/SYS:
Example 2 (Volumes folder access):
To access all the discs of your StorPoint CD+ with serial number
00408CCD000B under the drive letter F, type:
map root F:=AXISCD000B_NW/SYS:VOLUMES
Example 3 (Disc access):
If your StorPoint CD+ serial number is 00408CCD000B, and you want to
map a disc named 44018881 to drive G, type:
map root G:=AXISCD000B_NW/SYS:VOLUMES/44018881
Note:
o
If the Show All Volumes parameter is set to yes, individual discs can be
mapped at SYS level. Some applications will not run properly unless the
data is stored at root level. To avoid such problems, you can map drive G
directly to the volume named 44018881. Type:
map root G:=AXISCD000B_NW/44018881
Note:
o
For more options, refer to the MAP command help.
AXIS StorPoint CD+ User’s Manual
65
UNIX (NFS)
Section 5
UNIX (NFS)
This section outlines the required configuration settings for running the
StorPoint CD+ in the UNIX (NFS) environment, how to set up access
restrictions and how to mount the StorPoint CD+ resources.
Note:
o
Make sure you have set the Internet address as described in “Assigning an
IP Address” on page 12.
If you are using the StorPoint CD+ in a multiprotocol environment,
proceed to the other relevant sections of the manual, namely:
•
•
•
•
•
“Microsoft & IBM Networks (SMB)” on page 27
“NetWare (NCP)” on page 43
“Macintosh (AFP)” on page 71
“FTP (File Transfer Protocol)” on page 78
“Web Browser (HTTP)” on page 81
Network Settings
Use the Administration pages within the StorPoint CD+ Web interface to
configure the StorPoint CD+.
1. Start your Web browser, and enter the name or IP address of the
StorPoint CD+ in the location/address field.
2. Click admin. You will be prompted for the User ID and the Server password.
By default, these are set to root and pass. To change the Server password,
see “Server Password” on page 24.
3. Click Network Settings.
4. Click Detailed View
. The Protocols dialog box appears.
5. Select the UNIX (NFS) tab and specify the settings.
6. Click OK.
Notes:
66
o
Context sensitive online help
is available for all parameters.
o
The parameter list is described in detail in “Parameter List” on page 115.
AXIS StorPoint CD+ User’s Manual
UNIX (NFS)
Access Control
To grant access to the StorPoint CD+ resources in the UNIX (NFS)
environment, you add clients with specific host names or IP addresses to
the NFS export list. You can also specify a range of IP addresses.
1. Click Discs & Drives.
2. To make all of the discs available to some clients only:
• Locate the Volumes folder in the file tree.
To protect one or several resources, but grant access to the other
resources:
• Locate the resource you want to protect in the file tree.
3. Click Properties
.
4. Open the UNIX Security page.
5. You can select whether you want to use the access rights of the disc or the
drive by checking the appropriate radio button. Note that this is a global
setting for all network protocols.
6. Optionally fill in a description of the shared resource in the Description field.
This text will appear in the directory listing on the NFS clients. If left blank,
the list of clients that are allowed to mount the exported resource will
appear instead.
Note:
o
HFS files are not exported automatically. This has to be defined via the
Web interface.
7. Choose whether you want to add a host name or an IP address.
Notes:
o
When specifying a host name, you can use these wildcards:
*
which represents any number of characters, except dots
(...). A single * implies any host name.
? which represents one character, except dot (.).
AXIS StorPoint CD+ User’s Manual
67
UNIX (NFS)
o
You can specify an IP address/subnet mask pair in order to export the
resource to an IP subnetwork.
8. Specify the new entry and click Add to add it to the NFS export list.
9. Click OK.
Note:
o
Per file access control is configured by using native utilities such as chown,
chgrp and chmod, on the mounted exports.
Accessing the Discs
The StorPoint CD+ integrates into your network operating system just like
any other file server. Thus you can use standard commands to access it.
To access the discs from your UNIX applications, you must first mount
the StorPoint CD+ to make the data available to your system. Some
applications will not run properly unless the data is located at root level.
Discs that include such applications must therefore be individually
mounted.
Note:
o
You will need root privileges to mount the StorPoint CD+.
To access the StorPoint CD+ resources from a UNIX client, follow these
steps:
1. Create a directory for the StorPoint CD+.
mkdir <directory>
Example:
mkdir /storpoint_sales_dept
2. Display the export list.
showmount -e <IP address>
3. Mount the resource.
mount <IP address>:<resource> <directory>
where <IP address> is the IP address or host name
Example 1 (Root):
mount 192.16.253.80:/ /storpoint_sales_dept
68
AXIS StorPoint CD+ User’s Manual
UNIX (NFS)
Example 2 (Volumes directory):
mount 192.16.253.80:/volumes /storpoint_sales_dept
Example 3 (Disc):
mount 192.16.253.80:/volumes/acrobat
/storpoint_sales_dept
Notes:
o
To increase performance, you can set the buffer size to 8192 as an option
in the mount command on most UNIX systems, e.g.
mount -o rsize=8192 <IP address>:<resource>
<mountpoint>
o
General Disc Settings
Different UNIX systems may have different mount command options. See
the manual page on the client system.
To specify the general settings for an inserted disc, follow these steps:
1. Start your Web browser, and enter the name or IP address of the
StorPoint CD+ in the location/address field.
2. Click admin. You will be prompted for the Server password. By default, this
is set to pass.
3. Click Discs & Drives.
4. Locate the desired disc in the file Volumes folder.
5. Click Properties
. The Properties dialog box appears:
6. Select the General tab. You can specify the following settings:
• Name - The volume name that will be presented to the clients. If left
blank, the volume label will be used.
• Description - The description that will be displayed in Windows
Explorer.
• User Limit - The number of users that will have access to the disc. To
disable this function, enter the value 0 into this field.
AXIS StorPoint CD+ User’s Manual
69
UNIX (NFS)
7. Click OK.
70
AXIS StorPoint CD+ User’s Manual
Macintosh (AFP)
Section 6
Macintosh (AFP)
This section outlines the required configuration settings for running the
StorPoint CD+ in the Macintosh (AFP) network environment. It also
describes how to set up access restrictions.
If you are using the StorPoint CD+ in a multiprotocol environment,
proceed to the other relevant sections of the manual, namely:
•
•
•
•
•
“Microsoft & IBM Networks (SMB)” on page 27
“NetWare (NCP)” on page 43
“UNIX (NFS)” on page 66
“FTP (File Transfer Protocol)” on page 78
“Web Browser (HTTP)” on page 81
Network Settings
No specific settings are required to make use of the StorPoint CD+ in the
Macintosh (AFP) environment. However, you might want to change some
of the default settings, e.g. the AFP server name or the authentication
server settings.
If you have set an IP address, you can use the Administration Web pages
to configure the StorPoint CD+ via a standard Web browser. The
installation wizard will guide you through the procedure. See “Wizard” on
page 72.
If you do not use TCP/IP and Web browsers on your network, you can
edit all the parameter settings by modifying the [AFP] section in the
config.ini file.
Note:
AFP Protocols
o
See “Text Editor in Macintosh” on page 20, for more information on how to
locate and modify the config.ini file.
The StorPoint CD+ supports the following transport methods:
• AFP over TCP/IP - max 255 users
• AFP over AppleTalk - max 125 users
Both protocols are enabled by default. However, you can disable the
protocols by setting the appropriate configuration parameters.
AFP Server Name
The default AFP server name is AXIS<nnnnnn>_AT, where <nnnnnn> are
the last six digits of the StorPoint CD+ serial number. This is the name
that will be presented to the Macintosh clients on the network. You can
change that name by editing the AFP Server Name parameter. It can be
useful to choose a more descriptive name, e.g. in order to indicate where
the unit is located, or for what it is used.
Recommendation!
Choose a more descriptive name for your server, e.g CD Server.
AXIS StorPoint CD+ User’s Manual
71
Macintosh (AFP)
Zone
A zone is a logical grouping of AppleTalk networks on a LAN or WAN.
There can be multiple networks within a zone and, in some cases, multiple
zones assigned to a network segment. An AppleTalk router is responsible
for assigning zone information to the AppleTalk networks to which it is
attached. You specify the zone by editing the Zone Name parameter.
Access Control
Access control is used for restricting access to the shared volumes and
discs on the StorPoint CD+. In the Macintosh (AFP) environment you can
select whether you want to use an authentication server or passwords for
access control. You choose which method to use by enabling/disabling
the Use Authentication Server parameter.
Authentication Server
When using an authentication server, all user names and passwords will
be verified against the authentication server. The user will then be
granted access to specific resources depending on the permissions set for
the user names used at logon.
Note:
o
Any Macintosh computer can be defined as the Authentication Server
provided it has file sharing enabled. This means the user names defined on
the authentication server can be used also for the StorPoint CD+.
To use this method for access control, you must enable the Use
Authentication Server parameter. How to specify the permissions is
described in “Authentication Server” on page 74.
Passwords
When using passwords, the user will be prompted for the password when
trying to access the volume. The user will then be granted access to the
volume and all its subfolders. You can define different passwords for
specific resources.
To use passwords for access control, the Use Authentication Server
parameter must be disabled. This is the default setting. How to specify
passwords is described in “Passwords” on page 75.
Recommendation!
Using an authentication server for access control is the preferred method
for Macintosh-based networks.
Wizard
The installation Wizard is a convenient way to set up your StorPoint CD+
for your Macintosh (AFP) environment. It will guide you through the
following:
•
Defining your server name and the zone you want your StorPoint CD+
to appear in.
• Defining how you want to control access to shared resources.
To run the Wizard, follow the steps outlined below:
1. Start your Web browser, and enter the name or IP address of the
StorPoint CD+ in the location/address field.
2. Click admin. You will be prompted for the Server password. By default, the
User Name is set to root and the Server password is set to pass.
72
AXIS StorPoint CD+ User’s Manual
Macintosh (AFP)
3. Click Network Settings.
4. Click Wizard
. The Network Settings Wizard dialog appears.
5. Choose Macintosh (AFP). Click Start to proceed with the installation.
6. Follow the instructions on the screen. When finished, click Close.
7. Click Detailed View
. The Protocols dialog box appears.
8. Select the Mac (AFP) tab and verify the settings.
9. Click OK.
Notes:
o
Context sensitive online help
is available for all parameters.
o
The parameter list is described in detail in “Parameter List” on page 115.
Access Control
In the Macintosh (AFP) environment, you have these options for access
control:
• Authentication server on page 74 - or • Passwords on page 75
You first configure the StorPoint CD+ for the method you want to use, see
“Access Control” on page 72. By default the authentication server is
disabled and no password is used. Consequently, Root and Guest can
login and access all the shared volumes.
AXIS StorPoint CD+ User’s Manual
73
Macintosh (AFP)
Authentication Server
Make sure the StorPoint CD+ has been configured to use an
authentication server, see page 72.
To specify permissions for the user names defined on the authentication
server, follow these steps:
1. From the Administration Web pages, click Discs & Drives.
2. Locate the volume you want to protect in the file tree.
3. Click Properties
.
4. Open the Mac Sharing page.
5. You can select whether you want to use the access rights of the disc or the
drive by checking the appropriate radio button. Note that this is a global
setting for all network protocols.
6. Select the Share as radio button, and enter a share name in the Share Name
field.
7. Specify the name of the user you want to define as volume owner and the
group to which the owner belongs. Note that the volume owner can only
belong to one group. World includes all other users.
8. Check the permissions you want the users to have:
• Read - Read files.
• Search - List files and folders.
Recommendation!
Use the same setting for Read and Search.
9. Click OK.
74
AXIS StorPoint CD+ User’s Manual
Macintosh (AFP)
Passwords
Make sure the StorPoint CD+ has been configured to use passwords, see
page 72. By default, all users will have access to all the discs. The system
files are protected by the Server password.
To change the settings:
1. From the Administration Web pages, click Discs & Drives.
2. Locate the volume you want to share in the file tree.
3. Click Properties
.
4. Open the Mac Sharing page.
5. You can select whether you want to use the access rights of the disc or the
drive by checking the appropriate radio button. Note that this is a global
setting for all network protocols.
6. Select the Share as radio button, and enter a share name in the Share Name
field.
7. Select the desired password option:
• None - if you do not want to use passwords for protecting the
resource.
• Server password - if you want use the Server password for protecting
the resource.
• Other - if you want to specify a password in addition to the Server
password.
8. Click OK.
AXIS StorPoint CD+ User’s Manual
75
Macintosh (AFP)
Accessing the Discs
To mount the StorPoint CD+ on a Windows network from a Macintosh,
follow these steps:
1. Open the Chooser from the Apple menu.
2. Click the AppleShare icon.
3. Depending on which AFP protocol you are using:
• If you are running AFP over AppleTalk, select the name of your
StorPoint CD+ from the Select a file server list. The default name is
AXIS<nnnnnn>_AT where <nnnnnn> are the last six digits of the
StorPoint CD+ serial number. Click OK.
• If you are running AFP over TCP/IP, click Server IP Address... and
enter the IP address of your StorPoint CD+ in the popup dialog. Click
Connect.
4. Select Guest, or Registered User if you are using an authentication server.
5. Click Connect.
76
AXIS StorPoint CD+ User’s Manual
Macintosh (AFP)
6. Choose the access point:
• The volume name for access to an individual disc.
• The Volumes folder for access to all the shared discs.
• The System folder is always present and contains system configuration
files.
7. Click OK.
8. An icon representing the shared resource will appear on your desktop.
AXIS StorPoint CD+ User’s Manual
77
FTP (File Transfer Protocol)
Section 7
FTP (File Transfer Protocol)
This section describes how to configure the StorPoint CD+ for FTP.
The StorPoint CD+ can be used as an FTP server, i.e. it is possible to use
the File Transfer Protocol (FTP) to put and get files. You can use FTP for:
Note:
•
•
Upgrading the firmware
Accessing the mounted discs
o
The FTP protocol is always enabled in the StorPoint CD+.
The following FTP commands are supported:
get
put
dir
cd
pwd
If you intend to use StorPoint CD+ in a multi protocol environment,
proceed to the other relevant sections in this manual:
•
•
•
•
•
“Microsoft & IBM Networks (SMB)” on page 27
“NetWare (NCP)” on page 43
“UNIX (NFS)” on page 66
“Macintosh (AFP)” on page 71
“Web Browser (HTTP)” on page 81
Network Settings
Use the Administration pages within the StorPoint CD+ Web interface to
specify the FTP settings. Follow these steps:
1. Start your Web browser, and enter the name or IP address of the
StorPoint CD+ in the location/address field.
2. Click admin. You will be prompted for the Server password. By default, this
is set to pass. To change the Server password, see “Server Password” on page
24.
3. Click Network Settings.
4. Click Detailed View
78
. The Protocols dialog box appears.
AXIS StorPoint CD+ User’s Manual
FTP (File Transfer Protocol)
5. Select the FTP tab.
6. Optionally specify an alternative FTP User Name and FTP User Password.
If you leave the fields empty, only the Server password can be used for
logging in to the StorPoint CD+ via FTP.
o
Other optional settings for FTP are:
• FTP Time Out, which specifies the time in seconds of inactivity after
which an FTP session is closed down.
• FTP Max Users, which specifies the maximum number of simultaneous
FTP sessions.
7. Click OK.
Notes:
o
Context sensitive online help
o
The parameter list is described in detail in “Parameter List” on page 115.
AXIS StorPoint CD+ User’s Manual
is available for all parameters.
79
FTP (File Transfer Protocol)
Access Control
You can always use the user name root in combination with the Server
password for logging in to the StorPoint CD+ via FTP. This will grant
access to all the resources in the Volumes folder, all the configuration
files in the System folder and flash loading. This type of access is
intended for the Administrator only.
However, if you want users to have the possibility to log in via FTP you
can specify an alternative FTP user name and password on the Network
Settings - FTP page. When users log on to the StorPoint CD+ using this
user name, they will get unlimited access to the Volumes folder, but no
access to the System folder.
Warning!
80
o
A user logging in with the FTP user name and password will automatically
get access to the Volumes folder, i.e. all the discs and their contents. No
access restrictions will apply.
AXIS StorPoint CD+ User’s Manual
Web Browser (HTTP)
Section 8
Web Browser (HTTP)
This section describes how to configure the StorPoint CD+ for use via its
Web interface.
The StorPoint CD+ supports HTTP over TCP/IP, which means that it works
as a Web server available on the Internet and intranets.
If you are using the StorPoint CD+ in a multiprotocol environment,
proceed to the other relevant sections of the manual, namely:
•
•
•
•
•
“Microsoft & IBM Networks (SMB)” on page 27
“NetWare (NCP)” on page 43
“UNIX (NFS)” on page 66
“Macintosh (AFP)” on page 71
“FTP (File Transfer Protocol)” on page 78
Network Settings
You use the Administration Web pages to configure the StorPoint CD+.
Wizard
The installation wizard is a convenient way to set up your StorPoint CD+
for your network environments.
1. Click Network Settings.
2. Click Wizard
. The Wizard Network Settings dialog appears.
3. Choose Web (HTTP). Click Start to proceed with the installation.
4. Follow the instructions on the screen. When finished, click Close.
5. Click Detailed View
. The Protocols dialog box appears.
6. Select the Web (HTTP) tab and verify the settings.
7. Click OK.
Notes:
o
Context sensitive online help
o
The parameter list is described in detail in “Parameter List” on page 115.
AXIS StorPoint CD+ User’s Manual
is available for all parameters.
81
Web Browser (HTTP)
External Link
You can add a customized link on the File View page. For example, you
might want to provide a link to a page on your company’s intranet with
guidelines on how to access the discs on the StorPoint CD+.
Follow these steps:
1. Click Network Settings.
2. Click Detailed View
.
3. Select the Web (HTTP) tab.
• In the URL to Page field, specify the full path to the page, e.g.
http://www.company.com.
• In the URL to Image field, optionally specify a link to an image to be
used as a button for the customized link. Specify the full path, e.g.
http://www.company.com/images/image.gif, or the path relative
to the URL of the page, e.g. images/image.gif. If you leave the field
blank, a standard button will be used.
External Link
button
Access Control
All users will always have access to the StorPoint CD+ File View page.
However, individual discs can be protected by password. If required, you
can limit Web browser access to the Administration pages only.
Use the Administration pages within the StorPoint CD+ Web interface for
access control. Refer to “Accessing the StorPoint CD+ Web Pages” on
page 21.
Note:
Discs & Drives
o
The Server password implies full access to the StorPoint CD+, regardless
any additional password set for particular discs. To change the Server
password, see “Server Password” on page 24.
To restrict user access to a particular disc:
1. Click Discs & Drives.
2. Locate the disc you want to protect in the file tree.
3. Click Properties
82
.
AXIS StorPoint CD+ User’s Manual
Web Browser (HTTP)
4. Select the Web Security tab.
5. You can select whether you want to use the access rights of the disc or the
drive by checking the appropriate radio button. Note that this is a global
setting for all network protocols.
6. Select Set Access Rights. Optionally specify an additional password. Note
that the Server password is always valid.
7. Click OK.
Disable User Access
To disable user access from the Web browser and thus limit access to the
Administration pages only, follow these steps:
1. Click Network Settings.
2. Click Detailed View
.
3. Open the Web (HTTP) page.
4. Uncheck the Enable access to volumes via Web browser (HTTP) check box.
5. Click OK.
AXIS StorPoint CD+ User’s Manual
83
Web Browser (HTTP)
Accessing the Discs
To access the discs from a Web browser, follow these steps:
1. Start the Web browser.
2. Enter the name or IP address of the StorPoint CD+ in the location/address
field.
3. This brings you to the File View page of the StorPoint CD+:
4. This page lists all the shared discs and folders. You might be prompted to
supply a password in order to access a particular discs. We recommend that
you add this page as a bookmark in your Web browser.
84
AXIS StorPoint CD+ User’s Manual
Recordable Discs
Section 9
Recordable Discs
If you have connected a CD-Recordable drive to your StorPoint CD+,
users can copy data to recordable discs, such as CD-R and CD-RW discs.
To limit the number of users, this function can be protected by password.
This section outlines the procedures for using recordable discs with your
StorPoint CD+.
Notes:
o
The Basic versions of the StorPoint CD+ do not support writing to
recordable discs.
o
If you experience problems with writing data to a disc, see “Errors when
Writing Data to a Disc” on page 135.
Copying Files to Recordable Discs
Follow these steps:
1. Insert a CD-R or CD-RW disc into the CD-Recordable drive.
2. Start the Web browser and enter the IP address of your StorPoint CD+ in
the location/address field.
The StorPoint CD+ File View page is displayed.
If you have a CD-Recordable drive connected to your StorPoint CD+,
the Recordable Discs button appears in the main menu.
AXIS StorPoint CD+ User’s Manual
85
Recordable Discs
3. Click Recordable Discs. The Recordable Discs page is displayed. From this
page you have access to the Format Disc and Finalize Disc dialogs.
The IDE version lists the drives as Master or Slave for each bus.
Formatting the Disc
Before you can start copying files to your disc, it must be formatted.
1. In the list, your unformatted disc will appear without a name and with
status Blank. Click
to open the Format Disc dialog.
2. Enter a name for your disc in the Name field.
3. Click OK. A progress bar will appear on the screen while your disc is being
formatted.
When the progress bar has disappeared from the screen, you can start
copying files to the disc.
Notes:
Copying Files
o
Formatting a CD-R and a blank CD-RW will take about 20 seconds.
Reformatting a CD-RW can take up to 80 minutes depending on writing
speed and the amount of data previously stored on the disc.
o
Any data stored on the disc will be erased when the disc is formatted.
To copy data to the formatted disc:
1. Open the Windows Explorer, or the file manager tool you normally use.
Locate the formatted disc. You will find it under the Volumes folder.
2. Copy the files to your disc.
3. Return to the Recordable Discs page.
Finalizing the Disc
When you have finished copying files to the disc, you must finalize it to
make it readable by other computers. This will also close the recording
session and prevent future recordings to the disc. The time it takes to
finalize the disc depends on how many files and directories you have
copied to it.
To finalize the disc:
1. Click
to open the Finalize Disc dialog.
2. Click OK.
86
AXIS StorPoint CD+ User’s Manual
Recordable Discs
Your disc is now finalized and can be read by other computers.
Notes:
o
It is not possible to copy files to a finalized disc.
o
If your disc is a CD-RW, you can reformat the disc and re-use it for
copying.
AXIS StorPoint CD+ User’s Manual
87
Recordable Discs
Setting a Password
You can protect the Recordable Discs page with a password in order to
limit the number of users who have access to this page.
To set a password, follow these steps:
1. Start the Web browser and enter the IP address of your StorPoint CD+ in
the location/address field.
The StorPoint CD+ File View page is displayed.
2. Click admin. You will be prompted for the Server username and password.
By default, these are set to root and pass. On the Server Settings page, click
the Change... button,
3. Select the Recordable Discs tab.
4. Enter a password in the Password field and confirm it in the Confirm field.
5. Click Save.
The user will now be prompted for this password when trying to access
the Recordable Discs page.
88
AXIS StorPoint CD+ User’s Manual
CD Grouping
Section 10
CD Grouping
In the Microsoft and IBM (SMB) and the Novell NetWare network
environments it is possible to use your standard file management tool to
create new folders under the Volumes folder. In the new group folders
you can organize your networked discs into groups. It will make it easier
for you to locate and access a required disc if it has been organized into a
folder with a name relating to its contents.
Note:
o
The Basic versions of the StorPoint CD+ do not support organizing discs
using a file management tool.
o
When creating group folders in SMB share level, you have to go to the root
share and enter the root password.
Windows Explorer
Note:
Use your Windows Explorer to organize your networked discs into
folders.
1. Select the Volumes folders.
2. From the File menu, select New|Folder and rename the folder.
3. Move the required discs into the new folder.
Note:
o
It is NOT possible to copy and paste a disc into a new virtual folder, the disc
must be moved into the folder, i.e. use cut and paste instead.
AXIS StorPoint CD+ User’s Manual
89
CD Grouping
These folders can then be viewed from the File View page, and
administered from the Discs & Drive page, see “Define Access Rights for
Group Folders” on page 90.
Define Access Rights
for Group Folders
The group folders created with your file management tool will appear on
the Discs & Drive page in the Discs and File System view.
When moving a disc from the Volumes folder to a new group folder,
shares and access rights defined for the disc will be removed. However,
when moving a disc from a group folder to the Volumes folder or to
another group folder, the disc will keep its shares and access rights.
To access and view the contents of a folder simply select the name of the
required folder.
Deleting a
Group Folder
90
A group folder must be empty before it can be deleted. Make sure than no
un-finalized CD-R or CD-RW discs are accidentally left in the group
folder since the contents on these discs will be deleted.
AXIS StorPoint CD+ User’s Manual
CD Grouping
AXIS StorPoint DISCO
AXIS StorPointTM DISCOTM is a convenient end user tool for
finding and organizing networked CD/DVDs. It runs in the
Windows 95/98/Me and Windows NT/2000/XP environments.
The advantages of using AXIS StorPoint DISCO are:
• You can group discs from several StorPoints,
• you get easy access from the desktop,
• and an application launcher.
However, you need to install the AXIS StorPoint DISCO software on your
client.
AXIS StorPoint DISCO will gather all the discs that reside on your Axis
Network Storage Servers in a single folder under My Computer in
Windows Explorer. As the program hides the network topography, the
discs will always be easy to find and access. You will no longer need to
browse through the entire Network Neighborhood in order to locate the
discs you are looking for. You use standard Explorer functions to
manipulate the discs.
AXIS StorPoint DISCO version 2.00 is available in two types of
installations:
•
•
Standalone
Client/Server
Standalone
The standalone version gives all the users full functionality and allows all
users to view all the discs on the network. For small workplaces or single
users, this is the recommended setup.
Client/Server
The client/server version is divided into one server part and one client
part. First the administrator will install the server version locally. The
administrator then organizes discs and launch objects (see “Launch
Objects” on page 94) into a number of public folders. When the client part
has been installed on the client users’ computers, the user can select
which public folders to use according to their needs. For larger
workplaces with a central system administration and many shared discs,
this is the recommended setup. See “Client Installation” on page 98.
Installing the
Software
Follow these steps to install AXIS StorPoint DISCO:
AXIS StorPoint CD+ User’s Manual
91
CD Grouping
1. Locate and run the setup file, DiscoSetup200.exe. The software is
available free of charge on the Axis web site and on the AXIS Online CD.
2. You will be asked where to unpack the setup files. Then the AXIS StorPoint
DISCO Setup Welcome dialog will then be displayed.
3. Choose which setup type you want to install: Standalone or Client/Server.
4. Follow the instructions on the screen. When finished, the Installation
Completed screen is displayed.
The AXIS StorPoint
DISCO Folder
When successfully installed, AXIS StorPoint DISCO is available through
the AXIS StorPoint DISCO folder found under My Computer in Windows
Explorer.
In the standalone and server versions, the AXIS StorPoint DISCO folder
originally contains two folders:
•
•
92
All Discs - This folder lists all the CD/DVDs detected on the network.
My Favorites - This folder is originally empty. It is intended for your
favorite discs. It can be renamed or deleted, if desired.
AXIS StorPoint CD+ User’s Manual
CD Grouping
New Folders
To create new folders within the AXIS StorPoint DISCO folder, click File
| New | Folder. Type a name for the new folder, and press Enter. You can
copy disc titles from the All Discs folder to the My Favorites folder and
to other user folders that you create under the AXIS StorPoint DISCO
folder.
Shortcuts
To create a shortcut on your desktop to a disc, folder or launch
object, right-click the item and select Create Shortcut on
Desktop.
Finding Discs and
Launch Objects
To find specific discs, folders or launch objects within AXIS StorPoint
DISCO, click Tools | Find Discs and Launch Objects... in Windows
Explorer.
To find a file on a disc, right-click the disc and select Find Files on this
Disc...
Note:
AXIS StorPoint DISCO
Settings
Note:
Automatic Searches
o
You cannot search the entire network for specific files.
To specify the program settings, click File | AXIS StorPoint DISCO
Settings.
o
The dialog contents depends on which version of the AXIS StorPoint
DISCO you are running. The example above shows the server version.
AXIS StorPoint DISCO can automatically scan the network in order to
detect the most recently attached storage servers and inserted discs.
To specify how often you want AXIS StorPoint DISCO to perform
automatic searches:
1. Click File | AXIS StorPoint DISCO Settings.
2. Open the Disc Search page, and fill in the desired values for automatic
searches.
AXIS StorPoint CD+ User’s Manual
93
CD Grouping
3. Click OK.
Note:
Manual Searches
o
AXIS StorPoint DISCO provides two methods to manually initiate
searches on the network:
•
•
Notes:
Launch Objects
This function is not available in the client version.
Quick search – Searches the most recently inserted discs on the
previously detected storage servers. Select Quick Search from the View
menu.
Full search - Searches the entire network for the most recently attached
storage servers and inserted discs. Select Full Search from the View
menu.
o
Network searches are performed in the background without decreasing
performance. However, it may take several minutes to complete a search
on a large network. A full search takes more time to complete than a quick
search.
o
During the search, the AXIS StorPoint DISCO icon on the
taskbar will change its appearance to indicate that a search is
being performed.
AXIS StorPoint DISCO version 2.00 includes an application launcher that
allows you to create and use launch objects. These launch objects are
similar to Windows shortcuts, but they have much more functionality. A
launch object can:
•
•
•
Start programs and documents from anywhere on the network
Automatically map and unmap drive letters
Initiate a series of actions related to the launched application, e.g.
displaying message boxes, parameter lists and file selection dialogs.
By doing this, programs can be customized to the user’s needs at startup.
A user might for example want to start a word processor with a specific
document template and then save the result on a specific file server on
the network. The launch object could then map the file server
automatically and open a file selection dialog where the user selects the
document template.
94
AXIS StorPoint CD+ User’s Manual
CD Grouping
Creating a Launch
Object
To create a new launch object:
1. Click File | New | Launch Object within one of your personal folders. The
launch object wizard dialog appears.
2. The wizard includes three screens: General, AutoMapping and Actions.
Click Next to continue to the next screen. For information on how to fill in
the specific fields, click the Help button.
Note:
Mapping Discs
o
To change any of the settings later, right-click the launch object, and
select Properties.
It is useful and sometimes necessary to assign (map) a drive letter to a
shared networked resource that you connect to often. Some software will
not run properly unless it finds data at root level.
Within AXIS StorPoint DISCO, drives letters can be mapped to discs
manually or automatically.
Manual Mapping
To map a disc manually, follow these steps:
1. Locate the disc you want to be mapped.
2. Right-click the disc and select Map Disc... from the drop-down menu.
3. Select a drive letter for connecting to the disc. The next available drive letter
is selected automatically. To specify a different drive letter, type the letter
or select one in the list.
4. If you use the resource often, check Reconnect at logon to make the
connection each time you start your computer.
5. Click OK.
Automatic Mapping
Automatic mapping (AutoMapping) allows mapping to be performed
automatically when you access a disc. With this feature, several discs can
share the same drive letter dynamically. Only the most recently accessed
disc will be mapped to the drive letter.
AXIS StorPoint CD+ User’s Manual
95
CD Grouping
AXIS StorPoint DISCO provides two methods for automatic mapping of
your networked discs:
Notes:
AutoMap Folders
•
•
General settings for all discs within an AutoMap folder.
Specific settings for each particular disc within your personal folders.
o
For each drive letter, only one mapping can be enabled at a time. The most
recently performed mapping is the one that will be used.
o
To quickly perform a mapping without opening the disc, right-click the disc
and select QuickMap.
o
Automatic mappings can also be performed within a launch object.
An AutoMap folder allows you to define AutoMapping settings
for all the discs contained within that folder.
To create a new AutoMap folder:
1. Within the AXIS StorPoint DISCO folder, click File | New | AutoMap
Folder.
2. The Create New AutoMap Folder dialog is opened. Select the desired
AutoMapping option. These settings will apply to all the discs contained
within this AutoMap folder.
Note:
AutoMapping a
Particular Disc
o
To change the settings, right-click the folder and select Properties. Open
the AutoMapping page.
To define the AutoMapping options for a particular disc:
1. Right-click the disc and select Properties.
2. Open the AutoMapping page.
96
AXIS StorPoint CD+ User’s Manual
CD Grouping
3. Select the desired option by clicking the appropriate radio button. You can
select Map several paths... to map a set of discs simultaneously.
4. Click OK.
AXIS StorPoint CD+ User’s Manual
97
CD Grouping
Client Installation
To set up the client part of the client/server version, you need to carry out
the following:
•
•
•
Creating Public
Folders
Create public folders
Edit the client setup script (optional)
Install the client version on the client user’s computers
A public folder can contain discs and launch objects. The
administrator prepares a set of folders and then makes these
available as public folders. When a user selects a public folder,
the folder will appear in the AXIS StorPoint DISCO folder on
the user’s computer.
To create a public folder:
1. Click File | Public Folder Settings to check the settings for public folders.
2. On the Public Folders page, make sure the network path to the public folder
data is specified correctly. The location was specified during the installation.
Note that the location must be reachable from the users’ computers. If you
want to change the path, click Change.
3. Click File | New | Folder to create a new folder.
4. Specify a descriptive name, and press Enter.
5. Select the new folder and click File | Properties.
6. On the General page, enter a descriptive text in the Comment field to
indicate its content.
7. Check the Make folder public checkbox to make this folder available to the
users.
Note:
Editing the Client
Setup Script
98
o
As opposed to shared folders in Windows, public folders within AXIS
StorPoint DISCO will not appear in Network Neighborhood.
When the administrator installed the server part of AXIS StorPoint
DISCO, the Setup program created a client setup script used for reducing
the user interaction during the client installation.
AXIS StorPoint CD+ User’s Manual
CD Grouping
To edit this script:
1. Click File | AXIS StorPoint DISCO Settings.
2. Open the Client Setup page.
3. Click the Create Setup Script button. A wizard will guide you through the
screens in the dialog. The script is stored under the filename sscript.ini
in the location specified at the top of the page.
Note:
Installing the
Client Version
Extracting New
Client Setup Files
o
If you provide all the information in the wizard, the client version can be
installed with no or little user interaction. Otherwise, the user will be
prompted to make the decisions during the installation.
Notify the users about where they can find the client installation files on
the network and ask them to run the installation program Setup.exe. Or,
use your standard procedures for installing new client software on the
network. The file location is specified on the AXIS StorPoint DISCO
Settings | Client Setup page.
The client setup files for AXIS StorPoint DISCO was created when the
administrator installed the server version. In case these files become
damaged, new files can be extracted without reinstalling the server
program.
Follow these steps:
1. Open the Windows Add/Remove Program dialog.
2. Select AXIS StorPoint DISCO and click Add/Remove.
3. The AXIS StorPoint DISCO Setup Maintenance program is opened. Click
Modify to generate new files.
AXIS StorPoint CD+ User’s Manual
99
Hard Disk Caching
Section 11
Note:
Hard Disk Caching
o
The Basic versions of the StorPoint CD+ do not support hard disk caching.
This section describes how to use hard disk caching with your StorPoint
CD+.
Hard disk caching means that
the inserted discs can be copied
to a hard disk attached to the
SCSI bus or the IDE bus.
StorPoint CD
The caching mechanism of the
StorPoint CD+ involves both
directory caching and complete
mirroring (copying). It allows
users to access the networked
discs at hard disk speed.
Hard disk
You manage the hard disk
caching facility via the
StorPoint CD+ Web interface.
Disc Changers
Because of the relatively long time needed to change discs in a changer,
the data transfer rate may become unacceptably low when two users
simultaneously attempt to read different discs. Hard disk caching will thus
significantly increase the access speed if you are using changers.
Archiving
The hard disk caching facility allows you to archive the cached discs, i.e.
keep the cached discs stored on the hard disk even if the original discs are
ejected from the drives. You can archive up to 255 volumes.
Capacity
The number of discs that can be cached depends on the size of the hard
disks as well as the size of the individual discs. About 90% of the disk
space can be used for caching. For example, a 4.3 GB hard disk will allow
six 650-MB discs to be cached. However, if each disc contains only 100
MB, about 38 discs can be cached on the hard disk.
A 650 MB disc is cached on the hard disk in less than six minutes.
Note:
o
Avoid turning off the power supply during hard disk caching. However,
should this happen, the StorPoint CD+ will restart caching the disc/discs
automatically when the power supply has been restored.
100
AXIS StorPoint CD+ User’s Manual
Hard Disk Caching
Caching Options
Hard disk caching with the StorPoint CD+ has two main purposes:
•
•
Performance Caching
Increasing performance
Archiving discs on the hard disk
For performance caching, you specify the cache mode on the Server
Settings | Change... | Caching page. These options are available:
None - The disc will not be cached.
Partial - Information about the directory structure and files are cached
on to the hard disk, but no actual data. This speeds up the directory
browsing, especially with the use of disc changers. Optionally select how
much space to allocate to file caching. The file cache is a separated part
on a hard disk where disc files may be cached. The more hard disk space
allocated to file caching, the larger files can be stored in the file cache.
• Mirror - A copy of the disc is created on the hard disk, and thus
increasing performance, especially with multiple users or frequent
access of multiple files. This method takes more time to carry out when
a new disc is inserted. The mirroring will be performed in the
background. Until a disc has been completely cached on the hard disk,
the disc will be accessible from the disc drive. If there is not enough
room on the hard disk to mirror all required discs, it is advisable to only
mirror the most frequently used discs and enable the file cache. The
most frequently used non-mirrored disc files will then be placed in the
file cache. The file caching option is only available for Partial caching.
For more information, see “Using Hard Disk Caching for Increased
Performance” on page 103.
•
•
Archiving Discs
The archiving option is only available from the Discs & Drives page:
Archive - This option does the same as Mirror and in addition saves the
created image on the hard disk. The archived disc is accessible to the
users even if the original disc has been ejected from the drive. Archiving
can be performed manually or automatically for one or more drives.
For more information, see “Using Hard Disk Caching for Archiving Discs”
on page 104.
•
AXIS StorPoint CD+ User’s Manual
101
Hard Disk Caching
Verifying the Hard Disk
The caching facility requires at least one hard disk to be connected to the
SCSI bus or the IDE bus. The StorPoint CD+ will automatically format
hard disks and use them for hard disk caching. You can connect up to six
or seven hard disks to your StorPoint CD+ depending on model.
Follow these steps to verify that a valid hard disk is connected to your
StorPoint CD+:
1. Start your Web browser and enter the name or IP address of the StorPoint
CD+ in the location/address field.
2. Click admin. You will be prompted for the Server username and password.
By default, this is set to root and pass. To change the Server password, see
“Server Password” on page 24.
3. On the Server Settings page, click the hard disk icon
to verify that
the StorPoint CD+ has detected a hard disk that can be used for hard disk
caching. Information about the hard disk will be displayed to the right.
Notes:
102
o
If the hard disk has been used before and includes a partition table, it
needs to be formatted before it can be used for hard disk caching. Click
Format to do that. The formatting will remove all the information currently
cached on the hard disk. This is not something you would normally want to
do.
o
On start up, if the StorPoint detects inconsistencies on the hard disk it will
reformat the disk automatically. Once the hard disk is set up and verified,
disable the ‘AutoFormatEnabled’ parameter to avoid unintentional loss of
data upon reboot. This is done by editing the config.ini file and setting the
[HDCache] parameter to no i.e. AutoFormatEnabled = no.
AXIS StorPoint CD+ User’s Manual
Hard Disk Caching
Using Hard Disk Caching for Increased Performance
To use hard disk caching to increase performance, follow these steps:
1. Start your Web browser and enter the name or IP address of the StorPoint
CD+ in the location/address field.
2. Click admin. You will be prompted for the Server username and password.
By default, this is set to root and pass. The Server Settings page appears.
3. Click Change... and select the Caching tab.
Note:
o
The Caching tab only appears if at least one hard disk has been connected
to the StorPoint CD+.
4. Select the default cache mode: None, Partial or Mirror. For Partial, select the
size of the file cache from the drop down list.
5. Make the required selections by checking the appropriate checkboxes. Click
Save.
New discs will automatically be cached according to this setting when
inserted.
Notes:
o
If the cache mode has been set to Mirror, but there is not enough disk
space or the Do not automatically mirror or archive discs larger than xxx
MB option has been set to smaller than the current disc size, the cache
mode for the disc will be Partial. Consequently, some of the files on the
disc may be placed in the file cache.
o
You can click the Clear All Disks button to clear the hard disk cache of
data.
AXIS StorPoint CD+ User’s Manual
103
Hard Disk Caching
Using Hard Disk Caching for Archiving Discs
To use the hard disk caching for archiving discs, follow these steps:
1. Start your Web browser and enter the name or IP address of the StorPoint
CD in the location/address field.
2. Click admin. You will be prompted for the Server username and password.
By default, this is set to root and pass.
3. Open the Discs & Drives page. This page includes three views that you can
select by clicking the corresponding tab:
• Discs and File System
• Drives
• Cached Discs
The Discs and File
System View
Manual archiving is managed from the Discs and File System view.
The Hard disk bar at the top of the page shows how much of the total
hard disk space that is currently being used for archived copies and
cached data. The free space available for archiving new discs is noted
next to the bar. If you have more than one hard disk attached to the
StorPoint CD+, the size of the largest disc that can be archived will be
displayed below the bar. For more information about free hard disk space,
go to the Statistics page.
The table lists:
inserted discs
inserted archived discs
archived discs that are currently not inserted
inserted mirrored disc
discs that are currently being cached.
Note:
104
o
Discs with multiple file systems are displayed as two discs in the Discs and
File System view.
AXIS StorPoint CD+ User’s Manual
Hard Disk Caching
Manual Archiving
Note:
Check the Archive checkbox to copy the disc to the hard disk.
Unarchiving a disc causes it to go back to the global setting mode.
o
This checkbox only appears if there is a hard disk connected to the
StorPoint CD+.
Properties
Click the Properties icon to display the Properties dialog box where
you can set properties such as sharing options, user limits and access
rights. Click
to set the access rights for the root or the volumes
folder. Click
to set the access rights for the disc.
Eject
Click
to eject a disc. Note that the disc will be ejected even if the
disc is in use or the drive is locked. However, a message will be
displayed if you try to eject a disc that is currently in use.
Note:
Description
The Drives View
o
This function does not apply to changers.
Add a text describing the disc contents in the Properties dialog box.
Display this dialog box by clicking the Properties icon.
Automatic archiving is managed from the Drives view.
SCSI Server - the Drive column lists all the drives by SCSI ID. In case of
a Dual SCSI server, A or B will be displayed to indicate which bus the
drive is connected to. If a LUN based device like a changer is attached, the
LUN will also be displayed. “A-6-0” indicates SCSI ID 6, LUN ID 0 on bus
A.
AXIS StorPoint CD+ User’s Manual
105
Hard Disk Caching
IDE Server - the Drive column lists all the drives by location. If a LUN
based device like a changer is attached, the LUN will also be displayed.
“A-Master-0” indicates the device connected as Master, LUN ID 0 on bus
A.
Note:
106
o
Discs with multiple file systems are displayed twice with the same drive
number in the Drives view.
AXIS StorPoint CD+ User’s Manual
Hard Disk Caching
Automatic Archiving
Note:
Check the Auto-archive checkbox to automatically archive all discs
that will be inserted into this drive.
o
This checkbox only appears if there is a hard disk connected to the
StorPoint CD+.
Eject
Click
to eject a disc. Note that the disc will be ejected even if the
disc is in use or the drive is locked. However, a warning message will
be displayed if you try to eject a disc that is currently in use.
Lock
Check the Lock checkbox to lock a drive. At the bottom of the page,
you can click Lock all or Unlock All to affect all the drives
simultaneously. When the drive is locked it cannot be ejected with the
eject button on the physical drive. However, it can still be ejected
from the Discs & Drives page.
Sorting
Click Sort to sort the items by Drive or Name, respectively.
Properties
Note:
Click the Properties icon to display the Properties dialog box where
you can set properties such as sharing options, user limits and access
rights. Click
to set the access rights for the disc.
o
Shared Drive
Notes:
You can click the Stop Archiving button to immediately interrupt all
current caching jobs. To restart archiving, check the appropriate
Archive/Auto-archive checkbox(es) again.
Click the Properties icon to display the Properties dialog box. Select
if you want to use the access rights and properties of the Disc or the
Drive by checking the appropriate checkbox. By selecting Drive, all
discs inserted into the drive become accessible under the drive’s name
and inherit the drive’s access rights and properties.
o
When a disc is inserted into a shared drive and then is archived, the disc
copies the drive’s access rights but keeps its original name.
o
When a disc in a shared drive is archived, or if a previously archived disc is
inserted into a shared drive, the drive icon will indicate that the disc in the
drive is not accessible under the drive’s name. This is because the disc is
already archived under its original name.
AXIS StorPoint CD+ User’s Manual
107
Hard Disk Caching
The Cached
Discs View
This view provides an overview of all cached
that are not inserted.
and mirrored
discs
When an un-inserted mirrored disc is deleted it is removed from the list
on this view.
Note:
Hard Disk Full
108
o
The IDE Server will list the location of the hard disks, e.g. A-Master.
If a hard disk becomes full and you want to cache another disc, you must
first free some space on the hard disk. To do this, go to the Discs & Drives
page, select the Discs and file system view and locate an archived disc
that is currently not inserted
. Uncheck the Archive checkbox.
Consequently, this disc will no longer be accessible to the users.
AXIS StorPoint CD+ User’s Manual
Monitoring the StorPoint CD+
Section 12
Monitoring the StorPoint CD+
This section describes the following monitoring tools:
Tools
See ...
Event log
page 109
Statistics
page 110
E-mail
page 111
SNMP
page 111
AXIS ThinWizard - a tool for locating and managing all the
AXIS servers on your network
page 113
Event Log
The event log is stored in the logfile.txt file located in the
System/ServerProperties folder. In the event log, the StorPoint CD+
writes information such as:
Information, e.g. completed tasks
Warnings, e.g. hard disk full
Errors, e.g. installation failures
To display the event log, follow these steps:
1. Start your Web browser, and enter the name or IP address of the
StorPoint CD+ in the location/address field.
2. Click admin. You will be prompted for the Server password. By default, this
is set to pass. To change the password, see “Server Password” on page 24.
3. Click Event Log.
All events are viewed in the same order as they entered the log.
Notes:
o
If a synchronization source has been found or if the correct date and time
have been set manually, date information will appear in the log file.
o
When the server is restarted, a sub-set of critical events will remain in the
event log.
o
Click Clear Event Log, to clear the event log of events.
AXIS StorPoint CD+ User’s Manual
109
Monitoring the StorPoint CD+
Statistics
To display the statistics:
1. Start your Web browser, and enter the name or IP address of the
StorPoint CD+ in the location/address field.
2. Click admin. You will be prompted for the Server password. By default, this
is set to pass. To change the server password, see “Server Password” on page
24.
3. Click Statistics.
The StorPoint CD+ presents statistics such as:
•
•
•
•
•
Note:
110
o
Server up-time.
Cache hit ratio in the RAM cache.
List of users who are currently connected to the StorPoint CD+ in each
particular network environment.
Available space on the attached hard disk(s).
List of cache state and the number of times a disc has been accessed.
The hard disk information appears only if you have attached a hard disk to
the SCSI bus or the IDE bus.
AXIS StorPoint CD+ User’s Manual
Monitoring the StorPoint CD+
E-mail (SMTP)
To specify the settings for your e-mail facilities:
1. Start your Web browser and enter the name or IP address of the StorPoint
CD+ in the location/address field.
2. Click admin. You will be prompted for the Server password. By default, this
is set to pass. To change the server password, see “Server Password” on page
24.
3. Click Network Settings within the Administration Web pages.
4. Click Detailed View
. The Protocols dialog box appears.
5. Select the E-mail (SMTP) tab. Specify the settings for the mail server.
6. Enter the Administrators e-mail address.
7. Select mail log events from the Mail Log Events drop down list. These will
be sent to the e-mail address specified above. Click OK.
SNMP
You can use SNMP (Simple Network Management Protocol) for remote
monitoring of the StorPoint CD+.
General Information
SNMP refers to a set of standards for network management, including a
protocol, a database structure specification, and a set of data objects. The
StorPoint CD+ SNMP implementation runs in the TCP/IP environment.
The management is handled by NMS (Network Management System)
software running on a host on your network. The NMS software
communicates with network devices by the means of messages, which are
references to one or more objects.
A message can be a question or an instruction to a device, or an alarm
triggered by a specific event in a device.
System Requirements
SNMP Settings
In order to make full use of the SNMP support, you will need an NMS
software that allows you to install private enterprise MIBs.
To configure your StorPoint CD+ for SNMP:
1. Start your Web browser and enter the name or IP address of the StorPoint
CD+ in the location/address field.
2. Click admin. You will be prompted for the Server password. By default, this
is set to pass. To change the server password, see “Server Password” on page
24.
3. Click Network Settings.
AXIS StorPoint CD+ User’s Manual
111
Monitoring the StorPoint CD+
4. Click Detailed View
.
5. Select the SNMP tab.
6. Specify the settings, and click OK.
112
AXIS StorPoint CD+ User’s Manual
Monitoring the StorPoint CD+
AXIS ThinWizard
AXIS ThinWizard provides a convenient interface for locating and
managing all the AXIS servers on your network. AXIS ThinWizard runs
on Windows NT/2000/XP, Windows 95/98/Me and UNIX.
Note:
o
AXIS ThinWizard requires the IP address of your StorPoint CD+ to be set.
Refer to “Assigning an IP Address” on page 12.
Installing AXIS
ThinWizard
The AXIS ThinWizard is included on the AXIS Online CD. The required
software can also be downloaded from the Axis Web Site free of charge.
An installation wizard will guide you through the installation procedures.
Accessing AXIS
ThinWizard
Follow these steps to access the AXIS ThinWizard:
1. Make sure an AXIS ThinWizard server is running on your network.
2. Start the Web browser and enter the name or IP address of the AXIS
ThinWizard server in the location/address field. If the AXIS ThinWizard server
is installed on a port other than port number 80, you must add the port
number to the URL:
http://<IP address>:<port number>/
Example:
http://192.16.253.80:8011/
3. The AXIS ThinWizard start page appears.
4. Enter your user ID and password and click Log in.
AXIS StorPoint CD+ User’s Manual
113
Monitoring the StorPoint CD+
Creating a
Network Group
Before you can access your StorPoint CD+ via AXIS ThinWizard, you
must first create an appropriate network group. A network group is
defined by the specific IP address ranges and server types i.e. storage
servers, print servers etc. that are included.
Follow these steps to create a network group:
1. Click Network Groups in the AXIS ThinWizard main menu.
2. Click Create.
3. The Create Network Group page opens. Type a name for the new network
group.
4. Specify the IP address ranges and AXIS server types to be included in the
network group. If you are only interested in storage servers, deselect all
options but the Storage Servers option.
5. Click OK to create the network group.
Note:
Accessing the
StorPoint CD+
o
You can create as many network groups as you need.
Follow these steps to access the StorPoint CD+ Web pages via AXIS
ThinWizard:
1. Click Manage Network in the AXIS ThinWizard main menu.
2. Select the network group that includes your StorPoint CD+ from the pulldown list.
3. All the detected AXIS servers included in the network group are listed.
4. Click the IP Address link of your StorPoint CD+. The StorPoint CD+ File View
page appears.
Note:
114
o
The AXIS ThinWizard can also be used for upgrading the StorPoint CD+
software. Refer to “Upgrading the Firmware” on page 142.
AXIS StorPoint CD+ User’s Manual
Appendix A Parameter List
This section includes the StorPoint CD+ parameter list. It also explains the
StorPoint CD+ directory structure and how to edit the configuration
settings.
The Configuration File
This table shows the parameter list stored in the config.ini file located
in the System/ServerProperties folder, see the “Directory Structure” on
page 121. The middle column shows the default values, when applicable.
The right-hand column gives a brief description of the parameters.
Note:
Parameter name
[Server]
HardwareAddress
Date
Time
FactoryDefaults
Restart
TimeZone
TimeSyncSource
ServerPassword
Shut Down
NetworkSpeed
NetworkDuplex
CDWritePassword*
UseCDWritePassword*
DBCSEncoding
[SCSI]
SCSITermination
JukeBoxLockTime
o
Parameters denoted by an asterisk (*) are not available in the Basic versions
of the StorPoint CD+.
Value
Description
= 00:40:8c:11:00:86 The StorPoint CD+ hardware address. Default is the serial number.
You can set a Locally Administrated Address. The value shown is an
example only.
= 99-11-01
yy-mm-dd, enter the date followed by ! to set manually
= 12:00:00
hh:mm:ss, enter the time followed by ! to set manually
= no
Set to configuration, volumeProperties or all.
= no
Set to yes to restart the StorPoint CD+.
= UTC
Must be set to the time zone that the StorPoint CD+ is operating
in. Refer to “Time Zone Parameter Values” on page 120.
= NDS
Specifies the time source for the StorPoint CD+. Set to NDS for
NetWare IPX. Set to NTP for NetWare PureIP, UNIX and SMB over
TCP/IP. Note that you will need third party software on your
Windows NT server to obtain support for NTP. Set to None for
manually setting the time.
= pass
The Supervisor, Administrator or Root user password used for
basically all protocols; i.e. HTTP, NetWare bindery, SMB user level,
SNMP and FTP. Once written into the configuration file, the
password will not be shown but replaced with *’s, representing
each letter of the password.
= no
Set to yes to shut down the StorPoint CD+.
= auto
The network speed. Set to 10, 100 or auto. Default is auto, which
means that it is automatically detected by the StorPoint CD+.
= auto
The network duplex. Set to full, half or auto. Default is auto, which
means that it is automatically detected by the StorPoint CD+.
=
Optional password used for protecting the Recordable Discs page.
Set to yes or no.
=
Used when protecting the Recorable Discs page with an optional
password. Set to yes or no.
= None/BIG5/GB/KSC BIG5 = Chinese traditional, used in Taiwan.
/Shift-JIS
GB = Chinese simplified, used in China.
KSC = Korean.
Shift-JIS = Japanese.
= on
= 0
AXIS StorPoint CD+ User’s Manual
Always on.
Specifies the maximum duration for a data read operation during
multiple access requests to prevent disc changer fluttering. Default
is 0 seconds which disables the function.
115
Parameter name
Disconnect_Reselect
Value
= on
BusMode
= Asynchronous
[IDE]
JukeBoxLockTime
= 0
StandbyTimer
=1800
IDEBootDelay
=15
[IP]
InternetAddress
DefaultRouter
= 192.36.253.80
= 0.0.0.0
NetMask
= 0.0.0.0
BOOTPEnable
DHCPEnable
RARPEnable
DomainName
PrimaryDNS
=
=
=
=
=
SecondaryDNS
= 0.0.0.0
NTPServer
EnableWINS
PrimaryWINSserver
SecondaryWINSserver
ProtectIP
=
=
=
=
=
SLPDirectoryAgent1
SLPDirectoryAgent2
SLPScopeList
= auto
= auto
= DEFAULT
[HTTP]
HTTPEnable
= yes
EnableMediaAccess
= yes
ExternalLink
=
ExternalImage
=
[FTP]
FTP User name
=
FTP User password
=
116
yes
yes
yes
0.0.0.0
no
0.0.0.0
0.0.0.0
no
Description
Set to off to disable the disconnect/reselect function in the disc
drives.
Specifies the transfer mode on the SCSI bus: Asynchronous,
Synchronous, Fast-10 or Ultra.
Specifies the maximum duration for a data read operation during
multiple access requests to prevent disc changer fluttering. Default
is 0 seconds which disables the function.
Specifies the number of seconds of idle time before a hard disk
drive will enter stand-by (power saving) mode.
Note: a restart is necessary for this setting to take effect.
Specifies the number of seconds devices are allowed to wake up
before device identification is started. The valid range is 5 through
30 seconds.
The StorPoint CD+ IP address
The IP address for the default router. All traffic directed outside
the local network (according to the NetMask) is sent to the default
router. Any re-routing via other routers is done automatically. The
default 0.0.0.0 indicates that no default router is set.
Used to determine when the traffic should be sent via a router. For
example, the normal class C mask is 255.255.255.0. The default
0.0.0.0 indicates that automatic router sensing is used.
Enables BOOTP IP address setup.
Enables DHCP IP address setup.
Enables RARP IP address setup.
Name of the domain to which the StorPoint CD+ belongs.
The IP address of the primary DNS server. Used for identifying
computers with names instead of IP addresses.
The IP address of the secondary DNS server, should the primary
DNS server be unavailable or disconnected.
Name or IP address for the NTP server.
Enables WINS over NetBIOS/TCP/IP.
The IP address of the primary WINS server.
The IP address of the secondary WINS server, if required.
Protects the StorPoint CD+ from changing the IP address using the
ARP or Web browser method. Default is no, which allows the IP
address to be set within 30 minutes from restart.
The IP address or DNS name of an SLP directory agent.
The IP address or DNS name of an SLP directory agent.
The SLP scope to which the StorPoint CD+ belongs. SLP scopes are
used for collecting services into logical or administrative groups.
Specify the scope names in a list separated by commas, i.e.
scope1,scoper2,scope3... The default value DEFAULT means that no
specific scope will be configured.
Enables HTTP. Set to no to restrict users from accessing the
CD-ROMs from a Web browser.
Enables access to the inserted discs. When set to no, only
administration is available from HTTP.
Specifies the URL to a customized link, e.g. to your company’s Web
site. The link will be available from the StorPoint CD+ Web
interface.
Specifies the URL to the image that will indicate the customized
external link.
Alternative user name for accessing the StorPoint CD+ Volumes
folder via FTP.
Once written into the configuration file, the password will not be
shown but replaced with *’s, representing each letter of the
password.
AXIS StorPoint CD+ User’s Manual
Parameter name
Timeout in seconds
Value
= 0
FTP Max Users
[SMB]
SMBEnable
ServerName
= 10
= yes
=
ServerPassword
= pass
Domain/GroupName
=
SecurityMode
NTDomainInstallation
= shareLevel
= no
User Account
=
User Password
EnableNBT
NBTscopeID
EnableNetBEUI
NetBEUIFrameType
=********
= yes
=
= yes
= auto
Enable Oplock
=yes
[NFS]
NFSEnable
DefaultUid
= yes
= -2
PCNFSDAuthentServer
= 0.0.0.0
ExportVolumes
= yes
LowerNonCase
[SNMP]
GetCommunityName
= yes
TrapDestination
= 0.0.0.0
TrapCommunityName
= public
SystemContact
=
SystemName
=
SystemLocation
=
AuthenticationTrap
= disabled
[NetWare]
NWEnable
IPXEnable
Frame_802_2
Frame_802_3
=
=
=
=
= public
AXIS StorPoint CD+ User’s Manual
yes
yes
auto
auto
Description
The time of inactivity in seconds after which an FTP is closed
down.
The maximum number of simultaneous FTP sessions.
Enables SMB.
The server name in the SMB environment. Default is AXIS<nnnnnn>
where nnnnnn are the last six digits of the serial number.
The Supervisor, Administrator or Root user password used for
basically all protocols; i.e. HTTP, NetWare bindery, SMB user-level,
SNMP and FTP. Once written into the configuration file, the
password will not be shown but replaced with eight *’s,
representing the password.
Name of the StorPoint CD+ workgroup in SMB. If not specified, the
StorPoint CD+ will appear in the workgroup that comes first in
alphabetical order.
Specifies the security mode used in SMB: userLevel or shareLevel.
Set to yes when you want to install the StorPoint CD+ in an NT
domain.
Enter user Account in config.ini file if domain denies anonymous
login.
Password for domain user account.
Enables SMB over NetBIOS/TCP/IP.
Defines the NetBIOS scope to which the StorPoint CD+ belongs.
Enables SMB over NetBIOS/NetBEUI.
If set to auto, 802.2 or DIX will automatically be selected by
scanning the network. If required, the frame type can also be set to
either 802_2 or dix.
Enables support for opportunistic locks, a performance enhancing
mechanism that allows clients to cache data locally.
Enables NFS.
Default user id to be used when authenticating PCNFSD clients.
Disable by setting the parameter to 0 (zero).
The IP address of the PCNFSD authentication server used for
authenitcating PCNFSD clients. The default 0.0.0.0 disables the
function.
Enables export of each new disc inserted as a mount point. If you
restore the factory default settings, all the currently inserted discs
will be exported.
Set to yes to displays non-case sensitive file systems in lower case.
Specifies the community that has read only access to all supported
SNMP objects except writeCommunity, SupervisorPassword and
ftpPassword. It corresponds to the readCommunity SNMP object.
Specifies the IP address which SNMP traps are sent to. It
corresponds to the trapAddress SNMP object. Default is 0.0.0.0, i.e.
all SNMP traps are disabled.
Specifies the community for all generated SNMP traps. It
corresponds to the trapCommunity SNMP object.
Optional entry which should be in plain text and may be used to
show the name of the system contact person.
Optional entry which should be in plain text and may be used to
show the name of the location of the system.
Optional entry which should be in plain text and may be used to
show the name of the location of the system.
Disables the SNMP authentication failure traps. It corresponds to
the snmpenableAuthenTraps (MIB-II) SNMP object.
Enables NetWare support.
Enables the IPX protocol.
Enables the 802.2 frame type.
Enables the 802.3 frame type (Ethernet versions only).
117
Parameter name
Frame_EthernetII
Frame_SNAP
NetWareIP_Enable
NetWareIP_DSS_Server
PureIPEnable
ServerName
Value
= auto
= auto
= no
=
= yes
= AXIS<nnnnnn>_NW
InternalNetAddress
= nn-nn-nn-nn
BurstMode
ShowAllVolumes
BinderyEnable
= on
= yes
= yes
BindAuthentication
NDSEnable
NDSTreeName
NDSServerContext
=
= yes
=
=
NDSAdminName
=
NDSAdminPassword
=
NDSInstall
= no
NDSRightsStorage
= NDS
NDSRightsFile
=
TimeSyncSources
= SAP
[AFP]
AFPEnable
AppleTalk_Enable
AFPIP_Enable
ServerName
= yes
= yes
= yes
=
ZoneName
AuthenticationServer
AuthenticationEnable
[SMTP]
Primary Mail Server
Secondary Mail Server
Administrator Address
Mail Log Events
118
=
=
= no
= mail
=
=
= no
Description
Enables the Ethernet II frame type (Ethernet versions only).
Enables the SNAP frame type.
Enables NCP over IPX/UDP (NetWare/IP).
The IP address of the DSS server.
Enables NCP over TCP/IP (PureIP).
NetWare server name to be presented to the NetWare clients.
Default is AXIS<nnnnnn>_NW where nnnnnn are the last six digits
of the serial number.
Internal network address. Default is nn-nn-nn-nn where nnnnnnnn
are the last eight digits of the serial number.
Enables burst mode.
Shows all drives and discs also at SYS level.
Enables bindery mode login. When using NDS, set to no to increase
system security. The Supervisor can always login in bindery mode
even if this parameter is set to no.
Name or IP address of the server used for authenitcating clients.
Enables NDS mode.
Name of the tree where you wish to install the StorPoint CD+.
Distinguished name of the context in the NDS tree where you wish
to install the StorPoint CD+, e.g. Corp.Acme.
Distinguished name of a user or administrator with Supervisor or
Create rights to the context where you want to install the
StorPoint CD+, e.g. Admin.Acme.
Password for the administrator defined in NDSAdminName. Once
written into the configuration file, the password will not be shown
but replaced with *’s, representing each letter of the password.
Set to install when you are ready to install the StorPoint CD+ in
NDS, or forced to overwrite the NDS server object.
Set to NDS to store the access rights in the NDS tree. Set to File to
store the access rights in a file on the Novell server. This is
necessary if you do not allow schema extensions in your NDS tree,
or if you do not have Supervisor access rights. Set to Local to store
access rights locally in the StorPoint CD+.
If you have set NDSRightsStorage to File, specify the whole path to
the file on the Novell file server using this syntax:
SERVER/VOLUME:DIR/.../FILE.DAT where SERVER is a NetWare server
name or IP address. The specified directory must exist and the
StorPoint CD+ must have Read, Write, Create, Erase, Modify and
File Scan rights. The StorPoint CD+ will create the file once you
start adding trustees.
If IPX is enabled, use SAP or a list of time servers containing NDS
server names. If PureIP is enabled, use a list of time servers
containing IP addresses, DNS names or NDS server names.
Enables AFP.
Enables AFP over AppleTalk.
Enables AFP over TCP/IP.
The server name in the AFP environment. Default is AXIS<nnnnnn>
where nnnnnn are the last six digits of the serial number.
The zone name to which the StorPoint CD+ server belongs.
Name of the server used for authenitcating clients.
Enables the authentication server. Default is no.
Name or IP address of the primary mail server.
Name or IP address of the secondary mail server.
The administrator’s e-mail address.
No means that no log events will be sent via e-mail to the
administrator. Error means that only errors will be sent to the
administrator. Warning means that only warnings will be sent to
the administrator. All means that all logged events will be sent via
e-mail to the administrator
AXIS StorPoint CD+ User’s Manual
Parameter name
[HDCache]*
CacheMode*
Value
Description
= mirror
ClearAllDisks*
EnableMaxAutoArchiveSize*
MaxAutoArchiveSize*
AutoEject*
EnableLowDiskWarning*
LowDiskTreshold*
FileCacheSize*
=
=
=
=
=
=
=
AutoFormatEnabled*
=yes
The default caching method to be used each time you insert a new
disc in one of the drives. None means no caching. Partial means
that the directory structure is cached to allow fast file browsing.
Mirror means complete caching. The hard disk will contain a
complete copy of the mirrored disc.
Set to yes to remove all information from the hard disk.
Set to yes to enable the Max Auto Archive Size option.
Specifies the maximum disc size to auto archive.
Set to yes to enable the Auto Eject function.
Set to no to disable the Low Disk Warning option.
Specifies for which disc size a low disk warning shall be displayed.
Specifies how much of the disk space to use for caching. Default is
0 which disables the function.
If enabled, hard disks with no recognizable file system will be
automatically formatted at start-up time. Disabling auto format
can help clarify the reasons for a hard disk or file system crash,
should one occur.
[CD Writing]*
Finalize with UDF*
= no
no
no
650
no
yes
650
0
If enabled, finalized CD-R/RWs will include the UDF (Universal Disk
Format) file system, as well as the defaults ISO 9660 and Joliet.
Note: Some operating systems may have problems reading disks
with UDF.
[END]
Note:
Parameters denoted by an asterisk (*) are not available in the Basic versions of
the StorPoint CD+
AXIS StorPoint CD+ User’s Manual
119
Time Zone Parameter
Values
This table lists the time zone as the number of hours +/- UTC.
Table 1:
TimeZone
parameter value
Hours +/UTC
TimeZone
parameter value
Hours +/UTC
UTC
0
GB_Eire
0
UTC+1_(No_DST)
1
Western_Europe
0
UTC+2_(No_DST)
2
Iceland
0
UTC+3_(No_DST)
3
Central_Europe
1
UTC+4_(No_DST)
4
Poland
1
UTC+5_(No_DST)
5
Eastern_Europe
2
UTC+6_(No_DST)
6
Turkey
3
UTC+7_(No_DST)
7
Western_Russia
3
UTC+8_(No_DST)
8
US_CAN_Eastern
-5
UTC+9_(No_DST)
9
US_CAN_Central
-6
UTC+10_(No_DST)
10
Saskatchewan
-6
UTC+11_(No_DST)
11
US_CAN_Mountain
-7
UTC+12_(No_DST)
12
US_Arizona
-7
UTC-1_(No_DST)
-1
US_CAN_Pacific
-8
UTC-2_(No_DST)
-2
US_Alaska
-9
UTC-3_(No_DST)
-3
US_Aleutian
-10
UTC-4_(No_DST)
-4
Cuba
-5
UTC-5_(No_DST)
-5
Egypt
2
UTC-6_(No_DST)
-6
Libya
1
UTC-7_(No_DST)
-7
Sudan
2
UTC-8_(No_DST)
-8
Tunisia
1
UTC-9_(No_DST)
-9
Brazil_Noronha
-2
UTC-10_(No_DST)
-10
Brazil_Sao_Paulo
-3
UTC-11_(No_DST)
-11
Brazil_Manaus
-4
UTC-12_(No_DST)
-12
Brazil_Rio_Branco
-5
Chile
-4
Chile_Easter_Isl
-7
Paraguay
-4
Aust_Adelaide
9h30m
Aust_Darwin
9h30m
Aust_Hobart
10
UTC = Universal Time Coordinated, which used to be
known as Greenwich Mean Time (GMT), i.e. the local
time at the Greenwich meridian (zero degrees longitude).
120
AXIS StorPoint CD+ User’s Manual
Table 1:
TimeZone
parameter value
Hours +/UTC
TimeZone
parameter value
Hours +/UTC
UTC
0
GB_Eire
0
Aust_Perth
8
Aust_Sydney
10
New_Zealand
12
Afghanistan
4h30m
Armenia_Azer
4
Burma
6h30m
China_PRC
8
India
5h30m
Iran
3h30m
Iraq
3
Jordan
2
Kazak_Kirgi
6
Lebanon
2
Syria
2
DST = Daylight Saving Time. No_DST means that automatic adjustment for DST is not included. The parameter values shown to the right include
adjustments for DST.
Directory Structure
The StorPoint CD+ will appear to your system as a file server. Like any
other file server it has a directory structure where files are stored. The
directory structure of the StorPoint CD+ is outlined below:
System
DeviceProperties
Flash
ServerProperties
VolumeProperties
Volumes
Disc1
Disc2
Disc3
....
Root
or
SYS
The purpose of each folder is explained on the following pages.
AXIS StorPoint CD+ User’s Manual
121
The System folder
The System folder includes configuration information about the StorPoint
CD+, e.g. configuration settings, connected drives, inserted discs, access
rights etc. It contains these subfolders:
•
•
•
•
122
DeviceProperties - Includes one text file for each connected drive, i.e.
CD/DVD-ROM drives and hard disks.
Flash - When updating the firmware, the file with the latest firmware
version is copied into this subfolder.
ServerProperties - Includes the configuration parameter list, event log
and statistics files.
VolumeProperties - When a disc is inserted into a connected drive, a
text file for that disc will be created. If specified, the volume name will
be used. If no volume name has been specified, the volume label will be
used instead. If the disc does not have a volume label, the StorPoint
CD+ will use a unique eight digit number. If the disc is blank or uses an
unknown file system, the text file will be named unknown##.txt.
AXIS StorPoint CD+ User’s Manual
The Volumes Folder
When a disc is inserted into a connected drive, a subfolder for that
volume will be created in the Volumes folder. The files on that disc are
accessed through this folder. By default, the Volumes folder is available to
all users. However, the Administrator can set a password to protect it.
The names of the subfolders found under the Volumes folder will comply
with the following rules:
•
If the Administrator has specified a volume name, this name will be
used.
• If no volume name has been specified, the volume label held on the disc
will be used.
• If the disc does not have a volume label, and no volume name has been
set, the StorPoint CD+ will automatically allocate a name of the form
cd_<nnnnnnnnn>, where <nnnnnnnn> is a unique eight digit number.
• If two inserted discs have the same volume name, the StorPoint CD+
will add the suffix _a to the name of the second one. If two inserted
discs are identical, the StorPoint CD+ will mount only the first one.
Often the volume label is not a good representation of the disc contents.
A volume name is a convenient way of setting a more significant or
recognizable name.
Important!
o
If you wish to run an application that is stored on a disc or searches for its
associated files on a disc, you cannot set a volume name because the
application will not recognize that name.
Editing the Configuration Parameters
Web Browser
Note:
If your network supports TCP/IP, you can display and edit the StorPoint
CD+ parameter list using a standard Web browser:
•
•
Netscape Navigator version 4.08 or higher, or
Internet Explorer version 4.0 or higher
o
You must first assign a valid IP address as described in “Assigning an IP
Address” on page 12.
To access the StorPoint CD+ Home Page from your Web browser, you
simply enter the URL of the StorPoint CD+, i.e. the name or IP address, in
the location/address field.
Example:
http://192.16.253.80
AXIS StorPoint CD+ User’s Manual
123
FTP
You can retrieve the configuration parameters of your StorPoint CD+
using the File Transfer Protocol (FTP). FTP is supported by most operating
environments.
Follow these instructions:
1. Log in to the StorPoint CD+ with the command:
ftp <IP address>
where <IP address> is the name or IP address of your StorPoint CD+.
2. You will be prompted for user id and password. Use the user id root, which
has the default password pass.
3. Windows 95 only: Change directory not to overwrite any of your system
files. See the caution note below.
4. Change to the directory where the configuration file is located:
cd System/ServerProperties
5. To access the configuration file, type:
get config.ini
6. Edit the config file using any text editor. In the Windows 95/98 and
Windows NT environments, you can for example use Notepad. Once the
editing is complete, save the file as config.
7. To upload the configuration file to the StorPoint CD+, type
put config.ini
8. To exit FTP, type the command quit, bye, or exit.
Caution!
124
o
Windows 95 has a directory called config that contains important system
files. It is therefore important to change to another directory using the cd
command before modifying your StorPoint CD+ configuration file from
within the Windows 95 environment. Failure to do this may result in some
of your system files to be overwritten.
AXIS StorPoint CD+ User’s Manual
Text Editor
If you do not have TCP/IP on your network, you can edit the StorPoint
CD+ parameter list and access control parameters via the text files. Use
your preferred text editor to make updates to the files.
You submit the new settings to the StorPoint CD+ by simply saving the
files. To activate the new settings it is necessary to restart the StorPoint
CD+. You can do this by setting the Restart parameter to yes.
Important!
Configuration
Settings
o
Do not restart the StorPoint CD+ in the middle of the NDS installation.
The StorPoint CD+ configuration settings are stored in the config.ini
file located in the System/ServerProperties folder.
Example:
; AXIS StorPoint CD+ Parameter List, V6.00
[Server]
HardwareAddress
Date
Time
FactoryDefaults
Restart
TimeZone
TimeSyncSource
ServerPassword
Shut Down
NetworkSpeed
CDWritePassword
[SCSI]
SCSITermination
JukeBoxLockTime
Disconnect_Reselect
BusMode
[IP]
InternetAddress
DefaultRouter
NetMask
BOOTPEnable
DHCPEnable
RARPEnable
...
Access Control
Parameters
Notes:
= 00:40:cc:24:c3:0c
= 99-11-01
= 08:54:37
= no
= no
= UTC
= None
= ********
= no
= auto
= ********
=
=
=
=
on
0
on
Asynchronous
=
=
=
=
=
=
192.16.253.80
192.16.1.1
255.255.0.0
yes
yes
yes
The StorPoint CD+ access control parameters are stored in separate text
files for each shared resource. These text files are located in the
System/VolumeProperties folder.
o
The text files cannot be used for setting up access rights for NetWare.
Instead, you can use standard NetWare tools such as NWAdmin or Filer.
o
The text files cannot be used for setting up NT user-level rights for SMB.
Instead, you can use the Windows NT Explorer.
AXIS StorPoint CD+ User’s Manual
125
Example:
...
; Explanations:
;
[W] - Writable
;
[R] - Read-only
--- Identification --[R] Volume name = Root
[R] Volume label = Root
[R] Volume serialnumber = 00000001
[W] Volume description =
...
; Access rights
...
--- Windows Sharing --...
File
= /
Share name
= Root
Comment
=
AccessRight
= Full-Server-Password
Read-Only Password
=
Full Access Password =
[END]
Important!
126
o
When editing the file, be sure that the equal sign and the parameter values
are separated by a space.
o
Do not remove the [END] marker from the file.
AXIS StorPoint CD+ User’s Manual
Appendix B Troubleshooting
This section provides useful information to help you resolve any difficulty
you might have with your StorPoint CD+, namely:
Notes:
Problem
See ...
The front panel indicators
page 128
Restoring the factory default settings
page 130
Running a diagnostic test
page 132
Errors when accessing the StorPoint CD+ or an inserted disc
page 133
Errors when Writing Data to a Disc
page 135
Low transfer rates when using disc changers
page 134
Problems connecting to the StorPoint CD+ in a PureIP environment
page 136
Problems running CD-ROM software
page 136
Difficulties locating the StorPoint CD+ in NetWare
page 136
Insufficient access rights in NetWare NDS
page 137
Name resolution problems in Windows (SMB)
page 139
Problems locating the domain controller in Windows) SMB
page 140
o
You will find more useful information such as technical notes and support
FAQs on the Axis Support Web at http://www.axis.com/techsup/.
o
You can also go to the StorPoint CD+ Support page, to solve any problems
you may have seeing your devices and discs in your StorPoint CD+, finding
your StorPoint CD+ in the network or installing your StorPoint CD+ in
NetWare. From this web page you can also produce a Server Report which
includes technical information about your StorPoint CD+.
o
To receive updated information about Axis products, services and software
updates by e-mail, you can register at the Axis web site at
http://www.axis.com
AXIS StorPoint CD+ User’s Manual
127
The Front Panel Indicators
The front panel indicators show the status of the StorPoint CD+. The
indicators have the following functions:
•
•
•
•
Normal Conditions
Status - Flashes during startup. When the StorPoint CD+ is ready for
use, the light turns solid green.
Drive - Flashes to indicate activity on the SCSI/IDE bus.
Network - Flashes to indicate the presence of network traffic.
Power - Indicates that power is connected to the StorPoint CD+. This
LED should always remain lit and is only used to indicate power is
present in the StorPoint CD+ unit.
The Power LED is controlled by hardware and is always green when
power is connected. When the system starts running after startup, the
Status LED turns solid green. The Drive and Network LEDs are turned off.
This table shows the other front panel indicators under normal
conditions:
Event
Status LED
Drive LED
Network LED
Initial power to unit.
GREEN
GREEN
GREEN
Power-up and self-test,
approx. 30 seconds.
GREEN
GREEN
GREEN
Firmware preparation
GREEN
Firmware startup.
GREEN *
Startup sequence OK.
GREEN
Normal operation.
GREEN
Writing to the SCSI/IDE bus.
AMBER *
Reading from the SCSI/IDE bus.
GREEN *
100 Mbit packet arrived.
GREEN *
10 Mbit packet arrived.
AMBER *
Flash loading in progress.
AMBER *
* Flashing, short interval.
** Flashing, long interval.
128
AXIS StorPoint CD+ User’s Manual
Error Conditions
This table shows various error conditions:
Event
Status LED
New firmware required. Flash loading via FTP possible.
AMBER **
Illegal serial number. Return unit.
RED *
Error in Flash PROM. Return unit.
RED **
Error in DRAM. Return unit.
RED **
Drive LED
Network LED
Error in DRAM expansion module. Replace DIMM module. RED / AMBER
Fatal SCSI/IDE error. Return unit.
RED
Drive disconnected or not working properly.
RED *
The network connection is down.
RED
* Flashing, short interval.
** Flashing, long interval.
Status Indicator Red
If the Status indicator turns red, this indicates a serious error in the
hardware. If this happens, contact your dealer and return the unit for
replacement.
AXIS StorPoint CD+ User’s Manual
129
Restoring Factory Default Settings
If required, you can restore the factory default settings to your StorPoint
CD+. This might be needed if you have disabled all the network protocols,
or if you have lost the Server password.
You can use any of these methods:
• Web browser
• Config.ini
• Push button
Step by step instructions for each method are given below.
Caution!
Web Browser
o
The node address, the Hardware Address parameter, will remain
unchanged, but all other parameters will be restored. You will thus need to
re-assign the IP address in order to re-establish the Web browser
connection.
To restore the defaults settings using a Web browser:
1. Start the Web browser.
2. Enter the name or IP address of your StorPoint CD+ in the location/address
field.
3. Click admin. You will be prompted for the Server password. By default, this
is set to pass.
4. Click Server Settings.
5. Click Factory Defaults.
6. Select the required factory default option.
Note:
o
If you select the Configurations or the All option, you will need to reassign the IP address as described in “Assigning an IP Address” on page 12.
7. Click OK.
The factory default setting will now be restored and the StorPoint CD+
will automatically restart.
130
AXIS StorPoint CD+ User’s Manual
Config.ini
To restore the defaults settings using the config.ini file:
1. Locate the config.ini file using your standard file manager tool. You
will find it in the Root/System/ServerProperties folder.
2. Use your preferred text editor and change the Factory Defaults
parameter to configuration, volumeProperties or all. You will find
the Factory Defaults parameter under the [Server] section.
3. Change the Restart parameter to yes. You will find the Restart
parameter under the [Server] section.
4. Save the config.ini file.
The factory default setting will now be restored and the StorPoint CD+
will automatically restart.
Push Button
To restore the default settings using the Push button:
1. Shut down the StorPoint CD+.
2. Use a thin object, e.g. a pen to press and hold the Push button.
3. Switch on the StorPoint CD+.
4. Wait until the Status indicator flashes yellow (one flash/second).
5. Let go of the button at least two seconds.
6. Press and hold the Push button again until the Status indicator shows a
steady yellow light. This may take 5-6 seconds.
Push button
7. Restart the StorPoint CD+ by switching the server off and on. The StorPoint
CD+ is now reset to factory default settings.
AXIS StorPoint CD+ User’s Manual
131
Running a Diagnostic Test
The StorPoint CD+ Web Pages include a diagnostic test that you can run
in order to check the memory and the performance of the connected
drives.
Before You Begin
Note the following:
•
•
•
•
Procedure
Users that are currently accessing the StorPoint CD+ will be interrupted.
The diagnostic test is only available the first hour after startup.
If you want to repeat the test, you must first restart the StorPoint CD+.
In order to test the data transfer performance of a drive, a disc
including a file larger than 10 MB must be inserted.
To perform the diagnostic test, follow these steps:
1. Start the Web browser, and enter the URL of the Diagnostics page in the
location/address field:
http://<IP address>/this_server/diag.shtml
Example
http://192.16.253.80/this_server/diag.shtml
2. The Diagnostics page appears:
Make sure a suitable disc is inserted into each of the drives you want
to test.
3. Start the diagnostic test by simply reloading/refreshing the Diagnostics
page. The test takes a few minutes to complete.
4. Reload/refresh the page once again to display the results.
132
AXIS StorPoint CD+ User’s Manual
Errors when Accessing the StorPoint CD+ or an Inserted Disc
If you get error messages when trying to access the StorPoint CD+ or a
disc:
LED Indicators
SCSI Chain
IDE Connector
IP Address
SMB Protocol
Consult the error table in section “Error Conditions” on page 129 to see if
the front panel indicators can help you identify the problem.
Check the SCSI chain and ensure that all the drives are switched on and
that only the last unit is terminated.
Check that no device has been configured as Slave with no Master and
ensure that all the drives are switched on.
If using TCP/IP, make sure that you have assigned a unique and valid IP
address to the StorPoint CD+. If you have changed the IP address, try
restarting the StorPoint CD+.
In the Microsoft & IBM networking environments, verify that the SMB
protocol is enabled.
WINS Database
If using WINS, check that the StorPoint CD+ is registered in the WINS
database. If it is, there is probably a problem with the name resolution
on your network.
NDS Installation
If you have changed any of the following parameters after installing the
StorPoint CD+ in the NDS tree, you might need to repeat the installation
in order to connect to the StorPoint CD+:
•
•
•
•
Discs
IP address
Internal Net Address
IPX Enable
PureIP Enable
Check that the disc is not scratched or damaged in any way. Verify that
the disc works when inserted into the CD drive of a regular PC. If you are
using packet writing software or DVDs, make sure that the disc has an ISO
9660 compatible header.
AXIS StorPoint CD+ User’s Manual
133
Problems Finding a Wide-SCSI Hard Disk
The StorPoint CD+ is a narrow (8-bit) device. However, most hard disks
are wide (16-bit) devices.
When you connect a wide-SCSI hard disk to your StorPoint CD+, you will
need an active converter in order to terminate the high data byte.
Important!
o
Make sure the converter actively terminates the high byte. Do not use the
converter on the last device in the SCSI chain. The last device should be a
narrow device, e.g. a CD/DVD drive.
Low Transfer Rates when Using Disc Changers
Disc changer flutter can occur if a user requests access to a disc when
another user is already reading data from another disc. The changer may
then attempt to service both requests by repeatedly changing between the
two discs and transferring a small amount of data each time. Because of
the relatively long time needed to change discs, the data transfer rate to
both users will become unacceptably low.
The JukeBox Lock Time parameter in the StorPoint CD+ configuration file
specifies how long a user has exclusive access to a disc during a data read
operation. This is to prevent disc change flutter in order to optimize
access speed when many users are accessing different discs in the same
changer.
The JukeBox Lock Time parameter will ensure that when there are
simultaneous requests for access to different discs, a sizable block of data
is transferred to each user before the access is changed.
•
If the JukeBox Lock Time parameter is set too low, the data transfer
rate will be unacceptably low.
• If the JukeBox Lock Time parameter is set too high, the disc drive will
time-out on a second user’s request before the first user’s access is
completed. This will result in users receiving a ‘CD-ROM not available’
notice.
The default setting is 0 seconds which disables this function.
Note:
134
o
If you attach a hard disk drive to the StorPoint CD+ SCSI bus or IDE bus,
you can benefit from the hard disk caching facility described in “Hard Disk
Caching” on page 100.
AXIS StorPoint CD+ User’s Manual
Errors when Writing Data to a Disc
The writing speed is by default set to the maximum speed for the
currently used drive. If you experience problems when writing data to a
disc, changing the writing speed might solve your problem.
To change the writing speed, follow these steps:
1. Start the Web browser and enter the IP address of your StorPoint CD+ in
the location/address field.
The StorPoint CD+ File View page is displayed.
2. Click admin. You will be prompted for the Server username and password.
By default, these are set to root and pass.
3. On the Server Settings page, click the Disc Drive icon
that
corresponds to the CD-Recordable drive on the Server Settings page. The
Disc Drive view will be displayed.
4. Click the Change button. The Set Writing Speed dialog appears on the
screen.
5. Select the required writing speed from the drop-down list and click OK.
The selected writing speed will now be displayed on the Disc Drive view.
AXIS StorPoint CD+ User’s Manual
135
Problems Running CD-ROM Software
Drive Letter Mapping
If you have inserted a CD-ROM successfully, but the software on it refuses
to run or produces error messages, the software may expect the CD-ROM
data to be at root level. This is often the case with installation programs.
In the NetWare and Microsoft & IBM networking environments, you then
need to map that disc to a drive letter of its own. In NetWare, the Show
All Volumes parameter must be enabled.
MSCDEX Driver
Some CD-ROMs, e.g. the single user version of “Computer Select”,
requires the MSCDEX (Microsoft CD-ROM Extension) driver. The volume
is usually released in a network version as well. Axis has developed two
MSCDEX emulation programs:
• AXCDEX for Windows 95
• AXISCDEX for Windows for Workgroups
The required software is available on the Axis Web Site at
http://www.axis.com/products/software. The MSCDEX emulation makes a
CD-ROM on the StorPoint CD+ look as if it was locally connected to the
PC.
Single User Version
If the CD-ROM is a single user version, refer to your software license for
the terms of use. You can restrict the number of simultaneous users to one
by setting the User Limit parameter. Refer to “General Disc Settings” on
page 35.
Default Names
Some applications look for information on the CD-ROM using its default
name - if you have set a volume name it may not recognize the disc and
fail to run.
Difficulties Locating the StorPoint CD+ in NetWare
There are basically two different frame types on Ethernet networks,
Ethernet II or IEEE 802.3. The IEEE 802.3 frame can be encapsulated in an
IEEE 802.2 LLC frame or a SNAP frame. All four frame types are enabled
by default with the value auto, which means that your StorPoint CD+
automatically adapts to the frame type used on the network. This will
meet most requirements. Frame types that are not in use in your network
will not be used by the StorPoint CD+.
However, depending on your network, you may want the StorPoint CD+
not to operate on some frame types. If your network has multiple sections
with different frame types on some of the sections, then the StorPoint
CD+ might log on to the wrong network section and adapt to a frame type
incompatible with the intended network section. For this reason, you have
the option to disable those frame types by changing the parameter from
auto to off.
136
AXIS StorPoint CD+ User’s Manual
Alternatively, it is possible to use the eight digit network number
appropriate to your segment of the network, in the form xx-xx-xx-xx
(e.g. 00-3F-B5-01). In all normal cases this will not be necessary since
autodetection will handle most cases. However, this must be done by
directly editing the config.ini file located in the
System/ServerProperties folder using a text editor. Although you
cannot enter the network number from a Web browser, you can display
the frame type and change the value to auto or off, if required.
Problems Connecting to the StorPoint CD+ in a PureIP Environment
SLP Parameters
In the PureIP environment, make sure your StorPoint CD+ is properly
configured for SLP. SLP (Service Location Protocol) is a protocol for
locating resources in IP networks.
You can specify a SLP scope list and directory agents for the StorPoint
CD+. From the StorPoint CD+ Web interface, you find the SLP settings on
the Network Settings | Detailed View | TCP/IP page.
Note:
Time Synchronization
o
If you are using DHCP on your network, the SLP parameters can also be
included in the DHCP scope. However, we recommend that you specify the
SLP settings in the StorPoint CD+ parameter list instead.
Make sure you have specified the time synchronization source properly.
Note that in the PureIP environment, you cannot use SAP for automatic
time synchronization. You can specify the name or IP address of the time
server. You find the time source setting on the Network Settings |
Detailed View | NetWare page.
Insufficient Access Rights in NetWare NDS
When you install the first StorPoint CD+ in the NDS tree, the StorPoint
CD+ will extend the NDS Schema with a new attribute. This is needed in
order to store the NDS access rights in the NDS tree. To carry out the
schema extension, you must use user account with Supervisor rights to
[Root] object of the NDS tree.
If you do not have Supervisor rights or if schema extensions are not
allowed in your NDS tree, you can instead store the NDS access rights in a
file on a Novell file server.
Follow these steps:
1. Create a directory on the Novell server where you want to store the
access rights.
2. Make sure that your NDS tree is synchronized.
AXIS StorPoint CD+ User’s Manual
137
3. Install the StorPoint CD+ as described in “Installation as an NDS Server” on
page 44. Make sure you set the NDS Rights Storage parameter to File and
specify the name of the file where you want to store the access rights on
the Novell file server.
4. Logout and login again in order to obtain all the necessary rights on the
StorPoint CD+ server object.
5. Start NWAdmin. The server object just created will appear in the context
where you installed the StorPoint CD+.
6. Add the StorPoint CD+ server object as a trustee with Read, Write, Create,
Erase, Modify and File Scan rights to the directory where you want to store
the access rights.
The StorPoint CD+ will create the file once you start adding trustees.
138
AXIS StorPoint CD+ User’s Manual
Name Resolution Problems in Windows (SMB)
If you cannot find your StorPoint CD+ on your Windows (SMB) network,
the reason might be a name resolution problem.
Find Computer
Flush Name Cache
When you have installed the StorPoint CD+, it takes a while before it
shows up in the browser list in Network Neighborhood. You can either
just wait for the browser list to be updated, or you can accelerate the
process using the Find Computer function available in Windows
95/98/Me and NT/2000/XP. Alternatively, you can perform a manual
mapping, e.g. use the command NET USE X: \\AXISnnnnnn\Volumes.
Use the command NBTSTAT -R to flush your machine's name cache.
Workgroup
Note that the StorPoint CD+ cannot be a master browser server in a
workgroup. It is not possible to place the StorPoint CD+ or a group of
StorPoint CD+ servers in a single workgroup without Windows machines
running file and/or print sharing.
Use WINS or LMHOST
If you are using NBT and try to access the StorPoint CD+ over a router,
e.g. the StorPoint CD+ is located on a segment remote from your
computer, you must use WINS or LMHOST. The recommended method is
WINS. Provided that you have set the WINS parameters correctly, you
should be able to access the StorPoint CD+ over routers. If this fails, check
the following:
1. Make sure the StorPoint CD+ has been registered in your WINS database
located on the Windows NT/2000 server. If the StorPoint CD+ is
registered and you still cannot see or access it over the Network
Neighborhood, you probably have other name resolution problems on
your network.
2. Ping the unit via its IP address to make sure that you have TCP/IP
connectivity.
3. Ping the unit using the SMB server name (NetBIOS) to check that the name
resolution works.
4. If you are using WINS, try a “static mapping” where you connect the IP
address of the StorPoint CD+ to its NetBIOS name. Note that if you used
DHCP, you should add a reservation where you connect the MAC address
of the StorPoint CD+ to a reserved IP address. It is often recommended that
you use these types of settings for server equipment. Refer to your Windows
NT/2000 server manuals for more information on this.
AXIS StorPoint CD+ User’s Manual
139
Problems Locating the Domain Controller in Windows (SMB)
If there is a problem locating the primary domain controller when using
user-level security mode in Windows (SMB), all users will be denied
access to the StorPoint CD+.
Web Browser
You can verify the configuration settings from the StorPoint CD+ web
interface. Within the Administration Web pages, click Network Settings,
Detailed View, and select the Windows (SMB) tab to do that.
Local Administrator
Account
In Windows NT/2000, you can correct the problem by logging on to the
StorPoint CD+ as local administrator. Note that the local administrator is
not the same as an Administrator with an account on the domain.
In the Map Network Drive dialog, specify the following:
Path:
The StorPoint CD+ name
Connect as:
Server name\Administrator
Password:
The password set in the
ServerPassword parameter
Example:
The host name of the StorPoint CD+ is cdserv.
Path:
Connect as:
Note:
140
o
\\cdserv\root
cdserv\Administrator
In Windows 95, you cannot tell the SMB client to change domain and user
when you are already logged in. Therefore, you cannot use the local
administrator account to solve domain problems in the Windows 95
environment
AXIS StorPoint CD+ User’s Manual
Appendix C
Upgrading the StorPoint CD+
This section includes the following information:
Task
See ...
Obtaining new software
page 141
Upgrading the firmware
page 142
Extending the RAM memory
page 145
Obtaining New Software
The following software for the StorPoint CD+ can be updated free of
charge:
Note:
Over the Internet
Your Dealer
•
•
•
The StorPoint CD+ software held in Flash memory
AXIS StorPoint Disco
AXIS ThinWizard
o
Stay current on the latest news, products, solutions and software upgrades
from Axis. Register for updated information via e-mail from Axis at the
Axis web site at www.axis.com
Check the Axis web Site at http://www.axis.com/, where you can
download the latest versions of the software. A link to the Axis web Site
is available from the StorPoint CD+ web pages.
Contact your dealer to check if there have been any new issues of the
software. You should have your present version numbers ready to
compare against the latest software issues from Axis.
AXIS StorPoint CD+ User’s Manual
141
Upgrading the Firmware
Using
Windows Explorer
Drag-and-Drop
The StorPoint CD+ firmware can easily be upgraded by using the
Windows Explorer drag-and-drop.
To upgrade using Windows Explorer, you need the following:
•
The file with the new StorPoint CD+ software. The name of this file is
of the form product_version.bin, e.g. cdplus_600.bin for the
StorPoint CD+ software release 6.00.
• A computer running Windows Explorer.
Follow these steps to upgrade the StorPoint CD+ by using drag-and-drop:
1. Start the Windows Explorer.
2. Find the StorPoint CD+.
3. Expand the Root and System folders.
4. Copy the new firmware file to the Flash folder.
System
DeviceProperties
Flash
ServerProperties
VolumeProperties
Volumes
Disc1
Disc2
Disc3
....
Root
or
SYS
5. Wait for the copy to complete.
Caution!
142
o
The StorPoint CD+ will automatically restart when the upgrade is
complete. It is very important that you do NOT press the Power button
during the upgrade.
AXIS StorPoint CD+ User’s Manual
Using AXIS
ThinWizard
The AXIS ThinWizard enables batch upgrading of several AXIS servers.
The program retrieves the new software from the Axis Web Site
automatically.
For more information about AXIS ThinWizard, refer to “Event Log” on
page 109.
Follow these steps to upgrade the StorPoint CD+ using AXIS ThinWizard:
1. Start the Web browser and enter the name or IP address of the AXIS
ThinWizard server in the location/address field.
Note:
o
If the AXIS ThinWizard server is installed on a port other than 80, you must
add :<port number>/ to the URL.
Example:
http://192.16.253.80:8033/
2. Log in to AXIS ThinWizard.
3. Click Manage Network in the main menu.
4. Select the network group that includes your StorPoint CD+. Note that you
can only update servers that are included in the selected network group.
5. All the detected servers included in the network group are listed. Click
Firmware to start the Upgrade Wizard.
6. Follow the instructions on the screen in order to complete the installation.
Using FTP
The StorPoint CD+ firmware can easily be upgraded over the network
using FTP on a TCP/IP network. You will need the following:
•
The file with the new StorPoint CD+ software. The name of this file is
of the form product_version.bin, e.g. cdplus_600.bin for the
software release 6.00 for the Ethernet version of the StorPoint CD+.
• A computer on the network with TCP/IP and FTP.
• The StorPoint CD+ must also be installed on the network with TCP/IP
as described in “Assigning an IP Address” on page 12.
Follow these steps to upgrade the StorPoint CD+ using FTP:
1. Go to the folder that contains the file you are going to download.
2. Log in to the StorPoint CD+ with the command:
ftp <IP address>
where <IP address> is the name or IP address of your StorPoint CD+.
3. You will be prompted for user id and password. Use the user id root, which
has the default password pass.
AXIS StorPoint CD+ User’s Manual
143
4. To change to binary transfer mode, issue the command:
bin
5. Issue the command:
put <software name> flash
where <software name> is the name of the new software, e.g.
cde_500.bin.
6. Wait for the flash memory load to finish. This normally takes 1 to 4 minutes.
The unit will then automatically restart with the new StorPoint CD+
software.
7. Log out using the command quit, bye or exit depending on your FTP
version.
Caution!
144
o
Be careful not to interrupt the file transfer. If the flash loading fails, the
StorPoint CD+ will not be accessible from the other protocols such as
Windows (SMB), Web browser (HTTP) etc. However, you can still access it
via FTP in order to carry out the upgrading once again.
AXIS StorPoint CD+ User’s Manual
Extending the RAM Memory
This section describes how to increase the performance of your StorPoint
CD+ by adding extra memory.
The basic 32 MB of RAM can be increased up to 256 MB. The extra cache
memory will speed-up data flow rates, especially when several users are
accessing the same disc.
Memory Modules
Supported DIMM
Modules
Installation Procedure
Caution!
You can add one module of 64, 128 or 256 MB in size.
o
If a module is connected, the mounted 32 MB SDRAM will become
inactive.
•
•
•
•
•
•
•
•
•
•
SDRAM
PC100 or PC133
CL2 or CL3 (CL2 preferred)
168 pin DIMM module
64 bits of Data
Unbuffered
Non parity (Non ECC)
+3.3V
Refresh 4k/64ms or 8k/64ms
SPD (Serial Presence Detect)
Follow these steps to add the memory module:
o
Always use an antistatic bracelet when handling the memory modules.
1. Unplug the power supply from the StorPoint CD+
2. Remove the server casing.
3. Release ejector latches on DIMM socket X4 by pushing them outwards from
the socket. Slide the DIMM module into socket X4 at an angle of 25 degrees.
When fully inserted, the ejector latches will automatically lock the DIMM
module into place .
4. Replace the server casing.
5. Power up the StorPoint CD+. The new memory module is automatically
identified and the usage optimized by the StorPoint CD+.
AXIS StorPoint CD+ User’s Manual
145
Appendix D Tower and Drive Installation
This appendix includes the procedures for installing the StorPoint CD+ in
a tower and connecting the drives.
Hardware Inventory
Unpack and inspect all parts for damage. Contact your dealer if anything
is missing. All packaging materials are recyclable.
The standard delivery includes the following:
146
Hardware
Description
Part Number
CD-ROM Server
AXIS StorPoint CD+ IDE/T
0150-001-01
AXIS StorPoint CD+ SCSI/T
0151-001-01
AXIS StorPoint CD+ Dual SCSI/T
0152-001-01
AXIS StorPoint CD+ BASIC SCSI/T
0153-001-01
AXIS StorPoint CD+ BASIC Dual SCSI/T
0154-001-01
Screw /Washer kit
(To attach the server unit)
18235
Product Label
(To be attached to the back of the tower.)
18300
Network Connection
Board
The StorPoint CD+ must be used together with the
network connection board
16273
Shielded Cat 5 Cable
0.5m
(To connect the server unit and the network
connection board)
16283
CD-ROM
AXIS Network Product CD
19114
Printed Material
AXIS StorPoint Instant uP and Running R2.0
19137
AXIS StorPoint CD+ User’s Manual
Physical Description
Familiarize yourself with your StorPoint CD+. This information provides a
useful reference during the installation.
SCSI Server
Front panel indicators
Connector board connector
SCSI connector
Power supply
Network
connection board
Cat 5 cable
Network Connector
Note:
SCSI Connector
Network
connector
Push button
The StorPoint CD+ is equipped with a 100baseTX connector. The internal
network connector will automatically adjust to 10baseT or 100baseTX,
full or half duplex mode. Use a Category 5 UTP cable for the 100baseTX
operation.
o
When the StorPoint CD+ has been installed in a tower, the network
connector is found on the network connection board that appears at the
back of the tower. Note that the network cable cannot be connected
directly to the server unit.
The StorPoint CD+ has a SCSI connector for connecting disc drives,
jukeboxes, changers and LUN expanders. The dual SCSI version is
equipped with two SCSI connectors.
AXIS StorPoint CD+ User’s Manual
147
Push Button
The Push button is used for restoring the StorPoint CD+ parameters to the
factory default settings. See “Restoring Factory Default Settings” on page
130.
LED Indicators
The StorPoint CD+ front panel indicators show the status of the unit. The
indicators have the following functions:
Status - flashes during startup. The light turns solid green when the
StorPoint CD+ is ready for use.
• Drive - flashes to indicate disc access.
• Network - flashes to indicate the presence of network traffic.
• Power - remains on to indicate that power is present in the unit.
Refer to “The Front Panel Indicators” on page 128 for a list of error
conditions.
•
Serial Number
The StorPoint CD+ serial number is found on the labels at the underside
of the server unit and at the back of the tower.
IDE Server
Front panel indicators
Connector board connector
IDE connector
Power supply
Network
connection
board
Cat 5 cable
Push button
Network
connector
148
AXIS StorPoint CD+ User’s Manual
Network Connector
Note:
The StorPoint CD+ is equipped with a 100baseTX connector. The internal
network connector will automatically adjust to 10baseT or 100baseTX,
full or half duplex mode. Use a Category 5 UTP cable for the 100baseTX
operation.
o
When the StorPoint CD+ has been installed in a tower, the network
connector is found on the network connection board that appears at the
back of the tower. Note that the network cable cannot be connected
directly to the server unit.
IDE Connector
The StorPoint CD+ has IDE connectors for connecting disc drives,
jukeboxes, changers and LUN expanders. Three of the four connectors are
placed under the cover.
Push Button
The Push button is used for restoring the StorPoint CD+ parameters to the
factory default settings. See “Restoring Factory Default Settings” on page
130.
LED Indicators
The StorPoint CD+ front panel indicators show the status of the unit. The
indicators have the following functions:
•
Status - Flashes during startup. The light turns solid green when the
StorPoint CD+ is ready for use.
• Drive - Flashes to indicate disc access.
• Network - Flashes to indicate the presence of network traffic.
• Power - Remains on to indicate that power is present in the unit.
Refer to “The Front Panel Indicators” on page 128 for a list of error
conditions.
Serial Number
The StorPoint CD+ serial number is found on the labels at the underside
of the server unit and at the back of the tower.
Installing the StorPoint CD+ in a Tower
The StorPoint CD+ is installed in standard 5.25 inch towers.
Caution!
o
To avoid the risk of electrical chock or other injury, disconnect power from
the tower before removing the chassis.
If not already installed in a tower when delivered, follow these steps:
1. Prepare the tower for the installation, e.g. by removing the chassis.
2. Make a note of the serial number of the StorPoint CD+, or attach the
enclosed product label to the back of the tower. The serial number is found
on the underside label of the StorPoint CD+ and will be needed during the
TCP/IP configuration.
3. Slide the StorPoint CD+ into the tower.
AXIS StorPoint CD+ User’s Manual
149
4. Fix the StorPoint CD+ with the four screws supplied. Use the upper or lower
holes depending on type of tower and mounting.
Caution!
o
The length of the screws must not exceed 0.2 inch (5 mm). If they do, the
internal components of the StorPoint CD+ may be damaged.
5. Attach the power cord to the StorPoint CD+. The power supply connector
is a standard PC 4-pin power supply connector (12 and 5 V DC). Hence, the
power supply available in the tower can also be used to supply the StorPoint
CD+.
6. Connect the external network connector board to the StorPoint CD+ using
the shielded CAT 5 cable.
Important!
o
It is not possible to connect an RJ-45 cable directly between the back of
the StorPoint CD+ server unit and the hub.
7. Mount the board on the back of the tower. The mounting plate on the board
fits into the standard Centronics cut-out available on most towers.
8. Attach the product label to the back of the tower.
150
AXIS StorPoint CD+ User’s Manual
Connecting the Drives to the StorPoint CD+
A single StorPoint CD+ can service up to 7, 8 or 14 CD/DVD-ROM drives
or up to six or seven hard disks, depending on model.
Caution!
Dual SCSI Version
Note:
•
SCSI Server - The SCSI bus allows 7 drives to be connected to the
StorPoint CD+. Each unit on the SCSI bus must have a unique SCSI
address. To work properly, the bus must be electrically terminated at
both ends.
If you want to use the hard disk caching facility, you must connect 1
to 6 hard disk units to the StorPoint CD+. The StorPoint CD+ will
automatically format the hard disks detected on the SCSI bus.
•
IDE Server - The IDE bus allows 8 drives to be connected to the
StorPoint CD+. Each unit on the IDE bus must be assigned as Master or
Slave.
If you want to use the hard disk caching facility, you must connect 1
to 7 hard disk units to the StorPoint CD+. The StorPoint CD+ will
automatically format the hard disks detected on the IDE bus.
o
Always make sure that power is not connected to the StorPoint CD+ or any
of the drives when making changes to the SCSI chain. The SCSI bus or IDE
bus may become damaged if you connect or disconnect any units when the
power is on.
It is recommended that the dual SCSI version of StorPoint CD+ is installed
in a 14 bay tower, i.e. all the drives are housed in the same enclosure with
the SCSI cables built-in.
o
However, if you are using two separate towers, we recommend that the
cable from the StorPoint CD+ to the second tower complies with the
following maximum cable length requirements:
• The cable from the StorPoint CD+ to the connector leaving the first
tower should not exceed 60 cm.
• The cable connecting the two towers should not exceed 50 cm.
Connecting the
SCSI Drives
To connect the SCSI drives to the StorPoint CD+, follow these steps:
1. Connect the SCSI cable to the SCSI connector on the StorPoint CD+.
2. Connect the SCSI cable to the drive(s).
3. Set a unique SCSI address 0 through 6 for each of the connected drives. The
dual SCSI version has two separate buses with addresses 0 through 6
available on each. Refer to the drive documentation for instructions on how
to set the SCSI address on your drives.
Note:
o
The SCSI address of the StorPoint CD+ is 7, and cannot be changed.
AXIS StorPoint CD+ User’s Manual
151
4. Connect an external, preferably active, SCSI terminator to the last drive in
the SCSI chain. If there is only one drive, it is the last one in the chain and
must be terminated. The StorPoint CD+ has built-in SCSI termination which
is always switched on. Therefore, the server must be physically located at
one end of the chain. This is the case for both the single and dual SCSI
versions.
Note:
o
Do not terminate the drives placed between the StorPoint CD+ and the last
drive.
5. Switch the power on to the whole of the tower.
6. The StorPoint CD+ front panel indicators will flash during power-on and
self-test. When the Status indicator stops flashing and turns solid green, the
StorPoint CD+ is ready for use.
Connecting the
IDE Drives
To connect the IDE drives to the StorPoint CD+, follow these steps:
1. Connect the IDE cable to the IDE connector on the StorPoint CD+.
2. Connect the IDE cable to the drive(s).
3. Assign each of the connected drives to Master or Slave. Refer to the drive
documentation for instructions on how to set the device type for your
drives.
Notes:
o
The server must be physically located at one end of the cable.
o
Do not set two drives to master or slave on the same IDE bus.
4. Switch the power on to the whole of the tower.
5. The StorPoint CD+ front panel indicators will flash during power-on and
self-test. When the Status indicator stops flashing and turns solid green, the
StorPoint CD+ is ready for use.
152
AXIS StorPoint CD+ User’s Manual
Appendix E
Technical Specifications
Supported Systems
Novell NetWare
Microsoft Windows
OS/2
TCP/IP
Macintosh
Web Browser
NetWare 3.11, 3.12, 4.10, 4.11 and 5.0.
Windows for Workgroups, Windows 95, Windows 98/Me Windows NT, Windows
2000, Windows XP.
OS/2 Warp 4, IBM Peer for OS/2.
Supports all UNIX/Linux dialects through NFS over UDP/IP on TCP/IP networks.
Mac OS 7.x, 8.x, 9.x using AppleShare 3 or later.
Internet/intranet over HTTP 1.0 and HTML 2.0 compatible browsers.
Supported Protocols
Novell NetWare
Windows and OS/2
UNIX
Macintosh
Web Browser
Network Management
NDS, NCP (IPX, NetWare/IP and PureIP).
SMB over NetBIOS/NetBEUI, SMB over NetBIOS/TCP/IP, WINS/NBNS.
NFS over UDP/IP, TCP, ARP, RARP, BOOTP, DHCP, SNMP, FTP.
AFP over AppleTalk, AFP over TCP/IP.
HTTP over TCP/IP.
SNMP MIB-II and private enterprise MIB. Platform independent configuration
and management via standard Web browser.
Security
Novell NetWare
Windows and OS/2
UNIX
Macintosh
Web Browser
Encrypted passwords. Authorization via file server, including NDS.
User-level or share-level access control.
NFS version 2, PCNFSD authentication via file server.
Encrypted passwords. Password for individual/all discs. User level authentication
via file server.
Password.
Supported File Systems
High Sierra (HSF), ISO 9660, Multisession, ISO 9660 with Rock Ridge or Joliet
extensions, ISO 9660 level 3 support (used by most DVD-ROM, CD/RW and CD-R
packet write), ISO 9660 with Apple extensions, HFS, CD-UDF version 1.0 and 1.5.
Software Updates
Flash memory allows central and remote updating of the StorPoint CD+ software
over the network using Windows Explorer drag-and-drop or FTP over TCP/IP.
Performance
Hardware
Attachments
SCSI CD/DVD-ROM
Drive Connections
IDE CD/DVD-ROM
Drive Connections
Data throughput up to 4000 kB/sec.
CPU: 32 bit RISC controller (ETRAX 100LX). Flash memory: 4 MB.
RAM: 32 MB, expandable up to 256 MB.
RJ-45 (for 100baseTX and 10baseT).
Up to 7 SCSI CD/DVD-ROM drives (14 for the dual SCSI version). Changers are
supported.
Up to 8 IDE CD/DVD-ROM drives.
Hard Disk Caching
Caching Options
Caching Speed
Compatible
CD-ROM Drives
Performance caching (Partial, Mirror, None) Archiving (Manual, Automatic)
Mirror/Archive caching performance: 4 min/650 MB.
Standard SCSI or IDE CD-ROM drives. Towers and jukeboxes with LUN based
addressing.
Support for firmware upgrade to Pioneer Disc Changer DRM-6324X via the
StorPoint CD+ Web interface.
AXIS StorPoint CD+ User’s Manual
153
SCSI Hard Disk
Drive Connections
Connector
Speed
IDE Hard Disk
Drive Connections
Connector
Speed
Power Supply
Dimensions
Weight
6 hard disk drives (13 for the dual SCSI version) for caching of CD/DVD-based
data.
Narrow 50-pin header.
Asynchronous (< 5 MB/sec), synchronous (5 MB/sec), fast SCSI (10 MB/sec) or
ultra fast SCSI (20 MB/sec).
7 hard disk drives for caching of CD/DVD-based data.
Four 40 pin header.
DMA Mode 2 (16.67 MB/s), PIO Mode 4 (16.67 MB/s).
Via 4-pin power connector:
IDE without DIMM module - 12V DC(0W) and 5V DC (6W)
IDE with a DIMM module - 12V DC (0W) and 5V DC (11W)
Single SCSI version without a DIMM module - 5V DC (8W)
Single SCSI version with a DIMM module - 5V DC (13W)
Dual SCSI without a DIMM module - 5V DC (13W)
Dual SCSI with a DIMM module - 5V DC (18W)
Height: 1.7 in (4.3 cm), Width: 5.9 in (14.9 cm), Depth: 8.8 in (22.4 cm).
2 lbs (0.9 Kg).
Environmental
SCSI
IDE
Temperature: 40-105°F (5-40°C).
Humidity operational: 20-80% RHG, non-condensing.
Temperature: 40-105°F (5-40°C).
Humidity operational: 20-80% RHG, non-condensing.
Approvals
EMC
Safety
Warranty
SCSI - CE: EN 55022/1998, EN 55024/1998. FCC Subpart B Class B.
IDE - CE: EN 55022/1998, EN 55024/1998. FCC Subpart B Class B.
EN 60950, UL1950. Approved power supply for all countries.
3 years.
All specifications are subject to change without prior notice.
154
AXIS StorPoint CD+ User’s Manual
Appendix F
Glossary
AFP
AppleTalk Filing Protocol. A network file system that supports HFS
specific entities, such as data forks and finder metadata.
AIX
Advanced Interactive eXecutive. A version of the UNIX operating system
from IBM that runs on various IBM computers including Mainframe
systems.
ARP
Address Resolution Protocol. A protocol within TCP/IP networks that
allows a host to find the physical address of a node on the same network.
ARP cannot be used over routers.
BOOTP
Boot Protocol. A TCP/IP protocol, which allows an Internet node to
discover certain startup information such as its IP address. A request
made to an active BOOTP daemon initiates a search of the Boot Table for
an entry matching the unit’s Ethernet address. If a matching entry is
found, the daemon then downloads the IP address to the device.
BSD
Berkeley Software Distribution. The University of California, Berkeley
additions to the UNIX operating system.
DBCS
Double Byte Character Set.
DHCP
Dynamic Host Configuration Protocol. A system based on network
interface card addresses for allocating IP addresses and other
configuration information for networked systems. It provides automatic
but temporary assignment of IP addresses from a central pool.
Distinguished Names
Names in the NDS Directory tree have two name types: typeful or
typeless. A typeful name includes the name types (OU, O, etc.) when
identifying the distinguished name of the object. A typeless name
excludes the name types. You can use either syntax when specifying the
parameters.
o
Example 1 (NDSServerContext parameter syntax):
Typeful distinguished name: .OU=Corp.O=Acme
Typeless distinguished name: .Corp.Acme
Example 2 (NDSAdminName parameter syntax):
AXIS StorPoint CD+ User’s Manual
155
o
Typeful distinguished name: .CN=Admin.O=Acme
Typeless distinguished name: .Admin.Acme
Tree Name = ACMECORP
Corp
Servers
Root
[Root]
Acme
Organization
O=Acme
Organizational Unit
OU=Corp.O=Acme
Users
Sales
Servers
Organizational Unit
OU=Sales.O=Acme
Users
Objects in an NDS Directory Tree
DNS
Domain Name Service. Reflects the server names and addresses within a
network.
DSS
Domain SAP/RIP Services. Provides a source of SAP/RIP information in a
NetWare environment.
DVD
Digital Versatile Disk. An optical disk that store up to 16 times more
information than a standard CD-ROM disk. Developed for video,
multimedia etc.
FAT
File Allocation Table. A file system originally invented for the DOS
operating system.
Flash Memory
FTP
File Transfer Protocol. The TCP/IP protocol used for logging into a
network and transferring files.
HFS
Hierarchical File System. This is a file system used om Macintosh discs.
HTML
Hypertext Markup Language. A standard hypertext language used for
creating Web pages and other hypertext documents.
HTTP
Hypertext Transfer Protocol. The TCP/IP protocol for Web based
communication.
IDE
156
Flash Memory is a memory chip that, like ordinary ROM memory, keeps
its contents even when the power is turned off. What makes it unique is
the possibility to erase its contents and write new data to it. The software
that runs on your StorPoint CD+ is stored in Flash Memory, i.e. when
software updates are available, you can update the StorPoint CD+ without
having to replace any parts.
Integrated Device Electronics. A high-speed parallel interface, used to
connect a computer to peripheral devices using channels.
AXIS StorPoint CD+ User’s Manual
IP
Internet Protocol. The TCP/IP session-layer protocol that regulates packet
forwarding by tracking Internet addresses, routing outgoing messages and
recognizing incoming messages.
LED
Light Emitting Diode. The LED indicators on the StorPoint CD+ front
panel indicate the status of the unit.
MIB
Management Information Base. A database of network configuration
information used by SNMP and CMIP to monitor or change network
settings.
NCP
NetWare Core Protocol. Network clients use the NCP to request services of
servers, and servers use NCP to provide services, such as file and print
services.
NDS
NetWare Directory Services. Manages network resources such as NetWare
servers and volumes.
NIS
Network Information Services. The security and file-access databases on
UNIX systems, previously known as Yellow Pages.
NTP
Network Time Protocol. Used by Internet time servers and their peers to
synchronize clocks, as well as automatically organize and maintain the
time synchronization subnet itself.
RARP
Reverse Address Resolution Protocol. A TCP/IP protocol governing the
translation of a Data-Link Control (DLC) address to an IP address. A
request made to an active RARP daemon initiates a search of the Ethernet
Address Table for an entry matching the unit’s Ethernet address. If a
matching entry is found, the daemon then downloads the IP address to
the device. RARP operates within a single network segment only, i.e. it
does not work over routers.
RISC
Reduced Instruction Set Computing. A processor that recognizes only a
limited number of assembly-language instructions.
SAP
Service Advertising Protocol. A network name advertising service that
e.g. file servers can use for advertising their existence to network clients.
SCSI
Small Computer System Interface. A high-speed parallel interface, used to
connect a computer to peripheral devices using just one port.
SLP
Service Location Protocol. A protocol used for advertising and
discovering network services, e.g. printers and CD servers.
SMB
Server Message Blocks. A protocol that makes use of NetBIOS.
SNMP
Simple Network Management Protocol. A TCP/IP protocol for managing
and monitoring nodes on a network.
AXIS StorPoint CD+ User’s Manual
157
TCP
Transmission Control Protocol. The connection-oriented, transport-level
protocol used in the TCP/IP suite of protocols.
UDF
Universal Disk Format. A specification developed by OSTA (Optical
Storage Technology Association) for use in optical storage devices. The
file format for DVD.
UNIX
URL
158
A 32-bit multitasking, multiuser operating system originally developed by
AT&T.
Uniform Resource Locator. A way of specifying the location of publicly
available information on the Internet.
WINS
Windows Internet Name Service. Allows Windows-based clients to locate
NetBIOS resources on TCP/IP networks. When using TCP/IP, the computer
name must be resolved to an IP address. WINS is designed to eliminate
the need for broadcasts in order to resolve computer names to IP
addresses. It provides a dynamic database that maintains computer name
to IP address mappings.
Wizard
A form of user assistance that automates a task through a dialog with the
user in order to speed up operation. These tasks are typically complex and
require experience.
AXIS StorPoint CD+ User’s Manual
Index
Index
A
access rights
FTP 80
Macintosh 73
NetWare bindery 51
NetWare NDS 50
UNIX 67
Web (HTTP) 82
active converter 134
Administration Web pages 21
AFP 71
AIX 16
archived discs 104
archiving 100, 101
ARP 14, 16
Asian languages 41
assigning an IP address 12
authentication server 51
AutoMap folders 96
AutoMapping 95
automatic archiving 107
AXCDEX 136
AXIS ThinWizard 113, 143
AXISCDEX 136
B
bindery server 49
BOOTP 17
BSD Systems 16
C
cache modes 101
Cached Discs View 108
caching 100
CD Grouping 89
CD/RW 153
CD-R packet write 153
CDRecordable drives 85
checking the memory 132
concurrent connections 51
config.ini 115, 125
configuration
FTP 78
Microsoft & IBM networks 27
NetWare 43
UNIX 66
Web (HTTP) 81
configuration file 115, 125
AXIS StorPoint CD+ User’s Manual
configuration tools 123
connecting the drives 151
connecting to the network 11
connection problems 133
converter 134
customized link 82
D
data throughput 153
DBCS encoding 41
default password 21, 24
default settings 130
defining shares 31
DHCP 12, 17
diagnostic test 132
Diagnostics page 132
directory agents 137
directory structure 121
disc
CD/R and CD/RW 85
copy to 86
format 86
disc changer flutter 134
disc drive
recording speed 135
disc problems 133
disc settings 35, 54, 69
Discs & Drives page 104
Discs and file system View 104
distinguished name 155
domain controller in SMB 127, 140
DOS
access control 28
configuration 27
protocol settings 28, 73
server name 27
Drives View 105
dual SCSI 7, 151
DVD-ROM 153
E
eject function 105, 107
error conditions 129
error messages
accessing discs 133
accessing the StorPoint CD 133
NDS installation 49
running CD-ROM software 136
errors 127
Ethernet address 12
Ethernet II frame 136
159
Index
event log 49, 109
Event Log page 49, 109
extending the RAM 145
external link 82
F
factory default settings 130
Fast Ethernet 147, 149
file cache 101
file rights
general settings 35, 54, 69
Macintosh 73
UNIX 67
Web (HTTP) 82
File View page 21
Filer 52
finding CD/DVDs 91
Flash memory 141
formatting hard disks 102
frame types 136
front panel indicators 128, 148, 149
FTP 124
access control 80
configuration 78
protocol settings 78
FTP commands 78
FTP user name 80
H
hard disk caching 100
hardware installation 146
hardware inventory 146
high byte 134
High Sierra (HSF) 153
I
IBM Peer for OS/2 38
IEEE 802.2 frame 136
IEEE 802.3 frame 136
indicators 128, 148, 149
installing the hardware 146
installing the StorPoint CD 10
insufficient rights in NetWare NDS 137
Internet 141
IP address 12
ARP 14, 16
BOOTP 17
DHCP 12, 17
RARP 18
Web browser 13
ISO 9660 153
160
L
launch objects 93
LED indicators 128, 148, 149
LMHOST 139
local administrator in SMB 140
logfile.txt 49, 109
long file names in DOS 41
M
Macintosh
access control 73
configuration 71
protocol settings 71
server name 71
zone 72
managing security
Macintosh 73
NetWare 50
NetWare bindery 51
NetWare NDS 50
UNIX 67
Web (HTTP) 82
manual archiving 105
map command 65
memory check 132
memory expansion 145
Microsoft & IBM networks
configuration 27
mirroring 101
monitoring 109
MSCDEX driver 136
Multisession 153
N
name resolution problems 139
narrow device 134
NBT 28
NDS schema extension 44, 137
NDS server 44
NetBEUI 28
NetBIOS 28
NetWare
access control 50
accessing the discs 54
authentication server 51
bindery server 49
configuration 43
NDS server 44, 50
server name 43
Supervisor 53
NetWare IPX 25
AXIS StorPoint CD+ User’s Manual
Index
NetWare/IP 25, 43
network connection board 147, 149, 150
network connector 147, 149
network protocols 153
network settings 26
FTP 78
Macintosh 71
Microsoft & IBM networks 28, 73
NetWare 45
UNIX 66
Web (HTTP) 81
NFS
access control 67
protocol settings 66
NFS export list 67
NMS 111
normal conditions 128
NT/2000 environments
managing access rights 32
NWAdmin 51
O
obtaining new software 141
organizing CD/DVDs 91
Organizing Discs 91
Organizing discs 89
OS/2
access control 28
configuration 27
protocol settings 28, 73
server name 27
OS/2 environments
managing access rights 33
P
parameter list 115
partial caching 101
partition table 102
password 24
recordable discs 88
performance 132, 153
performance caching 101
physical description 147
ping command 16
power supply 154
problems 127
problems finding the hard disk 134
ProtectIP parameter 13
protocol settings 26
FTP 78
Macintosh 71
AXIS StorPoint CD+ User’s Manual
Microsoft & IBM networks 28, 73
NetWare 45
UNIX 66
Web (HTTP) 81
public folders 98
PureIP 25, 43, 137
Push button 148, 149
R
RARP 18
recordable discs 85
restoring default settings 130
Rock Ridge 153
S
SAP 25
schema extension 44, 137
SCSI address 151
SCSI chain 134, 152
SCSI terminator 152
security management
Macintosh 73
NetWare 50
NetWare bindery 51
NetWare NDS 50
UNIX 67
Web (HTTP) 82
serial number 12, 148, 149
Server Manager 31
server name
Macintosh 71
Microsoft & IBM networks 27
NetWare 43
SMB 27
Server password 24
setting the IP address 12
ARP 14, 16
BOOTP 17
DHCP 12, 17
RARP 18
Web browser 13
shared drive 107
share-level mode 34
shutdown 23
single user version 136
SLP directory agent 17
SLP scope 137
SLP scope list 17
SMB server name 27
SNAP frame 136
SNMP 111
161
Index
Station Restrictions 51
statistics 110
Statistics page 110
Status indicator 11, 129, 152
Supervisor 53
Support services 4
supported protocols 153
supported systems 153
synchronizing the NDS tree 44
System folder 122
T
TCP/IP 12, 26
technical specifications 153
text files 125
ThinWizard 113, 143
This StorPoint page 22
throughput 9
time synchronization 25
time zone 25, 120
tower installation 149
troubleshooting 127
typeful name type 155
typeless name type 155
managing shares 31
configuration 27
NT/2000 environments 32
OS/2 environments 33
protocol settings 28, 73
server name 27
WINS 139
WINS database 133
wizard
NetWare 45
TCP/IP 26
Web (HTTP) 81
Windows (SMB) 28, 73
writable discs 85
Z
zone 72
U
UNIX
access control 67
configuration 66
protocol settings 66
upgrading 141
upgrading the firmware 142
user-level mode 31
user-level security in SMB 140
V
volume name 123
Volumes folder 123
W
Web (HTTP)
access control 82
configuration 81
Web browser 13
wide device 134
wide-SCSI hard disks 134
Windows
access control 28
share-level 28
user-level 28
access-control
162
AXIS StorPoint CD+ User’s Manual