1
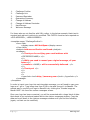
Frequently Asked Questions
Table of Contents
DNS Settings ............................................................................................................................................ 3
MX record .............................................................................................................................................. 3
SPF record ............................................................................................................................................. 3
Configuring Outbound .......................................................................................................................... 3
Smart host configuration for Exchange 2003 ......................................................................... 3
Smart host configuration for Exchange 2007 ......................................................................... 3
Smart host configuration for Exchange 2010 ......................................................................... 4
Smart host configuration for Exchange 2013 ......................................................................... 4
Outbound configuration when using Office 365 ..................................................................... 5
Outbound configuration when using Google Apps................................................................. 5
Configuring Users ................................................................................................................................... 6
How to add an alias ........................................................................................................................... 6
How to change a user’s password ............................................................................................... 6
How to add email addresses and domains to allow list....................................................... 6
Branding..................................................................................................................................................... 6
How to add a custom logo .............................................................................................................. 6
Custom message templates ........................................................................................................... 6
Enterprise Settings ................................................................................................................................ 8
How to add domains ......................................................................................................................... 8
How to view delivery results for a message ............................................................................ 8
Adding users via LDAP setup ......................................................................................................... 8
How to add entries to permitted relay ....................................................................................... 8
Manually adding users ...................................................................................................................... 8
How to run a configuration test .................................................................................................... 9
1|Page
www.avg.com
How to update settings for all existing users .......................................................................... 9
How to resend welcome messages ............................................................................................. 9
How to enable permitted languages ........................................................................................... 9
How to enable permitted countries ............................................................................................. 9
Adding domains to allow lists when using BATV and PRVS ............................................... 9
SMTP Errors Codes and Solutions .................................................................................................. 10
550 5.1.0 Address Rejected ......................................................................................................... 10
550 5.1.1 User Unknown............................................................................................................... 10
553 Sorry, relay of mail is not allowed. (#5.7.1) ............................................................... 10
554 Denied.......................................................................................................................................... 11
451 Connection Error ...................................................................................................................... 11
451 Connection Refused ................................................................................................................ 11
5.3.4 Message Size Exceeds Fixed Maximum ....................................................................... 11
5.7.1 Message Rejected as Spam by Content Filter ........................................................... 11
5.7.1 SPF Not Authorized .............................................................................................................. 12
4.3.1 Insufficient System Resources ........................................................................................ 12
Network Security Settings ................................................................................................................ 13
Configuring access control/enforcing IP restrictions .......................................................... 13
Exchange 2007 & 2010 .............................................................................................................. 13
Exchange 2003 .............................................................................................................................. 13
2|Page
www.avg.com
DNS Settings
MX record
The MX record for AVG AntiSpam should point to mx1.avgcloud.net and
mx2.avgcloud.net [preference=0].
SPF record
You will want to make sure that your domain has the following added to its SPF:
v=spf1 ip4:100.42.120.96/27 ip4:100.42.115.0/27 ip4:208.70.208.0/22 ~all
Configuring Outbound
Smart host configuration for Exchange 2003
1.
2.
3.
4.
5.
6.
7.
Open the Exchange System Manager on the Exchange Server
Open the Protocols folder in the Administrative Groups area
Open the SMTP folder
Right-click on the SMTP Virtual Server and select Properties
Select Advanced in the SMTP Virtual Server Properties
Add outbound.avgcloud.net to the smart host box, Click OK and exit.
Select the Routing Groups folder (NOTE: the Routing Groups folder is usually
under Administrative Groups)
8. Select Connectors
9. Right-click SMTP Connector and select Properties
10. On the General tab it will say “Use DNS to route each address space on this
connector”
11. Select the radio button that says “Forward all mail through this connector to
the following smart hosts”
12. Enter this smart host address: outbound.avgcloud.net
13. Restart the SMTP service
Smart host configuration for Exchange 2007
1.
2.
3.
4.
5.
6.
Open the Exchange Management Console on the Exchange Server
Go to Organization Configuration
Right-click on Hub Transport then right-click on the Connectors tab
Select Properties and select the Network tab
Select the “Route mail through the following smart host” radio button
Add your recommended outbound DNS setting to the smart host text box;
this entry will be similar to outbound.avgcloud.net
7. Click OK on all selections and exit; clicking Cancel will remove changes
3|Page
www.avg.com
Smart host configuration for Exchange 2010
1. Make sure that the following components are installed in MS Exchange 2010
(open MS Exchange 2010 management console for this): Mailbox Role, Client
Access Role, Hub Transport Role
2. Right-click the container Hub Transport and select the item New Send
Connector (if you already have a send connector set up you can skip to step
5 and alter the smart host address)
3. Specify a smart host name, choose type Custom and click Next
4. Type * in the Address field, leave the default Cost value (1), check the option
to include all sub domains and click OK
5. Select the “Route mail through the following smart hosts” option and use
outbound.avgcloud.net
6. Click next, select your hub transport server and click next
7. Verify the created smart host configuration and click New if it is correct
8. Click Finish when you’re done creating the smart host
9. In the Management Console tab, Send Connectors should contain the created
smart host as Enabled
Smart host configuration for Exchange 2013
1.
2.
3.
4.
5.
6.
7.
8.
9.
Open the Exchange Administration Center (EAC)
In the left hand column, select Mail Flow
From the top menu bar choose Send Connectors
Click the Add (+) button; this will open the New Send Connector wizard
Enter the name as AVG
Change the Type to Custom and click Next
In the next step, change the option to “Route mail through smart hosts”
Click the Add button (+) underneath to add a new smart host
Enter outbound.avgcloud.net in the “Fully qualified domain name (FQDN)”
field and click Save
10.In the smart host authentication window, choose NONE and click Next
11.In the Address Space window, the Type should already be SMTP and cost
should be 1
12.Enter * in the “Fully qualified domain name (FQDN)” field; this means all mail
sent to this connecter (for all domains) will be routed through this smart host
13.Click Save and then click Next in the Send Connector wizard
14.For “Source server” click Add (+) and add the servers that can send via this
connector
15.Click OK and then Finish
The basic setup is now complete and you should be able to send email messages
from your Exchange server and network.
4|Page
www.avg.com
Outbound configuration when using Office 365
In order to configure an outbound smart host, you must create an outbound FOPE
connector to your organization.
1. In the FOPE Administration Center, click the Administration tab, and then
click the Company tab
2. In the Connectors section, for the Outbound Connectors, click Add; the Add
Outbound Connector dialog box opens
3. In the Name field, enter a descriptive name for the outbound connector ( ex:
AVG AntiSpam)
4. In the Description field, enter additional descriptive information about the
outbound connector (ex: Sending outbound through AVG AntiSpam)
5. In the Recipient Domains field, type the *.* wildcard characters to signify
that this outbound connector will be applied to all domains to which FOPE
sends email
6. Select the “Deliver all messages to the following destination” check box, and
then specify the fully qualified domain name as outbound.avgcloud.net
7. In the Transport Layer Security (TLS) Settings section, select Opportunistic
TLS (FOPE attempts a TLS connection, but automatically rolls over to an
SMTP connection if the receiving email server is not configured to use TLS)
8. Click Save
Outbound configuration when using Google Apps
To configure outbound email to send through AVG AntiSpam, please reference
http://support.google.com/a/bin/answer.py?hl=en&answer=178333&topic=268386
6&ctx=topic and change the smart host to outbound.avgcloud.net
In AVG AntiSpam, add the IPs of the servers that are going to submit the messages
to us under the trusted hosts:
1.
2.
3.
5|Page
Log in at https://cloudcare.avgcloud.net
Go to Costumers, choose the company you are setting this up for, then
go to Enterprise Options > Enterprise Properties
Under Trusted Hosts, add the IPs
www.avg.com
Configuring Users
How to add an alias
•
•
Click on the primary email address of the user
Click User Options > Addresses > Add New Alias
How to change a user’s password
•
•
Click on the primary email address of the user
Click User Options > Password
How to add email addresses and domains to allow list
•
•
•
•
•
Log into AVG AntiSpam (https://cloudcare.avgcloud.net) using your solution
provider credentials
Click on Customers and select the customer you would like to add entries for
Click on Enterprise Options > Allow List
Click New Entry
You can add a full email address to block an individual sender or a domain
name to block an entire domain
Branding
How to add a custom logo
•
•
•
•
•
Log into AVG AntiSpam (https://cloudcare.avgcloud.net) using your solution
provider credentials
Click on Customers and select the customer you would like to add a custom
logo for
Click on Custom Appearance
Custom Link Name is what your customers would see (EX: For more
information contact COMPANY NAME)
Custom Link URL – Would be the website users would be directed to when
they click on the link name
Custom message templates
Log into the AVG AntiSpam management console (https://cloudcare.avgcloud.net),
click Customers, then choose a customer and click Enterprise > Custom Messages.
Once there, click the Load Default button. You will find the following default
customizable templates spread throughout the XML code:
6|Page
www.avg.com
1.
2.
3.
4.
5.
6.
7.
8.
Challenge Confirm
Challenge Link
Password Reminder
Quarantine Summary
Change of Address
Change of Address Reminder
Hard Bounce
Welcome Message
For those who are not familiar with XML coding, in the below example, black text is
required and red text is able to be modified. The CAPITAL functions are required ex:
<OLD-ADDRESS>, <NEW-ADDRESS>.
<template name="ChallengeConfirm">
<from-field>
<display-name>AVG AntiSpam</display-name>
</from-field>
<subject>Address verification confirmed</subject>
<message>
<l>Thank you for verifying your email address with
<ENTERPRISE-NAME/>.</l>
<l/>
<l>While you need to resend your original message, all your
future</l>
<l>emails to <NAME/> will be successfully delivered. </l>
<l/>
<l>Thank you! </l>
<l/>
<l/>
<l>
<hyperlink><href>http://www.avg.com</href></hyperlink></l>
</message>
</template>
In order to insert your logo into each template message, you will need to save your
logo as a *.gif or *.jpg image less than 5 KB in size and convert it to Base64. The
easiest way to convert your logo to Base64 is by clicking the “Encode image as
Base64 XML” link from the custom messages screen.
Once your logo has been converted, you will be presented with a large block of data
that needs to be copied and pasted within the custom messages window. Copy the
data and scroll down in the custom messages window until you find the following
(again, red text can be modified):
7|Page
www.avg.com
<logo>
<link-uri>http://www.avg.com</link-uri>
<alternate-text>AVG AntiSpam</alternate-text>
<position>top</position>
<data>
Paste your Base64 data between the <data> and </data> tags and click the Save
button. To view the new changes, you can resend the welcome message or
quarantine summaries to yourself.
Enterprise Settings
How to add domains
1.
2.
3.
4.
Log into AVG AntiSpam (https://cloudcare.avgcloud.net) using your solution
provider credentials
Click the customer you would like to add the domain for
Click Enterprise > Enterprise Domains
Click Add Domain
How to view delivery results for a message
1.
2.
3.
4.
Log into AVG AntiSpam (https://cloudcare.avgcloud.net)
Click the customer name
Click Reports > Recent Messages > All
You will see all messages to and from that customer; click the “i” icon next to
any message to view details about it
Adding users via LDAP setup
1.
2.
3.
Log into AVG AntiSpam (https://cloudcare.avgcloud.net)
Click Customers > List All Customers and then choose a customer
Click All Users > LDAP Setup
How to add entries to permitted relay
Permitted relay is used when forwarding email to external contacts through AVG
AntiSpam from an on-premises email server. To enable this configuration:
1.
Log into AVG AntiSpam (https://cloudcare.avgcloud.net) using your solution
provider credentials
2.
Click Customers > Permitted Relay > New Entry
3.
Add the domain of the address that messages will be forwarding to (ex:
gmail.com, etc.); this entry will apply to all of your customers
Manually adding users
1.
2.
3.
Log in AVG AntiSpam (https://cloudcare.avgcloud.net)
Click Customers > List All Customers and then choose a customer
Click Users > New User
8|Page
www.avg.com
How to run a configuration test
1.
2.
3.
Log into AVG AntiSpam (https://cloudcare.avgcloud.net)
Click Customers > List All Customers and then choose a customer
Click Enterprise > Configuration Status; the test will run in the background
How to update settings for all existing users
1.
2.
3.
Log into AVG AntiSpam (https://cloudcare.avgcloud.net)
Click Customers > List All Customers and then choose a customer
Click All Users > Update Users
How to resend welcome messages
1.
2.
3.
Log into AVG AntiSpam (https://cloudcare.avgcloud.net)
Click Customers > List All Customers and then choose a customer
Click All Users > Resend Welcome Message
How to enable permitted languages
1.
2.
3.
Log into AVG AntiSpam (https://cloudcare.avgcloud.net) using your solution
provider credentials
Click Customers > List All Customers and then choose a customer
Click Enterprise > Permitted Languages
When enabled, the system examines the subject line of each inbound
message to determine its character set. If the subject is not of a language
from among the permitted languages chosen by the enterprise administrator
or user, the system will block the message and place it into the quarantine.
How to enable permitted countries
1.
2.
3.
Log into AVG AntiSpam (https://cloudcare.avgcloud.net) using your solution
provider credentials
Click Customers > List All Customers and then choose a customer
Click Enterprise > Permitted Countries
When enabled, the system examines the IP address of the each sender's mail
server to determine its country of origin. If the country of origin is not among
the permitted countries chosen by the enterprise administrator or user, the
system will block the message and place it into the quarantine.
Adding domains to allow lists when using BATV and PRVS
Users may encounter situations where they add a sender to their allow list — either
from a quarantine summary or from directly within the portal — yet the sender is
still blocked or quarantined.
If a sender's administrator has enabled bounce address tag validation (BATV), the
envelope address will be different than the displayed address. BATV alters the
sending envelope address in order to be able to identify bounce messages as
legitimate by only accepting those going to the BATV address.
9|Page
www.avg.com
Each message has a different BATV address, which is usually seen as a series of
letters, numbers, and symbols added to the beginning of the email address (note
that this is also used for newsletters and legitimate bulk mail). The envelope
address will look somewhat like this:
[email protected]
OR
[email protected]
These addresses change with each message sent.
To resolve the issue, you can add the sending domain (example.com) to the sender
allow list or enterprise allow list.
SMTP Errors Codes and Solutions
The following is a list of common error codes returned when using the AVG
AntiSpam service. This list does not contain all codes and there may be variations.
Should you have questions about the nature of any of these codes, please contact
customer support.
550 5.1.0 Address Rejected
This error is generated on the recipient server; not by the AVG AntiSpam email
protection system (insert server name/IP address here). This can be due to the
email mailbox not existing on the receiving server, filtering policies on the receiving
server, or the mailbox being unavailable at the time of transmission. If this is
received, the sender will need to contact the recipient directly to resolve this issue.
Adding the sender or recipient to your allow list will not resolve this issue as it was
not generated by AVG AntiSpam.
550 5.1.1 User Unknown
This error is generated by the destination server (insert server name/IP address
here) that is receiving the mail. This indicates that a mailbox on that server is
currently unavailable.
553 Sorry, relay of mail is not allowed. (#5.7.1)
This error messages indicates:
•
•
The smart host is not configured correctly to send mail via
outbound.avgcloud.net. The sending IP of the server is not listed in the
trusted host.
o If you encounter this error, your IP address may have changed or the
IP address you are sending messages from is not in our trusted hosts.
The sending domain is not sending from a domain listed in AVG AntiSpam.
10 | P a g e
www.avg.com
You will also see this when you are trying to forward messages to an external
domain (ex: Yahoo.com or Gmail.com). If so, please add the external domain to
permitted relay (see the “How to add entries to permitted relay” entry above).
“Connection died” indicates the connection died after we sent the data; often a sign
that the receiving server’s (insert server name/IP address here) content filtering is
being maxed out, or of some type of connection filtering on the server or firewall.
554 Denied
The error message “554 Denied” means that the recipient’s server rejected the
message as spam. This is either due to the content of the message or the sending
IP address is blocked on the recipient’s end.
451 Connection Error
This error indicates that the mail server (insert server name/IP address here) was
reachable and started reception of the message but terminated the delivery before
the message transaction could be completed. In this case, the destination server
should review server logs to look for any issues causing the abnormal termination
of the message transmission.
451 Connection Refused
This error indicates that the receiving server (insert server name/IP address here)
is blocking or dropping the connection to AVG AntiSpam without any response being
provided. Unlike "unable to locate MX server" errors, this indicates that DNS has
provided a valid MX record for the domain but the server listed in the MX record is
not responding. The receiving server should validate at the firewall and server
levels that there is not any blocking of AVG AntiSpam's IP ranges taking place.
5.3.4 Message Size Exceeds Fixed Maximum
This is not an error generated by AVG AntiSpam. This is an error generated by the
receiving server (insert server name/IP address here) that indicates that the
message has violated some level of attachment size filtering present on that server.
To resolve this error, the system administrator for the receiving server will need to
investigate filtering policies present on that server. (Note: The AVG AntiSpam
maximum send/receive limit is 50 MB.)
5.7.1 Message Rejected as Spam by Content Filter
This error is not generated by AVG AntiSpam. This error is commonly enforced by a
firewall or Microsoft Exchange server (insert server name/IP address here) with
specific content policies.
If Exchange 2007, Microsoft recommends reviewing:
http://technet.microsoft.com/en-us/library/aa995995%28EXCHG.80%29.aspx
If Exchange 2010, Microsoft recommends reviewing:
http://technet.microsoft.com/en-us/library/aa995953.aspx
11 | P a g e
www.avg.com
5.7.1 SPF Not Authorized
This is not an error generated by the AVG AntiSpam service. This indicates that the
receiving server (insert server name/IP address here) is utilizing SPF validation to
ensure mail senders match SPF records. If the server is an inbound server receiving
filtered mail from AVG AntiSpam, the SPF checking should be disabled on the
server. If this is a message being sent outbound through the AVG AntiSpam
service, make sure that your domain has the following added to its SPF:
v=spf1 ip4:100.42.120.96/27 ip4:100.42.115.0/27 ip4:208.70.208.0/22 ~all
4.3.1 Insufficient System Resources
This error will occur when the Exchange Server software resides on a physical
server that has reached capacity on the RAM, hard drive, or both.
In Exchange Server 2007, the transport service monitors system resources such as
disk space and memory on the transport servers (the Hub transport and Edge
transport servers), and stops message submission if it is running low on these
resources. It continues to deliver existing messages in the queue. When resource
utilization returns to normal, it resumes message submission. The feature is called
Back Pressure.
For an understanding of what may trigger this error, please see:
http://www.msexchange.org/articles_tutorials/exchange-server2007/management-administration/understanding-back-pressure-feature-exchangeserver-2007.html
Additional Microsoft troubleshooting information may also be found at:
http://support.microsoft.com/kb/329167
12 | P a g e
www.avg.com
Network Security Settings
Configuring access control/enforcing IP restrictions
Enforcing IP restrictions is absolutely critical to complete protection of your mail
server. Because hackers and spammers can easily bypass cloud services and target
your server directly, mail servers protected by AVG AntiSpam should only accept
SMTP connections from AVG AntiSpam IPs listed below and deny all other traffic:
Exchange 2007 & 2010
1. Open the Exchange Management Console
2. Navigate to Server Configuration > Hub Transport > Default Receive Connector
> Properties > Network tab
3. Locate the “Receive mail from remote server with IP” screen
4. By default, the rule is 0.0.0.0 to 255.255.255.255. Remove the default and add
the following AVG AntiSpam ranges:
100.42.120.96/27 (255.255.255.224)
100.42.115.0/27 (255.255.255.224)
208.70.208.0/22 (255.255.252.0)
5. Stop and restart the MSExchangeTransport service on the HUB transport
server(s)
Exchange 2003
1. Open the Exchange System Manager
2. Navigate to the Default SMTP Virtual Server folder, right-click on the folder and
select Properties
3. Within the Default SMTP Virtual Server Properties pop-up window, click the
Access tab and the Connection button
4. From here, you will add the below IPs. Select the “Only the list below” radio
button, and then add these IPs:
100.42.120.96/27 (255.255.255.224)
100.42.115.0/27 (255.255.255.224)
208.70.208.0/22 (255.255.252.0)
5. Each IP should be added as a single computer
6. Please restart SMTP service for the changes to occur
13 | P a g e
www.avg.com