1
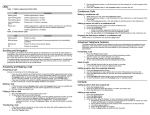
Description of LEDs
• Press an available call appearance button.
2. Dial the number you want to call.
Call appearance button LEDs
Putting a call on hold
LED
Description
Steady green
Call appearance is active.
Slow blinking green
Call appearance is ringing.
Fast blinking green
Call appearance is on hold.
Very fast blinking green
Conference or Transfer is pending.
Steady red
Call appearance is selected and will be used when you go
off-hook. It remains steady red while you use the call
appearance.
Off
Call appearance is available.
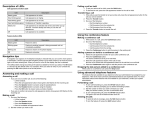
Feature button LEDs
1. To put your active call on hold, press the Hold softkey.
2. To resume the call, press the call appearance button for the call on hold.
Transferring a call
1. If the call you want to transfer is not your active call, press the call appearance button for the
call you want to transfer.
2. Press the Transfer softkey.
3. Do one of the following:
• Dial the telephone number.
• Call the person from the contacts list.
• Call the person from the call history.
4. Press the Transfer softkey to transfer the call.
Using the conference feature
LED
Description
Steady green
Feature is active.
Blinking green
Feature is pending (request is being processed and not
immediately available).
Blinking red
Feature is shown on the phone display.
Off
Feature is not active.
Navigation tips
A navigation icon appears in the telephone display to indicate that you can scroll to more options
or information. Use the right and left navigation arrows to go to other screens when the paging icon
(left- and right-facing arrows) displays on the title line or to move the cursor right or left when entering
text.
When you scroll to a line on the display, that line is selected. The softkey labels change according
to the options available for the line you select. The OK button is a shortcut for the default action.
For example, when you select an entry in your contacts list, pressing the OK button places a call
to that person.
Answering and making a call
Answering a call
• If you are not on another call, do one of the following:
- Lift the handset.
- Press the call appearance button whose green LED flashes for the incoming call.
- Press the Speaker button to answer using the speakerphone.
- Press the Headset button to answer using the headset.
- Press the ON button to answer using a wireless headset.
• If you are on another call, press the call appearance button whose green LED flashes for the
incoming call.
Making a call
1. Do one of the following:
• Lift the handset.
• Press the Speaker button.
• Press the Headset button.
Making a conference call
1. While active on a call, press the Conf softkey.
2. Do one of the following:
• Dial the telephone number.
• Call the person from the contacts list.
• Call the person from the call history.
3. Press the Conf softkey to add the person to the existing call.
Adding a person on hold to a conference call
1. Select the call appearance button for your active conference call.
2. Press the Conf softkey.
The active conference call is put on soft hold.
3. Press the call appearance button of the call on hold.
Be sure not to choose the call appearance button for the call that is on soft hold.
4. Press the Conf softkey again to add the person to the conference call.
Dropping the last participant from a conference call
While active on a conference call, press the Drop softkey.
Using advanced telephone features
The features that are available to you depend on what your administrator has assigned to your
telephone. A few of the most commonly administered features are explained below. For more
information about all the features that are available for your extension, contact your system
administrator.
Forwarding calls
1. To turn call forwarding on, press the CFrwd feature button.
You hear a dial tone prompting you to dial the forwarding number.
2. Dial the number to which you want to forward your calls.
After you dial the number, you hear a confirmation tone.
3. To turn call forwarding off, press the CFrwd feature button.
The green LED next to the feature button turns off.
Sending all calls
• To send all calls to coverage, press the SAC feature button.
• To turn the feature off, press the SAC feature button.
Calling a person from the corporate directory
1. Press the Directory feature button.
2. Use the dialpad keys to start spelling the last name of the person you want to call.
3. Press the Next feature button to view the next name alphabetically in the directory, if
necessary.
4. Press the Make Call feature button when you see the name you want.
5. To exit the Directory, press the Phone button or the Exit softkey.
Using the contacts feature
4. To edit the name or number, scroll up or down and edit as appropriate.
5. Press the Save softkey to save your changes.
Using the Avaya Home menu
Use the Avaya Home menu to perform tasks such as adjust and customize phone settings, select
the display language, turn call logging on or off for different call types, and set visual and audible
alerting.
The Avaya Home menu has four sub-menus:
Call Settings
Lets you set the visual alerting, audible alerting, show phone screen, and stay
in contacts options to on or off; and set the audio path to speakerphone or
headset.
Application
Settings
Lets you turn call logging on and off for answered, unanswered, outgoing, and
bridged calls; and personalize button labels or restore the default button
labels.
Calling a person from the contacts list
1.
2.
3.
4.
Press the Contacts button.
Locate the contact you want by typing the first letter of the contact's name as it is listed.
Scroll up or down to select the person or number you want to call.
Press the OK button or the Call softkey.
Adding a new contact
1.
2.
3.
4.
Press the Contacts button.
Press the More softkey.
Press the New softkey.
Enter the name using the dialpad. To enter characters using the dialpad:
• Press the number key that corresponds to the letter or number you want to enter until
the letter or number is displayed.
• If the characters are on the same key, pause before entering the next character.
• To enter a space, press 0.
• Enter remaining letters or numbers.
• To delete the last character, press the More softkey and then the Bksp softkey.
5. Press the down navigation arrow.
6. Enter the telephone number as you would if you were dialing it directly.
7. Press the Save softkey to save your changes.
Editing a contact
1.
2.
3.
4.
5.
6.
7.
Press the Contacts button.
Scroll to the contact you want to edit.
Press the Details softkey.
Press the Edit softkey.
Scroll up or down to choose the field you want to edit.
Use the dialpad and softkeys to make changes to the contact information.
Press the Save softkey to save your changes.
Using the call history feature
Calling a person from the call history
1. Press the History button.
2. Scroll to the left or right to view a separate list of all calls, missed (unanswered) calls, answered
calls, or outgoing calls.
3. Scroll up or down to select the person or number you want to call.
4. Press the Call softkey or the OK button.
Adding an entry from the call history to your contacts list
1. Press the History button.
2. Scroll to the number you want to add to your contacts list.
3. Press the +Contact softkey.
Screen & Sounds Lets you adjust the display brightness and contrast, select your ringing
pattern, turn button click sounds on and off, and turn error tones on and off.
Advanced
Options
Lets you erase customized settings, perform a telephone self-test, select the
display language, set audio levels for different environments, set the remote
headset option, and enable a higher quality voice transmission.
Note:
The sub-menus that appear depend on how your extension was administered. Some sub-menus
may not be available.
Changing the telephone display language
1.
2.
3.
4.
5.
6.
7.
Press the Home button.
Scroll to Advanced Options.
Press the Select softkey or the OK button.
Scroll to Language.
Press the Select softkey or the OK button.
Scroll up or down to select the desired language.
Press the Select softkey or the OK button to change to the selected language.
For more information
For the latest information including the user guide, installation and maintenance guide, interactive
document, and software downloads, go to the Avaya Support site at www.avaya.com/support.
16-603536
Issue 1
August 2011
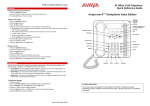
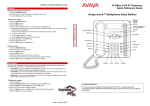
Introduction to the Avaya 9400 Series Digital Deskphones
Overview of phone buttons and features
Avaya 9404 telephone
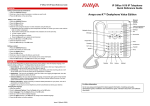
Overview of phone buttons and features
Avaya 9408 telephone
Introduction to the Avaya 9400 Series Digital Deskphones
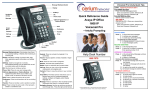
No. Name of button or
feature
Description
1
Call/Message
Waiting Indicator
An illuminated red light in the upper-right corner of your phone indicates you have voicemail messages
waiting. This light flashes when you receive an incoming call. In addition to the Message Waiting
Indicator, the Message button is also illuminated when you have voice mail messages waiting.
2
Feature Buttons and
Call Appearance
Buttons
There are 4 (9404) or 8 (9408) buttons that can be programmed as either call appearance buttons or
feature buttons. Press a call appearance button to make or answer a call or resume a call on hold. Press
a labeled feature button to enable or disable that feature. The feature buttons provide access to the Avaya
call management system features that have been administered for your extension. The green LED next to
each function key indicates whether the feature is currently on or off. If the light is on, the feature is on. For
more information about the feature buttons, see Using advanced telephone features on
page 33.
3
Softkeys
Press the softkeys to select the softkey labels. The softkey labels indicate the action that each softkey
produces. The labels and the actions vary depending on your selection.
Overview of phone buttons and features
No.
Name of button
or feature
Description
4
OK
Press the OK button for a shortcut to an action. For example, select an entry from your
call history and press OK to dial the number.
5
Phone
Press the Phone button to view and manage your calls. For example, if you are viewing a
menu, pressing the Phone button takes the telephone display back to the home screen.
6
Contacts
Press the Contacts button to view the entries in your Contacts list.
7
Avaya Home
Press the Home button to gain access to the Avaya menu. The Avaya menu provides options that you can use to customize
telephone settings, configure call logging, select the display language, and verify the telephone operation.
8
History
Press the History button to view a list of all your calls. The icon on the History button
lights up when you have missed calls.
9
Volume
Press + or - on the Volume button while active on the handset, headset or speaker to
adjust the volume of the speaker or ringer.
10 Mute
Press the Mute button to mute a call in progress or reactivate a muted call.
11 Microphone
The omnidirectional microphone sends and receives signals from all directions.
12 Speaker
Press the Speaker button to use the speakerphone. To take a call off speakerphone, lift
the handset.
13 Headset
Press the Headset button to use the headset if it is connected. For wired headsets, only
HIC headset cords are compatible with your phone.
Introduction to the Avaya 9400 Series Digital Deskphones
14 Message
Press the Message button to connect directly to your voicemail system. This button is
illuminated when you have voicemail messages waiting.
15 Navigation
Arrows
Press the up and down navigation arrows to scroll through lists. Press the right and left
navigation arrows to navigate between different views of an application, to move the
cursor during text input, or to turn an option on or off.
16 Telephone
Display
There are four rows in the 9404 telephone display and eight rows in the 9408
telephone display.
The top row shows the extension number, user name and the time and date. On the
9404 telephone, the top row also provides application-specific information.
The middle two rows in the 9404 telephone display and the middle six rows in the 9408
telephone display provide application-specific information. The second and the third rows
in both telephone displays provide the name of the current application (for example,
contacts) and a prompt line that provides context-sensitive prompts, explanations, or
help for the current application. The bottom line displays the softkey labels.
Avaya 9400 Series Digital Deskphone Quick
Reference for Avaya Aura ® Communication
Manager