1
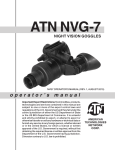
ATN NVG7 u s e r ` s g u i d e Important Export Restrictions! Commodities, products, technologies and services contained in this manual are subject to one or more of the export control laws and regulations of the U.S. Government and they fall under the control jurisdiction of either the US Department of State or the US BIS-Department of Commerce. It is unlawful and strictly prohibited to export, or attempt to export or otherwise transfer or sell any hardware or technical data or furnish any service to any foreign person, whether abroad or in the United States, for which a license or written approval of the U.S. Government is required, without first obtaining the required license or written approval from the Department of the U.S. Government having jurisdiction. Diversion contrary to U.S. law is prohibited. American Technologies Network Corp. One 3V Lithium or 1.5V AA battery 5 Diopter 1’ to Infinity focus Single switch button operation Built-in infra-red illuminator 26mm F 1:1.2 lens for maximum clarity Specifications Magnification........................................1X (3X,5X, 10X optional) Lens System.........................................26 mm; F1:1.2 Field of view..........................................40° Range of Focus....................................0.25m to Power Supply.......................................3V Lithium (CR123A) or AA battery Battery Life........................................... 60 hours w/o IR illuminator (CR123A type) Operating Temperature ....................... -40°C to +50°C Storage Temperature . ......................... -50°C to +70°C Dimensions..........................................172x62x102 mm (6.7” x 2.5” x 4”) Weight..................................................0.45kg (0.9 lb) * ATN reserves the right to change the above specifications at any time without notice Cau ti o n : This product contains natural rubber latex which may cause allergic reactions. The information in this manual furnished for information use only, is subject to change without notice, is not to be construed as a commitment by ATN Corp. ATN Corp. assumes no responsibility or liability for any errors or inaccuracies that may appear in this book. ©2008 ATN Corp. All right reserved. • • • • • • • • • High Quality image intensifier tube Super fast lens system provides the user with a clear and sharp image Dual eye viewing system for long viewing sessions Built-in Infra Red illuminator lets you see even in total darkness Interchangeble lenses for different magnification Head or helmet mounted for hands free use Rugged and versatile design Easy to use digital controls Two-Year Warranty Application Compact and lightweight, rugged, and a top-notch performer the NVG-7 is an exceptional choice for hands free usage. The NVG-7 goggles have a built in IR for total darkness with indicator “ON” light within the FOV and a flip-up headset. The NVG-7 is available with a wide range of image intensifier options to meet a wide array of specification requirements. The NVG-7 night vision goggles is a complex opticoelectronic system for individual use. The device consists of the objective lens assembly, eyepiece and the body. The body contains a image intensifier tube assembly with an integrated high voltage power source and the battery housing. Objective lens protective cover (not shown) is intended to protect the objective lens from dust and scratches. It also will act as a daylight filter, allowing you to test the scope in daylight or other bright light situations. The pinhole in the center of the protective cover allows the user to check the operation ability of the device in daylight conditions. NOTE: Do not test the scope in daylight conditions even with the daylight filter/lens cap on for more than ten (10) minutes. BATTERY Installation Install standard CR123A batteries as follows: 1. Unscrew the battery cap(A). 2. Insert CR123 battery(B), observing the polarity as indicated. 3. Replace the battery cap and screw cap hand tight. Install AA batteries as follows: 1. Unscrew the battery cap(A). 2. Screw the AA battery adapter(C) in to the battery housing. 3. Insert the AA battery(D), observing the polarity as indicated. 4. Replace the battery cap and screw cap hand tight. B A C D A 2 Operation • Take the monocular out of the case. • Press the button (short press - less than 1.5 sec.) to turn the unit on by the protective lens cover still attached to the lens. Do not turn the unit on in the daytime without the protective lens cap on. You should see green glow in the eyepiece. • Observe the scene and adjust the diopter for optimal image clarity. • You may now enter a dark environment or simply shut the lights off in order to darken the room. • Next, remove the lens cap/daylight filter. Adjust the front lens for the distance of the focus. You should not have to readjust the diopter. • To turn the unit off, push the button again by short press (less than 1.5 sec.). Focusing To focus the NVG-7, first you will need to adjust the diopter. Simply turn the diopter clockwise until it stops. Then, while looking throught the diopter at an object, slowly turn the diopter back counter clockwise until the grain in the image is sharp. NOTE: We suggest that you focus the diopter during daylight with the filter on. Next focus the front lens until the image and the grain are both sharp. When you are in low-light conditions and the daylight filter is off, you may focus the front lens to receive sharp image, the Lens focus adjusting diopter should not be adjusted. NOTE: The front lens should be readjusted as you view objects at different distances. Diopter adjasting Infra-Red illuminator Infra-red illuminators, or IR illuminators, are common to night vision. The IR light greatly enhances the performance of the NVG-7 while remaining almost totally invisible to the naked eye. The NVG-7 goggles have a built in IR with indicator “ON” light within the FOV. To turn the IR on, push the button by long press (more than 1.5 sec.). It is important to remember that the IR illuminator is simply an infra red light source, and like any light source, it may loose its effectiveness over a great distance. To turn the IR off, push the button again by long press (more Built-in Infra-red Illuminator than 1.5 sec.). NOTE: The IR will automatically turn off when the unit’s power is turned off. flipup headset FITTING THE HEADGEAR 1) Fit the headgear to your head size. Adjust the head gear fist before attaching the NVG-7 to it. 2) Loosen all the straps and place the headgear onyour head. 3) Tighten the straps until the headgear fits firmly. 3 GOOGLES INSTALLATION AND AJUSTMENT Now you are ready to mount the NVG-7 on to your headgear. 1) Remove the already adjusted headgear from your head. 2) Push button [1] and insert the bracket [2] of the NVG-7 to the rail of the headset. 3) Place the headgear with NVG-7 onto your head. 4) Loosen the screw [3] and move the unit along the rail for eye relief adjustment . The NVG-7 headset has a flip-up mechanism. Push the button [4] on the side of mount and lift the unit up until the unit fixates in the top position. Push same button to lower NVG-7 to viewing position. If you need increase the eye relief of your goggles, you can displace the bracket on the top of NVG-7. 1) Unscrew the screw and detach the end-cap from the bracket of NVG-7. 2) Unscrew the 2 screws and detach the bracket from the NVG-7 body. 3) Turn the bracket 180 degrees. 1 4 3 2 4) Screw the 2 screws back into place. helmet mount (o p t i o n a l ) Helmet mount for attachment of ATN’s NVG-7 to a stan1 4 dard PASGT helmet. Helmet mount fits securely onto hel2 met via a rugged strapping device and grooved hooks. With helmet mount, NVG-7 can be positioned directly in 3 front of user’s eyes or flipped. INSTALLATION 1) Install the mount onto helmet as shown on the picture. 2) Tighten and fixate the straps [1] 1 5 3) Attach goggles to the rail. Push button [2] and insert the bracket of the NVG-7 to the rail of the mount. 4) Place the helmet on your head. ADJUSTMENT 1) Loosen the screw [3] and move the unit along the rail for eye relief adjustment. Tighten the screw [3]. 2) Loosen the top vertical fixation screw [4]. Adjust goggle vertical position. Tighten vertical position screw. 3) The NVG-7 helmet mount has a flip-up mechanism. Push a button [5] on the side of mount and lift the unit up till fixation in the top position. The helmet mount has an adjustment of angular position of device relatively of the look axis. 1) Loosen two screws on the front of ±10˚ flip-up mechanism. 2) Rotate device around axis of mechanism to the necessary position. 3) Tighten the two screws again. 4 INTERchangeable lens (o p t i o n a l ) The NVG-7 with 3X or 5X front lens can be used as a powerful night vision bi-ocular. To install 3X Afocal Lens screw it into the front lens of NVG-7. To install 5X/10X lens unscrew the objective lens of NVG-7 and screw 5X/10X lens to the free place (make sure that the unit is turned off). 3X Lens 5X Lens 10X Lens Storage and care • If the device is not to be used for extended period of time (more than 10 days) remove the battery. • Avoid touching lenses. If fingerprints or traces of dirt or dust appear, clean their surface with a Photographic lens cleaning tissue. • Keep lens cap/daylight filter on when not in use. • The NVG-7 is not harmful to the user or the environment. • Do not disassemble except to clean the front lens and eyepiece: it will void your warranty. • Evaluate the scope function by looking through it in a lit environment with the daylight filter lens cap on. Never use in daylight without the daylight filter lens cap on. • Never point the NVG-7 at a bright light source. • Adverse atmospheric conditions such as fog, smog, or haze and a lack of ambient light (moon or starlight) may diminish the effective viewing distance. • If you use the rubber eyecaps for a long period of time, you may suffer skin inflammation. If you develop any symptoms, consult a doctor immediately. TroubleShooting Q: Flashes, flickers, or clicking occur while operating S: If it occurs within the first five minutes of inserting new batteries, it is normal and the device will resume normal operation soon thereafter. If it occurs for more than 10 minutes, contact for service instructions. Q: Dark spots on screen. S: These are either cosmetic blemishes in the intensifier tube or dust particles. Q: Screen becomes darker than at previous use. S: Replace batteries. If problem persists, contact your dealer or other authorized service representative for service instructions. Q: Image not clear. S: Adjust objective lens, and/or the eyepiece. 5 2 Year product Warranty This product is guaranteed to be free from manufacturing defects in material and workmanship under normal use for a period of 2 (two) years from the date of purchase. In the event a defect that is covered by the foregoing warranty occurs during the applicable period stated above, ATN, at its option, will either repair or replace the product, and such action on the part of ATN shall be the full extent of ATN’s liability, and the Customer’s sole and exclusive remedy. This warranty does not cover a product (a) used in other than its normal and customary manner; (b) subjected to misuse; (c) subjected to alterations, modifications or repairs by the Customer of by any party other than ATN without prior written consent of ATN; (d) special order or “close-out” merchandise or merchandise sold “as-is” by either ATN or the ATN dealer; or (e) merchandise that has been discontinued by the manufacturer and either parts or replacement units are not available due to reasons beyond the control of ATN. ATN shall not be responsible for any defects or damage that in ATN’s opinion is a result from the mishandling, abuse, misuse, improper storage or improper operation, including use in conjunction with equipment which is electrically or mechanically incompatible with or of inferior quality to the product, as well as failure to maintain the environmental conditions specified by the manufacturer. CUSTOMER IS HEREBY NOTIFIED THAT OPERATION OF THE EQUIPMENT DURING DAYLIGHT HOURS OR UNDER ANY EXCESSIVE LIGHT CONDITIONS MAY PERMANENTLY DAMAGE THE INTERNAL COMPONENTS OF THE UNIT AND SAID DAMAGE WILL NOT BE COVERED UNDER THIS WARRANTY. This warranty is extended only to the original purchaser. Any breach of this warranty shall be waived unless the customer notifies ATN at the address noted below within the applicable warranty period. The customer understands and agrees that except for the foregoing warranty, no other warranties written or oral, statutory, expressed or implied, including any implied warranty of merchantability or fitness for a particular purpose, shall apply to the product. All such implied warranties are hereby and expressly disclaimed. Limitation of liability ATN will not be liable for any claims, actions, suits, proceedings, costs, expenses, damages or liabilities arising out of the use of this product. Operation and use of the product are the sole responsibility of the Customer. ATN’s sole undertaking is limited to providing the products and services outlined herein in accordance with the terms and conditions of this Agreement. The provision of products sold and services performed by ATN to the Customer shall not be interpreted, construed, or regarded, either expressly or implied, as being for the benefit of or creating any obligation toward any third party of legal entity outside ATN and the Customer; ATN’s obligations under this Agreement extend solely to the Customer. ATN’s liability hereunder for damages, regardless of the form or action, shall not exceed the fees or other charges paid to ATN by the customer or customer’s dealer. ATN shall not, in any event, be liable for special, indirect, incidental, or consequential damages, including, but not limited to, lost income, lost revenue, or lost profit, whether such damages were foreseeable or not at the time of purchase, and whether or not such damages arise out of a breach of warranty, a breach of agreement, negligence, strict liability or any other theory of liability. Product warranty registration In order to validate the warranty on your product, ATN must receive a completed Product Warranty Registration Card for each unit or complete warranty registration on our website at www.atncorp. com. Please complete the included form and immediately mail it to our Service Center: ATN Corporation, 1341 San Mateo Avenue, South San Francisco, CA 94080. 29072008 Obtaining warranty service To obtain warranty service on your unit, please contact our Customer Service department and request an RMA number. Once you have received your RMA # please mark this # on the outside of the shipping box and take or send the product, postage paid, with a copy of your sales receipt to our service center, ATN Corporation at the address noted above. All merchandise must be fully insured with the correct postage; ATN will not be responsible for improper postage or missing or damaged merchandise during shipment. Packages that do not have an RMA # clearly marked on the outside of the package will be delayed in being processedt. 6 For customer service and technical support, please contact American Technologies Network Corp. North American Office 1341 San Mateo Avenue, South San Francisco, CA 94080 phone: 800-910-2862, 650-989-5100; fax: 650-875-0129 European Office phone: 44(0)870-0111286, fax: 44(0) 845-3349142 The following countries can use our toll free number 00 800 9102-8620 Austria, France, Germany, Holland, Italy, Spain, Sweden, Switzerland www.atncorp.com ©2008 ATN Corporation