1
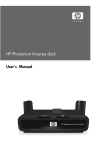
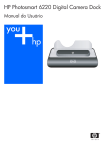
HP Photosmart R-series dock
User's Manual
HP Photosmart
R-series dock
User’s Manual
3
Trademark and copyright information
© 2004 Copyright Hewlett-Packard Development Company, LP
Reproduction, adaptation, or translation without prior written
permission is prohibited, except as allowed under copyright laws.
The information contained in this document is subject to change
without notice. Hewlett-Packard shall not be liable for errors contained
herein or for consequential damages in connection with the furnishing,
performance, or use of this material.
Microsoft® and Windows® are U.S. registered trademarks of
Microsoft Corporation.
Apple®, Macintosh®, and Mac® are registered trademarks of Apple
Computer, Inc.
4
HP Photosmart R-series dock User’s Manual
Table of Contents
Getting Started . . . . . . . . . . . . . . . . . . . . . . . . . . . . 6
Setting Up the Dock . . . . . . . . . . . . . . . . . . . . . . 6
Charging a Spare Battery . . . . . . . . . . . . . . . . . 8
Dock Lights and Buttons . . . . . . . . . . . . . . . . . . . 9
Transferring Images to a Computer Using the Dock . . 10
Printing Images Using the Dock . . . . . . . . . . . . . . . . 11
Displaying Images on a TV Using the Dock . . . . . . . 12
Using the Remote . . . . . . . . . . . . . . . . . . . . . . 14
Dock Remote Control Buttons . . . . . . . . . . . . . . 15
Technical Support . . . . . . . . . . . . . . . . . . . . . . . . . 17
Troubleshooting . . . . . . . . . . . . . . . . . . . . . . . . . . . 17
Battery Charge Times . . . . . . . . . . . . . . . . . . . . . . . 20
Battery Safety Precautions . . . . . . . . . . . . . . . . . . . . 20
Using Lithium Ion Batteries . . . . . . . . . . . . . . . . 20
Recharging Lithium Ion Batteries . . . . . . . . . . . . 21
Purchasing Camera Accessories . . . . . . . . . . . . . . . 22
5
Getting Started
The HP Photosmart R-series camera dock allows you to easily
download images to your computer, print images directly to a
printer, recharge the camera battery and a spare battery at the
same time, and display images on a television (TV). You can
use the dock remote control just as you would use a TV remote
control, with the added ability to rotate, magnify, and print
images (if the dock is connected to a printer). You can also use
the remote control to navigate the camera menus and use the
HP Instant Share feature (see your camera User’s Manual).
Setting Up the Dock
1 Attach the dock insert. One or
more clear plastic dock inserts
came in the box with your dock.
Each of these dock inserts has a
colored sticker on it. See Chapter
1 of your camera User's Manual
to determine which dock insert to
use, and attach that insert to the
top of the camera dock by
snapping it into place as shown in
the picture.
1
2
To remove the insert, press your
thumb against the inside of the
insert at the end of the insert that is closest to the end of the
dock (1) and push the end of the insert out (2) to release it.
6
HP Photosmart R-series dock User’s Manual
2 Connect the TV, AC power adapter, and USB cables to the
right-hand side of the dock.
1 2 3
#
Icon
Description
1
Connect the dock to a TV using the audio/video
cable with the part number C6324-61601.
Connect the yellow connector to the video input,
and the red connector to the audio input on your
TV, VCR, or DVD player.
2
Connect the AC power adapter to the DC IN
connector on the dock, plug the power cord into the
AC power adapter, and plug the power cord into a
wall outlet. If more than one power cord is in the
box, use the cord that is appropriate for power
outlets in your country. The AC power adapter for
the dock is the same as the one used for your Rseries camera. If no power adapter came with your
dock, use the one that came with your camera.
3
Connect the dock to your computer or printer using
the appropriate USB cable. You cannot connect the
dock to both a computer and a printer at the same
time.
The USB cable to use for connecting to a computer
or a non-HP printer is part number C8887–80003,
and it came in the box with the dock.
The USB cable to use for connecting to an HP
printer is part number Q2164-61600 (or 81210807), and it came in the box with your camera.
7
3 Remove any cables that may
be attached to your camera.
Then, insert the camera into the
camera dock as shown here.
The back of the camera must
point toward the edge of the
dock with the two buttons.
Charging a Spare
Battery
Insert a spare rechargeable lithium ion battery into the dock
recharging bay door with the arrows on the top of the battery
(1) pointing toward the door, as shown in the picture.
Push the battery into the
recharging bay until the slide
knob (2) snaps down. (The slide
knob must be pushed up to
remove the battery.) Make sure
the spare battery charging light
(see page 9) begins blinking.
1
2
Caution Read Battery Safety
Precautions on page 20 carefully before recharging lithium ion
batteries.
The first time that you use a rechargeable battery, be sure that
you charge it fully before using it in your camera. It may take
up to 2.5 hours to fully charge a new battery in the dock, or
3.5 hours to charge a fully depleted battery. You can charge a
battery in the camera while simultaneously charging a battery
in the dock, but the battery in the dock will charge more
quickly than the battery in the camera. (See Battery Charge
Times on page 20 for details.)
8
HP Photosmart R-series dock User’s Manual
Dock Lights and Buttons
1
2
#
1
Name
3
4
Description
Spare Shows the power/battery charging status. If this
battery light is:
charging
! On - the spare battery in the dock is fully charged
light
! Blinking - the spare battery in the dock is charging
! Off - there is no spare battery in the dock, or the
battery has been inserted incorrectly
2
Activates the connection to the computer or the
printer, depending on which of those devices is
Save/Print
attached to the dock. If the light above this button
button
is:
! On - the dock is connected to the computer or
printer
! Blinking - there is an active connection between
the camera and the computer or printer
3
Activates the television (TV) connection, which
starts the slideshow of images. If the light above
TV button this button is:
! On - the dock is connected to the TV
! Blinking - an audio/video signal is being sent to
the TV
9
#
Name
Description
4
Power
light
Shows the power/camera battery charging status.
If this light is:
! On - the camera is in the dock, the dock has
power, a spare battery may or may not be in the
dock charging bay, and the camera battery is fully
charged (or is not rechargeable)
! Blinking - the camera is in the dock, and the
battery in the camera is charging
! Off - the dock has no power or there is no camera
in the dock
Transferring Images to a
Computer Using the Dock
1 Confirm the following:
• The dock insert for your camera is attached to the top of
the camera dock. (See step 1 on page 6.)
• The USB cable for connecting to a computer is connected
between the camera dock and your computer, the AC
power adapter is connected to the dock, and the power cord
is plugged into the AC power adapter and a wall outlet.
(See step 2 on page 7.)
• The HP Image Zone software is installed on your
computer. (See your camera User’s Manual.)
• If you are using a Macintosh computer, the camera’s USB
Configuration is set to Disk Drive in the Setup menu. (See
your camera User’s Manual.)
2 Insert the camera into the camera dock. The camera will
turn on automatically.
10
HP Photosmart R-series dock User’s Manual
3 Press the Save/Print
button on the dock. The HP
Image Transfer software will launch on your computer. If you
have set the software to automatically transfer the images
from the camera, the images will automatically transfer to
the computer. Otherwise, in the Welcome screen, click Start
Transfer. If there were any images on the camera that had
been selected for printing or e-mail, those actions are
started after the images have been transferred to the
computer.
4 When the transfer screen on the computer says Finished,
your images have been saved and shared. You can leave
the camera in the dock to recharge the camera battery.
Printing Images Using the Dock
1 Confirm the following:
• The dock insert for your camera is attached to the top of
the camera dock. (See step 1 on page 6.)
• The USB cable for connecting to an HP printer (or the
USB cable for connecting to a computer if you have a
non-HP printer) is connected between the camera dock
and your printer, and the power cable is plugged into the
dock. (See step 2 on page 7.)
• The printer is turned on and paper is loaded in the
printer. Refer to your camera manual for printer setup
information.
2 Insert the camera into the camera dock. The camera will
turn on automatically.
11
3 Press the Save/Print
button on the camera dock to
start the print dialog. The Print Setup menu displays on the
camera. If you already selected images to print in the
camera, the number of images selected will be shown in the
Print Setup menu. Otherwise, Images: ALL will be
displayed.
4 If all the settings in the Print Setup menu look correct, press
the Menu/OK button on the camera or on the dock remote
control to begin printing. Or, you can change settings in
the Print Setup menu using the arrow keys on the camera or
on the dock remote control, then press Menu/OK to begin
printing.
NOTE There is a print preview in the Print Setup screen
showing the page layout that will be used for printing.
This print preview updates as you change the settings for
Print Size and Paper Size.
5 When the printing completes, you can leave the camera in
the dock to recharge the camera battery.
Displaying Images on a TV
Using the Dock
1 Confirm the following:
• The dock insert for your camera is attached to the top of
the camera dock. (See step 1 on page 6.)
• The audio/video cable is connected between the camera
dock and your TV, and the power cable is plugged into
the dock. (See step 2 on page 7.)
12
HP Photosmart R-series dock User’s Manual
TIP If you cannot locate video and audio input jacks on your
TV to fit the connectors on the audio/video cable, you
should be able to use the video and audio input jacks on
a video cassette recorder (VCR) or DVD player connected
to your TV.
2 Your camera is set to send either an NTSC or a PAL video
signal to a TV, depending on the language you selected
when you set up your camera. The NTSC format is used
primarily in North America and Japan, and the PAL format
is used primarily in Europe. If your TV accepts a different
video signal from the default setting for your language, you
must change the TV configuration setting in your camera.
(See your camera User’s Manual.)
3 Your camera will be the source for the TV signal (just like a
VCR or a camcorder), so you must set the TV to take video
input from an external video source (your camera) instead
of the antenna or cable TV. Refer to the TV user’s manual for
directions on how to do this.
4 Insert the camera into the camera dock. The camera will
turn on automatically.
5 Press the TV
button on the dock or the dock remote
control. The first image in the camera is displayed on the TV.
You can use the
buttons to manually navigate through
a slideshow of the images on the camera, or press
to
start an automatic slideshow of each image, playing any
attached audio clip or video clip, and then changing to the
next image.
6 To end the slideshow, press the TV
button again.
NOTE The Image Display on the camera turns off when the
camera is connected to a TV, but you can still use the
camera’s menus because the menus will display on the TV
screen.
13
Using the Remote
You can use the dock remote control to pause the slideshow,
magnify an image, rotate an image, select an image for HP
Instant Share, or mark an image for printing.
Before you can use the
remote, you need to install
the remote control battery.
Remove the battery door on
the back of the dock remote
control and slide the round
non-rechargeable CR 2025
battery into the remote, +
(positive) side up, until it
clicks into place, as shown in
the picture. Then replace the battery door.
14
HP Photosmart R-series dock User’s Manual
Dock Remote Control Buttons
1
7
8
9
#
Button
1
4
5
6
Description
TV button
Activates the TV connection and displays the
first image in the camera on the TV (same as
the TV button on the dock).
Play/Pause
button
Starts and pauses the slideshow of images on
the TV. To resume the slideshow, press this
button again.
2
3
2
3
and These buttons work just like the arrow buttons
buttons to
buttons on your camera. Use the
manually navigate through the slideshow.
Since you can view the camera menus on the
TV, you can use these buttons to navigate
menus.
4
Menu/OK
button
Works just like the Menu/OK button on your
camera.
15
#
Button
5
Magnify
button
Description
Magnifies the image just as you can with the
Zoom lever on your camera. Pressing it again
goes to the next magnification level. Use the
arrow buttons to pan around the magnified
image. To return to 1x, press the Thumbnail
View
button. (Magnification has no effect
on printing.)
6
Displays a thumbnail view of all images stored
in the camera, or returns a magnified image to
Thumbnail
1x. Use the arrow buttons to navigate through
View button
the thumbnails, and the Menu/OK button to
select an image.
7
Works the same as the HP Instant Share button
on the camera. You can select images to be
automatically e-mailed using HP Instant Share.
HP Instant
Share button
8
Works the same as the Print button on the
camera. Allows you to mark the current image
Print button
for printing and adjust the number of copies
that you want to have printed.
If the dock is connected to a printer, then after
pressing this button you can follow the
instructions on the screen to print the current,
selected, or all images in the camera.
If the dock is connected to a computer, then
after pressing this button, following the
instructions on the screen to print will actually
save the images on the computer.
Rotates the image 90 degrees to the right.
9
Rotate button
16
HP Photosmart R-series dock User’s Manual
Technical Support
Please refer to your camera User's Manual for support
procedures and contact information.
Troubleshooting
NOTE For additional troubleshooting information, please see
the Troubleshooting section in your camera User’s
Manual.
Problem
Possible cause
The camera
batteries will
not charge,
and the
camera
charging
light is on.
Batteries in the Install a rechargeable lithium ion
camera are not battery. Disposable Duracell® CP-1
rechargeable. batteries are not rechargeable.
Solution
The camera
has not been
left in the dock
long enough.
Make sure the camera has been left
in the camera dock for at least
4 to 7 hours to charge completely,
and the charging light has stopped
blinking.
Battery voltage
is too low for
charging to
start.
The camera will not attempt to
charge batteries that may be
damaged or over-discharged.
Remove the battery from the
camera and charge it in the dock
recharging bay, then try it in the
camera again. If the battery will not
charge sufficiently in either the dock
or the camera, it is likely that the
battery is bad. Purchase a new
lithium ion battery and try again.
17
Problem
Possible cause
Solution
The camera
batteries will
not charge,
and the
camera
charging
light is off.
The camera is
not securely in
the dock.
Make sure the camera is inserted
completely into the dock.
The camera
dock does not
have electrical
power.
Confirm that the power cord is
plugged into the dock. Check that
the dock power light blinks when
the camera is in the dock.
The camera
is not
recognized
by the
computer
when it is in
the dock.
The dock is
Connect the USB cable directly to
connected to
one of the USB ports on the back of
the computer
the computer.
through a USB
hub or the USB
port on the
front of the
computer.
18
The USB cable
connecting the
dock to the
computer is
bad.
Try connecting the camera directly
to the computer using the cable that
is connecting the dock to the
computer. If it works, then the
problem is not the cable. If it does
not work, try using a different USB
cable.
The HP Image
Zone software
is not installed
on your
computer.
Refer to your camera User’s
Manual for installation instructions.
HP Photosmart R-series dock User’s Manual
Problem
Possible cause
Solution
The camera
is not
recognized
by the
computer
when it is in
the dock.
There is a
functional
problem with
the dock.
Run the dock functionality test by
unplugging the power cord from
the dock, then holding down the
two buttons on the front of the dock
while you plug the power cord
back into the dock, and continue
holding the buttons down. If the
dock lights come on in 5 seconds
(blinking or solid), then the dock is
fully functional.
The TV is not
set to the
correct input
mode.
Check your TV user’s manual to set
the TV to accept video or input
mode.
Audio and
video cables
are switched.
Try switching the audio and video
cables on the back of the TV, DVD
player, or VCR.
(continued)
Cannot
display
images on
the TV.
Incorrect video Change the TV configuration
signal format
setting in your camera (see your
(NTSC or PAL). camera User’s Manual).
19
Battery Charge Times
Where Battery is
Charged
Average Charge
Time*
Signal When
Charging Has
Completed
In camera while
4 to 7 hours
(depending on
camera model)
Power light on dock
turns On
In dock charging
bay
2.5 to 3.5 hours
Spare battery light
on dock turns On
camera is in dock
*Charging may take a shorter or longer period of time depending on condition and state of discharge of the battery.
Battery Safety Precautions
Using Lithium Ion Batteries
!
Do not disassemble or modify the battery. The battery
contains safety and protection devices, which, if damaged,
may cause the battery to generate heat, explode, or ignite.
!
Immediately discontinue use of the battery if, while using,
charging, or storing the battery, the battery emits an
unusual smell, feels unusually hot, changes color or shape,
or appears abnormal in any other way.
!
In the event the battery leaks and the fluid gets into one’s
eye, do not rub the eye. Rinse well with water and
immediately seek medical care. If left untreated, the battery
fluid could cause damage to the eye.
!
Do not expose the battery to water or salt water, or allow
the battery to get wet.
!
Do not place the battery in fire or heat the battery.
20
HP Photosmart R-series dock User’s Manual
!
Do not connect the positive terminal and the negative
terminal of the battery to each other with any metal object
(such as wire).
!
Do not carry or store the battery together with necklaces,
hairpins, or other metal objects.
!
Do not pierce the battery with nails, strike the battery with a
hammer, step on the battery, or otherwise subject it to strong
impacts or shocks.
!
Do not solder directly onto the battery.
NOTE The camera and the dock may be warm while
operating and charging a lithium ion battery. This is
normal.
NOTE A lithium ion battery can be left in the camera or the
dock for any period of time without harm to the battery,
the camera, or the dock. However, do not store the battery
in the camera if it is not necessary. Always store charged
batteries in a cool location.
Recharging Lithium Ion Batteries
!
Do not charge any other battery than the HP Photosmart
R07 lithium ion battery in the camera or the dock.
!
Insert the lithium ion battery in the correct orientation in the
camera and in the dock.
!
Use the camera and the dock in a dry location only.
!
Do not charge a lithium ion battery in a hot location, such
as near a fire or in direct sunlight.
!
When recharging a lithium ion battery, do not cover the
camera or the dock in any way.
!
Do not operate the camera or the dock if it appears
damaged in any way.
21
!
Do not disassemble the camera or the dock.
!
Unplug the HP AC power adapter from the electrical outlet
before cleaning.
!
After extensive use, the lithium ion battery may begin to
swell. If it becomes difficult to insert the battery into or
remove the battery from the camera or the dock, discontinue
use of the battery and replace it with a new one. Please
recycle the old battery.
Purchasing Camera Accessories
For information about purchasing accessories, go to:
!
www.hp.com/go/myhpcamera (US)
!
www.hp.ca/myhpcamera (Canada)
!
www.hp.com (all other countries)
To purchase accessories, visit your local retailer or order online
at:
!
www.hpshopping.com (US)
!
www.hpshopping.ca (Canada)
!
www.hp.com/eur/hpoptions (Europe)
!
www.hp.com/apac/homeandoffice (Asia Pacific)
Some available accessories are as follows:
!
HP Photosmart Quick Recharge Kit for HP Photosmart
R-series cameras—L1810A (Not available in Latin
America.)
!
Rechargeable HP Photosmart R07 lithium ion battery for
HP Photosmart R-series cameras—L1812A
22
HP Photosmart R-series dock User’s Manual
!
HP Photosmart 3.3V AC power adapter for HP Photosmart
R-series cameras—C8912B (Not available in Latin
America)
!
HP Photosmart SD Memory cards
• HP Photosmart 64 MB SD memory card—C8896A
• HP Photosmart 128 MB SD memory card—C8897A
• HP Photosmart 256 MB SD memory card—L1813A
• HP Photosmart 512 MB SD memory card—L1814A
NOTE HP Memory cards are not available in Asia
Pacific and Latin America.
NOTE The 64 MB HP memory cards are available in
North America only.
!
HP Photosmart premium case for HP Photosmart R-series
cameras— L1811A
!
www.casesonline.com—Go to www.casesonline.com to
design your own custom case to fit your HP Photosmart
R-series camera. Choose the style, material, and color for
your camera case.
23