1
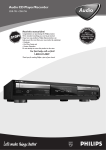
CDR Mini Hi-Fi system
Toll Free Help Line
Ligne d’assistance en service libre
Linea de ayuda telefónica sin cargo
800-531-0039
FW-R8
Return your Warranty Registration card today to
ensure you receive all the benefits you’re entitled to.
• Once your Philips purchase is registered, you’re eligible to
receive all the privileges of owning a Philips product.
• So complete and return the Warranty Registration Card
enclosed with your purchase at once. And take advantage
of these important benefits.
Owner
Confirmation
Model
Registration
Registering your product within 10 days
confirms your right to maximum
protection under the terms and
conditions of your Philips warranty.
Your completed Warranty Registration
Card serves as verification of ownership
in the event of product theft or loss.
Returning your Warranty Registration
Card right away guarantees you’ll
receive all the information and special
offers which you qualify for as the
owner of your model.
RATION
IT
D
AY
ry!
r
u
H
EEDED W
S• REG
ST
N
I
Warranty
Verification
HIN 10
Congratulations on your purchase,
and welcome to the “family!”
Dear Philips product owner:
Thank you for your confidence in Philips.You’ve selected one of the best-built,
best-backed products available today. And we’ll do everything in our power to
keep you happy with your purchase for many years to come.
As a member of the Philips “family,” you’re entitled to protection by one of the
most comprehensive warranties and outstanding service networks in the industry.
Know these
safety symbols
CAUTION
RISK OF ELECTRIC SHOCK
DO NOT OPEN
CAUTION: TO REDUCE THE RISK OF ELECTRIC SHOCK, DO NOT
REMOVE COVER (OR BACK). NO USER-SERVICEABLE PARTS
INSIDE. REFER SERVICING TO QUALIFIED SERVICE PERSONNEL.
t
This “bolt of lightning” indicates
uninsulated material within your unit
may cause an electrical shock. For
the safety of everyone in your household,
please do not remove product covering.
s
What’s more, your purchase guarantees you’ll receive all the information and
special offers for which you qualify, plus easy access to accessories from our
convenient home shopping network.
The “exclamation point” calls attention
to features for which you should read
the enclosed literature closely to
prevent operating and maintenance problems.
And most importantly you can count on our uncompromising commitment to
your total satisfaction.
WARNING: TO PREVENT FIRE OR
All of this is our way of saying welcome–and thanks for investing in a Philips product.
Sincerely,
SHOCK HAZARD, DO NOT EXPOSE THIS
EQUIPMENT TO RAIN OR MOISTURE.
CAUTION: To prevent electric shock,
match wide blade of plug to wide slot, and
fully insert.
Robert Minkhorst
President and Chief Executive Officer
For Customer Use
Enter below the Serial No. which is located
on the rear of the cabinet. Retain this
information for future reference.
P.S. Remember, to get the most from your Philips product, you must
return your Warranty Registration Card within 10 days. So please
mail it to us right now!
Model No. ___________________________
Serial No. ____________________________
MAC5097
Visit our World Wide Web Site at http://www.philipsusa.com
Français
Français : Cet appareil numérique n'émet pas de bruits
radioélectriques dépassant les limites applicables aux
appareils numériques de Classe B prescrites dans le
Règlement sur le Brouillage Radioélectrique édicté par le
Ministère des Communications du Canada.
English ....................................................4
Français.................................................32
Español
English: This digital apparatus does not exceed the Class B
limits for radio noise emissions from digital apparatus as set
out in the Radio Interference Regulations of the Canadian
Department of Communications.
English
Canada
This warning lable is located on the rearside and inside this laser product.
INVISIBLE
CAUTION: LASER
RADIATION
Español .................................................62
WHEN OPEN. DO NOT STARE INTO BEAM.
LASER RADIATION WHEN OPEN.
DANGER:INVISIBLE
AVOID DIRECT EXPOSURE TO BEAM.
AVATTAESSA JA SUOJALUKITUS OHITETTAESSA OLET
VARO! ALTTIINANAKYMATTOMAALLE LASERSATEILYLLE. ALA
KATSO SATEESEEN.
OSYNLIG LASERSTRÅLNING NÄR DENNA DEL ÄR ÖPPNAD.
VARNING! OCH
SPARREN AR URKOPPLAD. BETRAKTA EJ STRÅLEN.
or
DANGER - Invisible laser radiation when open.
AVOID DIRECT EXPOSURE TO BEAM.
IMPORTANT SAFETY INSTRUCTIONS – Read before operating equipment
This product was designed and manufactured to meet strict
quality and safety standards. There are, however, some
installation and operation precautions which you should be
particularly aware of.
1. Read these instructions – All the safety and operating
instructions should be read before the appliance is
operated.
2. Keep these instructions – The safety and operating
instructions should be retained for future reference.
9. Do not defeat the safety
purpose of the polarized or
grounding-type plug. A polarized
AC Polarized
Plug
plug has two blades with one
wider than the other. A grounding type plug has two
blades and a third grounding prong. The wide blade or
the third prong are provided for your safety. When the
provided plug does not fit into your outlet, consult an
electrician for replacement of the obsolete outlet.
3. Heed all warnings – All warnings on the appliance
and in the operating instructions should be adhered to.
10. Protect the power cord from being walked on or
pinched particulary at plugs, convenience receptacles,
and the point where they exit from the apparatus.
4. Follow all instructions – All operating and use
instructions should be followed.
11. Only use attachments/accessories specified by the
manufacturer.
5. Do not use this apparatus near water – for example,
near a bathtub, washbowl, kitchen sink, laundry tub, in a
wet basement or near a swimming pool, etc.
12.
6. Clean only with a damp cloth. The appliance should
be cleaned only as recommended by the manufacturer.
7. Install in accordance with the manufacturers
instructions. Do not block any of the ventilation
openings. For example, the appliance should not be
situated on a bed, sofa, rug, or similar surface or placed in a
built-in installation, such as a bookcase or cabinet that may
impede the flow of air through the ventilation openings.
8. Do not install near any heat sources such as
radiators, heat registers, stoves, or other apparatus
(including amplifiers) that produce heat.
Use only with a cart, stand, tripod, bracket,
or table specified by the manufacturer, or sold
with the apparatus. When a cart is used, use
caution when moving the cart/apparatus
combination to avoid injury from tip-over.
13. Unplug this apparatus during lightning storms or
when unused for long periods of time.
14. Refer all servicing to qualified service personnel.
Servicing is required when the apparatus has been
damaged in any way, such as power-supply cord or plug is
damaged, liquid has been spilled or objects have fallen into
the apparatus, the apparatus has been exposed to rain or
moisture, does not operate normally, or has been dropped.
EL 4562-E004: 99/3
3
GENERAL INFORMATION
English
Safety instructions....................................................................................2 & 3
General information
Accessories supplied ....................................................................................4
Setup information...........................................................................................4
Maintenance ..................................................................................................4
Environmental information.............................................................................4
Discs for recording .........................................................................................5
Discs for playback ..........................................................................................5
CD(RW) handling ............................................................................................5
Controls and connections ..........................................................................6–7
Installation
Power..............................................................................................................8
Speaker connections ......................................................................................8
Antenna connections......................................................................................8
Analog audio connections..............................................................................9
Digital audio connections ..............................................................................9
Connecting a subwoofer ................................................................................9
Remote control
Remote control buttons................................................................................10
Remote control batteries .............................................................................10
Display .............................................................................................................11
Basic functions
Switching on, switching to standby ............................................................12
Loading the CD changer, CD recorder..........................................................12
Playing a CD(RW) .........................................................................................12
Sound control ...............................................................................................13
Demo mode ..................................................................................................13
Selecting a disc on the CD changer.............................................................14
Selecting a track and searching ..................................................................14
SHUFFLE and REPEAT...................................................................................14
CD text..........................................................................................................14
Microphone mixing.......................................................................................14
Program
Programming track numbers ........................................................................15
Erasing a track from the program ................................................................15
Clearing the program ...................................................................................15
Making a program for recording ..................................................................15
About recording
Basic information .........................................................................................16
Direct Line Recording (DLR) .........................................................................16
Auto Level Control (ALC) ..............................................................................16
REC LEVEL key..............................................................................................16
Internal recording
Recording modes..........................................................................................17
High speed recording and automatic finalizing...........................................17
High speed recording ...................................................................................18
Normal recording and listening ...................................................................18
Manual recording .........................................................................................19
External recording
Analog or digital recording?.........................................................................20
Recording with automatic start ...................................................................20
Manual recording .........................................................................................21
Automatic track increment...........................................................................22
(Un)finalizing, erasing
Finalizing CDR(W) discs ...............................................................................22
Unfinalizing CDRW discs .............................................................................23
Erasing from a CDRW disc...........................................................................23
Features
EDIT TEXT (on CD recorder only) ...........................................................24–25
Track editing (on CD changer only) ..............................................................25
Tuner
Tuning to radio stations ...............................................................................26
Storing radio stations...................................................................................26
Tuning to preset stations .............................................................................26
Clock/Timer
Clock setting.................................................................................................27
Alarm timer...................................................................................................28
Record timer .................................................................................................28
Switching the alarm and record timer on/off..............................................28
Sleep timer ...................................................................................................28
Technical data ................................................................................................29
Troubleshooting..............................................................................................30
Limited warranty ............................................................................................31
4
Accessories supplied
– 2 speakers including 2 speaker cables
– Remote control
– 2 batteries for the remote control, size AA
– AM loop antenna
– FM wire antenna
– Power cable
Setup information
Place the unit on a flat, hard and stable surface. Make sure
there is sufficient space around the unit to prevent
overheating.
Active mobile phones close to the CDR Mini Hi-Fi system may
cause malfunctions.
Maintenance
Clean the unit with a soft,
slightly dampened, lint-free cloth. Do
not use any cleaning agents as they
may have a corrosive effect.
Do not expose the unit, batteries
or discs to humidity, rain, sand or
excessive heat (caused by heating
equipment or direct sunlight).
MIC
Environmental information
All redundant packing material has been omitted. We have
tried to make the packaging easy to separate into three mono
materials: cardboard (box), polystyrene foam (buffer) and
polyethylene (bags, protective foam sheet).
Your unit consists of materials which can be recycled if
disassembled by a specialized company. Please observe the
local regulations regarding the disposal of packing materials,
dead batteries and old equipment.
As an ENERGY STAR® partner,
Philips has determined that this
product meets the ENERGY STAR®
guidelines for energy efficiency.
Discs for recording
CD(RW) handling
For recording, make sure to use special audio discs only.
These discs are marked “Digital Audio” and with the logos
shown below.
If the CDR Mini Hi-Fi system fails to read discs correctly, use
a commonly available cleaning-CD to clean the lenses before
submitting the unit to repair. Other cleaning methods may
destroy the lenses. Always keep the trays closed to avoid
dust on the lenses.
Two different types of audio discs are usable on this
CD recorder:
– CD-Audio Recordable (CDR) discs
These discs can be recorded once and
will play on all standard CD players and
CD recorders, when finalized.
– CD-Audio ReWritable (CDRW) discs
These discs can be recorded, erased and
rerecorded many times and will play on
CDRW-compatible CD players and
CD recorders, when finalized.
All Philips CD players and CD recorders with
this sticker are CDRW compatible.
To ensure proper working of the unit, we recommend the use
of Philips audio CDR and audio CDRW discs only.
The lenses may cloud over when the unit is suddenly moved
from cold to warm surroundings. Playing a CD(RW) is not
possible then. Leave the unit in a warm environment until the
moisture evaporates.
To take a CD(RW) out of its box
easily, press the center spindle while
lifting the CD(RW). Always pick up a
CD(RW) by the edge and put it back in
its box after use. Never write on a CD
or attach a sticker to it. Write only on
the printed side of a CDR or CDRW,
and only with a soft, felt-tipped pen.
To clean a CD(RW), wipe it in a
straight line from the center toward the
edge using a soft, lint-free cloth. A
cleaning agent may damage the disc!
Note: Do not use a computer CDR or CDRW as recording will
not work properly!
Recording is permissable insofar as copyright or other
rights of third parties are not infringed upon.
In some countries, the use of the Philips CDR Mini
Hi-Fi system as shown or suggested in this user
manual may require the authorization of copyright
holders.
Discs for playback
CAUTION
For playback on this CD changer and CD recorder you can use
the following audio discs:
Use of controls or adjustments or performance of
procedures other than herein may result in hazardous
radiation exposure or other unsafe operation.
– All pre-recorded audio CDs
– All audio CDR and audio CDRW discs
Notes: – Do not try to play a CD-ROM, CD-I or CDV!
– CDR(W) discs, which are recorded on a computer,
can only be used when they are correctly treated
according to the audio standard (IEC958: Consumer
part). Single session only!
5
English
GENERAL INFORMATION
CONTROLS AND CONNECTIONS
English
& 0^
%$
# @ !
0 98 7
6
5
OPEN/CLOSE
CD CHANGE
CD
CHAN
CD REWRITABLE COMPATIBL
GER
E • 3 CD CHANGER
ANALOG
DIGITAL /
AUX
STANDBY
ON
TUNER
SOR
iR SEN
CD 1
CD 2
CD 3
CD TEX
FW-
R8
CK/T
T CLO
MINI HIFI SYSTEM
CD RECORD ABLE
IMER
º
ª
•
AM
AERIAL
SPEAKERS
6Ω
L
FM AERIAL
300Ω
DISPLAY
R
CD-TEXT EDITIN
≥
G
SE
OPEN/CLO
SUBWOOFE
OUT
R
DIGITAL
OUT
RDER
CD RECO
L
CDR
AUX
IN
DIGITAL
IN
R
L
LINE
OUT
RECORD
R
CD
CD
NS
AC MAI
COMPILE
MIC
LEVEL
~
CD
REC TYPE
ERASE
FINALIZE
EDIT
MIC
1
* (
)
¡ ™£ ≤
23
4
∞ §
On the back
1 AC MAINS ~ ........................After all other
connections have been
made, connect the power
cord to the power outlet.
For optimal performance
use only the original
power cable.
2 DIGITAL IN ...........................connect to the coaxial output
of a digital appliance
3 DIGITAL OUT........................connect to the coaxial input
of a digital appliance
4 SPEAKERS 6 Ω L/R .............connect to the supplied
speakers
5 SUBWOOFER OUT ..............connect to the input of a
subwoofer
6
6 AM AERIAL ..........................connect the supplied loop
antenna here
7 FM AERIAL 300 Ω ...............connect the supplied wire
antenna here
8 AUX IN L/R ...........................connect to the analog audio
output of an additional
appliance
9 LINE OUT L/R .......................connect to the analog audio
input of an additional
appliance
On the front
0 Source selection
CD 1, CD 2, CD 3 ..................selects the CD changer,
switches to CD 1, CD 2 or
CD 3
CDR........................................selects the CD recorder
TUNER...................................selects the tuner
DIGITAL / ANALOG AUX ....selects the input for an
additional appliance
! ...............................................CD changer tray
@ OPEN/CLOSE........................opens and closes the
CD changer tray
# CD CHANGE .........................selects the next disc tray
$ ...............................................display
% CD RECORDER .....................CD recorder tray
^ y STANDBY ON...................switches the unit on and to
standby
& DISPLAY ...............................selects display
information/text
* MIC LEVEL ...........................adjusts the microphone
volume
( MIC........................................microphone jack
) Multiple function control
Rotary control:
í JOG CONTROL ë........CDC, CDR: selects the
previous/next track
TUNER: selects the
previous/next preset tuner
station
Keys to press:
YES ........................................confirms a selection
á SEARCH..........................CDC, CDR: searches forward,
reviews the tracks in a
program, controls the cursor
in different menus
TUNER: tunes to a higher
radio frequency
É PLAY/PAUSE..................starts and interrupts
playback/recording
PROG.....................................opens/closes the program
menu
EDIT TEXT.............................enters/exits the text edit
menu
EDIT TRACK .........................enters/exits the track edit
menu
REC LEVEL ............................enables the rotary control to
adjust the level for
recordings
Ç STOP...............................stops CD play/record, closes
program memory
à SEARCH..........................CDC, CDR: searches
backward, reviews the tracks
in a program, controls the
cursor in different menus
TUNER: tunes to a lower
radio frequency
NO..........................................cancels a selection
¡ FINALIZE...............................finalizes and unfinalizes
recordings
™ REC TYPE..............................enters/exits the recording
menu
£ RECORD
CD™CD..................................selects high speed recording
and automatic finalizing of
current CD
COMPILE CD ........................selects high speed recording
and automatic finalizing of
current program
≤ ERASE ...................................erases recordings
∞ Sound control
MASTER VOLUME ..............adjusts the volume
TREBLE .................................sets the treble level
PURE .....................................switches bass and treble
settings on/off
INCREDIBLE SURR..............creates an incredibly wide
stereo effect
LOUDNESS...........................boosts treble and bass
BASS.....................................sets the bass level
§ p ...........................................3.5 mm headphone jack
Note: Connecting the headphones will switch off the
speakers.
≥ OPEN/CLOSE........................opens and closes the
CD recorder tray
• CD TEXT................................switches through CD text
information
ª CLOCK/TIMER......................selects the clock function,
activates and deactivates the
timer
º iR SENSOR ...........................sensor for the infrared
remote control
Note: You will recognize that various keys will be illuminated
on the unit depending on the different modes or
programs you are in. This is for your guidance in order
to facilitate the finding of the relevant keys for
selection.
7
English
CONTROLS AND CONNECTIONS
INSTALLATION
English
Power
Antenna connections
The type plate is located on the rear of the unit.
AM antenna
The supplied loop antenna is for indoor use only.
1 Check whether the power voltage as shown on the type
plate corresponds to your local power voltage. If it does
not, consult your dealer or service organization.
1 Fit the plug of the loop antenna to AM AERIAL as shown
below.
2 Make sure all connections have been made before
switching on the power supply.
2 Position the antenna as far as possible from a TV, VCR or
other radiation sources.
3 Connect the supplied power cable to AC MAINS ~ and to
the power outlet. This switches on the power supply.
3 Turn the antenna for optimum reception.
For optimal performance use only the original power
cable.
AM
AERIAL
When the unit is switched to standby, it is still consuming
some power. To disconnect the unit from the power
completely, remove the power cable from the power outlet.
To avoid overheating of the unit, a safety circuit has
been built in. Therefore, your unit may disconnect
under extreme conditions. If this happens, switch the
unit off and let it cool down before reusing it.
Speaker connections
The speaker connections are click-fit connectors. Use them as
shown below.
FM antenna
The supplied wire antenna can only be used to receive nearby
stations. For better reception we recommend using a cable
antenna system or an outdoor antenna.
1 Open the FM AERIAL 300 Ω click-fits by pushing the lever
down as shown below.
2 Insert each wire of the antenna into one hole.
3 Close the click-fits using the lever.
4 Move the antenna in different positions for optimum
reception.
1 Connect the colored (or marked) wire to the red terminal
and the black (or unmarked) wire to the black terminal.
2 Connect:
– Left speaker to L (red and black)
– Right speaker to R (red and black)
8
AL
FM AERI
300 Ω
AL
FM AERI
300 Ω
The unit complies with the FCC-Rules, Part 15 and with
21 CFR 1040.10. Operation is subject to the following
two conditions:
1. This device may not cause harmful interference, and
2. This device must accept any interference received,
including interference that may cause undesired
operation.
English
INSTALLATION
SUBWOOFER
AM
AERIAL
SPEAKERS 6 Ω
FM AERIAL
300 Ω
L
R
SUBWOOFER
OUT
DIGITAL
OUT
L
AUX
IN
DIGITAL
IN
R
L
LINE
OUT
R
AC MAINS
~
TAPE RECORDER
CD PLAYER
CD RECORDER
Analog audio connections
Digital audio connections
AUX IN L/R
It is possible to use an additional appliance, e.g. tape
recorder, TV or VCR, with the unit.
DIGITAL IN
You can use this coaxial input for recordings from any digital
audio equipment with a digital coaxial output e.g. CD player
or DVD player.
1 Insert the red plug of a cinch cable to the red jack AUX IN R
and insert the white plug to the white jack AUX IN L.
2 Connect the other end of the cinch cable to the audio
outputs of the additional appliance.
3 Press DIGITAL / ANALOG AUX repeatedly to select the
analog input for the appliance.
y AUX Analog is displayed.
4 Operate your appliance as usual and adjust volume and
sound with the unit.
Note: It is not possible to connect a turntable directly to
AUX IN L/R. If you wish to use a turntable with the
unit, you have to connect an amplifier to AUX IN L/R on
the unit. Then connect the turntable to the amplifier.
LINE OUT L/R
You can use these outputs for playback or recording on any
analog audio equipment e.g. amplifier or tape recorder.
• Use a cinch cable to connect the analog audio inputs of the
additional appliance with LINE OUT L/R on the unit and
operate your appliance as usual.
1 Use a coaxial cable to connect the coaxial output of the
additional appliance with DIGITAL IN on the unit.
2 Press DIGITAL / ANALOG AUX repeatedly to select the
digital input for the appliance.
y AUX Digital is displayed.
3 Operate your appliance as usual.
DIGITAL OUT
You can use this coaxial output for recordings on any digital
audio equipment with a digital coaxial input e.g. CD recorder.
• Use a coaxial cable to connect the coaxial input of the
additional appliance with DIGITAL OUT on the unit and
operate your appliance as usual.
Connecting a subwoofer
A subwoofer can be used to enhance the bass performance of
your unit dramatically.
1 Use a cinch cable to connect the input of the subwoofer
with SUBWOOFER OUT at the unit.
2 Follow the instructions supplied with the subwoofer.
9
REMOTE CONTROL
2 ...........................switches the unit to standby
CDR, TUNER, CD1,
CD2, CD3, AUX........selects the sources
Number/alphabet keys
1–0 ....................keys in numbers for tracks or stations
ABC – XYZ ........keys in letters for text
SPACE ...............keys in a space within the text
EDIT TEXT ................enters the text edit menu
-VOLUME.............decreases the volume
+VOLUME.............increases the volume
É ...........................starts playback/recording
í ..........................CDC, CDR: selects the previous track
TUNER: selects the previous preset tuner
station
ë ...........................CDC, CDR: selects the next track
TUNER: selects the next preset tuner
station
Ç ...........................stops CD play/recording, closes program
memory
á ...........................CDC, CDR: searches forward, reviews the
tracks in a program, controls the cursor in
different menus
TUNER: tunes to a higher radio frequency
à ...........................CDC, CDR: searches backward, reviews
the tracks in a program, controls the
cursor in different menus
TUNER: tunes to a lower radio frequency
Å ...........................interrupts playback/recording
YES ..........................selects a selection
NO ...........................cancels a selection
PROGRAM ...............opens/closes the program menu
SHUFFLE ..................plays tracks in random order
REPEAT ....................repeats a track, the entire CD(RW) or the
program
TRACK INCR. ...........selects automatic or manual increment of
a track
TIMER ON/OFF ........activates and deactivates the timer
SLEEP.......................activates the sleep timer
MUTE.......................mutes the sound
BRIGHTNESS...........controls the brightness of the display
L BALANCE..............adjusts the volume balance to the left
speaker
R BALANCE .............adjusts the volume balance to the right
speaker
LOUDNESS ..............boosts treble and bass
INCREDIBLE
SURROUND .............creates an incredibly wide stereo effect
PURE ........................switches bass and treble settings on/off
Note: Always press the source key of the source you wish to
control (e.g. CD1) before selecting the desired function
key (e.g. SHUFFLE).
CDR
2
TUNER
CD1
ABC
CD2
CD3
DEF
GHI
1
2
3
JKL
MN
OPQ
4
5
6
RST
UVW
XYZ
7
8
9
SPACE
TEXT
0
EDIT
AUX
VOLUME
-
É
ë
English
Remote control buttons
+
ë
Ç
Å
NO
YES
PROGRAM SHUFFLE
TIMER ON/OFF
REPEAT TRACK INCR.
SLEEP
BRIGHTNESS
LOUDNESS
MUTE
BALANCE
L
R
INCREDIBLE
PURE
SURROUND
Remote control batteries
Open the battery compartment
of the remote control and insert
2 alkaline batteries, type AA
(R06, UM-3).
Do not use old and new or
different types of batteries in
combination.
Remove batteries if they are dead or if the remote control is
not to be used for a long time.
Batteries contain chemical substances, so they should
be disposed of properly.
10
DISPLAY
Information area
PRESET
STEP
TOTAL
TRACK
TIME
TOTAL
REM
REC
REM
TOTAL
REC
TRACK
TIME
AM
PM
CD RECORDER
CD CHANGER
CD R W
TUNER
CD R W
COMPILE CDC
FM TUNER
CD CD AUX
START
RECORDING IN PROGRESS
FINALIZE
MIC
ALC
FINISH
CD TEXT EDIT TRACK REC
PROG ALARM SLEEP
REPEAT SHUFFLE
DISC TRACK ALL
STEREO
NEWS TA EON
INCREDIBLE
AUX
SURROUND
LOUDNESS DIGITAL ANALOG
PURE
20 + 1 2 3 4
5 6 7 8 9 10
11 12 13 14 15
16 17 18 19
This area is used for feedback of the CD changer, CD recorder,
tuner frequencies, menu options, values and scrolling text
messages.
Status lights and flags
PRESET
STEP
.....current program is being recorded with
high speed dubbing and auto finalize
FM TUNER
..........FM station is being recorded
............current disc is being recorded with
CD=CD
high speed dubbing and auto finalize
AUX
...................material from an external source is
being recorded
É .........................playback is activated
Å .........................playback is interrupted
RECORDING IN PROGRESS ..recording in progress
.....status of recording progress is shown
CD ..................................pre-recorded CD, finalized CDR or
CDRW inserted
CD R ...............................unfinalized CDR inserted
CD RW ............................unfinalized CDRW inserted
FINALIZE .........................(un)finalizing will start
MIC ................................microphone input is being used
ALC ................................auto level control is active
COMPILE CDC
The display of the unit is divided into 3 sections, which show
you the following:
TOTAL
TRACK
TOTAL
REM
REC
TRACK
CD RECORDER
CD CHANGER
CD R W
COMPILE CDC
FM TUNER
CD CD AUX
START
FINISH
Tuner
TIME
TIME
STEREO ...........................FM
AM
PM
CD R W
START
RECORDING IN PROGRESS
CD TEXT EDIT TRACK REC
PROG ALARM SLEEP
REPEAT SHUFFLE
DISC TRACK ALL
TUNER
FINALIZE
MIC
ALC
FINISH
STEREO
NEWS TA EON
INCREDIBLE
AUX
SURROUND
LOUDNESS DIGITAL ANALOG
PURE
20 + 1 2 3 4
5 6 7 8 9 10
11 12 13 14 15
16 17 18 19
AUX
DIGITAL ...........................digital
ANALOG ..........................analog
CD TEXT ..........................CD
text is available
CD TEXT EDIT ..................text edit menu is active
EDIT TRACK ....................track edit menu is active
REC X..........................record timer is selected
PROG ..............................program menu is active
X ................................clock is selected
ALARM X .....................alarm timer is selected
SLEEP .............................sleep timer is selected
REPEAT DISC ...................selected disc is played repeatedly
REPEAT TRACK .................current track is played repeatedly
REPEAT ALL .....................all discs in the CD changer (or the
program) are (is) played repeatedly
SHUFFLE ..........................either all tracks of the program or of
the loaded disc(s) in the CD changer or
CD recorder are played in random
order
CD Changer
........................number of disc trays loaded
É ........................playback is activated
Å .........................playback is interrupted
CD 1, 2, 3.....................disc tray 1, 2 or 3 is selected and
loaded with a pre-recorded CD,
finalized CDR or CDRW
CD R 1, 2, 3..................disc tray 1, 2 or 3 is selected and
loaded with an unfinalized CDR
CD RW 1, 2, 3...............disc tray 1, 2 or 3 is selected and
loaded with an unfinalized CDRW
input in use for external source
input in use for external source
Music calendar, sound lights and remote control
PRESET
Flags
station is being received in stereo
STEP
TOTAL
TRACK
TIME
TOTAL
REM
REC
TRACK
TIME
AM
PM
CD RECORDER
CD CHANGER
CD R W
CD R W
COMPILE CDC
FM TUNER
CD AUX
CD
START
RECORDING IN PROGRESS
CD TEXT EDIT TRACK REC
PROG ALARM SLEEP
REPEAT SHUFFLE
DISC TRACK ALL
TUNER
FINALIZE
MIC
ALC
FINISH
STEREO
NEWS TA EON
INCREDIBLE
AUX
SURROUND
LOUDNESS DIGITAL ANALOG
PURE
20 + 1 2 3 4
5 6 7 8 9 10
11 12 13 14 15
16 17 18 19
INCREDIBLE SURROUND ....Incredible
Surround is active
is active
PURE ..............................bass and treble settings are switched
off
...............................command from remote control is being
received
Music calendar
1–20..........................CDC, CDR: actual track number played,
number of tracks on a disc/program
TUNER: preset number of tuned
station
+................................CDC, CDR: disc or program contains
more than 20 tracks
TUNER: more than 20 radio stations
are stored
......spectrum analyzer
LOUDNESS ......................Loudness
11
English
CD Recorder
Display
BASIC FUNCTIONS
English
OPEN/CLOSE
CD CHANGE
CD
CHAN
GER
LE • 3 CD CHANGER
CD REWRITABLE COMPATIB
DIGITAL /
ANALOG
AUX
STANDBY
ON
TUNER
SOR
iR SEN
CD 1
CD 2
ER
CK/ TIM
T CLO
CD TEX
CD 3
FW-
R8
M
MINI HIFI SYSTE
CD RECOR DABLE
DISPLAY
CD-TEXT EDIT
ING
LOSE
OPEN/C
ER
CD RECORD
CDR
RECORD
CD
CD
COMPILE
MIC
LEVEL
3 CD changer:
Press OPEN/CLOSE on the unit again to close the tray.
yThe tray is closed and Reading is displayed.
yIf an unfinalized disc is inserted, Initializing will
be displayed.
yCD, the disc tray number, the total number of tracks and
the total playing time of the disc in the last selected disc
tray are displayed. The track numbers light up in the music
calendar.
CD recorder:
Press OPEN/CLOSE on the unit again to close the tray.
yThe tray is closed and Reading is displayed.
yIf an unfinalized disc is inserted, Initializing will
be displayed.
yCDR, the total number of tracks and the total playing time
of the disc are displayed. The track numbers light up in the
music calendar.
CD
REC TYPE
ERASE
Playing a CD(RW)
FINALIZE
EDIT
MIC
Switching on, switching to standby
• To switch the unit on press y STANDBY ON on the unit.
• To switch the unit to standby press y STANDBY ON
again on the unit (2 on the remote control).
Loading the CD changer, CD recorder
Important!
1) This system is designed for regular CD(RW)s.
Therefore, do not use any accessories such as disc
stabilizer rings or CD treatment sheets, etc. as offered
on the market, because they may cause jamming of
the changer mechanism.
2) Do not load more than one disc into one disc tray.
1 CD changer:
Press OPEN/CLOSE on the unit to open the CD changer tray.
yOpen CDC is displayed and the tray is opened.
CD recorder:
Press OPEN/CLOSE on the unit to open the CD recorder tray.
yOpen CDR is displayed and the tray is opened.
2 CD changer:
You can load up to three discs in the CD changer for
continuous playback without interruption. Insert an
audio disc (printed side up) in the right disc tray.
• You can load another disc in the left disc tray.
• To insert a third audio disc, press CD CHANGE on the unit.
yThe CD carousel will rotate until the empty disc tray
is at the right hand side.
CD recorder:
Insert an audio disc (printed side up) in the tray.
12
1 Press É PLAY/PAUSE (Éon the remote control) to start
playback.
CD changer:
y CD, the disc tray number, the current track number and
elapsed playing time are displayed. The current track
number is also blinking in the music calendar.
CD recorder:
y CDR, the current track number and elapsed playing time
are displayed. The current track number is also blinking
in the music calendar.
• To switch through the following information, repeatedly
press DISPLAY on the unit:
y Track number, remaining playing time of current track
y Track number, remaining playing time of disc
y Track number, actual playing time of current track
2 Press Ç STOP (Çon the remote control) to stop playback.
CD changer:
y CD, the disc tray number, the total number of tracks and
the total playing time of the disc are displayed.
CD recorder:
y CDR, the total number of tracks and the total playing
time of the disc are displayed.
• To switch through the following information, repeatedly
press DISPLAY on the unit:
y Total number of tracks, total playing time of disc
y CD text is displayed.
• You can interrupt playback by pressing É PLAY/PAUSE
(Åon the remote control).
y The time where playback was interrupted is blinking.
• To resume playback press É PLAY/PAUSE (Éon the
remote control) again.
BASIC FUNCTIONS
RECORD
CD
CD
COMPILE
CD
REC TYPE
ERASE
FINALIZE
T
English
LOUDNESS
• Press LOUDNESS to switch loudness either on or off.
yLOUDNESS is shown and Loudness is displayed if
loudness is on.
MUTE
This feature allows you to temporarily switch off the sound
without switching off the unit.
1 Press MUTE on the remote control to switch off the sound.
yMute is displayed and playback/recording will be
continued without sound.
Sound control
2 Press MUTE on the remote control again to switch on the
sound again.
Volume adjustment
• Adjust the volume by using MASTER VOLUME
(-VOLUME/+on the remote control).
y The volume level in dB (decibel) is displayed.
Speaker balance
It is possible to adjust the relative volume balance between
the connected front speakers.
Incredible Surround
Stereo sound is determined by the distance between the front
speakers. Incredible Surround enables you to enjoy an incredibly
wide stereo effect, regardless of the speakers’ distance.
• Press INCREDIBLE SURR. (INCREDIBLE SURROUND on the
remote control) to switch the surround sound effect either
on or off.
yINCREDIBLE SURROUND is shown and Incredible
Surround is displayed if the surround sound effect is on.
Note: The effect of Incredible Surround may vary with different
types of music.
Treble and Bass level adjustment
1 Press TREBLE or BASS on the unit.
yThe volume rotary is activated to select the treble/bass
settings.
2 Turn the volume rotary to adjust the treble or bass.
y Treble or Bass and the actual value (between –5
and +5) is displayed briefly.
Note: If the volume rotary is not turned for 5 seconds, it will
switch back to volume.
• Press L BALANCE or R BALANCE on the remote control to
adjust the relative volume of the left or right front speaker.
y Balance L (or R) and the actual volume of the left
(or right) front speaker are displayed.
y When the volume of both speakers is balanced,
Balance L=R is displayed.
Demo mode
The demo mode displays various features of the unit and will
start automatically.
• If any source key is pressed:
y The unit switches to the selected source.
If y STANDBY ON is pressed:
y The unit switches to standby. After a few seconds, the
demonstration will start again.
Cancelling the demo mode
• Keep Ç STOP on the unit pressed for at least 3 seconds to
cancel the demo mode.
y The demo mode is cancelled permanently. The unit
switches to standby. A few seconds later the unit
switches to an economy power save mode.
PURE
• Press PURE repeatedly to switch bass and treble settings
either on or off.
yPURE is shown and Pure is displayed if bass and treble
settings are switched off.
yOptimal is displayed if preset bass and treble
settings are switched on.
yPersonal is displayed if personal preset bass and
treble settings are switched on.
13
BASIC FUNCTIONS
English
Selecting a disc on the CD changer
• Press either CD 1, CD 2 or CD 3 to select a particular disc.
Selecting a track and searching
Selecting a track during playback
• Rotate í JOG CONTROL ë (pressí or ë on the remote
control) to skip to the beginning of the previous or next track
on the selected disc.
y Playback continues with the selected track.
Selecting a track when playback is stopped
1 Rotate í JOG CONTROL ë (pressí or ë on the
remote control) to skip to the required track number.
2 PressÉ PLAY/PAUSE (Éon the remote control) to start
playback.
y Playback starts with the selected track.
Note: Instead of using í or ë on the remote control, you can
also directly key in the required track number by using the
numerical keys. For 2-digit numbers, press the keys in
rapid succession.
Searching for a passage during playback
1 Keep à SEARCH or á SEARCH (à or á on the remote
control) pressed to find a particular passage in a backward
or forward direction.
y Searching is started and playback continues at a low
volume. After 3 seconds, the search speeds up with
volume muted.
2 Release the key at the desired passage.
y Normal playback continues.
Note: During SHUFFLE, while repeating a track or while playing
a program, searching is only possible within the current
track.
SHUFFLE and REPEAT
Playing tracks in random order
1 Press SHUFFLE on the remote control during playback.
y SHUFFLE is shown and either all tracks of the program or
of the loaded disc(s) in the CD changer or CD recorder
are played in random order.
2 To return to normal playback, press SHUFFLE again.
CD text
CD TE
ABLE MINI HIFI
XT
CLOCK
/TIMER
SYSTEM
This feature allows the display of information such as album
title or track title contained on a specially encoded CD.
• Make sure to insert a CD with CD text.
yCD TEXT is shown and the album title is scrolled once.
CD text when playback is stopped
• Press CD TEXT on the unit to see the following information,
which will be scrolled once (if available):
– Album title
– Artist’s name on album
CD text during playback
• Press CD TEXT on the unit to see the following information,
which will be scrolled once (if available):
– Artist’s name on track (on CD recorder only)
– Track title
Microphone mixing
1 Set MIC LEVEL to the minimum level to prevent acoustic
feedback (e.g. a loud howling sound) before you connect the
microphone.
2 Connect a microphone to MIC.
Repeating a track, the disc or the program
1 Repeatedly press REPEAT on the remote control during
playback to select either:
y REPEAT TRACK: The current track is played repeatedly.
y REPEAT DISC: The entire selected disc is played repeatedly.
y REPEAT ALL: All discs in the CD changer (or the program)
are (is) played repeatedly.
3 Press CD 1, CD 2, CD 3, CDR, TUNER or
DIGITAL / ANALOG AUX to select the source with which
you wish to mix the microphone.
2 Playback starts in the chosen mode.
6 Adjust the desired mixing level between the source and the
microphone by turning MIC LEVEL.
3 To return to normal playback, press REPEAT on the remote
control until the display indication disappears.
7 Start singing or talking through the microphone.
Note: REPEAT DISC is not possible during SHUFFLE or while
playing a program.
Note: Keep the microphone away from the speakers to
prevent a howling sound.
14
4 Play the selected source.
5 Adjust the volume using MASTER VOLUME.
Erasing a track from the program
RECORD
CD
1 If necessary, press Ç STOP on the unit (Ç on the remote
control) to stop playback.
CD
COMPILE
MIC
LEVEL
CD
REC TYP
E
FINALIZE
2 Press either CD 1, CD 2, CD 3, or CDR to select the desired
memory.
EDIT
MIC
3 Press PROG (PROGRAM on the remote control), followed by
à SEARCH or á SEARCH (à or á on the remote
control) to move through the program steps.
y The track number at the selected step and the total
program time are displayed.
Programming track numbers
You can select tracks and store them either in the CD changer
or CD recorder memory. If you use the program for playback
you can choose one of the two memories, else if you like to
specify tracks for recording, use the CD changer memory only!
You can store any track more than once.
4 Press NO to remove the track from the program.
y Cleared is displayed briefly.
y The next programmed track number will move up to this
position and is displayed together with the step number
and the remaining total program time.
1 Load the desired disc(s) in the disc tray(s).
Clearing the program
2 Press either CD 1, CD 2, CD 3, or CDR to select the disc.
1 If necessary, press Ç STOP on the unit (Ç on the remote
control) to stop playback.
3 Press PROG on the unit (PROGRAM on the remote control).
y PROG starts blinking and Program is displayed.
2 Press NO.
y Clear Prog? is displayed.
4 If either CD 1, CD 2 or CD 3 is selected:
Rotate í JOG CONTROL ë to select either:
y CD1 (or 2, 3) All: All tracks of CD 1 (or 2, 3) will be
programmed.
y CD1 (or 2, 3) and track number: The track number of
CD 1 (or 2, 3) will be programmed.
3 Press YES to clear the program.
y Prog Cleared will be displayed and PROG goes off.
If CDR is selected:
Rotate í JOG CONTROL ë (press the numerical keys on
the remote control; for 2-digit numbers, press the keys in
rapid succession) to select a track number.
5 Press YES to store your selection in the memory.
y The number of programmed tracks (STEP), Prog and the
total program time are displayed. The track number
blinks in the music calendar.
6 Select and store all desired tracks in this way.
7 Press PROG on the unit (PROGRAM on the remote control)
to end programming.
y PROG stays shown and the program is currently
available.
Note: If the maximum number of programmable tracks is
reached, the display shows Program full.
Note: When you open the CD recorder tray or the CD changer
tray the respective program will be cleared.
Making a program for recording
1 Select and store all desired tracks in the CD changer
memory (see “Programming track numbers”).
2 Enter the recording menu (see “Internal recording”).
• If the total time of the program is of larger size than the
remaining recording time of the CDR(W):
yNot fitting! will be displayed briefly, followed by
the remaining recording time and Record Prog?
If you nevertheless start recording, only those tracks of the
program that fit onto the CDR(W) will be recorded in
entirety.
•To change the program, press NO.
yEdit Program will be displayed briefly, PROG and
the time of the program start blinking. Now you can
change the program (see “Programming track numbers”,
“Erasing a track from the program” and “Clearing the
program”).
15
English
PROGRAM
ABOUT RECORDING
English
Basic information
Direct Line Recording (DLR)
The CD recorder deck offers you 3 main functions:
– Recording from the internal CD changer and tuner or
from a selected external source
– Finalizing your CDR(W) discs and unfinalizing your
CDRW discs
– Erasing a CDRW disc
The CD recorder is equipped with the high-performance Direct
Line Recording technique. It ensures a perfect recording of
the source material, meaning a true “bit for bit” recording.
DLR will always become active when you make normal
recordings in listen mode.
The recording procedure is the same for CDR and CDRW
discs. Make sure the CDR(W) is absolutely free of
scratches and dust particles.
For recordings, the minimum track length is 4 seconds. You can
record up to a maximum of 99 tracks on a disc. The minimum
of recording time left on the disc is 7 seconds. Otherwise
Does not fit is displayed and you cannot enter the
record standby mode.
DO NOT FORGET TO FINALIZE!
Finalizing a CDR(W) disc is a simple procedure, necessary to:
– play a recorded CDR on a standard CD player or
– play a recorded CDRW on a CDRW compatible CD player
and CD recorder.
Copyright protection
The Serial Copy Management System (SCMS) prevents the
making of a digital copy from a digital copy. The system allows
making a digital recording from the original, however in some
countries this may require the authorization of copyright holders.
Auto Level Control (ALC)
Auto Level Control ensures that the tracks on the recorded
disc have a similar volume level. At all times the already
recorded tracks of the CDR(W) disc will be taken as reference
for the volume level of the following recordings. ALC is active
when ALC is shown.
Auto level control becomes active when:
– COMPILE CD is being used,
– a disc, a track or a track edit is being high speed recorded
and the CDR(W) has recordings on it,
– a program (consisting from more than one disc) from the
CD changer is being high speed recorded, or
– CD™CD is being used and the CDR(W) has recordings on it.
Auto level control will not become active when:
– CD™CD is being used and the CDR(W) has no recordings
on it,
– making recordings from the FM tuner,
– making recordings from an external source, or
– making normal recordings in listen mode.
REC LEVEL key
When you try to record copy protected material from an external
source, Copy Protect will be displayed. No further digital
recording is possible then.
You can adjust the reference record level. This is also possible
when ALC is active. This feature can be used for fading your
recordings in or out.
When you try to record copy protected material from the
internal CD changer, no digital recording is possible, however
the CD recorder will automatically switch to analog recording.
1 Keep REC LEVEL on the unit pressed to enable the rotary
control to adjust the record level.
Recording CD text
If the original CD has CD Text, this text will be recorded
automatically, provided that the CD text is not copy protected.
In that case, recording of CD text will not be possible and
Text Protect will be displayed.
16
2 Turn the rotary control to the left to adjust the desired
record level.
y The actual record level (in dB) will be displayed.
• The record level is reset after the unit has been switched to
standby.
Recording modes
For internal recordings you can record from the internal
CD changer or tuner. You can choose from the following
recording modes:
– High speed recording and automatic finalizing:
Fast and easy! Record and finalize your CDR(W) in one
quick step while the sound is muted. You can record the
current CD or a program from the CD changer.
– High speed recording:
Record your CDR(W) fast while the sound is muted. You can
record an entire CD, a track, a program or a track edit from
the CD changer.
– Normal recording and listening:
Listen to the recording while you are making it. You can
record an entire CD, a track, a program or a track edit
from the CD changer.
– Manual recording:
Start and stop your recording manually while listening to
it. You can do either microphone recordings or radio
recordings from the FM tuner.
High speed recording and automatic finalizing
2 Press COMPILE CD on the unit to enter the record mode.
yBoth decks will be selected in the display, the arrow
starts blinking. The remaining recording time of the
CDR(W), the total playing time of the source CD and
Record Prog? are displayed.
3 Press either:
YES to confirm,
or
NO to change the program.
yPROG starts blinking. Now you can change the program
(see “Program”) and return to the record mode by
pressing COMPILE CD.
4 Auto Fin? is displayed.
Press either:
YES, if the CDR(W) is to be finalized after recording,
or
NO, if the CDR(W) is not to be finalized after recording.
yThe
arrow lights, RECORDING IN PROGRESS is shown, high
speed recording and finalizing (if selected) start and the
actual recording time remaining starts to count down.
RECORD
CD
High speed recording and automatic finalizing
(optional) of the current program
1 Make sure the CDR(W) is absolutely free of scratches and
dust particles.
CD
COMPILE
CD
REC TYPE
ERASE
FINALIZE
Note: If no program is available and you press COMPILE CD,
you enter immediately into the program menu. Start
your programming and return to the record mode by
pressing PROGRAM or COMPILE CD.
EDIT
DO NOT FORGET TO FINALIZE!
High speed recording and automatic finalizing of the
current disc
1 Make sure the CDR(W) is absolutely free of scratches and
dust particles.
Finalizing a CDR(W) disc is a simple procedure, necessary to:
– play a recorded CDR on a standard CD player or
– play a recorded CDRW on a CDRW compatible CD player
and CD recorder.
2 Press CD™CD on the unit to enter the recording mode.
yBoth decks will be selected in the display, the arrow starts
blinking. The remaining recording time of the CDR(W), the
total playing time of the source CD and Record CD1
(or 2, 3)? are displayed.
3 Press YES to start recording and finalizing.
yThe arrow lights, RECORDING IN PROGRESS is shown, high
speed recording and finalizing start, and the actual
recording time remaining starts to count down.
Note: If a program was already available before pressing
CD™CD, this will be ignored. PROG goes off and the
current disc will be recorded. After finishing the recording,
PROG is shown and the program is available again.
17
English
INTERNAL RECORDING
INTERNAL RECORDING
English
ANALOG
DIGITAL /
AUX
STANDBY
ON
TUNER
SOR
iR SEN
CD 1
CD 2
CK /TIM
T CLO
CD TEX
CD 3
FW-
R8
CD
5 Press YES to confirm your selection.
yBoth decks will be selected in the display, the arrow
starts blinking. The remaining recording time of the
CDR(W), the total recording time of the CDR(W) and
either Record CD1 (or 2, 3)?, Record Prog? or
Record A-B? is displayed.
HIFI SYSTE M
RECO RDAB LE MINI
Note: When the CDR(W) already contains a recording, ALC
will also become active and ALC will be shown.
DISPLAY
ING
CD -TEXT EDIT
OPEN/C
LOSE
DER
CD RECOR
CDR
6 Press YES to start high speed recording.
yThe arrow lights, RECORDING IN PROGRESS is shown, high
speed recording starts and the actual recording time
remaining starts to count down.
RECORD
CD
• To stop recording, press Ç STOP on the unit.
CD
COMPILE
CD
Normal recording and listening
E
REC TYP
MIC
LEVEL
ERASE
FINALIZE
EDIT
MIC
Normal recording and listening of an entire disc, a
track, a program or a track edit
1 Make sure the CDR(W) is absolutely free of scratches and
dust particles.
2 Follow steps 2 and 3 of “High speed recording”.
High speed recording
High speed recording of an entire disc, a track, a
program or a track edit
1 Make sure the CDR(W) is absolutely free of scratches and
dust particles.
2 Press either CD 1, CD 2 or CD 3 to select the disc from
which you wish to record.
3 Press REC TYPE on the unit to enter into the recording menu.
4 Rotate í JOG CONTROL ë to select one of the
following high speed recording modes:
If a disc from the CD changer is selected:
yCD Fast?: for high speed recording of an entire disc
• Continue with step 5.
yTrack Fast?: for high speed recording of a track
• Press YES to confirm.
• Rotate í JOG CONTROL ë to select the track.
yRec Tr and the track number is displayed.
• Continue with step 6.
If CD changer program mode is available:
yProg Fast?: for high speed recording of the selected
disc or of the program
If CD changer track edit mode is available:
Fast?: for high speed recording of the A–B track
yA-B
3 Rotate í JOG CONTROL ë to select one of the
following normal record options:
If CD changer is selected:
yCD Listen?: for listening to the entire disc during
normal recording
yTrackListen?: for listening to the track during
normal recording
• Press YES to confirm.
• Rotate í JOG CONTROL ë to select the desired
track.
yRec Tr and the track number is displayed.
• Continue with step 6 of “High speed recording”.
If CD changer program mode is available:
yProg Listen?: for listening to the program during
normal recording
If CD changer track edit mode is available:
yA-B Listen?: for listening to the A–B track during
normal recording
4 Follow steps 5 and 6 of “High speed recording”.
• To stop recording, press Ç STOP on the unit.
DO NOT FORGET TO FINALIZE!
Finalizing a CDR(W) disc is a simple procedure, necessary to:
– play a recorded CDR on a standard CD player or
– play a recorded CDRW on a CDRW compatible CD player
and CD recorder.
18
ANALOG
DIGITAL /
AUX
STANDBY
ON
4 Press CD 1, CD 2 or CD 3 to select the disc with which you
wish to mix the microphone.
TUNER
SOR
iR SEN
CD 1
5 Press REC TYPE on the unit to enter the recording menu.
CD 2
CK /TIM
T CLO
CD TEX
CD 3
FW-
R8
CD
HIFI SYSTE M
RECO RDAB LE MINI
DISPLAY
ING
CD -TEXT EDIT
OPEN/C
LOSE
6 Rotate í JOG CONTROL ë to select the manual recording
mode for the microphone:
yCD Mix Mic is displayed.
7 Press YES to confirm.
yWait and Record? are displayed.
DER
CD RECOR
8 Press YES to start recording.
CDR
9 Rotate í JOG CONTROL ë to select the desired track.
yThe disc tray number, the current track number and
playing time of the track are displayed.
RECORD
CD
CD
COMPILE
CD
E
REC TYP
MIC
LEVEL
ERASE
FINALIZE
10 Press É PLAY/PAUSE to start playback.
yThe selected source is mixed with the microphone.
EDIT
MIC
Manual recording
Manual recording from the FM tuner
1 Make sure the CDR(W) is absolutely free of scratches and
dust particles.
2 Press TUNER repeatedly to select the FM tuner. Then select
the desired radio station (see “Tuning to radio stations”).
11 Press Ç STOP to stop recording.
• To perform microphone recording only, see “Manual
recording” in chapter “External recording”.
DO NOT FORGET TO FINALIZE!
Finalizing a CDR(W) disc is a simple procedure, necessary to:
– play a recorded CDR on a standard CD player or
– play a recorded CDRW on a CDRW compatible CD player
and CD recorder.
3 Press REC TYPE on the unit to enter the recording menu.
Tuner? is displayed.
yFM
4 Press YES to confirm.
yWait and Record? are displayed.
5 Press YES to start recording.
yThe arrow lights, RECORDING IN PROGRESS is shown,
manual recording starts and the actual recording time
remaining starts to count down.
6 Press Ç STOP to stop recording.
Manual microphone recording
1 Make sure the CDR(W) is absolutely free of scratches and
dust particles.
2 Set MIC LEVEL to the minimum level to prevent acoustic
feedback (e.g. a loud howling sound) before you connect
the microphone.
3 Connect a microphone to MIC.
19
English
INTERNAL RECORDING
EXTERNAL RECORDING
English
ANALOG
DIGITAL /
AUX
STANDBY
ON
TUNER
SOR
iR SEN
CD 1
6 Start playback on the selected source.
yThe CD recorder starts to record simultaneously and
RECORDING IN PROGRESS is shown. The remaining
recording time on the CDR(W) is displayed.
CD 2
ER
CK /TIM
T CLO
CD TEX
CD 3
FW-
R8
CD
HIFI SYSTE M
RECO RDAB LE MINI
DISPLAY
ING
CD -TEXT EDIT
OPEN/C
LOSE
DER
CD RECOR
Note: If you start playback on the selected source within a
track, recording starts at the beginning of the next track
or after 2.7 seconds of silence in analog recordings.
7 If a digital source is selected:
After the recording process, the CD recorder stops
automatically.
CDR
Note: Recordings from DAT or DCC will automatically stop
after 20 seconds of silence.
RECORD
CD
CD
COMPILE
CD
E
REC TYP
MIC
LEVEL
ERASE
If an analog source is selected:
At the end of the recording process, the CD recorder stops
after a silence of 20 seconds on the source material.
FINALIZE
EDIT
MIC
Analog or digital recording?
When making recordings from an external source, we
recommend to do analog recording only if digital recording is
not possible. Digital recording will usually result in better
sound quality.
Recording with automatic start
Recording of an entire disc or a track with automatic
start
1 Make sure the CDR(W) is absolutely free of scratches and
dust particles.
2 Repeatedly press DIGITAL / ANALOG AUX to select the
input for the external source from which you want to record.
yAUX Digital is displayed if the digital input is
selected.
yAUX Analog is displayed if the analog input is selected.
3 Press REC TYPE on the unit to enter the recording menu.
4 Rotate í JOG CONTROL ë to select either:
yAUX CD?: for recording with synchronized start of an
entire disc
yAUX Track?: for recording with synchronized start of
a track
5 Press YES to confirm your selection.
yStart Source, AUX and the remaining recording
time of the CDR(W) are displayed.
20
• To stop recording manually, press Ç STOP on the unit.
yRECORDING IN PROGRESS goes off.
DO NOT FORGET TO FINALIZE!
Finalizing a CDR(W) disc is a simple procedure, necessary to:
– play a recorded CDR on a standard CD player or
– play a recorded CDRW on a CDRW compatible CD player
and CD recorder.
Manual recording
Manual recording from an external source
1 Make sure the CDR(W) is absolutely free of scratches and
dust particles.
2 Repeatedly press DIGITAL / ANALOG AUX to select the
input for the external source from which you want to record.
yAUX Digital is displayed if the digital input is
selected.
yAUX Analog is displayed if the analog input is selected.
3 Press REC TYPE on the unit to enter the recording menu.
4 Rotate í JOG CONTROL ë to select the type of recording.
yAUX Manual?: for manual start of recording
5 Press YES to confirm your selection.
yWait is displayed.
yRecord?, AUX and the remaining recording time of
the CDR(W) are displayed.
6 Start playback on the external source in order to set the
optimal recording level on the CD recorder (see
“REC LEVEL key”).
7 Stop playback on the external source.
8 Go to the beginning of the desired track.
9 Press YES on the unit and simultaneously start playback on
the external source.
yThe CD recorder starts to record and RECORDING IN
PROGRESS is shown. The remaining recording time of the
CDR(W) is displayed.
Note: If Check Input is flashing, check the digital
connection.
10 Press Ç STOP on the unit to stop recording.
yUpdate is displayed and RECORDING IN PROGRESS goes off.
Manual microphone recording
1 Make sure the CDR(W) is absolutely free of scratches and
dust particles.
2 Set MIC LEVEL to the minimum level to prevent acoustic
feedback (e.g. a loud howling sound) before you connect
the microphone.
4 Repeatedly press DIGITAL / ANALOG AUX to select the
input for the external source with which you wish to mix
the microphone.
yAUX Digital is displayed if the digital input is
selected.
yAUX Analog is displayed if the analog input is selected.
5 Press REC TYPE on the unit to enter the recording menu.
6 Rotate í JOG CONTROL ë to select the type of recording:
yAUX Mix Mic: the microphone is mixed with the
external source.
yMic Only: only the microphone is recorded.
7 Press YES to confirm your selection.
yWait is displayed.
yRecord?, AUX and the remaining recording time of
the CDR(W) are displayed.
8 Set the optimal recording level on the CD recorder (see
“REC LEVEL key”).
• In addition, you can also set the optimal recording level
of the microphone by turning MIC LEVEL.
9 If AUX Mix Mic is selected:
Press YES on the unit and simultaneously start playback on
the external source.
yThe CD recorder starts to record and RECORDING IN
PROGRESS is shown. The remaining recording time of the
CDR(W) is displayed.
If Mic Only is selected:
Press YES on the unit to start recording.
yThe CD recorder starts to record and RECORDING IN
PROGRESS is shown. The remaining recording time of the
CDR(W) is displayed.
10 Press Ç STOP on the unit to stop recording.
yUpdate is displayed and RECORDING IN PROGRESS goes off.
DO NOT FORGET TO FINALIZE!
Finalizing a CDR(W) disc is a simple procedure, necessary to:
– play a recorded CDR on a standard CD player or
– play a recorded CDRW on a CDRW compatible CD player
and CD recorder.
3 Connect a microphone to MIC.
21
English
EXTERNAL RECORDING
EXTERNAL RECORDING
(UN)FINALIZING, ERASING
English
Automatic track increment
RECORD
In recording mode, tracks will be incremented automatically so
that the track numbers are in the same position as the original.
CD
CD
COMPILE
• To switch the automatic track increment function on, press
as often as necessary TRACK INCR. on the remote control
during stop when CDR is selected.
yAuto Tr ON is displayed and the function is on. Track
increments are now automatically detected from digital
source material. In analog source material, a silence of
2.7 seconds or more is detected as a track increment.
• To switch the automatic track increment function off, press
as often as necessary TRACK INCR. on the remote control
during stop when CDR is selected.
yAuto Tr OFF is displayed and the function is off.
Track numbers can now be incremented manually by
pressing TRACK INCR. on the remote control during
recording. The minimum track length is 4 seconds.
Notes: – Track numbers cannot be changed after recording.
– The automatic track increment only works with
consumer sources with a digital output signal
according to the IEC 958 (consumer part) audio
standard. DAT, DVD and DCC do not deliver this
signal.
CD
REC TYPE
ERASE
FINALIZE
EDIT
Finalizing CDR(W) discs
Finalizing a CDR(W) disc is a simple procedure, necessary to:
– play a recorded CDR on a standard CD player,
– play a recorded CDRW on a CDRW compatible CD player
and CD recorder,
– avoid further unwanted recordings on a disc, or
– avoid erasure of tracks on a CDRW.
Notes: – Finalizing will take about 2–4 minutes.
– After finalization of the CDR(W), CDR(W) changes to
CD on the display.
– During finalization no other operating commands
can be executed.
Auto finalizing
When using either CD™CD or COMPILE CD, your recordings
will be finalized automatically (see “High speed recording and
automatic finalizing”).
Manual finalizing when recording is in progress
1 Press FINALIZE on the unit during recording.
yAuto Final? is displayed.
2 Press YES to confirm.
yFINALIZE is shown. The finalization will start after recording
and the actual finalizing time left will start to count down.
Manual finalizing when recording is stopped
1 Insert the CDR(W) you want to finalize in the CD recorder tray.
2 Press CDR to select the CD recorder.
3 Press FINALIZE on the unit.
yFinalize? is displayed.
4 Press YES to start finalizing.
yFINALIZE is shown, Final is displayed and the actual
finalizing time left starts to count down.
22
Unfinalizing CDRW discs
If you want to record (or erase) on (from) a finalized CDRW,
you have to unfinalize it first.
Notes: – Unfinalizing will take approximately 2 minutes.
– After unfinalizing of the CDRW, CD changes to CDRW
on the display.
– When unfinalizing a CDRW with CD text on it
available, this text will be transferred to the
CD recorder memory. In case the memory is full, you
have to erase text (see “Erasing from the memory”)
or to finalize another disc first in order to obtain
memory space.
5 Press YES to confirm your selection.
yErase?, the total playing time and the total number of
tracks to be erased are displayed. All track numbers will
blink in the music calendar.
6 Press YES to start erasing.
yErase is displayed and the operation time remaining
starts to count down. The track number of the actual
erased track will go off in the music calendar.
Erasing one or more tracks
1 Insert the CDRW from which you want to erase tracks in
the CD recorder tray.
2 Press CDR to select the CD recorder.
1 Insert the CDRW you want to unfinalize in the CD recorder
tray.
3 Press ERASE to enter the erasing menu.
4 Rotate í JOG CONTROL ë to select the track number(s)
you wish to erase.
yErase and the track number (e.g. 10+)? are displayed.
2 Press CDR to select the CD recorder.
3 Press FINALIZE on the unit.
yUnfinalize? is displayed.
• To select more tracks to be erased, repeat step 4.
4 Press YES to start unfinalizing.
yUnfinal is displayed and the operation time remaining
starts to count down.
Erasing from a CDRW disc
Note: When erasing more tracks, the tracks to be erased
must be selected in sequence, starting from the last
recorded track. Example: The CDRW has 5 tracks
recorded on it. Now, you can erase tracks 5 and 4. You
can also erase tracks 5, 4 and 3, but you cannot erase
tracks 5 and 3!
RECORD
yAll
CD
track numbers selected for erasing will blink in the
music calendar. The remaining track numbers light up.
CD
COMPILE
CD
5 Press YES to confirm your selection.
yErase? is displayed.
REC TYPE
ERASE
FINALIZE
EDIT
6 Press YES to start erasing.
yErase is displayed and the operation time remaining
starts to count down. The track number of the currently
erased track will go off in the music calendar.
It is possible to erase one or more tracks (starting from the
end of the last track) or the entire CDRW.
Erasing an entire CDRW
1 Insert the CDRW you want to erase in the CD recorder tray.
2 Press CDR to select the CD recorder.
3 Press ERASE to enter the erasing menu.
4 Rotate í JOG CONTROL ë to select:
yErase Disc?: for erasing the entire disc
23
English
(UN)FINALIZING, ERASING
FEATURES
English
RECORD
CD
CD
COMPILE
MIC
LEVEL
CD
REC TYP
E
FINALIZE
Storing text during recording
You can store and edit text even while recording a single
track or single CD, or when recording from an external source
or tuner. Editing text during finalizing is not possible. Make
sure, when using high speed recording and automatic
finalizing, to enter the text before finalizing starts, otherwise
automatic finalizing will be cancelled.
EDIT
• Follow steps 3–10 of “Storing text during stop mode”.
MIC
EDIT TEXT (on CD recorder only)
Storing text during stop mode
After you have recorded your CDR(W) you can enter text, e.g.
names to discs and tracks. The text will be displayed during
playback. You can enter up to 60 characters per text field.
Only use an unfinalized CDR or CDRW (finalized CDRW must
be unfinalized first).
1 If necessary, press Ç STOP on the unit (Ç on the remote
control) to stop playback.
2 Press CDR to select the CD recorder.
3 Press EDIT TEXT on the unit to enter the text edit menu.
yCD TEXT EDIT is blinking, Text Edit is displayed.
Note: Editing text is not possible when a copy protected track
is analog recorded. Editing is stopped, CDText
Saved is displayed and your text is saved for later
editing.
Auto copied text
When an artist’s name has been stored for a track, it will be
copied automatically into the next track.
• Press either:
EDIT TEXT to confirm the copied text,
or
NO to delete the copied text and enter new text.
Inserting a space
1 Press à SEARCH or á SEARCH (à or á on the remote
control) to move to the position where the space is to be
inserted.
y The position starts blinking.
4 Press YES to confirm.
5 Rotate í JOG CONTROL ë to select either:
yAlbum Artist: for editing the CD artist.
yAlbum Title: for editing the CD title.
yArtist Tr 1 or (2, 3,…): for editing the artist of
track 1 or (2, 3,…).
yTitle Tr 1 or (2, 3,…): for editing the title of track 1
or (2, 3,…).
6 Press YES to confirm the selection.
7 Rotate í JOG CONTROL ë (press the alphabet keys on
the remote control) to select a character.
2 Press YES to confirm the position of the insert character.
y A space will be inserted, text will move to the right.
Deleting and substituting a character
1 Press à SEARCH or á SEARCH (à or á on the remote
control) to move to the character’s position to be deleted or
substituted.
y The character starts blinking.
2 If you want to delete the character:
Press NO.
y The character is deleted and the text is shifted one
position to the left.
8 Press YES to confirm the selection.
yThe cursor moves to the next character space.
If you want to substitute the character:
Rotate í JOG CONTROL ë (press the alphabet keys on
the remote control) to select a new character.
9 Repeat steps 7 and 8 for adding further characters.
Press YES to confirm the selection.
10 Press EDIT TEXT to save the characters that have been
selected and to exit to the last position in the text editing
menu.
yUpdate is displayed.
24
• To change another character, press à SEARCH or
á SEARCH (à or á on the remote control).
Erasing text
1 Press EDIT TEXT to enter the text edit menu.
yCD TEXT EDIT is blinking, Text Edit is displayed.
2 Rotate í JOG CONTROL ë to select the text erase menu.
yText Erase is displayed.
3 Press YES to confirm.
4 Rotate í JOG CONTROL ë to select one of the following:
yAll Text: All text of the selected disc is chosen to
be erased in one step.
yAlbum Artist: CD artist’s name is chosen to be
erased.
yAlbum Title: CD title is chosen to be erased.
yArtist Tr 1 or (2, 3,…): artist’s name of track 1 or
(2, 3,…) is chosen to be erased.
yTitle Tr 1 or (2, 3,…): title of track 1 or (2, 3,…)
is chosen to be erased.
Track editing (on CD changer only)
You can create a “track” by marking a passage of music within
one track on the current disc. This new “track” can be used for
recording or playing. The minimum track length is 4 seconds.
1 Press EDIT TRACK on the unit.
y EDIT TRACK starts blinking, Track and the current track
number ? are displayed. The current track number also
blinks in the music calendar.
2 Rotate í JOG CONTROL ë until the desired track
number is displayed.
3 Press YES to confirm the selected track.
y The marker position A and the track time will be
displayed. The first 4 seconds of the track will be played
continuously.
5 Press YES to confirm your selection.
yErase? or Erase All? is displayed.
4 Press É PLAY/PAUSE on the unit to play to the desired
start position of your new “track” (The initial position of
marker A is always the start of the chosen track).
6 Press YES to start erasing.
y Update is displayed and the chosen text is erased.
• To fast forward to the desired start position, press
à SEARCH or á SEARCH on the unit.
Erasing from the memory
When the text memory of your CD recorder is full, the messages
Memory Full and Finalize Disc will be displayed. If
you still want to add a new disc to the text memory, you either
have to erase another disc from the memory or you have to
finalize another disc.
• To fine tune the position, first press É PLAY/PAUSE on the
unit, then rotate í JOG CONTROL ë.
1 Press EDIT TEXT to enter the text edit menu.
yCD TEXT EDIT is blinking, Text Edit is displayed.
2 Rotate í JOG CONTROL ë to select the memory view
menu.
yText Memory is displayed.
3 Press YES to confirm.
4 Rotate í JOG CONTROL ë to select the disc you wish to
erase from the text memory.
5 Press YES to confirm.
yErase Memory is displayed.
6 Press YES to confirm the text erasure of that particular disc.
5 Press YES to confirm the position of marker A.
y The marker position B and the new “track” time will be
displayed. The first 4 seconds before marker position B
until marker position B will be played continuously.
6 Press É PLAY/PAUSE on the unit to play to the stop position
of your new “track” (the initial position of marker B is always
the position of marker A plus 4 seconds).
7 Press YES to confirm the marked passage.
y EDIT TRACK is shown, A-B and the track edit time are
displayed.
Note: If you open the CD changer tray, the edit is deleted.
Clearing the track edit
1 Press NO during stop.
y Clear A-B? is displayed.
2 Press YES to clear the markers.
y The markers A-B are cleared.
Note: If there are no discs stored in the text memory,
Memory Empty will be displayed.
25
English
FEATURES
TUNER
English
ANALOG
DIGITAL /
AUX
STANDBY
ON
TUNER
SOR
iR SEN
CD 1
CD 2
CK /TIM
T CLO
CD TEX
CD 3
FW-
R8
CD
HIFI SYSTE M
RECO RDAB LE MINI
DISPLAY
ING
CD -TEXT EDIT
OPEN/C
LOSE
DER
CD RECOR
CDR
CD
COMPILE
CD
E
REC TYP
MIC
LEVEL
• To store radio stations for another waveband, repeat steps
1–2. Make sure to select the next available preset number
first before proceeding, otherwise already programmed
radio stations may be erased.
• To exit the automatic programming, press PROG (PROGRAM
on the remote control).
RECORD
CD
2 Keep PROG (PROGRAM on the remote control) pressed for
more than 2 seconds.
y Autoprogram is displayed, PROG and the current
preset number in the music calendar start blinking.
y All available radio stations for the selected waveband are
stored automatically. PROG goes off, the preset number,
the waveband and the frequency of the last preset station
are displayed briefly.
ERASE
Note: Strong stations will always automatically be programmed
first, followed by the weak stations.
FINALIZE
EDIT
MIC
Tuning to radio stations
1 Press TUNER to select the tuner.
y Tuner is scrolled.
2 Press TUNER again to select the desired waveband.
y The selected waveband is displayed.
3 Keep à SEARCH or á SEARCH (à or á on the remote
control) pressed for more than a half second.
y The selected waveband and Searching are displayed.
The radio tunes to a station with sufficient signal strength.
4 Repeat searching until you find the desired station.
• To tune to a weak station, briefly press à SEARCH or
á SEARCH (à or á on the remote control) as often as
necessary for optimum reception.
Manual programming
1 Follow steps 1 and 2 of “Tuning to radio stations”.
2 Keep PROG (PROGRAM on the remote control) pressed for
less than 2 seconds.
y PROG and the current preset number in the music
calendar start flashing.
3 Press à SEARCH or á SEARCH (à or á on the remote
control) to tune to the desired radio station.
• To allocate the radio station to another preset number,
rotate í JOG CONTROL ë (pressí or ë on the
remote control).
4 Press YES to confirm the setting.
y PROG goes off, the preset number, the waveband and
the frequency of the preset station are displayed.
• To exit manual programming, press PROG (PROGRAM on
the remote control).
Tuning to preset stations
Storing radio stations
It is possible to store up to 40 radio stations. Stations can be
selected and programmed automatically or you can do that
yourself. Programming will overwrite your former presets
starting from the last active preset station. After programming
the last stored preset station will be tuned.
Automatic programming
If no preset is tuned, automatic programming starts at preset
number one.
1 Follow steps 1 and 2 of “Tuning to radio stations”.
26
• Use í JOG CONTROL ë (í or ë on the remote control)
until the preset number of the desired station is displayed.
CLOCK/TIMER
English
ANALOG
DIGITAL /
AUX
STANDBY
ON
TUNER
SOR
iR SEN
CD 1
CD 2
ER
CK /TIM
T CLO
CD TEX
CD 3
FW-
R8
CD
HIFI SYSTE M
RECO RDAB LE MINI
DISPLAY
ING
CD -TEXT EDIT
OPEN/C
LOSE
DER
CD RECOR
CDR
RECORD
CD
CD
COMPILE
CD
E
REC TYP
MIC
LEVEL
ERASE
FINALIZE
EDIT
MIC
Clock setting
Manual clock setting
1 Press y STANDBY ON as often as necessary on the unit to
switch the unit to standby.
2 Press CLOCK/TIMER on the unit.
3 Rotate í JOG CONTROL ë to select the clock.
y Clock is displayed and X starts blinking.
4 Press YES to confirm the selection.
y The day of the week digit blinks.
5 Rotate í JOG CONTROL ë to set the day.
6 Use à SEARCH or á SEARCH on the unit to move from
day of the week to hour.
7 Rotate í JOG CONTROL ë to set the hour.
8 Repeat steps 6 and 7 to set the minutes.
9 Press YES to confirm the settings.
27
CLOCK/TIMER
English
You can select different timer functions which will be activated
at a chosen time. Make sure the clock is set before using one
of these features.
Alarm timer
Alarm timer setting
The unit can be used as an alarm clock, whereby the tuner,
CD recorder or CD changer starts playback automatically at a
preset time.
5 Use à SEARCH or á SEARCH on the unit to move from
hour to minutes of start of recording.
6 Rotate í JOG CONTROL ë to set the minutes of start of
recording.
7 Continue this procedure by using à SEARCH or
á SEARCH to move on to hour and minutes of end of
recording and to the day of the week. After each move,
always rotate í JOG CONTROL ë to do the settings.
1 Press y STANDBY ON as often as necessary on the unit to
switch the unit to standby.
8 Press YES to confirm the settings.
2 Press CLOCK/TIMER on the unit.
9 Rotate í JOG CONTROL ë to select from which you
want to record.
3 Rotate í JOG CONTROL ë to select the alarm timer.
y Alarm is displayed, ALARM is blinking.
If you have chosen the tuner as source:
Rotate í JOG CONTROL ë again to select a preset radio
station and confirm this selected station by pressing YES.
4 Press YES to confirm the selection.
y The hour digit is blinking.
10 Press YES on the unit to confirm the source selection.
5 Rotate í JOG CONTROL ë to set the hour.
• To stop the recording press Ç STOP on the unit.
6 Use à SEARCH or á SEARCH on the unit to move from
hour to minutes.
Switching the alarm and record timer on/off
7 Rotate í JOG CONTROL ë to set the minutes.
8 Press YES to confirm the time settings.
9 Rotate í JOG CONTROL ë to select the source you want
to be woken up with.
10 Press YES on the unit to confirm the source selection.
• To stop the alarm, press y STANDBY ON on the unit.
• Press TIMER ON/OFF on the remote control repeatedly to
switch the alarm and/or record timer on or off:
y ALARM is shown and Alarm ON is displayed when the
alarm timer is on.
y REC is shown and REC Timer ON is displayed when
the record timer is on.
y ALARM and REC are shown, REC+Alarm ON is
displayed when the alarm and record timer are on.
y ALARM and REC go off, REC+AlarmOFF is displayed
when the alarm and record timer are off.
Sleep timer
Record timer
You can set a certain period of time before the unit switches off.
Record timer setting
The unit can do recordings automatically from an external
source or from a preset radio station at a preset time.
1 Press SLEEP on the remote control until the desired sleeper
time is displayed.
y SLEEP is shown and Sleep 60 min, 45 min, 30
min,15 min is displayed or, Sleep OFF is displayed.
1 Follow steps 1 and 2 of “Alarm timer setting”.
2 Rotate í JOG CONTROL ë to select the record timer.
y Rec Timer is displayed, REC is shown and X starts
blinking.
3 Press YES on the unit to confirm the selection.
y The hour digit for the start of recording blinks.
4 Rotate í JOG CONTROL ë to set the hour of start of
recording.
28
2 As soon as the desired time is displayed, do not press
SLEEP again.
y After the chosen time has elapsed, the unit switches to
standby.
• To deactivate the sleep timer, press SLEEP on the remote
control until Sleep OFF is displayed.
Subject to modification without notice.
General
AC Power ..............................................................120 V / 60 Hz
Power consumption
Active.........................................................................148 W
Standby.....................................................................< 30 W
Economy power save mode .......................................< 2 W
Dimensions, w × h × d ...........................10.4 × 12.2 × 15.6 in.
Weight (without speakers) ................................................11 kg
Amplifier
Output power ................2 × 100 W FTC, 6 Ω, 1 kHz, THD 10%
Frequency response ................60–12,500 Hz FTC, +0.5/-1.5 dB
S/N ratio..............................................................≥ 80 dBA (IEC)
Input sensitivity
AUX IN L/R...............................................................800 mV
MIC...............................................................................1 mV
DIGITAL IN ..............................500 mVpp (75 Ω)/12–56 kHz
Output
Impedance speakers...................................................≥ 6 Ω
Impedance headphones ..................................32 Ω–600 Ω
LINE OUT L/R ...........................................................500 mV
DIGITAL OUT ..............................500 mVpp (75 Ω)/44.1 kHz
SUBWOOFER OUT...........................................................1 V
CD changer
Number of programmable tracks............................................40
Frequency range ...................................................20–20,000 Hz
S/N ratio......................................................................≥ 92 dBA
Cross talk ..........................................................≤ -65 dB (1 kHz)
Total harmonic distortion..................................≤ -94 dB (1 kHz)
CD recorder
Number of programmable tracks............................................99
CD playback
Frequency range.............................................20–20,000 Hz
S/N ratio playback ................................................≥ 92 dBA
Cross talk....................................................≤ -65 dB (1 kHz)
Total harmonic distortion ...........................≤ -84 dB (1 kHz)
Analog recording, digital playback
Frequency range.............................................20–20,000 Hz
S/N ratio playback ................................................≥ 86 dBA
Cross talk....................................................≤ -65 dB (1 kHz)
Total harmonic distortion ...........................≤ -81 dB (1 kHz)
Laser (CD recorder)
Type ..............................................Semiconductor laser GaAIAs
Wave length...........................................775–795 nm (at 25° C)
Output power............................2.5 mW (Read), 35 mW (Write)
Beam divergence........................................................60 degree
Tuner
Wave range
FM..............................................................87.5–108.0 MHz
AM................................................................530–1,700 kHz
Speakers
System............................................................3 way bass reflex
Impedance ............................................................................6 Ω
Woofer ...........................................................................1 × 6.5"
Tweeter ...........................................1 × 2.5", Ferro fluid cooled
Tweeter ..........................................................1 × 1", Polydome
Dimensions, h × w × d .............................12.2 × 9.4 × 12.7 in.
Weight .....................................................................4.6 kg/each
29
English
TECHNICAL DATA
TROUBLESHOOTING
English
WARNING
Under no circumstances should you try to repair the
unit yourself as this will invalidate the guarantee. Do
not open the unit as there is a risk of electric shock.
If a fault occurs, first check the points listed, before taking
the unit for repair.
If you are unable to solve a problem by following these hints,
consult your dealer or service center.
LASER SAFETY
This unit employs a laser. Only a qualified service
person should remove the cover or attempt to service
this device, due to possible eye injury.
PROBLEM
POSSIBLE CAUSE
SOLUTION
No sound,
no power
Volume is not correctly adjusted.
Adjust the volume.
Headphones are connected.
Disconnect headphones.
Speakers are wrongly or not connected.
Make sure speakers are properly connected.
Power cable is not securely connected.
Connect power cable properly.
No reaction to
controls
Electrostatic discharge
Disconnect the unit from power supply, then
reconnect after a few seconds.
Poor radio reception
Weak radio signal
Direct the antenna for optimum reception.
Antenna is positioned near a radiation source
such as a TV, VCR, computer, etc.
Change the position of the interfering unit or
try to switch it off.
Poor bass sound
Speakers are not in phase.
Connect the colored (or marked) wires to the
colored terminals and the black (or unmarked)
wires to the black terminals.
Bad sound
Badly matched setting for the given type of
music or sound.
Correct the sound settings on the unit.
Remote control does not
function properly
Batteries are inserted incorrectly.
Insert batteries correctly.
Batteries are flat.
Insert new batteries.
Distance to the unit is too large.
Reduce distance.
Insert Disc indication The CD(RW) is scratched badly or dirty.
Replace or clean the disc.
No CD(RW) inserted or inserted upside down.
Insert a CD(RW), with label facing upwards.
The laser lens is steamed up.
Wait until the lens has cleared.
Wrong Disc indication, No digital audio disc is inserted.
Use Audio CD indication
Insert a digital audio disc marked with “Digital
Audio” and the special logo.
Disc Recover indication Power loss
Wait a few minutes. The disc is being repaired.
Disc Error indication
The disc can still be played, but not recorded
or finalized further.
Disc Recover was not able
to repair the disc.
Check Input indication Wrong input is chosen.
Does not record
Recorded disc does not
play in another standard
CD player
30
Select the correct input.
No correct digital source is detected after
starting recording.
Make sure the connection cable is properly
connected.
CDR(W) is scratched or dirty.
Make sure the CDR(W) is absolutely free of
scratches and dust particles.
The inserted disc is not recordable.
Insert a digital CDR(W) and make sure it is
unfinalized.
Recording process is interrupted (power
loss, mechanical shock).
Start recording again.
The inserted CDR(W) is not finalized.
Finalize the CDR(W).
The CDRW is inserted in a non-CDRW
compatible CD player.
Insert the CDRW in a CDRW compatible
CD player.
LIMITED WARRANTY
AUDIO SYSTEM
One Year Free Labor
One Year Free Service on Parts
This product must be carried in for repair.
WHO IS COVERED?
BEFORE REQUESTING SERVICE...
You must have proof of purchase to receive warranty service. A sales
receipt or other document showing that you purchased the product
is considered proof of purchase.
Please check your owner’s manual before requesting service.
Adjustments of the controls discussed there may save you a service
call.
WHAT IS COVERED?
TO GET WARRANTY SERVICE IN U.S.A.,
PUERTO RICO OR U.S. VIRGIN ISLANDS...
Warranty coverage begins the day you buy your product. For one
year thereafter, all parts will be repaired or replaced, and labor is
free. After one year from the day of purchase, you pay for the
replacement or repair of all parts, and for all labor charges.
All parts, including repaired and replaced parts, are covered only for
the original warranty period.When the warranty on the product
expires, the warranty on all replaced and repaired parts also expires.
WHAT IS EXCLUDED?
Your warranty does not cover:
• labor charges for installation or setup of the product, adjustment
of customer controls on the product, and installation or repair of
antenna systems outside of the product.
• product repair and/or part replacement because of misuse, accident, unauthorized repair or other cause not within the control of
Philips Consumer Electronics Company.
• reception problems caused by signal conditions or cable or antenna systems outside the unit.
• a product that requires modification or adaptation to enable it to
operate in any country other than the country for which it was
designed, manufactured, approved and/or authorized, or repair of
products damaged by these modifications.
• incidental or consequential damages resulting from the product.
(Some states do not allow the exclusion of incidental or consequential damages, so the above exclusion may not apply to you.
This includes, but is not limited to, prerecorded material, whether
copyrighted or not copyrighted.)
• a product that is used for commercial or institutional purposes.
WHERE IS SERVICE AVAILABLE?
Warranty service is available in all countries where the product is
officially distributed by Philips Consumer Electronics Company. In
countries where Philips Consumer Electronics Company does not
distribute the product, the local Philips service organization will
attempt to provide service (although there may be a delay if the
appropriate spare parts and technical manual(s) are not readily available).
Take the product to a Philips factory service center (see enclosed
list) or authorized service center for repair.When the product has
been repaired, you must pick up the unit at the center. Centers may
keep defective parts. (In U.S.A., Puerto Rico and U.S.Virgin Islands, all
implied warranties, including implied warranties of merchantability
and fitness for a particular purpose, are limited in duration to the
duration of this express warranty. But, because some states do not
allow limitations on how long an implied warranty may last, this limitation may not apply to you.)
TO GET WARRANTY SERVICE IN CANADA...
Please contact Philips at:
1-800-661-6162 (French Speaking)
1-800-363-7278 (English Speaking)
(In Canada, this warranty is given in lieu of all other warranties. No
other warranties are expressed or implied, including any implied warranties of merchantability or fitness for a particular purpose. Philips is
not liable under any circumstances for any direct, indirect, special,
incidental or consequential damages, howsoever incurred, even if
notified of the possibility of such damages.)
REMEMBER...
Please record the model and serial numbers found on the product
below. Also, please fill out and mail your warranty registration card
promptly. It will be easier for us to notify you if necessary.
MODEL #
________________________________________
SERIAL #
________________________________________
MAKE SURE YOU KEEP...
Please keep your sales receipt or other document showing proof of
purchase. Attach it to this owner’s manual and keep both nearby. Also
keep the original box and packing material in case you need to return
your product.
This warranty gives you specific legal rights.You may have other rights which vary from state/province to state/province.
Philips Service Solutions Group, P.O. Box 2976, Longview,Texas 75606, (903) 242-4800
EL4965E005 / MAC 4110 / 1-97
PHILIPS CONSUMER ELECTRONICS COMPANY
English
A Division of Philips Electronics North America Corporation
Knoxville, Tennessee 37914-1810, U.S.A.
Français
Español
W
CLASS 1
LASER PRODUCT
3103 306 1694.1
Printed in Italy
IB8187T001 / VieEvS9950