1
PQQX13103ZA-BM 01.7.6 1:39 PM y [ W 1
1
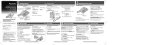
Getting Started
1-A Accessories
“
1-B Location of Controls
∑ Handset . . . . . . . . . . . . . . . . one
(TONE) Button (5-B)
RINGER Selector (1-C)
1
2
3
4
∑ Handset Cord . . . . . . . . . . . . one
6
5
7
8
M1
9
0
M2
GH
AB
M3
C
I
DE
PQ
JK
RS
TU
PRO
MN
PA
YZ
NE
RE
FL
∑ Telephone Line Cord
AU
. . . . . . . . . . . . . . . . . . . . . . . one
O
GR
AM
V
WX
TO
F
L
AS
D IA
US
E
L
DIALING MODE
Selector (on the bottom of the unit)
(1-C)
H
HANDSET VOLUME
Selector (on the bottom of the unit)
(2-A)
TO
One-Touch Auto Dial Buttons (4-A, 4-B)
Ringer Indicator (2-B)
(AUTO) Button (3-B)
∑ Wall Mounting Adaptor
(PROGRAM) Button (3-A, 4-A)
. . . . . . . . . . . . . . . . . . . . . . . one
(FLASH) Button (5-A)
(PAUSE) Button (5-C)
(REDIAL) Button (2-A)
1-C Settings
DIALING MODE Selector
Handset
1
2
3
Handset Cord
LINE
To Single-Line
Telephone Jack
Connect the telephone line cord, then lift
the handset to confirm the dial tone.
Set the DIALING MODE selector to TONE
(preset).
≥If you cannot dial, set to
PULSE.
RINGER Selector
Telephone Line
Cord
Connect the handset cord.
DATA
4
Set the RINGER selector to HIGH
(preset), LOW or OFF.
≥When set to OFF, the unit
will not ring.
≥Use only a Panasonic Handset for the KX-T2371MXW.
TONE
PULSE
DIALING
MODE
HIGH
LOW
RINGER
OFF
Ge
PQQX13103ZA-BM 01.7.6 1:39 PM y [ W 3
“
Getting Started
Section 1
1-D Connecting a Communication Device
If you connect a communication device (computer, modem, fax,
answering machine, etc.) to the telephone line, you can connect it
through this unit using the DATA jack.
1
2
Be sure to perform steps 1 through 4 in 1-C.
Connect the communication device telephone line
cord to the DATA jack.
≥Make sure that the communication device is not in use before using this
unit (making calls, storing phone numbers in memory, etc.), or the
communication device may not operate properly.
nit)
To Single-Line
Telephone Jack
LINE
DATA
≥Computer
≥Modem
≥Fax
≥Answering machine
1-E Wall Mounting
The unit can be mounted on a wall.
lift
1
Pull down the handset hook
until it locks, so the tab
holds the handset.
ONE
E
2
Tuck the telephone line cord
inside the wall mounting
adaptor, and push it in the
direction of the arrow.
≥“UP” should be facing
upward.
3
Install screws using the
wall template below.
Connect the telephone
line cord. Mount the
unit, then slide it down.
Screws
8.3 cm
To Single-Line
Telephone Jack
To temporarily set the handset
down during a conversation,
place it as shown here.
H
Wall Template
8.3 cm
PQQX13103ZA-BM 01.7.6 1:39 PM y [ W 5
n1
2
Making/Answering Calls
Section 2
2-A Making Calls
e
this
(REDIAL)
1
2
Lift the handset.
3
When finished talking, hang up.
Dial a phone number.
≥If you misdial, hang up and start from step 1.
To redial the last number
Lift the handset. ¤ Press (REDIAL).
≥While lifting the handset, each time you press (REDIAL), the line will be automatically
disconnected and the number will be redialed.
≥(REDIAL) will dial the last number you called manually, not a Speed Dialer number (3-B) or
One-Touch Dialer number (4-B).
To select the receiver volume
Set the HANDSET VOLUME selector to HIGH, MEDIUM (preset) or LOW.
HIGH
LOW
HANDSET
VOLUME
3 cm
2-B Answering Calls
Line
Jack
Ringer Indicator
1
When the unit rings, lift the handset.
2
When finished talking, hang up.
≥The Ringer indicator lights.
PQQX13103ZA-BM 01.7.6 1:40 PM y [ W 7
3
Speed Dialer
“
Sp
3-A Storing Phone Numbers in Memory
You can store up to 10 phone numbers in the memory stations. The dialing buttons ((0) to
(9)) function as memory station numbers. Do not press any memory stations before storing
to prevent misoperation.
1
2
3
Lift the handset.
Press (PROGRAM).
Enter a phone number up to
16 digits.
≥If you enter a wrong number, hang up
and start again from step 1.
(PROGRAM)
Memory Station Numbers
(PAUSE)
(AUTO)
4
5
6
Press (PROGRAM).
To store a dialed number in
memory
Lift the handset. ¤
¤ Phone number (up to 16 digits) ¤
¤ During a conversation, press (PROGRAM)
twice ¤ Station number ((0) to (9)) . ¤
¤ Hang up.
Memory Card
Remove the memory card and use it as a
name or phone number index for speed
dialing.
Cover
Press a memory station
number ((0) to (9)).
Memory
Card
When finished, hang up.
≥To store other numbers, repeat steps 1
through 6.
≥If a pause is required for dialing, press
(PAUSE) where needed. Pressing (PAUSE)
counts as one digit (5-C).
4
One-Touch Dialer
“
4-A Storing Phone Numbers in Memory
You can store up to 3 phone numbers in the one-touch auto dial buttons ((M1) to (M3)).
Do not press any one-touch auto dial buttons before storing to prevent misoperation.
One-Touch Auto Dial Buttons
1
2
3
Lift the handset.
Press (PROGRAM).
Enter a phone number up to
16 digits.
≥If you enter a wrong number, hang up
and start again from step 1.
(PROGRAM)
(PAUSE)
4
5
6
Press (PROGRAM).
Press a one-touch auto dial
button ((M1) to (M3)).
When finished, hang up.
≥To store other numbers, repeat steps 1
through 6.
≥If a pause is required for dialing, press
(PAUSE) where needed. Pressing (PAUSE)
counts as one digit (5-C).
To store a dialed number in
memory
Lift the handset. ¤
¤ Phone number (up to 16 digits) ¤
¤ During a conversation, press
(PROGRAM) twice ¤
¤ One-touch auto dial button ((M1) to (M3)) . ¤
¤ Hang up.
On
PQQX13103ZA-BM 01.7.6 1:40 PM y [ W 9
“
Speed Dialer
Section 3
5
Special Features “
Sp
3-B Dialing a Stored Number
AM)
1
2
3
Lift the handset.
Press (AUTO).
Press the memory station number ((0) to (9)).
≥The stored number is dialed.
(PAUSE)
(TONE)
a
≥The (REDIAL) button does not work for Speed Dialer.
To dial the number again, hang up and repeat steps 1 to 3.
≥If the telephone line cord is disconnected more than 3 days, the stored
numbers may be erased. Store phone numbers again.
(FLASH)
5-A For Call Waiting Service Users
ry
Press (FLASH) if you hear a call-waiting tone while talking.
≥The first call is put on hold and you can answer the second call.
≥To return to the first caller, press (FLASH) again.
≥If this function does not operate properly, consult your telephone
company.
“
One-Touch Dialer
Section 4
4-B Dialing a Stored Number
1
2
.¤
Lift the handset.
Press the one-touch auto dial button ((M1) to (M3)).
≥The stored number is dialed.
≥The (REDIAL) button does not work for One-Touch Dialer.
To dial the number again, hang up and repeat steps 1 and 2.
≥If the telephone line cord is disconnected more than 3 days, the stored
numbers may be erased. Store phone numbers again.
6
Things You Should Know “
6-A Before Requesting Help
Problem
Remedy
The unit does not work. ≥Check the settings (1-C).
The call cannot be
connected even you
dialed correctly.
≥Check whether the DIALING MODE
selector setting is correct or not (1-C).
The unit does not ring.
≥The RINGER selector is set to OFF.
Set to HIGH or LOW (1-C).
You cannot store a
phone number in
memory.
≥Confirm the handset is off the cradle.
≥Do not enter a phone number more
than 16 digits long, or the entered
number and the previously stored
number will be cleared.
Th
PQQX13103ZA-BM 01.7.6 1:40 PM y [ W 11
“
Special Features
Section 5
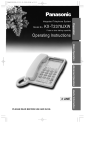
Integrated Telephone System
5-B Temporary Tone Dialing
Model No.
(For Rotary Service Users)
KX-T2371MXW
Pulse-or-tone dialing capability
Press (TONE) before entering access numbers which require tone
dialing.
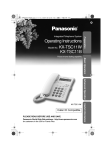
Operating Instructions
≥The dialing mode changes to tone. You can enter numbers to access
answering services, electronic banking services, etc. When you hang up,
the mode returns to pulse.
5-C How to Use the PAUSE Button
(For Analog PBX Line/Long Distance Service Users)
We recommend you press (PAUSE) if a pause is required for dialing
with a PBX or to access a long distance service.
Ex. Line access number (9) (PBX)
(9) ¤ (PAUSE) ¤ Phone number
“
≥Pressing (PAUSE) once creates a few seconds pause.
This prevents misdialing when you redial or dial a stored number.
≥Pressing (PAUSE) more than once increases the length of the pause
between numbers.
PLEASE READ BEFORE USE AND SAVE.
Things You Should Know
For your future reference
Section 6
Contents by Section
1 Getting Started
2 Making/Answering Calls
3 Speed Dialer
Serial No.
4 One-Touch Dialer
5 Special Features
6 Things You Should Know
Date of purchase
(found on the bottom of the unit)
6-B Safety instructions
Name and address of dealer
Take special care to follow the safety suggestions listed below.
DE
1-C).
FF.
adle.
ore
d
d
Installations
Environment
1) Do not use this unit near water—for example, near a bathtub,
washbowl, sink, etc. Damp basements should also be avoided.
2) The unit should be kept away from heat sources such as
radiators, kitchen range, etc. It also should not be placed in
rooms where the temperature is less than 5oC or greater than
40oC.
Placement
1) Do not place heavy objects on top of this unit.
2) Care should be taken so that objects do not fall onto, and liquids
are not spilled into, the unit. Do not subject this unit to excessive
smoke, dust, mechanical vibration, or shock.
3) Place the unit on a flat surface.
WARNING:
TO PREVENT FIRE OR SHOCK HAZARD, DO NOT EXPOSE
THIS PRODUCT TO RAIN OR ANY TYPE OF MOISTURE.
If there is any trouble, disconnect the unit from the telephone line
and connect a known working phone. If the known working phone
operates properly, do not reconnect the unit to the telephone line
until the trouble has been repaired. If the known working phone
does not operate properly, consult with your telephone company.
Kyushu Matsushita Electric Co., Ltd.
Manufactured by Kyushu Matsushita Electric (Malaysia) Sdn. Bhd. Johor
Malaysia
PQQX13103ZA-BM FM0601HK0 D