1
XL-PM25SL / LVT0997-004A / B, UJ
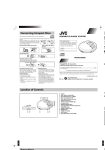
Concerning Compact Discs
C
PORTABLE CD PLAYER XL-PM25SL
Only compact discs bearing this mark can be used with this unit.
Re
However, continued use of irregular shape CDs (heart-shape, octagonal, etc.) can damage
the unit.
CD-R and CD-RW discs recorded with the audio
CD format can be played back, though some may
not be played back because of the disc characteristics or recording condition.
How to remove a disc from its case
•O
• If
tim
ov
• Re
lif
•W
no
sh
di
st
•D
ch
w
•D
ie
How to store the disc in its case
Label side up
How to hold a disc
INSTRUCTIONS
If the disc surface is dirty
Dr
ba
Wipe it with a damp cloth and then wipe dry.
Wipe from the center toward the outer edge.
Play surface (shiny surface)
To p
the
•A
ie
•D
ne
• Re
lo
•D
as
•D
Supplied Accessories
Check the packing carton for these accessories.
If moisture has formed on a disc
When moisture has formed because the
disc was brought suddenly into a warm
room from a cold environment, wipe off
the moisture using a soft dry cloth.
When storing discs
Avoid locations which are
• Exposed to direct sunlight.
• Susceptible to high levels of humidity or
dust.
• Directly exposed to heat from a heating
appliance.
• On top of a car dashboard or near the
rear window.
AC adaptor (AA-R4515 for the U.K.) .......................................................................................... 1 pc.
Stereo headphones .......................................................................................................................... 1 pc.
Remote control ................................................................................................................................. 1 pc.
Rechargeable batteries (BN-R1211 for the U.K.) ..................................................................... 2 pcs.
Use numbers in parentheses when asking for replacement parts.
Handling precautions
• On the label side (the side with writing)
Do not write anything using a pencil,
ball-point pen, etc. Do not use adhesive
paper or labels.
• On the disc (shiny) side
Handle this side carefully to keep it free
from fingerprints or scratches. Do not
use record cleaners, solvents, etc.
• Do not attach labels or stickers to CDs.
Do not use CDs with exposed adhesive
from tape or left over peeled off stickers.
• Do not use scratch-proof protectors or
covers other than those specified for use
with this unit.
Thank you for purchasing this JVC product. Please read these instructions carefully before starting
operation to be sure to obtain optimum performance and a longer service life from the unit.
EN
0503SKMCREORI
Ca
rec
Whe
bag,
plac
circu
LVT0997-004A [B,UJ]
Precautions
CAUTION!
THIS PRODUCT UTILIZES A LASER.
USE OF CONTROLS OR ADJUSTMENTS OR PERFORMANCE OF PROCEDURES OTHER THAN THOSE
SPECIFIED HEREIN MAY RESULT IN
HAZARDOUS RADIATION EXPOSURE.
DO NOT OPEN COVERS AND DO NOT
REPAIR YOURSELF. REFER SERVICING TO QUALIFIED PERSONNEL.
1. CLASS 1 LASER PRODUCT
2. DANGER: Invisible laser radiation when open and interlock
failed or defeated. Avoid direct exposure to beam.
3. CAUTION: Do not open the top cover. There are no user
serviceable parts inside the Unit; leave all servicing to
qualified service personnel.
CAUTION:
• Do not block the ventilation opening or holes. (If the ventilation
openings of holes are blocked by a newspaper or cloth, etc., the
heat may not be able to get out.)
• Do not place any naked flame sources, such as lighted candles, on
the apparatus.
• When discarding batteries, environmental problems must be considered and local rules or laws governing the disposal of these batteries must be followed strictly.
• Do not expose this apparatus to rain, moisture, dripping or
splashing and that no objects filled with liquids, such as vases,
shall be placed on the apparatus.
S
Po
Typ
Sign
Pick
Num
Freq
Wow
Out
WARNING:
TO REDUCE THE RISK OF FIRE OR
ELECTRIC SHOCK, DO NOT EXPOSE
THIS APPLIANCE TO RAIN OR MOISTURE.
Dur
(wit
Pro
Pow
Marking sign is located on bottom of
the unit.
DANGER
ADVARSEL
INVISIBLE LASER RADIATION WHEN OPEN AND INTERLOCK DEFEATED.
AVOID DIRECT EXPOSURE TO BEAM.
USYNLIG LASERSTRÅLING VED ÅBNING, NÅR SIKKERHEDSAFBRYDERE
ER UDE AF FUNKTION. UNDGÅ UDSÆTTELSE FOR STRÅLING.
(Bottom of product)
(Påsat under apparatet)
Dim
Bottom of the unit
Mas
VARO!
AVATTAESSA JA SUOJALUKITUS OHITETTAESSA OLET ALTTIINA
NÄKYMÄTÖNTÄ LASERSÄTEILYLLE. ÄLÄ KATSO SÄTEESEEN.
(Tuotteen pohjassa)
VARNING
OSYNLIG LASERSTRÅLNING NÄR DENNA DEL ÄR ÖPPNAD OCH
SPÄRREN ÄR URKOPPLAD. BETRAKTA EJ STRÅLEN.
(Apparatens undersida)
ADVARSEL
USYNLIG LASERSTRÅLING NÅR DEKSEL ÅPNES OG SIKKERHEDSLÅS
BRYTES. UNNGÅ EKSPONERING FOR STRÅLEN.
(Produktets underside)
Inpu
(Unterseite des Gerätes)
Out
UNSICHTBARE LASERSTRAHLUNG, WENN ABDECKUNG GEÖFFNET
VORSICHT UND SICHERHEITSVERRIEGELUNG ÜBERBRÜCKT.
AC
NICHT DEM STRAHL AUSSETZEN.
*D
1
2
J
XL-PM25SL / LVT0997-004A / B, UJ
Cautions
Rechargeable batteries
When purchasing rechargeable batteries
• Only the BN-R1211 battery can be recharged.
• If the power delivered by the batteries lasts for a very short
time after recharging, it means that the batteries’ service life is
over. Do not use them any more.
• Recharging already charged batteries will shorten their service
life.
• When recharging batteries for the first time or when they have
not been used for a long period of time, the play time may be
shorter than usual. In a case like this, repeatedly recharge and
discharge the batteries. This will restore them to their regular
state.
• Do not allow any metal objects to touch the terminals of rechargeable batteries since this may cause short-circuiting
which is dangerous.
• Do not peel off the plastic covering on the rechargeable batteries. Short-circuiting may occur which is dangerous.
As a safety precaution, the portable CD players made by JVC
have a construction designed to make it impossible to recharge
ordinary batteries.
To use rechargeable batteries, be absolutely sure to purchase the
rechargeable Ni-Cd batteries designed especially for this unit.
Dry cell batteries / rechargeable
batteries
To prevent damage to the batteries and electrolyte leakage, heed
the following points.
• Align the ª and · polarities properly when inserting the batteries.
• Do not mix different types or makes of batteries or old and
new batteries.
• Remove the batteries if you do not plan to use the unit for a
long period of time.
• Do not throw batteries into a fire, and do not short-circuit, disassemble or subject them to excessive heat.
• Do not attempt to recharge dry cell batteries.
c.
c.
c.
s.
ting
Carrying dry cell batteries /
rechargeable batteries around
When putting dry cell or rechargeable batteries in a pocket or
bag, ensure that no other metal objects such as a necklace are
placed together with them. Contact with metal may cause shortcircuiting which, in turn, may cause a fire.
UJ]
Special rechargeable Ni-Cd batteries:
BN-R1211 (set of 2)
For details, check with your dealer.
Special rechargeable
batteries
Notice about the rechargeable battery
The battery is designated recyclable.
Please follow your local recycling regulations.
:
Dimensions (W × H × D) :
Mass
:
When purchasing AC adaptor
(for multi voltage area)
Compact disc player
Non-contact optical pickup (semiconductor laser)
3 beam laser
2 channels (stereo)
20 Hz to 20 000 Hz
Unmeasurable
Headphones (3.5 mm dia. stereo × 1)
9 mW/ch at 10 % THD/16 Ω matching impedance (16 Ω to 1 kΩ)
LINE OUT (3.5 mm dia. stereo × 1) 0.6 V/50 kΩ
Approx. 3 hours when using two rechargeable batteries
(BN-R1211) charged for 10 hours,
Approx. 20 hours when using two alkaline batteries (LR6)
DC 3 V (“R6” size battery × 2)
DC 2.4 V (rechargeable battery × 2)
DC IN 4.5 V
134.0 mm × 26.5 mm × 140.0 mm
(Excluding buttons and controls)
Approx. 270 g
(without batteries)
AC adaptor
Input power source
Output voltage
: AC 230 V, 50 Hz (for the U.K.)
AC 220 V-240 V/110 V-127 V, 50/60 Hz (for multi voltage area)
: DC 4.5 V, 600 mA
* Design and specifications are subject to change without notice.
2
No dropping or strong impacts
Avoid using the unit in the following locations since they can
cause malfunctioning.
1. Bathrooms and other moisture-prone places.
2. Warehouses and other dusty places
3. Very hot places near heating appliances, etc.
Do not leave the unit exposed to direct sunlight for
long periods of time
This may deform or discolor the cabinet and may also cause malfunctioning.
• Do not play your headphones at a high volume. Hearing experts
advise against continuous extended play.
• If you experience a ringing in your ears, reduce volume or discontinue use.
• Do not use while operating a motorized vehicle. It may create a
traffic hazard and is illegal in many areas.
• You should use extreme caution or temporarily discontinue use
in potentially hazardous situations.
• Even if your headphones is an open-air type designed to let you
hear outside sounds, don’t turn up the volume so high that you
can’t hear what’s around you.
Portable CD player
:
This can cause malfunctioning.
• Handle the AC adaptor carefully. Improper handling is dangerous.
• Do not touch it with wet hands.
• Do not place heavy objects on top of it.
• Do not forcibly bend it.
• Be sure to connect only the AC adaptor provided (for the U.K.
only) with the unit.
• Disconnect the AC adaptor from the power outlet if the unit is
not going to be used for a long time.
Specifications
Duration of battery
(with Aunti-Shock
Protection OFF)
Power requirements
No altering or remodeling
Listening Precautions
on
:
:
:
:
:
:
:
Unit
AC adaptor
on
he
Type
Signal detection system
Pickup system
Number of channels
Frequency response
Wow & flutter
Output
AC plug adaptor: QAM0060-001
For details, check with your dealer.
Locations to be avoided
Ordinary dry cell
batteries/rechargeable
batteries
AC adaptor: AA-R4516
For details, check with your dealer.
or
es,
Be absolutely sure to purchase the AC plug adaptor designed especially for this unit.
This may damage the unit.
Be absolutely sure to purchase the AC adaptor designed especially for this unit.
nat-
When purchasing AC plug adaptor
(for multi voltage area)
1
2
Maintenance
P
Troubleshooting
Unit
Wipe the unit with a soft cloth. Remove stubborn dirt using a
cloth which has been dipped in water or soapy water and wrung
out, and then wipe dry.
• If you intend to use a chemically treated cleaning cloth, read its
directions first.
• Do not use alcohol or paint thinners.
Lens
Symptom
Us
(su
Check this
• Are the batteries charged?
• Is the AC adaptor securely connected?
• Is the HOLD switch set to OFF position?
Does not turn on.
Be s
Cannot close lid.
Is the disc properly secured in place?
Cannot play discs.
• Is the disc properly secured in place?
• Is there moisture condensation on the lens?
(Wait for about an hour and then try again.)
• Are MP3 files recorded on the disc?
• Do MP3 files have the extension code—.mp3?
• Are MP3 files recorded in the format compliant with ISO 9660?
Cannot hear music
—too noisy.
• Is the headphone correctly connected?
• Is the plug dirty? (Wipe away dirt on the plug.)
• Are you playing a compatible disc? While playing a non-MP3 file, you will hear a noise. (Note it
may not be an MP3 file although it has the extension code—.mp3.)
TV picture is distorted.
Radio reception is noisy.
Are you using the unit too near a TV or tuner? (If the TV or tuner is connected to a simple
indoor antenna, connect it to an outdoor antenna.)
“NO DISC” or “Error” is
displayed when a disc is in
the player.
• Is the disc damaged?
• Is the disc playable on this player?
• Has the disc been inserted upside down?
Air blower for
camera lens
Lens
Re
1
Ca
Do n
2
If the remedies indicated in the chart do not solve the problem, refer to the directory of Authorized Service Centers (enclosed with this
unit) to locate a convenient service center, or consult your dealer.
AC
Location of Controls
A
Portable CD player A A
GROUP buttons (UP, DOWN)
Stop / power off button (7)
PROGRAM button
Display
MODE button
Play / pause button (3/8)
SOUND button
In addition to sound effect selection, you can turn on/off HBS
(Hyper-Bass Sound).
A.S.P. (Anti-Shock Protection) /
T.SEARCH (Title Search) button
Skip / search buttons (4, ¢)
HOLD switch
RESUME switch
DC in jack (DC IN 4.5 V
)
Lid open switch (OPEN 3)
LINE OUT jack
Headphones jack ( )
Headphones volume control
B
Remote control B
Skip / search buttons (+, –)
HOLD switch
Stop / off button (7)
Play / pause button (38)
Volume control
Re
A
MP
(VOLUME )
• Th
th
• Th
—
•G
• ID
* A
its
Th
ch
Display
Repeat indicator (See page 7)
MP3 indicator
Lights when a MP3 disc is used.
INTRO indicator (See page 7)
RAND (Random) indicator (See page 7)
PROG (Program) indicator (See page 7)
Battery indicator (See page 4)
3
4
XL-PM25SL_BUJ.p65
1
XL-PM25SL / LVT0997-004A / B, UJ
2
Power Supply Preparations
3
Using rechargeable batteries
(supplied for the U.K.)
When recharging is complete, unplug the Battery indicator
AC adaptor from the AC power outlet and
Battery indicator
the DC IN jack.
Be sure to recharge the rechargeable batteries before using them.
Notes:
Recharging procedure
1
it
• Rechargeable batteries have a service life of approximately
300 charge-discharge cycles. If the operating time on one full
charge becomes noticeably shorter than it used to be, the batteries
have reached the end of their service life and should be replaced.
• You can recharge the batteries only when the unit is turned off.
• The AC adaptor and rechargeable batteries may become warm
while recharging is in progress. This is normal and is not a
malfunction.
Insert the rechargeable batteries.
* Insert the battery as you push it in the indicated direction.
If the battery lid
compartment
comes loose
Removing batteries
Note:
Turning off the Anti-Shock Protection (see page 6) will save the
battery power more or less. (Available for an Audio CD only)
If the unit malfunctions or freezes during use, disconnect the AC adaptor and batteries. Then, connect the AC adaptor and batteries, and operate
the unit again.
Slide the lid back into
place horizontally.
Caution:
This indicator lights when the batteries are almost out of power.
Power will be shut off a short while later.
Do not forcibly open the battery lid too wide.
2
AC adaptor (for multi voltage area)
(not supplied)
Connect the AC adaptor
(supplied for the U.K.).
Before use
Make sure the present voltage of your AC adaptor fits to your local
voltage before plugging it into the AC power outlet. If it doesn’t,
shift the AC line-voltage selector with a screwdriver so that it corresponds to your local voltage.
this
J
AC power outlet
AC adaptor
Using the AC adaptor
(supplied for the U.K.)
VOLTAGE
ADJUSTOR
AC 110V
~127V
Connect the AC adaptor.
AC 220V
~240V
Refer to “Using rechargeable batteries” for connection instructions.
If the power plug will not fit your socket, use the AC plug adaptor.
Note:
Even if the unit is turned off, small power is consumed as long
as the AC adaptor is connected to the AC power outlet.
DC IN jack (DC IN 4.5 V
How to use the AC plug adaptor (not supplied)
)
Recharging will be completed after 10 hours.
Using dry-cell batteries
(not supplied)
After disconnecting the AC adaptor, insert two “R6” (LR6) alkaline batteries.
The procedure for inserting and removing dry-cell batteries is
identical to that rechargeable batteries.
Note:
When you want to purchase the AC adaptor and the AC plug
adaptor, see page 2.
About MP3 files
MP3 File Compatibility
Playing order of MP3 files
• This player can read MP3 files that are recorded in the format
that is compliant with ISO 9660.
• The player can read or play an MP3 file with the extension code
—“.mp3”.
• Group/track title can be displayed.
• ID3* tags can be shown on the display.
* An MP3 file can contain file information called “ID3 Tag” where
its album name, artist, title, etc. are recorded.
This player can handle only one-byte characters. Any other
characters cannot be correctly displayed.
The illustration below shows the normal playing order of the MP3
files. You will see that the MP3 files are played back in the order
from the higher hierarchy to the lower one.
Hierarchy
Group
3
4
MP3 file
6
7
1
8
9
10
2
5
4
6/27/03, 3:22 PM
XL-PM25SL / LVT0997-004A / B, UJ
XL-PM25SL / LVT0997-004A / B, UJ
Basic Play
A
This CD player can play back Audio CDs and MP3 files (tracks).
This
by u
of th
Follow the steps in the numerical order.
R
7
L
ON
2
HOLD
OFF
4
1
• Play stops automatically when all
For
the tracks have
been played.
For
Nor
and
For MP3
For Audio CD
“MP3”
Scrolls
( ID3 tag )
5
9
VOLUME
VOLUME
Elapsed playing
Group number
time of each track
Elapsed playing time of each track Track number (in the
group) in play
Label side
3
6
VOLUME
Whe
mem
Track number in play
VOLUME
8
To c
Pres
“AS
OPEN
To
Pres
No
Operation
Display/reference
Button
Audio-CD
MP3
• Th
pl
ca
• Tu
m
File name and ID3 tag display (MP3 only):
During playback, the file name and ID3 tag scroll on the display
as follows:
File name ] ID3 tag (Title ] Artist ] Album) ] ID3 tag
(Title ] Artist ] Album) ] .....
During play,
• The file name scrolls at first only. Then, the ID3 tag repeatedly
scrolls.
• For the ID3 tag, the Title, Artist and Album scroll in that order.
To pause play
Press again to restart play.
During play,
Total playing time
Total number of tracks
To stop play
Stop mode
For your reference:
Pre
“
Rele
Total number of groups
In stop mode,
”
This indication appears if 3/8 is pressed when no disc is loaded in
the unit or if the disc is not properly seated.
“
Total number of tracks
U
”
This indication appears when the lid is open.
Removing the disc
To turn off the
unit
Turn off the unit and, after the disc has stopped rotating, remove
the disc as shown below:
Ho
Off mode
Skip function
During play,
Fast forward/
reverse
Forward
Reverse
Search function
• To skip back to the previous track, quickly press 4
twice.
• During Program play, the button is used to fast forward or back through the programmed sequence of
tracks.
• During Random play, the skip button cannot be used
to skip back to tracks that were played previously in
the random sequence.
Auto power off function
Keep depressing during play.
During play (except Random play) or in
stop mode,
Group skip
(MP3 only)
( ID3 tag )
Forward
Reverse
DOWN GROUP UP
During play (except Random play)
or in stop mode, keep depressing.
Track skip
(MP3 only)
If the unit is left in stop mode for 30 seconds, the unit turns
itself off automatically to save power.
Group skips.
Group number
Track number quickly changes over the groups.
( ID3 tag )
Reverse
Forward
DOWN GROUP UP
Track number
During play, keep depressing.
( ID3 tag )
Showing the
group title
(MP3 only)
(Group title)
T
To cancel it, keep MODE depressing again.
MODE
5
6
J
XL-PM25SL / LVT0997-004A / B, UJ
Anti-Shock Protection
Preventing Accidental Operation (Hold mode)
The HOLD switch on the unit/remote control is prepared to prevent an accidental operation by an unexpected button press.
This function minimizes sound interruption caused by vibrations,
by utilizing audio data that has been stored in the memory ahead
of the following time:
Hold mode prevents the following:
For Audio CD: Up to 45 seconds worth (Anti-Shock Protection
on/off selectable)
For MP3:
Up to 120 seconds worth at 128 kbps (Anti-Shock
Protection is fixed to on.)
l
Normally, “ASP” and the A.S.P. progress meters are displayed
and the Anti-Shock Protection is in effect.
ON
HOLD OFF
• Powering on the unit accidentally (which can cause the batteries to go dead).
• Play being cut off unexpectedly.
• Unexpected operation during play. (Set the HOLD switch to
the ON position after you start playing disc.)
To set the unit/remote control in Hold mode
lls
• Set the HOLD switch on the unit/remote control to the ON position. The all buttons on the unit/remote control are disabled.
A.S.P. indicator
“HOLD” indication
When the disc is played, as the audio data gradually stored in the
memory, the A.S.P. progress meter progresses.
g
ack
When the unit is in Hold mode, “HOLD” will be displayed if a
button on the unit is pressed.
[Fully stored]
To release the Hold mode
HOLD
Set the HOLD switch to OFF position.
To cancel (Audio CD only)
Press the A.S.P./T.SEARCH button in stop mode or during playback.
“ASP OFF” appears on the display.
Notes:
• Before turning on the unit, be sure that HOLD is OFF.
Otherwise, you cannot turn on the unit.
• The HOLD switch on the unit is effective for the unit only.
While, that on the remote control is effective for the remote
control only.
To activate again (Audio CD only)
Press the A.S.P./T.SEARCH button.
Notes:
• The Anti-Shock Protection can be enabled or disabled during
play, and this may cause a slight interruption in the sound because the disc’s rotational speed changes.
• Turning off the Anti-Shock Protection will save battery life
more or less.
play
g
edly
Using the Remote Control
er.
Preparation:
Using with an audio system
You can use an audio system by connecting it to the unit with a stereo connection cable (not supplied).
Release the remote control from the Hold mode.
d in
•
•
•
•
Connect the cable to the amplifier after turning off its power.
Do not connect the cable to the PHONO jacks on the amplifier.
Obtain the optional connecting cable if the amplifier comes with mini-phone jacks.
Adjust the volume level on the amplifier.
HOLD
LINE OUT jack
Left side panel of the unit
move
How to use the remote control
Stereo connection cable
(not supplied)
Amplifier
Press during off or stop mode.
(White)
To start play
(Red)
Press during play.
Note:
To stop play
To obtain original sound, turn HBS to OFF. Also, set the sound effect to “FLAT”. (See page 7)
Press during stop mode.
ns
To turn off the unit
Skip function
Press during play.
Forward
Fast forward/reverse
Reverse
Search function
Keep depressed during play.
When adjusting the volume using the remote control, set
the volume control on the unit to an appropriate position.
To adjust the volume
6
5
6
Other Play Methods
Descriptions are common to Audio CDs and MP3 files unless otherwise noted.
Random play
Program play
RESUME
You can play all tracks in a random order. After playing all
tracks, the unit stops.
You can program up to 64 tracks in any desired order including
the same tracks.
For Audio CD, go to step 3. Though the display differs a little,
operation is the same.
This function allows you to listen from the beginning of the track
that was lastly stopped.
During playback,
Ti
F
Yo
ch
yo
are
•N
RESUME
ON
OFF
During playback or in stop mode,
1
MODE
Press 6 to resume playback.
• The setting (e.g. sound effect, etc.) are also resumed.
To cancel, set RESUME to “OFF”.
(MP3 only)
(repeatedly)
To cancel
1
PROGRAM
Press MODE . “RAND” goes out .
Or press 7 to stop playback.
Sound effect
Notes:
Program sequence number
• You can also select Random play in stop mode.
• During Program play, you can not select Random play.
2
You can enjoy various sound effects.
SOUND
(MP3 only) Select the desired group number.
(e.g. 02)
Repeat play
2
Each time you press,
ROCK
You can repeatedly play one track or one group (for MP3), or all
tracks.
During playback,
1 group repeat (MP3 only)
FLAT
CLASSIC
JAZZ
Hyper-Bass Sound effect
Group number
3
1 track repeat
POP
You can enjoy powerful bass sound.
PROGRAM
SOUND
All tracks repeat
MODE
(Keep depressing)
(repeatedly)
4
To cancel
Select the desired track. (e.g. 03)
To cancel
Press MODE repeatedly until the repeat indicator goes out.
Keep depressing SOUND. “HBS” will go out.
Notes:
• You can also select Repeat play in stop mode.
• You can also select Repeat play during Program play (except 1
group repeat).
PROGRAM
You can successively play the first 10 seconds of every track.
Intro play stops after playing the last track.
1
Track number
5
Intro play
In stop mode,
6
MODE
(repeatedly)
For MP3, repeat steps 2-5 to select other
tracks.
For Audio-CD, repeat steps 4 and 5.
7
2
Intro play will start from the first track.
• To confirm the program
To cancel
Press MODE repeatedly until “INTRO” goes out.
Notes:
• You can also select Intro play during playback. In this case,
Intro play after the current track has been played back.
• You can also select Intro play during Program play.
In stop mode, press PROGRAM repeatedly. The programmed
track number will successively appear together with the program sequence number. At this time, you can change the program, if required.
If the programmed tracks are less than 64, track number “
”
appears for the youngest programmable sequence number, enabling
further programming.
• To delete the entire program
Set RESUME to “OFF”, then turn off the unit.
7
8
XL-PM25SL_BUJ.p65
2
XL-PM25SL / LVT0997-004A / B, UJ
6
Title search (MP3 only)
File search (Alphabet search)
ck
J
3
1
Group search
Select the track title you want.
1)
You can search a track title you want by specifying up to first five
characters. For example, to search the track title “CHAMPION”,
you can specify “C”, “CH”, etc. In the following example, “CH”
are specified.
• Note that search is made for the track title (file name) and not
for the ID3 tag.
You can search a group you want to play.
Search is made for the group title (folder name) and not for the
ID3 tag.
MODE
1
In stop mode or during playback,
“G” flashes.
2) Select the track title you want.
In stop mode or during playback,
“A” flashes.
(Group 1)
(Group 2)
A.S.P./T. SEARCH
(press twice)
Track title changes.
A.S.P./ T. SEARCH
2
Enter the characters “CH”, for example.
1) Press ¢ or 4 repeatedly to select “C”. (“C” flashes.)
2) Press 6 to enter “C”.
The first track title that begins with “C”.
•By pressing SOUND, you can scroll the track title. To cancel
scrolling, press SOUND again.
•If there is only one track that begins with “CH”, the track title
does not change.
(Group 2)
(Group 3)
• When you want to play from the first track of the group, skip
the following 3 and 4, and proceed to 5.
3
Notes:
• If no track title begins with “C”, “NO File” is displayed. In
this case, press 7 to cancel the character.
• When you specify only the first letter of the track title, skip
the following step 3), 4), 5) and proceed to 3.
3) Keep depressing ¢ until “GHIJKL:” is displayed for
entering the next character “H”.
Press ¢ or 4 repeatedly until the group you
want is displayed on the first line.
4
The selected track starts playback.
Group number Track number
2
• To exit the File search (Alphabet search) mode, press 7 or A.S.P./
T.SEARCH repeatedly at any time to return to the normal display.
• When playback starts, the File search (Alphabet search) mode
is automatically released.
• If you leave the unit for more than 30 seconds during operation, the File search mode will be cancelled and the display returns to the normal one.
To specify a track in the group, keep depressing
¢ or 4 until the letter “T (Track)” is displayed.
“T” flashes.
(Track 1)
(Track 2)
• By pressing SOUND, you can scroll the group title and track
title. To cancel scrolling, press SOUND again.
4
Each time ¢ or 4 is kept depressing, the character
set cyclically changes as follows:
Press ¢ or 4 until the track title you want is
displayed on the first line.
5
[Character set]
Playback starts from the selected track of the selected group.
When playback starts, the Group search mode is automatically released.
Notes:
4) Press ¢ or 4 to select “H”.
5) Press 6 to enter “H”.
• To exit the Group search mode, press 7 or A.S.P./T.SEARCH
at any time to return to the normal display.
• When you skip the above steps 3 and 4, playback starts from
the first track of the group you selected in step 2.
• If you leave the unit for more than 30 seconds during operation, the Group search mode will be cancelled and the display
returns to the normal one.
The first track title that begins with “CH”.
• If no track title begins with “CH”, “NO File” is displayed.
In this case, press 7 to cancel the character.
8
6/27/03, 3:22 PM
XL-PM25SL / LVT0997-004A / B, UJ