1
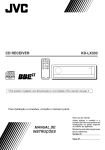
CD RECEIVER
KD-LX50
ENGLISH
RECEPTOR CON CD
KD-LX50
ESPAÑOL
RECEPTEUR CD
KD-LX50
FRANÇAIS
VCR
/I
SCM
SEL
7
MONO
8
LOCAL
9
MODE
S
S
M
DISP
ATT
SOURCE
BBE
BAND
INT
10
RPT
11
RND
12
OFF
KD-LX50
For installation and connections, refer to the separate manual.
Para la instalación y las conexiones, refiérase al manual separado.
Pour l’installation et les raccordements, se référer au manuel séparé.
For customer Use:
INSTRUCTIONS
MANUAL DE INSTRUCCIONES
MANUEL D’INSTRUCTIONS
Enter below the Model No. and
Serial No. which are located on
the top or bottom of the cabinet.
Retain this information for future
reference.
Model No.
Serial No.
LVT0496-001A
[J]
EN00-00.KD-LX50[J]/f
3
00.3.13, 4:09 PM
ENGLISH
INFORMATION (For U.S.A.)
This equipment has been tested and found to comply with the limits for a Class B digital
device, pursuant to Part 15 of the FCC Rules. These limits are designed to provide
reasonable protection against harmful interference in a residential installation. This
equipment generates, uses, and can radiate radio frequency energy and, if not installed
and used in accordance with the instructions, may cause harmful interference to radio
communications. However, there is no guarantee that interference will not occur in a
particular installation. If this equipment does cause harmful interference to radio or television
reception, which can be determined by turning the equipment off and on, the user is
encouraged to try to correct the interference by one or more of the following measures:
– Reorient or relocate the receiving antenna.
– Increase the separation between the equipment and receiver.
– Connect the equipment into an outlet on a circuit different from that to which the receiver
is connected.
– Consult the dealer or an experienced radio/TV technician for help.
IMPORTANT FOR LASER PRODUCTS
Precautions:
1. CLASS 1 LASER PRODUCT
2. DANGER: Invisible laser radiation when open and interlock failed or defeated. Avoid direct
exposure to beam.
3. CAUTION: Do not open the top cover. There are no user-serviceable parts inside. Leave
all servicing to qualified service personnel.
4. CAUTION: This CD player uses invisible laser radiation, however, is equipped with safety
switches to prevent radiation emission when unloading CDs. It is dangerous to defeat the
safety switches.
5. CAUTION: Use of controls, adjustments or performance of procedures other than those
specified herein may result in hazardous radiation exposure.
How to reset your unit
Press the reset button on the front panel using a ball-point
pen or a similar tool.
This will reset the built-in microcomputer.
NOTE:
Your preset adjustments — such as preset channels or sound
adjustments — will also be erased.
BEFORE USE
* For safety....
• Do not raise the volume level too much, as this
will block outside sounds, making driving
dangerous.
• Stop the car before performing any complicated
operations.
* Temperature inside the car....
If you have parked the car for a long time in hot
or cold weather, wait until the temperature in the
car becomes normal before operating the unit.
2
EN02-06.KD-LX50[J]/f
2
00.3.13, 4:12 PM
ENGLISH
WARNINGS
• DO NOT install any unit in locations
where;
– it may obstruct the steering wheel and
gearshift lever operations, as this may
result in a traffic accident.
– it may obstruct the operation of safety
devices such as air bags, as this may
result in a fatal accident.
– it may obstruct visibility.
• DO NOT operate any unit while
manipulating the steering wheel, as this
may result in a traffic accident.
• DO NOT register or record the voice
commands while driving, as this may
result in a traffic accident.
• If you need to operate the receiver while
driving, be sure to look ahead carefully
or you may be involved in a traffic
accident.
CAUTION on Volume Setting
CDs produce very little noise compared with other sources. If the volume level is adjusted for the
tuner, for example, the speakers may be damaged by the sudden increase in the output level. Therefore,
lower the volume before playing a disc and adjust it as required during playback.
3
EN02-06.KD-LX50[J]/f
3
00.3.13, 4:12 PM
ENGLISH
Thank you for purchasing a JVC product. Please read all instructions carefully before operation, to
ensure your complete understanding and to obtain the best possible performance from the unit.
CONTENTS
How to reset your unit .................................................................... 2
BASIC OPERATIONS .................................................... 6
RADIO OPERATIONS ................................................... 7
Listening to the radio ..................................................................... 7
Searching a station automatically: Auto search ........................... 7
Searching a station manually: Manual search ............................. 8
Storing stations in memory ............................................................ 9
FM station automatic preset: SSM ............................................... 9
Manual preset ............................................................................ 10
Tuning into a preset station ......................................................... 11
CD OPERATIONS ....................................................... 12
Playing a CD ................................................................................. 12
Locating a track or a particular portion on a CD ..................... 13
Selecting CD playback modes...................................................... 14
Prohibiting CD ejection ............................................................... 15
Playing a CD Text ......................................................................... 16
SOUND ADJUSTMENTS ............................................. 17
Adjusting the sound ...................................................................... 17
Turning on/off the BBEII function ............................................... 18
Using the Sound Control Memory .............................................. 19
Selecting and storing the sound modes ..................................... 19
Recalling the sound modes ........................................................ 20
Storing your own sound adjustments ......................................... 21
VOICE COMMAND OPERATIONS .............................. 22
What is Voice Recognition System? ............................................ 22
Before using the voice commands ............................................... 23
Operating the receiver in the Standard Word mode ................. 24
Operating the receiver in the User Word mode ......................... 26
Registering your own voice for the Operation Commands ........ 26
Presetting the Access Commands ............................................. 30
Other convenient functions for the Voice Recognition System ..... 38
OTHER MAIN FUNCTIONS ......................................... 40
Setting the clock ............................................................................ 40
Controlling the volume automatically (Audio Cruise) .............. 41
Changing the general settings (PSM) ......................................... 43
Assigning names to the sources ................................................... 48
REMOTE OPERATIONS............................................... 51
Installing the battery .................................................................... 51
Using the remote controller ......................................................... 52
4
EN02-06.KD-LX50[J]/f
4
00.3.13, 4:12 PM
STOP
PLAY
ENGLISH
EXTERNAL COMPONENT OPERATIONS ..................... 53
Playing an external component ................................................... 53
Using a subwoofer ......................................................................... 53
CD CHANGER OPERATIONS ......................................54
Playing CDs ................................................................................... 54
Selecting CD playback modes ...................................................... 56
MAINTENANCE ......................................................... 58
Handling CDs ................................................................................ 58
TROUBLESHOOTING .................................................59
SPECIFICATIONS ....................................................... 61
To activate the display demonstration
While holding DISP, press
¢ until “DEMO” appears on the
lower part of the display.
Various functions and display illumination modes equipped for
this unit will be demonstrated repeatedly in sequence.
During the display demonstration, “DEMO” flashes on the lower
part of the display.
To turn off the display demonstration, press
¢ again for a
few seconds again while holding DISP.
• The display demonstration will turn off automatically after 1 hour.
How to use the number buttons:
After pressing MODE, the number buttons work as different function buttons (while
“MODE” remains on the display).
To use these buttons as number buttons after pressing MODE, wait for 5 seconds
without pressing any number button so that “MODE” disappears from the display.
• Pressing MODE again also erases “MODE” from the display.
5
EN02-06.KD-LX50[J]/f
5
00.3.22, 10:38 AM
BASIC OPERATIONS
ENGLISH
Notes:
• When you use this unit for the
first time, set the built-in
clock correctly, see page 40.
• To operate the v oice
recognition system, see
pages 22 to 39.
3
1
1
2
Turn on the power.
The display illuminates and the control panel comes out.
2
Select the source.
Each time you press the button, the source changes as follows:
= Tuner (FM or AM) = CD* = CD changer** = External component
= (back to the beginning)
To operate the tuner, see pages 7 – 11.
To operate the CD player, see pages 12 – 16.
To operate the external component connected to the LINE IN plugs,
see page 53.
To operate the CD changer, see pages 54 – 57.
Notes:
* If a CD is not in the loading slot, you cannot select CD as the source to play.
** Without connecting the CD changer, you cannot select it as the source to play.
3
Adjust the volume.
Volume level meter
4
Adjust the sound as you want (see pages 17 – 21).
To drop the volume in a moment
Press SOURCE (ATT) for more than 1 second while listening to any source. “ATT” starts
flashing on the display, and the volume level will drop in a moment.
To resume the previous volume level, press the button for more than 1 second again.
To turn off the power
Press and hold OFF/ 0 until “SEE YOU” appears on the display.
6
EN02-06.KD-LX50[J]/f
6
00.3.13, 4:12 PM
RADIO OPERATIONS
ENGLISH
Listening to the radio
You can use either automatic searching or manual searching to tune into a particular station.
Searching a station automatically: Auto search
LOCAL
1
2
1
MODE
1- 1 1- 2
2
Select the band.
1 Press SOURCE (ATT) to select the tuner as the source.
2 Press BAND to select the band (FM1, FM2, FM3 or AM).
Each time you press the button, the band changes as
follows:
FM1
FM2
FM3
AM
Selected band appears.
Note:
This receiver has three FM bands (FM1, FM2, FM3). You can use any one of them to listen
to an FM broadcast.
2
To search stations of
higher frequencies
To search stations of
lower frequencies
Start searching a station.
When a station is received, searching stops.
To stop searching before a station is received, press the same button you have pressed
for searching.
To tune in FM stations only with strong signals
This function works only while searching FM stations, including SSM preset (see page 9).
1 Press MODE.
“MODE” appears on the lower part of the display, and the number buttons can work as
different function buttons.
2 Press LOCAL, while “MODE” is still on the display, so that the LOCAL indicator lights up on
the display.
Each time you press the button, the LOCAL indicator lights up and goes off alternately.
7
EN07-11.KD-LX50[J]/f
7
00.3.13, 4:11 PM
ENGLISH
Searching a station manually: Manual search
MONO
1
MODE
1- 1 1- 2
2,3
2
1
Select the band.
1 Press SOURCE (ATT) to select the tuner as the source.
2 Press BAND to select the band (FM1, FM2, FM3 or AM).
Note:
This receiver has three FM bands (FM1, FM2, FM3). You can use any one of them to listen
to an FM broadcast.
2
3
8
Press and hold
¢ or 4
starts flashing on the display.
until “M” (Manual)
To tune into stations
of higher frequencies
Tune into a station you want while
“M” is flashing.
To tune into stations
of lower frequencies
• If you release your finger from the button, the
manual mode will automatically turn off after
5 seconds.
When an FM stereo broadcast is hard to receive:
1 Press MODE while listening to an FM stereo broadcast (the ST indicator lights up while
receiving an FM stereo broadcast).
“MODE” appears on the lower part of the display, and the number buttons can work as
different function buttons.
2 Press MONO (monaural), while “MODE” is still on the display, so that the MO indicator
lights up on the display.
The sound you hear becomes monaural but reception will be improved (the ST indicator
goes off).
Each time you press the button, the MO indicator lights up and goes off alternately.
EN07-11.KD-LX50[J]/f
8
00.3.13, 4:11 PM
ENGLISH
Storing stations in memory
You can use one of the following two methods to store broadcasting stations in memory.
• Automatic preset of FM stations: SSM (Strong-station Sequential Memory)
• Manual preset of both FM and AM stations
FM station automatic preset: SSM
You can preset 6 local FM stations in each FM band (FM1, FM2 and FM3).
2 1- 1 1- 2
11
2
Select the FM band number (FM1, FM2 or
FM3) you want to store FM stations into.
1 Press SOURCE (ATT) to select the tuner as the
source.
2 Press BAND to select the band (FM1, FM2, or FM3).
FM1
2
FM2
FM3
AM
Press and hold both buttons for more than
2 seconds.
“SSM” appears, then disappears when automatic preset is over.
Local FM stations with the strongest signals are searched and stored automatically in the
band number you have selected (FM1, FM2 or FM3). These stations are preset in the number
buttons — No. 1 (lowest frequency) to No. 6 (highest frequency).
When automatic preset is over, the station stored in number button 1 will be automatically
tuned in.
9
EN07-11.KD-LX50[J]/f
9
00.3.13, 4:11 PM
ENGLISH
Manual preset
You can preset up to 6 stations in each band (FM1, FM2, FM3 and AM) manually.
EXAMPLE: Storing an FM station of 88.3 MHz into the preset number 1 of the FM1 band
3
1
2
1
1- 1 1- 2
2
Select the band.
1 Press SOURCE (ATT) to select the tuner as the source.
2 Press BAND to select the FM1 band.
2
Tune into a station of 88.3 MHz.
See page 7 to tune into a station.
3
Press and hold the number button (in this example, 1)
for more than 2 seconds.
FM band number and “MEMO”
appear alternately for a while.
4
10
Repeat the above procedure to store other stations into other
preset numbers.
Notes:
• A previously preset station is erased when a new station is stored in the same preset number.
• Preset stations are erased when the power supply to the memory circuit is interrupted (for example,
during battery replacement). If this occurs, preset the stations again.
EN07-11.KD-LX50[J]/f
10
00.3.13, 4:11 PM
You can easily tune into a preset station.
Remember that you must store stations first. If you have not stored them yet, see pages 9
and 10.
2
1
2
1
ENGLISH
Tuning into a preset station
1- 1 1- 2 2
Select the band.
1 Press SOURCE (ATT) to select the tuner as the source.
2 Press BAND to select the band (FM1, FM2, FM3 or AM).
2
Select the number (1 – 6) for the preset station you want.
When using this unit in an area other than North or South America:
You need to change the AM/FM channel intervals. See “To change the AM/FM channel
intervals” on page 47.
11
EN07-11.KD-LX50[J]/f
11
00.3.13, 4:11 PM
ENGLISH
CD OPERATIONS
Playing a CD
¢
4
1
1
Open the loading slot.
The display panel moves down, and the loading slot appears.
2
Insert a disc into the loading slot.
The unit draws a CD, the display panel moves up, and CD play starts
automatically.
Total track number Total playing time of
of the inserted disc the inserted disc
Current track
Elapsed
playing time
Notes:
• When a CD is in the loading slot, selecting “CD” as the source by pressing SOURCE (ATT) starts
CD play.
• When a CD is inserted upside down, “DISC EJECT” appears on the display and the CD automatically
ejects.
• When you play a CD Text, the disc title and performer appear on the display. Then the current track
and elapsed playing time appear on the display. See also “Playing a CD Text” (page 16) and “To
select the scroll mode” (page 46).
If a CD Text includes much text information, some may not appear on the display.
• If you change the source, the CD play also stops (without ejecting the CD).
To stop play and eject the CD
Press OFF/0 briefly.
CD play stops, the display panel moves down, then the CD automatically ejects from the loading
slot.
To move up the display panel, press
¢ or 4
.
CAUTION: NEVER insert your finger between the display panel
and the unit, as it may get caught in the unit.
Note:
If the ejected disc is not removed for about 15 seconds, the disc is automatically inserted again into the
loading slot to protect it from dust. (CD play will not start this time.)
12
EN12-16.KD-LX50[J]/f
12
00.3.13, 4:10 PM
¢
4
ENGLISH
Locating a track or a particular portion on a CD
Number buttons
4 (10) to 6 (12)
Number buttons
1(7) to 3 (9)
To fast-forward or reverse the track
Press and hold
¢, while playing a CD, to fast-forward the track.
Press and hold 4
, while playing a CD, to reverse the track.
To go to the next tracks or the previous tracks
Press
¢ briefly, while playing a CD, to go ahead to the beginning of
the next track. Each time you press the button consecutively, the beginning
of the next tracks is located and played back.
Press 4
briefly, while playing a CD, to go back to the beginning of
the current track. Each time you press the button consecutively, the
beginning of the previous tracks is located and played back.
To go to a particular track directly
Press the number button corresponding to the track number to start its
playback.
• To select a track number from 1 – 6:
Press 1 (7) – 6 (12) briefly.
• To select a track number from 7 – 12:
Press and hold 1 (7) – 6 (12) for more than 1 second.
13
EN12-16.KD-LX50[J]/f
13
00.3.13, 4:10 PM
ENGLISH
Selecting CD playback modes
MODE
INT
RPT
RND
To play back tracks at random (Random Play)
You can play back all tracks on the CD at random.
1 Press MODE while playing a CD.
“MODE” appears on the lower part of the display, and the number buttons
can work as different function buttons.
2 Press RND (Random), while “MODE” is still on the display, so that the
RND indicator lights up on the display.
Each time you press the button, CD random play mode turns on and off
alternately.
When the random mode is turned on, the RND indicator lights up on the
display and a track randomly selected starts playing.
To play back tracks repeatedly (Repeat Play)
You can play back the current track repeatedly.
1 Press MODE while playing a CD.
“MODE” appears on the lower part of the display, and the number buttons
can work as different function buttons.
2 Press RPT (Repeat), while “MODE” is still on the display, so that the RPT
indicator lights up on the display.
Each time you press the button, CD repeat play mode turns on and off
alternately.
When the repeat mode is turned on, the RPT indicator lights up on the
display.
Track number of the currently playing track
14
EN12-16.KD-LX50[J]/f
14
00.3.13, 4:10 PM
You can play back the first 15 seconds of each track sequentially.
1 Press MODE while playing a CD.
“MODE” appears on the lower part of the display, and the number buttons
can work as different function buttons.
2 Press INT (Intro), while “MODE” is still on the display.
Each time you press the button, CD intro scan mode turns on and off
alternately.
When the intro scan mode is turned on, “INTRO” appears on the display
for 5 seconds and the track number flashes.
ENGLISH
To play back only intros (Intro Scan)
Track number of the currently playing track
Prohibiting CD ejection
SOURCE (ATT)
OFF/0
You can prohibit CD ejection and can lock a CD in the loading slot.
While pressing SOURCE (ATT), press and hold OFF/0 for more than 2 seconds. “NO EJECT”
flashes on the display for about 5 seconds, and the CD is locked and cannot be ejected.
Note:
If you press OFF/0 while CD ejection is prohibited, the control panel moves down, but the CD cannot
be ejected. (“NO EJECT” appears on the display.)
¢ or 4
.
To move up the display panel, press
To cancel the prohibition and unlock the CD, press and hold OFF/0 for more than 2
seconds again, while pressing SOURCE (ATT). “EJECT OK” flashes on the display for about
5 seconds, and the CD is unlocked.
15
EN12-16.KD-LX50[J]/f
15
00.3.13, 4:10 PM
ENGLISH
Playing a CD Text
In a CD Text, some information about the disc (its disc title, performer and track title) is recorded.
You can show these disc information on the display.
DISP
Select text display mode while playing a CD Text.
Each time you press the button, the display changes as follows:
Disc Title / Performer
Track Title
Current track no.
and Elapsed playing time
Notes:
• The display shows up to 12 characters at one time and scrolls if there are more than 12 characters.
See also “To select the scroll mode” on page 46.
• When you press DISP while playing a conventional CD, “NO NAME” appears for the disc title/
performer and the track title.
16
EN12-16.KD-LX50[J]/f
16
00.3.13, 4:10 PM
SOUND ADJUSTMENTS
ENGLISH
Adjusting the sound
You can adjust the sound characteristics to your preference.
2
1
1
Select the item you want to adjust.
Each time you press the button, the adjustable items change as follows:
BAS
TRE
(bass)
(treble)
VOLUME
Indication
FADER
WOOFER
BALANCE
To do:
Range
BAS
Adjust the bass.
–06 (min.) — +06 (max.)
TRE
Adjust the treble.
–06 (min.) — +06 (max.)
FADER*
Adjust the front and rear speaker
balance.
R06 (Rear only) — F06 (Front only)
BALANCE Adjust the left and right speaker
balance.
L06 (Left only) — R06 (Right only)
WOOFER
Adjust the subwoofer output level.
00 (min.) — 08 (max.)
VOLUME
Adjust the volume.
00 (min.) — 50 (max.)
Note:
* If you are using a two-speaker system, set the fader level to “00.”
2
Adjust the level.
Equalization pattern changes as you adjust the bass or treble.
Note:
Normally + / – button works as the volume control. So you do not
have to select “VOLUME” to adjust the volume level.
17
EN17-21.KD-LX50[J]/f
17
00.3.13, 4:17 PM
ENGLISH
Turning on/off the BBEII function
The BBEII* function restores the brilliance and clarity of the original live sound in recording,
broadcasts, etc.
When a speaker reproduces sound, it introduces frequency-dependent phase shifting, causing
high-frequency sounds to take longer to reach the ear than low frequency sounds. The BBEII
function adjusts the phase relationship between the low, mid and high frequencies by adding
a progressively longer delay time to the low and mid frequencies, so that all frequencies
reach the listener’s ears at the proper time.
In addition, the BBEII function boosts low and high frequencies, which loudspeakers tend to
be less efficient in reproducing, through dynamic, program-driven augmentation. When
combined with the phase compensation feature, the resulting sound has a clearer, more
finely detailed “live” presence.
BBE
Each time you press BBE, the BBE II function changes as follows.
BBE 1
BBE 2
BBE 3
BBE OFF
As the number gets higher, the BBEII function becomes stronger.
When shipped from the factory, the BBEII function is set to “BBE 2.”
To cancel the BBEII function, select “BBE OFF.”
* Under license from BBE Sound, Inc.
is a trademark of BBE Sound, Inc.
R
18
EN17-21.KD-LX50[J]/f
18
00.3.13, 4:17 PM
You can select and store a preset sound adjustment suitable for each playback source.
(Advanced SCM)
ENGLISH
Using the Sound Control Memory
Selecting and storing the sound modes
Once you select a sound mode, it is stored in memory, and will be recalled every time you
select the same source. A sound mode can be stored for each of the following sources —
FM1, FM2, FM3, AM, CD and external components.
• If you do not want to store the sound mode separately for each playback source, but want to
use the same sound mode for all the sources, see “To cancel Advanced SCM” on page 45.
“Link” indicator
2
1
1
Light “MODE” on the lower part of the display.
The number buttons can work as different function buttons.
2
Within
5 seconds
Select the sound mode you want.
Each time you press the button, the sound mode changes as follows:
BEAT
SOFT
POP
OFF
• If the “Link” indicator is lit on the display (with “SCM LINK” set to “SCM
LINK ON” — see page 45), the selected sound mode can be stored in
memory for the current source, and the effect applies to the current
source.
• If the “Link” indicator is NOT lit on the display (with “SCM LINK” set to
“SCM LINK OFF”), the selected sound mode effect applies to any
source.
Indication
For:
Preset values
Bass
Treble
BBEII
00
BBE 2
OFF
(Flat sound)
00
BEAT
Rock or disco music
+02
00
BBE 2
SOFT
Quiet background music
+01
–03
Off
POP
Light music
+04
+01
Off
19
EN17-21.KD-LX50[J]/f
19
00.3.13, 4:17 PM
ENGLISH
Recalling the sound modes
SOURCE (ATT)
Select the source while the “Link” indicator is
lit on the display.
The “Link” indicator starts flashing, and the sound mode stored
in memory for the selected source is recalled (and appears
on the display for a while).
Notes:
• You can adjust each sound mode to your preference, and store it in memory.
If you want to adjust and store your original sound mode, see “Storing your own sound adjustments”
on page 21.
• To adjust the bass and treble reinforcement levels or to turn on/off the BBEII function temporarily,
see pages 17 and 18. (Your adjustments will be canceled if another source is selected.)
• By setting “CLOCK DISP” to “CLK DISP OFF” (see page 45), you can always show the current
sound mode setting when the unit is turned on.
20
EN17-21.KD-LX50[J]/f
20
00.3.13, 4:17 PM
You can adjust the sound modes (BEAT, SOFT, POP: see page 19) to your preference and
store your own adjustments in memory.
3- 2
1
3- 1 2,4 1
ENGLISH
Storing your own sound adjustments
3
Light “MODE” on the lower part of the display.
The number buttons can work as different function buttons.
REMEMBER you must finish the following steps while “MODE”
is still on the display. Otherwise, the setting will be canceled.
2
Select the sound mode you want.
For details, see page 19.
3
1
2
To adjust the bass or treble level
1 Select “BAS” or “TRE.”
2 Adjust the bass or treble level.
To turn on or off the BBEII function
See page 18.
4
Press and hold SCM until the sound mode you have
selected flashes on the display.
Your adjustment made for the selected sound mode is stored in memory.
5
Repeat the same procedure to adjust other sound modes.
To reset to the factory settings
Repeat the same procedure and reassign the preset values listed in the table on page 19.
21
EN17-21.KD-LX50[J]/f
21
00.3.13, 4:17 PM
STOP
ENGLISH
PLAY
VOICE COMMAND OPERATIONS
What is Voice Recognition System?
The Voice Recognition System enables the voice command operations — “Speak a word. It
will be done.”
This System allows you to operate the receiver by your spoken words with ease and safety. It
has ended the risk of searching for push-buttons while you are on the road.
JVC Voice Recognition System provides you two modes; Standard Word mode and User
Word mode.
In the Standard Word mode, this System allows you to use only 13 Operation Commands,
preset by the factory, and covering basic operations such as “turning off the power” and
“Ejecting the CD” (see the Preset Operation Command list on page 24).
The Operation Commands are speaker-independent in the Standard Word mode, so the
System recognizes and responds to an Operation Command spoken by anyone in English.
In the User Word mode, then, you can use two types of commands — Operation Commands
and Access Commands.
The Operation Commands are exactly the same as you can use in the Standard Word mode,
except the fact that you have to register the commands using your own voice before use.
On the other hand, the Access Commands must be preset by yourself, and be registered by
CD your own voice. For example, you can preset an Access Command to choose a disc in
the CD changer when you say “Pop music.” The Voice Recognition System responds to your
command, giving you direct access to the disc . You need to preset what to do and what to
speak for the Access Commands.
In the User Word mode, both the Operation Commands and the Access Commands are
speaker-dependent. So, they may be any phrase in any language (English, Spanish, even
Japanese) as long as they are registered using your voice.
This fact ensures that only you can operate this receiver by your voice.
JVC Voice Recognition System
Standard Word mode
Features:
• No registration of commands
required before use.
• Only 13 Operation Commands
available.
• Anyone’s voice can be recognized.
• Only English can be recognized.
User Word mode
Features:
• Registration of your voice required
before use.
• More commands available (13
Operation Commands and 12
Access Commands).
• Only your voice can be recognized.
• Any language can be recognized.
22
EN22-39.KD-LX50[J]/f
22
00.3.22, 10:40 AM
STOP
Before using the voice commands
Read carefully the following precautions.
Before you start...
• Make sure that the voice control unit, voice remote, and microphone are correctly
connected. (Refer to the Installation/Connection Manual separately supplied.)
• Set “VOICE/BEEP” to “VOICE,” and “VOICE LANG” to the language you understand
(see page 39). This may make the voice command operations easy for you to follow.
ENGLISH
PLAY
Precautions for registering your voice:
• Words you should not use:
– Similarly-pronounced words: If you register words similarly pronounced for different
commands, the Voice Recognition System cannot distinguish the differences and cannot
recognize your voice.
– Too short or too long words: Too short or too long words may be difficult to register.
Use the words of adequate length (within 3 seconds).
• Where to register: Command registration should be performed in as quite a condition
as possible with car windows all closed.
• Timing to speak your voice: Your voice will not be accepted unless the voice navigation
“Please speak now”, “Please repeat” or “Please speak again” is finished completely.
– Speak word(s) only while “SPEAK” or “REPEAT” is shown on the display.
– Pronounce your words in a large, clear voice.
• Keep the ignition turned on during registration:Do not turn on or off the ignition.
Precautions when speaking your commands:
• Your voice commands may not be recognized or executed correctly in the following
cases:
– When road conditions are not good. (for example, you are driving on rough roads.)
– When car windows are open and surrounding noise is high.
• In the Standard Word mode: Due to the characteristics of your voice, the Voice
Recognition System may fail to recognize your Operation Commands you speak and
they cannot be executed correctly. If this happens, use the User Word mode.
• In the User Word mode: If an operation different from one you have commanded is
executed, or if your command is ignored so frequently, try to change and register different
words again.
23
EN22-39.KD-LX50[J]/f
23
00.3.15, 4:12 PM
STOP
ENGLISH
PLAY
Operating the receiver in the Standard Word mode
In the System, 13 preset Operation Commands have been preset when shipped from the
factory.
When you speak these 13 preset words (in English), the receiver operates as you command
the receiver to do so.
To use the preset voice commands without recording your own voice, make sure
that “VOICE WORD” is set to “STANDARD” (initial setting).
If not, set it correctly by following the steps described on pages 38 and 39.
Preset Operation Command list
Command
No.
Voice Commands
(Words you speak)
What to do
1
POWER OFF
(Power off)
Turn off the receiver.
2
¢ SEEK
(Up)
• While playing a CD, change the track number in the
increasing order.
• While listening to the radio, change the frequencies
in the increasing order.
3
4 SEEK
(Down)
• While playing a CD, change the track number in the
decreasing order.
• While listening to the radio, change the frequencies
in the decreasing order.
4
EJECT (Eject)
Eject the CD from the receiver if any.
5
NEXT (Next)
• While playing the CD changer (not supplied), change
the CD number in the increasing order.
• While listening to the radio, change the preset
channel numbers in the increasing order.
6
BACK (Back)
• While playing the CD changer (not supplied), change
the CD number in the decreasing order.
• While listening to the radio, change the preset
channel numbers in the decreasing order.
7
CD (CD)
Change the source to CD.
8
CHANGER (Changer) Change the source to the CD changer if connected.
9
LINE-IN (Line in)
Change the source to the external component.
10
FM (FM)
Change the source to FM.
11
AM (AM)
Change the source to AM.
12
VCR PLAY (Play)* Start playback on the VCR (KZ-V10) if connected.
13
VCR STOP (Stop)* Stop playback on the VCR (KZ-V10) if connected.
* Used only when the external component is selected as the source.
24
EN22-39.KD-LX50[J]/f
24
00.3.15, 4:12 PM
STOP
PLAY
ENGLISH
Basic Procedure
1,2
4
ATT/STR*
Voice remote
1
* ATT stands for “attenuator,”
and STR stands for “store.”
Turn on the power.
The display illuminates and the control panel comes out.
2
Activate the Voice Recognition System.
“SPEAK” starts flashing on the display after the voice navigation “Please
speak now” (or a beep).
3
Speak one of the Operation Commands (listed on page 24) to
the microphone while “SPEAK” is flashing on the display.
The receiver performs what you command it to do. (Ex. when
you speak “FM.”)
If your voice cannot be recognized
The unit will ask you to speak again (and more) until “V.COMMAND” disappears from the
display.
If your voice command cannot be carried out and “V.COMMAND” disappears, repeat from
step 2.
TO BE CONTINUED ON THE NEXT PAGE
25
EN22-39.KD-LX50[J]/f
25
00.3.15, 4:12 PM
STOP
ENGLISH
PLAY
4
Adjust the volume.
To drop the volume in a moment
Press ATT (STR) while listening to any source. “ATT” starts flashing on the display, and the
volume level will drop in a moment.
To resume the previous volume level, press the button again.
Operating the receiver in the User Word mode
In the User Word mode, you can use 13 preset Operation Commands and 12 Access
Commands.
To use these voice commands in the User Word mode, you have to do the following:
To use the Operation Commands;
1 Select the User Word mode (Follow steps 1 to 4 on page 27.)
2 Register your voice into each Operation Command (Follow steps 5 to 11 on pages 27 to
29.)
To use the Access Commands;
1 Select the User Word mode (Follow step 1 on page 30.)
2 Select an operation to preset into an Access Command (For operations you can store into
the Access Commands, see page 30.)
3 Register your voice into the Access Command (See pages 31 to 34.)
Registering your own voice for the Operation Commands
When shipped from the factory, the System recognizes and accepts the Operation Commands
anyone speaks (in the Standard Word mode).
If you do not like this and want to make the System accept only your own voice as an Operation
Command, you need to record your own voice (within 3 seconds long).
Before you start...
• Set “VOICE WORD” to “USER.”
Without setting it to “USER,” you cannot record your own voice.
• Notice the following;
– You can only use the Operation Command for which you have registered your voice.
– You can register any word you want; however, if it is too short (ex. “Pops”), the System
may not recognize it correctly.
26
EN22-39.KD-LX50[J]/f
26
00.3.22, 10:41 AM
STOP
PLAY
ENGLISH
Registering procedure
EXAMPLE:
Storing your own voice “Turn off” into Operation Command number 01
5,11
6
1,4
1
3
7
2
Voice remote
Press and hold SEL (Select) for more than 2 seconds
so that one of the PSM items appears on the display.
(See page 44.)
2
Select “VOICE WORD.”
3
Set it to “USER.”
• For more details, see page 39.
4
5
Finish the setting.
Press and hold VOICE until Access Command
(VOICE 14) appears on the display.
TO BE CONTINUED ON THE NEXT PAGE
27
EN22-39.KD-LX50[J]/f
27
00.3.15, 4:12 PM
STOP
ENGLISH
PLAY
6
Select the preset voice command number (VOICE 01).
7
Press STR (ATT) to make the System ready to record
your voice.
“SPEAK” starts flashing on the display after the voice navigation “Please
speak now.”
8
Speak the word(s) you want to record while “SPEAK” is flashing
on the display. (In this example, speak “Turn off.”)
• If the System recognizes your word(s), “REPEAT” starts flashing on the display after
the voice navigation “Please repeat.”
• If the System does not recognize your word(s), it will ask you to speak again. In this
case, speak the word(s) again.
28
EN22-39.KD-LX50[J]/f
28
00.3.15, 4:12 PM
STOP
9
Speak the same word(s) again while “REPEAT” is flashing on
the display. (In this example, speak “Turn off.”)
ENGLISH
PLAY
“CHECK” appears on the display while recording your voice.
“OK” appears when
recording is complete.
“ ” on the display means that your own voice is recorded for this voice
command.
If the recording fails
A beep sound comes out and the display goes back to the one shown in step 6.
10
Repeat steps 6 to 9 to record your own voice for other preset
Operation Commands (VOICE 02 to VOICE 13).
11
Press and hold VOICE again to finish the recording.
To make the system recognize and accept the preset voice
commands anyone speaks
Set “VOICE WORD” to “STANDARD” by following steps 1 to 4 on page 27. (In step 3, press +
to select “STANDARD.”)
To erase your own voice from the Operation Commands
See “To erase the voice commands” on page 37.
29
EN22-39.KD-LX50[J]/f
29
00.3.15, 4:12 PM
STOP
ENGLISH
PLAY
Presetting the Access Commands
You can store the frequently-used operations into the Access Commands and register your
voice to make the System execute the Access Commands.
• You can store the following operations into the Access Commands;
– Selecting the source (CD and External component).
– Selecting the frequencies (FM and AM).
– Selecting the CDs in the CD changer.
Before you start...
• Set “VOICE WORD” to “USER.”
Without setting it to “USER,” you cannot preset the Access Commands.
• Notice the following;
– You can store up to 12 Access Commands (12 operations and voice commands into
memory).
– Each voice command must be within 3 seconds long.
– You can register any word you want; however, if it is too short (ex: “Pops”), the System
may not recognize it correctly.
Registering procedure (for the first Access Command)
EXAMPLE:
Storing an operation of “selecting the FM station of 89.5 MHz,” and registering words “Jazz
89” as your Access Command to that operation into Access Command number 14.
3,7
1- 1, - 4
1
1- 3
1- 2
4
Voice remote
Select the User Word mode by following steps 1 to 4 on page 27.
1 Press and hold SEL (Select) for more than 2 seconds so that one of the PSM
items appears on the display.
2 Press
¢ or 4
repeatedly until “VOICE WORD” appears on the display.
3 Press – to select “USER WORD.”
4 Press SEL again to finish the setting.
30
EN22-39.KD-LX50[J]/f
30
00.3.22, 10:41 AM
STOP
2
Select the operation you want to store into the Access Command.
(In this case, select “FM 89.5 MHz.”)
ENGLISH
PLAY
If you want to memorize the sound mode at the same time
Select the sound mode you want. (See page 19.)
Note:
Preset number cannot be stored but only its station frequency is stored in the user voice
command.
3
Press and hold VOICE until Access Command
(VOICE 14) appears on the display.
4
Press STR (ATT) to make the System ready to record
your voice.
“SPEAK” starts flashing on the display after the voice navigation “Please
speak now.”
5
Speak the word(s) you want to record while “SPEAK” is flashing
on the display. (In this example, speak “Jazz 89.”)
• If the System recognizes your word(s), “REPEAT” starts flashing on the display after
the voice navigation “Please repeat.”
• If the System does not recognize your word(s), it will ask you to speak again. In this
case, speak the word(s) again.
TO BE CONTINUED ON THE NEXT PAGE
31
EN22-39.KD-LX50[J]/f
31
00.3.15, 4:12 PM
STOP
ENGLISH
PLAY
6
Speak the same word(s) again while “REPEAT” is flashing on
the display. (In this example, speak “Jazz 89.”)
“CHECK” appears on the display while recording your voice,
“OK” appears when
recording is complete.
7
Press and hold VOICE again to finish the
recording.
Note:
If you want to show “JAZZ 89” on the display when you recall this station using the voice
command, assign the name “JAZZ 89” to this station. See “Assigning names to the sources”
on page 48.
TO BE CONTINUED ON THE NEXT PAGE
32
EN22-39.KD-LX50[J]/f
32
00.3.15, 4:13 PM
STOP
Registering procedure (Continued for the second Access
Command by following the previous one)
EXAMPLE:
Storing an operation of “selecting disc number 01 in the CD changer,” and registering word
“Classics” as your Access Command to that operation into Access Command number 15.
ENGLISH
PLAY
2,6
3
1
Voice remote
Select the operation you want to store into the Access Command.
(In this case, select “disc number 01 in the CD changer.”)
2
3
Press and hold VOICE until Access Command (VOICE
15) appears on the display.
Press STR (ATT) to make the System ready to record
your voice.
“SPEAK” starts flashing on the display after the voice navigation “Please
speak now.”
TO BE CONTINUED ON THE NEXT PAGE
33
EN22-39.KD-LX50[J]/f
33
00.3.15, 4:13 PM
STOP
ENGLISH
PLAY
4
Speak the word(s) you want to record while “SPEAK” is flashing
on the display. (In this example, speak “Classics.”)
• If the System recognizes your word(s), “REPEAT” starts flashing on the display after
the voice navigation “Please repeat.”
• If the System does not recognize your word(s), it will ask you to speak again. In this
case, speak the word(s) again.
5
Speak the same word(s) again while “REPEAT” is flashing on
the display. (In this example, speak “Classics.”)
“CHECK” appears on the display while recording your voice,
“OK” appears when
recording is complete.
6
7
Press and hold VOICE again to finish the
recording.
Repeat the above procedure to store other Access Commands.
34
EN22-39.KD-LX50[J]/f
34
00.3.15, 4:13 PM
STOP
To operate the system in the User Word mode
Make sure to set “VOICE WORD” to “USER” by following steps 1 to 4 on page 27.
Then follow the procedure below.
1 Press VOICE to turn on the receiver.
2 Press VOICE again to activate the Voice Recognition System.
3 Speak one of the Operation Commands or of the Access Commands you have stored to
the microphone while “SPEAK” is flashing on the display.
• For example, to use Access Command number 14, speak “Jazz 89” (which you have
registered previously.)
4 Press + or – to adjust the volume.
ENGLISH
PLAY
To check the registered voice and stored operations
Follow the procedure below.
1 Press and hold VOICE until one of the Access Commands appears on the display.
2 Press + or – to confirm the command contents.
• Each time you press + or –, the commands appear on the display in sequence.
You can check the command contents on the display.
EXAMPLE: A station of 89.5 MHz
is stored in the Access Command
14 (with sound mode — “SOFT”)
EXAMPLE: Disc no. 01 of the CD
changer is stored in the Access
Command 15 (without any sound
mode)
The recorded voice is also reproduced.
If you want to check the recorded voice again
Press VOICE while the voice command number you want to confirm is selected.
3 Press and hold VOICE again to finish the checking.
35
EN22-39.KD-LX50[J]/f
35
00.3.15, 4:13 PM
STOP
ENGLISH
PLAY
To change the Access Command contents
You can change the following command contents:
– Registered word(s) (ex: disc name, frequency name)
– Registered word(s) and operation (ex: disc number 01 of the CD changer = disc number
03 of the CD changer, CD changer = FM 89.5 MHz)
If you want to change an Access Command contents, follow the procedure below. Be sure to
select the source you want to store newly before you start.
EXAMPLE: When you replace the CD named “Classical music” (disc number 01 in the CD
changer) to another CD named “Popular music.”
In this case, you may want to change the voice Access Command “Classics” to “Pop music”
for Access Command 15.
1 Select the source you want to store newly. (In this example, select disc number 01 in the
CD changer.)
2 Press and hold VOICE until one of the Access Commands appears on the display.
3 Press + or – to select the Access Command number whose voice command you want to
change. (In this example, select Access Command number 15.)
4 Press STR (ATT) to make the System ready to record your voice.
“SPEAK” starts flashing on the display after the voice navigation “Please speak now.”
5 Speak the word(s) you want to register while “SPEAK” is flashing on the display. (In this
example, speak “Pop music.”)
“REPEAT” starts flashing on the display after the voice navigation “Please repeat.”
6 Speak the same word(s) again while “REPEAT” is flashing on the display. (In this example,
speak “Pop music”).
“CHECK,” then “OK” appears when recording is complete.
7 Press and hold VOICE again to finish the recording.
36
EN22-39.KD-LX50[J]/f
36
00.3.15, 4:13 PM
STOP
To erase the voice commands
If you want to erase the Access Commands (VOICE 14 to VOICE 25) already stored, or if you
want to erase the registered voice for the Operation Commands (VOICE 01 to VOICE 13),
follow the procedure below.
• An Operation Command cannot be erased but only the registered voice for it is erased.
ENGLISH
PLAY
1 Press and hold VOICE until one of the Access Commands appears on the display.
2 Press + or – until the voice command you want to delete appears on the display.
(In this example, select Access Command number 15.)
3 Press and hold STR (ATT) until the following message appears on the display.
4 Press + to erase the voice command.
If you want to cancel the erasing, press –.
5 Press and hold VOICE again to finish the erasing.
37
EN22-39.KD-LX50[J]/f
37
00.3.15, 4:13 PM
STOP
ENGLISH
PLAY
Other convenient functions for the Voice Recognition System
You can use the functions described on the next page for the Voice Recognition System.
Basic Procedure
1,4
1
2
3
2
Press and hold SEL (Select) for more than 2 seconds
so that one of the PSM items appears on the display.
(See page 44.)
Select the function you want to set or adjust — VOICE
LANG, VOICE/BEEP, VOICE WORD, or VOICE VOL.
3
Set or adjust the selected function.
4
Finish the setting.
38
EN22-39.KD-LX50[J]/f
38
00.3.15, 4:13 PM
STOP
To select the voice navigation language — VOICE LANG
When the voice control unit is connected to the receiver, you can select the language for the
voice navigation in the voice command registration process. When this unit is shipped from
the factory, “English” is selected.
• English:
English navigation will be heard while registering your voice commands into
the system.
• French:
French navigation will be heard while registering your voice commands into the
system.
• Spanish:
Spanish navigation will be heard while registering your voice commands into
the system.
ENGLISH
PLAY
Note:
If “VOICE/BEEP” is set to “BEEP,” you cannot hear the voice navigation. (See below.)
To select the voice navigation or beep sound — VOICE/BEEP
When the voice control unit is connected to the receiver, you can select either the voice
navigation (see above) or the confirmation beep, which is heard in response to the given
commands. When this unit is shipped from the factory, “VOICE” is selected.
• VOICE:
English, French, or Spanish navigation will be heard in response to the given
commands.
• BEEP:
Confirmation beep sound will be heard in response to the given commands.
To change the Voice Recognition System operation mode —
VOICE WORD
When the voice control unit is connected to the receiver, you can only use the Operation
Commands (in the Standard Word mode).
If you want to use the other Access Commands or to make the Voice Recognition System
accept only your own voice as a command, change the Voice Recognition System operation
mode.
• STANDARD: The System recognizes and accepts the Operation Commands anyone
speaks (in English).
• USER:
The System only recognizes and accepts your voice both for the Operation
Commands and the Access Commands.
Note:
When you register your voice for the Operation Commands or preset the Access Commands, you
have to select “USER” before you start.
To adjust the voice navigation volume — VOICE VOL
When the voice control unit is connected to the receiver, you can adjust the voice navigation
volume level (00 – 50).
When shipped from the factory, the voice navigation volume level is set at level 15.
39
EN22-39.KD-LX50[J]/f
39
00.3.15, 4:13 PM
ENGLISH
OTHER MAIN FUNCTIONS
Setting the clock
1,4
1
2
2,3
2,3
Press and hold SEL (Select) for more than 2 seconds
so that one of the PSM items appears on the display.
(See page 44.)
1
2
Set the hour.
1 Select “CLOCK HOUR” if not
shown on the display.
2 Adjust the hour.
3
1
2
Set the minute.
1 Select “CLOCK MINUTE.”
2 Adjust the minute.
4
Finish the setting.
To check the current clock time while the unit is turned off, press + or –.
The power turns on, the clock time is shown for 5 seconds, then the power turns off.
40
EN40-50.KD-LX50[J]/f
40
00.3.13, 4:14 PM
You can select the proper cruise mode for your car.
This unit changes the volume level automatically (at 3 possible levels) based on the driving
speed of your car by detecting the alternator’s generating frequency (Audio Cruise).
If you want to use this mode, follow the procedure below. When shipped from the factory, this
mode is set to “CRUISE OFF.”
• CRUISE 1:
Select this if your car is relatively quiet.
• CRUISE 2:
Select this if your car is relatively loud.
The volume increase rate is twice as much as that of the CRUISE 1
setting.
• CRUISE OFF: Cancels Audio Cruise.
1,4
1
3
ENGLISH
Controlling the volume automatically (Audio Cruise)
2
Press and hold SEL (Select) for more than 2 seconds
so that one of the PSM items appears on the display.
(See page 44.)
2
Select “CRUISE MODE.”
3
Select the desired setting.
Each time you press the button, the Audio Cruise mode changes as
follows:
CRUISE 1
4
CRUISE 2
CRUISE OFF
Finish the setting.
41
EN40-50.KD-LX50[J]/f
41
00.3.13, 4:14 PM
ENGLISH
When this function is turned on (the CRUISE indicator lights up on the display), the proper
volume level is automatically selected among the 3 possible levels according to the driving
speed, and the selected level is shown on the display.
When the driving speed increases.
When the driving speed decreases.
To adjust the volume increase rate
If you find Audio Cruise increases (or decreases) the volume either too much or too little as
the driving speed changes, you can adjust the increase rate by changing the boost level.
To change it, follow the procedure below.
1 Press and hold SEL (Select) for more than 2 seconds so that one of the PSM items
appears on the display.
2 Press
¢ or 4
repeatedly until “CRUISE MODE” appears on the display.
3 Press + or – to select either “CRUISE 1” or “CRUISE 2.”
4 Press
¢ (or 4
) to select “BOOST.”
The current boost level also appears on the display.
5 Press + or – to select the desired boost level (among 01 to 15).
6 Press SEL again to finish the setting.
If Audio Cruise does not function correctly
You may need to store the idling speed into memory to make Audio Cruise function correctly.
NOTICE that a number of factors, such as electric power steering, wipers, power windows, air
conditioner, etc. do generate noises and, as a result, may cause Audio Cruise not to function
correctly. If this is the main cause of malfunction, connect the memory backup lead (yellow
lead) directly to the car battery to prevent these noises from affecting Audio Cruise.
1 Start the engine and let it warm up.
2 Press and hold SEL (Select) for more than 2 seconds so that one of the PSM items
appears on the display.
3 Press
¢ or 4
repeatedly until “CRUISE MODE” appears on the display.
4 Press + or – to select either “CRUISE 1” or “CRUISE 2.”
5 Press
¢ (or 4
) to select “+OR– RPM SET.”
6 Press + or – to select the desired idling speed.
7 Press SEL again to finish the setting.
When the setting is complete, the unit automatically checks to see if Audio Cruise functions
correctly with this new idling setting. If it does not function correctly, Audio Cruise is canceled
automatically and the idling setting becomes invalid.
• If this happens, see the NOTICE above.
42
EN40-50.KD-LX50[J]/f
42
00.3.13, 4:14 PM
You can change the items listed on the next page by using the PSM (Preferred Setting Mode)
control.
ENGLISH
Changing the general settings (PSM)
Basic Procedure
1,4
1
2
3
2
Press and hold SEL (Select) for more than 2 seconds
so that one of the PSM items appears on the display.
Select the PSM item you want to adjust. (See page
44.)
3
Adjust the PSM item selected above.
4
Finish the setting.
43
EN40-50.KD-LX50[J]/f
43
00.3.13, 4:14 PM
ENGLISH
3
2
1
Set.
Factory-preset
settings
See
page
1:00
40
Select.
–
CLOCK HOUR
Hour adjustment
Back
Advance
CLOCK MINUTE
Minute adjustment
Back
Advance
SCM LINK
Sound control
memory linkage
SCM LINK OFF SCM LINK ON SCM LINK ON
45
CLOCK DISP
Clock display
CLK DISP OFF CLK DISP ON CLK DISP ON
45
LEVEL METER
Level display
DIMMER MODE
Dimmer mode
+
6 types (See page 45.)
DIMMER AUTO
DIMMER OFF
NORMAL
45
DIMMER AUTO
45
CRUISE OFF
41
800 rpm
42
DIMMER ON
CRUISE MODE
CRUISE 1
Audio cruise
CRUISE 2
CRUISE OFF
—
+OR– RPM SET*
Idling speed
BOOST*
Boost
BOOST 05
42
BEEP SWITCH
Key-touch tone
BEEP OFF
BEEP ON
BEEP ON
45
P. AMP SWITCH
Power amplifier
switch
P. AMP OFF
P. AMP ON
P. AMP ON
46
CONTRAST
Display contrast
CONTRAST 01 –10
CONTRAST 05
46
SCROLL MODE
Scroll mode
SCROLL AUTO
SCROLL ONCE
SCROLL OFF
SCROLL ONCE
46
WOOFER FREQ
Subwoofer cutoff
frequency
FREQ LOW
FREQ MID
46
AREA CHANGE
Channel interval
AREA US
AREA US
47
LINE ADJ
Line input level
adjustment
LINE ADJ 00
47
VOICE LANG**
Voice language
English
39
VOICE
STANDARD
39
VOICE VOL 15
39
FLAT OFF
47
BOOST 01 – 15
FREQ MID
FREQ HIGH
AREA EU
LINE ADJ 00 – 05
English
French
Spanish
VOICE/BEEP**
Voice/beep
VOICE
VOICE WORD**
Voice word
USER
VOICE VOL**
Voice volume
FLAT PANEL
Flat panel
BEEP
STANDARD
VOICE VOL 00 – 50
FLAT OFF
FLAT ON
* When you select “CRUISE 1” or “CRUISE 2” for Audio Cruise Mode, you can adjust these
items.
** These items are shown only when the voice control unit is connected to the receiver.
4
Press SEL (Select) to finish the setting.
44
EN40-50.KD-LX50[J]/f
44
00.3.24, 4:09 PM
39
You can cancel the Advanced SCM (Sound Control Memory), and unlink the sound modes
and the playback sources
When shipped from the factory, a different sound mode can be stored in memory for each
source so that you can change the sound modes simply by changing the sources.
• SCM LINK ON: Advanced SCM (different sound modes for different sources)
• SCM LINK OFF: Conventional SCM (one sound mode for all sources)
ENGLISH
To cancel Advanced SCM — SCM LINK
To set the clock display — CLOCK DISP
You can set the clock to be shown on the lower part of the display when the unit is turned on.
When shipped from the factory, the clock is set to be shown on the display.
• CLK DISP ON: Clock display is turned on.
• CLK DISP OFF: Clock display is turned off. When “CLK DISP OFF” is selected, the
current sound mode setting (see page 20) is shown on the upper part of
the display.
To select the level meter — LEVEL METER
You can select the level meter display according to your preference. When shipped from the
factory, “NORMAL” is selected.
• NORMAL:
Normal audio level meter (illuminates from bottom to top)
• REVERSE:
Level meter illuminates from top to bottom.
• WIDE:
Level meter illuminates from center to outside.
• RACE:
Level meter illuminates as if cars are racing.
• LEVEL OFF:
Level meter stays lit and does not change its illumination.
• ALL OFF:
Level meter turns off.
To select the dimmer mode — DIMMER MODE
When you turn on the car head lights, the display automatically dims (Auto Dimmer).
When shipped from the factory, Auto Dimmer mode is activated.
• DIMMER AUTO: Activates Auto Dimmer.
• DIMMER OFF: Cancels Auto Dimmer.
• DIMMER ON:
Always dims the display.
Note on Auto Dimmer:
Auto Dimmer equipped with this unit may not work correctly on some vehicles, particularly on those
having a control dial for dimming.
In this case, set the dimmer mode to “DIMMER ON” or “DIMMER OFF.”
To turn on/off the key-touch tone — BEEP SWITCH
You can deactivate the key-touch tone if you do not want it to beep each time you press a
button. When shipped from the factory, the key-touch tone is activated.
• BEEP ON: Activates the key-touch tone.
• BEEP OFF: Deactivates the key-touch tone.
45
EN40-50.KD-LX50[J]/f
45
00.3.13, 4:14 PM
ENGLISH
To turn on/off the power amplifier switch — P. AMP SWITCH
You can switch off the built-in amplifier and send the audio signals only to the external
amplifier(s) to get clear sounds and to prevent internal heat buildup inside this unit. When
shipped from the factory, the power amplifier switch is turned on so that the built-in amplifier
works.
• P. AMP ON:
Select this mode when not using external amplifier(s).
• P. AMP OFF:
Select this mode when using external amplifier(s).
To adjust the display contrast level — CONTRAST
You can adjust the display contrast level among 01 (dark) to 10 (bright). When shipped from
the factory, the display contrast level is set at level 05.
To select the scroll mode — SCROLL MODE
You can select the scroll mode for the disc information if it consists of more than 12 characters.
When shipped from the factory, Auto Scroll mode is set to “SCROLL ONCE.”
• SCROLL ONCE: Scrolls only once.
• SCROLL AUTO: Repeats the scroll (in 5-second intervals).
• SCROLL OFF: Cancels Auto Scroll.
Note:
Even if the scroll mode is set to “SCROLL OFF,” you can scroll the display by pressing DISP for
more than 1 second.
To select the subwoofer cutoff frequency — WOOFER FREQ
When a subwoofer is connected to this unit, select an appropriate cutoff frequency level for
your subwoofer. When shipped from the factory, the subwoofer cutoff frequency is set to
“MID.”
• FREQ LOW:
Frequencies higher than 50 Hz are cut off to the subwoofer.
• FREQ MID:
Frequencies higher than 80 Hz are cut off to the subwoofer.
• FREQ HIGH:
Frequencies higher than 120 Hz are cut off to the subwoofer.
46
EN40-50.KD-LX50[J]/f
46
00.3.13, 4:14 PM
When this unit is shipped from the factory, the channel intervals are set to 10 kHz for AM and
200 kHz for FM (AREA US settings).
You will have to change the channel intervals when using this unit in an area other than North
America and South America.
• AREA EU: Select this when using this unit in an area other than North and South America.
(9 kHz for AM and 50 kHz (for manual tuning) / 100 kHz (for searching) for FM)
• AREA US: Select this when using this unit in North or South America. (10 kHz for AM and
200 kHz for FM)
ENGLISH
To change the AM/FM channel intervals — AREA CHANGE
Note:
If the channel intervals settings are changed, the following will occur.
• The names assigned to the stations will be erased from memory. To reassign the names, see “Assigning
names to the sources” on pages 48 – 50.
• The frequencies stored in the Access Commands will be changed. If this happens, store the Access
Commands again. See “Presetting the Access Commands” on pages 30 – 34.
To adjust the line input level — LINE ADJ
Adjust the line input level properly when an external component is connected to the LINE IN
plugs. When shipped from the factory, the line input level is set at level 00.
If the input level of the connected component is not high enough, increase the input level
properly. Without adjusting the line input level, you may be surprised at a loud sound when
you change from the external component to another source.
To make the front panel look flat (hiding the control panel)
— FLAT PANEL
When operating the receiver using the remote control, you can hide the control panel to make
the front panel look flat. When shipped from the factory, “FLAT OFF” is selected.
• FLAT ON: The control panel will not come out when you turn on the unit.
To use the control panel, press 4
so that the control panel comes out. If
no operation is done for about 10 seconds, it automatically goes back into the
receiver.
• FLAT OFF: You can use the control panel normally.
Note:
When “FLAT ON” is selected, you can eject a CD by holding 4
.
47
EN40-50.KD-LX50[J]/f
47
00.3.13, 4:14 PM
ENGLISH
Assigning names to the sources
You can assign names to station frequencies, CDs and the external component connected to
the LINE IN plugs. After assigning a name, it will appear on the display when you select the
source.
Sources
Station frequencies
CDs * and CD changer *
External component
Maximum number of the characters
up to 12 characters (up to 30 station
frequencies including both FM and AM)
up to 32 characters (up to 40 discs)
up to 12 characters
* You cannot assign a name to a CD Text.
4
1
2,7
2,3
5
Select a source you want to assign a name to.
2
Press and hold SEL (Select) for more than 2
seconds while pressing DISP.
When you select a station
frequency as the source:
When you select the CD
as the source:
When you select the
external component
connected to LINE IN as the
source:
48
EN40-50.KD-LX50[J]/f
48
00.3.13, 4:14 PM
Select the character set you want while “ ” is flashing.
Each time you press the button, the character set changes as follows:
Capital letter (
)
Small letter (
Numbers and symbols (
4
ENGLISH
3
)
)
Select a character.
About the available characters, see page 50.
5
6
Move the cursor to the next (or previous) character
position.
Repeat steps 3 to 5 until you finish inputting the name.
7
Press the button while the last selected character is
flashing.
The input name is stored in memory.
To erase the input characters
Insert spaces using the same procedure described above.
49
EN40-50.KD-LX50[J]/f
49
00.3.13, 4:14 PM
ENGLISH
Available characters
Capital letters
A
B
C
D
E
F
G
H
I
J
K
L
M
N
O
P
Q
R
S
T
U
V
W
X
Y
Z
space
Small letters
a
b
c
d
e
f
g
h
i
j
k
l
m
n
o
p
q
r
s
t
u
v
w
x
y
z
space
Numbers and symbols
0
1
2
3
4
5
6
7
8
9
!
”
#
$
%
&
’
(
)
+
,
–
.
/
:
;
<
=
*
>
?
@
_
`
space
Notes:
• When you try to assign a name to the 41st disc, “NAME FULL” appears on the display. (In this case,
delete unwanted names before assignment.)
• When the CD changer is connected, you can assign names to CDs in the CD changer. These names
can also be shown on the display if you insert the CDs in this unit.
50
EN40-50.KD-LX50[J]/f
50
00.3.13, 4:14 PM
Remote sensor
Before using the remote controller:
• Aim the remote controller directly at the remote sensor
on the main unit. Make sure there is no obstacle in
between.
• Do not expose the remote sensor to strong light (direct
sunlight or artificial lighting).
ENGLISH
REMOTE OPERATIONS
Installing the battery
When the controllable range or effectiveness of the remote controller decreases, replace
the battery.
1. Remove the battery holder.
1) Push out in the direction indicated by the arrow
using a ball point pen or a similar tool.
2) Remove the battery holder.
(back side)
1)
2)
Lithium coin battery
(product number:
CR2025)
2. Place the battery.
Slide the battery into the holder with the + side facing
upwards so that the battery is fixed in the holder.
3. Return the battery holder.
Insert again the battery holder pushing it until you
hear a clicking sound.
(back side)
WARNING:
• Store the batteries in a place which children cannot reach.
If a child accidentally swallows the battery, immediately consult a doctor.
• Do not recharge, short, disassemble or heat the batteries or dispose of in a fire.
Doing any of these things may cause the batteries to give off heat, crack or start a fire.
• Do not leave the batteries with other metallic materials.
Doing this may cause the batteries to give off heat, crack or start a fire.
• When throwing away or saving the batteries, wrap in tape and insulate; otherwise, , it may cause
the batteries to give off heat, crack or start a fire.
• Do not poke the batteries with tweezers or similar tools.
Doing this may cause the batteries to give off heat, crack or start a fire.
51
EN51-52.KD-LX50[J]/f
51
00.3.17, 4:02 PM
ENGLISH
Using the remote controller
1
1 • Turns on the unit if pressed briefly.
• Turns off the unit if pressed and held until “SEE YOU”
appears on the display.
• Drops the volume level for a moment if pressed briefly.
Press again to resume the volume.
2 • Functions as the BAND button while listening to the radio.
Each time you press the button, the band changes.
• Functions as the DISC + button while listening to the CD
changer.
Each time you press the button, the disc number increases,
and the selected disc starts playing.
• Does not function as the PROG button.
3 • Functions as the PRESET button while listening to the
radio.
Each time you press the button, the preset station number
increases, and the selected station is tuned in.
• Functions as the DISC – button while listening to the CD
changer.
Each time you press the button, the disc number decreases,
and the selected disc starts playing.
4 Functions the same as the control dial on the main unit.
Note: This button does not function for the preferred setting mode
adjustment.
5 Select the sound mode.
Each time you press SCM (Sound Control Memory), the mode
changes.
6 Select the source.
Each time you press FUNC (function), the source changes.
7 • Searches stations while listening to the radio.
• Fast forwards or reverses the track if pressed and held
while listening to a CD.
• Skips to the beginning of the next tracks or goes back to
the beginning of the current (or previous tracks) if pressed
briefly while listening to a CD.
8 VCR (KZ-V10) operating buttons
•
: Turns on or off the VCR.
• 7:
Stops playback.
• 1 : Rewinds the tape if pressed and held while watching
a video tape.
• 3 : Starts playback.
• ¡ : Fast-forwards the tape if pressed and held while
watching a video tape.
5
6
2
7
3
4
8
52
EN51-52.KD-LX50[J]/f
52
00.3.13, 4:13 PM
Playing an external component
When connecting an external component such as a VCR (KZ-V10) to the LINE IN plugs on
the rear, you can select the component as the sound source.
You can also connect the TV to this unit.
2
1
1
ENGLISH
EXTERNAL COMPONENT OPERATIONS
2
Select the external component.
Each time you press the button, the source changes as described on
page 6.
2
Operate the external component.
If the VCR KZ-V10 is the external source to play, you can perform the following
operations using the buttons on the unit or on the remote control.
: Turns on or off the VCR.
7:
Stops playback.
1 : Rewinds the tape if pressed and held while
watching a video tape.
3:
Starts playback.
¡ : Fast-forwards the tape if pressed and held
while watching a video tape.
Notes:
• For the external component connection, see the Installation/Connection Manual (separate volume).
• See also “Assigning names to the sources” on page 48 if you want to match the name shown on the
display with the name of the connected component.
Using a subwoofer
By connecting a subwoofer to the SUBWOOFER OUT plugs on the rear, you can enjoy
enhanced bass sounds and a more realistic theater atmosphere in your car.
• Refer also to the instructions supplied with your subwoofer.
To set the subwoofer cutoff frequency, see “To select the subwoofer cutoff frequency” on
page 46.
To adjust the subwoofer output volume, see “Adjusting the sound” on page 17.
53
EN53-53.KD-LX50[J]/f
53
00.3.13, 4:19 PM
ENGLISH
CD CHANGER OPERATIONS
We recommend that you use one of the CH-X series (ex: CH-X1200) with your unit.
If you have another CD automatic changer, consult your JVC car audio dealer for connections.
• For example, if your CD automatic changer is one of the KD-MK series, you need a cord (KS-U15K)
for connecting it to this unit.
Before operating your CD automatic changer:
• Refer also to the Instructions supplied with your CD changer.
• If no discs are in the magazine of the CD changer or the discs are inserted upside
down, “NO DISC” will appear on the display. If this happens, remove the magazine and
set the discs correctly.
• If “RESET 1 - RESET 8” appears on the display, something is wrong with the connection
between this unit and the CD changer. If this happens, check the connection, connect
the connecting cord(s) firmly if necessary, then press the reset button of the CD changer.
Playing CDs
¢
4
Number buttons
1(7) to 3 (9)
SOURCE
(ATT)
Number buttons
4 (10) to 6 (12)
Select the CD automatic changer.
Each time you press the button, the source changes as
described on page 6.
Playback starts from the first track of the first disc.
All tracks of all discs are played back.
Track number
Elapsed playing time
Disc number appears.
Note:
When a CD is in the CD changer, selecting CD changer as the source by pressing SOURCE (ATT)
starts CD play.
54
EN54-57.KD-LX50[J]/f
54
00.3.13, 4:19 PM
Press and hold
¢, while playing a CD, to fast-forward the track.
Press and hold 4
, while playing a CD, to reverse the track.
ENGLISH
To fast-forward or reverse the track
To go to the next tracks or the previous tracks
Press
¢ briefly, while playing a CD, to go ahead to the beginning of
the next track. Each time you press the button consecutively, the beginning
of the next tracks is located and played back.
Press 4
briefly, while playing a CD, to go back to the beginning of
the current track. Each time you press the button consecutively, the
beginning of the previous tracks is located and played back.
To go to a particular disc directly
Press the number button corresponding to the disc number to start its
playback (while the CD changer is playing).
• To select a disc number from 1 – 6:
Press 1 (7) – 6 (12) briefly.
• To select a disc number from 7 – 12:
Press and hold 1 (7) – 6 (12) for more than 1 second.
Ex. When disc number 3 is selected
Track number
Disc number
To show the CD Text information
This is possible only when connecting a JVC CD automatic changer equipped with CD Text
reading capability.
See “Playing a CD Text” on page 16.
55
EN54-57.KD-LX50[J]/f
55
00.3.13, 4:19 PM
ENGLISH
Selecting CD playback modes
MODE
INT
RPT
RND
To play back tracks at random (Random Play)
1 Press MODE while playing a CD.
“MODE” appears on the lower part of the display, and the number buttons
can work as different function buttons.
2 Press RND (Random), while “MODE” is still on the display, so that the
RND indicator lights up on the display.
Each time you press the button, CD random play mode changes as follows:
RANDOM1
RANDOM2
Canceled
Mode
RND Indicator
Plays at random
RANDOM1
Lights
All tracks of the current disc, then the tracks of the
next disc, and so on.
RANDOM2
Flashes
All tracks of all discs inserted in the magazine.
To play back tracks repeatedly (Repeat Play)
1 Press MODE while playing a CD.
“MODE” appears on the lower part of the display, and the number buttons
can work as different function buttons.
2 Press RPT (Repeat), while “MODE” is still on the display, so that the RPT
indicator lights up on the display.
Each time you press the button, CD repeat play mode changes as follows:
REPEAT1
REPEAT2
Canceled
Mode
RPT Indicator
REPEAT1
Lights
The current track (or specified track).
Plays repeatedly
REPEAT2
Flashes
All tracks of the current disc (or specified disc).
56
EN54-57.KD-LX50[J]/f
56
00.3.13, 4:19 PM
1 Press MODE while playing a CD.
“MODE” appears on the lower part of the display, and the number buttons
can work as different function buttons.
2 Press INT (Intro), while “MODE” is still on the display.
Each time you press the button, CD intro scan mode changes as follows:
ENGLISH
To play back only intros (Intro Scan)
INTRO 1
INTRO 2
Canceled
Mode
Indication
Plays the beginnings (15 seconds)
INTRO 1
Track number flashes
Of all tracks on all inserted discs.
INTRO 2
Disc number flashes (when
it is shown on the display)
Of the first track on each inserted disc.
57
EN54-57.KD-LX50[J]/f
57
00.3.13, 4:19 PM
ENGLISH
MAINTENANCE
Handling CDs
COMPACT
This unit has been designed only to reproduce the CDs bearing the
Other discs cannot be played back.
and
marks.
DIGITAL AUDIO
How to handle CDs
When removing a CD from its case, press down the center holder of the case and
lift the CD out, holding it by the edges.
• Always hold the CD by the edges. Do not touch its recording surface.
Center holder
When storing a CD into its case, gently insert the CD around the center holder
(with the printed surface facing up).
• Make sure to store CDs into the cases after use.
To keep CDs clean
A dirty CD may not play correctly. If a CD does become dirty, wipe it with a soft cloth in
a straight line from center to edge.
To play new CDs
New CDs may have some rough spots around the inner and outer edges. If such a CD
is used, this unit may reject the CD.
To remove these rough spots, rub the edges with a pencil or ball-point pen, etc.
Moisture condensation
Moisture may condense on the lens inside the CD player in the following cases:
• After starting the heater in the car.
• If it becomes very humid inside the car.
Should this occur, the CD player may malfunction. In this case, eject the CD and leave
the unit turned on for a few hours until the moisture evaporates.
CAUTIONS:
• Do not insert 8cm (3 3/16") CDs (single CDs) into the loading slot. (Such CDs cannot be ejected.)
• Do not insert any CD of unusual shape – like a heart or flower; otherwise, it will cause a malfunction.
• Do not expose CDs to direct sunlight or any heat source or place them in a place subject to high temperature and
humidity. Do not leave them in a car.
• Do not use any solvent (for example, conventional record cleaner, spray, thinner, benzine, etc.) to clean CDs.
When playing a CD-R (Recordable)
You can play back your original CD-Rs on this receiver.
• Before playing back CD-Rs, read their instructions or cautions carefully.
• Some CD-Rs recorded on CD recorders may not be played back on this receiver because of their disc
characteristics, and of the following reasons:
– Discs are dirty or scratched.
– Moisture condensation occurs on the lens inside the unit.
– The pickup lens inside the CD player is dirty.
• Use only “finalized” CD-Rs.
• CD-RWs (Rewritable) cannot be played back on this receiver.
• Do not use the CD-Rs with stickers or sticking labels on the surface. They may cause malfunctions.
About mistracking:
Mistracking may result from driving on extremely rough roads. This does not damage the unit and
the CD, but will be annoying.
We recommend that you stop CD play while driving on such rough roads.
58
EN58-61.KD-LX50[J]/f
58
00.3.13, 4:18 PM
What appears to be trouble is not always serious. Check the following points before calling a
service centre.
Symptoms
Causes
Remedies
• CD cannot be played back.
CD is inserted upside down.
Insert the CD correctly.
• CD sound is sometimes
interrupted.
You are driving on rough roads.
Stop CD play while driving on
rough roads.
CD is scratched.
Change the CD.
Connections are incorrect.
Check the cords and
connections.
The volume level is set to the
minimum level.
Adjust it to the optimum level.
Connections are incorrect.
Check the cords and
connections.
• SSM (Strong-station
Sequential Memory)
automatic preset does not
work.
Signals are too weak.
Store stations manually.
• Static noise while listening to
the radio.
The antenna is not connected
firmly.
Connect the antenna firmly.
• “NO DISC” appears on the
display.
No CD is in the magazine.
Insert CD.
• “RESET 8” appears on the
display.
This unit is not connected to a
CD changer correctly.
Connect this unit and the CD
changer correctly and press the
reset button of the CD changer.
• Sound cannot be heard from
the speakers.
• “RESET 1-RESET 7” appears
on the display.
• “EJECT ERROR” appears on
the display and CD cannot be
ejected.
ENGLISH
TROUBLESHOOTING
Press the reset button of the
CD changer.
The CD player may function
incorrectly.
Press and hold – of the + / –
button for more than 5 seconds.
While holding
¢, press the
reset button. Release the reset
button, then release
¢.
(Be careful not to drop the CD
when ejecting.)
• No message appears on the
display but CD cannot be
ejected.
TO BE CONTINUED ON THE NEXT PAGE
59
EN58-61.KD-LX50[J]/f
59
00.3.13, 4:18 PM
ENGLISH
Symptoms
Causes
• Your voice commands (either
Operation or Access
Commands) do not operate
the receiver.
Remedies
Microphone is not connected.
Connect it correctly.
Voice control unit is not
connected.
Connect it correctly.
Your voice does not reach the
microphone.
Attach the microphone to the
place indicated in the
Installation/Connection manual
(separate volume).
• You cannot use all Operation
Commands.
“USER” is selected for “VOICE
WORD.” In this case, you can
use only the Operation
Commands for which you have
registered your own voices.
Register your own voices for all
Operation Commands.
• The receiver operates
unintentionally when another
person speaks in your car.
“STANDARD” is selected for
“VOICE WORD.”
Select “USER” for “VOICE
WORD.” (See page 39)
• You cannot register your own
commands.
“STANDARD” is selected for
“VOICE WORD.”
Select “USER” for “VOICE
WORD.” (See page 39)
Noises inside or outside the car
will interfere.
Change the microphone position
or take any other methods to
eliminate the noises.
The built-in microcomputer may
function incorrectly due to noise,
etc.
Press the reset button on the
front panel. (See page 2)
• This unit does not work at all.
• The CD changer does not
work at all.
60
EN58-61.KD-LX50[J]/f
60
00.3.13, 4:18 PM
AUDIO AMPLIFIER SECTION
Maximum Power Output:
Front: 45 W per channel
Rear: 45 W per channel
Continuous Power Output (RMS):
Front: 17 W per channel into 4 Ω, 40 Hz
to 20,000 Hz at no more than
0.8 % total harmonic distortion.
Rear: 17 W per channel into 4 Ω, 40 Hz
to 20,000 Hz at no more than
0.8 % total harmonic distortion.
Load Impedance: 4 Ω (4 Ω to 8 Ω allowance)
Tone Control Range:
Bass: ±10 dB at 100 Hz
Treble:±10 dB at 10 kHz
Frequency Response: 40 Hz to 20,000 Hz
Signal-to-Noise Ratio: 70 dB
Line-In Level/Impedance:
1.5 V/20 kΩ load
Line-Out Level/Impedance:
4.0 V/20 kΩ load (full scale)
Output Impedance: 1 kΩ
TUNER SECTION
Frequency Range:
FM: 87.5 MHz to 107.9 MHz
(with channel interval set to 200
kHz)
87.5 MHz to 108.0 MHz
(with channel interval set to 50 kHz)
AM: 530 kHz to 1,710 kHz
(with channel interval set to 10 kHz)
531 kHz to 1,602 kHz
(with channel interval set to 9 kHz)
[FM Tuner]
Usable Sensitivity: 11.3 dBf (1.0 µV/75 Ω)
50 dB Quieting Sensitivity:
16.3 dBf (1.8 µV/75 Ω)
Alternate Channel Selectivity (400 kHz):
65 dB
Frequency Response: 40 Hz to 15,000 Hz
Stereo Separation: 35 dB
Capture Ratio: 1.5 dB
CD PLAYER SECTION
Type: Compact disc player
Signal Detection System: Non-contact optical
pickup (semiconductor laser)
Number of channels: 2 channels (stereo)
Frequency Response: 5 Hz to 20,000 Hz
Dynamic Range: 96 dB
Signal-to-Noise Ratio: 98 dB
Wow and Flutter: Less than measurable limit
GENERAL
Power Requirement:
Operating Voltage: DC 14.4 V (11 V to
16 V allowance)
Grounding System: Negative ground
Allowable Operating Temperature:
0°C to +40°C (32°F to 104°F)
Main unit
Dimensions (W x H x D):
Installation Size:
182 mm x 52 mm x 160 mm
(7-3/16" x 2-1/16" x 6-5/16")
Panel Size: 188 mm x 58 mm x 8 mm
(7-7/16" x 2-5/16" x 3/8")
Mass: 1.7 kg (3.8 lbs) (excluding accessories)
Voice control unit
Dimensions (W x H x D):
122 mm x 34 mm x 73 mm
(4-13/16" x 1-3/8" x 2-7/8")
Mass: 310 g (0.69 lbs)
Design and specifications subject to change
without notice.
If a kit is necessary for your car, consult
your telephone directory for the nearest
car audio speciality shop.
[AM Tuner]
Sensitivity: 20 µV
Selectivity: 35 dB
EN58-61.KD-LX50[J]/f
ENGLISH
SPECIFICATIONS
61
61
00.3.22, 10:45 AM
Having TROUBLE with operation?
Please reset your unit
Refer to page of How to Reset
Still having trouble??
USA ONLY
Call 1-800-252-5722
http://www.jvcservice.com
We can help you!
VICTOR COMPANY OF JAPAN, LIMITED
EN, SP, FR
EN00-00.KD-LX50[J]/f
V
J
2
C
0300MNMMDWJEIN
00.3.13, 4:09 PM