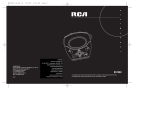
Download RCA RS2604 CD Shelf System
Transcript
RS2604 EN 3/7/02 10:39 AM Page 2
31
RS26
EM RS25
EM 04
SYST
AUDIOOSYST
AL AUDI
EM RS26
DIGIT
TAL
DIGI
AUDIO SYST
DIGITAL
COMPACT
ANG
5 DISC CH
DISC AUDIO
SIMU
OUS
LTANE
PLAY
OAD
AND L
LE
CD-RW COMPATIB
RS
SUBWOOFE
POWERED
BUILT-IN
STANDBY
D
POWER
CLOCK
TIMER
TIMER
ROCK
/CLASSIC
ROCK
/CLASSIC
KEVLAR
ARM
VL
KE
SYSTE
OUND
SOUN
TE
D SYS
S
PHONES
OW
N
UP
T
LAT
M/FLA
CUSTO
CUSTOM/F
A
3W
WOOF
KEVLAR TRO
EQ CON
M
DISC SKIP
OPEN/CLOSE
D
SURROUN
BAND
SOURCE
AUTO
AUTO PROG.
DISC
C T
PROG. D I R E
DISC
1
2
D I S C
DISC
3
LAR
K E V ER SYS
K
TEM
OOFER
3
EA
Y SP
WA
SE
SE
PA
R
AT
E
ENC
E
LOSURE SP
AK
ER
SY
ST
EXPORTER
Thomson multimedia Inc.
10330 N. Meridian St. Indianapolis, IN 46290
© 2002 Thomson multimedia Inc.
IMPORTADOR
Comercializadora Thomson de Mexico, S.A. de C.V.
Miguel de Cervantes Saavedra No. 57
Col. Ampliación Granada
C.P. 11529 Mexico D.F.
Telefono: (55)25 81 53 20
RFC: CTM-980723-KS5
Trademark(s) ® Registered
Marca(s) Registrada(s)
Marque(s) ® Déposée(s)
55274770 (EN/F/E)
www.rca.com
www.rca.com/LatinAmerica
0151
Made in China/Fabricado en China
BACK
REC/PLAY
COR
AT I C R E
M
A U TO M
E
POWERED
SUPER W
DECK-1
L/
D LEVE
TO P
A U TO S
PA
R
AT
E
RS2604 EN 3/7/02 10:39 AM Page 3
u
s
e
r
m
a
31
NGER
STE
AD SY
M
n
DEMO
SE
OPEN/CLO
DIMMER
EM
ER SYST
Y
CD DISPLA
. SET T
PROG
PROG./SE
SUB
WOOFER
DDO
LAR
K E V KER SYSTEM
SPEA
AY
3W
T
TUNE/PRESE
SET
TUNE/PRE
OFER
ROL
UND
S S
A C C E
DISC
4
DISC
5
E
CONTIN
L AY / TA
UOUS P
DECK-2
BIN
PE DUB
G 2 - 1
SE
PA
R
AT
E
ENC
E
LOSURE SP
AK
ER
SY
ST
l
PLAYBACK
P
OOFER
M
3
SUPER W
S C
C
a
POWERED
VOLUME
VOLUME UP
UP
NN
O WW
u
TK
REPEA
CLOC
ZZJAZZ
POP/
POP/JA
T
AT
RS2606
RS2604
RS2606
It is important to read this instruction book prior to using your new product for the first time.
Es importante leer este manual antes de usar por vez primera su euipo.
RS2604 EN 3/7/02 10:39 AM Page 4
FCC Information
EN
This device complies with Part 15 of the FCC Rules. Operation
is subject to the following two conditions: (1) This device may
not cause harmful interference, and (2) this device must
accept any interference received, including interference that
may cause undesired operation.
In accordance with FCC requirements, changes or modifications not expressly approved by Thomson multimedia Inc.
could void the user’s authority to operate this product.
This device generates and uses radio frequency (RF) energy,
and if not installed and used properly, this equipment may
cause interference to radio and television reception.
If this equipment does cause interference to radio or television reception (which you can determine by unplugging the
unit), try to correct the interference by one or more of the following measures:
• Re-orient the receiving antenna (that is, the antenna for the
radio or television that is "receiving" the interference).
• Move the unit away from the equipment that is receiving
interference.
• Plug the unit into a different wall outlet so that the unit
and the equipment receiving interference are on different
branch circuits.
If these measures do not eliminate the interference, please
consult your dealer or an experienced radio/television techni-
cian for additional suggestions. Also, the Federal
Communications Commission has prepared a helpful booklet,
"How To Identify and Resolve Radio TV Interference
Problems." This booklet is available from the U.S. Government
Printing Office, Washington, DC 20402. Please specify stock
number 004-000-00345-4 when ordering copies.
This product complies with DHHS Rules 21 CFR Subchapter J.
Applicable at the date of manufacture.
For Your Safety
The AC power plug is polarized (one blade is wider than the
other) and only fits into AC power
outlets one way. If the plug won’t
go into the outlet completely, turn
the plug over and try to insert it the
other way. If it still won’t fit, contact a qualified electrician to
change the outlet, or use a different one. Do not attempt to
bypass this safety feature.
CAUTION: TO PREVENT ELECTRIC SHOCK,
MATCH WIDE BLADE OF PLUG TO WIDE
SLOT, FULLY INSERT.
Have a Blast- Just Not in Your Eardrums
Make sure you turn down the volume on the
unit before you put on headphones. Increase
the volume to the desired level only after headphone are in place.
CAUTION
RISK OF ELECTRIC SHOCK
DO NOT OPEN
THE LIGHTNING
FLASH AND ARROWHEAD WITHIN THE
TRIANGLE IS A
WA R N I N G S I G N
ALERTING YOU OF
"DANGEROUS
VOLTAGE" INSIDE
THE PRODUCT.
CAUTION: TO REDUCE THE
RISK OF ELECTRIC SHOCK,
D O N OT R E M OV E C OV E R
( O R BAC K ) . N O U S E R S E RV I C E A B L E PA RT S I N S I D E . R E F E R S E RV I C I N G
T O Q UA L I F I E D S E RV I C E
PERSONNEL.
THE EXCLAMATION
POINT WITHIN THE
TRIANGLE IS A
WARNING
SIGN
ALERTING YOU OF
I M P O R TA N T
INSTRUCTIONS
A C C O M PA N Y I N G
T H E P R O D U C T.
SEE MARKING ON BOTTOM / BACK OF PRODUCT
WARNING: TO PREVENT FIRE OR ELECTRICAL
SHOCK HAZARD, DO NOT EXPOSE THIS PRODUCT
TO RAIN OR MOISTURE.
RS2604 EN 3/7/02 10:39 AM Page 5
FCC Information
in appropriate servicing techniques. For instructions on how to
obtain service, refer to the warranty included in this Guide.
For Your Records
In the event that service should be required, you may need
both the model number and the serial number. In the space
below, record the date and place of purchase, and the serial
number:
Model No.
Remote Control No.
Date of Purchase
Place of Purchase
Serial No.
Service Information
This product should be serviced only by those specially trained
Technical specification
Power Supply: 120V~60Hz
Power consumption: 300 Watts
IMPORTER
Comercializadora Thomson de Mexico, S.A. de C.V.
Miguel de Cervantes Saavedra No. 57
Col. Ampliación Granada
C.P. 11529 Mexico D.F.
Telefono: (55)25 81 53 20
RFC: CTM-980723-KS5
Contents
FCC/ Safety Information
Installation . . . . . . . . . .2
Controls & Indicators
Main Unit . . . . . . . . . . . . . . .3
Tape Player . . . . . . . . . . . . . .3
Remote Control . . . . . . . . . .4
Display
Showing the Demonstration
. . . . . . . . . . . . . . . . . . . . . . . .5
Display Timer/Clock . . . . . . .5
Setting the Time . . . . . . . . .5
Setting the Timer . . . . . . . . .5
Activating the Timer . . . . . .5
Adjusting the Display
Brightness . . . . . . . . . . . . . . .5
Sleep Mode . . . . . . . . . . . . . .5
Sound Features
Using Preset Equalizer Curves
. . . . . . . . . . . . . . . . . . . . . . . .6
Creating a Custom Curve
. . . . . . . . . . . . . . . . . . . . . . . .6
Sub-Woofer . . . . . . . . . . . . .6
Muting Audio . . . . . . . . . . . .6
X- Surround . . . . . . . . . . . . . .6
CD Player
Loading Discs . . . . . . . . . . . .6
Playing Discs . . . . . . . . . . . . .6
Shuffling the Play Order . . .6
Sampling Tracks . . . . . . . . . .6
Repeating the Play Order . .7
Setting Up a CD program . .7
Playing a Program List . . . . .7
Displaying the Program list
. . . . . . . . . . . . . . . . . . . . . . . .7
Deleting a Program List . . .7
Skipping a Disc . . . . . . . . . . .7
Searching through a CD . . .7
Suppressing Stereo Signal
. . . . . . . . . . . . . . . . . . . . . . . .8
Tape Player
Playing a Tape . . . . . . . . . . .9
Continuous Play . . . . . . . . . .9
Recording . . . . . . . . . . . . . . .9
From Tuner . . . . . . . . . . . . . .9
From CD . . . . . . . . . . . . . . . .9
Tape to Tape . . . . . . . . . . . . .9
From an Auxiliary Input . . .9
Troubleshooting Tips
. . . . . . . . . . . . . . . . . . .10
Maintenance
Cleaning . . . . . . . . . . . . . . .10
CD Player . . . . . . . . . . . . . . .10
Tape Player . . . . . . . . . . . . .10
Tuner
Tuning to a Station . . . . . . .8
Using Presets . . . . . . . . . . . .8
Auto Preset Program (for FM
only) . . . . . . . . . . . . . . . . . . . .8
Setting Presets . . . . . . . . . . .8
More Information . . . .11
Limited Warranty . . . .13
1
EN
RS2604 EN 3/7/02 10:39 AM Page 6
Installation
EN
1. AM Loop Antenna Connector
2. Auxiliary Connector
3. Surround Speaker Jacks
4. Main Speaker Jacks
5. Subwoofer Speaker Jacks
6. FM Antenna Jack
6
AM LOOP
FM
75 Ω
1
AUX IN
R
L
SURROUND SPEAKERS 8 Ω
2
-
-
3
R
+
+
R
L
MAIN SPEAKERS 6 Ω
+ R -
4
- L +
5
~
WOOFER SPEAKERS 6 Ω
Unpacking the system:
You should have:
• one main unit (with 2 speakers);
• surround speakers (RS2606 only)
• one remote control;
• one AM loop antenna;
• T-Type FM antenna wire;
• one user’s guide;
• one safety leaflet.
To ensure sufficient ventilation, keep the spacings shown below free from other surfaces:
4 inches
4 inches
DIGITAL AUDIO SYSTEM RS2604
4 inches
4 inches
STANDBY
OPEN/CLOSE
CLOCK
TIMER
KEVLAR
2 inches
ROCK
/CLASSIC
CUSTOM/FLAT
POP/JAZZ
SOUND SYSTEM
PROG./SET
VOLUME
UP
WN
DO
TUNE/PRESET
AUTO PROG.
Antenna and Speaker Wire Connection
Push terminal tab down to
insert wire.
Release tab to lock wire in
the terminal.
NOTE: Make sure the insulation is completely removed from the
ends of the Antenna and speaker wires at all connection
points.
2
RS2604 EN 3/7/02 10:39 AM Page 7
Controls and Indicators
Main Unit
EN
OPEN/CLOSE — Opens or closes
the disc tray.
DISC 1 - DISC 5 — Selects disc 1,
2, 3, 4, or 5
DISC SKIP — Skips to the next CD
in the tray
DIGITAL AUDIO SYSTEM RS2604
STANDBY
STANDBY/POWER — Turns
power on or off (STANDBY mode).
PHONES — Jack for connecting
headphones
SOURCE— Selects the CD player/
tuner/ tape player/ external source
DIMMER/DEMO — Turns the feature demonstration on or off,
adjusts display brightness.
STOP / TUNE / PRESET—
Stops CD track, sets tune
or preset mode
SKIP FORWARD —
Increments radio frequency, CD tracks or setting options.
SKIP BACKWARD —
Decrements radio frequency, CD tracks or setting options
PLAY/PAUSE — Plays or
pauses CD
CLOCK — Shows clock time and
enters clock setting mode.
TIMER — Enters timer setting
mode and turns the mode on/off.
BAND/AUTO PROG. — Changes
between FM and AM tuner
bands. Enters auto preset program in FM mode.
REPEAT - Selects among repeat
modes.
PROG./SET- enters program or
setting mode for CD & tuner
mode.
BASS BOOST — Turns sub-woofer
on or off
ROCK/CLASSIC, CUSTOM/FLAT,
POP/JAZZ — selects among the
different EQ modes.
OPEN/CLOSE
CLOCK
TIMER
KEVLAR
ROCK
/CLASSIC
CUSTOM/FLAT
PROG./SET
POP/JAZZ
VOLUME
UP
WN
DO
SOUND SYSTEM
TUNE/PRESET
AUTO PROG.
X-SURROUND — Press once to
activate X-SURROUND
VOLUME — Increases/ decreases
volume.
Tape Player
RECORD
PLAY
REWIND
FAST-FORWARD
STOP/EJECT
PAUSE
Tip: In STANDBY mode (press
POWER off), the system displays the time. Press POWER to
turn the system on in the previously used
mode. Press CD, TAPE, TUNER, or AUX
(Remote Only) to select the corresponding
mode. Look at the display icons to identify
the current mode.
3
RS2604 EN 3/7/02 10:40 AM Page 8
Controls and Indicators
EN
Remote Control
POWER — Turns power on or off (STANDBY mode).
TUNER — Selects tuner
CD — Selects CD player
TAPE — Selects tape player
AUX — Selects external input.
B-BOOST - Turns B BOOST on or off
VOL+ or VOL- — Increases/ decreases volume
EQ — Selects equalizer presets
PLAY/PAUSE
— Plays or pauses current CD
STOP — Stops playing CD
NEXT/FWD
— Increments CD track; searches through CD
PREV/REV—
Decrements CD track; searches through CD
(Press NEXT/FWD or PREV/REV to tune up/ down tuner frequency)
DISC SKIP — Skips to next CD
REPEAT — Repeats a track, CD, or all CDs.
MUTE - mutes sound
SHUFFLE — Turns on/off random listening
FM ST. - Toggles between FM stereo and mono
INTRO - Turns INTRO mode on or off to play the first 10 seconds
of each track.
PRESET UP/DOWN — Selects next/ previous preset station
OPEN/CLOSE — opens/closes cd tray door
SLEEP - selects the time interval in minutes before the unit turns
off
X-SURROUND - enables/disables X-surround feature
TUNER
SOURCE
TAPE
AUX
CD
B BO
EQ
OST
POWER
X-SURROUND
VOL
NE
EV
XT
PR
RE
D
V
FW
VOL
OPEN/CLOSE
STOP
MUTE
SHUFFLE
DISC SKIP
INTRO
REPEAT
FM ST.
PRESET
DOWN
UP
SLEEP
Battery Size:
“AAA” or “UM-4” or “R03”
4
RS2604 EN 3/7/02 10:40 AM Page 9
Display
EN
Showing the Demonstration
Activating the Timer
Not operational in CD mode. Press DIMMER/DEMO
to turn on/off demonstration mode. The demonstration scrolls through all display operations.
Press and release TIMER to turn on/off
the alarm. The alarm is active when the
clock icon indicator is lit.
DISPLAY TIMER/CLOCK
Adjusting the Display Brightness
Setting the Time
1. Press and hold DIMMER/DEMO for more
DIM 2
than 2 seconds.
2. While the dimmer is displayed, press and release
DIMMER/DEMO to select the desired level (DIM 0 3).
1. Press and hold CLOCK until the hour flashes on
the display.
2. Press SKIP BACKWARD
or SKIP FORWARD
to set the hour and then press
CLOCK to shift to minute digits.
3. Press SKIP BACKWARD
or SKIP FORWARD
to set the minute.
4. Press SET to save settings and STOP to quit setting.
Note: When system is ON, you can press CLOCK to
display the current time for about 2 seconds.
Sleep Mode
You can select the time interval in minutes before
the unit turns off automatically. Press SLEEP on the
remote to select among 120, 90, 60, 45, 30, 15 & 5
minutes. (Remote Only)
Setting the Timer
1. Press and hold TIMER until the ON appear with
the hour flashing ( ON - timer on time )
2. For setting time, press SKIP FORWARD
/
BACKWARD
to set the hour and then
press TIMER to shift to minute digits.
3. Press SKIP FORWARD
/ BACKWARD
to set the minute.
4. Press TIMER to change to OF (timer off time) with
hour flashing. Repeat steps 2 & 3 for timer off time
setting.
5. Press TIMER to select source. Press SKIP FORWARD
/ BACKWARD
to select
between CD /TUNER / TAPE)
6. Press TIMER to set volume. Rotate the VOLUME
knob to set desired volume level.
7. Press SET to save settings or STOP to quit setting.
5
RS2604 EN 3/7/02 10:40 AM Page 10
Sound Features
EN Using Preset Equalizer Curves
Boosting the bass
Press ROCK/CLASSIC, CUSTOM/FLAT, POP/JAZZ on the
main unit or EQ on the remote to toggle among
FLAT, ROCK, JAZZ, POP, CLASSICAL & CUSTOM. The
display shows briefly the selection.
Press Bass Boost to turn on/off boosting the bass
frequency.
Creating a Custom Curve
Press MUTE on the
remote to cut the sound. (Remote Only)
1. Press CUSTOM/FLAT to select CUSTOM mode.
2. While "CUSTOM" is displayed, press SKIP FORWARD
/ BACKWARD
to cycle
among displayed bass-, mid-, and treble - range levels.
3. While BAS or TRE is displayed, adjust VOLUME to set
the associated gain between 10 - +10.
TRE+08
CD PLAYER
DIGITAL AUDIO SYSTEM
COMPACT DISC AUDIO
CD-RW COMPATIBLE
Muting Audio
MUTE
X-Surround
Press X-SURROUND to enjoy enriched sound quality.
This feature gives you:
1. Better width and depth for vocal and instrumental
sound.
2. More powerful presence for studio recording.
3. Enhanced surround effects with greater flexibility
in positioning speakers.
Play and load simultaneously by:
1. Press OPEN/CLOSE to open the tray while a CD is
playing
2. Load/change discs for available trays by pressing
DISC SKIP.
3. Press OPEN/CLOSE to close the tray.
5 DISC CHANGER
SIMULTANEOUS PLAY AND LOAD SYSTEM
Shuffling the Play Order
Loading Discs
1. Press SOURCE repeatedly to select CD mode.
2. Press OPEN/CLOSE to open the drawer.
3. Insert up to five discs with label face up. (Press DISC
SKIP to rotate the disc carrier.)
4. Press OPEN/CLOSE to close the drawer. Loaded disc
position icon lights.
Playing Discs
Press PLAY/PAUSE to begin or pause play, and STOP
to stop play.
Select a specific disc by pressing DISC 1 - DISC 5.
Press SKIP FORWARD
/ BACKWARD
to select a specific track.
6
Press SHUFFLE to turn on/off the playing of tracks in
random order. (Remote Only)
Sampling Tracks
Press INTRO to play the first 10 seconds of each track
on the current disc, all discs in the tray, or turn INTRO
mode off. (Remote Only)
(Note: You may also press REPEAT to select 1 disc or
all discs before activating INTRO & SHUFFLE functions)
Tip: While playing a CD, press
and hold SKIP-FORWARD or
BACKWARD for more than 2 seconds to search through the CD.
CD Player
Repeating the Play Order
Deleting Program List
Press REPEAT to repeat the current track, current disc,
all discs, or turn REPEAT mode off.
While in PROGRAM mode, press and hold STOP
for 5 seconds. They system displays the message
CLEAR.
Setting Up a CD Program
EN
Skipping a Disc
You can program the CD player to play up to any 32
tracks on the CDs in the tray.
1. While the CD player is
stopped, press PROG./SET
to enter
program mode. The system displays the next available program number: “- P:01,” with “- -” flashing, prompts you for the first
track in the program list.
2. Press SKIP FORWARD
/ BACKWARD
to select a track (press DISC SKIP or DISK 1
- DISK 5 to select a track from a different disc).
3. Immediately press SET to assign the selected track
to the program number. After 3 seconds, you are
prompted for the next track in the program list.
(In CD program mode, PROG icon will be lit.)
5 P:01
Press DISC SKIP.
Searching Through a CD
Press and hold SKIP FORWARD
/ BACKWARD
to search through a CD as it is playing.
Playing a Program List
While in PROGRAM mode, press PLAY
.
Displaying the Program List
1. While the CD player is stopped, press SET to enter
PROGRAM mode.
2. Press SET repeatedly to list each track assignment
in the program list.
Tips: You can create a program of up to 32 tracks.
Press CD DISPLAY repeatedly to view
elapsed track time, track number, track
remain time and disc remain time.
Caution: Do not push to force closing of the tray
during CD playback or tray opening.
7


