1
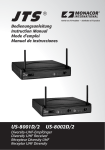
us-8002d(DB)
US-8001D(DB)
US-8216D Series
Instruction Manual
Thank you for choosing the JTS wireless system. In order to obtain the best efficiency from the system,
you are recommended to take a few minutes to read this instruction manual carefully.
INDEX
1. Important Caution 1
2. Features
1
3. Specification
2
3-1 Receiver// US-8001D(DB)/ US-8002D(DB)/US-8216D
2
3-2 Handheld Transmitter // Mh-750 / Mh-850 / Mh-8016
2
3-3 Miniature Head Worn Transmitter/UT-16HW
3
3-4 Body-pack Transmitter // PT-850B(mi)
3
3-5 Optional Condenser Microphone
4
4. Part Identification & Accessories
6
4-1 Receiver// US-8001D(DB)/ US-8002D(DB)/US-8216D
6
4-2 Handheld Transmitter // Mh-750 / Mh-850 / Mh-8016
6
4-3 Miniature Head Worn Transmitter/UT-16HW
7
4-4 Body-pack Transmitter // PT-850B(mi)
7
4-5 Optional Condenser Microphone
7
4-6 Accessories
11
5. Preparing Procedures & Basic Operation
12
5-1 Receiver// US-8001D(DB)/ US-8002D(DB)/US-8216D
12
5-2 Rack Mounting
13
5-3 Battery Insertion of the transmitter
14
5-4 Body-pack Transmitter // PT-850B(mi)
15
6. System operation
7. Recommendation
8. Important notice
16
19
20
1. Important Caution
• Always makes all connections before plugging the unit into an AC power outlet.
• Do not leave the device in a place neither with high temperature nor high humidity.
• Always do not handle the power cord with wet hands!
• Keep the devices away from fire and heat sources.
2. Features
• Operated in UHF band where there is less RF interference than the VHF band.
• Due to the PLL synthesized technology, the system offer 16 selectable channel.
• The true diversity reception with 2 independent RF receivers ensure the stable transmission and
reception.
• Adjustable squelch control can effectively reduce the noise.
• Tuned antennas can benefit the stable RF reception.
• Built-in Tone key Squelch & Noise Mute detection are available to restrain the interference
signal.
• Rugged metal housing can pass through the difficult environment.
• Equipped with balanced XLR and unbalanced output allows great convenience.
• Body-pack transmitter provides phantom powering for condenser lavaliere and headset
microphones.
1
WIRELESS MICROPHONE SYSTEM
3. Specification
3-1 Receiver
Model No ......................................... US-8001D(DB)/US-8002D(DB)/US-8216D
Frequency Preparation.............. PLL Synthesized Control
Carrier Frequency Range....... 502~960 MHz
S/N Ratio........................................... > 105dB
T.H.D................................. <0.6%@1KHz
Display.............................. LED
Display Contents........................... Antenna A/B, RF/AF Status
Controls............................ Power On/Off, Channel Selecting, Audio Level
Audio Output Level.................... -12dB
AF Output Impedance.............. 600Ω
Squelch............................. Pilot Tone, Noise and Mute
Operation Voltage......................... US-8002D(DB)/US-8216D: 12-18 VDC, 200mA
US-8001D(DB): 12-18 VDC, 150mA
Output Connector....................... 1 Balanced XLR socket
(2 for US-8002D(DB)/US-8216D)
1 Unbalanced Ø6.3mm phone jack
Dimension(m/m)............... 221mm (W)* 40mm (H)* 152mm (D)
3-2 Handheld Transmitter
Model No...................................... Mh-750 / Mh-850
Frequency Preparation......... PLL Synthesized Control
Carrier FrequencyRange.... 502~960 MHz
RF Outputs.................................. 10mW
Stability............................................ ±10KHz
Frequency Deviaion.............. ±48KHz
LED Display................................ Low Battery, Power On/Off
Controls.......................................... Power On/Off,
Channel Selecting
Spurious Emissions................ <-50 dBC
Audio Frequency Resonse 50~16,000 Hz
Battery.............................................. UM3, AA 1.5V*2
Mh-8016( i )
PLL Synthesized Control
502~960 MHz
10mW
±10KHz
±48KHz
Power On/Off,
Channel Up/Down
<-60 dBC
50~16,000 Hz
UM3, AA 1.5V*2
2
3-3 Miniature Head Worn Transmitter
UT-16HW
PLL Synthesized Control
502~960 MHz
Maximum 10mW
±10KHz
±48KHz
Power On/Off, Low battery
Power On/Off, AF Level, Channel
Selecting, Mute
<-50 dBC
Spurious Emissions.............
Audio Frequency Response 40~18,000 Hz
LR03, AAA 1.5V
Battery....................................
Model No........................................
Frequency Preparation........
Carrier Frequency Range.....
RF Outputs............................
Stability..................................
Frequency Deviation............
LED Display...........................
Controls.................................
3-4 Body-pack Transmitter
Model No........................................
Frequency Preparation.........
Carrier Frequency Range......
RF Outputs.....................................
Stability...................................
Frequency Deviation................
LED Display....................................
Controls..................................
PT-850B(mi)
PLL Synthesized Control
502~960 MHz
10mW
±10KHz
±48KHz
Power On/Off, Low battery
Power On/Off, AF Level,
Channel Selecting
Spurious Emissions................... <-50 dBC
Audio Frequency Response 40~18,000 Hz
Battery.................................... UM3, AA 1.5V*2
3
WIRELESS MICROPHONE SYSTEM
3-5 Optional Condenser Microphone
Lavaliere Microphone
Model No............................... CM-501
Connector.............................. 4P Mini XLR
Frequency Response...... 100~15,000 Hz
Polar Pattern.......................... Cardioid
Sensitivity (at 1000Hz) -60±3 dB
Impedance............................. 2.2kΩ
Max. SPL for 1% THD 130dB
Dimension(mm).............. Ø10.1mm(W)
* 26.4mm(H)
Net Weight............................ 21.5g
CM-201
4P Mini XLR
60~15,000 Hz
Omni-directional
-60±3 dB
2.2kΩ
130dB
Ø5mm(W)
* 9mm(H)
20.7g
CM-125
4P Mini XLR
50~18,000 Hz
Omni-directional
-53±3 dB
4.4kΩ
130dB
Ø4mm(W)
* 11mm(H)
7g (cable excluded)
Model No............................... CM-204
Connector.............................. 4P Mini XLR
CM-204U
4P Mini XLR
Frequency Response......
Polar Pattern..........................
Sensitivity (at 1000Hz)
Impedance.............................
Max. SPL for 1% THD
Dimension(mm)..............
30~18,000 Hz
Cardioid
-68±3 dB
680Ω
130dB
205mm(W)
* 134mm(H)
* 157mm(D)
38.4g
CM-204UL
801C3 (3 pin mini XLR)
801C4 (4 pin mini XLR)
801CS (3.5 stereo plug)
100 ~ 18,000Hz
Cardioid
-75±3 dB
1.5kΩ
120dB
125mm(W)
* 134mm(H)
* 157mm(D)
18g (cable excluded)
Headset Microphone
60~15,000 Hz
Omni-directional
-60±3 dB
2.2kΩ
130dB
125mm(W)
* 134mm(H)
* 157mm(D)
Net Weight............................ 32.9g
Model No...............................
Connector..............................
Frequency Response......
Polar Pattern..........................
Sensitivity (at 1000Hz)
Impedance.............................
Max. SPL for 1% THD
Dimension(mm)..............
CM-225
4P Mini XLR
50~18,000 Hz
Omni-directional
-53±3 dB
4.4kΩ
130dB
155mm(W)
* 134mm(H)
* 157mm(D)
Net Weight............................ 17g (cable excluded)
CX-504
4P Mini XLR
30~18,000 Hz
Cardioid
-68±3 dB
680Ω
130dB
285mm(W)
* 55mm(H)
* 111.3mm(D)
56.3g
4
Ear-hook Microphone
Model No............................... CM-801/CM-804i
Connector.............................. 801C4 (4 pin mini XLR)
Option Connector........... 801C3 (3 pin mini XLR)
801CS (3.5 stereo plug)
Frequency Response...... 60~15,000 Hz
Polar Pattern.......................... Omni-directional
Sensitivity (at 1000Hz) -64±3 dB
Impedance............................. 1.8kΩ
Max. SPL for 1% THD 130dB
CM-8015/CM-825i
801C4 (4 pin mini XLR)
801C3 (3 pin mini XLR)
801CS (3.5 stereo plug)
50~18,000 Hz
Omni-directional
-53±3 dB
1.2kΩ
130dB
Compatible Instrument Microphone
5
Model No...............................
Connector..............................
Frequency Response......
Polar Pattern..........................
Sensitivity (at 1000Hz)
Impedance.............................
Max. SPL for 1% THD
Good For.................................
CX-500
4P Mini XLR
20~20,000 Hz
Omni-directional
-58±3dB
1.5kΩ
130 dB
Violin
CX-500F
4P Mini XLR
50~18,000 Hz
Omni-directional
-58±3dB
1.5kΩ
130 dB
Flutes
Model No...............................
Connector..............................
Frequency Response......
Polar Pattern..........................
Sensitivity (at 1000Hz)
Impedance.............................
Max. SPL for 1% THD
Good For.................................
CX-508W
4P Mini XLR
50~18,000 Hz
Cardioid
-67±3 dB
220Ω
130 dB
Winds
CX-516W
4P Mini XLR
50~18,000 Hz
Cardioid
-67±3 dB
220Ω
130 dB
Accordion
WIRELESS MICROPHONE SYSTEM
CX-520
4P Mini XLR
50~18,000 Hz
Supercardioid
-78±3dB
600Ω
148 dB
Harmonica
4. Parts Identification & Accessories
4-1 Receiver // US-8001D(DB) / US-8002D(DB)/US-8216D
6
1
2
3
4
5
6
7
(US-8001D(DB) 12-18V DC/150mA)
8
9
5
(US-8001D)
Power On
Channel Selector
RF indicator
AF indicator
Volume control
Antenna(BNC Antenna for US-8001DB , US-8002DB)
DCV Input (US-8002D(DB)/US-8216D 12-18V DC/200mA)
1
2
3
7
9 8
6
(US-8002D/US-8216D)
US-8002D
Unbalanced 6.3mm jack socket
Balanced XLR socket
2
1
3
6
6
3
(US-8002DB)
1
2
(US-8001DB)
5
4
9 8
1
7
9
4-2 Handheld Transmitter // Mh-850/Mh-750/Mh-8016( i )
11
12
13
14
15
16
17
Interchangeable capsule module
Battery tray release knobs
Battery tray
Channel selector
Power On/Off switch
LED Indicator
12
ID housing
Gain control
10
11
5
7
10
11
12
17
13
POWER
14
MH-750
Low Batt.
15
POWER
16
14
CH
13
Low Batt.
Low Batt.
MH-850
POWER
15
8
4
12
POWER
Low Batt.
14
2
3
10
CH
13
4
7
9 8
10
4
16
MH-8016
6
4-3 Miniature Head Worn Transmitter/UT-16HW
18
19
20
21
22
23
24
25
26
Gooseneck
Headband
Battery Lid(Color ID):Orang/White/Gray
Adjustable elastic headband
19
Input gain
Channel selector
Power On/Mute/Off switch
LED indicator for power On/Off, bettery
status and mute
Sweat Shield
20
21
22
23
24
25
18
26
4-4 Body-pack Transmitter // PT-850B(mi)
27
28
29
30
31
32
33
34
35
Mic. input (4 pin mini XLR socket)
Power On/Off switch
Antenna
LED indiccator for power and battery status
Battery tray
AF leavel control 29
Belt-loop
Carry case
30 28 27
Channel selector
Gain adjust
(for PT-850Bmi only)
33
32
35
34
31
4-5 Optional Condenser Microphone
Lavaliere Microphone // CM-501 / CM-201 / CM-125
36
37
38
Clip
4 Pin Mini XLR
Windscreen
36
36
38
38
37
CM-501
7
WIRELESS MICROPHONE SYSTEM
CM-201
36
38
CM-125
Headset Microphone // CM-204 / CM-204U / CM-204UL / CM-225 /
CX-504
39 Gooseneck
40 Headband
41 4 Pin Mini XLR
42 Windscreen
40
40
CM-204
42
40
CM-204UL
Standard :
4 Pin Mini XLR
3 Pin Mini XLR
3.5 Stereo Plug
CM-204U
39
42
39
42
39
40
40
CM-225
CX-504
39
41
42
42
39
8
Ear-hook Microphone // CM-801 / CM-804i / CM-8015 / CM-825i
43
44
45
46
47
48
49
50
51
49
Boom
Adjustable Headband
Adjustable ear hook
Detchable Cable
Cable Clip
Windscreen
4 Pin Mini XLR
3 Pin Mini XLR Option
3.5 Stereo Plug Option
50
51
48
45
43
46
CM-801
47
45
44
48
46
43
47
CM-804i
48
45
43
46
CM-8015
47
45
44
48
43
CM-825i
9
WIRELESS MICROPHONE SYSTEM
46
47
Compatible Instrument Microphone // CX-500 / CX-500F / CX-520 /
CX-508W / CX-516W
52
53
54
55
56
57
Gooseneck
Clip
Bracket
Volume Control
Windscreen
4 Pin Mini XLR
56
CX-500
57
52
CX-500F
56
53
56
56
52
52
55
54
53
CX-520
CX-508W
CX-516W
10
4-6 Accessories
58
59
60
61
62
63
64
AC/DC adaptor
A Switching Power Supply(100V~240V , 50~60Hz)
B Linear Power Supply (220V , 50Hz) Option
C Linear Power Supply (220V , 60Hz) Option
Screwdriver
DR-900 Dual Rack Adaptor Option
RP-900 Panel Cover Option
AF output cable (with Ø6.3 plug at both ends)
GC-80/GC-100 Guitar Cable Option
GC-80L/GC-100L Guitar Cable Option
A
58
B
C
60
59
61
62
11 WIRELESS MICROPHONE SYSTEM
63
64
5. Preparing Procedures & Basic Operation
5-1 Receiver // US-8001D(DB) / US-8002D(DB)/US-8216D
(1) Audio Output Connector
The receiver equipped with both balanced XLR output and unbalanced φ 6.3mm jack output;
you can choose the proper way for using.
Connect one end of the Audio cable to the AF output socket in the rear panel of the receiver and
plug another end to the “MIC IN” input socket of a mixer or amplifier. (Step 1 of Figure 1)
(2) Power connection
Connect one end of AC/DC adaptor cable to DC input socket in the rear panel of the receiver,
and plug another end into an AC outlet. (Step 2 of Figure 1)
MIXER
1
AUDIO OUTPUT
DC INPUT
AC/DC ADAPTOR
2
AC POWER SOCKET
12
5-2 Rack Mounting
(1) Before mount receivers onto DR-900 rack adaptor, please release any cables from the rear of
the receiver.
(2) Turn over receiver and DR-900 rack adaptor simultaneously, there are 4 threaded holes each
in the bottom of receiver and rack adaptor for inserting screws.
(3) Single receiver
Insert in a receiver through the front of DR-900 until it is firmly attached to the rack, then
screw on a RP-900 to another side of the rack. (Figure 4)
(4) Dual receivers
The same way as above, put one receiver to each rack space.
(Figure 4)
13 WIRELESS MICROPHONE SYSTEM
5-3 Battery Insertion of the transmitter
(1) Mh-850 & Mh-750 Handheld Transmitter
1. Turn the microphone ball grille counter-clockwise
( Figure 1), press both release knobs to remove the
battery tray from the mic. housing ( Figure 2).
2. Insert two 1.5V batteries according to the correct polarity
(Step 1 of Figure 3) and return the battery tray back to
housing (Step 2 of Figure 3).
Aim the connecting pins exactly toward the cavities on the
bottom side of detachable mic. capsule module ( Figure 4)
and tighten it clockwise!
1
2
Figure 1
Figure 2
Figure 3
Figure 4
(2) Mh-8016 Series Handheld Transmitter
1. Insert 2 pcs 1.5V AA batteries into the battery tray.
2. After putting into the battery, switch on the power switch.
14
5-4 Body-pack Transmitter // PT-850B(mi)
(1) Slide the battery tray cover in the direction of the arrow to open it. Insert two 1.5V batteries
according to the correct polarity , and return the cover.
SIZE “AA“ OREQUIV.
ORUM-3X2
I.5V
(2) Lavaliere microphone
Attach lavaliere microphone to a tie, lapel, where is suitable for sound pick-up.
Plug the connector into input socket on the body-pack transmitter.
(3) Headset microphone
Put the headband behind your head, and fix the temples on your ears as shows, then
adjust the gooseneck to have best miking. Plug the connector into input socket on the
body-pack transmitter.
MIC IN
(4) Instrument Microphones
The system is compatible with JTS various instrument microphones.
For detail please refer to user’s manuals of these microphones.
15 WIRELESS MICROPHONE SYSTEM
6. System operation
Be sure to mute the audio signal of a mixer or amplifier before turning on the receiver and
transmitter.
(1)Power on
Turn AF level on the receiver completely counter-clockwise to the minimum level, and switch
on the receiver. As soon as you turn power of the receiver on, the power LED lights red,
meanwhile the RF signal and AF LED light up to indicate the receiver is ready for operating.
US-8002D
Always it’s a good idea to keep “open space” between transmitter and receiver, that will improve
RF reception.
(2) Selecting channel for the receiver and transmitter
1. Use the supplied screwdriver to select a desired channel for the receiver and transmitters.
Both receiver and transmitters are preprogrammed with 16 channels.
CH
US-8002D
2. Make sure the channel of receiver matches that of the transmitter.
3. When 2 or more transmitters and receivers are being used in the same location, they must
be set up to use different channels. If existing channel is being interfered, please change to
another non-interference channel.
16
(3) Using the PT-850B / PT-850Bmi Body-pack transmitter
1. Use the supplied screwdriver to adjust the gain control on the rear panel of PT-850B /
PT-850Bmi body-pack transmitter to a proper level.
2. The carry case allows the PT-850B to be attached on performer’s belt, place the antenna
towards the back of his body. The Velcro tag ensures tight fixing and less hindrance
during performance.
Wing the Velcro tag around the belt and fix it.
17 WIRELESS MICROPHONE SYSTEM
(6) Ear-hook Microphone
1. Lightweight Dual Ear Hook Microphone
Try on whether the headset is fit.
Adjust the headband to a suitable width.
Tighten or loosen the curve of the ear-hook by twisting the loop or expanding it.
Curve and bend the boom to fit your face.
Attach the detachable cable to a suitable place by a cable clip.
2. Lightweight Single Ear Hook Microphone
Try on whether the original curve is tight or loose.
Re-try and push the fixed curve against your earlobe.
Curve and Bend the boom to fit your face.
Attach the detachable cable to a suitable place by a cable clip.
18
7. Recommendation
(1) In order to achieve the optimum reception condition and also extend the operating distance,
please leave a “open space” between the receiver and transmitter.
(2) Keep the devices away from the metal objects or any interference sources, at least 50 cm.
(3) To avoid the feed-back effect, don’t leave the mic. to aim at the speakers directly.
(4) For best pick-up pattern, please hold the middle of the mic. body.
(5) Remove batteries from the battery compartment when the transmitter will not be used for a
long time.
(6)When you need to replace the batteries, please replace both batteries at the same time with
new ones.
19 WIRELESS MICROPHONE SYSTEM
8. Important notice
(1) JTS offers wireless systems in a selection of bands that conform to the different government
regulations of specific nations or geographic regions. These regulations help limit radio
frequency (RF) interference among different wireless devices and prevent interference with
local public communications channels, such as television and emergency broadcasts.
(2) For information on bands available in your area, consult your local dealer or phone JTS.
More information is also available at JTS’s website (www.jts.com.tw).
(3) This Radio apparatus may be capable of operating on some frequencies not authorized in
your region. Please contact your national authority to obtain information on authorized
frequencies and RF power levels for wireless microphone products.
20
US-8001D(DB)/US-8002D(DB)/US-8216D Series
59506-036-07