1
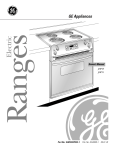
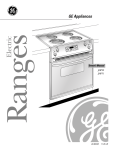
Electric Slide-In
Ranges
www.GEAppliances.com
Safety Instructions . . . . . . . .2–5
Owner’s Manual
Operating Instructions
JSS16
JSS26
Clock and Timer . . . . . . . . . . . .7
Oven . . . . . . . . . . . . . . . . . . .8, 9
Surface Units . . . . . . . . . . . . . . 6
Thermostat . . . . . . . . . . . . . . .10
Care and Cleaning
Anti-Tip Device . . . . . . . . . 11, 14
Broiler Pan & Grid . . . . . . . . . 13
Lift-Off Oven Door . . . . . . . . . 12
Lift-Up Cooktop . . . . . . . . . . . 15
Light . . . . . . . . . . . . . . . . . . . . 12
Oven Interior . . . . . . . . . . . . . .13
Surface Units . . . . . . . . . . . . . 15
Troubleshooting Tips . . . . . . 16
Consumer Support
Consumer Support . . Back Cover
Product Registration . . . . . 17, 18
Warranty . . . . . . . . . . . . . . . . . 19
Write the model and serial
numbers here:
Model #__________________
Serial # __________________
You can find them on a label
on the front of the range
behind the storage drawer.
164D4290P062
49-80104
06-01 JR
WARNING!
For your safety, the information in this manual must be followed to minimize the risk of fire, electric
shock, or to prevent property damage, personal injury, or loss of life.
WARNING ANTI-TIP DEVICE
All ranges can tip and injury could result.
Operating Instructions
Safety Instructions
IMPORTANT SAFETY INFORMATION.
READ ALL INSTRUCTIONS BEFORE USING.
To prevent accidental tipping of the range, attach it to the wall and floor by installing the Anti-Tip
device supplied.
Check if the device is installed and engaged properly. Make sure the chain fits securely into the slot
in the bracket.
If you pull the range out from the wall for any reason, make sure the device is properly
engaged when you push the range back against the wall. If it is not, there is a possible risk of
the range tipping over and causing injury if you or a child stand, sit or lean on an open door.
Consumer Support
Troubleshooting Tips
Care and Cleaning
Please refer to the Anti-Tip device information in this manual. Failure to take this precaution
could result in tipping of the range and injury.
2
SAFETY PRECAUTIONS
When using electrical appliances, basic safety precautions should be followed, including the following:
■ Use this appliance only for its intended
purpose as described in this Owner’s
Manual.
■ Have the installer show you the location
of the circuit breaker or fuse. Mark it for
easy reference.
■ Do not attempt to repair or replace any
part of your range unless it is specifically
recommended in this manual. All other
servicing should be referred to a qualified
technician.
■ Do not leave children alone—children
should not be left alone or unattended in
an area where an appliance is in use. They
should never be allowed to sit or stand on
any part of the appliance.
■ Potentially hot surfaces include the
cooktop, areas facing the cooktop, oven
vent opening, surfaces near the opening,
crevices around the oven door and metal
trim parts above the door.
■ REMEMBER: The inside surface of the
oven may be hot when the door is opened.
■ Do not store or use combustible materials,
gasoline or other flammable vapors and
liquids in the vicinity of this or any other
appliance.
■ Large scratches or impacts to glass doors
can lead to broken or shattered glass.
Troubleshooting Tips
■ Do not allow anyone to climb, stand or
hang on the door, storage drawer or
cooktop. They could damage the range
and even tip it over, causing severe
personal injury.
■ Do not touch the surface units, the
heating elements or the interior surface
of the oven. These surfaces may be hot
enough to burn even though they are
dark in color. During and after use, do not
touch, or let clothing or other flammable
materials contact, the surface units, areas
nearby the surface units or any interior
area of the oven; allow sufficient time for
cooling first.
Care and Cleaning
■ Before performing any service, disconnect
the range power supply at the household
distribution panel by removing the fuse or
switching off the circuit breaker.
CAUTION:
Items of interest to
children should not be stored in cabinets
above a range or on the backsplash (on
some models) of a range—children
climbing on the range to reach items
could be seriously injured.
Operating Instructions
■ Be sure your appliance is properly
installed and grounded by a qualified
installer in accordance with the provided
installation instructions.
■
Safety Instructions
www.GEAppliances.com
Consumer Support
3
WARNING!
SAFETY PRECAUTIONS
Operating Instructions
Safety Instructions
IMPORTANT SAFETY INFORMATION.
READ ALL INSTRUCTIONS BEFORE USING.
■ Do not use water on grease fires. Never
pick up a flaming pan. Turn the controls
off. Smother a flaming pan on a surface
unit by covering the pan completely with
a well-fitting lid, cookie sheet or flat tray.
Use a multi-purpose dry chemical or
foam-type fire extinguisher.
■ Never wear loose-fitting or hanging
garments while using the appliance.
Be careful when reaching for items stored
over the range. Flammable material could
be ignited if brought in contact with hot
surface units or heating elements and may
cause severe burns.
■ Flaming grease outside a pan can be put
out by covering it with baking soda or,
if available, by using a multi-purpose dry
chemical or foam-type fire extinguisher.
■ Use only dry pot holders—moist or damp
pot holders on hot surfaces may result in
burns from steam. Do not let pot holders
touch hot surface units or heating
elements. Do not use a towel or other
bulky cloth in place of pot holders.
■ Flame in the oven can be smothered
completely by closing the oven door
and turning the oven off or by using
a multi-purpose dry chemical or
foam-type fire extinguisher.
Care and Cleaning
■ Never leave jars or cans of fat drippings
in or near your range.
■ Do not let cooking grease or other
flammable materials accumulate in
or near the range.
■ Keep the hood and grease filters clean
to maintain good venting and to avoid
grease fires.
Troubleshooting Tips
■ Do not store flammable materials in an
oven or near the cooktop.
■ For your safety, never use your appliance
for warming or heating the room.
■ Teach children not to play with the
controls or any other part of the range.
■ Always keep dish towels, dish cloths,
pot holders and other linens a safe
distance from your range.
■ Always keep wooden and plastic utensils
and canned food a safe distance from
your range.
■ Always keep combustible wall coverings,
curtains or drapes a safe distance from
your range.
OVEN
■ Stand away from the range when opening
the oven door. Hot air or steam which
escapes can cause burns to hands, face
and/or eyes.
■ Do not heat unopened food containers.
Pressure could build up and the container
could burst, causing an injury.
Consumer Support
■ Keep the oven vent unobstructed.
■ Keep the oven free from grease buildup.
■ Place the oven shelf in the desired position
while the oven is cool. If shelves must be
handled when hot, do not let pot holder
contact the heating elements.
4
■ Pulling out the shelf to the stop-lock is
a convenience in lifting heavy foods.
It is also a precaution against burns from
touching hot surfaces of the door or
oven walls.
■ When using cooking or roasting bags in
the oven, follow the manufacturer’s
directions.
■ Do not use the oven to dry newspapers.
If overheated, they can catch on fire.
■ Do not use the oven for a storage area.
Items stored in an oven can ignite.
■ Do not leave paper products, cooking
utensils or food in the oven when not
in use.
■ After broiling, always take the broiler pan
out of the range and clean it. Leftover
grease in the broiler pan can catch on fire
the next time you use the pan.
■ Do not use aluminum foil to line oven
bottoms, except as suggested in this manual.
Improper installation of aluminum foil
may result in a risk of electric shock or fire.
COOK MEAT AND POULTRY THOROUGHLY…
Cook meat and poultry thoroughly—meat to at least an INTERNAL temperature of 160°F. and poultry
to at least an INTERNAL temperature of 180°F. Cooking to these temperatures usually protects against
foodborne illness.
Operating Instructions
SURFACE COOKING UNITS
Use proper pan size—select cookware having flat bottoms large enough to cover the surface unit
heating element. The use of undersized cookware will expose a portion of the surface unit to direct
contact and may result in ignition of clothing. Proper relationship of cookware to surface unit will
also improve efficiency.
■ Never leave the surface units unattended
at high heat settings. Boilovers cause
smoking and greasy spillovers that may
catch on fire.
■ Be sure the drip pans and the vent duct
are not covered and are in place. Their
absence during cooking could damage
range parts and wiring.
■ To minimize the possibility of burns,
ignition of flammable materials and
spillage, the handle of a container
should be turned toward the center of
the range without extending over nearby
surface units.
■ Always turn the surface units off before
removing cookware.
■ Clean the cooktop with caution. If a wet
sponge is used to wipe spills on a hot
cooktop, be careful to avoid steam burns.
■ Keep an eye on foods being fried at high
or medium high heat settings.
■ Foods for frying should be as dry as
possible. Frost on frozen foods or moisture
on fresh foods can cause hot fat to bubble
up and over the sides of the pan.
■ Use little fat for effective shallow or deep
fat frying. Filling the pan too full of fat can
cause spillovers when food is added.
■ If a combination of oils or fats will be used
in frying, stir together before heating, or
as fats melt slowly.
■ Always heat fat slowly, and watch as it
heats.
■ Use a deep fat thermometer whenever
possible to prevent overheating fat beyond
the smoking point.
READ AND FOLLOW THIS SAFETY INFORMATION CAREFULLY.
SAVE THESE INSTRUCTIONS
5
Consumer Support
■ Do not immerse or soak the removable
surface units. Do not put them in a
dishwasher.
■ To avoid the possibility of a burn or
electric shock, always be certain that the
controls for all surface units are at the
OFF position and all coils are cool before
attempting to lift or remove a unit.
Troubleshooting Tips
■ Only certain types of glass, glass ⁄ceramic,
earthenware or other glazed containers
are suitable for cooktop service; others
may break because of the sudden change
in temperature.
■ When flaming foods under the hood,
turn the fan on.
Care and Cleaning
■ Do not use aluminum foil to line the drip
pans or anywhere in the oven except as
described in this manual. Misuse could
result in a shock, fire hazard or damage
to the range.
Safety Instructions
www.GEAppliances.com
Safety Instructions
Operating Instructions
Care and Cleaning
Throughout this manual, features and appearance may vary from your model.
How to Set
Push the knob in and turn in either
direction to the setting you want.
At both OFF and HI the control clicks
into position. You may hear slight
clicking sounds during cooking,
indicating the control is keeping the
power level you set.
Be sure you turn the control knob
to OFF when you finish cooking.
A surface unit ON indicator light will
glow when any surface unit is on.
Surface Cookware Tips
Not over 1 inch.
Use medium- or heavy-weight cookware.
Aluminum cookware conducts heat faster
than other metals. Cast-iron and coated
cast-iron cookware are slow to absorb
heat, but generally cook evenly at low to
medium heat settings. Steel pans may
cook unevenly if not combined with
other metals.
For best cooking results, pans should be
flat on the bottom. Match the size of the
saucepan to the size of the surface unit.
The pan should not extend over the
edge of the surface unit more than 1″.
Wok Cooking
We recommend that you use only a flat-bottomed
wok. They are available at your local retail store.
Do not use woks that have support rings.
Use of these types of woks, with or
without the ring in place, can be
dangerous.
Placing the ring over the surface unit will
cause a build-up of heat that will damage
the porcelain cooktop. Do not try to use
such woks without the ring. You could be
seriously burned if the wok tipped over.
Use only flat-bottomed woks.
Deep Fat Frying
Do not overfill cookware with fat that
may spill over when adding food. Frosty
foods bubble vigorously.
Consumer Support
Troubleshooting Tips
Using the surface units.
6
Watch food frying at high temperatures.
Keep range and hood clean from grease.
www.GEAppliances.com
To Set the Clock:
Press the CLOCK pad.
Press the SET TIME +/- pads.
To Set the Timer:
Press the TIMER ON/OFF pad.
Press the SET TIME +/- pads until
the amount of time you want shows
in the display. The timer will start
automatically within a few seconds
of releasing the pad.
The end of cycle tone will sound when
the timer countdown is complete. To stop
the tone, press the TIMER ON/OFF pad or
CLOCK pad.
To Reset the Timer:
If the display is still showing the time
remaining, you may change it by pressing
the SET TIME +/- pads until the time you
want appears in the display.
To Cancel the Timer:
If the display is still showing the time
remaining, press the TIMER ON/OFF pad.
The display will return to the time of day.
If the remaining time is not in the
display, recall the remaining time by
pressing the TIMER ON/OFF pad. Press
the TIMER ON/OFF pad again; the display
will return to the time of day.
Troubleshooting Tips
If the remaining time is not in the
display, recall the remaining time by
pressing the TIMER ON/OFF pad and then
pressing the SET TIME +/- pads until the
new time you want shows in the display.
Care and Cleaning
The timer is a minute timer only.
The timer does not control oven
operations. You can set the timer
for up to 9 hours and 50 minutes.
Operating Instructions
Make sure the clock is set to the
correct time of day.
Safety Instructions
Using the clock and timer.
Consumer Support
7
Safety Instructions
To avoid possible burns, place the shelves in the desired position before you turn the oven on.
Before you begin…
The shelves have stop-locks, so that
when placed correctly on the supports,
they will stop before coming completely
out, and will not tilt.
When placing and removing cookware,
pull the shelf out until it stops.
To remove a shelf, pull it toward you,
tilt the front end up and pull it out.
To replace, place the end of the shelf
(stop-locks) on the support, tilt up the
front and push the shelf in.
The oven has 4 shelf positions.
Oven Control Knob
The OVEN TEMP knob maintains the
temperature you set, from WM (150°F.)
to BROIL (550°F.).
■ The oven cycling light glows until
the oven reaches your selected
temperature, then goes off and on with
the oven element(s) during cooking.
How to Set the Oven for Baking or Roasting
Care and Cleaning
Operating Instructions
Using the oven.
Turn the OVEN TEMP knob to the
temperature you desire.
Type of Food
Check food for doneness at
minimum time on recipe. Cook
longer if necessary.
Angel food cake,
bundt or pound cakes
Troubleshooting Tips
Turn the OVEN TEMP knob to OFF
when cooking is complete.
Frozen pies (on cookie sheet)
Shelf Position
B or C
A
Biscuits, muffins, brownies,
cookies, cupcakes,
layer cakes, pies
B or C
Casseroles
B or C
Preheating and Pan Placement
Preheat the oven if the recipe calls for it.
Preheating is necessary for good results
when baking cakes, cookies, pastry and
breads.
To preheat, set the oven at the correct temperature.
Preheating will take approximately 10–15 minutes.
Baking results will be better if baking
pans are centered in the oven as much as
possible. Pans should not touch each
other or the walls of the oven. If you
need to use two shelves, stagger the pans
so one is not directly above the other, and
leave approximately 11⁄2″ between pans,
from the front, back and sides of the wall.
Consumer Support
Aluminum Foil
Cut slits in the foil just like the grid.
8
You can use aluminum foil to line the
broiler pan and broiler grid. However,
you must mold the foil tightly to the grid
and cut slits in it just like the grid.
Without the slits, the foil will prevent fat
and meat juices from draining into the
broiler pan. The juices could become
hot enough to catch on fire. If you
do not cut the slits, you are essentially
frying, not broiling.
Do not use aluminum foil on the bottom of
the oven.
Never entirely cover a shelf with
aluminum foil. This will disturb the heat
circulation and result in poor baking.
A smaller sheet of foil may be used to
catch a spillover by placing it on a lower
shelf several inches below the food.
How to Set the Oven for Broiling
Place the meat or fish on the broiler
grid in the broiler pan.
Turn the OVEN TEMP knob to
BROIL.
Follow suggested shelf positions in
the Broiling Guide.
When broiling is finished, turn the
OVEN TEMP knob to OFF.
Leave the door open to the broil
stop position. The door stays open
by itself, yet the proper temperature
is maintained in the oven.
Broiling Guide
Food
Bacon
† The U.S. Department of
Agriculture says “Rare beef is
popular, but you should know that
cooking it to only 140°F. means
some food poisoning organisms
may survive.” (Source: Safe Food
Book. Your Kitchen Guide. USDA
Rev. June 1985.)
Ground Beef
Well Done
Beef Steaks
Rare†
Medium
Well Done
Rare†
Medium
Well Done
Chicken
Shelf
First Side Second Side
Position Time (min.) Time (min.) Comments
1/2 lb.
(about 8 thin slices)
1 lb. (4 patties)
1/2 to 3/4″ thick
C
41⁄2
41⁄2
Arrange in single layer.
C
10
7
Space evenly. Up to 8
patties take about the
same time.
1″ thick
1 to 11⁄2 lbs.
C
C
C
6
8
12
5
6
11
Steaks less than 1″
thick cook through
before browning. Pan
frying is recommended.
Slash fat.
11⁄2″ thick
2 to 21⁄2 lbs.
C
C
C
A
10
15
25
35
7–8
14–16
20–25
10–15
1 whole
2 to 21⁄2 lbs.,
split lengthwise
B
13–16
Do not
turn
over.
Fish Fillets
1/4 to 1/2″ thick
C
5
5
Ham Slices
(precooked)
1″ thick
B
8
8
Pork Chops
Well Done
Lamb Chops
Medium
Well Done
Medium
Well Done
2 (1/2″ thick)
2 (1″ thick) about 1 lb.
C
B
10
13
10
13
2 (1″ thick) about 10
to 12 oz.
2 (11⁄2″ thick) about 1 lb.
C
C
C
B
10
12
14
17
9
10
12
12–14
Slash fat.
9
Consumer Support
2–4
6 to 8 oz. each
Troubleshooting Tips
Lobster Tails
Reduce time about 5
to 10 minutes per side
for cut-up chicken.
Brush each side with
melted butter. Broil
skin-side-down first.
Cut through back of
shell. Spread open.
Brush with melted
butter before broiling
and after half of
broiling time.
Handle and turn very
carefully. Brush with
lemon butter before
and during cooking, if
desired. Preheat
broiler to increase
browning.
Increase time 5 to 10
minutes per side for
11⁄2″ thick or homecured ham.
Slash fat.
Care and Cleaning
The size, weight, thickness,
starting temperature
and your preference
of doneness will affect
broiling times. This guide
is based on meats at
refrigerator temperature.
Quantity and/
or Thickness
Operating Instructions
If your oven is connected to 208 volts, rare steaks
may be broiled by preheating the broiler and
positioning the oven shelf one position higher.
Safety Instructions
www.GEAppliances.com
Safety Instructions
Operating Instructions
Care and Cleaning
Troubleshooting Tips
Consumer Support
Adjust the oven thermostat—Do it yourself!
You may find that your new oven cooks differently than the one it replaced. Use your new oven for a few
weeks to become more familiar with it. If you still think your new oven is too hot or too cold, you can adjust the
thermostat yourself.
Do not use thermometers, such as those found in grocery stores, to check the temperature setting of your oven.
These thermometers may vary 20–40 degrees.
To Adjust the Thermostat
Pull the OVEN TEMP knob off the shaft,
look at the back of the knob and note the
current setting before making any
adjustment. The knob is factory set with
the top screw directly under the pointer.
Pull off the OVEN TEMP knob.
Back of the OVEN TEMP knob.
Lower screw moves toward hotter
or cooler.
Loosen both screws on back of
the knob.
Hold both parts of the knob as
shown in the illustration of the back
of the OVEN TEMP knob and turn so
the lower screw moves in the desired
direction. You will hear and feel the
notches as you turn the knob. Each
notch changes temperature about
10° Fahrenheit.
Tighten the screws.
The lower screw moves toward
HOTTER to increase the temperature.
Return the OVEN TEMP knob to
the oven.
Re-check oven performance before making any
additional adjustments.
The lower screw moves toward
COOLER to decrease the temperature.
The type of margarine will affect baking performance!
Most recipes for baking have been developed using high fat products such as butter or margarine (80% fat). If you
decrease the fat, the recipe may not give the same results as with a higher fat product.
Recipe failure can result if cakes, pies, pastries, cookies or candies are made with low fat spreads. The lower the fat
content of a spread product, the more noticeable these differences become.
Federal standards require products labeled “margarine” to contain at least 80% fat by weight. Low fat spreads, on the
other hand, contain less fat and more water. The high moisture content of these spreads affects the texture and flavor
of baked goods. For best results with your old favorite recipes, use margarine, butter or stick spreads containing at least
70% vegetable oil.
10
www.GEAppliances.com
Be sure electrical power is off and all surfaces are cool before cleaning any part of the range.
If your range is removed for cleaning, servicing or any reason, be sure the anti-tip
device is re-engaged properly when the range is replaced. Failure to take this
precaution could result in tipping of the range and cause injury.
To assure no damage is done to the finish
of the product, the safest way to remove
the adhesive left from packaging tape on
new appliances is an application of a
household liquid dishwashing detergent,
mineral oil or cooking oil.
Apply with a soft cloth and allow to soak.
Wipe dry and then apply an appliance
polish to thoroughly clean and protect
the surface.
NOTE: The plastic tape must be removed from all
chrome trim. It cannot be removed if it is baked on.
Control Panel
Molded rib
Spring clip
Clear groove
in stem
Do not use abrasive cleansers, strong
liquid cleansers, plastic scouring pads or
oven cleaners on the control panel—they
will damage the finish. A 50/50 solution
of vinegar and hot water works well.
Control Knobs
The control knobs may be removed for easier
cleaning.
The knob stem has a groove in each side.
The groove on one side has a spring clip.
Wash the knobs in soap and water or a vinegar
and hot water solution but do not soak.
Replace the knob by fitting the molded
rib inside the knob into the clear groove
on the stem.
Brushed Chrome Cooktop (on some models)
Clean the brushed chrome top with
warm, soapy water or Bon Ami® brand
cleanser. Rinse and immediately dry it
with a clean, soft cloth. Take care to dry
the surface following the “grain.”
To help prevent finger marks after
cleaning, spread a thin film of baby oil
on the surface or a chrome protectant
may be used to help reduce spotting or
fingerprinting. Wipe away excess oil with
a clean, soft cloth.
The porcelain enamel finish is sturdy
but breakable if misused. This finish is
acid-resistant. However, any acidic foods
spilled (such as fruit juices, tomato or
vinegar) should not be permitted to
remain on the finish. If acids spill on the
cooktop while it is hot, use a dry paper
towel or cloth to wipe it up right away.
When the surface has cooled, wash with
soap and water. Rinse well.
For other spills such as fat spatterings, wash
with soap and water or cleansing powders after
the surface has cooled. Rinse well. Polish with a
dry cloth.
11
Consumer Support
Porcelain Enamel Cooktop (on some models)
Troubleshooting Tips
Before removing the knobs for cleaning,
please note that the knobs are in the
OFF position. When replacing the knobs,
check the OFF position to insure proper
placement.
The other groove is clear (see
illustration). Check the inside of the
knob and find the molded rib.
Care and Cleaning
It’s a good idea to wipe the control panel
after each use. Clean with mild soap
and water or vinegar and water, rinse
with clean water and polish dry with
a soft cloth.
Operating Instructions
How to Remove Packaging Tape
Safety Instructions
Care and cleaning of the range.
Oven Shelves
Clean the oven shelves with an abrasive
cleanser or steel wool.
The oven door is removable for easier
access to the light bulb.
■ If necessary, you may use an oven
cleaner. Follow the package directions.
Do not lift the door by the handle.
■ Clean the inside of the oven window
with a mild non-scratching cleaner and
a damp cloth.
To remove the door, open it to the broil
stop position. Grasp firmly on each side
and lift the door straight up and off the
hinges.
Do not place hands between the hinge and the
oven door frame.
Lift the door straight up and off the
hinges.
To replace the door, make sure the hinges
are in the broil stop position. Position the
slots in the bottom of the door squarely
over the hinges and slowly lower it over
both hinges.
To clean the inside of the door:
■ Soap and water will normally do the
job. Heavy spattering or spillovers may
require cleaning with a mild abrasive
cleaner. Soapy, wet metal pads may also
be used.
Do not allow food spills with a high sugar or acid
content (such as tomatoes, sauerkraut, fruit juices
or pie filling) to remain on the surface. They may
cause a dull spot even after cleaning.
Troubleshooting Tips
Care and Cleaning
After cleaning, rinse the shelves with
clean water and dry with a clean cloth.
Lift-Off Oven Door
Operating Instructions
Safety Instructions
Care and cleaning of the range.
To clean the outside of the door:
■ Use soap and water to thoroughly
clean the top, sides and front of the
oven door. Rinse well. You may also use
a glass cleaner to clean the glass on the
outside of the door. Do not let water
drip into the vent openings.
■ Spillage of marinades, fruit juices,
tomato sauces and basting materials
containing acids may cause
discoloration and should be wiped up
immediately. When surface is cool,
clean and rinse.
■ Do not use oven cleaners, cleaning
powders or harsh abrasives on the
outside of the door.
Oven Light
Before replacing the bulb, disconnect
electrical power to the range at the main
fuse or circuit breaker panel.
Let the bulb cool completely before
removing it. Replace the bulb with
a 40-watt appliance bulb only. Do not
touch a hot bulb with a damp cloth
because the bulb will break.
Painted Surfaces
Consumer Support
Painted surfaces include the sides and
the drawer front.
Clean these with soap and water or
a vinegar and water solution.
12
Do not use commercial oven cleaners,
cleaning powders, steel wool or harsh
abrasives on any painted surface.
Oven Heating Elements
Do not clean the bake element or the broil
element. Any soil will burn off when the
elements are heated.
To clean the oven floor, gently lift
the bake element. Clean with warm
soapy water.
After broiling, remove the broiler
pan from the oven.
After broiling, remove the broiler pan
from the oven. Remove the grid from the
pan. Carefully pour out the grease from
the pan into a proper container.
If food has burned on, sprinkle the grid
with detergent while hot and cover with
wet paper towels or a dishcloth. Soaking
the pan will remove burned-on foods.
Wash and rinse the broiler pan and grid
in hot water with a soap-filled or plastic
scouring pad.
Both the broiler pan and grid may be
cleaned with a commercial oven cleaner.
Do not store a soiled broiler pan and grid
anywhere in the range.
Both the broiler pan and grid can also be
cleaned in a dishwasher.
With proper care, the porcelain enamel
finish on the inside of the oven—top,
bottom, sides, back and inside of the
door—will stay new-looking for years.
Let the range cool before cleaning. We
recommend that you wear rubber gloves
when cleaning the range.
Do not allow food spills with a high sugar or acid
content (such as tomatoes, sauerkraut, fruit juices
or pie filling) to remain on the surface. They may
cause a dull spot even after cleaning.
■ Do not spray oven cleaner on the electrical
controls and switches because it could cause
a short circuit and result in sparking or fire.
■ Do not allow a film from the cleaner to build up
on the temperature sensor—it could cause the
oven to heat improperly. (The sensor is located
at the top of the oven.) Carefully wipe the
sensor clean after each oven cleaning, being
careful not to move the sensor as a change in
its position could affect how the oven bakes.
■ Do not spray any oven cleaner on the oven
door, handles or any exterior surface of the
oven, cabinets or painted surfaces. The cleaner
can damage these surfaces.
Oven Vent
The oven is vented through an opening
under the right rear surface unit.
Never cover the opening with aluminum foil or
any other material.
13
Consumer Support
Household ammonia may make the
cleaning job easier. Place 1/2 cup in
a shallow glass or pottery container in
a cold oven overnight. The ammonia
fumes will help loosen the burned-on
grease and food.
Troubleshooting Tips
Soap and water will normally do the job.
Heavy spattering or spillovers may
require cleaning with a mild abrasive
cleaner. Soapy, wet metal pads may also
be used.
If necessary, you may use an oven cleaner.
Follow the package directions.
Care and Cleaning
Porcelain Oven Interior
Operating Instructions
Broiler Pan & Grid
Safety Instructions
www.GEAppliances.com
Safety Instructions
Care and cleaning of the range.
If the range is removed for cleaning or any reason, make sure the chain is reattached.
Optional
bracket location
Backsplash
(on some models)
Chain
Back of
range
Before placing range in the counter,
notice the location of the stability
bracket which is already attached to
the back of the range. This location
should work for most installations.
However, it may be more convenient
to hook the stability chain to the
unit when the stability bracket is
attached to the upper set of holes in
the back of range.
The upper level set of holes is intended for use
with a backsplash kit. If the backsplash is not
being used, make sure that there are no
structural supports for the countertop which will
interfere with the stability bracket when located
in the upper set of holes.
Chain
Wall
Care and Cleaning
Operating Instructions
Factory bracket
location
Anti-Tip Device
Floor
Washer and long screw
Fasten one end of the stability chain
to the floor or wall with the long
screw and washer supplied.
NOTE: If attaching to masonry, you can buy
suitable screws and anchors at hardware stores.
Use a masonry drill to drill the required holes.
Troubleshooting Tips
Chain
Long screw
Wall plate
Washer
Make certain the screw is going into the wall
plate at the base of the wall or one of the studs
in the base of the wall.
Whether you attach the chain to the wall
or floor, be certain that the screw is in at
least 3/4 inch thickness of wood other
than baseboard and that there are no
electrical wires or plumbing in the area
which the screw could penetrate. Attach
the stability chain in a location which will
allow the chain to be in line with the
bracket side to aid as much as possible
when attached to the unit. Test to see if
the chain is securely fastened by tugging
on the chain.
Temporarily attach
the loose end of the
chain to the rear of
the countertop with
the tape from the
packaging.
Tape
Place the range in the counter
cutout leaving just enough room
between the back of the range and
the wall to reach the stability
bracket.
Hook the loose end of the chain
onto the bracket by slipping the
nearest link of the chain into the
slot in the bracket. Make sure the
chain is pulled as tight as possible
and that there is no excess slack in
the chain after the chain is attached
to the bracket.
Slide the range all the way back into
the counter. Once the range is
pushed back in place, there will be
a small amount of slack in the chain.
This is normal.
CAUTION: Excessive slack in the chain could
allow the range to tip over.
Consumer Support
Removable Storage Drawer
The storage drawer may be
removed for cleaning under the
range.
14
The storage drawer is a good place to store
cookware and bakeware. Do not store plastics
and flammable material in the drawer.
To remove:
Pull the drawer straight out and lift over
the guide stops.
Do not overload the storage drawer.
If the drawer is too heavy, it may slip off
the track when opened.
To replace:
Lift over the guide stops and slide the
drawer into place.
To open the drawer, grasp the center of
the handle and pull straight out.
To clean both the inside and the outside:
Wipe with soap and water. Rinse well.
Do not use cleansing powders or harsh
abrasives which may scratch the surface.
Be sure the controls are turned to OFF and the surface units are cool before attempting to remove them.
Surface Units
Surface unit
To clean the surface units, turn the
control to the highest setting for a
minute. The coils will burn off any soil.
Receptacle
Drip pan
Lift the surface unit about 1″ above the
drip pan and pull it out.
Do not lift the surface unit more than 1″.
If you do, it may not lie flat on the drip pan
when you plug it back in.
Repeated lifting of the surface unit more
than 1 inch above the drip pan can
permanently damage the receptacle.
Insert the terminals of the surface unit
through the opening in the drip pan and
into the receptacle.
Guide the surface unit into place so it
rests evenly.
Do not immerse the surface units in liquids of
any kind.
Do not clean the surface units in a dishwasher.
Do not bend the surface unit plug terminals.
Do not attempt to clean, adjust or in any way
repair the plug-in receptacle.
Care and Cleaning
Drip Pans
Remove the surface units. Then lift out
the drip pans.
The drip pans may also be cleaned in
a dishwasher.
For best results, clean the drip pans by
hand. Place them in a covered container
(or a plastic bag) with 1/4 cup ammonia
to loosen the soil. Then scrub with a
soap-filled scouring pad if necessary.
Rinse with clean water and polish with
a clean soft cloth.
Clean the area under the drip pans
often. Built-up soil, especially grease,
may catch fire.
Do not cover the drip pans with foil. Using foil
so close to the receptacle could cause shock,
fire or damage to the range.
Troubleshooting Tips
Lift-Up Cooktop
Clean the area under the cooktop often. Built-up
soil, especially grease, may catch fire.
To make cleaning easier, the entire
cooktop may be lifted up and supported
in the up position.
Support rod
Be sure all the surface units are turned
off before raising the cooktop. The
surface units and drip pans do not need
to be removed; however, you may remove
one to make raising the cooktop easier.
A support rod will hold the cooktop up
while you clean underneath it.
Consumer Support
Be sure all surface units are turned
off before raising the cooktop.
Operating Instructions
To remove a surface unit:
To remove the drip pans for cleaning,
the surface units must be removed first.
To replace a surface unit:
Replace the drip pan into the recess in
the cooktop. Make sure the opening in
the pan lines up with the receptacle.
Safety Instructions
www.GEAppliances.com
After cleaning under the cooktop with
hot, soapy water and a clean cloth, lower
the cooktop. Be careful not to pinch
your fingers.
15
Safety Instructions
Operating Instructions
Care and Cleaning
Troubleshooting Tips
Consumer Support
Before You Call For Service…
Troubleshooting Tips
Save time and money! Review the chart on this page first
and you may not need to call for service.
Problem
Possible Causes
What To Do
Surface units not
functioning properly
The surface units are not
plugged in solidly.
• With the controls off, check to make sure the surface
unit is plugged completely into the receptacle.
The surface unit controls
improperly set.
• Check to see the correct control is set for the surface
unit you are using.
The drip pans are not set
securely in the cooktop.
• With the controls off, check to make sure the drip
pan is in the recess in the cooktop and that the
opening in the pan lines up with the receptacle.
Clock and timer do
not work
A fuse in your home may
be blown or the circuit
breaker tripped.
• Replace fuse or reset circuit breaker.
Oven light does
not work
Light bulb is loose or defective. • Tighten or replace the bulb.
Oven will not work
Plug on range is not completely • Make sure electrical plug is plugged into a live, properly
inserted in the electrical outlet.
grounded outlet.
Food does not bake
or roast properly
Switch operating light
is broken.
• Call for service.
A fuse in your home may be
blown or the circuit breaker
tripped.
• Replace fuse or reset circuit breaker.
Oven control improperly set.
• See the Using the oven section.
Oven control improperly set.
• See the Using the oven section.
Shelf position is incorrect
or the shelf is not level.
• See the Using the oven section.
Incorrect cookware or cookware • See the Using the oven section.
of improper size being used.
Food does not
broil properly
Oven thermostat needs
adjustment.
• See the Adjust the oven thermostat—Do it yourself!
section.
Oven control improperly set.
• See the Using the oven section.
Door not open to the broil stop • See the Using the oven section.
position as recommended.
Improper shelf position.
• See the Broiling Guide.
Food being cooked
in a hot pan.
• Use the broiling pan and grid that came with your range.
Make sure it is cool.
Cookware not suited for broiling. • Use the broiling pan and grid that came with your range.
Aluminum foil used on the
• See the Using the oven section.
broiling pan and grid has not
been fitted properly and slit as
recommended.
Oven temperature too
hot or too cold
16
In some areas the power
(voltage) may be low.
• Preheat the broil element for 10 minutes. Broil for
the longest period of time recommended in the
Broiling Guide.
Oven thermostat
needs adjustment.
• See the Adjust the oven thermostat—Do it yourself!
section.
GE Service Protection Plus™
GE, a name recognized worldwide for quality and dependability, offers you
Service Protection Plus ™—comprehensive protection on all your appliances—
No Matter What Brand!
Benefits Include:
• Backed by GE
• All brands covered
• Unlimited service calls
• All parts and labor costs included
• No out-of-pocket expenses
• No hidden deductibles
• One 800 number to call
We’ll Cover Any Appliance.
Anywhere. Anytime.*
You will be completely satisfied with our service protection or you may request your money back
on the remaining value of your contract. No questions asked. It’s that simple.
Protect your refrigerator, dishwasher, washer and dryer, range, TV, VCR and much more—any brand!
Plus there’s no extra charge for emergency service and low monthly financing is available. Even icemaker
coverage and food spoilage protection is offered. You can rest easy, knowing that all your valuable
household products are protected against expensive repairs.
Place your confidence in GE and call us in the U.S. toll-free at 800.626.2224
for more information.
*All brands covered, up to 20 years old, in the continental U.S.
✁
Cut here
Please place in envelope and mail to:
General Electric Company
Warranty Registration Department
P.O. Box 32150
Louisville, KY 40232-2150
17
Consumer Product Ownership Registration
Dear Customer:
Thank you for purchasing our product and thank you for placing your confidence in us.
We are proud to have you as a customer!
Follow these three steps to protect your new appliance investment:
1 2 3
Complete and mail
your Consumer
Product Ownership
Registration today.
Have the peace of
mind of knowing we
can contact you in the
unlikely event of a
safety modification.
Read your Owner’s
Manual carefully.
It will help you
operate your new
appliance properly.
After mailing the
registration below,
store this document
in a safe place. It
contains information
you will need should
you require service.
Our service number is
800.GE.CARES
(800.432.2737).
Model Number
Serial Number
Important: If you did not get a registration card with your
product, detach and return the form below to
ensure that your product is registered, or register
online at www.GEAppliances.com.
✁
Cut here
Consumer Product Ownership Registration
Model Number
ant
ort l
p
Im Maiay!
d
To
Mr. ■
Ms. ■
Mrs. ■
Serial Number
Miss ■
First
Name
Last
Name
Street
Address
Apt. #
E-mail Address*
Date Placed
In Use
Month
Zip
Code
State
City
Day
Year
Phone
Number
_
_
* Please provide your e-mail address to receive, via e-mail, discounts, special offers and other important
communications from GE Appliances (GEA).
■ Check here if you do not want to receive communications from GEA’s carefully selected partners.
General Electric Company
Louisville, Kentucky
www.GEAppliances.com
18
All warranty service provided by our Factory Service Centers,
or an authorized Customer Care® technician. To schedule service,
on-line, 24 hours a day, visit us at www.GEAppliances.com,
or call 800.GE.CARES (800.432.2737).
Staple your receipt here.
Proof of the original purchase
date is needed to obtain service
under the warranty.
GE Will Replace:
One Year
From the date of the
original purchase
Any part of the range which fails due to a defect in materials or workmanship.
During this full one-year warranty, GE will also provide, free of charge, all labor
and in-home service to replace the defective part.
What GE Will Not Cover:
■ Service trips to your home to teach you how to use
the product.
■ Replacement of house fuses or resetting of circuit
breakers.
■ Improper installation.
■ Damage to the product caused by accident, fire, floods
or acts of God.
■ Failure of the product if it is abused, misused, or used
for other than the intended purpose or used
commercially.
■ Incidental or consequential damage caused by possible
defects with this appliance.
Some states do not allow the exclusion or limitation of incidental or consequential damages. This warranty
gives you specific legal rights, and you may also have other rights which vary from state to state. To know
what your legal rights are, consult your local or state consumer affairs office or your state’s Attorney General.
Warrantor: General Electric Company. Louisville, KY 40225
Care and Cleaning
This warranty is extended to the original purchaser and any succeeding owner for products purchased for
home use within the USA. In Alaska, the warranty excludes the cost of shipping or service calls to your home.
Operating Instructions
For The Period Of:
Safety Instructions
GE Electric Range Warranty.
Troubleshooting Tips
Consumer Support
19
Consumer Support.
GE Appliances Website
www.GEAppliances.com
Have a question or need assistance with your appliance? Try the GE Appliances Website 24 hours a day,
any day of the year! For greater convenience and faster service, you can now download Owner’s Manuals,
order parts, catalogs, or even schedule service on-line. You can also “Ask Our Team of Experts™”
your questions, and so much more...
Schedule Service
www.GEAppliances.com
Expert GE repair service is only one step away from your door. Get on-line and schedule your service at
your convenience 24 hours any day of the year! Or call 800.GE.CARES (800.432.2737) during normal
business hours.
Real Life Design Studio
www.GEAppliances.com
GE supports the Universal Design concept—products, services and environments that can be used by
people of all ages, sizes and capabilities. We recognize the need to design for a wide range of physical and
mental abilities and impairments. For details of GE’s Universal Design applications, including kitchen
design ideas for people with disabilities, check out our Website today. For the hearing impaired, please call
800.TDD.GEAC (800.833.4322).
Extended Warranties
www.GEAppliances.com
Purchase a GE extended warranty and learn about special discounts that are available while your warranty
is still in effect. You can purchase it on-line anytime, or call 800.626.2224 during normal business hours.
GE Consumer Home Services will still be there after your warranty expires.
Parts and Accessories
www.GEAppliances.com
Individuals qualified to service their own appliances can have parts or accessories sent directly to their
homes (VISA, MasterCard and Discover cards are accepted). Order on-line today, 24 hours every day or
by phone at 800.626.2002 during normal business hours.
Instructions contained in this manual cover procedures to be performed by any user. Other servicing generally
should be referred to qualified service personnel. Caution must be exercised, since improper servicing may cause
unsafe operation.
Contact Us
www.GEAppliances.com
If you are not satisfied with the service you receive from GE, contact us on our Website with all the details
including your phone number, or write to: General Manager, Customer Relations
GE Appliances, Appliance Park
Louisville, KY 40225
Register Your Appliance
www.GEAppliances.com
Register your new appliance on-line—at your convenience! Timely product registration will allow for
enhanced communication and prompt service under the terms of your warranty, should the need arise.
You may also mail in the pre-printed registration card included in the packing material, or detach and
use the form in this Owner’s Manual.
Printed in the United States