1
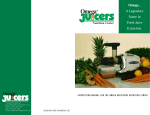
Instruction Manual For The Omega Model 8003/8005 Nutrition Center
IMPORTANT SAFEGUARDS
When using electrical appliances, basic safety precautions should always be followed
including the following:
•
•
•
•
•
•
•
•
•
•
•
•
•
•
•
Read all instructions.
To protect against risk of electrical shock, do not put the motor base in water or other liquid.
Close supervision is necessary when any appliance is used by or near children.
Unplug from outlet when not in use, before putting on or taking off parts and before
cleaning.
Avoid contact with moving parts.
DO NOT operate any appliances with a damaged cord or plug, or after the appliance
malfunctions or is dropped or damaged in any manner.
Return appliance to the nearest authorized service facility for examination, repair or
electrical adjustment.
The use of attachments not recommended or sold by the manufacturer may cause fire,
electric shock or injury.
DO NOT use outdoors.
DO NOT let cord hang over edge of table or counter, or touch hot surfaces.
DO NOT place on or near a hot gas or electric burner or in a heated oven.
DO NOT use appliance for other than intended use.
Be sure to switch to off position after each use of your juicer.
DO NOT put your fingers or other objects into the juicer opening while it is in operation. If
food becomes lodged in the opening, use the plunger or another piece of fruit to push it
down. When this method is not possible, turn the motor off and disassemble juicer to
remove the remaining food.
DO NOT plug in until familiar with all the instructions and operating procedures.
DO NOT unplug from electrical outlet by pulling on the cord. To unplug, grasp the plug, not
the cord, and pull.
Turn off all controls before unplugging from or plugging into an electrical outlet.
WARNING: This appliance has a polarized plug (one blade is wider than the other). To reduce the
risk of electrical shock, this plug will fit in a polarized outlet only one way. If the plug does not fit
fully into the outlet, reverse the plug. If it still does not fit, contact a qualified electrician. Do not
attempt to modify the plug in any way.
SAVE THESE INSTRUCTIONS.
OMEGA MODEL 8003/8005 NUTRITION CENTER
This heavy-duty juicer features a patented, stone mill-like auger, made of hygienic U.S. FDAapproved melamine, which prevents poisonous heavy metals from mixing with your fresh
juices.
The Omega 8003/8005 Nutrition Center’s low speed of 80 RPM's ensures full taste and the
highest nutritional value.
The Omega 8003/8005 Nutrition Center is easy to assemble and disassemble for quick cleaning.
The Omega 8003/8005 Nutrition Center assures you many years of trouble-free, dependable
service. Ten-year warranty on all parts and labor.
MULTI-PURPOSE JUICER/FOOD PROCESSOR
•
FRUIT JUICE EXTRACTOR Omega 8003/8005 Nutrition Center efficiently juices
hard and soft fruits: even citrus fruits, usually one of the hardest fruits to juice.
•
VEGETABLE JUICE The Omega 8003/8005 Nutrition Center juices all kinds of
vegetables including carrots, beets, celery, peppers, and radishes without destroying the natural
flavor and nutritional benefits. Fresh taste and full nutrition are guaranteed with this unique
extraction process.
•
WHEAT GRASS AND LEAFY GREENS Wheat grasses, kale, cabbage, spinach, and
pine tree needles are just some of the natural products that can be juiced with the Omega 8003/8005
Nutrition Center. Enjoy the best that nature offers in raw foods of all kinds and juice them for full
nutritional benefits.
•
FOOD PROCESSOR The Omega 8003/8005 Nutrition Center chops and minces,
providing natural flavor and nutrition from garlic, scallions, red pepper, ginger, and most other
foods, including herbs and seasonings. Soft foods for special diets for babies and geriatric patients
are quick and easy to prepare with the mincing set-up.
•
PASTA EXTRUDER Homemade spaghetti, linguini or breadsticks can be extruded in just
minutes with the included pasta nozzles.
•
HOMOGENIZES Make fresh frozen desserts, natural baby food and nut butters using your
fresh fruit and vegetables.
•
GRINDER Grind coffee beans and flour.
SPECIFICATIONS
Model
Omega 8003/8005 Nutrition Center
Height
11 1/4" (Assembled)
Width
Length
7 inches
10 1/4" (Base Only)
15 3/8" (Assembled)
7 3/8" (Base Only)
Weight
Voltage
Motor
15 lbs.
120V/60Hz
1/3 HP single-phase induction
Auger RPM
75 to 85
Height
Parts
1 Hopper
2 Drum
3 Auger
4 Juicing Screen
5 Blank Cone
6 Drum Cap
7 Plunger
8 Brush
9 Bowl (2)
10 Sieve
11 Nozzles
ASSEMBLY INSTRUCTIONS
For Juicing
STEP 1 Place the auger into the drum. Insert the juicing screen into the drum with the protruding
tab at the bottom. Place the drum cap onto the drum end and turn it counterclockwise until it is
firmly in place.
STEP 2 Connect assembled drum set with main body by inserting the visible part of the metal shaft
into the hex area on the main body. Secure by turning the locking clip clockwise. Place the hopper
onto the drum.
STEP 3 Place juice bowl and waste bowl under drum set. Plug power cord into wall outlet. Press
the power switch down on the ON side of the switch.
For All Non-Juicing Functions
STEP 1 Place the auger into the drum. Insert the blank into the drum with the protruding tab at the
bottom. Insert the appropriate nozzle into the inside of the Drum Cap. Place the drum cap onto the
drum end and turn it counterclockwise until it is firmly in place.
STEP 2 Connect assembled drum set with main body by inserting the visible part of the metal shaft
into the hex area on the main body. Secure by turning the locking clip clockwise. Place the hopper
onto the drum.
STEP 3 Place the two bowls under the drum set. Plug the power cord into wall outlet. Press the
power switch down on the ON side of the switch.
Congratulations! You are ready to use your Omega 8003/8005 Nutrition Center. All items will
be placed down the feed chute. Use the plunger to press the items into the chute. Leave the machine
running while you process the items. When juicing, the juice will exit the bottom of the drum and
the pulp will exit out the end of the drum cap. For all other functions, everything will exit through
the end of the drum cap.
STEP 4 DO NOT place any metal objects into the hopper. DO NOT place any ice cubes into the
hopper. If drum set is clogged or the machine stops operating, press the reverse button 2 to 3 times
and press the ON button again to resume normal operation.
STEP 5 Switch the juicer OFF before changing or touching any moving parts. Remove the drum
set from the main body by turning the locking clip counterclockwise. Remove the Drum Cap by
turning clockwise and pull out the screen/blank. Pull the auger forward to disassemble it from the
drum set. After each juicing session, wash all parts in warm soapy water.
All of the removable parts are dishwasher safe. Do NOT place the motor housing into the
dishwasher.
Do NOT run juicer more than 30 minutes continuously at any on time.
Choosing the Correct Cones
Juicing Screen This is the cone with the stainless steel mesh. It is used for all juicing functions and
only juicing functions.
Blank Cone This is the cone constructed of solid polycarbonate with a stainless steel rim on the
inside. It is used for all functions except juicing. All six nozzles may be used with the blank cone.
Choosing the Correct Nozzles
Oval Nozzle
• Mincing and chopping vegetables
• Making nut butters
• Homogenizing frozen fruit, milk or yogurt
• Extruding breadsticks
Round Nozzle
• Mincing and chopping vegetables
• Making nut butters
• Homogenizing frozen fruit, milk or yogurt
• Extruding breadsticks
Four Remaining Nozzles
• Extrusion of various sized pastas.
SIEVE
The included sieve, which fits on both of the bowls, should only be needed after processing items
that seem to have too much pulp in the juice or foam on the top of the juice. It is best to use the
sieve at the end of the juicing process by pouring all of the prepared juice through the sieve.
JUICING
FRUIT AND VEGETABLE JUICER
Cone:
Juicing Screen
Nozzle:
No Nozzle Needed
HELPFUL HINTS
•The included sieve, which fits on both of the bowls, should be needed after processing items that
have more pulp or foam for your taste. It should not be used during the juicing process. It should be
used at the end of the juicing process by pouring all of the prepared juice through the sieve.
•While the Omega Nutrition Center can extract juice from unpeeled fruits and vegetables, we
recommend you thoroughly wash and peel your fresh ingredients to remove accumulated chemicals.
•Cutting fruit or vegetables into smaller pieces may help the juice be extracted more thoroughly.
But, it is not necessary.
•Turn on the machine and let it run without interruption until all the juice has been extracted.
•When using a combination of soft and firm produce, alternate the items. It is best to start with the
softer items and to finish with the firmer items.
•If the pulp in the drum starts to clog or the juicer starts to vibrate slightly during operation, turn off
the machine and empty the drum set. Reassemble and resume normal operation.
•Do not juice anything that will change the taste in a negative way. (Example: orange rind)
•Items that are traditionally thrown away for meals may be juiced. (Example: carrot or beet stems)
•Soft produce will process more easily if refrigerated.
•Items like ginger, lemon and beet may be added for taste. They should all be used according to
your taste. Although they are listed in many of our recipes, they are optional. Make drinks that suit
your personal taste or health needs.
•After placing the last piece of fruit or vegetable into the hopper, keep the machine running for a
few seconds longer to ensure the machine has extracted the last drops of juice.
•Clean all parts that come into contact with juice after each use of the Omega 8003/8005 Nutrition
Center.
WHEAT GRASS AND GREENS JUICER
Cone:
Nozzle:
Juicing Screen
No Nozzle Needed
HELPFUL HINTS
•It is best to put smaller amounts in at a time and push them into the chute with the plunger rather
that trying to force very large amounts into the chute.
•Allow most of the juice to exit before pushing the next item in.
•When using a small item or piece of an item for taste, insert that item during the first half of the
juicing process. If inserted at the end, the full taste may not come through.
•Various green drinks may be too strong for some people. If so, it is advised to add carrots or beets,
which will sweeten or mask the taste of the greens so you may still enjoy its benefits and nutrients.
•The included sieve fits on both of the bowls. It should only be needed when processing items that
seem to have too much pulp in the juice or excessive foam on the top of the juice. The sieve should
not be on any of the bowls during the juicing process. It should be used at the end of the juicing
process by pouring all of the prepared juice through the sieve.
GROUND COFFEE BEANS
Cone:
Blank
Nozzle:
Round Hole / Oval Hole
To grind, gather needed quantity of coffee beans. Place the items in the chute at a steady pace. The
items will come out finely ground. There should be no need to run the items through twice. Some
coffee beans may have a higher oil content than others, especially gourmet coffee beans. These
should be dried out overnight in order to process easier.
HOMOGENIZING - NUT BUTTERS, FROZEN DESSERTS, ETC.
Cone:
Blank
Nozzle:
Round Hole / Oval Hole
HELPFUL HINTS
•
Nut butters are an all-natural version of peanut butter.
•
Most nuts need additional oil added.
•
Remove all skins and shells from nuts.
•
Fruits can be cut into pieces and then frozen prior to juicing them.
•
Juice can be frozen in ice cube trays and those cubes can be put through the machine.
•
You may try to add milk, yogurt, syrups, or sugar to change the taste or consistency.
MINCING AND CHOPPING
Cone:
Blank
Nozzle:
Round Hole / Oval Hole
HELPFUL HINTS
•
The mincing/chopping function can be used in many “food processor” type ways.
•
Seed and peel any part of the fruit or vegetable that you do not want in the finished product.
•
Remove any fat from meat or poultry if not desired in the finished product.
•
Bone and scale fish before processing.
•
Chop or grind meat, fish, fruit, vegetables, herbs, and soaked rice and beans.
•
Uses include marinades, salsas, soups and sauces.
PASTA EXTRUSION
Cone:
Blank
Nozzle:
Desired Nozzle
HELPFUL HINTS
•
Water may be added if the dough becomes too dry.
•
Sprinkle a small amount of flour on the holding dish before making pasta. This will prevent sticking.
•
Sprinkle a small amount of flour on the pasta as it piles up. This will prevent sticking.
•
Pasta may be cut with scissors or knife to desired length.
•
Decide which styles of noodle you would like to make and place the appropriate nozzle on the
8003/8005. Place the pasta in the shape of balls or tubes (slightly smaller than the opening).
•
A consistent motion without any gaps will give you longer noodles as the pasta exits.
•
The freshly made pasta should be put into boiling water. It will cook much quicker than storebought pasta. Keep checking in order to remove the pasta at the desired consistency.
•
If you would like to get more creative, you can make any flavorful additions you'd like. Spinach,
basil, or sun dried tomatoes may be added to the pasta dough.
•
Leftover vegetable juice or pulp may be mixed into dough for extra flavor.
•
The pasta function of the 8003/8005 is to only extrude pasta. The unit is not designed to make pasta.
The following recipe can be done by hand or in a mixer.
•
If you would like to attempt the full process of making the pasta in the 8003/8005, try the following:
after the ingredients are mixed enough that you now have a ball of dough, run the dough through the
8003/8005 several times to knead the dough. Do not use any nozzle when doing this.
Recipes
WHEAT GRASS AND GREEN RECIPES
Wheat grass
5 or 6 handfuls of wheat grass
Wheat grass regimens should be started slowly. This natural anti-oxidant can make people nauseous
until their body gets used to it. Only an ounce or so is suggested until your body acclimates. Mixing
with carrots can soften the taste.
Carrot Parsley
A “bunch” of parsley 4 or 5 carrots
Inserting the parsley first, followed by the carrots.
Wheat grass Carrot
Handful of wheat grass 5 or 6 carrots
Insert the wheat grass, followed by the carrots.
HOMOGENIZING RECIPES
Nut Butter
2 or 3 cups of nuts, Peanut oil (or other nut oil), and salt (optional/to taste)
Place small handfuls of nuts in the juicer. Allow the nuts to process before placing the next handful
in the chute. Most nuts will need small amounts of oil added at times to keep the moisture level
higher. Most nuts will need to be processed multiple times to gain a smoother consistency.
Banana - Banana Berry
2 or 3 bananas (peeled), 6 to 12 berries (no stems or seeds)
Place items in a zip-lock style bag. Place the items in the freezer overnight. It is helpful to cut the
bananas into smaller pieces before freezing. Place the frozen pieces into the juicer. The result is an
ice cream or frozen yogurt-type dessert. You may run the item through multiple times to increase
creaminess.
Baby Food
Fruits and/or vegetables (cleaned, no stems, rinds or seeds)
Place fruits or vegetables into the chute. Most items should be processed twice. Most baby food
should be diluted with water due to strength of straight juice. For taste or softness, some items may
be cooked prior to processing.
MINCING AND CHOPPING RECIPES
Salsa
1 1/2 cups tomatoes (seeded)
¼ cup red onions (peeled)
1 tbsp. garlic
1 tbsp. jalapeno
1 to 2 tbsp. cilantro – to taste (optional)
2 limes
Salt (to taste)
Freshly ground pepper (to taste)
The two limes are needed for the juice only. You may juice them first or
squeeze them for the juice. Process the first five items while alternating.
If the mixture seems too wet, some juice may be drained. Add the limejuice. Stir. Salt and pepper to
taste.
PASTA EXTRUSION RECIPES
Pasta Dough
3 cups Seminola flour (most flours may be substituted), 3 eggs, 1/8 tsp. Salt, and Water (as needed)
•Place the flour on a large, flat surface. Make a bowl or well-type shape in the pile of flour to hold
the other ingredients. Beat the eggs. Add the eggs and salt into the bowl of water. Use your hands or
a fork to slowly incorporate the eggs into the inner layers of flour. Once the eggs become
incorporated into the flour, begin kneading. Continue kneading until the dough becomes very firm.
•If the dough does not feel dry enough, knead it by hand – adding semolina to the dough as you
knead. Start by dusting a non-porous surface with seminola and place the dough on the dusted
surface. Sprinkle some more of the semolina over the top of the dough, then knead the dough until it
is smooth and very firm.
•When you can set the dough on a clean countertop (without a dusting of flour underneath it) and
trust that it won't stick, the dough is ready. Because of the size of the semolina grain, the dough may
not be as smooth as it would be with a flour-based dough.
•Wrap the pasta dough into an airtight plastic-wrapped ball. Set dough in a clean, dry area. Let it sit
at room temperature for about an hour to give the gluten inside the flour a chance to relax. If the
dough isn't given a chance to relax, it will be too stiff to work with and will yield tough noodles.
Once your dough has had a chance to rest, unwrap it and make noodles.
OMEGA PRODUCTS, INC.
Omega Juicer Model 8003/8005 Nutrition Center
Omega Products, Inc. warrants this juicer to be free from defects of workmanship and material
under normal use and service. The juicer is required to be operated solely on the electric current
indicated on the unit. Damage or malfunction caused by use on other electrical current is excluded
from this warranty. This warranty is limited to repair or replacements of original parts, which, in the
opinion of Omega Products, Inc. are defective in workmanship or material.
Should such a defect be discovered within ten (10) years from date of purchase, Omega Products,
Inc. will, upon receipt of machine, shipped prepaid, repair such defect and return the unit prepaid.
This warranty does not cover breakage of any part in shipment or damage caused by misuse.
A service charge of $10.00 must accompany any unit over one (1) year old. For service, send juicer
or part to:
Omega Products, Inc.
6291 Lyters Lane, PO Box 4523
Harrisburg, PA 17111
For additional service or operational information please contact Omega Products, Inc. directly.
Phone: 717.561.1105
Fax-717.561.1298
Web Site: www.omegajuicers.com Email: [email protected]
? -----------------------------------------------------------------------------------------------------------------Registration and Guarantee Record
??
??
Omega Model 8003
Omega Model 8005
Serial Number
Name
Address
City
Phone (
)
Purchased From
City
Date of Purchase
State
Zip Code
State
IMPORTANT
To protect your purchase, fill out and mail this form within thirty (30) days of juicer purchase.