1
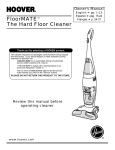
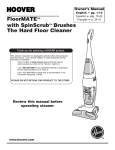
Owner’s Manual
FloorMATE™
The Hard Floor Cleaner
Thank you for selecting a HOOVER product.
This cleaner was inspected and packaged carefully before being shipped
from the factory. If you should happen to need assistance during assembly or operation:
Visit us online at www.hoover.com to find the service
outlet nearest you (click on the “Service” button) or
Call 1-800-944-9200 for an automated referral of authorized
service outlet locations (U.S. only) or
Call 1-330-499-9499 to speak with a representative in our
Consumer Response Center.
PLEASE DO NOT RETURN THIS PRODUCT TO THE STORE.
Review this manual before
operating cleaner.
www.hoover.com
English ➜ pp. 1-13
Español ➜ pàg. 15-22
Français ➜ p. 24-31
Fill in and retain
The model and serial number are located at the bottom of the back of the
cleaner body.
For your personal records, please enter the COMPLETE model and serial
number in the spaces provided and retain this information.
Your cleaner is model___________________________________
and has serial number___________________________________
It is suggested that you attach your sales receipt to this owner’s manual.
Verification of date of purchase may be required for warranty service of
your Hoover product.
Index
Assembly .....................................3-4
Cleaner descriptions..................5
How to use...................................5-8
Automatic shut-off .....................7
General operation ......................6
Clean solution tank.................6-7
Recovery tank .......................................7
Storage ......................................11
How to clean..............................9-10
Recommended cleaning
sequence.....................................9
To clean floor..............................9
Cleaning sealed wood floors ..10
Picking up spills.......................10
If You Have a Problem .................12
Service.......................................12
Important Safeguards ....................2
Maintenance ............................10-11
Cleaning the brushes .........10-11
Cleaning the nozzle..................11
Warranty........................................13
© 2003 The Hoover Company
www.hoover.com
2
Important Safeguards!
When using an electrical appliance, always follow basic precautions,
including the following:
READ ALL INSTRUCTIONS BEFORE USING THIS APPLIANCE
Warning:
To reduce the risk of fire, electric shock, or injury:
• Use indoors only.
• Use only on surfaces moistened by the cleaning process or small spills. Do not
immerse product.
• For use on bare floors or sealed wood floors. Not for use on carpets.
• Always install float before any wet pick up operation.
• Close supervision is necessary when any appliance is used by or near children.
Do not allow cleaner to be used as a toy or to run unattended at any time.
• Keep hair, loose clothing, fingers, feet and all parts of body away from openings
and all moving parts.
• Do not pick up anything that is burning or smoking, such as cigarettes, matches,
or hot ashes.
• Do not pick up or use flammable or combustible materials such as gasoline or
fine wood sandings or use in areas where present.
• Avoid picking up hard, sharp objects with the cleaner. They may damage the
cleaner.
• Do not put any object into openings. Do not use with any opening blocked; keep
free of dust, lint, hair, or anything that may reduce air flow.
• Do not pull or carry by cord, use cord as a handle, close door on cord or pull cord
around sharp edges or corners. Do not run appliance over cord. Keep cord away
from heated surfaces.
• Always disconnect cord from electrical outlet before servicing the cleaner.
• Unplug cleaner when not in use. Turn off all controls before unplugging.
• Do not unplug by pulling on cord. To unplug, grasp the plug, not the cord. Never
handle plug or appliance with wet hands.
• Connect to a properly grounded outlet only. See “Grounding instructions”.
• Do not clean over floor electrical outlets.
• Do not use without tanks in place.
• Use extra care when cleaning on stairs. Do not place cleaner on stairs.
• The use of an extension cord is not recommended. If an extension cord is
absolutely necessary, use at least a 16 gauge 3-wire cord which has a 3-prong
grounding type plug and a 3-pole receptacle that accepts the machine plug.
• Keep detergents and other cleaners out of children’s reach.
• Do not pick up chlorine bleach, pine based cleaners, drain cleaner, or
any other toxic material with this appliance.
• When using recommended chemicals with this machine, be certain area is well
ventilated.
• Follow manufacturer’s instructions for all chemicals used with this machine. Do
not exceed recommended mixing ratios.
• Store in a dry place. Do not expose machine to freezing temperatures.
• Do not use with damaged cord or plug. If appliance is not working as it should,
has been dropped, damaged, left outdoors, or dropped into water, take it to a
Hoover Factory Service Center or Authorized Hoover Warranty Service Dealer
(Depot).
• Use cleaner only for its intended use as described in the instructions.
Save these instructions!
Questions or Concerns?
The Hoover Company wants to quickly resolve any concerns about your cleaner or questions regarding its
use. Look on the list provided with the product for your local Hoover Factory Service Center or in the Yellow Pages under “Vacuum Cleaners - Household” for the nearest Authorized Hoover Warranty Service
Dealer (Depot) or:
Visit us online at www.hoover.com to find the service outlet nearest you (click on the
“Service” button) OR
Call 1-800-944-9200 for an automated referral of authorized service outlet locations (U.S. only) OR
Call 1-330-499-9499 to speak with a representative in the Hoover Consumer Response Center.
Call 1-800-228-4722 for questions or comments concerning Machine Formula LYSOL® or OLD
ENGLISH® Floor Cleaning Concentrate.
Grounding Instructions
DANGER-
A
B
C
This appliance must be grounded. If it
should malfunction or breakdown, grounding provides a path of least resistance for
electrical current to reduce the risk of
electric shock. This appliance is equipped
with a cord having an equipment-grounding conductor (C) and grounding plug (A).
The plug must be plugged into an appropriate outlet (B) that is properly installed
and grounded in accordance with all local
codes and ordinances.
Improper connection of the equipmentgrounding conductor can result in the risk
of electric shock. Check with a qualified
electrician or service person if you are in
doubt as to whether the outlet is properly
grounded. Do not modify the plug provided with the appliance - if it will not fit the
outlet, have a proper outlet installed by a
qualified electrician. This appliance is for
use on a nominal 120 volt circuit and has
a grounding plug that looks like the plug
illustrated in sketch (A).
A temporary adapter (D) may be used to
connect this plug to a 2-pole receptacle
(E) if a properly grounded outlet is not
available. The temporary adapter should
be used only until a properly grounded
outlet (B) can be installed by a qualified
D
F
G
E
electrician. The green colored rigid ear,
lug, or the like (F) extending from the
adapter must be connected to a permanent ground (G) such as a properly
grounded outlet box cover. Whenever the
adapter is used, it must be held in place
by a metal screw. NOTE: In Canada, the
use of a temporary adapter is not permitted by the Canadian Electrical Code.
1. Assembly
1-1
Assemble handle
1-2
A
C
A
B
F
Assemble Handle
Press down on latch (A) and remove
clean solution tank from upper handle.
D
E
Carton contents
A. Hard floor cleaner
B. Upper handle
C. Screw packet (3 screws-1 with washer)
D. Brush assembly
E. Nozzle
F. Floor cleaning concentrates
The assembled cleaner will
look like this drawing.
This cleaner is intended for
household use.
Continued
3
1-3
1-5
1-4
B
C
With cord hook (B) to back of cleaner, Insert two screws into back of handle
push upper handle down onto cleaner. as shown. Tighten with a Phillips
Insert screw with washer in front of
screwdriver.
tank area. Tighten screw with a
Phillips screwdriver.
Push brush control switch (C) down to
connect switch rod. You will hear a
“click” when the switch rod is in
place.
1-6
1-8
1-7
E
G
D
F
Replace clean solution tank by positioning bottom first. Press latch and
snap top portion into place.
To install brush assembly and nozzle,
place handle in upright position.
Align tabs (D) on brush assembly with
slots (E) in cleaner.
Slide brush assembly (F) into place.
1-9
1-10
I
While holding nozzle in place, slide
latches inward to lock in place.
Remove cardboard packing insert
from squeegee area on underside of
nozzle.
4
Cord clip
To help keep the cord out of the way
while cleaning, position cord down
into cord clip (I), located on the
handle.
G
H
To install nozzle, make sure latches
(G) are out.
Align middle section (H) of nozzle
with opening on cleaner.
2. How to use
2-1
1
2
3
4
5
17
6
7
9
13
16
18
8
10
16
12
11
14
15
19
13
The assembled cleaner will look like
this drawing.
1. Hand grip
2. Solution trigger: squeeze to
release clean solution.
3. Brush control switch: lowers
the brush assembly for wet cleaning or raises the brush assembly
for wet pickup and dry vacuuming.
4. Clean solution tank release
5. Clean solution tank cap/
measuring cup
6. Clean solution tank
7. ON/OFF switch
8. Recovery tank lid and filter
9. Recovery tank release
10. Recovery tank: Collects dry
2-2
11.
12.
13.
14.
15.
16.
17.
18.
19.
debris as well as dirty cleaning
solution.
Wet/Dry pedal: Press pedal to
change between wet and dry
cleaning.
Wet/Dry indicators: Shows
either wet or dry cleaning usage.
Nozzle release buttons:
Release nozzle for easy clean-up.
Nozzle
Squeegee
Handle release pedal
Cord hooks: Top hook rotates
for quick cord release.
Carrying handle
Soft-tread wheels
This cleaner is intended for household use.
Operate cleaner only at voltage
specified on data plate on back of
cleaner.
Plug cleaner into a properly
grounded outlet.
2-4
2-3
B
A
Handle Release Pedal
ON/OFF Switch
To transport
Step on pedal (A) to lower handle to
operating position. Handle does not
lock into a single position but “floats”
to allow convenient operation.
Push switch (B) up to turn cleaner on.
Push switch down to turn cleaner off.
To move your cleaner from room to
room, put handle in upright position;
tilt cleaner back on rear wheels and
push forward.
Continued
5
General Operation
2-5
C
2-6
Your HOOVER FloorMate™ Cleaner
can be used to both vacuum dry
debris and wet clean non-carpeted
floor surfaces such as vinyl, tile and
sealed wood. It is not intended for
use on carpet or rugs.
D
F
E
The cleaner may also be lifted using
the carrying handle (C) on the back of
the cleaner.
CAUTION: To prevent damage to
wood floors, follow the flooring
manufacturer’s cleaning recommendations.
If using cleaner on sealed wood
floors, inspect floor surface for
worn finish, bare wood or separated joints. Do not use ‘FloorMate’
cleaner to wet clean sealed wood
floors if any of these conditions
exist.
Wet/Dry pedal and indicators
The wet/dry pedal (D) lowers the nozzle squeegee for wet operation and
raises it for picking up dry debris.
The WET indicator (E) will show red
when pedal is set for wet operation.
The DRY indicator (F) will show red
when pedal is set for dry vacuuming.
See “How to clean” section for complete cleaner setup instructions.
Step on pedal to choose either the
WET or DRY setting.
2-7
To wet clean with brush assembly
down, push the switch down to the
WET SCRUB position.
G
For wet pickup, push the switch up
to the WET/DRY PICKUP position. In
this position, the brush assembly will
be raised off the floor surface.
For dry debris pickup, push the
switch up to the WET/DRY PICKUP
position.
Brush Control Switch
The brush control switch (G) lowers
or raises the brush assembly for different types of cleaning.
The Tanks
See “How to clean” section for complete cleaner setup instructions.
2-8
2-9
To remove tank, press down on
release button and pivot tank forward.
Carry tank to a sink.
Clean Solution Tank (Upper
Tank)
The clean solution tank holds the
cleaning solution that is to be dispersed onto the surface to be
cleaned.
How to fill
Disconnect cleaner from electrical
outlet.
Place cleaner handle in upright,
locked position.
6
Rotate tank cap counter-clockwise
and lift up to remove cap.
Use Machine Formula OLD ENGLISH® Wood Floor Cleaning Concentrate for wood floors when cleaning
laminate wood, polyurethane sealed
wood or other wood floors that can
normally be cleaned using water.
2-11
2-10
2.0 oz./60ml.
2.0 oz./60ml.
H
Turn cap (H) upside down to serve
as a measuring cup.
Check for worn spots or joint separations before using, as these conditions could lead to damaged flooring
when using water to clean floor.
Using cap, measure 2 oz. of applicable concentrate formulated for use
with the ‘FloorMate’ hard floor cleaner.
For best results, use Machine Formula
LYSOL® Floor Cleaning Concentrate
when cleaning floor surfaces such as
vinyl, ceramic and other tiles, and
linoleum.
CAUTION: Machine Formula
LYSOL® Floor Cleaning Concentrate and OLD ENGLISH® Wood
Floor Cleaning Concentrate cannot
be used in Hoover SteamVac™
products. Doing so could damage
your SteamVac™.
2-14
Both of these concentrates have been
specifically formulated to resist
excessive foaming and other undesirable effects when used in your ‘FloorMate’ cleaner.
DO NOT use cleaning concentrates
that contain pine or solvent based
ingredients.
2-13
2-12
2.0 oz./60ml.
I
FILL
K
J
Pour cleaning concentrate into tank.
Fill tank to fill line (I) (1 quart) with
warm water.
If rubber ring (J) on cap has become
dislodged, reposition it with uneven
side against ledge (K) as shown.
2-15
Recovery Tank (lower tank)
The recovery tank holds both dry
debris and dirty cleaning solution that
is picked up from the floor surface.
Automatic Shut-Off
Replace cap. Rotate cap clockwise
until it locks in place. Cap must be
locked in place for proper performance and to prevent leaking.
Position bottom of tank into cleaner.
Press latch and snap tank into place.
An automatic suction shut-off is built
into the recovery tank to prevent the
tank from overflowing.
When the shut-off activates, the cleaner will not pick up debris and the
sound of the motor will change.
There are two reasons the shut-off will
activate.
1. Recovery tank is full - Turn the
cleaner off and empty the recovery
tank.
2. The handle was raised to the
upright position while the motor
was running - Turn cleaner off. Wait a
moment for the shut-off to reset. Turn
cleaner on and continue cleaning.
Continued
7
How to Empty
2-16
Turn cleaner off and disconnect
from electrical outlet.
Although not necessary for satisfactory performance, it is recommended
that the recovery tank be emptied
after dry vacuuming and before wet
operation.
Check the solution tank also. It may
need to be refilled at this time.
2-18
2-17
N
L
M
To remove tank, press down on
release button (L) and pivot tank forward.
Lift up on tank lid latch (M) and
remove the tank lid (N). Empty tank.
2-19
2-20
O
P
R
Q
Dry or loose debris will also collect on
the filter screen (O) in the tank lid.
Remove debris from screen.
The filter screen may also be cleaned
by rinsing it under running water.
To replace lid, align tab (P) on lid with
hole on front of tank (Q).
Snap latch over tabs (R) on back of
tank.
The tank lid contains a washable,
reusable filter. Clean this filter when
suction is low or reduced (Figs. 2-21
and 2-22).
To Clean Filter
2-21
2-22
S
Turn cleaner OFF and disconnect
from electrical outlet.
Remove recovery tank and lid (Fig. 216 & 2-17). Remove filter lid (S), then
remove filter. Remove loose debris
from filter by either brushing or tapping the filter. The filter may also be
rinsed for additional cleaning. Allow
filter to air dry between uses.
8
Replace filter lid. Press down firmly to
secure the seal.
To replace tank, insert bottom of tank
into cleaner and pivot top portion until
it is locked in place.
3. How to clean
Recommended Cleaning Sequence
Use your HOOVER ‘FloorMate’ Cleaner to:
1. Dry Vacuum to remove loose dirt, hair and debris.
2. Wet Clean the floor surface.
3. Wet Pickup reduces drying time of the floor surface.
Follow the chart to set the controls for each cleaning step.
OPERATION
BRUSH CONTROL SWITCH
Dry Vacuuming
Wet Cleaning
WET/DRY PEDAL
“Wet/Dry Pickup” (UP)
Dry Pickup
“Wet Scrub” (DOWN)
Wet Pickup
Wet Pickup/
Scrub
“Wet/Dry Pickup” (UP)
Wet Pickup/
Scrub
See Page 6 Figs. 2-6 and 2-7 for complete instructions on the control switch
and pedal.
To Clean Floor (vinyl, tile,
linoleum, etc.)
1. Set cleaner for Dry Vacuuming
operation and vacuum floor. (See
chart on page 9.)
The cleaner’s suction will pick up the
dirty solution throughout cleaning.
3-1
A
2. Empty Recovery Tank. (Figs. 2-16
through 2-20).
3. Fill solution tank with Machine Formula LYSOL® Floor Cleaning Concentrate and water, according to
instructions for Figs. 2-8 through 212. Do not use pine or solvent
based cleaning concentrates in
your cleaner. Do not use any type
of wax in your cleaner.
6. Step on handle release pedal and
lower handle to operating position;
turn cleaner ON.
4. Set cleaner controls for “Wet
Cleaning” operation. (See chart on
page 9.)
7. To release solution, squeeze trigger (A). Slowly move cleaner forward
and backward over area to be
cleaned. Squeeze trigger to release
solution as needed.
5. Dry hands and plug cleaner into a
properly grounded outlet.
Overlap strokes by one inch to help
prevent streaking.
8. To greatly enhance drying of the
floor surface, release trigger and
move wet control switch up to the
“WET/DRY PICKUP” setting. Continue to move cleaner over the area to
pick up the dirty solution.
9. To continue cleaning another area,
move wet control switch down to
“WET Scrub”. Repeat with steps 7-9.
NOTE: When switching between wet
cleaning and wet pickup, it is not necessary to turn the cleaner off. Simply
move the control switch back and
forth between the two settings.
10. Empty recovery tank or clean the
filter when the motor sound becomes
higher in pitch and there is a loss of
suction (see “Automatic Shut-Off”,
page 7).
9
Cleaning Sealed Wood
Floors
Your HOOVER ‘FloorMate’ Cleaner
may be used to clean wood floors
that have been sealed with a
polyurethane coating and can be
cleaned with water.
CAUTION: To prevent damage to
wood floors, follow the flooring
manufacturer’s cleaning recommendations.
If using cleaner on sealed wood
floors, inspect floor surface for
worn finish, bare wood or separated joints. Do not use ‘FloorMate’
cleaner to wet clean sealed wood
floors if any of these conditions
exist.
9. To greatly enhance drying of the
floor surface, release trigger and
move wet control switch to the “WET
PICKUP” setting.
10. To continue cleaning, move wet
control switch down to “WET Scrub”.
Repeat steps 7 – 9. Make sure all
areas are completely dry. Ensure
that no water remains on the floor.
1. Inspect floor surface for worn finish, bare wood or separated joints.
Do not use your ‘FloorMate’ cleaner to
wet clean the floor if any of these conditions exist.
2. Set cleaner for Dry Vacuuming
operation and vacuum floor (see chart
on Page 9).
3. Empty recovery tank (Figs. 2-16
through 2-20).
4. Fill solution tank with Machine Formula OLD ENGLISH® Wood Floor
Cleaning Concentrate and water,
according to instructions for Figs. 2-8
through 2-12.
4-1
7. Step on handle release pedal and
lower handle to operating position;
turn cleaner ON.
8. Push cleaner forward, squeeze
trigger while pulling cleaner backward. Release trigger and push
cleaner forward. Continue cleaning
floor surface while releasing solution
on the backward strokes only. This
will allow for effective cleaning with
small amounts of solution.
Overlap strokes by 1 inch to help prevent streaking.
11. Empty the recovery tank or clean
the filter when the motor sound
becomes higher in pitch and there is
a loss of suction (see “Automatic
Shut-Off”, Page 7).
Picking Up Spills
Your cleaner may also be used to
pick up small liquid spills (1 quart
or less, never to exceed 1/4 inch in
depth) on non-carpeted floors.
Set Wet/Dry pedal in the WET Pickup/Scrub position.
Set Wet Control switch to the
“WET/DRY Pickup” position.
Do not use the cleaner to pick up
flammable or combustible liquids
or chemicals. Do not use the cleaner to pick up detergents that contain pine or solvent based ingredients.
4-2
4-3
B
B
A
Cleaning the Nozzle
Turn cleaner OFF and disconnect
from electrical outlet.
The cleaner’s nozzle (A) can be
removed for easy cleaning.
10
6. Dry hands and plug cleaner in to
a properly grounded outlet.
Do not use pine or solvent based
detergents. Do not put any type of
wax in your cleaner.
NOTE: When switching between wet
cleaning and wet pickup, it is not
necessary to turn the cleaner off.
Simply move the control switch back
and forth between the two settings.
4. Maintenance
5. Set cleaner controls for “Wet”
Cleaning (see chart page 9).
Slide the two nozzle release latches
(B) outward.
C
Remove the nozzle by pulling straight
out.
Rinse nozzle under running water.
Remove debris from squeegee (C)
and wipe with a damp cloth.
4-5
4-4
Cleaning the brushes
Turn cleaner OFF and disconnect
from electrical outlet.
The brush assembly can be removed
for easy cleaning.
4-6
D
E
To replace nozzle, make sure latches
are out. Align middle section (D) of
nozzle with opening on cleaner.
While holding nozzle in place, slide
latches inward to lock in place.
F
Remove nozzle as described in Fig.
4-1 through 4-3.
Using finger grips (E) on the brush
assembly (F), pull straight out.
The brush assembly can be washed
with a mild detergent and rinsed. Do
not use pine or solvent-based detergents.
Storage
4-7
H
G
Align tabs (G) on brush assembly
with slots (H) in cleaner.
Slide brush assembly into place.
Replace nozzle as described in Figs.
4-4 and 4-5.
Before storing cleaner:
Turn cleaner OFF and disconnect
from electrical outlet.
• Empty and rinse solution and recovery tanks. Allow to air dry.
• Allow filter in recovery tank lid to
dry.
• Set the cleaner for “Dry Vacuuming”
(pedal to “DRY” and Wet Control
switch up).
• Make sure that nothing is pressing
on the nozzle squeegee.
• Do not store cleaner on a wood surface unless cleaner is completely
dry.
Continued
11
5. If you have a
problem
If a minor problem occurs, it usually
can be solved quite easily when the
cause is found by using the check list
below.
Problem: Machine won’t run
Possible cause
Possible solution
• Not firmly plugged in
• Plug unit in firmly.
• No voltage in wall receptacle
• Check fuse or breaker.
• Blown fuse/tripped breaker
• Replace fuse/reset breaker.
Problem: Low or no suction
Possible cause
Possible solution
• Automatic shut-off activated
• Turn cleaner OFF and then ON
again or
• Empty recovery tank (see “Automatic shut-off” section)
• Filter or filter lid missing or not
positioned correctly
• Ensure that filter and filter lid are
properly positioned in the recovery
tank lid (Fig. 2-22)
• Recovery tank and/or solution
tank not positioned properly
• Ensure that both tanks are locked in
place.
• Filter is dirty
• Clean filter
• Nozzle not properly positioned
• Ensure nozzle is replaced properly
and locked (Figs. 4-4 & 4-5).
Problem: Water puddling behind
cleaner
Possible cause
Possible solution
• Excess cleaning concentrate
foaming in tanks
• Use Machine Formula LYSOL®
Floor Cleaning Concentrate or
Machine Formula OLD ENGLISH®
Wood Floor Cleaning Concentrate, it
is a low-foam formulation. If using
cleaning concentrate other than
LYSOL® brand or OLD ENGLISH®
brand, remix cleaning solution using
less concentrate.
• Solution tank not properly
installed
• Ensure that tank is installed properly
(Fig. 2-15).r
• Recovery tank is full
• Empty tankProblem: Cleaner does
12
Problem: Cleaner does not pick up
dirty solution
Possible cause
Possible solution
• Cleaner not set for wet operation
• Press wet/dry pedal to “WET” position.
• Recovery tank not properly
installed
• Ensure that recovery tank is
installed properly (Fig. 2-20).
• Recovery tank full/automatic shutoff engaged.
• Remove and empty recovery tank.
• Filter or filter lid missing or not
properly positioned.
• Ensure recovery tank filter and filter
lid are properly installed (Fig. 2-22).
Problem: Cleaner pushes a line of
dry debris in front of it
Possible cause
Possible solution
• Cleaner not set for dry operation
• Press wet/dry pedal to “DRY PICKUP” position.
• Debris is too large to clear
squeegee
• Tip nozzle off floor by pushing down
on handle.
Problem: Clean solution won’t dispense
Possible cause
Possible solution
• Solution tank not firmly in place
• Make sure tank is securely locked in
position.
• Solution tank empty
• Refill solution tank.
• Brush assembly channels clogged
• Remove brush assembly (Figs. 4-1
through 4-3 and 4-6 through 4-7) and
clean channels (A) by running under
warm tap water.
5-1
A
Service
To obtain approved HOOVER service and
genuine HOOVER parts, locate the nearest Hoover Factory Service Center or
Authorized Hoover Warranty Service
Dealer (Depot) by:
• checking the Yellow Pages
under “Vacuum Cleaners Household” OR • checking the list of Factory
Service Centers provided
with this cleaner OR • checking the Service section of
The Hoover Company on-line at
www.hoover.com OR • calling 1-800-944-9200 for an
automated referral of
authorized service outlet
locations (U.S. only).
Do not send your cleaner to The Hoover
Company in North Canton for service, this
will only result in delay.
If further assistance is needed, contact
The Hoover Company Consumer
Response Center, North Canton, Ohio
44720 Phone: 1-330-499-9499.
In Canada, contact Hoover Canada,
Burlington, Ontario L7R 4A8,
Phone: 1-800-263-6376.
Always identify your cleaner by the complete model number when requesting
information or ordering parts. (The model
number appears at the bottom of the back
of the cleaner body.)
For questions or comments concerning
Machine Formula LYSOL® or OLD
ENGLISH® Floor Cleaning Concentrate,
call 1-800-228-4722.
LYSOL and OLD ENGLISH are registered
trademarks of Reckitt Benckiser Inc.
Full One Year
Warranty
(Domestic Use)
Your HOOVER® appliance is warranted in
normal household use, in accordance with
the Owner’s Manual against original
defects in material and workmanship for a
period of one full year from date of purchase. This warranty provides, at no cost
to you, all labor and parts to place this
appliance in correct operating condition
during the warranted period. This warranty applies when the appliance is purchased in the United States including its
territories and possessions, or in Canada
or from a U. S. Military Exchange. Appliances purchased elsewhere are covered
by a limited one year warranty which covers the cost of parts only. This warranty
does not apply if the appliance is used in
a commercial or rental application.
Warranty service can only be obtained by
presenting the appliance to one of the following authorized warranty service outlets. Proof of purchase will be required
before service is rendered.
1. Hoover Factory Service Centers.
2. Hoover Authorized Warranty Service
Dealers (Depots).
For an automated referral of authorized
service outlets in the U.S.A.,
phone 1-800-944-9200 OR
Visit The Hoover Company on-line at
www.hoover.com
This warranty does not cover pick up,
delivery, or house calls; however, if you
mail your appliance to a Hoover Factory
Service Center for warranty service, transportation will be paid one way.
While this warranty gives you specific
legal rights, you may also have other
rights which vary from state to state.
If further assistance is needed, or if there
are questions concerning this warranty or
the availability of warranty service outlets,
write or phone the Consumer Response
Center, The Hoover Company, 101 East
Maple St., North Canton, Ohio 44720.
Phone 1-330-499-9499.
In Canada, contact Hoover Canada,
Burlington, Ontario L7R 4A8,
1-800-263-6376.
13
14