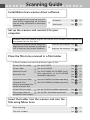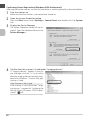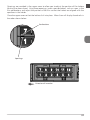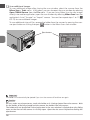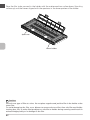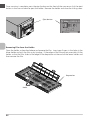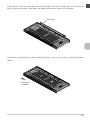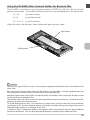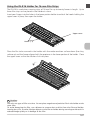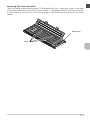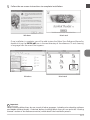
1
En
Setup
Device Registration
(Windows Only)
Scanning
Film Holders for
the 8000 ED
Nikon Scan
Reference
User’s Manual
○○○○
○ ○ ○ ○ ○ ○Scanning
○ ○ ○ ○ ○ ○Guide
○○○○○○○○○○
○
○○ ○○ ○ ○ ○ ○
Install Nikon Scan scanner driver software
The procedure for installing the software differs depending on whether
you are using a Windows or Macintosh
computer.
Windows
See
16
Macintosh
See
21
○
○○ ○○ ○ ○ ○ ○ ○ ○ ○
Set up the scanner and connect it to your
computer
Windows users will need to register the scanner with Windows when connecting
the scanner for the first time.
Connect the scanner to the computer.
Registration of the scanner as a new device is necessary only under Windows.
Connect the scanner See
25
Register the scanner See
27
○
○ ○ ○ ○ ○ ○ ○ ○ ○ ○ ○ ○ ○ ○ ○ ○ ○ ○ ○ ○ ○ ○
Place the film to be scanned in a film holder
○
○
Different holders are used for different types of film.
35-mm film (in strips)
Use the FH-835S
35-mm slides
Use the FH-835M
See
87
Medium-format
(Brownie) film
Use the FH-869S,the FH-869G (available separately), or the FH-869GR
(available separately)
See
See
See
90
99
103
Medium-format slides
Use the FH-869M (available separately)
See
96
Panorama film,
electron microscope film,
medium-format film
Use the FH-869GR (available separately)
See
103
16-mm film (in strips)
Use the FH-816 (available separately)
See
107
Microscope slides of
prepared tissue samples
Use FH-8G1 (available separately)
See
112
Basic scanning
See
61
The scan window
See
118
See
56, 81
Insert the holder into the scanner and scan the
film using Nikon Scan
Product Documentation
The documentation for this product includes the manuals listed below. Please be sure to read
all instructions thoroughly.
User’s Manual (this manual)
This User’s Manual provides instructions for setting up and using your scanner. It is divided into
the following chapters:
Overview
Read this chapter for information on the symbols and conventions used in this manual.
Setup
This chapter contains all you need to know when setting up your scanner for the first time,
including how to install Nikon Scan and how to connect your scanner. It also describes how to
care for your scanner when it is not in use and how to treat film to ensure the best results when
you make a scan.
Device Registration
Before you will be able to use your scanner with a Windows computer, you will need to “register” the scanner with the Windows Device Manager. Read this chapter for information on
registering the scanner with different versions of Windows.
Scanning
This chapter describes how to make your first scan.
Film Holders for the 8000 ED
Read this chapter for a description of the holders for scanning different types of film. A description of the optional holders available for the 8000 ED is also included.
Nikon Scan
This chapter provides a quick overview of Nikon Scan, the scanner driver software that controls
your scanner. For more information on Nikon Scan, see the Nikon Scan Software Manual (on
the software manual CD provided with your scanner).
Reference
This chapter contains product specifications and troubleshooting information, including film
that cannot be scanned and scanner storage and maintenance.
Nikon Scan Reference Manual (on CD)
The Nikon Scan Reference Manual describes how to use Nikon Scan 3, the software that drives
your scanner. This manual may be found on the software manual CD, which also contains the
software needed to view the manual, Adobe Acrobat Reader 4.0. Instructions for installing
Adobe Acrobat Reader 4.0 are given in Step 6 of “Setup” in the User’s Manual.
i
For Your Safety
To prevent damage to your scanner or injury to yourself or to others, read the following safety
precautions in their entirety before using this equipment. Keep these safety instructions where
all those who use the product will read them.
The consequences that could result from failure to observe the precautions listed in this section
are indicated by the following symbols:
This icon marks warnings, information that should be read before using the scanner
to prevent possible serious injury or death.
This icon marks cautions, information that you should read before using the scanner
to prevent damage to the equipment or injury to yourself or to others.
WARNINGS
Do not disassemble or modify
• The interior of the scanner contains areas of high voltage. Removing the scanner’s cover could result in fire or
electric shock. Contact your dealer or Nikon service office for inspection or repair.
• Do not modify. Modification could result in fire or electric shock.
Do not touch exposed parts
Should the product break open as the result of a fall or other accident, do not touch the exposed parts. Failure to
observe this precaution could result in injury or electric shock. Unplug the power cable and take the product to a
Nikon-authorized service center for inspection.
Unplug the equipment immediately should you notice anything out of the ordinary
• Should you notice an unusual noise, smell, or smoke coming from the equipment, turn the scanner off at once and
unplug the power cable. Continued use could cause fire or electric shock. After ensuring that the equipment is no
longer smoking, contact your dealer or Nikon service representative for information on replacement or repair. DO
NOT attempt repairs yourself, as this would be extremely dangerous.
• In the event of damage to the equipment, turn the scanner off at once and unplug the power cable, then contact
your dealer or Nikon service representative for information on replacement or repair. Continued use could result
in fire or electric shock.
Do not allow foreign objects to enter the scanner
• Do not place vases, flowerpots, cups, cosmetics, vessels containing chemicals or water, or small metal articles on
top of the equipment. Should such articles or their contents fall into the equipment, fire, electric shock or malfunction could result.
• In the event that foreign substances or water should find their way into the equipment, turn the scanner off
immediately, unplug the power cord and contact your dealer or nearest Nikon service representative. Continued
use could result in fire, electric shock or malfunction. Particular care is advised in households with small children.
Do not use in the presence of flammable gas or dust
Failure to observe this precaution could result in explosion or fire.
Keep small objects out of reach of children
Particular care should be taken to prevent infants from putting small parts of the equipment into their mouths. In
the event that a child should swallow part of the equipment, contact a physician immediately.
Do not handle the power cable during thunderstorms
Operating the equipment during thunderstorms could result in electric shock. Do not go near the equipment or
handle the power cable until after the thunderstorm has passed.
Do not play CD-ROM disks on audio CD players
The CDs provided with this product should not be played back on audio CD equipment. Playing CD-ROMs on an
audio CD player could cause hearing loss or damage the equipment.
ii
Use an appropriate power supply
Use an AC power supply of 50/60Hz and a voltage of from 100V–240V. Use a power cord rated for the appropriate voltage.
At voltages of over AC 125V:
Use a power cord that complies with the safety standards of the country in which it is used, that has a plug rated for
AC 250V, 15A (NEMA 6P-15) and insulation of SVT type or better, and that is more than AWG18 in thickness.
At voltages of AC 125V or less:
Use a power cord that complies with the safety standards of the country in which it is used, that has a plug rated for
AC 125V, 10A and insulation of SVT type or better, and that is more than AWG18 in thickness.
Observe appropriate precautions when handling the power cable
• Do not damage or modify the power cable. Fire or electric shock could result if the cable is placed under heavy
objects, exposed to heat or flame, or forcibly tugged or bent.
• In the event that the insulation is damaged and the wires become exposed, contact your retailer or Nikon service
office for information on repair or replacement. Continued use could result in fire or electric shock.
• Do not handle the plug when your hands are wet. Doing so could cause electric shock.
• Should you notice dust on or near the metal parts of the plug, remove it with a dry cloth. Continued use could
result in fire or electric shock.
CAUTIONS
Do not handle the equipment when your hands are wet
Failure to observe this precaution could result in electric shock.
Keep equipment out of reach of children
Failure to observe this precaution could result in injury.
Install the scanner only as directed in this manual
Failure to observe this precaution could block the scanner’s vents and cause the power source to overheat, possibly resulting in fire.
Place on a stable surface
• Do not use the equipment on an unstable surface or on a surface that is not level. The equipment could fall,
resulting in injury or in damage to the scanner.
• The scanner contains glass parts. Caution is advised in the event of breakage to prevent injury from broken glass.
Do not place heavy objects on the equipment
Do not place heavy objects on the equipment, as either the objects or the equipment could overbalance or fall, causing injury.
Unplug the equipment before cleaning
For your safety, turn off and unplug the scanner when cleaning the equipment.
Save where indicated otherwise, do not put your fingers into the equipment
Failure to observe this precaution could result in injury.
Unplug the equipment when not in use
For your safety, turn off and unplug the scanner when you do not intend to use it for an extended period. Failure to
observe this precaution could result in fire.
Observe appropriate precautions when handling the power cable
• Do not place the power cable in the vicinity of a stove or heater, as this could melt the insulation, resulting in fire
or electric shock.
• Unplug the cable by the plug, never by pulling on the cord itself. Failure to observe this precaution could damage
the cord, resulting in fire or electric shock.
• Do not plug the power cable into an extension cord or multi-outlet adapter, as this could cause fire or malfunction.
Ground the equipment
• The outlet into which the power cable is plugged must be grounded. Failure to ground the power supply could
result in electric shock.
• Do not ground the outlet to a gas or water pipe or a dedicated telephone system earth connector. Failure to
observe this precaution could result in fire or electric shock.
iii
Notices
• No part of the manuals included with this product may be reproduced, transmitted, transcribed, stored in a retrieval system, or translated into any language in any form, by any
means, without Nikon’s prior written permission.
• Nikon reserves the right to change the specifications of the hardware and software described in these manuals at any time and without prior notice.
• Nikon will not be held liable for any damages to film or film rolls resulting from the use of
this product.
• While every effort has been made to ensure that the information in these manuals is accurate and complete, we would appreciate it were you to bring any errors or omissions to the
attention of the Nikon representative in your area (address provided separately).
Notice for customers in the U.S.A.
Federal Communications Commission (FCC) Radio Frequency Interference Statement
This equipment has been tested and found to comply with
8000 ED
the limits for a Class B digital device, pursuant to Part 15 of
Tested To Comply
the FCC rules. These limits are designed to provide reasonWith FCC Standards
able protection against harmful interference in a residential
FOR
HOME
OR OFFICE USE
installation. This equipment generates, uses, and can radiate radio frequency energy and, if not installed and used in
accordance with the instructions, may cause harmful interference to radio communications.
However, there is no guarantee that interference will not occur in a particular installation. If
this equipment does cause harmful interference to radio or television reception, which can be
determined by turning the equipment off and on, the user is encouraged to try to correct the
interference by one or more of the following measures:
• Reorient or relocate the receiving antenna.
• Increase the separation between the equipment and receiver.
• Connect the equipment into an outlet on a circuit different from that to which the receiver
is connected.
• Consult the dealer or an experienced radio/television technician for help.
CAUTIONS
Modifications
The FCC requires the user to be notified that any changes or modifications made to this device
that are not expressly approved by Nikon Corporation may void the user's authority to operate
the equipment.
Interface Cables
Use the interface cables sold or provided by Nikon for your equipment. Using other interface
cables may exceed the limits of Class B Part 15 of the FCC rules.
Nikon Inc.,
1300 Walt Whitman Road, Melville, New York
11747-3064, U.S.A.
Tel.: 631-547-4200
iv
Notice for customers in Canada
CAUTION
This class B digital apparatus meets all requirements of the Canadian Interference Causing
Equipment Regulations.
ATTENTION
Cet appareil numérique de la classe B respecte toutes les exigences du Règlement sur le matériel
brouilleur du Canada.
Notice Concerning Prohibition of Copying or Reproduction
Note that simply being in possession of material that has been digitally copied or reproduced
by means of a scanner, digital camera or other device is punishable by law.
• Items prohibited by law from being copied or reproduced
Do not copy or reproduce paper money, coins, securities, government bonds, or local government bonds, even if such copies or reproductions are stamped “Sample.”
The copying or reproduction of paper money, coins, or securities which are circulated in a
foreign country is prohibited.
Unless the prior permission of the government has been obtained, the copying or reproduction of unused postage stamps or post cards issued by the government is prohibited.
The copying or reproduction of stamps issued by the government and of certified documents stipulated by law is prohibited.
• Cautions on certain copies and reproductions
The government has issued cautions on copies or reproductions of securities issued by private companies (shares, bills, checks, gift certificates, etc.), commuter passes, or coupon
tickets, except when a minimum of necessary copies are to be provided for business use by
a company. Also, do not copy or reproduce passports issued by the government, licenses
issued by public agencies and private groups, ID cards, and tickets, such as passes and meal
coupons.
• Comply with copyright notices
The copying or reproduction of copyrighted creative works such as books, music, paintings,
woodcut prints, maps, drawings, movies, and photographs is prohibited except when it is
done for personal use at home or for similar restricted and non-commercial use.
Trademark Information
Apple, the Apple logo, Macintosh, Mac OS, Power Macintosh, and PowerBook are registered trademarks of Apple
Computer, Inc. Finder and Power Mac are trademarks of Apple Computer, Inc. IBM and IBM PC/AT are registered
trademarks of International Business Machines Corporation. PowerPC is a trademark of International Business Machines Corporation, used under license. Microsoft is a registered trademark, and Windows, MS-Windows and Windows NT trademarks, of Microsoft Corporation. Internet Explorer is a product of Microsoft Corporation. Pentium is a
trademark of Intel Corporation. Internet is a trademark of Digital Equipment Corporation. Netscape and Netscape
Navigator are registered trademarks of Netscape Communications Corporation. Adobe and Acrobat are registered
trademarks, and Photoshop a trademark, of Adobe Systems Inc. Applied Science Fiction, Digital ICE cubed (Digital
ICE3), Digital ICE, Digital ROC, and Digital GEM are trademarks of Applied Science Fiction, Inc. “Digital ICE cubed” and
“Digital ICE3” are used throughout the documentation provided with this product as generic terms to describe Digital
ICE, Digital ROC, and Digital GEM, which are technologies of Applied Science Fiction, Inc. Radius, ColorMatch, and
PressView are registered trademarks of miro displays, inc. All other trade names mentioned in this manual or the other
documentation provided with your Nikon product are trademarks or registered trademarks of their respective holders.
v
Table of Contents
Product Documentation .................................................................................................. i
For Your Safety .............................................................................................................. ii
Introduction ................................................................................................................. viii
Setup ................................................................................................................. 1
Before Using Your Scanner ........................................................................................... 2
Connecting the Scanner ................................................................................................. 2
Using the Scanner with a Windows Computer ............................................................... 2
Get to Know Your Scanner ............................................................................................ 3
Your Scanner ................................................................................................................. 3
Accessories .................................................................................................................... 4
Keep the Holder Slot Closed ........................................................................................... 6
Choose a Location ......................................................................................................... 6
Protect Your Film ............................................................................................................ 7
Connecting the IEEE 1394/Firewire Devices .................................................................... 8
Installing the IEEE 1394/Firewire Interface Board ............................................................. 9
Installing the IEEE 1394/Firewire Interface Board in a PCI slot ........................................ 10
Installing the Drivers for the IEEE 1394/Firewire Interface Board (Windows Only) .......... 11
Installing Nikon Scan ................................................................................................... 16
Installing Nikon Scan under Windows .......................................................................... 16
Installing Nikon Scan on a Macintosh ........................................................................... 21
Connecting the Scanner .............................................................................................. 25
Connecting the Power Cable ........................................................................................ 25
Connecting the Interface Cable .................................................................................... 25
Turn the Scanner On .................................................................................................... 26
Device Registration (Windows Only) ............................................................ 27
Windows XP Home Edition/Windows XP Professional ................................................... 28
Windows 2000 Professional ......................................................................................... 34
Windows Millennium Edition (Me) ............................................................................... 42
Windows 98Second Edition (SE) ................................................................................... 48
Scanning .......................................................................................................... 55
Step 1—Ready the Film ............................................................................................... 56
Step 2—Place the Film in the Holder ......................................................................... 58
Step 3—Insert the Holder ............................................................................................ 60
Step 4—Scan the Slide ................................................................................................. 61
Making a Scan ............................................................................................................. 61
vi
Film Holders for the 8000 ED ......................................................................... 79
Holders Provided with Your Scanner .......................................................................... 80
Using the FH-835S Holder for 35-mm Film Strips .......................................................... 81
Using the FH-835M Holder for Mounted 35-mm Slides ................................................ 87
Using the FH-869S Holder for Brownie Film .................................................................. 90
Optional Holders ......................................................................................................... 94
Using the FH-869M Holder for Mounted Brownie Film ................................................. 96
Using the FH-869G Glass-Covered Holder for Brownie Film .......................................... 99
Using the FH-869GR Glass-Covered Rotating Holder for Brownie Film ......................... 103
Using the FH-816 Holder for 16-mm Film Strips ........................................................... 107
Using the FH-8G1 Medical Holder ............................................................................... 112
Nikon Scan ...................................................................................................... 115
Viewing the Nikon Scan 3 Software Manual ............................................................ 116
The Scan Window ....................................................................................................... 118
The Parts of the Scan Window .................................................................................... 118
The Control Area ........................................................................................................ 120
The Information Panel ................................................................................................. 122
The Preview Button ..................................................................................................... 123
The Scan Button .......................................................................................................... 123
The Thumbnail Drawer Tab .......................................................................................... 123
The Processed/Natural Tabs ......................................................................................... 123
The Tool Chest ............................................................................................................ 124
The Scan Progress Window ......................................................................................... 126
Reference ........................................................................................................ 127
Maintenance ............................................................................................................... 128
Caring for Your Scanner .............................................................................................. 128
Caring for Holders ....................................................................................................... 130
Troubleshooting ......................................................................................................... 131
Specifications .............................................................................................................. 134
Scanner Specifications ................................................................................................. 134
Holder Specifications ................................................................................................... 136
Specifications for Optional Holders .............................................................................. 137
Index ............................................................................................................................ 138
vii
Introduction
Thank you for your purchase of a Nikon SUPER COOLSCAN 8000 ED (8000 ED). This manual
describes how to care for, install, and use your scanner. Be sure that you have read and understood its contents before using your scanner, and leave it where those who use the scanner will
read it.
To make it easier find the information you need, the following symbols and conventions are
used:
This icon marks cautions, information that you should read before using your Nikon
scanner to prevent damage to the device.
This icon marks notes, information that you should read before using your Nikon
scanner.
This icon marks tips, additional information you may find helpful when using your
Nikon scanner.
This icon indicates that more information is available elsewhere in this manual or in
other documentation.
This symbol indicates that the cross-reference marked with the
8000 ED User’s Manual (this manual).
icon is to the
This symbol indicates that the cross-reference marked with the
Nikon Scan Software Manual (on CD).
icon is to the
Illustrations
The majority of illustrations in this manual are taken from Windows XP Home Edition or Windows XP
Professional (hereafter, “Windows XP”). Illustrations from Mac OS are used together with Windows illustrations where operations in the two operating systems differ.
Life-Long Learning
As part of Nikon’s “Life-Long Learning” commitment to ongoing product support and education, continually updated information is available on-line at www.nikon-euro.com. Visit this site to keep up-to-date
with the latest product information, tips, answers to frequently asked questions (FAQs), and general advice
on digital imaging and photography.
viii
Setup
This chapter describes how to set up the scanner, how to install
Nikon Scan, and how to connect the scanner. It also describes
how to care for your scanner when it is not in use and how to
treat film to ensure the best results when you make a scan.
Before Using Your Scanner ......................... 2
Get to Know Your Scanner .......................... 3
Installing Nikon Scan ................................. 16
Connecting the Scanner ............................ 25
Turn the Scanner On .................................. 26
○○○○
1
Before Using Your Scanner
Connecting the Scanner
• Connect the scanner directly to the computer as described in “Connecting the Scanner” (
25). The scanner may not function as expected when connected to an IEEE
1394 hub.
• The scanner may not function as expected used with other IEEE 1394 devices. Should
you notice a problem with the scanner when used with other IEEE 1394 devices,
disconnect the other devices and use the scanner alone.
• Only one scanner can be connected to the computer at a time.
Using the Scanner with a Windows Computer
Before you will be able to use your scanner with a Windows computer, you must register the
scanner with the system.
Before registering the scanner, disconnect all other peripherals from the computer
and connect only the scanner.
2
Get to Know Your Scanner
Your Scanner
쐇
쐃
쐆
쐏
쐋
쐄
Front View
� Status LED
This LED blinks slowly (roughly twice every three
seconds) when the scanner is in operation. Do
not turn the scanner off, remove or insert adapters, or eject or insert film until the LED has
stopped blinking and is glowing steadily. If the
LED flashes rapidly (about five times a second),
a communications error has occurred or there is
a problem with the scanner. Turn the scanner
off, wait for at least five seconds, and then turn
the scanner on again.
The first time you run Nikon Scan, the status
LED will emit five series of rapid blinks (each of
about three seconds duration) when you first
insert a holder with the scanner on or if you
start Nikon Scan for the first time with the scanner on and a holder in place. This does not
indicate an error. Do not eject the holder.
Rear View
쐂
� Holder Slot
This is where you put holders for different
types of film. Don’t put anything in this slot
except an approved Nikon holder.
쐄 Sliding cover
Slide the cover down before inserting a holder.
To protect your scanner from dust and other
foreign objects, be sure ALWAYS to close the
cover when no holder is in place.
쐂 AC connector
Connect the female end of the power cable
here.
쐆 IEEE 1394/Firewire interface connector
Connect the IEEE 1394/Firewire interface cable
here.
쐇 Power switch
Press this switch to turn the scanner on and
off.
쐋 Eject button
Use this button to eject holders from the scanner.
3
Accessories
After unpacking the scanner, check that the package contains all the items listed below. Contact your retailer immediately should you find that anything is missing or damaged.
FH-835S 35-mm strip film holder (1)
This holder is used to scan up to two strips of
35-mm film up to six frames in length.
FH-835M 35-mm slide mount holder (1)
Use this holder to scan up to five mounted 35mm slides.
Masking sheet (2)
Masking sheets are used with the FH-835S 35mm strip film holder when scanning a single
strip of film or two strips of unequal lengths.
FH-869S medium-format strip-film holder (1)
Use this holder to scan medium format
(Brownie or 120/220) film strips or 59 mm × 82
mm film for electron microscopes. The number of frames that can be scanned depends on
the type of film:
6 × 4.5:
Up to four frames
6 × 6:
Up to three frames
6 × 7 – 6 × 9: Up to two frames
Power cable (1)
(shape of cable depends on country of sale)
IEEE 1394/Firewire interface cable (1)
Use this cable to connect the scanner to your
computer.
4
CD-ROM
M
ROM CDD-
-ROM C
CD
M CD-RO
RO
Nikon Scan 3.1 CD-ROM (1)
This CD contains driver software for your Nikon
scanner. Depending on the country of sale, it
may also include a variety of sample software.
IEEE 1394/Firewire interface board (1)
(for Windows and Macintosh; includes user’s manual)
If you are using a Windows or old-model (beige)
Macintosh G3 desktop computer, you may need
to install this PCI board before you will be able
to connect your scanner to your computer. This
board can not be used with laptop computers
or computers not equipped with a PCI slot, and
is not required in the case of Macintosh computers with built-in Firewire ports.
CD-ROM
M
ROM CDD-
-ROM C
CD
M CD-RO
RO
Reference CD (1)
This CD contains a reference manual for the
Nikon Scan driver software, together with installers for Adobe Acrobat Reader, the software
used to view the manual.
“Open me first” envelope (1)
This envelope contains a packing list, user registration cards, and other important documents.
SUPER COOLSCAN 8000ED
User's Manual
User’s Manual (this manual) (1)
Quick Start Guide (1)
This guide provides you with the information you
need to get started with your Nikon scanner.
5
Keep the Holder Slot Closed
In order to ensure that your scanner always produces the best possible results, remove any
holders and close the sliding cover when the scanner is not in use.
Never remove a holder from the scanner without first checking that the statusLED
on the front of the scanner is glowing steadily. Do not insert or remove holders or
turn the scanner off while the LED is blinking.
After using the scanner, eject the holder and turn the scanner off, then close the
sliding cover to prevent dirt and dust from accumulating in the scanner.
Choose a Location
Before connecting the power and interface cables, choose a flat, stable location for your scanner close to the computer and to a suitable power outlet. Do not install your scanner where:
it would be exposed to direct or reflected sunlight
it would be subject to condensation or to drastic changes in temperature
it would be exposed to dust or smoke
it would be exposed to water vapor from a humidifier
it would be exposed to radio interference from other electronic devices
the temperature exceeds 35°C (95°F) or falls below 10°C (50°F)
other objects would block the scanner’s vents
Leave enough space around the scanner to ensure ease of operation: at least 5 cm (2˝) above
and on either side of the scanner, 10 cm (4˝) behind, and 50 cm (20˝) in front.
5cm (2˝)
10cm (4˝)
5cm (2˝)
5cm (2˝)
50cm (20˝)
6
Protect Your Film
The Digital ICE photo retouch function built into your Nikon scanner can be used to eliminate
the effects of dust, scratches, and surface defects on your film. To ensure the best possible
results and to prevent damage to slides or film, however, be sure to protect your film from dust,
fingerprints, and condensation as described below.
Before inserting film in a holder, remove dirt and dust with a blower
to protect the surface of the film from scratches. Dirt and dust can
also interfere with the operation of the scanner, causing scanning
errors or malfunctions.
Fingerprints can be removed with a soft, dry cloth. Be careful not
to scratch the surface of the film when removing fingerprints.
The film base and emulsion will deteriorate if exposed to high temperatures or
humidity. Use the scanner at the temperature and humidity given in the specifications (see below).
Sudden changes in temperature and humidity, even when within the limits given in
the specifications, can cause condensation on the film. Before using film, check to
be sure that no condensation is present.
If condensation is present on the film, leave the film out until it dries. Condensation
can cause damage when film is inserted in the scanner.
The operating temperature and humidity for your scanner are:
Temperature: +10 – +35°C (+50 – +95°F)
Humidity: 20 – 60%
7
Connecting IEEE 1394/Firewire Devices
When using the scanner with other devices connected to the same bus, observe the precautions below.
Do not turn other devices on or off or disconnect interface cables while scanning is
in progress (i.e., while the scanner status LED is blinking slowly).
Connect the scanner directly to the computer. The scanner may not function as
expected when connected to a hub.
The scanner may not function as expected when used together with other IEEE
1394/Firewire devices. Should you experience difficulties operating the scanner, we
recommend that you disconnect all other devices on the same bus and reconnect
the scanner and computer.
Do not connect two or more scanners of the same type to the same computer simultaneously.
The description in this manual follows the order of steps you will take when setting up the scanner for the
first time, with the result that the instructions on turning the scanner on follow those on cable connection.
Please note, however, that as an IEEE 1394/Firewire device, your Nikon scanner can be connected or disconnected while on and can be used immediately following connection. There is no need to turn off or
restart the device each time it is connected.
After disconnecting the interface cable, wait a few seconds before plugging it in again.
8
Installing the IEEE 1394/Firewire Interface Board
If your computer is not already equipped with a built-in IEEE 1394 interface port or a suitable
expansion board or card, you can install the IEEE 1394/Firewire interface board provided with
your scanner. Detailed instructions may be found in the manual included with the interface
board.
Do I Need to Install the IEEE 1394/Firewire Interface Board?
You will not need to install the IEEE 1394 (Firewire) interface board provided with your scanner if:
• Your computer is equipped with a built-in IEEE 1394 (Firewire) port. Macintosh
users should note that old-model (beige) G3 computers are not equipped with a
built-in Firewire port.
• Your computer is equipped with an IEEE 1394 (Firewire) expansion board or card
approved for use with the 8000 ED.
The IEEE 1394 (Firewire) interface board included with your scanner can not be used in laptop
computers or in low-profile PCI slots. In these cases, you will need to install one of the interface
boards or cards recommended by Nikon. For more information, see the following web site:
http://www.nikon-image.com/en/ei_cs/index.htm
Installing the Interface Board
There are two steps to installing the interface board:
1. Insert the interface board in one of your computer’s free PCI slots (
2. Install the drivers for the interface board (Windows only;
10)
11–15)
In Windows XP, Windows 2000 Professional, and Windows Me, the necessary drivers
will be installed automatically after you install the interface board.
If you are using a computer running Windows 98 SE, you must update the IEEE 1394
driver as instructed on page 17 of this manual before installing the interface board.
9
Installing the IEEE 1394/Firewire Interface Board in a PCI Slot
After turning the computer off and disconnecting all cables, insert the interface board in one of
the computer’s PCI slots as shown below. For information on the location of the PCI slots and
on installing PCI boards, see the documentation provided with your computer.
If you will be using the interface board
with devices that require power to be supplied by the computer, you will need to
connect the board to the computer’s
power supply. You will not need to connect the power supply if you will only be
using the 8000 ED, which receives power
from an external source.
Do not use force when installing the interface board. Excessive force could damage the computer
or the board.
10
Installing the Drivers for the IEEE 1394/Firewire Interface Board (Windows Only)
After installing the interface board in a PCI slot, closing the computer’s case, and reconnecting
the cables, turn the computer on and install the board drivers as described below.
Windows XP Home Edition/Windows XP Professional
The first time the computer is powered on with the board in place, Windows will automatically
install the necessary drivers. To confirm that the drivers have been installed and are functioning
normally:
1
Select Control Panel from the Start
menu and click the Performance and
Maintenance icon. In the Performance and Maintenance window,
click the System icon.
2
The System dialog will be displayed.
Select the Hardware tab and click
Device Manager….
3
Confirm that a listing for “NEC
Firewarden OHCI Compliant IEEE 1394
Host Controller” appears in the Device Manager.
11
Windows 2000 Professional
The first time the computer is powered on with the board in place, Windows 2000 will automatically install the board drivers. To confirm that the drivers are installed and functioning
normally:
on the My Computer icon with the
1 Click
right mouse button and select Properties from the menu that appears.
System Properties window, open
2 InthetheHardware
tab and click the Device
Manager button.
that “NEC Firewarden OHCI
3 Check
Compliant IEEE 1394 Host Controller”
appears in the Device Manager under
“IEEE 1394 Bus host controllers.”
12
Windows Millennium Edition (Me)
The first time the computer is powered on with the board in place, Windows Me will automatically install the board drivers. To confirm that the drivers are installed and functioning normally:
dialog shown at right will be dis1 The
played. Click Yes to restart your computer.
on the My Computer icon with the
2 Click
right mouse button and select Properties from the menu that appears.
System Properties window, click
3 InthetheDevice
Manager tab. Check that
“NEC Firewarden OHCI Compliant IEEE
1394 Host Controller” appears in the
Device Manager under “1394 Bus Controller.”
13
Windows 98 Second Edition (SE)
first time the computer is powered
1 The
on with the board in place, the dialog
shown at right will be displayed. Click
Next.
Search for the best driver for
2 Select
your device (Recommended) and click
Next.
dialog shown at right will be dis3 The
played. After making sure that none
of the options are selected, click Next.
14
The updated driver (Recom4 Select
mended) NEC Firewarden OHCI Compliant IEEE 1394 Host Controller and
click Next.
dialog shown at right will be dis5 The
played. Click Next.
Disk dialog is displayed, in6 IfsertthetheInsert
Windows 98 Second Edition CD
into the CD-ROM drive and click OK. If
the computer displays the message,
“The file (file name) on Windows 98
Second Edition CD-ROM could not be
found,” enter g:\win98_se (substitute
the drive letter of your CD-ROM drive
for “g”) in the Copy files from text box
and click OK.
dialog shown at right will be dis7 The
played. Click Finish. After the installation has been completed, refer to the
“Installing the IEEE 1394 Update for
Windows 98 Second Edition” (
17)and install the update program.
15
Installing Nikon Scan
Before you can connect your scanner to your computer, you will need to install Nikon Scan 3
driver software for your scanner. The procedure for installing Nikon Scan 3 on Windows computers differs from the install procedure for Macintosh computers.
The Nikon Scan 3 install CD includes two versions of Nikon Scan 3: version 3.1.2 (for Windows
and Mac OS 9 or earlier) and version 3.1.3 (for Mac OS X version 10.1.3 or later).
Nikon Scan 3 Version 3.1.2
This version of Nikon Scan will be installed under Windows and Mac OS 9 or earlier.
Nikon Scan 3 Version 3.1.3
This version of Nikon Scan 3 is supported only under Mac OS X (version 10.1.3 or later). It will
be installed on Macintosh computers running Mac OS X. The following limitations apply:
• The LS-2000 and COOLSCAN III are not supported.
• The menus and dialogs shown in the Nikon Scan 3 Help file are for version 3.1.2.
Installing Nikon Scan under Windows
Before installing Nikon Scan, turn your computer on and wait for Windows to start up. Check
to make sure that:
• The scanner is not connected to your computer.
• Your computer satisfies the Nikon Scan 3 system requirements (see page 5 of the
Nikon Scan Reference Manual for details).
• No other applications (including anti-virus software) are running.
16
Installing the IEEE 1394 Update for Windows 98 Second Edition
This section describes how to install the IEEE 1394 update required when using the scanner
under Windows 98 Second Edition (SE).
1 Turn on your computer and insert the Nikon Scan 3.1 CD in the CD-ROM drive.
The Welcome Window
If the installer starts automatically when you insert the Nikon Scan 3.1 CD into the CD-ROM
drive, click Exit to close the Welcome window.
2 Double click on the My Computer icon and open the CD-ROM drive.
click on the Nikon Scan 3.1 CD with the right mouse button and select Explore.
3 Next
When the Microsoft directory opens, double click the 242975USA8(.EXE) file.
the dialog shown at right is dis4 When
played, remove the CD from the CDROM drive and then click Yes to restart
your computer.
the computer has restarted, check
5 Once
that the drivers for the interface board
have been installed and are functioning normally. Click on the My Computer
icon with the right mouse button and
select Properties from the menu that
appears.
System Properties window, click
6 InthetheDevice
Manager tab. Check that
“NEC Firewarden OHCI Compliant IEEE
1394 Host Controller” appears in the
Device Manager under “1394 Bus Controller.”
17
Installation
1
Insert the Nikon Scan 3 CD into the CDROM drive. When the Welcome dialog is displayed, click Nikon Scan 3.
Depending on where you purchased your
scanner, you may be prompted to select
the language in which Nikon Scan’s
menus and dialogs will be displayed.
Choose a language from the list provided.
2
The InstallShield Wizard will start.
Click Next. The license agreement will
be displayed; click Yes to accept the
agreement and continue with installation.
What to do when the CD-ROM does not start automatically.
If the Welcome dialog does not appear when the CD-ROM is inserted in the drive:
1. Double click the My Computer icon
2. In the My Computer window, click on the CD-ROM drive icon with the right mouse button
3. Select Autorun from the menu that appears
Important
Log into the Administrator account when installing Nikon Scan under Windows 2000.
18
3
Click Next to install Nikon Scan 3 to
the folder for Nikon Scan 3 shown
under “Install Location,” or click
Browse… to choose another location.
4
Once the Nikon Scan program files
have been copied to disk, a colorspace selection wizard will be displayed. Click Use Wizard to have the
wizard assist you in choosing a colorspace profile (recommended) or Use
name list to choose a custom profile
(see the Nikon Scan Software Manual
for details.
Choosing the correct color-space profile is very important if the scanner is to be used in a
professional setting, for example as a part of a production workflow. The Nikon Scan
Reference Manual contains information about the color management system used in Nikon
Scan. Please take time to study the explanations and advice provided. If you have questions about any aspect of color management, we suggest that you contact your national
Nikon office, which may be able to provide or recommend training resources.
5
Clicking Use Wizard in the Color Space
Wizard dialog displays the dialog
shown at right. Click Windows.
19
6
Choose sRGB from the list of colorspace profiles and click OK. More information about the different profiles
is available in the Nikon Scan Reference Manual.
7
The installation complete dialog will
be displayed. Click Finish to exit the
InstallShield wizard.
8
Once the computer has restarted, take a few moments to view the ReadMe file,
which may contain important information that could not be included in this manual.
This completes installation of Nikon Scan 3.
20
Installing Nikon Scan on a Macintosh
Before installing Nikon Scan, turn your computer on and wait for it to start up. Check to make
sure that:
• The scanner is not connected to your computer
• Your computer satisfies the Nikon Scan 3 system requirements (see page 5 of the
Nikon Scan Reference Manual for details)
• No other applications (including anti-virus software) are running
Installation
1
Insert the Nikon Scan 3 CD into the
CD-ROM drive. When the Nikon Scan
3.1.2 window opens on the desktop,
double-click the Nikon Scan Installer
icon for the language of your choice.
Mac OS X
The Nikon Scan 3.1.3 window will open
on the desktop. Double-click the Nikon
Scan Installer icon for the language of
your choice.
Memory Requirements under Mac OS X
Running Nikon Scan 3.1.3 under Mac OS X requires a minimum of 256 MB of memory, of which 128 MB
are required by the operating system and the remainder by Nikon Scan 3.1.3.
21
2
When the installer starts, click Continue… to display the license agreement. Clicking Accept displays the
ReadMe file. Take a few moments to
read this file, which may contain important information that could not be
included in this manual. After reading the file, click Continue….
3
Choose a location for Nikon Scan from
the Install Location menu and click
Install.
Mac OS X
Nikon Scan will automatically be installed
to the folder “Applications : Nikon Software” on the startup disk. You can not
select an alternate location.
22
4
Once the Nikon Scan program files
have been copied to disk, a color-space
selection wizard will be displayed.
Click Use Wizard to have the wizard
assist you in choosing a color-space
profile (recommended) or Use name
list to choose a custom profile (see the
Nikon Scan Software Manual for details). The color-space profile selected during
installation can be changed at any time as detailed in the “Preferences” section of
the Nikon Scan Reference Manual. Choosing the correct color-space profile is very
important if the scanner is to be used in a professional setting, for example as part
of a production workflow. More information about the color management system used in Nikon Scan 3 may be found in the Nikon Scan Reference Manual.
5
Clicking Use Wizard in the Color Space
Wizard dialog displays the dialog
shown at right. Click Macintosh.
6
Choose Apple RGB and click OK. More
information about the different profiles is available in the Nikon Scan
Reference Manual.
23
7
Nikon Scan 3 can be used to scan images directly into any application that
supports Adobe Photoshop 5.0 acquire plug-ins. The installer will display a list of plug-in folders for the
applications currently installed on
your computer; choose the folders
containing Adobe Photoshop plug-ins
and click OK to copy the Nikon Scan
3.1 plug-in to the selected folders.
Click Cancel to complete installation
without creating a copy of the Nikon
Scan 3.1 plug-in.
8
A dialog will be displayed stating that
installation is complete. Click Restart
to restart your computer (Mac OS 9
or earlier) or Quit to exit the installer
(Mac OS X).
9
This completes installation of Nikon Scan 3.
24
Connecting the Scanner
The first time the scanner is connected to a Windows computer, the Device Manager will install
the device drivers needed to “register” the scanner with the system (more information on
device registration is available on page 27 of this manual).
Connect the Power Cable
Before connecting the power cables, be sure the scanner is off. Attach the female end of the
power cable to the AC connector on the rear of the scanner and insert the male end into a
general-purpose (AC 100–240 V, 50/60 Hz) household outlet.
Power off
Power on
Connecting the Interface Cable
After confirming that the scanner is off, connect one end of the supplied 6-pin–6-pin IEEE
1394 cable to the scanner, the other to the computer.
Connect the cable as shown. Attempting to insert the connector in another orientation could not
only damage the connector, but also damage the scanner or computer or interfere with their
correct functioning.
Computer
○ ○ ○ ○ ○ ○ ○ ○ ○ ○ ○ ○ ○ ○ ○ ○ ○ ○ ○ ○ ○ ○ ○ ○
Scanner
Align the curved portion of
the connector (circled) with
the matching portion of the
connector on the scanner or
computer.
IEEE 1394 connector
Important
If you are using a computer with a 4-pin DV connector (such as SONY VAIO laptop computers),
you will need to purchase a 6-pin–4-pin cable or 6-pin–4-pin adapter.
25
Turn the Scanner On
Before turning the scanner on for the first time, confirm that the Nikon Scan 3.1 CD is in your
computer’s CD-ROM drive. Press the power switch to turn the scanner on. When the scanner
is turned on, the status LED will blink for a few seconds while the scanner initializes and then
glow steadily.
Status LED
When turning the scanner on, be sure that no holder is inserted. Leaving a holder in place can prevent the
scanner from initializing normally.
The status LED should blink slowly (about twice every three seconds) while the scanner initializes. If the
LED flashes rapidly (about five times a second), there may be a problem with the scanner or with the
connection to your computer. Try turning the scanner off, waiting for five seconds, and then turning the
scanner on again.
The first time you run Nikon Scan, the status LED will emit five series of rapid blinks (each of about three
seconds duration) when you first insert a holder with the scanner on or if you start Nikon Scan for the first
time with the scanner on and a holder in place. This does not indicate an error. Do not eject the holder. If
you ejected the holder while the status LED was blinking, turn the scanner off and then on again and
restart Nikon Scan.
Pg.
27
131
26
For more information on:
Device Registration (Windows Only)
Troubleshooting
Device Registration
(Windows Only)
The first time you connect the scanner to a Windows computer,
you will need to “register” the scanner with the system by installing the hardware drivers.
Windows XPXP
Home
Edition/Windows
XP Professional
Windows
Home
Edition/Professional
. 28
....................................................................
Windows 2000 Professional ...................... 28
34
Windows 2000
Professional
......................
Windows
Millennium
Edition
(Me) .......... 34
42
Windows 98
Millennium
Edition(SE)
(Me)
.......... 48
42
Windows
Second Edition
.............
Windows 98 Second Edition (SE) ............. 48
○○○○
27
Windows XP Home Edition/Windows XP Professional
Registering the Scanner with Windows XP
1
Turn the scanner on
The first time the computer detects the
scanner, Windows will display the dialog
shown at right. Select the automatic install option and click Next.
2
Insert the Nikon Scan 3 CD
Holding down the shift key to prevent the Welcome program from starting automatically,
insert the Nikon Scan 3 CD into the CD-ROM drive. The list of drivers shown in step 3 will
be displayed.
If the List of Drivers Is Not Displayed
If the list of drivers shown in step 3 is not displayed automatically, select the automatic
install option in the dialog shown above and click Next.
Logging On
Log on as the Computer Administrator when registering the scanner.
The Welcome Window
If the Welcome program starts automatically when
you insert the Nikon Scan CD, click Exit to close
the Welcome window.
28
3
Select ls8000xp.inf
Select ls8000xp.inf in the list of drivers
and click Next.
“ls8000xp.inf”
If ls8000xp.inf is not visible in the list,
drag the scroll bar at the right of the list
until it is displayed. Be sure to choose
the driver that has “xp” in the file name.
4
Click Continue Anyway
Click Continue Anyway to begin installation of the files need to register the scanner.
5
Click Finish
Click Finish to complete installation.
6
Confirm device registration
Confirm that the scanner has been correctly registered with the system as described in
“Confirming Device Registration (Windows XP)” (
30).
29
Confirming Device Registration (Windows XP)
After registering the scanner, confirm that the device is working normally as described below.
1
2
Turn the scanner on
Make sure that the scanner is connected and turned on.
3
Display the Device Manager
The System Properties dialog will be displayed. Open the Hardware tab and click
Device Manager….
4
Confirm that the scanner is listed under “Imaging devices”
If “Imaging devices” appears in the Device Manager, click the “+” to its left to
view the imaging devices currently registered with Windows. Confirm that your
scanner is listed.
Open the System Properties dialog
Select Control Panel from the Start menu, open Performance and Maintenance, and
click System.
If the Scanner Is Not Listed
If the scanner is not listed under “Imaging devices,” proceed to “Updating the
Device Driver (Windows XP)” (
32).
30
5
Confirm that the scanner is working properly
Double-click the listing for your scanner
that appears under “Imaging devices.”
The scanner Properties dialog will be displayed. Click the General tab and confirm that “This device is working properly” appears under “Device Status.” If
another message is displayed, proceed to
“Updating the Device Driver (Windows
XP)” (
32).
31
Updating the Device Driver (Windows XP)
If the scanner is not listed under “Imaging devices” in the Device Manager or the message
“This device is working properly” does not appear in the Properties dialog, you will need to
reinstall the device driver as detailed below.
1
Open the scanner Properties dialog
Display the Device Manager as described in steps 1–3 of “Confirming Device Registration
30). If the scanner is listed under “Other devices” or appears next to
(Windows XP)” (
a “!”, “?”, or “×”, double-click the entry for the scanner to display the scanner Properties
dialog.
2
Click Reinstall Driver…
Open the General tab and click Reinstall
Driver….
3
Insert the Nikon Scan 3 CD
The dialog shown at right will be displayed. Holding down the shift key to
prevent the Welcome program from starting automatically, insert the Nikon Scan
3 CD into the CD-ROM drive. Select the
automatic install option and click Next.
The Welcome Window
If the Welcome program starts automatically when you insert the Nikon Scan CD,
click Exit to close the Welcome window.
32
4
Select ls8000xp.inf
Select ls8000xp.inf in the list of drivers
and click Next.
“ls8000xp.inf”
If ls8000xp.inf is not visible in the list,
drag the scroll bar at the right of the list
until it is displayed.
5
Click Continue Anyway
Click Continue Anyway to begin installation of the files need to register the scanner.
6
Click Finish
Click Finish to complete installation.
7
Confirm device registration
Confirm that the scanner has been correctly registered with the system as described in
“Confirming Device Registration (Windows XP)” (
30).
33
Windows 2000 Professional
Registering the Scanner with Windows 2000 Professional
1
Turn the scanner on
The first time the computer detects the
scanner, Windows will display the dialog
shown at right. Click Next.
2
Insert the Nikon Scan 3 CD
Holding down the shift key to prevent the
Welcome program from starting automatically, insert the Nikon Scan 3 CD into
the CD-ROM drive. Select the search
option and click Next.
Logging On
Log on as the Administrator when registering the scanner.
The Welcome Window
If the Welcome program starts automatically when
you insert the Nikon Scan CD, click Exit to close
the Welcome window.
34
3
Select Specify a location
Select Specify a location and click Next.
4
Click Browse…
When the dialog shown at right is displayed, click Browse….
5
Select the Win2000 folder
The Locate File dialog will be displayed.
Select the “Nkscan” CD from the Look
in menu and open each of the “INF,”
“LS8000,” and “Win2000” folders in
turn. Select the file LS80002K.INF and
click Open.
35
6
Confirm the file path
The dialog shown at right will be displayed.
Confirm that the path “\INF\LS8000\Win2000”
appears after the drive letter of the CD-ROM
drive and click OK.
If the Correct Path Is Not Displayed
If the correct path is not displayed, repeat
steps 4–6 to select the correct path.
7
Begin installation of the device drivers
Click Next.
8
Click Yes
The dialog shown at right will be displayed. Click Yes.
36
The dialog shown at right will be displayed
while Windows registers the scanner.
9
Click Finish
Click Finish to complete installation.
the computer
10 Restart
Click Yes to restart the computer.
device registration
11 Confirm
Confirm that the scanner has been correctly registered with the system as described in
“Confirming Device Registration (Windows 2000 Professional)” (
38).
37
Confirming Device Registration (Windows 2000 Professional)
After registering the scanner, confirm that the device is working normally as described below.
1
2
Turn the scanner on
Make sure that the scanner is connected and turned on.
Open the System Properties dialog
From the Start menu, select Settings > Control Panel and double-click the System
icon.
3
Display the Device Manager
The System Properties dialog will be displayed. Open the Hardware tab and click
Device Manager….
4
Confirm that the scanner is listed under “Imaging devices”
If “Imaging devices” appears in the Device Manager, click the “+” to its left to
view the imaging devices currently registered with Windows. Confirm that your
scanner is listed.
If the Scanner Is Not Listed
If the scanner is not listed under “Imaging devices,” proceed to “Updating the
Device Driver (Windows 2000 Professional)” (
40).
38
5
Confirm that the scanner is working properly
Double-click the listing for your scanner
that appears under “Imaging devices.”
The scanner Properties dialog will be displayed. Click the General tab and confirm that “This device is working properly” appears under “Device Status.” If
another message is displayed, proceed to
“Updating the Device Driver (Windows
2000 Professional)” (
40).
39
Updating the Device Driver (Windows 2000 Professional)
If the scanner is not listed under “Imaging devices” in the Device Manager or the message
“This device is working properly” does not appear in the Properties dialog, you will need to
reinstall the device driver as detailed below.
1
Open the scanner Properties dialog
Display the Device Manager as described in steps 1–3 of “Confirming Device Registration
38). If the scanner is listed under “Other devices” or
(Windows 2000 Professional)” (
appears next to a “!”, “?”, or “×”, double-click the entry for the scanner to display the
scanner Properties dialog.
2
Click Update Driver…
Open the Driver tab and click Update
Driver….
3
Click Next
When the Upgrade Device Driver wizard
is displayed, click Next.
40
4
Select the search option
Select the search option and click Next.
5
Insert the Nikon Scan 3 CD
Holding down the shift key to prevent the
Welcome program from starting automatically, insert the Nikon Scan 3 CD into
the CD-ROM drive.
The Welcome Window
If the Welcome program starts automatically when you insert the Nikon Scan CD,
click Exit to close the Welcome window.
6
Reinstall the drivers
Reinstall the drivers as described in steps 3–8 of “Registering the Scanner with Windows
2000 Professional” (
35–37).
7
Click Finish
When the Wizard displays a message stating that it has found the drivers for your
scanner, click Finish to complete installation. If prompted to restart the computer,
click Yes.
8
Confirm device registration
Confirm that the scanner has been correctly registered with the system as described in
“Confirming Device Registration (Windows 2000 Professional)” (
38–39).
41
Windows Millennium Edition (Me)
Registering the Scanner with Windows Me
1
Turn the scanner on
The first time the computer detects the
scanner, Windows will display the dialog
shown at right. After confirming that the
Nikon Scan CD is inserted in the CD-ROM
drive, select the search option and click
Next.
Inserting the Nikon Scan CD
If the Nikon Scan CD is not in the CDROM drive, insert the disk while holding
down the shift key to prevent the Welcome program from starting automatically.
2
Select LS8000ME.INF
Select LS8000ME.INF in the list of drivers and click OK.
“LS8000ME.INF”
Several drivers with similar names may be
displayed. Be sure to select LS8000ME.INF.
The Welcome Window
If the Welcome program starts automatically when
you insert the Nikon Scan CD, click Exit to close
the Welcome window.
42
3
Click Finish
Click Finish to complete installation.
4
Restart the computer
Click Yes to restart the computer.
5
Confirm device registration
Confirm that the scanner has been correctly registered with the system as described in
“Confirming Device Registration (Windows Me)” (
44).
43
Confirming Device Registration (Windows Me)
After registering the scanner, confirm that the device is working normally as described below.
1
2
Turn the scanner on
Make sure that the scanner is connected and turned on.
Open the System Properties dialog
From the Start menu, select Settings > Control Panel and double-click the System
icon.
3
Display the Device Manager
The System Properties dialog will be displayed. Open the Device Manager tab.
4
Confirm that the scanner is listed under “Imaging Device”
If “Imaging Device” appears in the Device Manager, click the “+” to its left to
view the imaging devices currently registered with Windows. Confirm that your
scanner is listed.
If the Scanner Is Not Listed
If your scanner is not listed under “Imaging Device,” proceed to “Updating the
Device Driver (Windows Me)” (
46).
44
5
Confirm that the scanner is working properly
Double-click the listing for your scanner
that appears under “Imaging Device.”
The scanner Properties dialog will be displayed. Click the General tab and confirm that “This device is working properly” appears under “Device Status.” If
another message is displayed, proceed to
“Updating the Device Driver (Windows
Me)” (
46).
45
Updating the Device Driver (Windows Me)
If the scanner is not listed under “Imaging Device” in the Device Manager or the message
“This device is working properly” does not appear in the Properties dialog, you will need to
reinstall the device driver as detailed below.
1
Open the scanner Properties dialog
Display the Device Manager as described in steps 1–3 of “Confirming Device Registration
(Windows Me)” ( 44). If the scanner is listed under “Other devices” or appears next to
a “!”, “?”, or “×”, double-click the entry for the scanner to display the scanner Properties
dialog.
2
Click Update Driver…
Open the Driver tab and click Update
Driver….
3
Insert the Nikon Scan 3 CD
The Upgrade Device Driver wizard will be
displayed. Holding down the shift key to
prevent the Welcome program from starting automatically, insert the Nikon Scan
3 CD into the CD-ROM drive.
The Welcome Window
If the Welcome program starts automatically when you insert the Nikon Scan CD,
click Exit to close the Welcome window.
46
4
Select the search option
Select the search option and click Next.
5
Select LS8000ME.INF
Select LS8000ME.INF in the list of drivers and click OK.
“LS8000ME.INF”
Several drivers with similar names may be
displayed. Be sure to select the driver with
the path ending in LS8000ME.INF.
6
Click Finish
Click Finish to complete installation. If
prompted to restart the computer, click
Yes.
7
Confirm device registration
Confirm that the scanner has been correctly registered with the system as described in
“Confirming Device Registration (Windows Me)” (
44–45).
47
Windows 98 Second Edition (SE)
Registering the Scanner with Windows 98 SE
Before beginning device registration, make sure that you have completed the IEEE 1394 update described in “Installing the IEEE 1394 Update for Windows 98 Second Edition” (
17).
1
Turn the computer on
Make sure that the computer is on, and that the scanner is off and connected to the
computer via the IEEE 1394 cable.
2
Turn the scanner on
Turn the scanner on and wait for Windows to display a message.
If the Insert Disk Dialog is displayed
If a message appears prompting you to
insert the Windows 98 Second Edition
CD, click OK and proceed to step 3a. Do
NOT insert the Windows 98 Second Edition CD.
If the Add New Hardware Wizard is
displayed
If the dialog shown at right is displayed,
click Next and proceed to step 3b.
If no message is displayed
If no message is displayed after sixty seconds, proceed to “Updating the Device
Driver (Windows 98 SE)” (
53).
“ntmap.sys”
3a Locate
The dialog shown at right will be displayed. Click Browse.
48
Navigate to “C:\windows\system32\ drivers” by selecting “C:” from the list of
drives and double-clicking in turn on each
of the following folders: “windows”,
“system32”, and “drivers.” “ntmap.sys”
will be selected in the list of files. Click
OK and confirm that the scanner has
been correctly registered with the system
as described in “Confirming Device Registration (Windows 98 SE)” (
51). This
completes device registration.
the Nikon Scan 3 CD
3b Insert
The dialog shown at right will be displayed. Holding down the shift key to
prevent the Welcome program from starting automatically, insert the Nikon Scan
3 CD into the CD-ROM drive, then select
the search option and click Next.
The Welcome Window
If the Welcome program starts automatically when you insert the Nikon Scan CD,
click Exit to close the Welcome window.
4
Select Specify a location
Select Specify a location and click
Browse.
The Welcome Window
If the Welcome program starts automatically when
you insert the Nikon Scan CD, click Exit to close
the Welcome window.
49
5
Select the Win98SE folder
The Browse for Folder dialog will be displayed. Select the “Win98SE” folder
under “Nkscan” > “INF” > “Ls8000” and
click OK.
6
Confirm the file path
The dialog shown at right will be displayed. Confirm that the path
“\INF\LS8000\Win98SE” appears after the
drive letter of the CD-ROM drive and click
Next.
If the Correct Path Is Not Displayed
If the correct path is not displayed, repeat
steps 4–6 to select the correct path.
7
Begin installation of the device drivers
Click Next.
8
Click Finish
Click Finish to complete installation.
9
Confirm device registration
Confirm that the scanner has been correctly registered with the system as described in “Confirming Device Registration (Windows 98 SE)” (
51).
50
Confirming Device Registration (Windows 98 SE)
After registering the scanner, confirm that the device is working normally as described below.
1
2
Turn the scanner on
Make sure that the scanner is connected and turned on.
Open the System Properties dialog
From the Start menu, select Settings > Control Panel and double-click the System
icon.
3
Display the Device Manager
The System Properties dialog will be displayed. Open the Device Manager tab.
4
Confirm that the scanner is listed under “Imaging Device”
If “Imaging Device” appears in the Device Manager, click the “+” to its left to
view the imaging devices currently registered with Windows. Confirm that your
scanner is listed.
If the Scanner Is Not Listed
If your scanner is not listed under “Imaging Device,” proceed to “Updating the
Device Driver (Windows 98 SE)” (
53).
51
5
52
Confirm that the scanner is working properly
Double-click the listing for your scanner
that appears under “Imaging Device.”
The scanner Properties dialog will be displayed. Click the General tab and confirm that “This device is working properly” appears under “Device Status.” If
another message is displayed, proceed to
“Updating the Device Driver (Windows 98
SE)” (
53).
Updating the Device Driver (Windows 98 SE)
If the scanner is not listed under “Imaging Device” in the Device Manager or the message
“This device is working properly” does not appear in the Properties dialog, you will need to
reinstall the device driver as detailed below.
1
Open the scanner Properties dialog
Display the Device Manager as described in steps 1–3 of “Confirming Device Registration
51). If the scanner is listed under “Other devices” or appears next
(Windows 98 SE)” (
to a “!”, “?”, or “×”, double-click the entry for the scanner to display the scanner Properties dialog.
2
Click Reinstall Driver…
Open the Driver tab and click Reinstall
Driver….
3
Click Next
When the Update Device Driver wizard is
displayed, click Next.
4
Select the search option
Select the search option and click Next.
5
Insert the Nikon Scan 3 CD
The dialog shown at right will be displayed. Holding down the shift key to
prevent the Welcome program from starting automatically, insert the Nikon Scan
3 CD into the CD-ROM drive, then select
Specify a location and click Browse.
The Welcome Window
If the Welcome program starts automatically when you insert the Nikon Scan CD,
click Exit to close the Welcome window.
53
6
Select the Win98SE folder
The Browse for Folder dialog will be displayed. Select the “Win98SE” folder under “Nkscan” > “INF” > “Ls8000” and
click OK to return to the dialog shown in
step 5. Confirm that the path “\INF\
LS8000\Win98SE” appears after the drive
letter of the CD-ROM drive and click
Next.
7
Begin installation of the device drivers
A dialog will be displayed stating that
Windows has found the drivers for the
device. Click Next.
8
Click Finish
Click Finish to complete installation.
9
Confirm device registration
Confirm that the scanner has been correctly registered with the system as described in
“Confirming Device Registration (Windows 98 SE)” (
51–52).
54
Scanning
This chapter describes how to make your first scan.
Step 1—Ready the Film ............................. 56
Step 2—Place the Film in the Holder ........ 58
Step 3—Insert the Holder .......................... 60
Step 4—Scan the Slide ............................... 61
○○○○
55
Step 1—Ready the Film
The holder you will use depends on the type of film scanned. This example illustrates how to
scan 35-mm film using the FH-835S film holder provided with your scanner. The FH-835S is
used when scanning strips of 35-mm film up to six frames in length. Up to two film strips can
be placed in the holder at a time. When scanning a single film strip, or when scanning two
strips of different lengths, use the masking sheet to mask the unused apertures in the holder.
FH-835S film holder for 35-mm film strips
35-mm film
56
Masking sheets
With the holder oriented so that the insertion guide is to the left, insert your fingers into the
holes in the lower portion holder to unlatch the hooks holding the upper cover in place, then
open the holder.
Insertion guide
Upper cover Hooks (× 2)
57
Step 2—Place the Film in the Holder
Place the film to be scanned in the holder with the matte emulsion surface down (the shiny
surface up) and the frames aligned with the apertures in the lower portion of the holder.
Apertures
Place the second strip of film in the holder as described above, aligning it with the next row of
apertures. Neither strip should be longer than the row of apertures.
Scanning Single Strips
When scanning film strips one at a time, be sure to cover the remaining apertures with a masking sheet. Place the film at the front of the
holder, where frame numbering starts. For more information, see page
81 of this manual.
58
Openings are provided in the upper cover to allow you to adjust the position of film before
latching the cover closed. Using these openings, insert a pointed object, such as a pen, in the
film perforations and adjust the position of the film so that the frames are aligned with the
apertures in the holder.
Close the upper cover so that the latches click into place. Nikon Scan will display thumbnails in
the order shown below.
Perforations
Openings
Direction of insertion
59
Step 3—Insert the Holder
After confirming that the status LED is glowing steadily, slide a holder into the holder slot as
shown below, with the insertion guide up and pointing toward the scanner. Do not insert the
holder at an angle. Once the holder has been inserted as far as the insertion guide, the scanner’s
loading mechanism will be activated and the holder will be fed into the scanner automatically.
Remove your hands from the holder when loading starts. Loading will stop when the holder is
in scanning position.
Insertion guide
Inserting Holders
Holders can not be inserted into the scanner if the sliding cover is not fully open.
When inserting holders in the scanner, do not use force. When a holder is inserted, the scanner
readies the loading mechanism. Removing the holder or otherwise interfering with loading can
cause scanning errors. Do not attempt to forcibly remove the holder during or after loading.
When ejecting the holder, always use the button on the front of the scanner or the eject button
in the Nikon Scan scan window.
If the holder does not load automatically when inserted, remove the holder and try again. Before
insertion, remove any dust or lint with a blower.
60
Step 4—Scan the Slide
The actual scan is performed using Nikon Scan (for detailed information on using Nikon Scan,
see the Nikon Scan 3 Software Manual).
Nikon Scan can be used as a “stand-alone” application for scanning images and saving them
to disk as described below. It can also be used to scan images directly into any application that
supports TWAIN (Windows) or Adobe Photoshop 5.0 acquire plug-ins (Mac OS 9 or earlier).
Nikon Scan can not be used to scan images into third-party applications in Mac OS X.
Windows
Select Nikon Scan from the application’s list of “Acquire” or “Import” sources.
Mac OS 9 or Earlier
Before starting the application, make sure that the Nikon Scan 3 plug-in (Nikon Scan Plugin
3.1) has been copied into the Import/Export folder in the application’s plug-in folder. You can
then scan images into the application by selecting Nikon Scan from the application’s list of
“Acquire” or “Import” sources.
For more information, see the documentation for the application in question.
Making a Scan
Starting Nikon Scan
Windows
From the Start menu, select All Programs > Nikon Scan 3.1 > Nikon Scan 3.1 (Windows XP)
or Programs > Nikon Scan 3.1 > Nikon Scan 3.1 (other versions of Windows).
Mac OS X
Open the folder Applications : Nikon Software :
Nikon Scan 3 on the startup disk and doubleclick the Nikon Scan 3 icon.
Mac OS 9 or Earlier
Open the Nikon Software folder in the location to which you installed Nikon Scan (the
default location is the root directory of the
startup disk) and double-click the Nikon Scan
3.1 icon.
61
Using Nikon Scan
This example illustrates how to scan 35-mm film using the FH-835S film holder.
Using Nikon scan for the First Time
The first time you run Nikon Scan, the status LED will emit five series of rapid blinks (each of about three
seconds duration) when you first insert holder with the scanner on or if you start Nikon Scan for the first
time with the scanner on and a holder in place. This does not indicate an error. Do not eject the holder. If
you ejected the holder while the status LED was blinking, turn the scanner off and then on again and
restart Nikon Scan.
62
1
Choose the type of film to be scanned
from the Nikon Scan media-type
menu.
2
Choose a color model from the colormodel menu. Calibrated RGB is the
best choice in most circumstances. The
Grayscale option is for use when scanning black-and-white (monochrome)
film, while CMYK is intended for professionals who wish to create a file
ready for printing on an industrial
four-color printer.
Pg.
26
For more information on:
Making a scan
63
3
Choose the frames to be scanned
Click the thumbnail drawer tab to open the thumbnail drawer (the thumbnail drawer is
not available when the optional FH-869GR rotating glass-covered holder for medium format film is inserted in the scanner).
Thumbnail drawer tab
Frames are identified by frame number (the number of frames displayed varies with the
type of holder used). To view frames as small preview images (thumbnails), click the
button. The button will change to
; click the button again to return to the framenumber display.
Click here to display and hide thumbnails
Thumbnail area
64
If the thumbnail drawer is too small to display all frames at once, you can enlarge the drawer by
dragging the lower right corner, or use the scroll bar to view frames that can not be displayed
in the drawer.
Scroll bar
Drag to enlarge thumbnail area
The frame to be scanned can be selected by clicking the associated frame number or thumbnail. To select multiple frames, hold down the Ctrl (Windows) or command (Macintosh) key
while clicking frames one at a time, or hold down the shift key while clicking two images to
select these images and all frames between them.
Selected thumbnail
65
4
Click the Preview button
Click the Preview button to create a preview of the image to be scanned. You can also
create a preview by double-clicking a selected frame in the thumbnail drawer.
Preview button
The preview will be displayed in the preview area.
Preview area
66
5
Adjust scan settings
For steps 6 through 10, you will use the tools in the “Tool Chest.” The Tool Chest is a
window of tool palettes, each containing controls for a specific task, such as selecting the
area to be scanned, adjusting contrast, color, and sharpness, setting the scan size and
resolution, or compensating for defects in the original, such as grain or fading. If the Tool
Chest is not already open, you can display the Tool Chest by clicking the Tools button in
the scan window and selecting Tool Palette 1 from the menu that appears.
Tools button
Menu
Tool Palette 1
Pg.
40
For more information on:
The Tool Chest
67
6
Rotate or flip the image
If necessary, you can rotate or flip the preview image. Click the triangle at the top left
corner of the Layout Tools palette in the Tool Chest to view the controls in the Layout Tools
palette.
In this example, the
button is used to rotate the image 90 ° to the right.
Click to open Layout Tools palette
The image in the preview area can be rotated and flipped using the following four buttons:
Rotate the image ninety degrees to the right
Rotate the image ninety degrees to the left
Flip the image horizontally
Flip the image vertically
Any flips and rotations performed on the image are reflected in the orientation of the
letter “R” in the Layout Tools palette.
Pg.
43
68
For more information on:
The Layout Tools palette
7
Compensate for defects
Click the triangle at the top left corner of the Digital ICE cubed (Digital ICE3) palette in the
Tool Chest to view the controls in the Digital ICE cubed palette (for more information on
Digital ICE3, see page 51 of the Nikon Scan 3 Software Manual).
Click
Digital ICE
To remove dust and scratches from the image, check Enable Digital ICE and select Normal or Fine from the Digital ICE menu. A setting of Fine can be used to remove very fine
scratches or barely visible dust, although this may sometimes result in reduced sharpness.
The effects of Digital ICE can be viewed by clicking the Preview button to refresh the
preview image.
Digital ROC, Digital GEM
To restore faded colors or reduce the effects of film grain, first check Enable Post Processing. Faded colors can be restored adjusting the Digital ROC (for Restoration of Color)
slider, while the image can be processed to minimize grain using the Digital GEM (for
Grain Equalization and Management) slider. The default values for these sliders are 5 and
3, respectively. Setting the sliders to zero turns the options off, while moving the sliders to
the right increases their effect. To view the effects of Digital ROC or Digital GEM in the
preview image, click the Redraw button.
Important
Because of the complexity of the processing involved, Digital ICE3 operations require additional time to
perform. The time required is determined in part by the processing power of your computer and in part by
the size of the image.
Pg.
51
For more information on:
Digital ICE3
69
8
Select a crop
Select a portion of the image for scanning. This selection is referred to as the “crop.”
Click the Crop tool ( ) in the Layout Tools palette and drag the mouse to select a crop.
The borders of the crop are indicated by a dotted line.
Selected area (“crop”)
○
○
○
○
○
○
○
○
○
○
○
○
○
○
○
○
○
○
○
○
○
○
○
○
○
○
The size of the crop can be changed by dragging its boundaries. To change the position of
the crop, place the cursor inside the selected area and drag it to a new location.
70
9
Choose an output size and resolution
If desired, you can specify the dimensions and resolution of the final image (“output size
and resolution”). Click the triangle at the top left corner of the Crop palette to view the
controls in the Crop palette.
Click
The Crop palette contains three options for determining output size: Keep this crop,
Keep this output size, and Keep this file size.
Output units menu
Output size
text boxes
File size
text box
Resolution
text box
Scale slider
Pg.
46
Output resolution menu
For more information on:
The Crop palette
71
• Keep this crop
Choose Keep this crop when you want to select the precise area to be scanned using the
mouse, then adjust the output resolution and size according to how the image will be used.
Enter a value for resolution suited to the device on which the image will be printed or
displayed in the Resolution text box, or select a resolution that matches the device from the
options listed in the output resolution menu. You can then choose the units for output size
from the output units menu and enter a value for either Width or Height in the output size
text boxes. The other dimension will be adjusted automatically to maintain the crop selected in the preview area.
• Keep this output size
Choose this option when you want to select the general area to be scanned using the
mouse, then specify the exact dimensions of the image to fit it into a pre-determined space,
for example in a magazine or on a web page. Follow the directions above to select the
output resolution and output units, then enter the desired values for Width and Height in
the output size text boxes. The crop selected in the preview area will automatically be
adjusted to maintain the crop at these proportions.
• Keep this file size
Choose this option when you want to select the general area to be scanned using the
mouse and then specify the exact file size of the final image, for example to keep file sizes to
a minimum for storage or electronic transfer, or because you have been asked for a file of a
certain size. Enter a value for file size in the file size text box and select the units for file size
from the menu to its right.
72
color, contrast, and sharpness
10 Adjust
Color, contrast, brightness, and sharpness can be adjusted as necessary using the tool palettes listed below. For more information, see the Nikon Scan 3 Software Manual (on CD).
Curves
The Curves palette makes it possible to adjust color balance and contrast in specific portions of the tone range. For example, you can selectively enhance detail in dark portions of
the image (shadow), brighten mid-tones, or bring out details in highlights. Changes can
be made to all the component colors in the image or only to specific color components
(channels).
Color Balance
The Color Balance palette can be used to adjust brightness, contrast, and color balance
over the entire tone range.
LCH Editor
The LCH Editor is used to adjust brightness and contrast in specific portions of the tone
range, edit chroma to modify color saturation, or “vividness,” and change one set of hues
(or colors) in the image to a different color.
Unsharp Mask
The tools in the Unsharp Mask palette sharpen outlines, either throughout the image or
only where specific colors predominate.
To open any of the above palettes, click the triangle at its top left corner.
Click
Pg.
63
76
78
85
For more information on:
Curves
Color Balance
The LCH Editor
Unsharp Mask
73
To view the effects of any changes that have been made and compare them with the
original, use the Processed and Natural tabs in the preview area to switch back and forth
between the processed and original image. The image produced when you click the Scan
button to open the image in the host application will be the same as the image in the
Processed tab.
The Processed/Natural Tabs
When using Nikon Scan as a stand-alone application, you can use the Ctrl-T (Windows) or
keyboard shortcut to switch between the Processed and Natural tabs.
74
-T (Macintosh)
11 Click the Scan button to begin scanning.
Scan button
When scanning is complete, the image will be displayed in an image window.
Windows
Macintosh
Scanned images can be saved and reopened for editing in another application, such as
Photoshop.
Image Windows
You can close the scan window if it blocks your view of the image in the image window.
75
additional images
12 Scan
To scan additional images after closing the scan window, select the scanner from the
Nikon Scan > Tools menu. In Windows, you can also open the scan window by selecting
Open TWAIN Source from the File menu. If you are using Nikon Scan to scan images
directly into another application, open the scan window by selecting Nikon Scan from the
application’s list of “Acquire” or “Import” sources. You can then repeat steps 1 to 11 (
63–75) to scan additional images.
To scan additional strips of film, remove the holder from the scanner by pressing the scanner eject button or clicking the eject ( ) button in the Nikon Scan scan window.
Eject button
Important
The holder will automatically be ejected if you turn the scanner off and then on again.
Caution
Do not, under any circumstances, touch the holder as it is being ejected from the scanner. Wait
for the holder to be fully ejected and the remove the holder from the scanner.
The holder will not be ejected if the eject button in the scan window is clicked when the sliding
cover on the front of the scanner is not fully open. Open the slot cover fully before clicking the
eject button.
76
13 Exit Nikon Scan and turn the scanner off
13-1. Eject the holder
Press the eject button to eject the holder (see step 12).
13-2. Close the sliding cover
Slide the cover closed.
Sliding cover
13-3. Exit Nikon Scan
If you are using Nikon Scan as a “stand-alone” application, choose Exit (Windows) or
Quit (Macintosh) from the File menu to exit Nikon Scan. If you are using Nikon Scan to
scan images directly into another application, simply close the scan window by clicking
the close box.
77
13-4. Turn the scanner off
If you are using a Macintosh or a computer running Windows XP or Windows 2000
Professional, wait for the status LED to stop blinking and then turn the scanner off by
pressing the power button. If you are using Windows Me or Windows 98 SE, you must
first remove the scanner from the system as described below.
Windows Me
Shut down the computer. Once the computer has turned off, press the power button
to turn the scanner off.
Windows 98 SE
Click the “Unplug or Eject Hardware” button in
the taskbar and select Stop Nikon SUPER
COOLSCAN 8000 ED from the menu that appears.
A message will be displayed stating that the scanner can be safely removed from the system; click OK and follow the on-screen instructions to terminate the transfer of data between the scanner and the computer. You
can then turn the scanner off by pressing the power button.
If you fail to perform this step before disconnecting the scanner or turning it off, the dialog shown at right will be displayed.
78
Film Holders for the 8000 ED
This chapter describes how to insert film in the various types of
film holder available for the 8000 ED.
Holders Provided with Your Scanner ................. 80
Optional Holders ................................................ 94
○○○○
79
Holders Provided with Your Scanner
Three holders are provided with your scanner, each for use with a different type of film.
When scanning
Use
35-mm film strips up to six
frames in length
FH-835S holder for 35-mm film strips
The FH-835S can be used to scan two strips of film up to six frames in
length.
Mounted 35-mm slides
Medium-format (120/220)
film strips
80
FH-835M holder for mounted 35-mm slides
The FH-835M can be used to scan up to five slides at a time.
FH-869S holder for Brownie film
The FH-869S can be used to scan strips of 120/220 film or 59 × 82 mm
film for electron microscopes.
Using the FH-835S Holder for 35-mm Film Strips
The FH-835S is used when scanning strips of 35-mm film up to six frames in length. Up to two
film strips can be placed in the holder at a time. When scanning a single film strip, or when
scanning two strips of different lengths, use the masking sheet to mask the unused apertures
in the holder (
84).
Masking sheets
With the holder oriented so that the insertion guide is to the left, insert your fingers into the
holes in the lower portion holder to unlatch the hooks holding the upper cover in place, then
open the holder.
Insertion guide
Upper cover
Hooks (× 2)
81
Place the film to be scanned in the holder with the matte emulsion surface down (the shiny
surface up) and the frames aligned with the apertures in the lower portion of the holder.
Apertures
Lower holder
Cautions
Use only one type of film at a time. Do not place negative and positive film in the holder at the
same time.
To avoid damaging the film, use a blower to remove dust and lint from the film and holder.
Leaving dust, lint, or other foreign objects on the film or holder during scanning could result in
reduced image quality or in damage to the film.
82
Openings are provided in the upper cover to allow you to adjust the position of film before
latching the cover closed. Using these openings, insert a pointed object, such as a pen, in the
film perforations and adjust the position of the film so that the frames are aligned with the
apertures in the holder.
Perforations
Openings
Close the upper cover so that the latches click into place.
Thumbnails are displayed in the thumbnail drawer in the scan window in the order shown
below.
Direction of insertion
Caution
When adjusting the position of the film, care should be observed to avoid damaging the perforations. Do not attempt to adjust the position of the film when the holder is latched. Failure to
observe this precaution could result in damage to the film.
83
Masking Sheets
When scanning film strips one at a time, be sure to cover the remaining apertures with a masking sheet.
Make sure to place the film strip on the left side and the mask strip of the right side with respect to the
direction of insertion as shown below.
Masking sheet
When scanning two strips of different lengths, cover any open apertures by cutting a masking sheet into
the appropriate lengths and placing it over the apertures. Leaving apertures open when scanning film of
different lengths can interfere with accurate color reproduction.
Masking sheet
When scanning two film strips containing less than six frames but of equal length, place the film so that it
covers the apertures at the end of the holder that will be inserted in the scanner.
Direction of
insertion
Leaving the apertures at the front of the holder uncovered can interfere with accurate color reproduction.
84
Inserting Film and Masking Sheets
Cut the masking sheets to the length needed to cover open apertures. Make sure that the film
and masking sheets are inserted between the guides. If you insert the holder into the scanner
with film riding up on the guides, the film holder may jam in the scanner.
85
Once scanning is complete, press the eject button on the front of the scanner or click the eject
button in the scan window to eject the holder. Remove the holder and close the sliding cover.
Eject button
Removing Film from the Holder
Open the holder as described above and remove the film. Insert your fingers in the holes in the
lower holder and pick the film up by its edges. If the edges of the film are not accessible, tilt the
holder so that the film slides to the edge of the depression at the end of the lower holder and
then remove the film.
Depression
Holes
86
Using the FH-835M Holder for Mounted 35-mm Slides
The FH-835M is used when scanning mounted 35-mm slides. Up to five slides can be placed in
the holder at a time. Insert the slides with the matte emulsion surface down (the shiny surface
up). Slide the mounts into place between the guides, oriented to match the apertures in the
holder. Stop when the slide comes into contact with the base of the clips.
Mount guides
Thumbnails are displayed in the thumbnail drawer in the scan window in the order shown
below.
Direction of
insertion
87
Cautions
Mounts must be 1.0–3.2 mm in thickness. Other mounts can not be used.
Do not use force when inserting slides. Failure to observe this precaution could damage the clips
that hold the mounts in place. Should you encounter resistance, try inserting the slides at a slight
angle.
Be sure to insert slides between the guides. The scanner may not be able to adjust focus correctly
if slides are placed on top of the guides. Inserting the slides on top of the guides could also
damage the clips that hold the mounts in place.
Do not leave slides in the holder for extended periods. Failure to observe this precaution could
deform the clips that hold the slides in place.
To avoid damaging the film, use a blower to remove dust and lint from the film and holder.
Leaving dust, lint, or other foreign objects on the film or holder during scanning could result in
reduced image quality or in damage to the film.
88
Once scanning is complete, press the eject button on the front of the scanner or click the eject
button in the scan window to eject the holder. Remove the holder and close the sliding cover.
Eject button
Removing Slides from the Holder
Slide the mounts out from under the clips that hold them in place.
Cautions
Do not use force when removing the slides. Failure to observe this precaution could result in
damage to the clips that hold the slides in place. Do not lift the slides up until they have been
fully removed from the clips.
89
Using the FH-869S Holder for Brownie Film
The FH-869S is used when scanning medium-format (120/220) or 59 mm × 82 mm film for
electron microscopes. The number of frames that can be scanned depends on the type of film:
6 × 4.5:
up to four frames
6 × 9:
up to three frames
6 × 7–6 × 9:
up to two frames
Insert your fingers in the depressions and unlatch the hooks, then open the upper holders.
Cautions
Use only one type of film at a time. Do not place negative and positive film in the holder at the
same time.
Be sure to place the end of the film against the stop. Leaving a gap between the film and the
stop could interfere with accurate color reproduction.
To avoid damaging the film, use a blower to remove dust and lint from the film and holder.
Leaving dust, lint, or other foreign objects on the film or holder during scanning could result in
reduced image quality or in damage to the film.
90
Insert the film with the matte emulsion surface down (the shiny surface up), with the end of
the film against the stop, then lower the upper holders until they click into place.
Film stop
Thumbnails are displayed in the thumbnail drawer in the scan window in the order shown
below.
Direction of
insertion
91
Curled Film
Follow the steps below to remove curl from medium-format film.
1
Slide the latch in the direction indicated by the arrow.
Latch
2
Slide the movable base outwards by pushing the grips lightly with your fingers to remove
curl from the film. Do not apply excessive force, as this could push the film out of alignment
(to prevent this, press the upper holder slightly downwards before sliding it outwards).
3
After adjusting the position of the movable base, turn the locking screw clockwise to tighten it.
Film that has more than 10 mm of curl can not be used. Use the optional FH-869G glass-covered brownie
film holder or optional FH-869GR glass-covered rotating brownie film holder.
Do not leave the film in the holder for extended periods, as it may leave marks in the film.
92
Once scanning is complete, press the eject button on the front of the scanner or click the eject
button in the scan window to eject the holder. Remove the holder and close the sliding cover.
Eject button
Removing Film from the Holder
Open the upper cover and take hold of the film by the edge at the rear of the holder.
93
Optional Holders
Five types of holder are available for separate purchase, each for use with a different type of
film.
When scanning
Use
Mounted medium-format
film
FH-869M holder for mounted Brownie film
The FH-869M can be used to scan 6 × 4.5, 6 × 6, 6 × 7, or 6 × 9 slides.
Medium-format film strips
FH-869G glass-covered holder for Brownie film strips
The FH-869G can be used to scan strips of medium-format (120/220)
film or 59 mm × 82 mm electron microscope film.
Medium-format film strips
FH-869GR glass-covered rotating holder for Brownie film
The FH-869GR can be used to scan medium-format (120/220) film, 59
mm × 82 mm film for electron microscopes, or frames of panorama
film 24 × 58 mm or 24 × 65 mm in size.
Panorama film
94
When scanning
Use
16-mm film strips up to
twenty frames in length
FH-816 16-mm film holder
The FH-816 can be used to scan from one to three strips of 16-mm film
up to twenty frames in length
Glass 26 mm × 76 mm
microscope slides of prepared tissue samples
FH-8G1 medical holder
The FH-8G1 can be used to scan up to three prepared glass 26 mm ×
76 mm microscope slides
95
Using the FH-869M Holder for Mounted Brownie Film
The FH-869M is used when scanning mounted medium-format (Brownie) film. It can be used
to scan up to two slides, one 6 × 4.5 or 6 × 6, the other 6 × 7, 6 × 8, or 6 × 9. Place the 6 × 4.5
or 6 × 6 slide at the front of the holder, the 6 × 7, 6 × 8, or 6 × 9 slide at the back. Insert the
slides with the matte emulsion surface down (the shiny surface up). Slide the mounts into
place between the guides, oriented to match the apertures in the holder. Stop when the slide
comes into contact with the base of the guides.
Mount guides
96
Thumbnails are displayed in the thumbnail drawer in the scan window in the order shown
below.
Direction of
insertion
Cautions
Do not place negative and positive film in the holder at the same time.
To avoid damaging the film, use a blower to remove dust and lint from the film and holder.
Leaving dust, lint, or other foreign objects on the film or holder during scanning could result in
reduced image quality or in damage to the film.
Mounts must be 1.0–3.2 mm in thickness. Other mounts can not be used.
Do not use force when inserting slides. Failure to observe this precaution could damage the clips
that hold the mounts in place. Should you encounter resistance, try inserting the slides at a slight
angle.
Be sure to insert slides between the guides. The scanner may not be able to adjust focus correctly
if slides are placed on top of the guides. Inserting the slides on top of the guides could also
damage the clips that hold the mounts in place.
97
Once scanning is complete, press the eject button on the front of the scanner or click the eject
button in the scan window to eject the holder. Remove the holder and close the sliding cover.
Eject button
Removing Slides from the Holder
Slide the mounts out from under the clips that hold them in place.
Cautions
Do not leave the film in the holder for extended periods, as it may deform the clips that hold the
slide mounts in place.
Do not use force when removing slides from the clips. Failure to observe this precaution could
result in damage to the clips. Lift the slides up only once they are clear of the clips.
98
Using the FH-869G Glass-Covered Holder for Brownie Film
The FH-869G is used when scanning medium-format (120/220) or 59 mm × 82 mm film for
electron microscopes. The number of frames that can be scanned depends on the type of film:
6 × 4.5:
up to four frames
6 × 6:
up to three frames
6 × 7–6 × 9:
up to two frames
Slide the knob in the direction shown below and open the glass cover.
Glass cover
Sliding knob
Cautions
Use only one type of film at a time. Do not place negative and positive film in the holder at the
same time.
Be sure to align the end of the film with the film line on the holder. Leaving a gap between the
film and the line could interfere with accurate color reproduction.
Multiple single-frame strips of film can be inserted in the holder at the same time, but be sure not
to mix positive and negative film.
The bottom side of the glass cover has been treated to prevent interference. Avoid leaving fingerprints or other stains on the glass.
To avoid damaging the film, use a blower to remove dust and lint from the film and holder.
Leaving dust, lint, or other foreign objects on the film or holder during scanning could result in
reduced image quality or in damage to the film.
A “Newton ring” interference pattern may appear when scanning film that has been folded or
otherwise deformed. This can be prevented by placing a masking sheet under the film.
99
Placing Seals Between Frames
Newton’s rings (a radial interference pattern) may appear when you scan film that has been bent out of
shape or otherwise distorted. When scanning film that has been folded or twisted, attach seals to the
emulsion surface of the film between all frames but the first and second, and then place the film on the
masking sheet emulsion side down (shiny surface up). Seals can be reused.
Seals
Masking sheets
1 Place a masking sheet of the appropriate size in the holder.
2 Place seals on the emulsion surface of the film between all but the first two frames.
Seals
Emulsion surface
Place film in holder, seals down
100
With the shiny surface of the film up (the emulsion side with seals in place down), place the film
3 between
the film guides with the beginning of the first exposure against the inner edge of the masking
sheet.
First exposure
Masking sheet
Film guides
4 Snap the cover closed.
5 Insert the holder as shown. The frames will appear in the thumbnail drawer in the order shown below.
Direction of
insertion
101
Once scanning is complete, press the eject button on the front of the scanner or click the eject
button in the scan window to eject the holder. Remove the holder and close the sliding cover.
Eject button
Removing Film from the Holder
Open the glass cover and tilt the holder so that the film slides to the depressions in the lower
holder, then insert your fingers in the depressions and remove the film.
Depression
102
Using the FH-869GR Glass-Covered Rotating Holder for Brownie Film
The FH-869GR is used when scanning medium-format (120/220) film, 59 mm × 82 mm film for
electron microscopes, or 24 × 65 panorama film. Film can be adjusted by ±5° to compensate
for camera angle. Multi-frame strips can be scanned one frame at a time without cutting the
film into strips one frame long.
Slide the knob in the direction shown below and open the upper cover.
Upper cover
Sliding knob
Place a masking sheet appropriate to the size of film to be scanned in the holder, aligning the
holes in the masking sheet with the guide pins in the holder. Place the film between the guide
rails, with the matte emulsion surface down (shiny side up). Align the frame to be scanned
with the aperture in the masking sheet. Close the upper cover so that the latch clicks into
place.
Guide pins
Masking sheet
103
When scanning with the FH-869GR, be sure to use a mask suited to the film to be scanned and
to align the frame to be scanned with the aperture in the masking sheet.
When using a 59mm by 82 mm electron microscope film, a 6 by 9 masking sheet should be
used.
Guide pins
Masking sheet
Aperture
104
The film angle can be adjusted up to ±5°. Loosen the locking screw by rotating it counterclockwise and adjust the film angle, using the marks at the front of the holder as a guide (each
mark is equivalent to 1°). Once you have adjusted the film to your satisfaction, rotate the
locking screw clockwise to tighten it.
Angle indicator
Locking screw
Cautions
Use only one type of film at a time. Do not place negative and positive film in the holder at the
same time.
Use a mask that matches the film scanned. Failure to observe this precaution could interfere with
accurate color reproduction.
To avoid damaging the film, use a blower to remove dust and lint from the film and holder.
Leaving dust, lint, or other foreign objects on the film or holder during scanning could result in
reduced image quality or in damage to the film.
105
Once scanning is complete, press the eject button on the front of the scanner or click the eject
button in the scan window to eject the holder. Remove the holder and close the sliding cover.
Eject button
Removing Film from the Holder
Open the upper cover and insert your fingers in the depressions in the lower holder to pick the
film up by its edges.
Depressions
Caution
The bottom side of the upper cover has been treated to prevent interference. Avoid leaving
fingerprints or other stains on the glass.
106
Using the FH-816 Holder for 16-mm Film Strips
The FH-816 is used when scanning strips of 16-mm film up to twenty frames in length. Up to
three film strips can be placed in the holder at a time.
Insert your fingers into the holes in the lower portion holder to unlatch the hooks holding the
upper cover in place, then open the holder.
Upper cover
Hooks (× 2)
Place the film to be scanned in the holder with the matte emulsion surface down (the shiny
surface up) and the frames aligned with the apertures in the lower portion of the holder. Close
the upper cover so that the latches click into place.
Cautions
Use only one type of film at a time. Do not place negative and positive film in the holder at the
same time.
To avoid damaging the film, use a blower to remove dust and lint from the film and holder.
Leaving dust, lint, or other foreign objects on the film or holder during scanning could result in
reduced image quality or in damage to the film.
107
Masking Sheets
When scanning film one or two strips at a time, be sure to cover the remaining apertures with a masking
sheet.
Masking sheets
When scanning two or three strips of different lengths, cover any open apertures by cutting a masking
sheet into the appropriate lengths and placing it over the apertures. Leaving apertures open when scanning film of different lengths can interfere with accurate color reproduction.
Masking sheets
When scanning three film strips containing less than twenty frames but of equal length, place the film so
that it covers the apertures at the end of the holder that will be inserted in the scanner.
Direction of
insertion
Leaving the apertures at the end of the holder that will be inserted in the scanner uncovered can interfere
with accurate color reproduction.
108
Inserting Film and Masking Sheets
Make sure that the film and masking sheets (
108) are inserted between the guides. If you
insert the holder into the scanner with film riding up on the guides, the film holder may jam in
the scanner.
109
Thumbnails are displayed in the thumbnail drawer in the scan window in the order shown
below.
1
Direction of
insertion
21
2
41
22
3
42
23
4
43
24
5
44
25
•
45
•
•
•
•
•
•
•
•
•
•
•
•
•
•
•
•
•
•
•
•
•
•
•
•
•
•
•
•
•
•
•
•
•
•
•
•
•
• 4
•
0
• 2
0
• 6
0
Once scanning is complete, press the eject button on the front of the scanner or click the eject
button in the scan window to eject the holder. Remove the holder and close the sliding cover.
Eject button
110
Removing Film from the Holder
Open the holder as described on page 107 and remove the film. Insert your fingers in the holes
in the lower holder and pick the film up by its edges. If the edges of the film are not accessible,
tilt the holder so that the film slides to the edge of the depression at the end of the lower
holder.
Depression
Holes
111
Using the FH-8G1 Medical Holder
The FH-8G1 is used when scanning 26 mm × 76 mm glass microscope slides containing prepared tissue samples. Up to three slides can be placed in the holder at a time. Slides must
conform to the following specifications:
Total thickness:
2 mm or less
Dimensions (slide):
width 26 mm, length 76 mm, thickness 0.8–1.5 mm
Dimensions (cover):
width 25 mm or less, length 60 mm or less, thickness 0.18 mm
or less
Insert the slides under the clips. Slides should be inserted between the guides, with the cover
facing upwards. Stop when the slide comes into contact with the base of the clips.
Clips
Cautions
Do not use force when inserting slides. Failure to observe this precaution could damage the clips
that hold the mounts in place. Should you encounter resistance, try inserting the slides at a slight
angle.
Be sure to insert slides between the guides. The scanner may not be able to adjust focus correctly
if slides are placed on top of the guides. Inserting the slides on top of the guides could also
damage the clips that hold the mounts in place.
Do not leave the slides in the holder for extended periods, as it may deform the clips that hold the
slide mounts in place.
Use a blower to remove dust and lint from the slides and holder. Leaving dust, lint, or other
foreign objects on the slides or holder during scanning could result in reduced image quality.
Do not use Digital ICE3 when scanning microscope slides. When Digital ICE3 is used, noise may
appear in the preview image or final scan.
The FH-8G1 can also be used to scan mounted 35-mm film. You should not, however, place
microscope slides and 35-mm slides in the holder at the same time.
112
Thumbnails are displayed in the thumbnail drawer in the scan window in the order shown
below.
Direction of
insertion
Once scanning is complete, press the eject button on the front of the scanner or click the eject
button in the scan window to eject the holder. Remove the holder and close the sliding cover.
Eject button
113
Removing Slides from the Holder
Slide the slides out from under the clips that hold them in place.
Cautions
Do not use force when removing slides from the clips. Failure to observe this precaution could
result in damage to the clips. Lift the slides only once they are clear of the clips.
114
Nikon Scan
This chapter provides a brief overview of Nikon Scan, the software that drives your Nikon scanner. For more information, see
the Nikon Scan 3 Software Manual, available in pdf format on
the Nikon Software Manual CD provided with your scanner.
Viewing the Nikon Scan 3 Software Manual ..... 116
The Scan Window .................................... 118
○○○○
115
Viewing the Nikon Scan 3 Reference Manual
Your Nikon scanner is controlled using Nikon Scan driver software, which must be installed
before you can use your scanner. The operating manual for Nikon Scan may be found on the
reference CD provided with your scanner, where it is stored in Adobe Acrobat Portable Document Format (pdf). To view the manual, you will require Adobe Acrobat Reader 4.0 or later.
English, German, Spanish, French, Italian, Japanese, and Dutch versions of Adobe Acrobat
Reader 4.0 can be found on the reference CD. To install Acrobat Reader, follow the instructions
below.
1
2
3
Insert the software manual CD in the CD-ROM drive. Macintosh users can proceed
to Step 3.
(Windows only)
Double-click the My Computer icon. In the My Computer window, double-click
the CD-ROM drive labeled “Nikon.”
The Nikon window will open on the desktop. Double-click the folder for the language of your choice.
Windows
4
Macintosh
Double-click the Setup (Windows) or installer (Macintosh) icon.
Windows
Macintosh
To get the most from your scanner, please read the documentation provided.
116
5
Follow the on-screen instructions to complete installation.
Windows
Macintosh
Once installation is complete, you will be able to view the Nikon Scan Reference Manual by
double-clicking the INDEX.pdf icon in the root directory of the reference CD and choosing
a language from the menu that appears.
Windows
Macintosh
Important
When installing Nikon Scan, be sure to exit all other programs, including virus-checking software
and Adobe Acrobat Reader. If desired, before installing Nikon Scan you can print the “Getting
Started” section of the Reference manual, which details the installation process.
117
The Scan Window
The Parts of the Scan Window
H
G
F
A
B
C
118
E
D
I
A
Control area
Contains the most frequently used scanning and preview controls.
B
Information panel
Provides information on current scan settings.
C
Preview button
Click to preview the frame to be scanned. The preview shows how the image will look
when it is scanned.
D
Scan button
Click to scan the selected portion of the image into the host application.
E
Interactive help
Gives a brief tip about the control under the mouse cursor.
F
Thumbnail drawer tab
Click to select frames to be scanned from multi-frame film.
G
Preview area
The preview image is displayed here.
H
Tool chest
Contains tools for:
• setting the image orientation and choosing the portion of the image to be scanned
• controlling the physical dimensions and file size of the image when opened in the host
application
• enhancing color, contrast, and sharpness
• removing the effects of scratches, dust, fading, and film grain
• controlling scanner settings
I
Scan Progress window
Shows what actions are being performed, and gives a log of automated tasks.
119
The Control Area
Eject Button
Autofocus Button
Ejects the holder from the scanner.
Click to focus the scanner on the center of the
image, or control-click (Windows) or optionclick (Macintosh) to select a new focus point.
Autoexposure Button
Zoom Buttons
Before scanning, the scanner needs to gather
information about the image to adjust exposure for best results. Click this button to adjust
exposure.
Click the
button button to zoom in on the
current crop, enlarging it to fill the preview
area. Click the
button to zoom out.
Settings Menu
Color Model Menu
Using the options in this menu, you can reset
the scanner to default settings, or save scanner
settings suited to particular scanning conditions
and recall them as desired.
Select a color model according to the capacities of your image editing software and
whether the image is destined for output on a
commercial four-color printing press or display
on a monitor.
120
Media Type Menu 1
Media Type Menu 2
When using the FH-869S or optional FH-869G
or FH-869GR holders for medium format film,
choose a setting that matches the media in the
scanner (6 × 4.5, 6 × 6, 6 × 7, 6 ×x 8, 6 × 9, etc.)
Adjusts scanner settings to match the media in
the scanner.
Window Buttons
• Prefs: click to open the preferences dialog
• Help: click to open the Nikon Scan help file
• Tools: open the Tool Chest or Scan Progress
windows
121
The Information Panel
Orientation
Dimensions/File Size
Shows the orientation of the preview image
relative to the original, reflecting any flips or
rotations that have been performed.
Gives the height and width of the current crop
in pixels, and the size of the file that will result
if the crop is scanned at the current output size
and resolution.
Image Enhancement
Scanner Extras
Indicates whether Digital ICE3 and analog gain
are in effect. Remember to use Digital ICE3 only
when needed, as turning Digital ICE3 on can
substantially increase scanning times.
Indicates the current bit depth (which determines the maximum number of colors in the
image), whether multi-sample scanning is in
effect, and the selected scanning mode (single
or three line).
Color Values
Gives the color values for the pixel under the
cursor in the Natural tab (top row) or Processed
tab (bottom row). Only the top row is displayed
if no changes have been made to color settings
in the Processed tab.
122
The Preview Button
The Scan Button
Clicking this button displays a preview of the
image to be scanned (if multiple frames are
selected in the thumbnail drawer, a preview will
be performed for each frame). You will need
to create a new preview after changing the
media type or using the zoom buttons.
Scans the image and opens it in the host application (if multiple frames are selected in the
thumbnail drawer, each frame will be scanned
and opened in a separate window).
The Thumbnail Drawer Tab
Clicking this tab opens the thumbnail drawer, where you can select the frame to be scanned by
clicking the associated frame number. To view the frames as small previews (thumbnails), click
the
button. Multiple frames can be selected by clicking each frame in turn while holding
down the control (Windows) or command (Macintosh) key, or by holding down the shift key
while clicking two frames to select these frames and all the frames between them.
The Processed/Natural Tabs
These tabs allow for a quick “before-and-after” comparison showing the effects of any changes
made to the image using the tools in the Tool Chest. The Processed tab how the image will look
when scanned at current settings, the Natural tab shows how the image looked before processing.
123
The Tool Chest
Layout Tools
Information
Use these tools to select the portion of the image to be scanned (the “crop”) and to rotate
and flip the image prior to scanning. You can
also select a new focus area and scroll images
that have been opened in Nikon Scan after
scanning.
Gives the height and width of the current crop
and the coordinates of its top left corner. The
color value display shows the color of the pixel
under the cursor before and after processing.
Crop
Curves
This is where you adjust the resolution and size
of the image according to the output device
(printer or monitor) on which the image will
be displayed.
One of three color editing tools offered by
Nikon Scan, the curves tool is useful when adjusting contrast and making changes to color
balance that effect only a specific portion of
the tone range (shadows, mid-tones, or highlights).
Color Balance
LCH Editor
Use the color balance tools to make adjustments to brightness, contrast, and color balance
that affect the entire image.
Like the Curves tool, the LCH editor can be used
to adjust brightness and contrast in shadows,
mid-tones, and highlights. It also incorporates
hue and chroma editors, which provide extremely flexible tools for adjusting color.
124
Unsharp Mask
Digital ICE Cubed
Unsharp mask increases the sharpness of the
image by making edges more distinct, either
over the entire image or in areas where specific colors are prominent.
Three tools are available:
• Digital ICE: reduces the effects of dust and
scratches
• Digital ROC: restores colors lost through
fading
• Digital GEM: reduces the effect of film grain
Analog Gain
Scanner Extras
Using analog gain, you can adjust colors by directly altering the exposure value for each of
the colored elements in the scanner’s light
source.
These tools offer control over features specific
to your scanner.
125
The Scan Progress Window
This window shows the progress of preview and scan operations. The current task can be
cancelled by clicking the Stop button. Tasks that have yet to be performed are listed in the
Queue tab and can be cancelled by selecting the task and clicking the
button. When
performing multiple (batch) scans, the tasks completed are listed in the Log tab.
The progress of preview and scan operations is indicated as shown above.
126
Reference
This chapter includes maintenance tips, troubleshooting instructions, product specifications, and an index.
Maintenance ............................................ 128
Troubleshooting ...................................... 131
Specifications ........................................... 134
Index ......................................................... 138
○○○○
127
Maintenance
Caring for Your Scanner
Storing the Scanner
When not using the scanner, turn it off, remove any holders from the scanner, and slide the
cover closed as shown below.
Sliding cover
If you will not be using the scanner for an extended period, turn off and unplug the scanner.
Store the scanner where:
• the temperature is between minus twenty and plus sixty degrees Centigrade (–4°F – +140°F)
• the humidity is between twenty and ninety percent (no condensation)
Servicing Your Scanner
Your scanner is a precision machine. We recommend that you take the scanner and holders to an authorized Nikon service representative once every one to two years for inspection, and once every three to five
years for servicing (a fee is charged for these services). Frequent inspection and servicing are particularly
recommended in the case of scanners used in commercial applications.
Caution
When not using the scanner, close the cover to prevent the accumulation of dust inside the device.
128
Cleaning the Scanner
Before cleaning the scanner, turn it off and unplug the power cord. The front of the scanner is
made of plastic, and consequently cannot be cleaned with volatile cleaners such as alcohol or
paint thinner. Use a blower to blow off dust or wipe the surface with a dry cloth. Remove dirt
from the metal rear panel of the scanner using a soft, dry cloth. If this is not sufficient to
remove all dirt, clean with a cloth that has been slightly dampened with a neutral detergent or
liquid soap.
Transporting the Scanner
Follow the steps below to prepare the scanner for transport.
1
2
3
4
5
6
Turn the scanner on and remove any holders.
Close the sliding cover.
Wait for the status LED on the front of the scanner to stop blinking.
Turn the scanner off.
Disconnect the power and interface cables.
Package the scanner in the original packing materials.
Cautions
Nikon scanners are certified for use in the country or region of sale. Transportation and use outside the country or region of sale are at the user’s own risk and responsibility.
Where the original packing materials are not available, package the scanner carefully in materials at least as shock resistant as the originals.
129
Caring for Holders
Storage
When not using the holders, remove them from the scanner. If you will not be using a holder
for an extended period, store it where:
• the temperature is between minus twenty and plus sixty degrees Centigrade (–4°F – +140°F)
• the humidity is between twenty and ninety percent (no condensation)
Cleaning
When cleaning the holder, do not use volatile cleaners such as alcohol or paint thinner. Use a
blower to remove dust. Clean dirt from the holder with a soft dry cloth, or dampen the cloth
with a neutral detergent to remove particularly stubborn stains, drying once cleaning is complete.
Transport
Package the holder in the original packing materials for transport.
Cautions
Where the original packing materials are not available, package the holder carefully in materials
at least as shock resistant as the originals.
Work with the holder and scanner on a table or other flat, stable surface. The holder or scanner
could be damaged should either fall to the floor.
130
Troubleshooting
Should you encounter problems with your scanner, refer to the following section and the troubleshooting section in the Nikon Scan Reference Manual before consulting your retailer or Nikon
representative.
Problem
Possible Cause
The scanner does not turn
on (the status LED does not
light)
• The power cable is not properly connected
After confirming that the scanner is off, reconnect the power
cable.
• The scanner is off
Turn the scanner on.
• The power supply to scanner has been interrupted
Try plugging a different device into the outlet used by the
scanner to determine whether the problem is caused by a
failed fuse or circuit breaker.
Holders can not be inserted
or removed
• The sliding cover is not fully open
Slide the cover down until it is fully open.
The status LED flashes
rapidly (scanner not connected to computer or
computer off)
• A scanner hardware malfunction has occurred
Turn the scanner off and disconnect it from the computer.
Wait five seconds, then turn the scanner on again. If the
problem persists, contact your retailer or Nikon service representative for advice.
25
26
–
60
–
131
Problem
The status LED flashes
rapidly (scanner connected
to computer)
Possible Cause
• A connection error or scanner hardware malfunction
has occurred
Turn the scanner and computer off and disconnect the scanner from the computer. Wait five seconds, then turn the
scanner on again. If the status LED flashes rapidly, a hardware malfunction has occurred. Contact your retailer or
Nikon service representative for advice. If the status LED
blinks slowly at first and then glows steadily, turn the scanner off and reconnect it to your computer, then start your
computer and turn the scanner on. If the status LED flashes
rapidly after the scanner is reconnected and turned on, there
may be a problem with the interface between the scanner
and the computer. Try the following measures to resolve
the problem:
• Disconnect all other devices that use same interface as the
scanner
• Re-install Nikon Scan
• Update the device drivers for IEEE 1394/Firewire interface
(Windows 98 SE only)
• Update the device drivers for your scanner (Windows only)
The quality of scanned
images is poor
132
• The film is not properly placed in the holder
Eject the holder and reposition the film.
• The holder was moved during scanning or scanner was
subjected to shock or vibration
Do not use the scanner where it will be subject to shock or
vibration. Failure to observe this precaution could result in
malfunction.
• Settings are improperly adjusted in Nikon Scan
Refer to the Nikon Scan Software Manual for information
on adjusting scanner settings, or try resetting scanner settings to factory defaults.
• The glass in the optional glass-covered holder (available separately) requires cleaning
Remove dust from the glass with a blower and wipe off any
stains with a soft cloth.
8
148
17
27
79
6
88
99
Problem
Possible Cause
Your computer does not
recognize the scanner
• The scanner is off
Turn the scanner on.
• The interface cable is not properly connected
After confirming that the scanner is off, reconnect the cable.
• The scanner was turned on with a holder inserted
After removing the holder and turn the scanner off and
then on again.
• Another device or program using the same interface
conflicts with the scanner or Nikon Scan
Remove all other hardware connected to the same bus as
the scanner. If the scanner is connected to a hub, extension cable, or other adapter, disconnect the adapter and
connect the scanner directly to the computer. If this does
not solve the problem, uninstall other software that uses
the same interface and re-install Nikon Scan.
• Your computer system does not meet the minimum
system requirements
See the Nikon Scan Software Manual for more information
on system requirements.
• The interface board is not compatible with Nikon Scan
Confirm that your IEEE 1394 (Firewire) interface board or
card is supported under Nikon Scan. At present, operation
has been confirmed only with the IEEE 1394 interface board
provided with your scanner. Operation is not guaranteed
with built-in IEEE 1394 ports or with expansion boards or
cards other than that provided with the scanner. More information on PCMCIA IEEE 1394 cards and on built-in IEEE 1394
interfaces is available on the web sites listed on page ix of
this manual. If your computer or expansion board or card is
not compatible with Nikon Scan, install the board provided
with your scanner (desktop computers) or use a Nikon-approved PCMCIA IEEE 1394 card (laptop computers).
• The interface board is not correctly installed
Check the documentation for your IEEE 1394 or Firewire
interface board.
• The device driver for your scanner is missing or corrupted (Windows only)
Check that the driver is correctly installed
• Nikon Scan is not correctly installed
Uninstall and re-install the software.
26
25
26
148
5
9
–
27
148
133
Specifications
Scanner Specifications
SUPER COOLSCAN 8000 ED (LS-8000 ED)
Film
Positive and negative film, both color and monochrome, may be used.
Film may be scanned in one or two strips of up to six frames or as 35-mm
slides using mounts 1.0–3.2 mm thick. Up to three frames of panorama
film with frame sizes of 24 × 58 mm or 24 × 65 mm can also be scanned.
• Medium-format (Brownie) film:
Positive or negative, 6 × 4.5, 6 × 6, 6 × 7, 6 × 8, or 6 × 9 film may be used,
either in strips of four (6 × 4.5), three (6 × 6), or two (6 × 7, 6 × 8, or 6 ×
9) frames or as mounted slides 1.0–3.2 mm thick.
• 16-mm film:
Positive and negative film, both color and monochrome, may be used.
• Prepared slides:
Prepared slides 26 × 76 mm in size can be scanned.
Aperture and scan range
25.4 × 37.5 mm, 4,000 × 5,904 pixels (35-mm film scanned using FH835S)
37.5 × 25.6 mm, 5,905 × 4,032 pixels (35-mm slides scanned using FH835M)
56.9 × 42.5 mm, 8,964 × 6,696 pixels (6 × 4.5 Brownie film*)
56.9 × 56.9 mm, 8,964 × 8,964 pixels (6 × 6 Brownie film*)
56.9 × 70.0 mm, 8,964 × 11,016 pixels (6 × 7 Brownie film*)
56.9 × 77.5 mm, 8,964 × 12,204 pixels (6 × 8 Brownie film*)
56.9 × 83.7 mm, 8,964 × 13,176 pixels (6 × 9 Brownie film*)
56.9 × 83.7 mm, 8,964 × 13,176 pixels (film for electron microscopes*)
15.0 × 21.48 mm, 2,362 × 3,384 pixels (16-mm film scanned using FH816)
46.02 × 24.0 mm, 7,248 × 3,780 pixels (prepared tissue sample scanning
using FH-8G1)
*When scanned using the FH-869S or optional FH-869G
Scanning system
Fixed-optical, movable-media parallel single-pass scanning-system
Light source
Three (R, G, B) LEDs
Slit (transmitted) light source with rod and disperser
Sensor
10,000-pixel, three-line, monochrome linear CCD image sensor
Color separation
Performed by RGB color LEDs
Optical resolution
Maximum 4,000 pixels per inch
Analog-to-digital (A/D) conversion
14 bits per color (RGB)
Focus
Autofocus
134
• 35-mm film:
Scanning time
Duration of Scanning on processes
Scanning time when using FH-835M holder
ICE
ROC
GEM
—
—
—
✔
—
—
—
—
—
✔
—
—
✔
✔
✔
—
✔
✔
—
✔
✔
✔
✔
✔
Scan, single frame
55 s
1 m 20 s
1 m 15 s
2 m 50 s
2 m 25 s
1 m 35 s
3 m 00 s
2 m 40 s
FH-869S holder
for Brownie film (6 x 9)
ICE
ROC
GEM
—
—
—
✔
—
—
—
—
—
✔
—
—
✔
✔
✔
—
✔
✔
—
✔
✔
✔
✔
✔
Scan, single frame
2 m 50 s
6 m 50 s
5 m 30 s
14 m 20 s
12 m 15 s
9 m 10 s
17 m 55 s
15 m 35 s
Computer:
RAM:
OS:
Interface board:
FMV715GTX6 (Pentium 4, 1.5 GHz)
1 GB
Windows 2000
IEEE 1394 interface board provided with scanner
Input resolution: 4000 dpi
Scan bit depth:
8 bit
CMS:
On
Media:
Positive
Interface
Power supply
Operating environment
Dimensions
IEEE1394
AC 100–240 V, 50/60 Hz
• Temperature: +10 – +35°C (+50 – +95°F)
• Humidity:
20–60%
245 × 485 × 200 mm/9.64˝ × 19.09˝ × 7.87˝ (W × D × H)
135
Holder Specifications
FH-835S Holder for 35-mm Strip Film
Film
One to two strips of 35-mm film containing a maximum of six frames each
Dimensions 130 × 320 × 17 mm/5.12˝ × 12.60˝ × 0.67˝ (W × D × H)
Weight
Approximately 200 g/7.1 oz
FH-835M Holder for 35-mm Slide Mounts
Film
One to five mounted 35 mm slides, 1.0–3.2 mm in thickness and 49.0–50.8
mm in width
Dimensions 130 × 345 × 17 mm/5.12˝ × 13.58˝ × 0.67˝ (W × D × H)
Weight
Approximately 180 g/6.4 oz
FH-869S Holder for Brownie Strip Film
Film
6 × 4.5:
1–4 frames
6 × 6:
1–3 frames
6 × 7, 6 × 8, 6 × 9: 1–2 frames
5.9 × 8.2 cm film for electron microscopes
Dimensions 130 × 320 × 17 mm/5.12˝ × 12.60˝ × 0.67˝ (W × D × H)
Weight
Approximately 290 g/10.4 oz
136
Specifications for Optional Holders
FH-869G Glass-Covered Holder for Brownie Film
Film
6 × 4.5:
1–4 frames
6 × 6:
1–3 frames
6 × 7, 6 × 8, 6 × 9: 1–2 frames
5.9 × 8.2 cm film for electron microscopes
Dimensions 130 × 300 × 17 mm/5.12˝ × 11.81˝ × 0.67˝ (W × D × H)
Weight
Approximately 300 g/10.7 oz
FH-869GR Glass-Covered Rotating Holder for Brownie Film
Film
6 × 4.5:
1–4 frames
6 × 6:
1–3 frames
6 × 7, 6 × 8, 6 × 9: 1–2 frames
5.9 × 8.2 cm film for electron microscopes
35-mm panorama film (frame size 24 × 58.24 or 24 × 65 mm)
Angle adjustment ±5º
Dimensions 130 × 320 × 17 mm/5.12˝ × 12.60˝ × 0.67˝ (W × D × H)
Weight
Approximately 330 g/11.8 oz
FH-869M Holder for Brownie Slide Mounts
Film
Up to two medium-format mounts, one 6 × 4.5 or 6 × 6, the other 6 × 7, 6 ×
8, or 6 × 9
Dimensions 130 × 320 × 17 mm/5.12˝ × 12.60˝ × 0.67˝ (W × D × H)
Weight
Approximately 170 g/6.1 oz
FH-816 Holder for 16-mm Film
Film
One to three strips of 16-mm film containing a maximum of twenty frames
each
Dimensions 130 × 375 × 17 mm/5.12˝ × 14.76˝ × 0.67˝ (W × D × H)
Weight
Approximately 250 g/8.9 oz
FH-8G1 Medical Holder
Media
Up to three prepared glass microscope slides of the dimensions listed below,
totaling no more than 2 mm in thickness including slide glass, cover glass,
and cement
Slide glass: 26 × 76 × 0.8–1.5 mm/1.02˝ × 2.99˝ × 0.03˝–0.06˝ (W × D × H)
Cover glass: 25 × 60 × 0.18 mm/0.98˝ × 2.36˝ × 0.01˝ or less
Dimensions 130 × 345 × 17 mm/5.12˝ × 13.58˝ × 0.67˝ (W × D × H)
Weight
Approximately 190 g/6.8 oz
137
Index
A
L
Accessories ..................................................... 4
Adobe Acrobat Reader installer icon ....... 116
Analog gain ................................................ 125
Angle indicator .......................................... 105
Aperture ....................................................... 58
Autoexposure ............................................. 120
Autofocus .................................................... 120
Layout tools ................................................ 124
LCH Editor .................................................... 73
Locking screw .............................................. 105
C
Color balance .............................................. 122
Color space .............................................. 19, 23
Color values ................................................. 122
Control area ....................................... 119, 120
Crop .............................................................. 70
Curves ................................................... 73, 124
D
Device drivers ............................................... 27
Digital ICE cubed .................................. 69, 125
Dust and lint .............................................. 6, 7
E
Eject button ................................................... 3
F
Film
curl ............................................................. 92
for electron microscopes ............ 90, 99, 103
emulsion surface of .................................. 82
panorama ................................................ 103
shiny surface of ......................................... 82
strips ............................................ 81, 99, 103
type .......................................................... 120
Film holders ........................................... 80, 130
FH-816 ................................................. 195, 107
FH-835M .................................................. 80, 87
FH-835S .......................................................... 80
FH-869G ................................................... 94, 99
FH-869GR ............................................... 94, 103
FH-869M .................................................. 94, 96
FH-869S ................................................... 80, 90
FH-8G1 .................................................. 95, 112
G
M
Macintosh ...................................................... 21
Masking sheet ..................... 4, 81, 85, 108, 109
Media type 1 ................................................. 21
Mount guides ................................................ 96
N
Newton rings .............................................. 106
Nikon Scan ............................................ 16, 117
installing .............................................. 11, 16
O
Orientation ................................................. 122
Output size ........................................... 71, 124
P
Perforations .................................................. 83
Power cable ............................................... 4, 25
Power switch ............................................. 3, 25
Preview .................................................. 66, 123
S
Scan window ............................................... 118
Scanner
caring for .................................................... 6
connecting ................................................. 25
setup ............................................................ 6
Scanning ........................................................ 75
Settings menu ............................................. 120
Slides ........................................................ 87, 96
Sliding knob ............................................ 87, 96
Sliding cover ................................................... 3
Specifications .............................................. 134
Status LED ................................................ 3, 26
T
Thumbnail previews ..................................... 64
Thumbnail drawer tab ...................... 119, 123
Tool palette ........................................... 67, 124
Grayscale ...................................................... 63
Guide pins ................................................... 103
U
H
W
Hooks .......................................................... 107
Windows 98 SE .................................. 14, 17, 48
Windows 2000 Professional ......................... 12
Windows Me ........................................... 13, 42
Windows XP ............................................ 11, 28
I
IEEE 1394 board .............................................. 9
IEEE 1394 interface cable ......................... 4, 25
Information panel ...................................... 122
Inspection .................................................... 128
Install. See Nikon Scan, installing
138
Unsharp mask ....................................... 73, 125