1
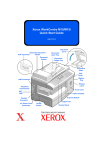
Xerox WorkCentre 5632
Quick Use Guide
Prepared by:
Xerox
GKLS European Operations
Bessemer Road
Welwyn Garden City
Hertfordshire
AL7 1BU
ENGLAND
©2007 by Xerox Corporation. All rights reserved.
Copyright protection claimed includes all forms and matters of copyrighted material and information now
allowed by statutory or judicial law or hereinafter granted, including without limitations, material generated
from the software programs which are displayed on the screen, such as icons, screen displays, looks etc.
Xerox®, and all Xerox products mentioned in this publication are trademarks of Xerox Corporation. Product
names and trademarks of other companies are hereby acknowledged.
Changes, technical inaccuracies and typographical errors will be corrected in subsequent editions.
WC5632/38/45/55: Logon
Network Accounting:
To access machine features:
1. Enter your User ID to access copy features, then
select [Enter]
(User ID = Blue Valley ID minus the leading zeros)
2. The Account ID = default Clicks Quick Key based on
the copier’s location.
You will only need to enter your Account ID when
using a machine in another
building.
NOTE: You can use the touchscreen and/or keypad
o enter your information
3. Complete your job.
4.
To Log Off:
Press [Access ] on the control panel.
Select [Logout] on the Touch Screen.
Network Authentication (required for scanning services):
To access scanning features:
1. Enter network user ID and select [Enter]
2. Enter password and select [Enter]
3. To Log Off:
•
•
Press [Access ] on the control panel.
Select [Logout] on the Touch Screen.
Getting Started
Control Panel Overview
Features
Displays the job features on the screen.
Job Status
Displays job progress
information.
Access
Help
Accesses Tools, used to adjust the
defaults of the machine.
Accesses additional
information.
Language
Clear All
Changes text to an alternative
language.
Resets all the features to their default
settings.
Machine Status
Displays the current status of the
machine.
Interrupt
Temporarily stops the current job to
allow a priority job to be run.
Power Saver Indicator
Indicates when the machine is in
Power Saver Mode.
Pause
Temporarily stops the current job.
*Use toAsterisk
start a DTMF (Dual Tone
Multi-frequency) operation.
Start
Starts the job.
Dial Pause
Enters a pause in a telephone
number when transmitting a fax.
Hash
Touch Screen
Displays and selects all the available programming
features, plus fault clearance procedures and general
machine information.
Quick Use Guide
Indicates the dialing
character or designates a
group dial number. Also
Deletes numeric
values or the last digit used when entering a
password.
entered.
Clear
Page 9
Getting Started
Power On or Off
1
To power ON:
¾
Press the [Power] switch. The entire powering on
process (to power on all installed options) takes less
than 165 seconds.
NOTE: Certain functions of the machine e.g. copying
and scanning will be available before others.
2
3
To power OFF:
¾
¾
Press the [Power] switch. A confirmation screen will appear requesting a power down
option.
If [Power Down] is selected the Power Down Confirmation screen displays a warning that
data may be lost if the machine is powered down.
NOTE: Confirmation of this screen will result in the deletion of any jobs currently in the
queue.
¾
Touch the [Confirm] button to power off the machine.
NOTE: The machine remains on for approximately 45 seconds before the power is
terminated.
¾
If [Enter Power Saver Mode] is selected, the machine will immediately enter the Power
Saver Mode appropriate to its configuration. If there are any jobs in the queue, a second
pop-up screen displays.
NOTE: To re-activate the machine when in this mode, touch a button on the Touch Screen or
control panel.
¾
If [Quick Restart] is selected and confirmed the machine will restart. A pop-up screen will
appear warning that any jobs in the queue will be deleted.
NOTE: Any copy jobs in the queue will be deleted, print jobs in the queue are recovered.
¾
Page 10
If [Cancel] is selected the power down options will be canceled and the machine will be
available for use.
Quick Use Guide
Getting Started
1
2
¾
Getting Started
Loading Paper
Open the required paper tray.
NOTE: Paper trays 1 and 2 are fully
adjustable for all stock sizes between A5 and
A3 (5.5"x8.5" and 11"x17"). Paper trays 3 and
4 are dedicated paper trays which can be
adjusted to hold either A4 or 8.5" x 11" long
edge feed paper only.
¾
Load paper. Paper must not be loaded
above the fill line.
¾
Close the tray.
NOTE: For paper trays 1 and 2, ensure the
guides are just touching the paper, otherwise
the size automatically detected may be
incorrect.
3
¾
Select [Confirm] OR select [Change Size] and/or [Change Type and Colour] to
reprogramme the tray if the paper size, type or colour has changed.
NOTE: Ensure the Size, Type and Colour are all correct. For standard copy paper the
following should apply:
Size - A4
Type - Plain paper
Colour - White
NOTE: Some machine configurations do not support envelope printing, please refer to
the Product Overview chapter for more information.
Quick Use Guide
Page 11
Getting Started
Making Copies
1
¾
Load the documents either in the
document handler or on the
document glass.
NOTE: Documents are only
scanned once.
2
3
¾
Access the Basic Copy screen - if necessary
select the [Features] button on the control
panel.
¾
Select the required features on the Touch Screen.
¾
Select the number of copies required.
¾
Press [Start].
Copy features include...
Page 12
• Producing stapled or hole punched sets, if there is
a finisher available
• Image Quality adjustment
• Auto Reduce/Enlarge
• Copying mixed size originals
• Adding printed or blank separators into
transparency sets
• Arranging multiple images on a page
• Adding printed or blank covers
• Adding Annotations
• Inserting printed or blank sheets or tabs
• Image Shift
• Erasing edges and borders
• Build Job to apply different programming within a
set of documents
• Storing the programming for frequently run jobs
• Creating booklets
Quick Use Guide
Getting Started
Saving for Reprint
1
¾
Load the documents either in the
document handler or on the
document glass.
NOTE: Documents are only
scanned once.
2
3
Page 14
¾
Access the Save Job for Reprint screen - if necessary select the [Features] button on
the control panel.
¾
Select the required option. Select [Save Only] if you want to store your document
without printing. Select [Copy and Save] if you want to print a copy and store your
document.
¾
Select the folder where you want to store your document.
¾
Select the required features on the Touch Screen.
¾
Press [Start].
Quick Use Guide
Getting Started
1
2
¾
Getting Started
Reprinting Saved Jobs
Access the Reprint Jobs screen - if necessary
select the [Features] button on the control
panel.
¾
Select the folder where you stored your document.
¾
Select the document from the list.
¾
Select the required features on the Touch Screen.
¾
Select the required option:
• Select [Print] if you want to print and then delete your document.
• Select [Print and Save] if you want to print and then save changes to your
document settings.
• Select [Save] to save changes to your document settings.
¾
Quick Use Guide
Press [Start].
Page 15
Getting Started
Sending an Embedded Fax
Embedded Fax is an optional walk up fax feature on your machine. If the Basic Fax screen
matches that displayed in step 2 then Embedded Fax is enabled. Refer to the System
Administration CD (CD1) for more information.
NOTE: Both Embedded and Server Fax can be installed on the WorkCentre at the same
time, however only one service can be enabled for use.
1
¾
Load the documents
either in the document
handler or on the
document glass.
NOTE: Documents are
only scanned once.
2
¾
Select [Fax].
NOTE: You may need to select [All
Services] first to access the fax
option.
3
¾
Enter the telephone number.
¾
Select the required features on the
Touch Screen.
¾
Press [Start].
Fax features include...
¾
¾
¾
¾
¾
¾
¾
¾
¾
Page 16
Adjusting the Resolution
Faxing double sided originals
Programming the size of the originals being scanned
Image Quality adjustment
Delaying the start time of a fax
Adding a Cover Letter
Sending to more than one recipient
Mailbox storage and polling to and from your machine
Setting the transmission speed
Quick Use Guide
Scanning a Document to a File
Refer to the System Administration CD (CD1) for more information on Network Scanning.
1
¾
Load the documents
either in the document
handler or on the
document glass.
NOTE: Documents are
only scanned once.
2
¾
Select [Network Scanning].
NOTE: You may need to select [All
Services] first to access the Network
Scanning option.
3
¾
Select the template required.
¾
Select the required features on the
Touch Screen.
¾
Press [Start].
¾
On completion access your job at
your workstation.
Network Scanning features include...
Adjusting the image output requirements
Adjusting the Resolution
¾ Scanning double sided originals
¾ Programming the size of the originals being scanned
¾ Changing the destination for the scanned image
¾
¾
Quick Use Guide
Page 19
Getting Started
Getting Started
Getting Started
Sending an E-mail
Refer to the System Administration CD (CD1) for more information on the E-mail feature.
1
¾
Load the documents
either in the document
handler or on the
document glass.
NOTE: Documents are
only scanned once.
2
¾
Select [E-mail].
NOTE: You may need to select [All
Services] first to access the e-mail
option.
3
¾
Select [To], enter the recipient
e-mail details and select [Enter].
¾
Select [Edit Subject], enter a
subject and select [Save].
¾
Select the required features on the
Touch Screen.
¾
Press [Start].
E-mail features include...
Setting up a Public or Internal Address Book
Adjusting the Resolution
¾ Scanning double sided originals
¾ Programming the size of the originals being scanned
¾ Image Quality adjustment
¾
¾
Page 20
Quick Use Guide
Printing from a PC
If your machine is connected to a network, documents can be printed directly from your PC
using the CentreWare Print Driver supplied. The Print Driver must be loaded on each PC
which uses the machine for printing.
1
2
¾
Select [Print] in your application.
¾
Select your machine as the printer.
¾
Select [Properties], make your
selections and click [OK].
¾
Click [OK] to print your document.
NOTE: Instructions may vary depending
on the application being used.
Print features include...
¾
¾
¾
¾
¾
¾
¾
¾
Quick Use Guide
Printing 1 or 2 sided
Producing stapled or hole punched sets, if available
Changing the printing Resolution
Adding a Banner Sheet
Adding a front cover
Adjusting the Image Quality
Adding a Watermark
Reprint Saved Jobs
Page 21
Getting Started
Getting Started
Getting Started
Sending a LAN Fax
Refer to the System Administration CD (CD1) for more information on the LAN Fax feature.
1
2
¾
Select [Print] in your application.
¾
Select your machine as the printer.
¾
Select [Properties].
¾
Select [Job Type] and then [Fax] from
the pull down menu.
¾
Enter the recipient details and select
the features required.
¾
Click [OK] to send your document.
NOTE: Instructions may vary depending
on the application being used.
LAN fax features include...
¾
¾
¾
¾
¾
¾
Page 22
Creating a Phone book
Confirmation Sheet
Send Speed
Resolution
Send Time
Cover sheet
Quick Use Guide
Getting Started
Further Assistance
1
2
3
Access the Job Queue
¾
Press the Job Status button on
the control panel. The All
Incomplete Jobs queue displays.
¾
Review the status of the job.
¾
Select [Other Queues] to access
and review the other queues
available.
Access the on-line Help
¾
Press Help at any time to
access the on-line help screens.
¾
Messages, screen instructions and
graphics provide additional
information.
For additional Help
If you need any additional help on using your machine you can:
¾
Refer to the Interactive User Guide CD (CD2), contained in the CD Pack
delivered with your machine.
¾
Refer to the System Administration CD (CD1) contained in the CD Pack
delivered with your machine.
¾
Visit our Customer Web Site at www.xerox.com or contact the Xerox Welcome
and Support Centre quoting the machine serial number.
¾
Press the [Machine Status]
button on the control panel.
¾
Select [Machine Details] to
display the machine serial
number.
NOTE: The serial number can also
be found on a metal plate inside
the front door.
Page 26
Quick Use Guide
Maintenance
Consumables
Consumables are items on the machine that need replenishing or replacing, such as paper,
staples, and customer replaceable units.To place an order for Xerox consumables, please
contact your local Xerox Representative giving your Company Name, product number and the
machine serial number.
HINT: For information about locating the serial number, please refer to “Locating the Serial
Number” on page -32.
To find out more information about each consumable please refer to the Maintenance section
of the Interactive User Guide CD (CD2), contained in the CD Pack delivered with your
machine.
Customer Replaceable Units
There are 5 replaceable units on the machine:
Xerographic Module
Replenisher Bottle (toner)
Fuser Module and Ozone Filter
Document Handler Feed Head
Waste Toner bottle
The machine will display a message on the Touch Screen when any of the above need to be
reordered. This message is a warning that the unit is nearing the end of its life.
Only replace the unit when a message actually instructs you to do so.
To replace a Replaceable Unit, follow the instructions on the User Interface or refer to the
Maintenance section of the Interactive User Guide CD (CD2), contained in the CD Pack
delivered with your machine.
CAUTION: When replacing consumables, DO NOT remove the covers or guards that
are fastened with screws. You cannot maintain or service any of the parts that are
behind these covers and guards. Do NOT attempt any maintenance procedure that is
NOT specifically described in the documentation supplied with your machine.
Staple Cartridges
If your machine is equipped with a finisher you will be required to replace the staple cartridge
or cartridges when the machine displays a message instructing you to do so.
To replace a staple cartridge, follow the instructions on the User Interface or refer to the
Maintenance section of the Interactive User Guide CD (CD2), contained in the CD Pack
delivered with your machine.
HINT: To place an order for any Xerox consumables, please contact your local Xerox
Representative giving your Company Name, product number and the machine serial
Quick Use Guide
Page 27
Maintenance
number.
CAUTION: When replacing consumables, DO NOT remove the covers or guards that
are fastened with screws. You cannot maintain or service any of the parts that are
behind these covers and guards. Do NOT attempt any maintenance procedure that is
NOT specifically described in the documentation supplied with your machine.
Cleaning the Machine
WARNING: When cleaning the machine do NOT use organic or strong chemical
solvents or aerosol cleaners. Do NOT pour fluids directly onto any area. Use supplies
and cleaning materials only as directed in this documentation. Keep all cleaning
materials out of the reach of children.
WARNING: Do not use pressurised air-spray cleaning aids on or in this equipment.
Some pressurised air-spray containers contain explosive mixtures and are not
suitable for use in electrical applications. Use of such cleaners can result in a risk of
explosion and fire.
1
Document Glass and Constant
Velocity Transport Glass
¾
Apply Xerox Cleaning Fluid or Xerox
Anti-Static Cleaner, to a lint-free cloth.
Liquid should never be poured directly
onto the glass.
¾
Wipe clean the entire glass area.
¾
Wipe away any residue with a clean
cloth or paper towel.
Constant velocity
transport glass
NOTE: Spots or marks on the glass will be reproduced on the prints when
copying from the document glass. Spots on the Constant Velocity Transport
Glass will show up as streaks on the prints when copying from the document
handler.
2
Touch Screen
¾
Use a soft, lint-free cloth, lightly
dampened with water.
¾
Wipe clean the entire area, including
the Touch Screen.
¾
Remove any residue with a clean cloth
or paper towel.
For more information about maintaining other areas of your machine please refer to the
Interactive User Guide CD (CD2), contained in the CD Pack delivered with your machine.
Page 28
Quick Use Guide
Maintenance
Page 30
Quick Use Guide
Troubleshooting
NOTE: For additional Troubleshooting information please refer to the Interactive User Guide
CD (CD2) or the System Administration CD (CD1).
Fault Clearance
1
When a fault occurs, a fault screen
displays which provides recovery
instructions.
¾
Follow these instructions to clear
the fault.
NOTE: Any printed sheets removed
will automatically be reprinted once
the paper jam is cleared.
2
Paper Jams
¾
The fault screen will indicate the
location of the jam.
¾
Use the green handles and knobs
indicated in the instructions displayed
on the screen to remove the jammed
paper.
¾
Ensure that all jam clearance handles
and levers are returned to their
correct positions. The red flashes
behind the jam clearance handles
and levers should not be visible.
NOTE: Jam Clearance areas vary
depending on your machine model and
configuration.
Quick Use Guide
Page 31
Troubleshooting
3
Document Jams
¾
Remove all the documents from the
document handler and document
glass as instructed.
¾
Re-order the documents as at the
start of the job and reload. The
documents will be recycled
automatically to recover the job.
If you are unable to clear the fault, refer to the next section to contact your local Xerox
Welcome and Support Centre for assistance.
Page 32
Quick Use Guide
WC5632/38/45: Call for Service or Phone Support
1-800-821-2797
Have your serial number ready. If you do not know your serial number, follow the steps below:
1.
Press the [Machine Status] button on the Control Panel. The Machine Status screen will be displayed.
2.
3.
Select the [Machine Information] tab on the Touch Screen.
Select the [Machine Details] button. The serial number will be displayed.
NOTE: The serial number can also be found on a plate on the machine, behind the Front Door.
To request training, please email: [email protected]
Additional Information including Video and Step-by-Step guides
can be found at:
http://www.bluevalleyk12.org/printing/copier