1
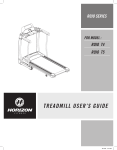
True Fitness Service Manual 455 Pediatric Treadmill True fitness technology, Inc. makes no representations or warranties regarding the contents of this manual. We reserve the right to revise this document at any time or to make changes to the product described within it without notice or obligation to notify any person of such revisions or changes. © 2004, True Fitness, Inc. All rights reserved. Printed in the United States of America. 865 Hoff Road. O’Fallon, MO 63366. 1-800-426-6570. Fax 636-272-3026. www.truefitness.com Revision 9/2004 Treadmill Preventative Maintenance Checklist Run calibration or run a manual program and watch and listen for anything out of the ordinary. Perform a push off test (page T-7) to check for proper lubrication. If excessive friction is found and lubrication doesn’t correct the problem perform the amp draw test (page T1-2) Inspect the belt surfaces, topside should still have texture for grip, bottom should be porous fabricnot glazed, smooth or hard. Inspect deck surface, should be free of scratches, abrasions or blistering. Listen for excessive bearing noise, from a standing position, in the front and rear roller and motor. Check for front roller/belt slippage and belt tension adjustment. Look for slippage on drive pulley. Inspect/ adjust tracking of belt. Vacuum out motor area, being careful not to damage PWM. Inspect drive belt for wear and cracking. Wipe down machine- leave it in better condition than you found it. True Fitness Treadmill Service Manual START Symptom guide Calibration Procedures Diagnostic Procedures Test Procedures Wiring Diagrams Part Manuals Page 1 SYMPTOM GUIDE Page 2 Error Code Definitions . . . . . . . . . . . . . . . . . . . . . . . . Page 3, 4 No Belt Movement Tread Belt Stops During Workout . . . . . . . . . . . . . . . . Page 7 Heart Rate Not Working / Erratic Readings . . . . . . . . Page 8 Elevation Not Functional . . . . . . . . . . . . . . . . . . . . .. . Speed Fluctuation: E2 Cal . . . . . . . . . . . . . . . . . . . . . . Page 10 Speed Fluctuation: S4, E5, E2 E3: EPROM . . . . . . . . . . . . . . . . . . . . . . . . . . . . . . .. . Page 11 No Display . . . . . . . . . . . . . . . . . . . . . . . . . . . . . . . . . . . Page 12 Circuit Breaker Trips at Start Up . . . . . . . . . . . . . .. . Page 13 Calibration Procedures . . . . . . . . . . . . . . . . . . . . . . . . Page 14 Diagnostics . . . . . . . . . . . . . . . . . . . . . . . . . . . . . . . . .. . . . . . . . . . . . . . . . . . . . . . . . . Page 5, 6 Page 9 Page 15 Symptom Probable Cause Corrective Action Recommended Tools ERROR MESSAGES: S1 L LUBE Indicates that the accumulated distance is such that the deck needs to be lubed S2 C CLEAN Indicates that the accumulated distance is such that the machine needs to be cleaned. S3 M MOTOR Indicates that the accumulated time on the treadmill is such that the motor brushes need to be changed/checked. • Lube deck with True Fitness liquid silicone lubricant. Inspect wax bar assembly on commercial models, if worn to less that ¼ inch in thicknessreplace wax bar. • Remove motor cover and vacuum dust from area. Wipe down the exposed area of the deck beside the straddle covers with a clean, dry cloth. • • Check/Replace motor brushes as needed. Reset timer. • Perform Speed Sensor Test page 21 SPEED SENSOR Cannot read speed sensor E1 S STALL Incline reading not changing when commanded • See Elevation Not Functional page 9. E1 I INCLINE Incline reading has changed without the incline being commanded. • See Elevation Not Functional page 9. E1 R RANGE Maximum or minimum elevation out of calibrated ranges • See Elevation Not Functional page 9. E5 S Support Services 800-883-8783 Mon-Fri 8:30am-5:00pm Central Time Zone Liquid silicone single use pack Liquid Silicone Applicator. Vacuum Shop towel Fax: 636-272-7148 Page 3 Symptom Probable Cause Corrective Action ERROR MESSAGES: (cont’d) Multi-meter Phillips head screwdriver E2 O OVERSPEED Belt speed ramping too fast. Perform Amp Draw Test – Page 17. Perform Belt / Deck Wear Test – Page 21. E2 C CALIBRATE Micro-controller cannot adjust belt speed to target. Calibrate Treadmill – Page 14. See appropriate Symptom Guide – pages 10-11. Software error during treadmill startup diagnostics. Restart Treadmill, if error persists- replace control panel. Treadmill has lost calibration settings. Recalibrate Treadmill – Page 14. (If unit loses programs- replace control panel) E3 E EEPROM E2 R RECALIBRATE Page 4 Recommended Tools Support Services 800-883-8783 Mon-Fri 8:30am-5:00pm Central Time Zone Fax: 636-272-7148 Symptom NO BELT MOVEMENT Probable Cause Treadmill in need of calibration. Corrective Action • Recommended Tools Run calibration. (page 14) Multi-meter PWM / Motor test cables -------Missing command to PWM. • Is PWM light blinking/ illuminated when fast button is pushed? NO- Check continuity on wire harness, if harness has continuity breaks replace the harness. If harness has continuity- replace the upper panel. Refer to wiring harness diagram for your model. YES- move on to next step, wire harness and control panel are OK. Note: All trouble shooting should be performed in calibration mode. Page 16 -------Missing/incorrect voltage to motor. • • • • • Damaged motor. With treadmill in calibration mode (page 14) Set speed at 4 MPH Check VDC across MTR 1 and MTR 2 with the motor leads connected to the motor the voltage should measure 10 VDC for every 1 MPH. If voltage is missing or low- Replace PWM. If voltage is greater than 20 VDC/MPH motor may have open windings. -------• • • • With PWM LED Blinking/ Illuminatedmove the tread belt with your foot to see if motor begins to move on its own. If motor begins to move, inspect the condition of the brushes and the commutator. If brushes are bad- replace brushes If motor doesn’t turn or has a damaged com segment- replace motor. Continue on next page… Support Services 800-883-8783 Mon-Fri 8:30am-5:00pm Central Time Zone Fax: 636-272-7148 Page 5 Symptom Probable Cause NO BELT MOVEMENT (cont’d) Motor turns but belt does not. Corrective Action • • Check belt tension. Set belt tension to 1/8-inch deflection or correct tension can be verified by twisting the belt almost to a 90-degree position. Recommended Tools Note: All trouble shooting should be performed in calibration mode. Page 14 -------- Belt cannot be moved manuallyforeign object under belt. Page 6 Support Services 800-883-8783 • Remove foreign object. Perform the Amp Draw Test (page 17) to check for excessive amp draw damage Mon-Fri 8:30am-5:00pm Central Time Zone Fax: 636-272-7148 Symptom TREADBELT STOPS DURING WORKOUT Error Code displays: Go to page 3 & Page 4. Probable Cause Loose safety key connection Corrective Action • • Recommended Tools Check safety key to ensure that it is seating properly. Check connection sensitivity. -------- Belt movement issue • If treadmill will not reset with cycling the power go to NO BELT MOVEMENT (pages 5 & 6) -------- Worn Deck / Belt • Perform Belt / Deck Wear Test (page 21). Perform Amp Draw Test (page 17). Apply silicone. Replace Deck and Belt. -------- • • • Occurs when making changes to speed or elevation • May be related to electro static discharge. Contact Technical support for assistance. Liquid silicone single use pack Liquid silicone Applicator Multi-meter Socket set Note: All trouble shooting should be performed in calibration mode. Page 14 -------Overloaded house circuit • • Verify the treadmill is on a dedicated circuit with at least a 15 amp breaker Have customer supply a dedicated circuit -------Continuity, connection to motor • Reconnect or replace motor wires or connectors -------- Tread belt not centered or obstructed Support Services 800-883-8783 • • • Tension tread belt (page 19) Center tread belt Remove obstruction Mon-Fri 8:30am-5:00pm Central Time Zone Fax: 636-272-7148 Page 7 Symptom Probable Cause HEART RATE NOT WORKING / ERRATIC READINGS Incorrect power source Corrective Action • • • Verify that the treadmill is connected to a dedicated line, 15-amp circuit, and not on an extension cord. Move to proper outlet. Test 110 VAC outlet for proper ground Recommended Tools Multi-meter Double sided tape Heart rate simulator -------Improper treadmill grounding • • Proper grounding is vitally important. Ensure that the pedestal wire harness ground lead is secure -------Improper heart rate receiver mount • Defective Chest Strap • • Ensure that the HR receiver is not touching metal and is mounted with the wires in a vertical position with the blue receiver facing the runner Note: All trouble shooting should be performed in calibration mode. Page 14 -------Does the receiver pick up a signal from the HR simulator? If yes, replace chest strap -------- Defective receiver • Does the heart rate LED on the control panel blink? If not then replace the receiver. -------- Radio Frequency Interference Page 8 Support Services 800-883-8783 • Locate RF sources and use process of elimination. Common sources of RF interference are: Invisible fences for pets; wireless networks; cordless phones, Cell phones, radios, home security sensors, etc. Mon-Fri 8:30am-5:00pm Central Time Zone Fax: 636-272-7148 Symptom ELEVATION NOT FUNCTIONAL ( E1 ERROR) Probable Cause Improper grounding / Calibration (May cause unit to drift up & down without command) Corrective Action • • • Recommended Tools Test 110VAC outlet for proper grounding If unit has not been calibrated – calibrate Ensure that incline cables are secure on PWM Multi-meter Alligator clip -------Unit is stuck at full incline • • • • Verify the lower limit switch is properly connected to the PWM Remove the LLS wire from the PWM and short the two posts of the connector together with an alligator clip. Cycle the power. If the treadmill lowers itself then replace the lower limit switch. Perform Incline potentiometer calibration procedure (page 20) If incline nut is stripped- replace incline nut Note: All trouble shooting should be performed in calibration mode. Page 14 -------- Defective Start Capacitor • • • • • Do Up/Down command LED’s light? If No- skip to defective PWM section. If yes- does motor hum with no movement? If yes- check the leads to the capacitor for breaks, if no breaks- replace capacitor. If No- replace PWM. -------- Defective PWM • • • Support Services 800-883-8783 If no Up/Down LED’s light check continuity on data cables. If cables are good- replace Upper Panel. If cables bad- Replace data cables. Mon-Fri 8:30am-5:00pm Central Time Zone Fax: 636-272-7148 Page 9 Symptom Probable Cause SPEED FLUCTUATION E2: CAL Speed Fluctuation (Due to high friction) Corrective Action • • Perform Push Off Test (page 21) Perform Amp Draw Test (page 17) • • • • Silicone Lubrication Packet Silicone Lubrication Applicator Check Line voltage for fluctuations. Have customer take corrective action. -------- Bad Data Feedback Multi-meter Socket Set -------- Speed Fluctuation (Due to Voltage fluctuation) Recommended Tools Verify tach feedback accuracy through out the speed range. If inaccurate perform speed sensor test (page 18) Note: All trouble shooting should be performed in Calibration Mode: See Page 14 -------- Incorrect Speed Sensor Gap • • Verify correct Speed sensor Gap. Gap should be equal to the thickness of (3) credit cards pressed together (approximately 1/8 to ¼ inch) ------ Page 10 Support Services 800-883-8783 Mon-Fri 8:30am-5:00pm Central Time Zone Fax: 636-272-7148 Symptom SPEED FLUCTUATION Probable Cause Corrective Action Recommended Tools Multi-meter No Belt Movement • Go to page 5, 6. Socket Set -------- S4: Sensor E5: Speed Sensor E2: Overspeed E3: EPROM Error No/Intermittent Tach Feedback • • • • Silicone Lubrication Packet Enter Calibration mode (page 14) Verify speed feedback in speed display through out the speed range. [Speed display should never show 0 mph when belt is moving] If no tach feedback is available perform speed sensor test (page 18). Check continuity of tach feedback portion of the data cable (To identify tach feed back lines see wiring diagram section for specific model). -------- Overspeed Error • • • • Silicone Lubrication Applicator Note: All trouble shooting should be performed in calibration mode. Page 14 Check/Adjust tread belt tension (page 20) Perform speed sensor test (page 18) If speed sensor fails adjust gap, if still fails-replace speed sensor. Perform belt / deck wear test (page 21) If badly worn, replace belt and deck. Replace PWM -------- E3: EPROM Error Software error during treadmill startup Support Services 800-883-8783 • Restart unit- if error persists, replace control panel. Mon-Fri 8:30am-5:00pm Central Time Zone Fax: 636-272-7148 Page 11 Symptom Probable Cause NO DISPLAY No power at the 110 VAC outlet. Corrective Action • • • Check home circuit breaker. Reset as necessary. Test for 110 VAC at outlet. Identify if outlet is a GFI. Note: Some brands of GFI outlets are too sensitive for treadmill use. Call the help line if encountering GFI issues. Recommended Tools Allen Key set. Phillips head screwdriver. Multi-meter. -------No power to the treadmill. • Check for AC light on PWM. (See diagram pages 23) • Check for 110 VAC at power cord. Replace if no power. • If Yes- Check for 110 VAC at tread power switch. Replace if no power. • If Yes-Check for 110 VAC at tread circuit breaker. Replace/ reset if necessary. • If Yes- Check for 110 VAC at PWM across AC1 & AC2. • If Yes- Replace PWM. Note: All trouble shooting should be performed in calibration mode. Page 14 -------No power to the control panel. Page 12 Support Services 800-883-8783 • Check status LED +11 VDC on PWM (See diagram pages 23). If not remove fuses and check continuity as replace as needed. • If Yes- Check wire harness connections at PWM and Control Panel. Reconnect as needed. • If Yes- Check voltage on harness at panel. Refer to wiring diagram for your machine type in wiring diagram section. If voltage is present– replace panel and recalibrate (page 14). If voltage is not present check voltage at PWM. If voltage is present at PWM replace pedestal wire harness. If 0 VDC replace PWM and recalibrate (page 14). Mon-Fri 8:30am-5:00pm Central Time Zone Fax: 636-272-7148 Symptom CIRCUIT BREAKER TRIPS Probable Cause Possible short in treadmill wiring. Corrective Action • • Recommended Tools Power off the treadmill and inspect all wiring for shorts or burned areas. Secure all connectors. Allen Key set Needle nose pliers Socket set -------Motor issues. • • Multi-meter Disconnect motor leads from the PWM. Power on treadmill, press start. If the breaker does not trip check the motor brushes and perform the motor test procedure (page 19). Reconnect motor to the PWM, if the breaker trips- replace the motor. -------- Incline motor drawing treadmill down • • Unplug incline motor. Power on treadmill, if breaker does not trip- replace incline motor. Note: All trouble shooting should be performed in calibration mode. Page 14 -------Bad PWM • Unplug PWM, power on machine. If breaker doesn’t trip- replace PWM. -------- Too much tension on belt or obstruction under belt. • • Check for correct tension adjustment (page 20) Check for obstruction- remove obstruction. -------- Weakened circuit breaker or High belt/deck friction • • • Support Services 800-883-8783 Perform AC Amp Draw Test (page 17) at circuit breaker. If draw is less than 15 amps continuously - replace breaker. Perform Amp Draw test (page 17) If Amp draw is higher than recommended try push test (page 21) procedure. Mon-Fri 8:30am-5:00pm Central Time Zone Fax: 636-272-7148 Page 13 Calibration Procedures 455 Calibration Enter Calibration Mode by holding the Up and Down keys while inserting the safety key In message center window displayed: Press Start to Calibrate NOTE: In Calibration mode, it is possible to check if the speed sensor is reading all the front roller magnets: the Met light will light when a magnet is in front of the sensor. Speed must be less than 1 mph. Press Start/Reset to begin calibration Treadmill will elevate and speed up/slow down. Wait for belt to stop. Message center window will display: Successful, or will indicate error area. Remove and re-insert safety key. Check operation of treadmill. Page 14 Support Services 800-883-8783 Mon-Fri 8:30am-5:00pm Central Time Zone Fax: 636-272-7148 DIAGNOSTICS To enter diagnostic mode, press and hold the FAST and SLOW buttons while pushing in the safety key. The control panel will show “Diagnostics”. Press the UP button: Total Hours (in whole hours) Press the UP button: Distance (in miles, two digits past decimal point) Press the UP button: Average Speed (in mph) Error List (This is an error log, but just a list of errors possible on the unit.) S1: Lube S2: Clean S3: Motor S4: Sensor E1: Minimum E2: Overspeed E2: Cal E3: EPROM Remove Safety Key to exit Diagnostics Page 15 Support Services 800-883-8783 Mon-Fri 8:30am-5:00pm Central Time Zone Fax: 636-272-7148 TEST PROCEDURES Grounded Outlet Test Page 17 Amp Draw Test Page 17 Speed Sensor Test Page 18 Voltage to Drive Motor Test Page 18 Drive Motor Test Page 19 Drive Belt Tension Test Page 19 Tread belt Tension Test Page 19 Incline Potentiometer Calibration Test Page 20 Voltage to Incline Motor Test Page 20 Belt / Deck Wear Test (Push Off Test) Page 21 Page 16 TEST PROCEDURES GROUNDED OUTLET TEST This test is very important for optimal HRC and incline operation. Set voltmeter for Volts AC Place 1 lead in the right side of the outlet (hot) Place 1 lead in the ground plug A properly grounded outlet will read 110 VAC AMP DRAW TEST This test is a good indicator of the wear condition of the belt and deck, and the need for lubrication. The treadmill circuit breaker will trip at 15 amps, so be sure the voltmeter you are using is rated for at least 15 amps when you are load testing the treadmill. This test can be performed either on one of the AC power cord leads or on one of the DC motor leads from the PWM to the motor. Testing the amp draw at certain speeds without load and with load will signal whether higher than normal amp draw is a result of PWM failure or increased friction from belt and deck wear. AC AMP DRAW PROCEDURE This procedure requires an AC clamp-on ammeter. Place the clamp around either of the power cord leads, black or white. Load test requires a person to walk on the tread belt for 5-10 minutes. 2.5 mph w/out load 2.5 mph with load 4.0 mph w/out load 4.0 mph with load 2.0-2.5 AMPS AC 2.75-3.75 AMPS AC 3.5-4.0 AMPS AC 5.0-7.0 AMPS AC DC AMP DRAW PROCEDURE This procedure can be performed with an ordinary voltmeter. (Note: Be sure the voltmeter is rated to handle 15 DC amps.) Disconnect the red motor lead from MTR1 on the PWM. Connect the voltmeter to MTR 1 on the PWM and the other voltmeter lead to the red motor lead so that the voltmeter completes the connection of the PWM to the motor. 2.5 mph w/out load 2.5 mph with load 4.5-5.0 AMPS DC 7.0-8.0 AMPS DC 4.0 mph w/out load 4.0 mph with load 5.0-5.5 AMPS DC 8.5-9.0 AMPS DC Higher than normal amp draws without load may signal that belt tension is too tight or there is a problem in the Drive Motor or PWM. Perform the Drive Motor Test and visually check the motor brushes before replacing the PWM. Higher than normal amp draws with load after normal readings without load signal belt and deck friction which may require lubrication or replacement. Page 17 Support Services 800-883-8783 Mon-Fri 8:30am-5:00pm Central Time Zone Fax: 636-272-7148 TEST PROCEDURES SPEED SENSOR TEST This test is used to verify sensor operation in conditions of speed fluctuation, E2: Cal error, S4: Sensor error, E2: Overspeed error or Unsuccessful Calibration. 455 Treadmill Set voltmeter to volts DC. Treadmill power on and speed at 0 mph Attach voltmeter leads across outside 2 contacts at J1 on PWM With magnet in front of sensor, 0 VDC With no magnet in front of sensor, 5 VDC Check the sensor on every magnet, adjust sensor until voltage shows In calibration mode before pressing Start, the tread belt can be moved manually and the Met light will blink when a magnet is in front of the sensor. VOLTAGE TO DRIVE MOTOR TEST This test is used to diagnose conditions of NO Belt Movement, or Speed Fluctuations Set voltmeter to volts DC and adjust speed on Control Panel to 4 mph Attach red voltmeter lead to MTR1 on PWM with motor wires attached Attach black voltmeter lead to MTR2 on PWM with motor wires attached 0 VDC signals no PWM output 166 VDC signals open circuit in motor or motor connection Operating voltage will lay between 0 VDC and 166 VDC NOTE: The reason that we do not narrow down PWM output voltage is that the PWM output is a pulse signal. The sampling rate of the voltmeter used will determine what output voltage the voltmeter is able to read. Support Services 800-883-8783 Mon-Fri 8:30am-5:00pm Central Time Zone Fax: 636-272-7148 Page 18 TEST PROCEDURES DRIVE MOTOR TEST This test is used in conditions of No Belt Movement. Unplug treadmill and set voltmeter to volts DC Disconnect motor leads from PWM Place 1 voltmeter lead in each motor wire Gently spin the motor flywheel and check for voltage DC 2-5 VDC means normal motor operation 0 VDC means motor malfunction DRIVE BELT TENSION TEST This test is used in front roller replacement and in conditions of belt slipping. Place two fingers on top of the drive belt halfway between the front roller pulley and the drive motor pulley. With moderate pressure push down on belt If belt deflects down more than 1/8 “, tighten motor mounts If belt deflects down less than 1/8 “, loosen motor mounts. It is also possible to twist the belt; you should be able to twist the belt almost to a vertical position TREADBELT TENSION TEST This test will address belt slipping and is used in any roller replacement or deck replacement. Ensure that the drive belt is properly tensioned before adjusting tread belt tension. Belt and deck wear and/or lack of lubrication can cause the tread belt to show symptoms similar to loose tread belt tension- check these conditions before adjusting tread belt tension. Turn treadmill on and adjust speed to 2 mph Walk heavily on the belt pulling slightly against belt movement If hesitation or slip is detected, tighten tread belt tension bolts ¼ turn Repeat until no hesitation or slip is encountered. Check at higher speeds Tread belt tension is too tight if the belt feels stiff to touch with no give or the belt groans against the rollers. You should be able to insert your hand between the belt and deck palm up almost to your thumb when the belt is at proper tension. Page 19 Support Services 800-883-8783 Mon-Fri 8:30am-5:00pm Central Time Zone Fax: 636-272-7148 TEST PROCEDURES INCLINE POTENTIOMETER CALIBRATION TEST This test can correct E1: Minimum conditions and aid in diagnosis of incline problems with finding zero or target incline. 455: Set voltmeter to Ohms (Ω) with treadmill unplugged from wall Place 1 voltmeter lead on pin 3 (Blue) and 1 lead on pin 2 (Orange) Check for 800 Ohms 455: In calibration mode before pressing Start, the Distance window displays the incline number. With the treadmill at zero, the number should be between 160 and 180. 0 often indicates a wire harness misconnection or failure of signal to panel. As the unit inclines during calibration, watch the numbers in the Distance window, if they do not increase by at least 60 from the zero value, an E1: Minimum error will result. Then the zero value may need to be reset to a lower value. If incline potentiometer needs adjustment, remove swivel pins and use Up and Down keys to make adjustment. (See diagram on T-6) VOLTAGE TO INCLINE MOTOR TEST This test is utilized in conditions of No Incline Movement, Incline Fluctuation, or E1: Minimum. Set voltmeter to AC volts. To access incline plug, PWM screws may need to be removed. Place voltmeter leads across White and Black while pushing UP button 10 VAC indicates normal PWM output, 0 VAC signals no output Place voltmeter leads across Red and White while pushing Down button 110 VAC indicates normal PWM output, 0 VAC signals no output Support Services 800-883-8783 Mon-Fri 8:30am-5:00pm Central Time Zone Fax: 636-272-7148 Page 20 TEST PROCEDURES Belt / Deck Wear Test This is a simple physical test to gauge the general level of friction present between the deck and belt. 1. While the treadmill is not running, inspect the condition of the underside of the tread belt. The fabric should be soft and porous. If the belt appears glazed- replace the belt. 2. While the treadmill is not running, slide your hand under the belt and feel the surface of the deck. The deck should feel smooth with no abrasions or scratches. If any abrasions or scratches are found- replace the deck. Push Off Test Place the machine in Calibration mode, elevate to the highest elevation- speed should be set to 0. Stand on the tread belt positioning yourself close to the console; push off with moderate force. The elevation combined with your weight and the force of the push should cause the belt to carry you all the way to the end of the machine*. If the test does not carry you to the end of the machine lubricate the belt using True Fitness liquid silicone. After lubricating the belt/deck perform the push off test again. If it does not pass the test after lubricating replace the belt and deck * Note: Residential treadmills may only carry about ¾ of the distance of the deck due to higher tension on the belt. Page 21 Support Services 800-883-8783 Mon-Fri 8:30am-5:00pm Central Time Zone Fax: 636-272-7148 455 Wiring Diagram Page 22 Page 22 455 Parts List 455 treadmil parts list WEIGHT PART # CONTROL PANEL 455 PWM ss90 3lbs. SPEED SENSOR (SS90 STYLE) DESCRIPTION 70242103 Control Panel Assembly 70150000 70177400 SAFETY SWITCH ASSY. REMOVABLE SAFETY KEY 70132500 70013500 MOTOR CONTROLLER SS90 PWM SCREW 10-32 X 3/8 70243200 70243300 CIRCUIT BOARD SPEED SENSOR SP. SENSOR SCREW 4-40 X 1/4 70337800 450 HRC DATA CABLE 70325900 3HP DRIVE MOTOR 10 MPH 8 mph 70006300 210J10 POLY-V DRIVE BELT 70113200 70115500 70116700 70118900 70183200 70013500 INCLINE MOTOR 3/8 X 1 1/2 CLEVIS PIN 1/16 DIA. X 1 5/16 COTTER PIN TORQUE ARM SWIVEL PIN START CAPACITOR FOR INCLINE MOTOR SCREW FOR START CAPACITOR 70121000 LOWER LIMIT SWITCH 70125700 70120500 LLS SCREW 10X 1/4 LLS TO PWM WIRE 70281001 70176701 ELEVATION RISER SUB ASSY. Molded wheels 70253100 70008200 9 FT. POWER CORD STRAIN RELIEF BUSHING DATA CABLE DRV MTR 44lbs. DRV BELT ELEVATION MTR 10lbs. (ELEVATIONHARDWARE) LLS ELEVATION RACK 15lbs. WHEEL POWER CORD Page 23 ON / OFF SWITCH 70251100 ROCKER ON/OFF SWITCH 70017200 15 AMP CIRCUIT BREAKER SWITCH 9lbs. 70159300 17 3/4" X 107 3/4" 2 PLY TREADBELT 40lbs. 70157700 70020200 FLEX DECK DECK SCREW 10/32 X 1 1/4 9lbs. 70359200 450/455 ADJ. ROLLER 13lbs. 70359000 70158900 70159000 REAR ROLLER ROLLER BOLT 5/16 INTERNAL TOOTH LOCK WASHER 70162101 70030900 70243400 LT & RT STRADDLE COVERS 3/8 X 1/16 X 108 FT. DBL. STICK TAPE BLUE TAPE 1/2 X 150 FT. ROLL 70233800 70155900 ROUND PEDESTAL WELDMENT PEDESTAL SCREWS 70255903 70155200 70020200 FRAME WELDMENT ADJ. FRONT ROLLER BUMPER FEET BUMPER FEET SCREW 10/32X1 1/4PPH 70348900 70349000 LUBE STICK SILICONE PACKET (1 APPLICATION) 70226501 455 Pediatric Handrails CIRCUIT BREAKER TREADBELT DECK FRONT ROLLER 455 front roller REAR ROLLER STRADDLE COVERS PEDESTAL 455 pedestal FRAME 450/455 LUBRICATION Pediatric Handrails Page 24