1
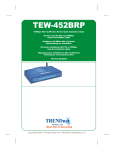
TEW-450APB
Super G Access Point Quick Installation Guide
Point d'accès Super G Guide d'installation rapide
Super G Access Point Kurzanleitung zur Installation
Punto de Acceso Súper G Guía de instalación rápida
Точка доступа Super G Руководство по быстрой установке
Version 06.28.2005
TRENDnet
TRENDware, USA
What's Next in Networking
Copyright ©2005. All Rights Reserved. TRENDware International, Inc.
Table of Contents
English ......................................................................................................
1. Prepare for Installation ......................................................................
2. Install Hardware ................................................................................
3. Configure TCP/IP Settings ................................................................
4. Configure the Access Point ...............................................................
1
1
2
3
5
Troubleshooting........................................................................................... 10
English QIG
1. Prepare for Installation
Thank you for purchasing TRENDnet's TEW-450APB Super G Access Point
This guide will help you set-up your Access Point quickly and easily. Just follow
the step-by-step instructions below, and enjoy the benefits of accessing the
Internet without ever being tied down to wires! If you run into problems, please
refer to the Troubleshooting section. If you need further technical support,
please visit www.TRENDNET.com or call technical support by phone.
Verify Package Contents
Please make sure you have everything in the box:
TEW-450APB
CD-ROM (User’s Guide)
TEW-450APB
Super G Access Point Quick Installation Guide
Point d'accès Super G Guide d'installation rapide
Super G Access Point Kurzanleitung zur Installation
Punto de Acceso Súper G Guía de instalación rápida
Точка доступа Super G Руководство по быстрой установке
Version 06.28.2005
TRENDnet
TRENDware, USA
What's Next in Networking
Copyright ©2005. All Rights Reserved. TRENDware International, Inc.
Quick Installation Guide
External Power Adapter
1.5M RJ-45 cable
Verify Equipment
Before setting up the Access Point, you should have:
1. A Computer with a Wired (RJ-45) or Wireless network card.
2. TCP/IP protocol installed on the Computer.
3. A Web Browser such as Internet Explorer (5.0 or higher) or
Netscape Navigator (4.7 or higher).
4. A Hub or Switch connecting your existing wired network.
5. An RJ-45 Network Cable for connecting the Access Point to your
network Switch.
1
English
2. Install Hardware
1. Locate an optimum location for the Access Point. The best place for the
Access Point is usually at the center of your wireless network.
2. Connect the RJ-45 network cable to the Access Point, then connect the
other end of the network cable to a Switch or Hub. The Access Point is now
connected to your 10/100Mbps network.
3. Connect the power adapter to the Access Point. Make sure you use the
power adapter supplied with the Access Point; using a different power
adapter may damage the unit.
TEW-450APB
2
3
NOTE: If you are using a wired computer to configure the Access Point,
please connect this computer to the same Switch or Hub the
TEW-450APB is connected to.
LAN
WLAN
POWER
Verify Hardware Installation
Make sure the front panel lights are on: Power, LAN, WLAN.
2
English
3. Configure TCP/IP Settings
Before the Access Point can be accessed and configured, the computer's
TCP/IP settings need to be changed. (That includes your wireless card's IP
address, too.)
Windows 2000/XP
1. Find the Start button located on the Desktop.
2. Click Start, and click on Control Panel. For Windows 2000, click Start,
highlight Settings, and click Control Panel.
3. Double-Click the Network Connection icon.
4. Right-Click on the Local Area Connection icon, then click on Properties.
The Local Area Connection Properties box will appear.
5. Under the General tab, locate and select Internet Protocol TCP/IP and
then click Properties. The Internet Protocol (TCP/IP) Properties box will
appear.
3
English
6. Click on Use the following IP address. Enter 192.168.1.50 for IP
address and 255.255.255.0 for Subnet, then click OK.
7. Click OK.
8. Your computer is now ready to access and configure the Access Point.
4
English
4. Configure the Access Point
From a Wired Computer
1. Open a web browser (Internet Explorer or Netscape) and enter
http://192.168.1.1 at the address bar, then press the Enter key. Type admin
for username, and type admin for your password. Click OK.
2. Click Wizard.
5
English
3. Click Next.
4. If you want to change the default password, type in a new password and
click Next. Otherwise, click Next.
6
English
5. If you want to change the default SSID or channel, type in the appropriate
information and click Next. Otherwise, click Next.
6. Click Next.
7
English
7. Click Restart and click Close.
Congratulations!
Installation is now complete.
From a Wireless Computer
(using TRENDnet's TEW-441PC as an example in this section)
The default settings of the Access Point are:
SSID - AP254f02
Channel - 6
8. On your wireless computer, open up your Wireless Utility Program.
8
English
9. Click Site Survey, select AP254f02 or the SSID that you assigned the TEW450APB, and click Connect. If you do not see the TEW-450APB's SSID,
click Refresh.
10. Click Apply.
11. Go to the beginning of section 4. Configure the Access Point and follow
steps 1-7.
9
English
Troubleshooting
Q1: I typed http://192.168.1.1 in my Internet browser's address bar, but
error message says "The page cannot be displayed". How can I get into
the TEW-450APB's web configuration page?
A1: Please check your hardware and TCP/IP settings again by following
the instructions in sections 1~3. Make sure the Power, LAN, and WLAN
LEDs are lit and the TCP/IP configurations are correct. Then try accessing
http://192.168.1.1 again.
Q2: If my network's IP is different than the Access Point's range, what
should I do?
A2: You should still configure the access point first. After all the settings
are applied, go to the Access Point's configuration page, click on TCP/IP
settings and change the IP address for the Access Point to match your
network's IP.
Q3. After I successfully configured the Access Point to meet my network
settings, I cannot connect to my network using wireless computers.
A3: If you have a DHCP server in your network, you need to go into TCP/IP
settings again and re-select "Obtain an IP automatically" for
Windows 98/ME and "Obtain an IP Address automatically" for Windows
2000/XP to allow the PC to regain an IP address from your DHCP server.
Q4. All the settings are set correctly, but I still can't use the Access Point,
what should I do?
A4: You can find additional information in the User's Guide. If you still have
Problems, contact our Technical Support by email or phone.
Certifications
This equipment has been tested and found to comply with FCC and CE Rules. Operation is
subject to the following two conditions:
(1) This device may not cause harmful interference.
(2) This device must accept any interference received.
Including interference that may cause undesired operation.
NOTE: THE MANUFACTURER IS NOT RESPONSIBLE FOR ANY RADIO OR TV
INTERFERENCE CAUSED BY UNAUTHORIZED MODIFICATIONS TO THIS
EQUIPMENT. SUCH MODIFICATIONS COULD VOID THE USER’S AUTHORITY TO
OPERATE THE EQUIPMENT.
10
TRENDnet
TRENDware, USA
What's Next in Networking
@
Product Warranty Registration
Please take a moment to register your product online.
Go to TRENDware’s website at http://www.TRENDNET.com
TRENDnet Technical Support
US/Canada Support Center
Contact
Telephone: 1(310) 626-6252
Fax:
1(310) 626-6267
Email: [email protected]
Tech Support Hours
7:30am - 6:00pm Pacific Standard Time
Monday - Friday
European Support Center
Contact
Telephone
Deutsch : +49 (0) 6331 / 268-460
Français : +49 (0) 6331 / 268-461
Español : +49 (0) 6331 / 268-462
English : +49 (0) 6331 / 268-463
Italiano : +49 (0) 6331 / 268-464
Dutch : +49 (0) 6331 / 268-465
Fax: +49 (0) 6331 / 268-466
Tech Support Hours
8:00am - 6:00pm Middle European Time
Monday - Friday
TRENDware International, Inc.
3135 Kashiwa Street. Torrance, CA 90505
http://www.TRENDNET.com
Copyright ©2005. All Rights Reserved. TRENDware International, Inc.