1
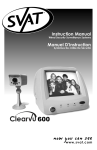
Clearvu S400
4 Indoor Camera Surveillance System
User's Manual
Système D'intérieur de Surveillance
de Caméra Quatre.
Le Manuel D'Utilisateur
w w w . s v a t . c o m
INCLUDED IN THIS SYSTEM:
1.
2.
3.
4.
5.
6.
4 Input Switcher
Remote Controller
4 x Color Camera With Mounting bracket
4 x 30ft of 4 PIN DIN cable
A/V cable
10V 600mA AC/DC Adaptor
1
2
PARTS OF THE SWITCHER
1. Power indication LED
2. Setting indication LED
3. Mute indication LED
4. Channel display LED
4
5. Power ON / OFF button
5
6. Setting button
6
7. Mute button
8. Storage button
9. Channel scan button
10. Channel down button
11. Channel up button
12. Scan time adjustment
13. Output jack to Monitor or TV A/V input
14~17. Camera input jacks
18. Adapter jack
7
8
3
11
9
10
12 13
14 15 16 17 18
PARTS OF THE CAMERA
A.
B.
Camera with built-in microphone
Mounting bracket
A
B
PARTS OF THE REMOTE CONTROLLER
1.
2.
3.
4.
MUTE button
SCAN button
Channel down button
Channel up button
4
3
2
1
w w w . s v a t . c o m
INSTALLATION AND ADJUSTMENT
A. CAMERA INSTALLATION
1.
2.
Install or mount the camera at the desired indoor location. Do not
place camera in a location subject to direct sunlight or bright light.
The coaxial cable supplied has one end with a DIN connector (Male)
and the opposite end with a DIN connector(Female). Slowly insert the
DIN plug into the back of the camera being careful to align the DIN
plug correctly.
B. SWITCHER INSTALLATION
1.
2.
3.
4.
Connect the power adapter to the DC IN jack on the back of the
switcher and connect the other end to a wall outlet.
Connect the output jack to your TV/VCR using the supplied cable.
Connect the CAM 1~4 DIN jack to the back of each camera.
After connecting all the cameras, press the power button, the
power indication LED will light up and indicating camera number on
channel display LED.
TV/VCR
AUDIO IN
VIDEO IN
DC IN
12V ADAPTER
w w w . s v a t . c o m
OPERATING PROCEDURE
A. SETTING UP CHANNELS ON SWITCHER
If you would like to view more then one camera on your screen, each
channel has to be stored in the switcher by the following procedure. Each
channel indicates one camera and displays the image of corresponding
camera.
1. Press [Set], setting indication LED will light up
2. Press channel select button, then press [Store] when channel display
LED indicates 1.
3. Press channel select button, then press [Store] when channel display
LED indicates 2.
4. Press channel select button, then press [Store] when channel display
LED indicates 3.
5. Press channel select button, then press [Store] when channel display
LED indicates 4.
6. Press [Set] again when completed [1] ~ [5].
B.
1.
2.
AUTO SWITCH FUNCTION
Press[Scan] button, the switcher will scan each preset camera
The scanning time is adjustable from 1 sec. to 30 sec. Use flat head
screwdriver to adjust the scan time period by turning the tuner
(no. 12 in the switcher parts list).
C. SINGLE CHANNEL SELECTION
1. Setting the scan channel according to the number of the camera
(procedure A). That is if the camera is No. 1, the switcher also has to
be on channel 1.
2. Use the channel selection button up/down to select desired camera
[Indicated by LED display]
Note: The single channel selection automatically stops the
auto-switch function.
D. MUTING
Push [Mute] button to stop audio transmission, and again to resume sound.
E. REMOTE CONTROLLER OPERATING :
1. Press [Scan] button, LED indicator will light up, channel scan
function starts.
2. You can select single channel monitoring by pressing [channel up]
button (LED indicator will light up, the Switcher Channel will up 1
channel) or [channel down] button (LED indicator will light up, the
Switcher Channel will down 1 channel) for channel selection. Please
note, this selection automatically stops the auto-scan function.
3. Push [Mute] button, the LED indicator will light up), to stop audio
transmission, and again to resume sound.
w w w . s v a t . c o m
SPECIFICATION
Transmission Unit
(4 Color Hard Wired Cameras)
Power Supply........................................DC12V 200mA
Current Consumption..........................0.22 Watts
Video / Audio Output ........................1 Vp-p / 75 Ohm
Resolution..............................................330 TV Lines
Image Sensor........................................1/3" CMOS
Picture Elements ..................................628 (H)×582 (V)
Scanning System..................................2:1 Interlace
Minimum Illumination
(with Infra LEDs) ....................................0.5 Lux w/ F2.0 Lens
Signal to Noise......................................Better than 46 db
Auto Shutter ........................................1/60 - 1/15,000 Sec
Geometric Linearity ............................No Camera Distortion
Gamma Correction ............................0.45
AGC ......................................................ON
Operation Temperature......................-10 C - +50 C
Lens........................................................6.0mm / F2.0 Fixed Focus
Dimensions (CCD-325C) ....................105mm(L) × 55mm(W) × 86mm(H)
Receiver Unit
(4 Input Sequential A/V Switcher with Remote Control Unit)
Power Supply........................................DC 10V 600mA
Current Consumption..........................100mA
Video / Audio Input ............................4 Video / Audio Input
(1 Vp-p/75 ohm)
Video / Audio Output ........................1 A/V Output
(1 Vp-p/75 Ohm)
Switching Interval ................................Approx. 1 sec - 30 sec (adjustable)
Dimensions ............................................195mm(L) x 125mm(W) x 30mm(H)
w w w . s v a t . c o m
PRODUCT WARRANTY
We take quality very seriously. This is why all of our products
come with a one year warranty from the original purchase date
against defects in workmanship and materials.
If you have warranty or support issues please contact us using any of the following methods:
SVAT Electronics USA
2315 Whirlpool St., Unit 333
NIagara Falls, New York
USA 14305
SVAT Electronics Canada
4080 Montrose Road
Niagara Falls, ON
Canada L2H 1J9
Phone: 866.946.7828
Fax: 888.771.1701
Email: [email protected]
Website: www.svat.com
Warranty Terms
1. SVAT products are guaranteed for a period of one year from the date of purchase against defects in
workmanship and materials. This warranty is limited to the repair, replacement or refund of the purchase price
at SVAT's option.
2. When service is required, the warranty is validated by the submission of a fully completed warranty card.
3. This warranty becomes void if the product shows evidence of having been misused, mishandled or tampered
with contrary to the applicable instruction manual.
4. Routine cleaning, normal cosmetic and mechanical wear and tear are not covered under the terms of this
warranty.
5. The warranty expressly provided for herein is the sole warranty provided in connection with the product itself
and no other warranty, expressed or implied is provided. SVAT assumes no responsibilities for any other
claims not specifically mentioned in this warranty.
6. This warranty does not cover the shipping cost, insurance or any other incidental charges.
7. You MUST call SVAT before sending any product back for repair. You will be given a Return Authorization
number. When returning the product for warranty service, please pack it carefully in the original box with all
supplied accessories, and enclose your original receipt or copy, and a brief explanation of the problem
(include RA #).
8. This warranty is valid only in Canada and the U.S.A.
9. This warranty card cannot be re-issued.
CAUTION
RISK OF ELECTRIC SHOCK, DO NOT OPEN
TO REDUCE THE RISK OF ELECTRIC SHOCK, DO NOT REMOVE THE COVER (BACK).
NO USER SERVICEABLE PARTS INSIDE. REFER SERVICING TO
QUALIFIED SERVICE PERSONNEL.
Graphic Symbol Explanation:
The lightning flash with arrowhead symbol, within an equilateral triangle, is intended to alert the user to
the presence of uninsulated “dangerous voltage” within the product’s enclosure that may be of sufficient magnitude to constitute a risk of electric shock to persons.
The exclamation point within an equilateral triangle is intended to alert the user to the presence of
important operating maintenance (servicing) instructions in the literature accompanying the appliance.
WARNING: TO PREVENT FIRE OR SHOCK HAZARDS, DO NOT EXPOSE THIS UNIT TO RAIN OR
MOISTURE
Disclaimer: SVAT does not endorse of any of SVAT products for any illegal activites.
SVAT is not responsible or liable in any way shape or form for any damage, vandalism,
theft or any other action that may occur while a SVAT product is in use by the purchaser.
w w w . s v a t . c o m
INCLUS DANS CE SYSTÈME :
•
•
•
•
•
•
Commutateur Entré Par 4
Contrôleur À distance
4 x Caméra couleur de avec le support
4 x 30ft 4 de la GOUPILLE câble DIN
Câble visuel audio
Adapteur De 10V 600mA AC/DC
1
2
PARTS OF THE SWITCHER
1.
2.
3.
4.
5.
6.
7.
8.
9.
10.
11.
12.
13.
Indication de puissance LED
Réglage de l'indication LED
Indication muette LED
Affichage de la Manche LED
4
Bouton de sous tension/hors tension
5
Réglage du bouton
Bouton muet
Bouton de stockage
Bouton de balayage de la Manche
La Manche se boutonnent vers le bas
La Manche vers le haut du bouton
Ajustement de temps de balayage
Produisez le cric pour surveiller ou
l'entrée de TV A/V
14~17. Crics d'entrée d'appareil-photo
18. Cric d'adapteur
6
7
8
3
11
9
10
12 13
14 15 16 17 18
PARTIES DE CAMERA
A.
B.
Camera avec le microphone intégré
Support
A
B
PARTIES DU TÉLÉCOMMANDE
1.
2.
3.
4.
Bouton MUET
Bouton de BALAYAGE
La Manche se boutonnent vers le bas
La Manche vers le haut du bouton
4
3
2
1
w w w . s v a t . c o m
INSTALLATION ET AJUSTEMENT
INSTALLATION CAMERA.
1.
2.
Install ou montent caméra à l'endroit d'intérieur désiré. Ne placez pas
caméra dans un endroit sujet à la lumière du soleil directe ou à la
lumière lumineuse.
The coaxial fourni a une extrémité avec un connecteur DIN (Male) et
l'extrémité opposée avec un connecteur (Female) DIN. Insérez
lentement la prise DIN dans le dos de caméra faisant attention à
aligner la prise DIN correctement.
B. INSTALLATION DE COMMUTATEUR
1.
2.
3.
4.
Reliez l'adapteur de puissance au C.C DANS le cric sur le dos du
commutateur et reliez l'autre extrémité à une prise murale.
Reliez le cric de rendement à votre TV/VCR en utilisant le câble fourni.
Reliez le cric de la CAME 1~4 DIN au dos de chaque caméra.
Après avoir relié tous les caméra, appuyez sur le bouton de puissance,
l'indication de puissance LED s'allumera et indiquant le nombre
caméra sur l'affichage LED de canal.
TV/VCR
ACOUSTIQUE DEDANS
VIDÉO DEDANS
DC DEDANS
12V ADAPTEUR
w w w . s v a t . c o m
MODE OPÉRATOIRE
A. CANAUX D'ÉTABLISSEMENT SUR LE COMMUTATEUR
Si vous voudriez regarder puis un appareil-photo sur votre écran, chaque
canal doit être stocké dans le commutateur par le procédé suivant.
Chaque canal indique un appareil-photo et montre l'image de l'appareilphoto correspondant.
1.
2.
3.
4.
5.
6.
B.
1.
2.
Serrez [ placez ], en plaçant l'indication LED s'allumera.
Serrez le bouton de canal, puis la pression choisis [ magasin
l'affichage LED de canal indique 1.
Serrez le bouton de canal, puis la pression choisis [ magasin
l'affichage LED de canal indique 2.
Serrez le bouton de canal, puis la pression choisis [ magasin
l'affichage LED de canal indique 3.
Serrez le bouton de canal, puis la pression choisis [ magasin
l'affichage LED de canal indique 4.
Serrez [ placez ] encore une fois accompli [ 1 ] ~ [ 5 ].
] quand
] quand
] quand
] quand
FONCTION AUTOMATIQUE DE COMMUTATEUR
Le bouton de Press[Scan ], le commutateur balayera chacun caméra
préréglé.
Le temps de balayage est réglable de 1 sec à 30 sec. Utilisez le tournevis
principal plat pour ajuster la période de temps de balayage en tournant
le tuner (numéro 12 dans la liste des pièces de commutateur).
C. CHOIX DE LA MANCHE SIMPLE
1. Réglage du canal de balayage selon le nombre de caméra
(procédé A). C'est si caméra est le numéro 1, le commutateur doit
également être sur le canal 1.
2. Utilisez le bouton de choix de canal haut/bas pour choisir a désiré la
note caméra [ indiqué par l'affichage à LED ] : Le choix de canal simple
arrête automatiquement la fonction d'autocommutateur.
D. ASSOURDIR.
Bouton [ muet ] de poussée pour arrêter la transmission audio, et pour
reprendre encore le bruit.
w w w . s v a t . c o m
E.
1.
2.
3.
OPÉRATION À DISTANCE DE CONTRÔLEUR.
Appuyez sur [ le bouton de balayage ], indicateur de LED s'allumera,
des débuts de fonction de balayage de canal.
Vous pouvez choisir le canal simple surveillant en appuyant sur [ canal
vers le haut ] le bouton (l'indicateur de LED s'allumera, la Manche de
commutateur lèvera 1 canal) ou [ canal vers le bas ] le bouton
(l'indicateur de LED s'allumera, la Manche de commutateur avalera
1 canal) pour le choix de canal. Svp la note, ce choix arrête
automatiquement automobile-balayent la fonction.
Le bouton [ muet ] de poussée, l'indicateur de LED s'allumera), arrêtera
la transmission audio, et encore reprendra le bruit.
SPÉCIFICATIONS
Unité De Transmission
(4 Color Hard Wired Cameras)
Alimentation D'Énergie........................DC12V 200mA
Consommation Courante ..................0.22 Watts
Rendement Visuel/Audio....................1 Vp-p / 75 Ohm
Résolution..............................................330 TV Lignes
Sonde D'Image ....................................1/3" CMOS
Éléments D'Image................................628 (H)×582 (V)
Système De Balayage ........................2:1 Interlace
Illumination Minimum
(avec Infra LEDs) ..................................0.5 Lux w/ F2.0 Lens
Signal-bruit ............................................Better than 46 db
Obturateur Automatique ..................1/60 - 1/15,000 Sec
Linéarités Géométriques ....................Aucune Déformation Camera
Correction Gamma ............................0.45
AGC ......................................................ON
La Température D'Opération ............-10 C - +50 C
Objectif ................................................6.0mm / F2.0 Fixed Focus
Dimensions (CCD-325C) ....................105mm(L) × 55mm(W) × 86mm(H)
Unité De Récepteur
(4 entrez le commutateur séquentiel d'A/V avec l'appareil de commande à distance)
Alimentation D'Énergie........................DC 10V 600mA
Consommation Courante ..................100mA
Video / Audio entrée ..........................4 Video / Audio entrée
(1 Vp-p/75 ohm)
Video / Audio Rendement ................1 A/V Rendement
(1 Vp-p/75 Ohm)
Intervalle De Commutation................Approx. 1 sec - 30 sec (réglable)
Dimensions ............................................195mm(L) x 125mm(W) x 30mm(H)
w w w . s v a t . c o m
GARANTIE DE PRODUIT
Nous prenons la qualité très sérieusement. C'est pourquoi tous
nos produits viennent avec une garantie d'un an de la date originale d'achat contre des défauts en exécution et matériaux.
Si vous avez les issues de garantie ou de soutien satisfont nous contactent employant n'importe laquelle
des méthodes suivantes :
SVAT Electronics USA
2315 Whirlpool St., Unit 333
NIagara Falls, New York
USA 14305
SVAT Electronics Canada
4080 Montrose Road
Niagara Falls, ON
Canada L2H 1J9
Phone: 866.946.7828
Fax: 888.771.1701
Email: [email protected]
Website: www.svat.com
Limites De Garantie
1. Les produits de SVAT sont garantis pour une période d'une année de la date d'achat contre défectuosités
l'exécution et défectuosité des matériels. Cette garantie est limitée à la réparation, le remplacement ou le
remboursement du prix d'achat à l'option de SVAT.
2. Quand le service est exigé, la garantie est validée par la soumission d'une carte de garantie entièrement
complétée.
3. Cette garantie devient vide si le produit montre l'évidence d'ayant été employé improprement, malmené ou a
altéré contraire au manuel d'instruction applicable.
4. Le nettoyage de routine, l'usure normale normal, cosmétique et mécanique n'est pas couverte sous les ter
mes de cette garantie.
5. La garantie a pourvu expressément à en ceci est la garantie seule fournie à propos du produit lui-même e
aucune autre garantie, exprimée ou suggérée est fournie. SVAT ne suppose pas de responsabilités pour les
autres réclamations pas en particulier mention né dans cette garantie.
6. Cette garantie ne couvre pas le coût expédiant, l'assurance ou les autres charges accessoires.
7. En retournant le produit pour le service de garantie, s'il vous plaît l'emballer soigneusement dans la boîte
originale avec tous accessoires fournis, et enclore votre carte de garantie, le reçu original ou la copie, et une
explication brève du problème.
8. Cette garantie est valide seulement dans le Canada et les ETATS-UNIS.
9. Cette carte de garantie ne peut pas être la réédition.
ATTENTION
LE RISQUE DE DÉCHARGE ÉLECTRIQUE, NE S'OUVRENT PAS
POUR RÉDUIRE LE RISQUE DE DÉCHARGE ÉLECTRIQUE, N'ENLEVEZ PAS LA COUVERTURE (ARRIÈRE). AUCUNES PIÈCES DE L'UTILISATEUR SERVICEABLE À L'INTÉRIEUR.
RÉFÉREZ-VOUS L'ENTRETIEN AU PERSONNEL DE SERVICE QUALIFIÉ.
Explication Graphique De Symbole :
Le flash de foudre avec le symbole de pointe de flèche, dans une triangle equilateral, est prévu pour
alerter l'utilisateur à la présence "de la tension dangereuse" non isolée dans la clôture du produit qui
peut être de la grandeur suffisante pour constituer un risque de décharge électrique aux personnes.
Le point d'exclamation dans une triangle equilateral est prévu pour alerter l'utilisateur à la présence
des instructions de fonctionnement importantes d'entretien (entretien) dans la littérature accompagnant
l'appareil.
AVERTISSEMENT : POUR EMPÊCHER DES RISQUES DU FEU OU DE CHOC, N'EXPOSEZ PAS
CETTE UNITÉ À LA PLUIE OU À L'HUMIDITÉ
Déni : SVAT n'approuve d'aucun de produits de SVAT pour aucun activites illégal. SVAT n'est pas
responsable ou responsable de quelque façon forme ou forme d'aucun dommage, de
vandalisme, de vol ou d'aucune autre action qui peuvent se produire tandis qu'un produit
de SVAT est en service par l'acheteur.
w w w . s v a t . c o m
If you require more information on this
product or other SVAT products visit
www.svat.com